A before and after home tour of my parent’s craftsman log cabin with recaps of countless DIY home improvement projects and woodworking tutorials. This cabin makeover is a must see!
I don’t usually write these types of braggadocious, we-did-a-thing posts. But today is a day for just that and this before and after cabin makeover is definitely worthy.
About twenty-five years ago, my family purchased this darling 18-acre estate with the hope of running a small farm and living out the country dream. Nicknamed “Paradise Cabin”, this one-of-a-kind home was custom built in 1982. It was my parent’s dream to live here for the rest of their lives. It’s where I got my first tastes of large home projects and the family working together to get things done.
However, my sister and I moved out and across the country to start our lives, you may understand that 18 acres and a high maintenance wood home became too much to maintain for two people working regular jobs. The unfinished projects piled up and the fields turned to forest.
Not every project makes it on to the blog as a tutorial because they are either totally custom to a situation or perhaps too complicated to tackle in a blog post. So today, I wanted to look back at all that was done to get this home ready to sell.
Why we renovated the house to Sell
When my parent’s reached out to us, knowing they could not dig themselves out to get the house ready for selling, we were skeptical but determined to pitch in.
Yes, we did all of this work! The only thing a contractor was hired was for was to survey the land and to replace the carpet upstairs.
As we set out to prepare my childhood home for selling, we prioritized repairs and finished years old projects, while keeping a tight budget.
It took 2 years with me coordinating projects from my home in DC and several month-long trips to work on site in Tennessee. There were arguments, tears, and high stakes, but I feel accomplished and proud of the work we did. In fact, they sold the home for $195,000 more than originally assessed (a 35% increase!).
For anyone reading this, I hope you come away with inspiration that things add up even if you don’t completely modernize and decorate a space.
House Exterior
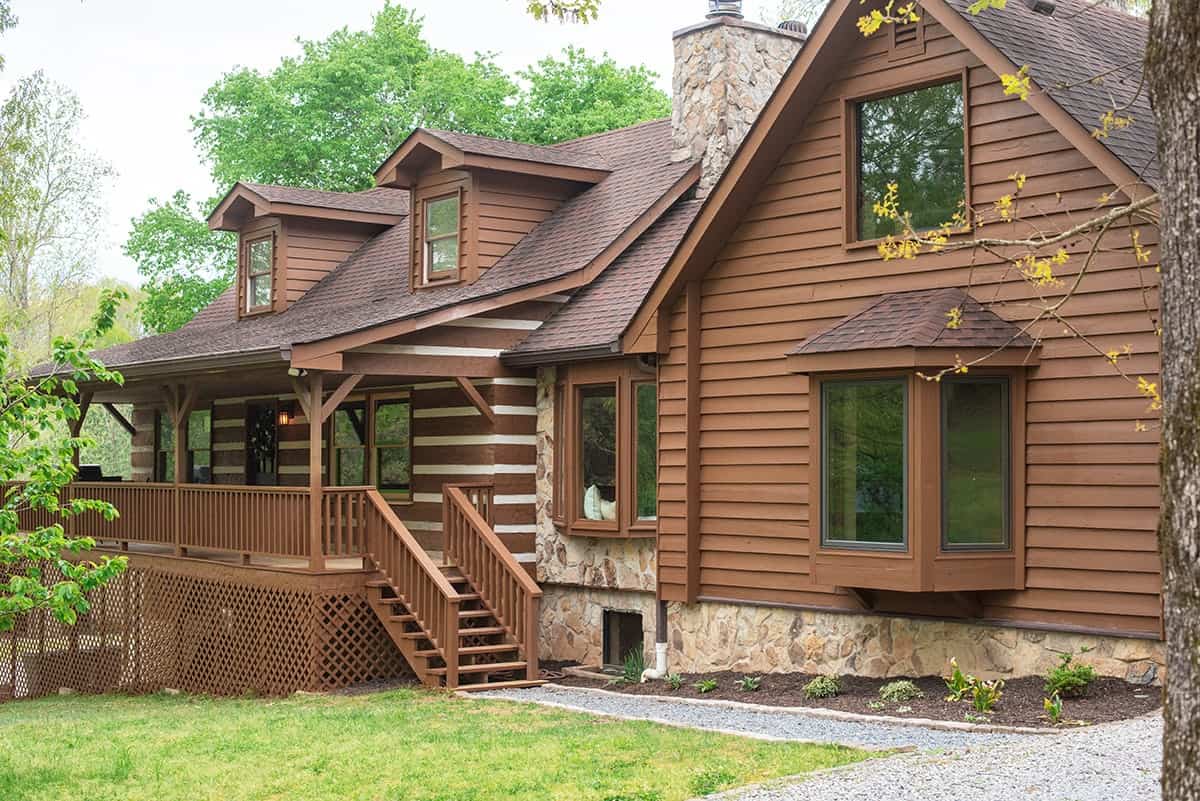
Because the house is primarily wood inside and out, we had a vast amount of woodworking projects, especially on the exterior.
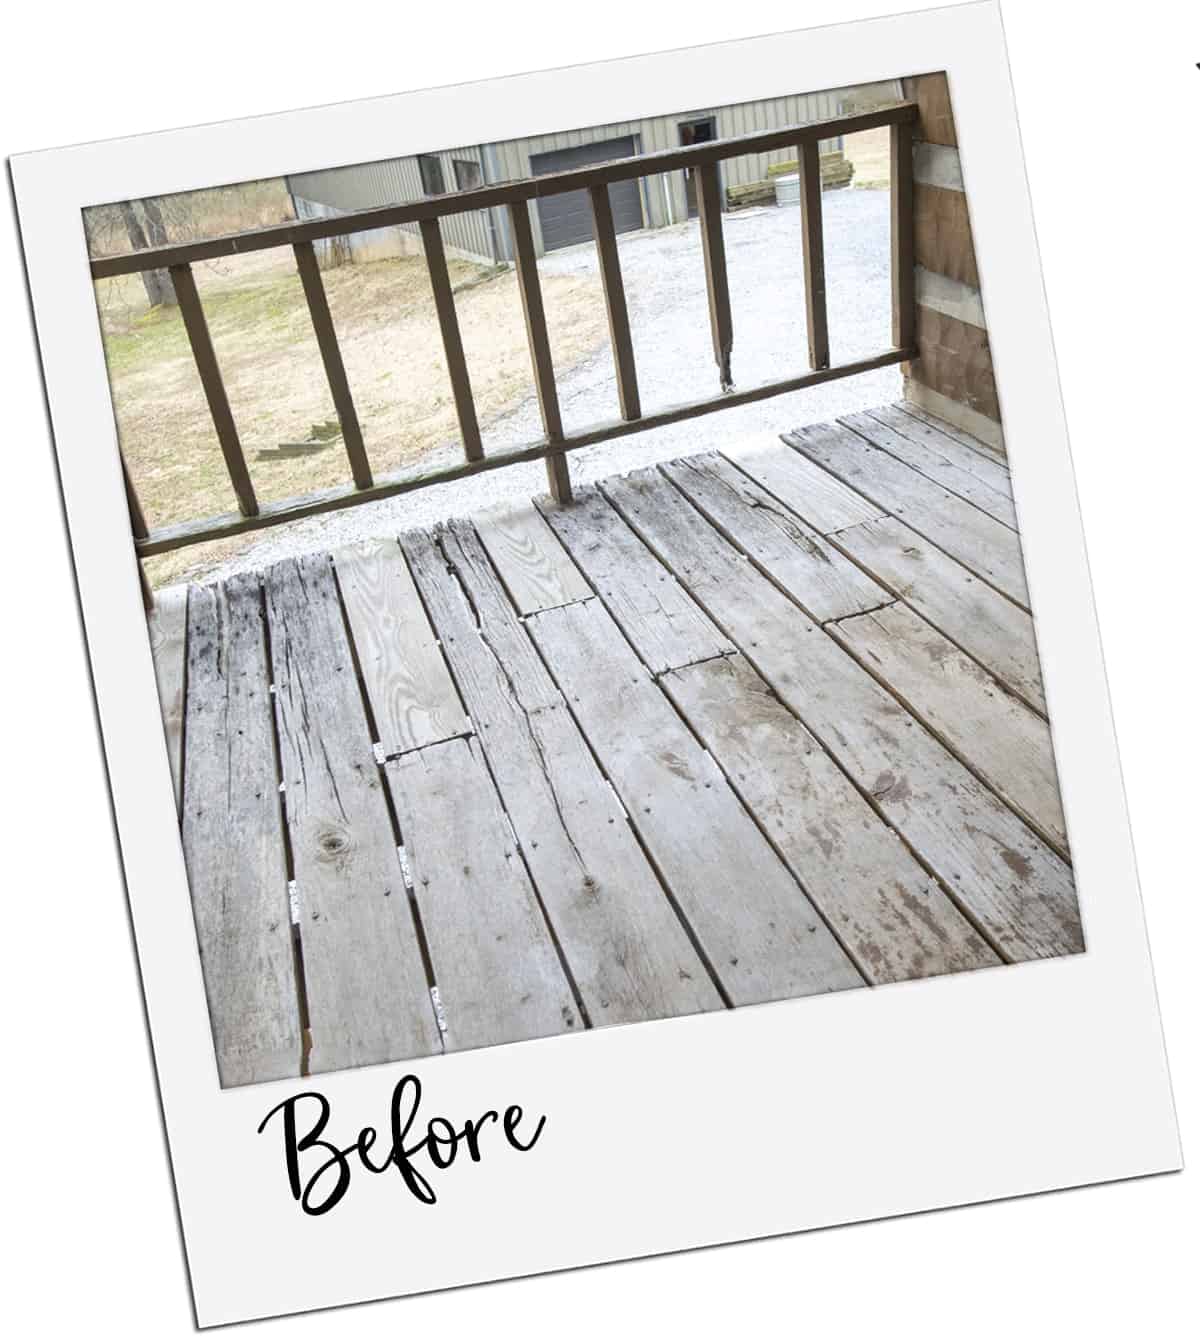
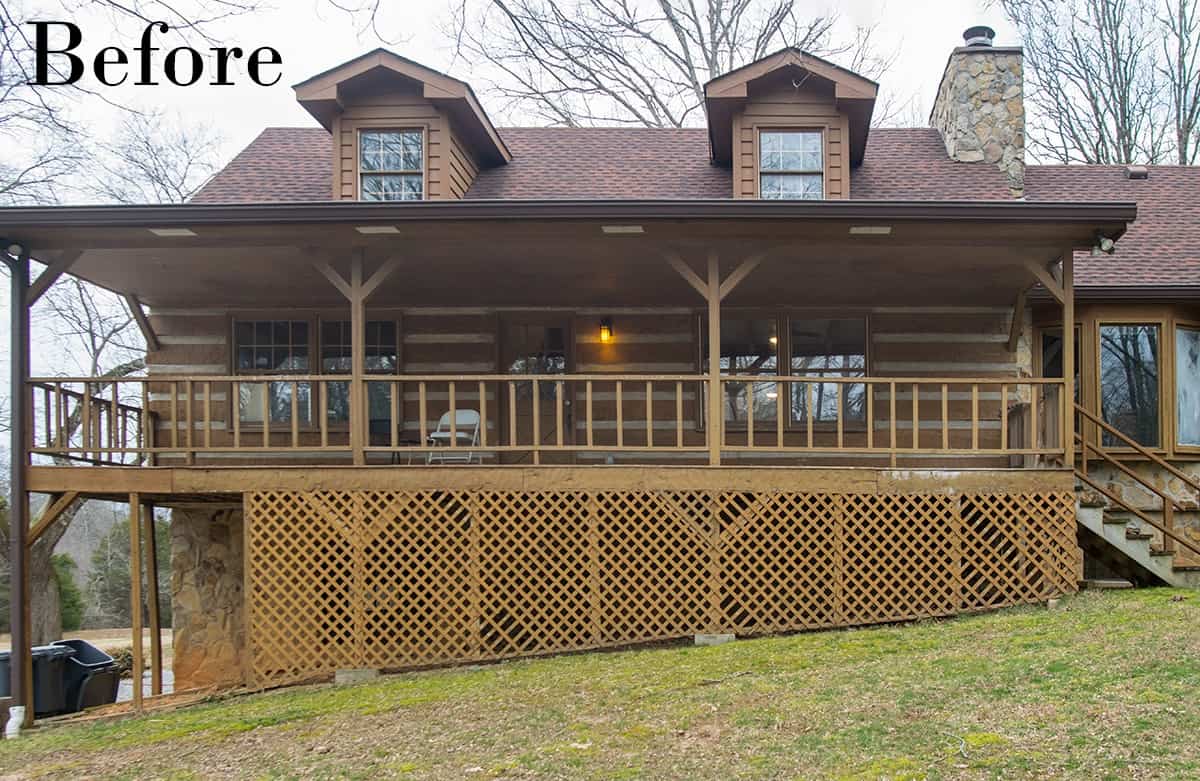
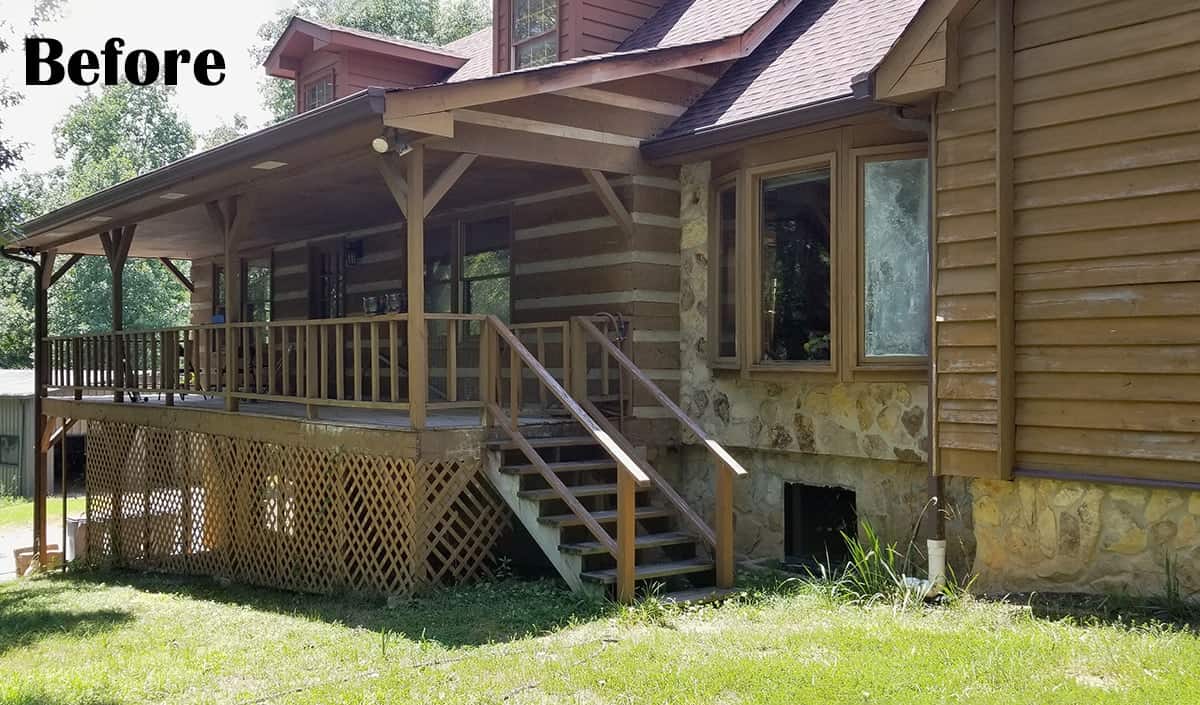
The front of the house was definitely not in great shape. The railings were rotting in several places and, while structurally sound, it definitely felt unsafe walking on the front deck with gaping holes and huge cracks.
We started adding some curb appeal with a new pathway to the front door and replacing the front deck entirely. We provided a renewed coat of stain to the entire exterior of the house and decks.
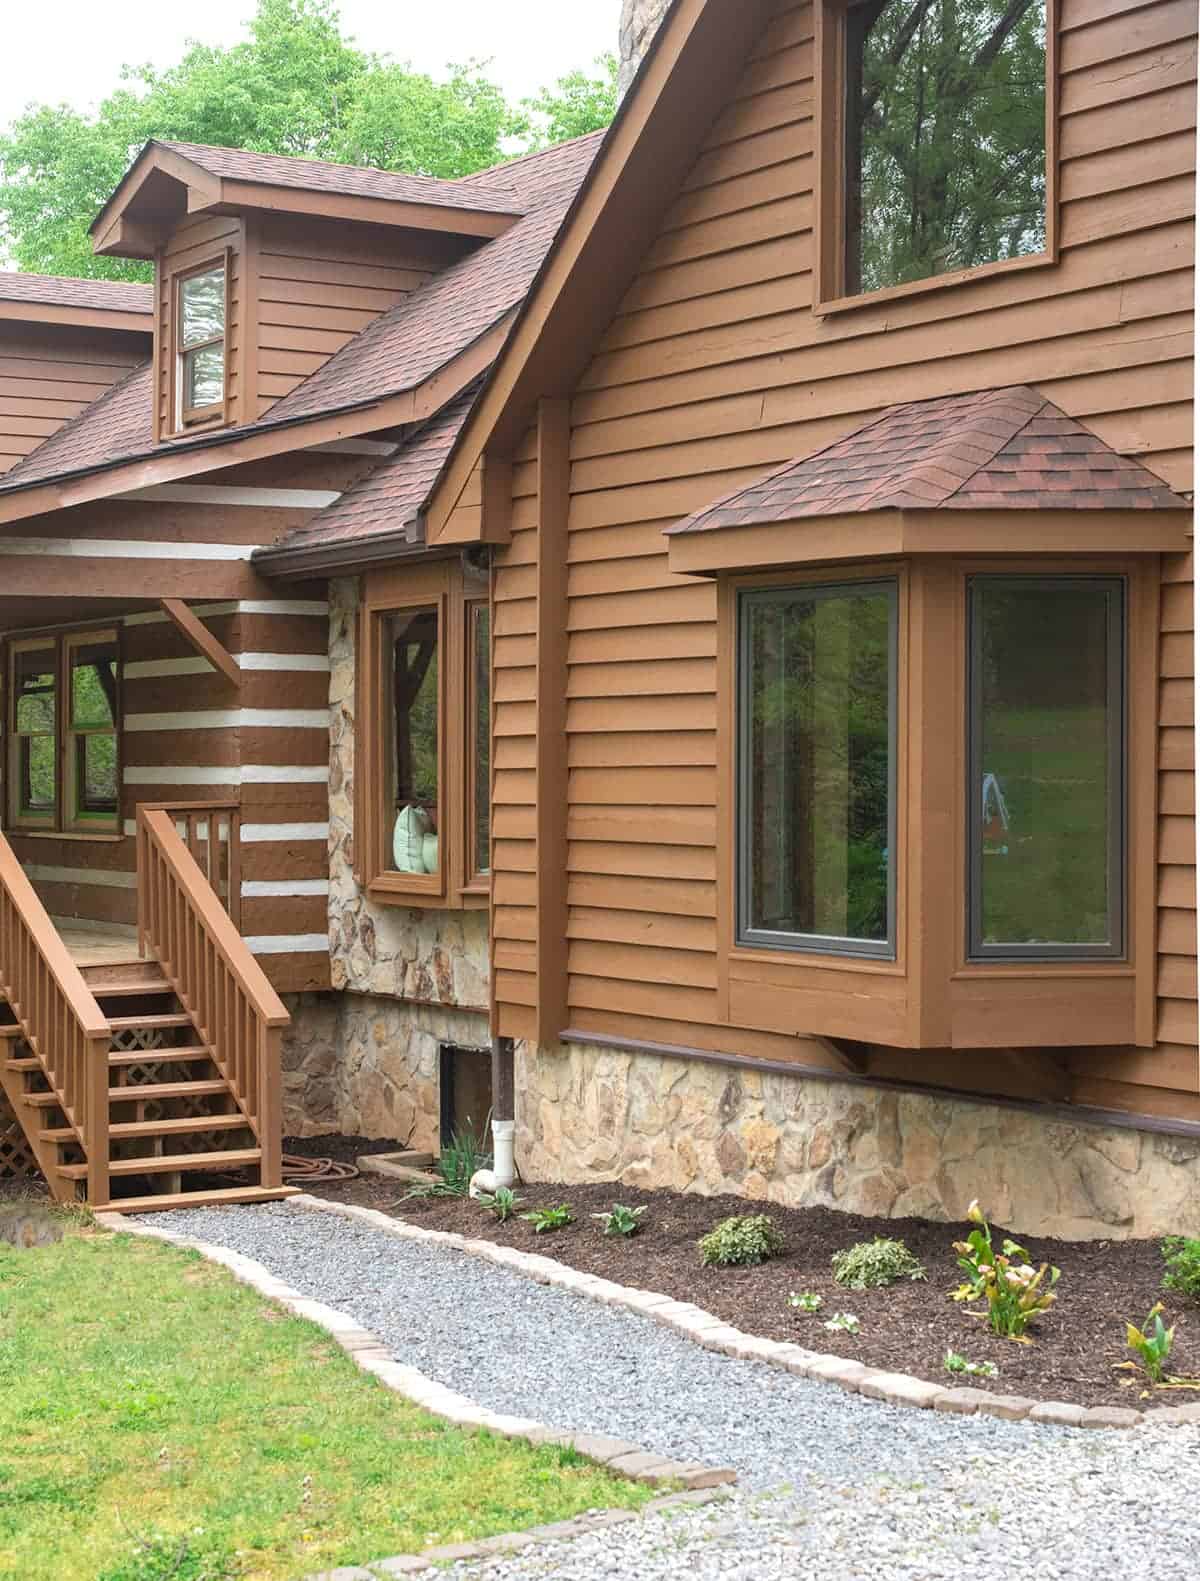
The railing is all new and robust. I will say that lumber today just isn’t as quality as it was back then. I wouldn’t expect modern lumber to last like the previous decking did.
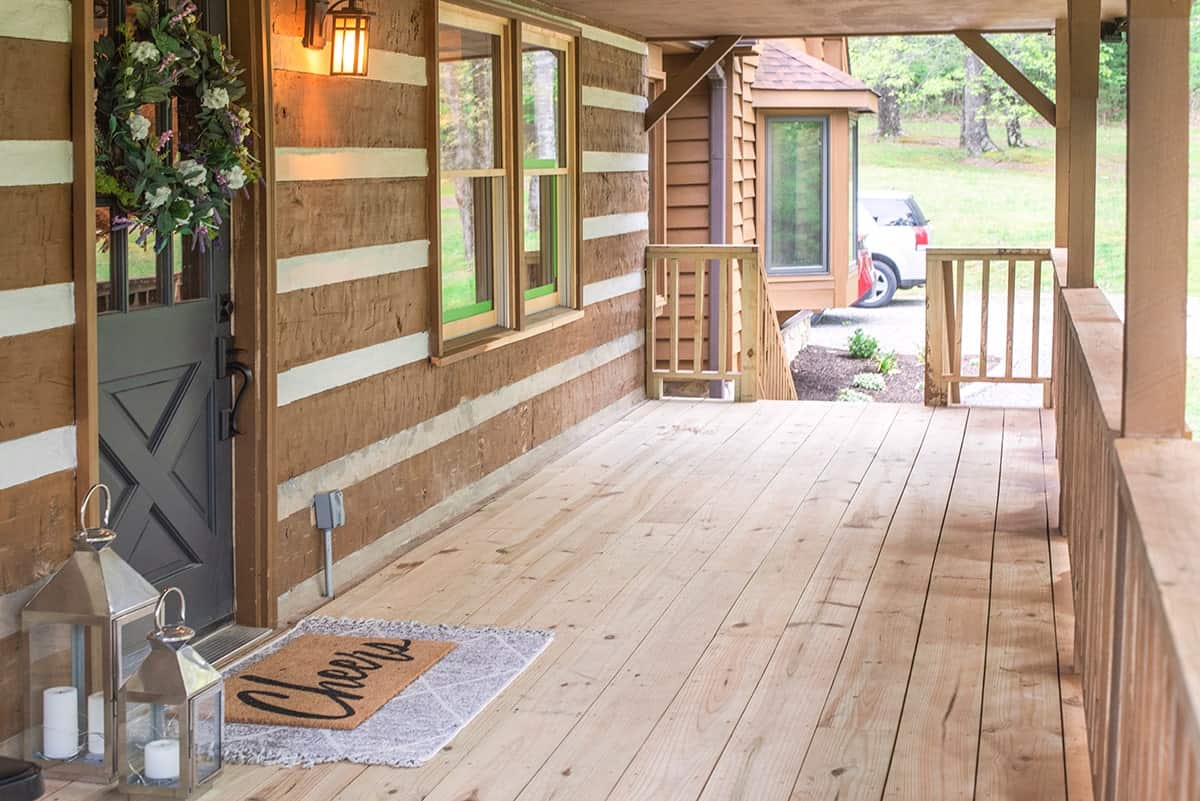
Then we worked on the back deck, which was original too. Because we had a shoestring budget for the numerous projects required, we saved as much money as we could. It’s a two-level deck and nearly only the supporting structure could be saved on the lower deck.

House Exterior Tutorials
- How to Paint Exterior Concrete
- How to Restore an Old Deck
- How to Stain a Wood Siding House
- How to Lay a Gravel Pathway
- Under Deck Storage Ideas
- Painting Garage Doors
Bathroom Makeovers
We completely updated two bathrooms. The plumbing was copper pipes with heated floors and other personal touches that we did not want to open up if it wasn’t adding value.
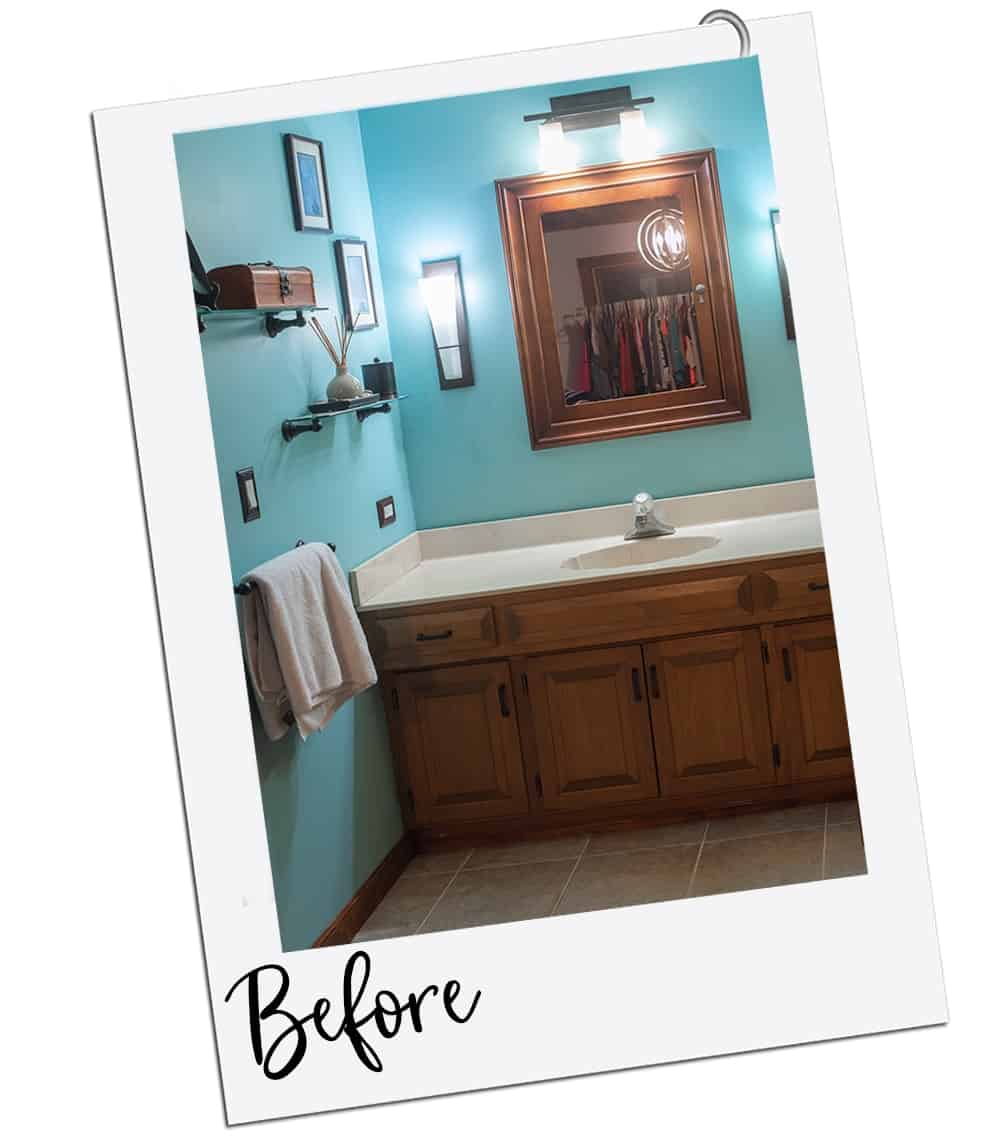
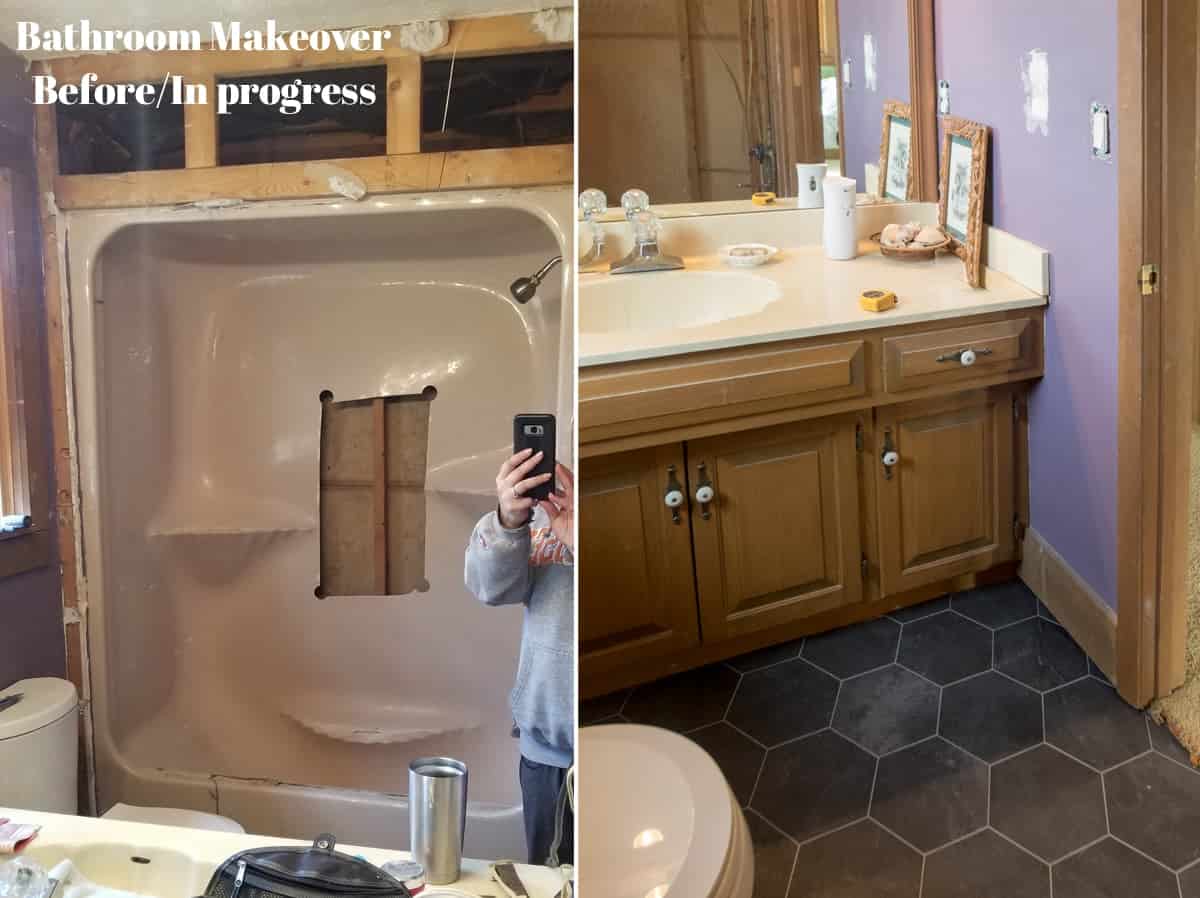
Above is the master bathroom and the first thing you notice is that crazy bright toothpaste green color. While I am not against color, I can’t say that this color did anything for the wood tones of the bathroom, so we repainted a warm neutral.
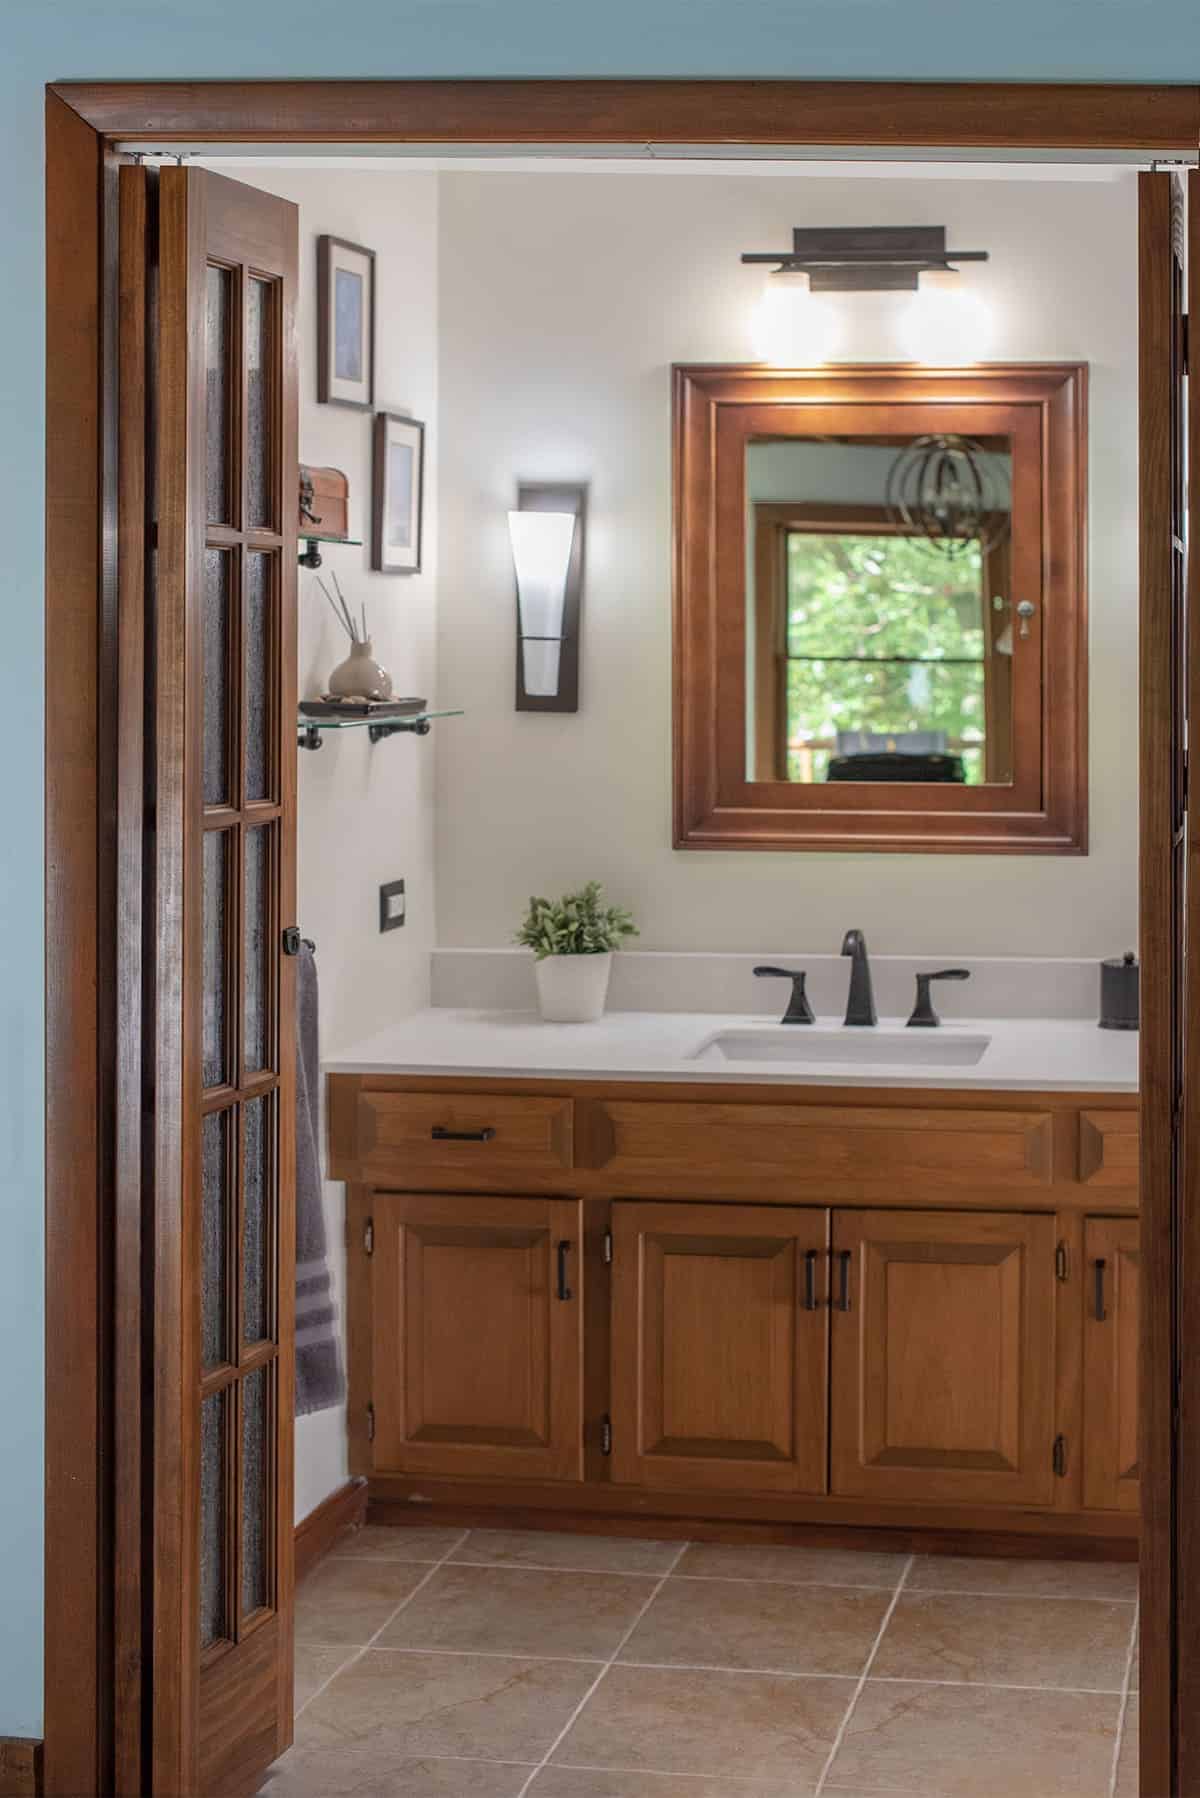
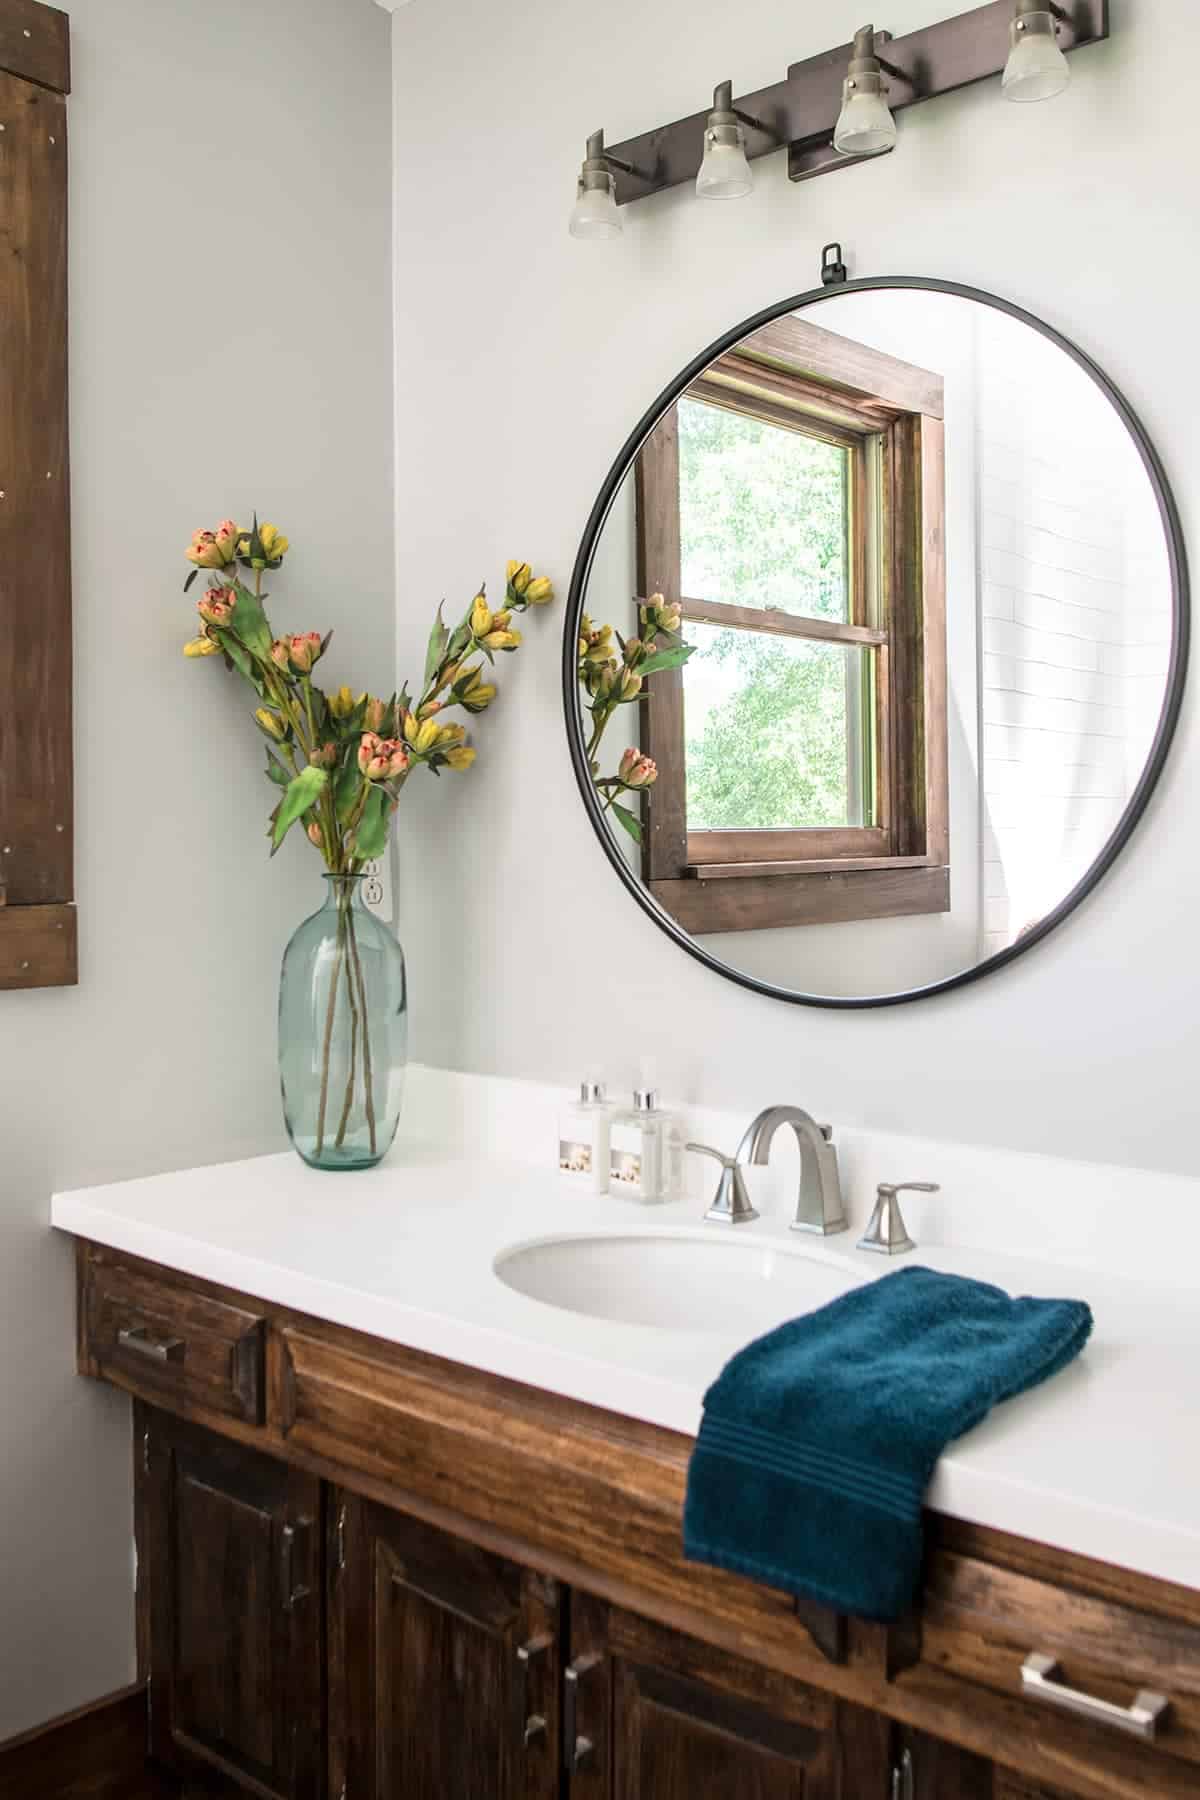
We replaced the seashell vanity, mixing modern with the rustic. New faucet, regrouting, and repairing the shower made everything look clean and tidy. I am still not a fan of the art deco light fixtures, but it’s a vast improvement on a tiny budget.
However, the upstairs bathroom is truly my proudest moment. I didn’t have any truly original photos, because the very first project we did was to replace the carpet in the bathroom.
YES, CARPET IN A BATHROOM! WHYYYYYYY?
Anyways, I gutted nearly this entire bathroom by myself. I was not very confident with the saws-all because I knew there was wiring in the wall, but I took it slow and managed the demo.
And this is what it looked like afterward.
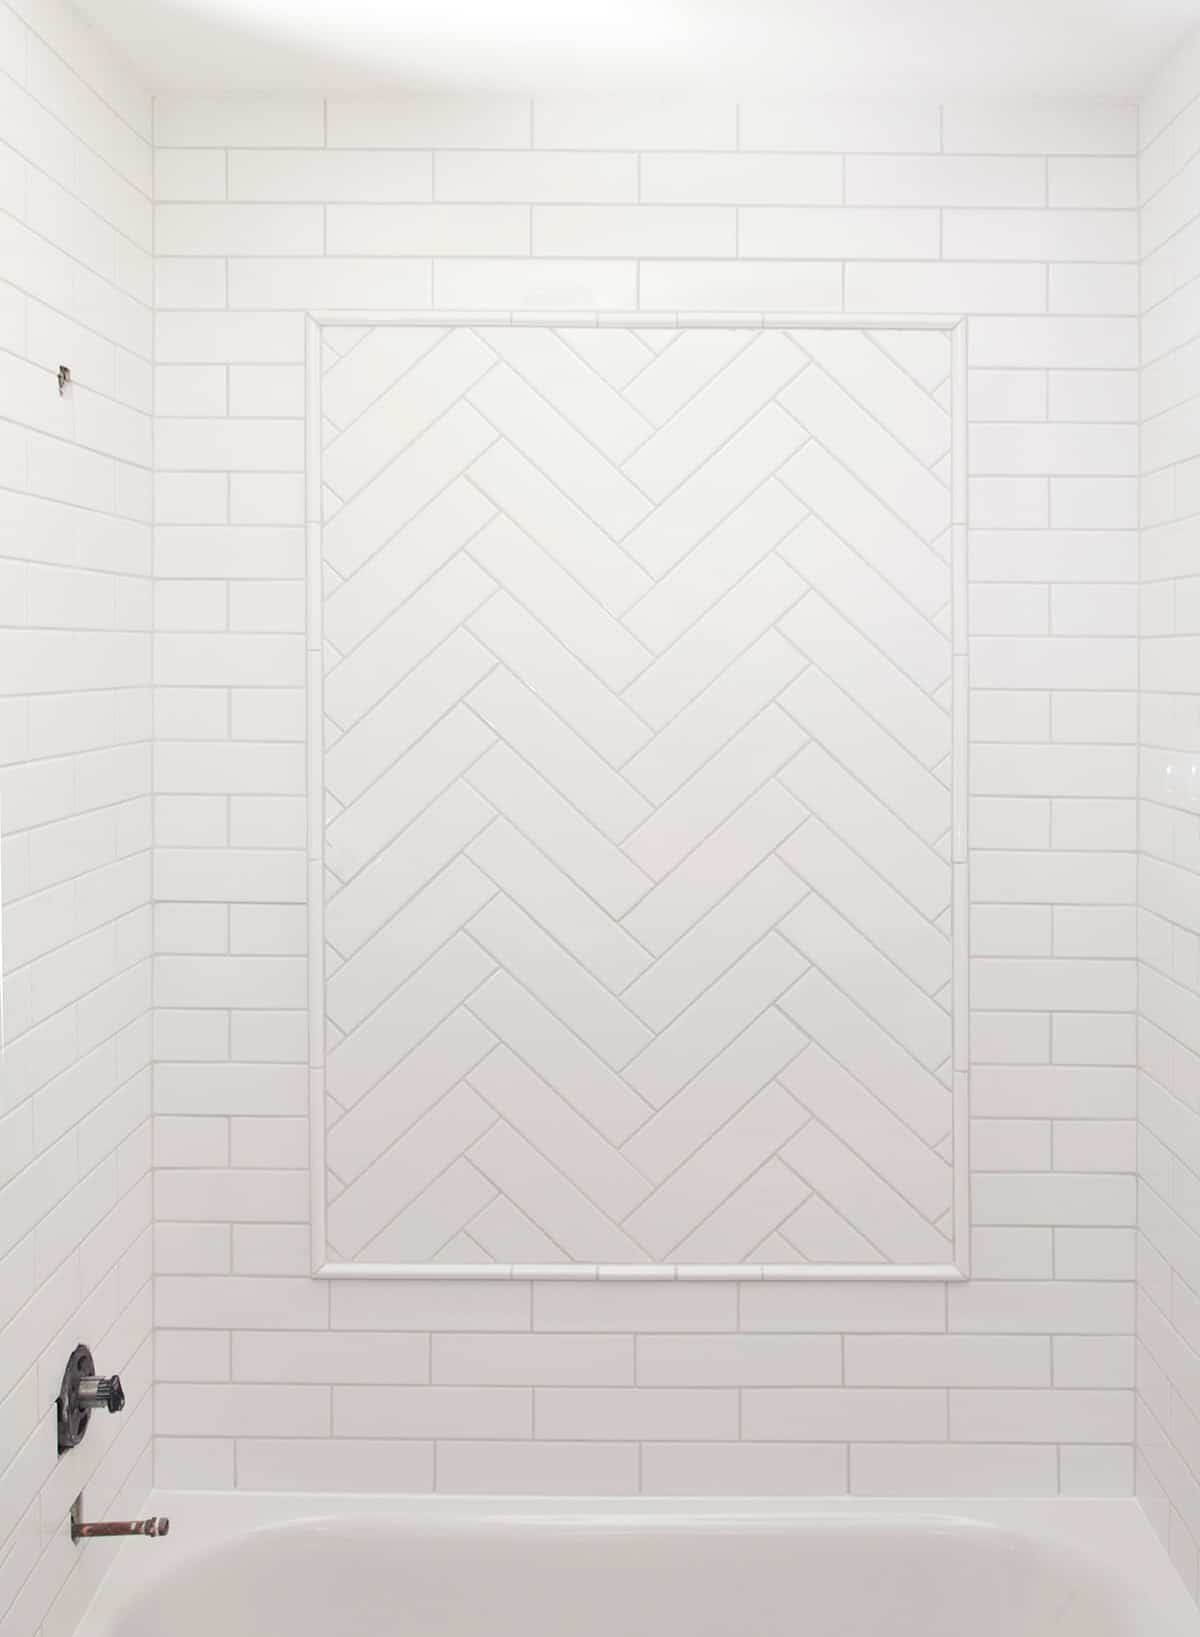
In this style of house, I wouldn’t generally use a fancy type of tile. However, by sticking to relatively plain tile, we could dress it up with a small herringbone inset.
Related Bathroom Makeover Tutorials
- How to Caulk a Bathtub
- How to Replace a Vanity Top
- How to Tile a Herringbone Pattern
- Groutable Vinyl Tile Installation
- How To Apply Window Film
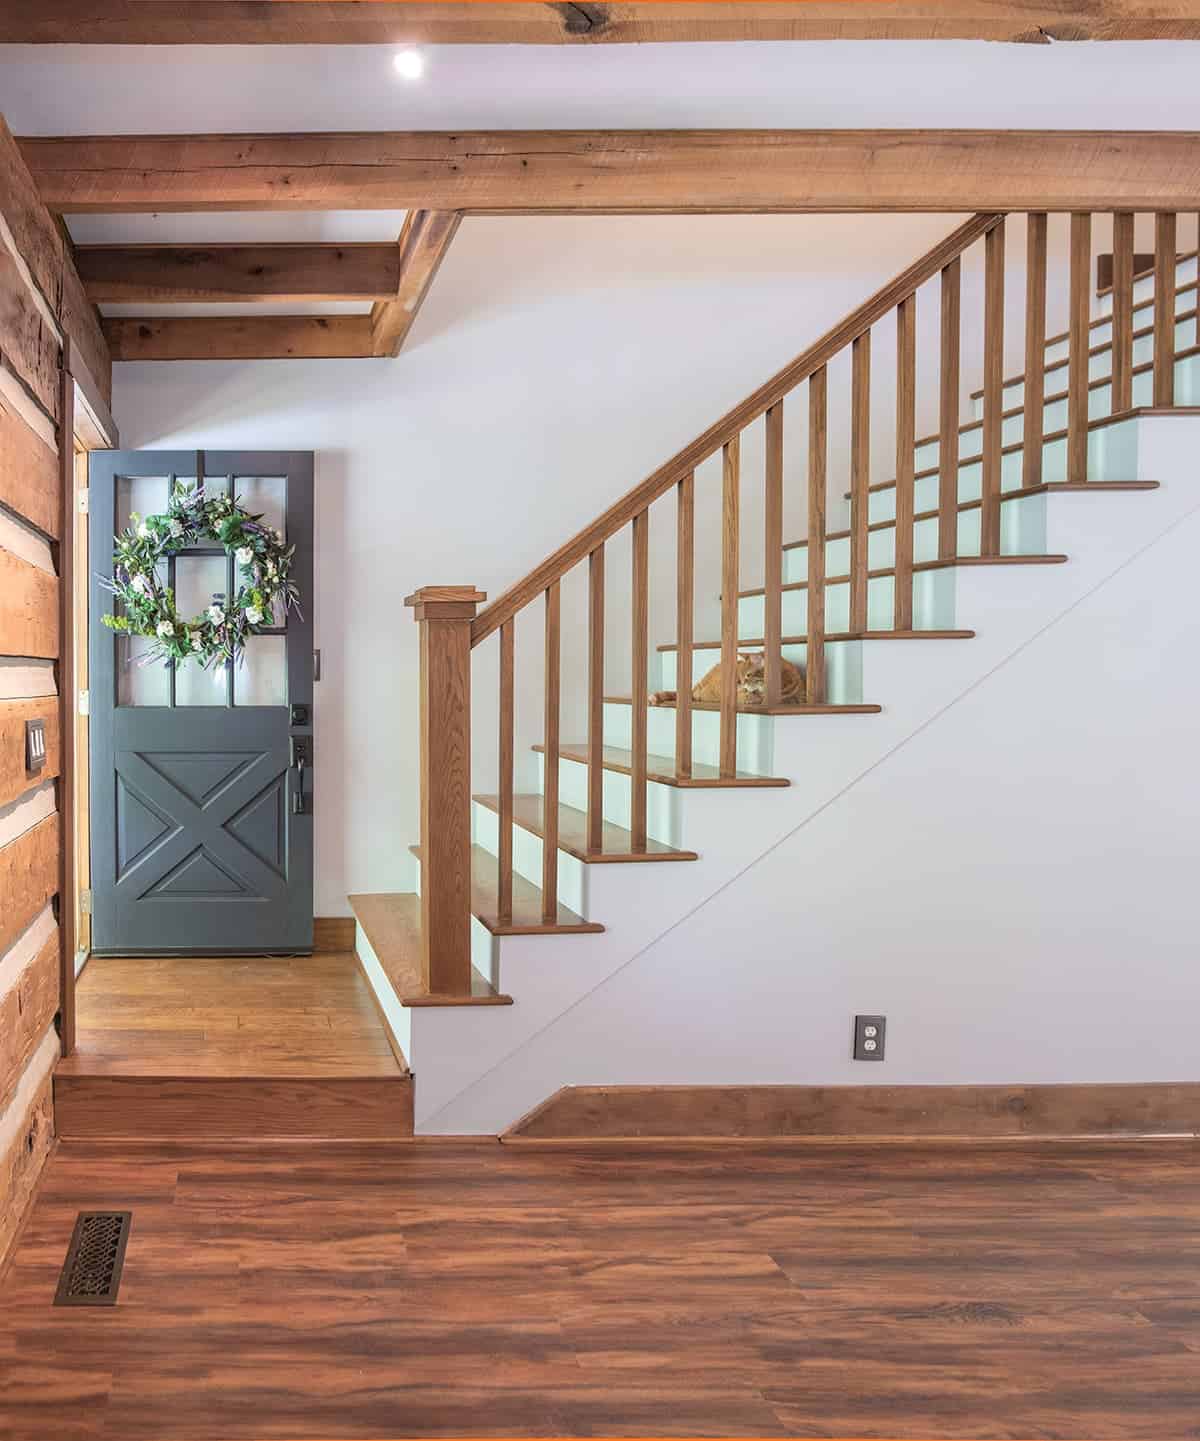
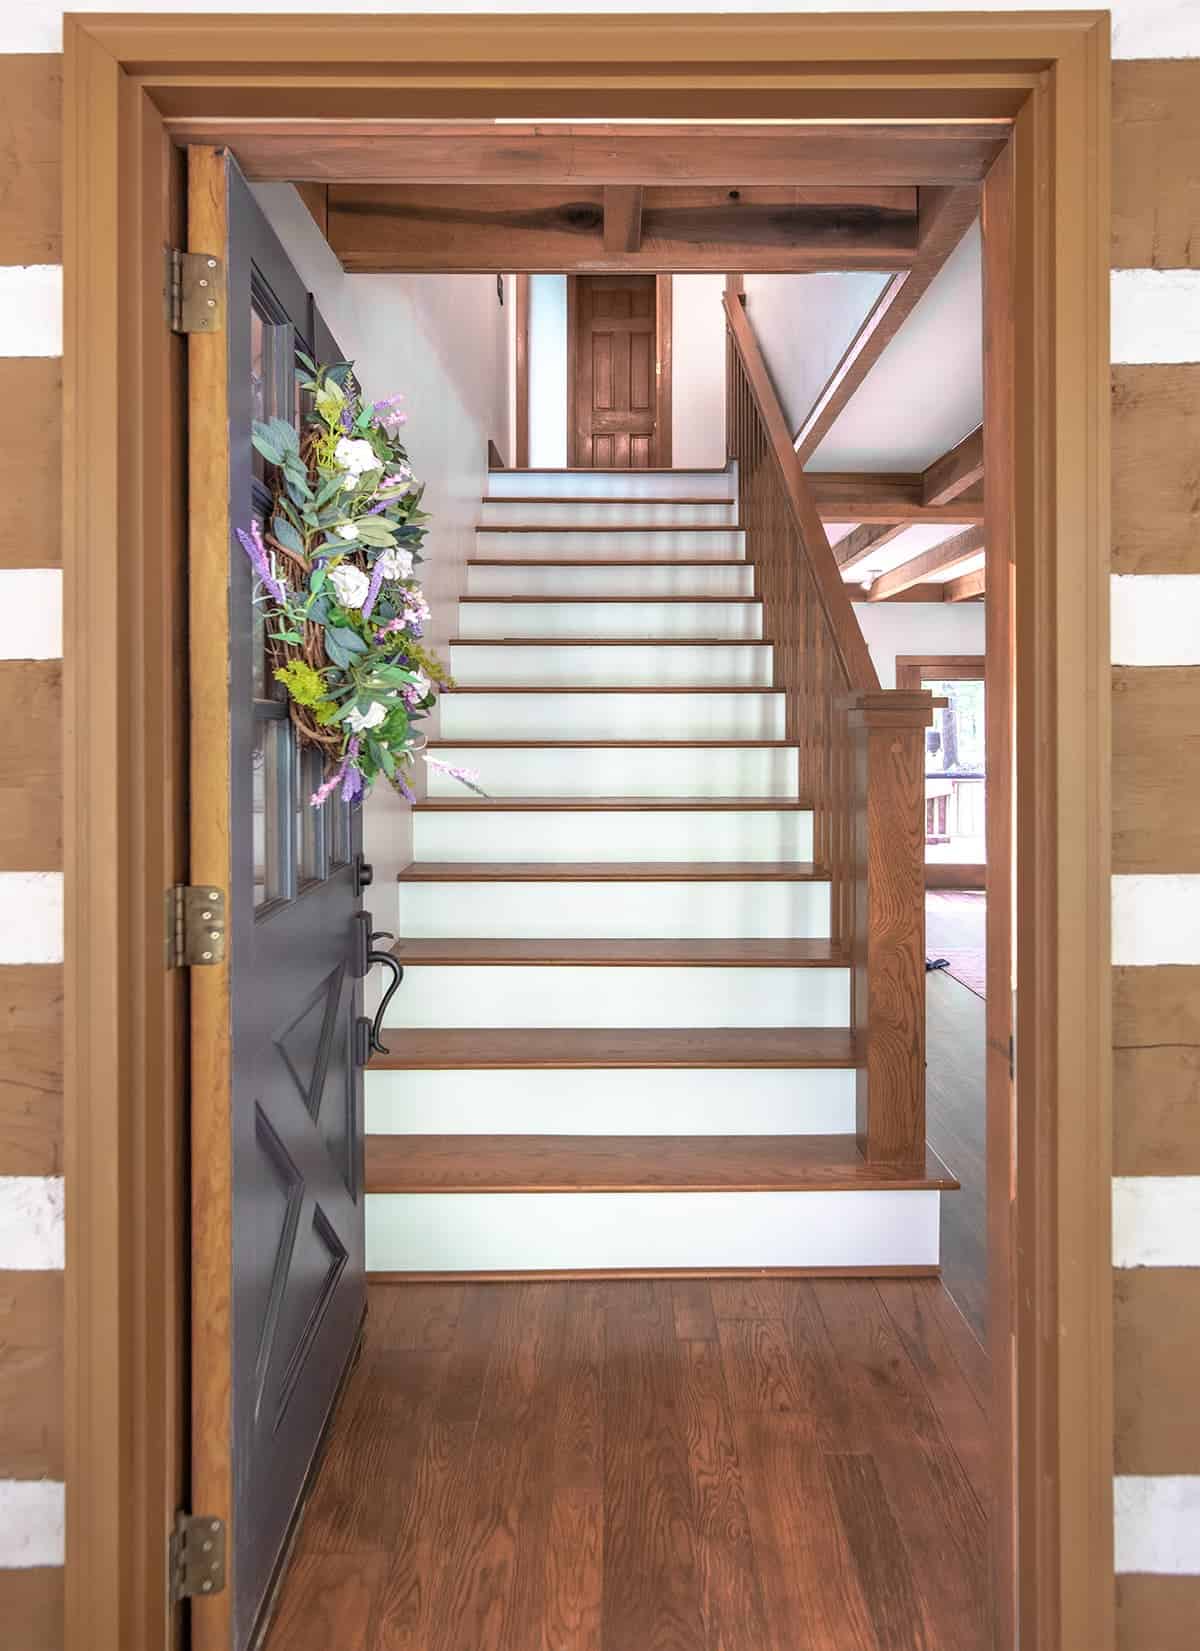
The Stunning Staircase Installation
I can’t and won’t take credit for everything, as I actually had very little to do with this staircase project beyond choosing the design. While I was busy painting rooms, my husband and son completed our most complicated single project ever!
He took this carpeted 80s open staircase:
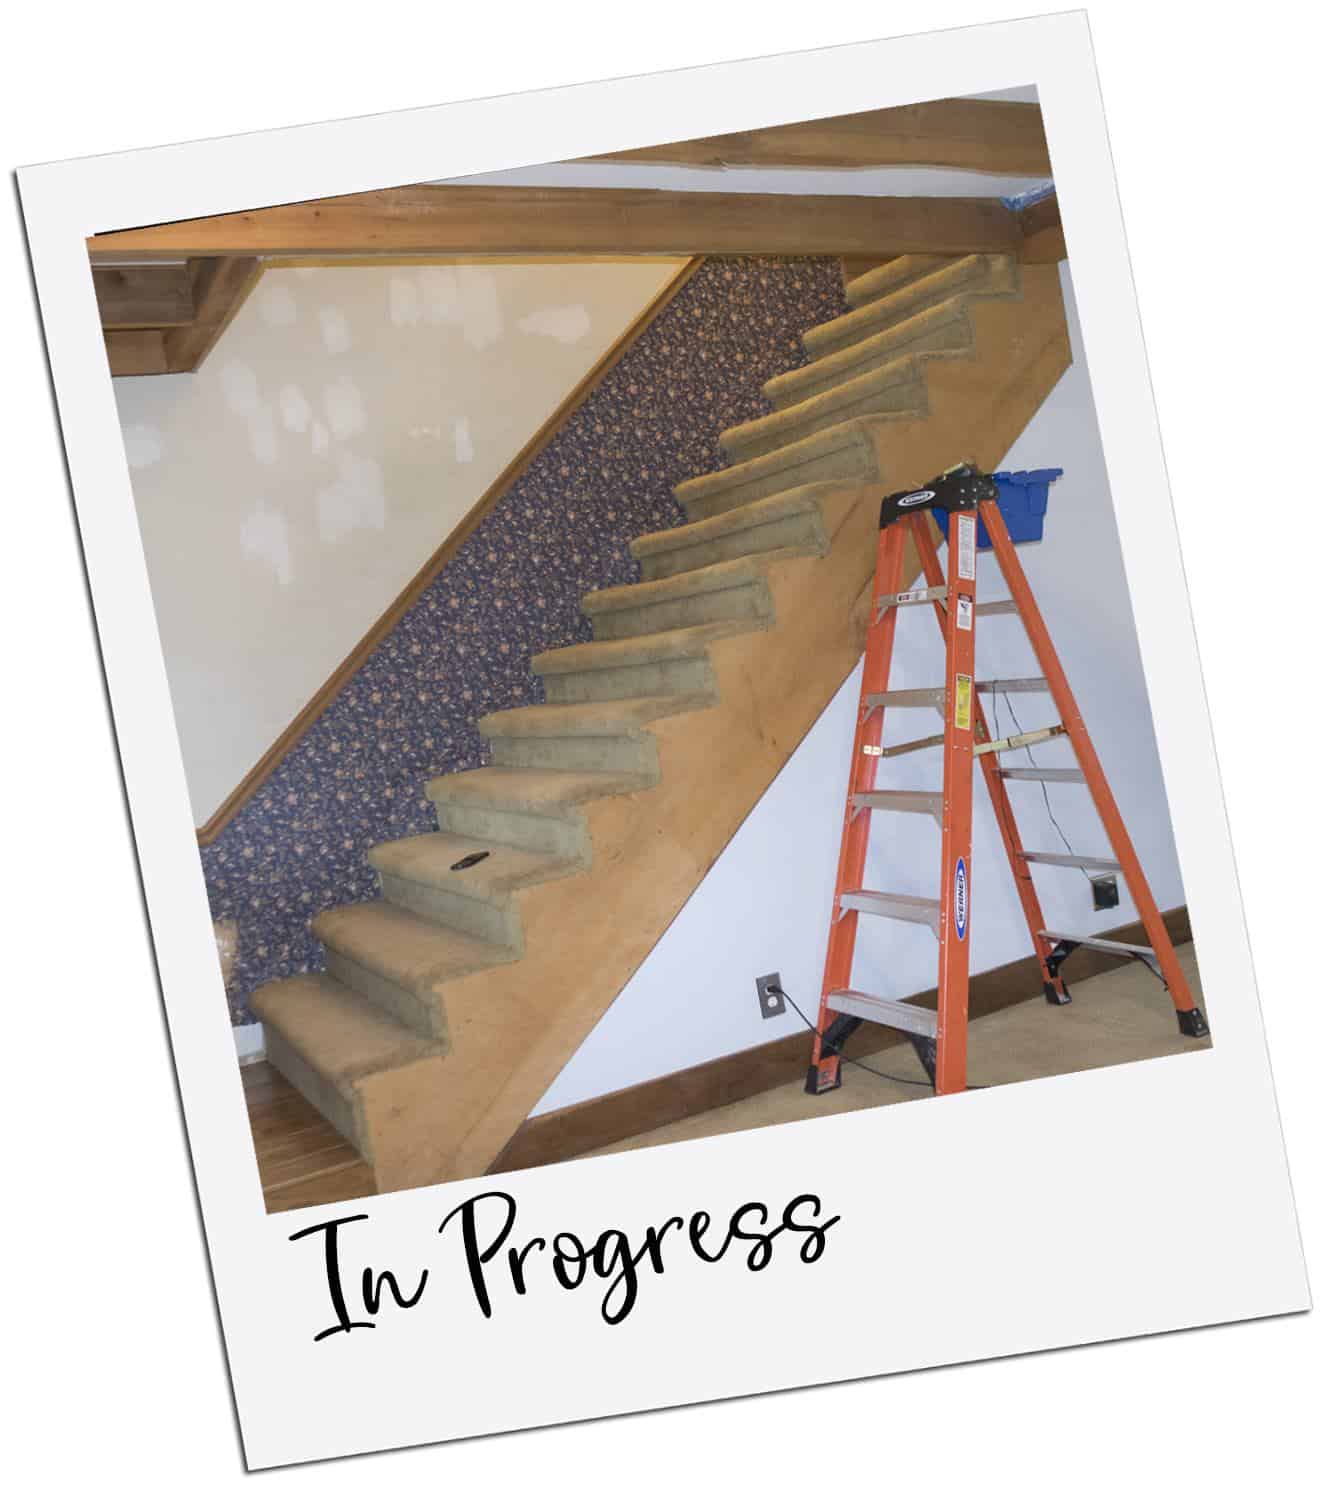
Even looking at it now, it’s hard to understand just how complicated this actually was to do.
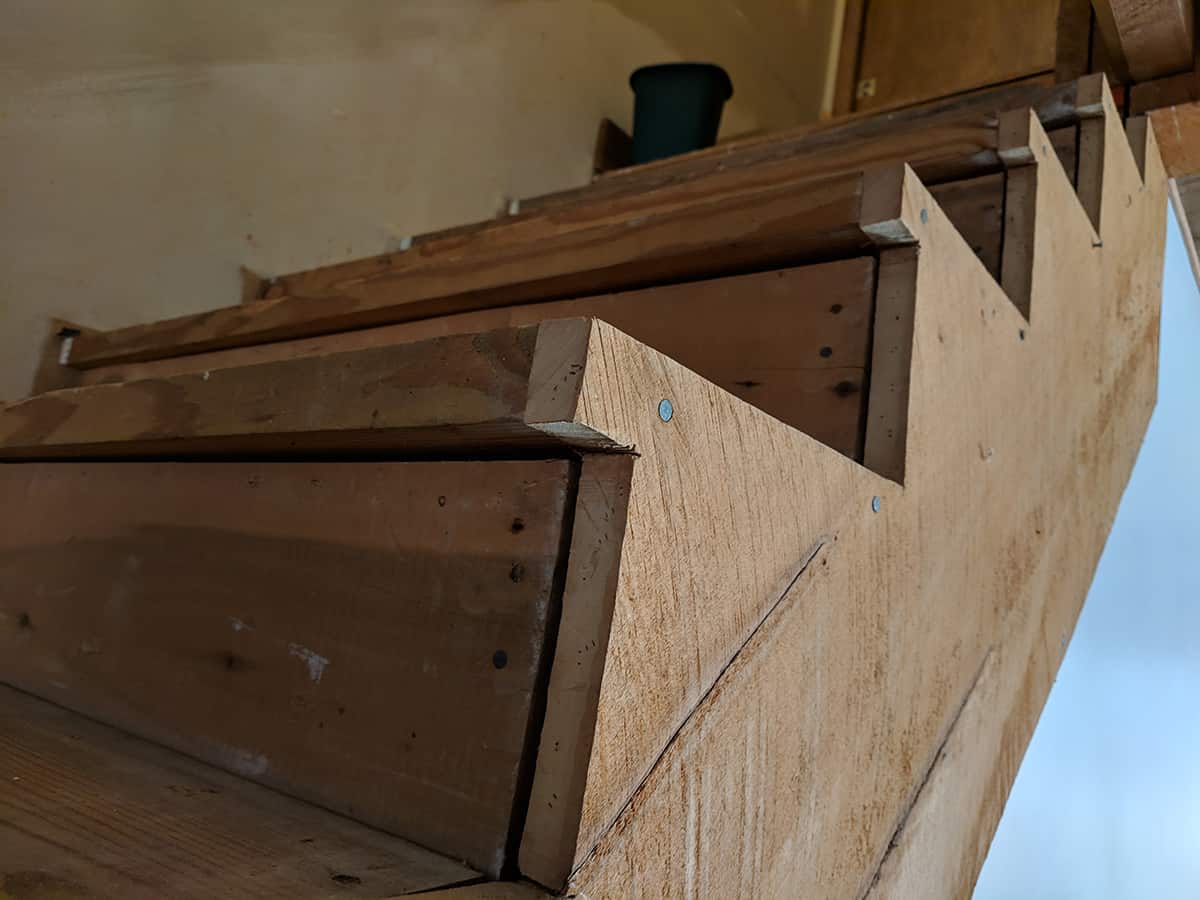
And after we removed the carpet, we knew this was going to be our toughest job ever. All the stair boards were warped and twisted in multiple directions with huge gaps. It was really bad, although actually extremely sound.
Furthermore, there was a rather large rough cut stringer board that had to be replaced.
Also, there was no previous railing and never had been. The new railing had to snake from an open space over the wall to the top of the stairs. This put us in a precarious situation since the wall and the stairs were not entirely parallel and true to each other.
In the end, one of the contractors my parents hired to install the flooring tried to hire my husband, lol. He said it was better than his stair guy could do.
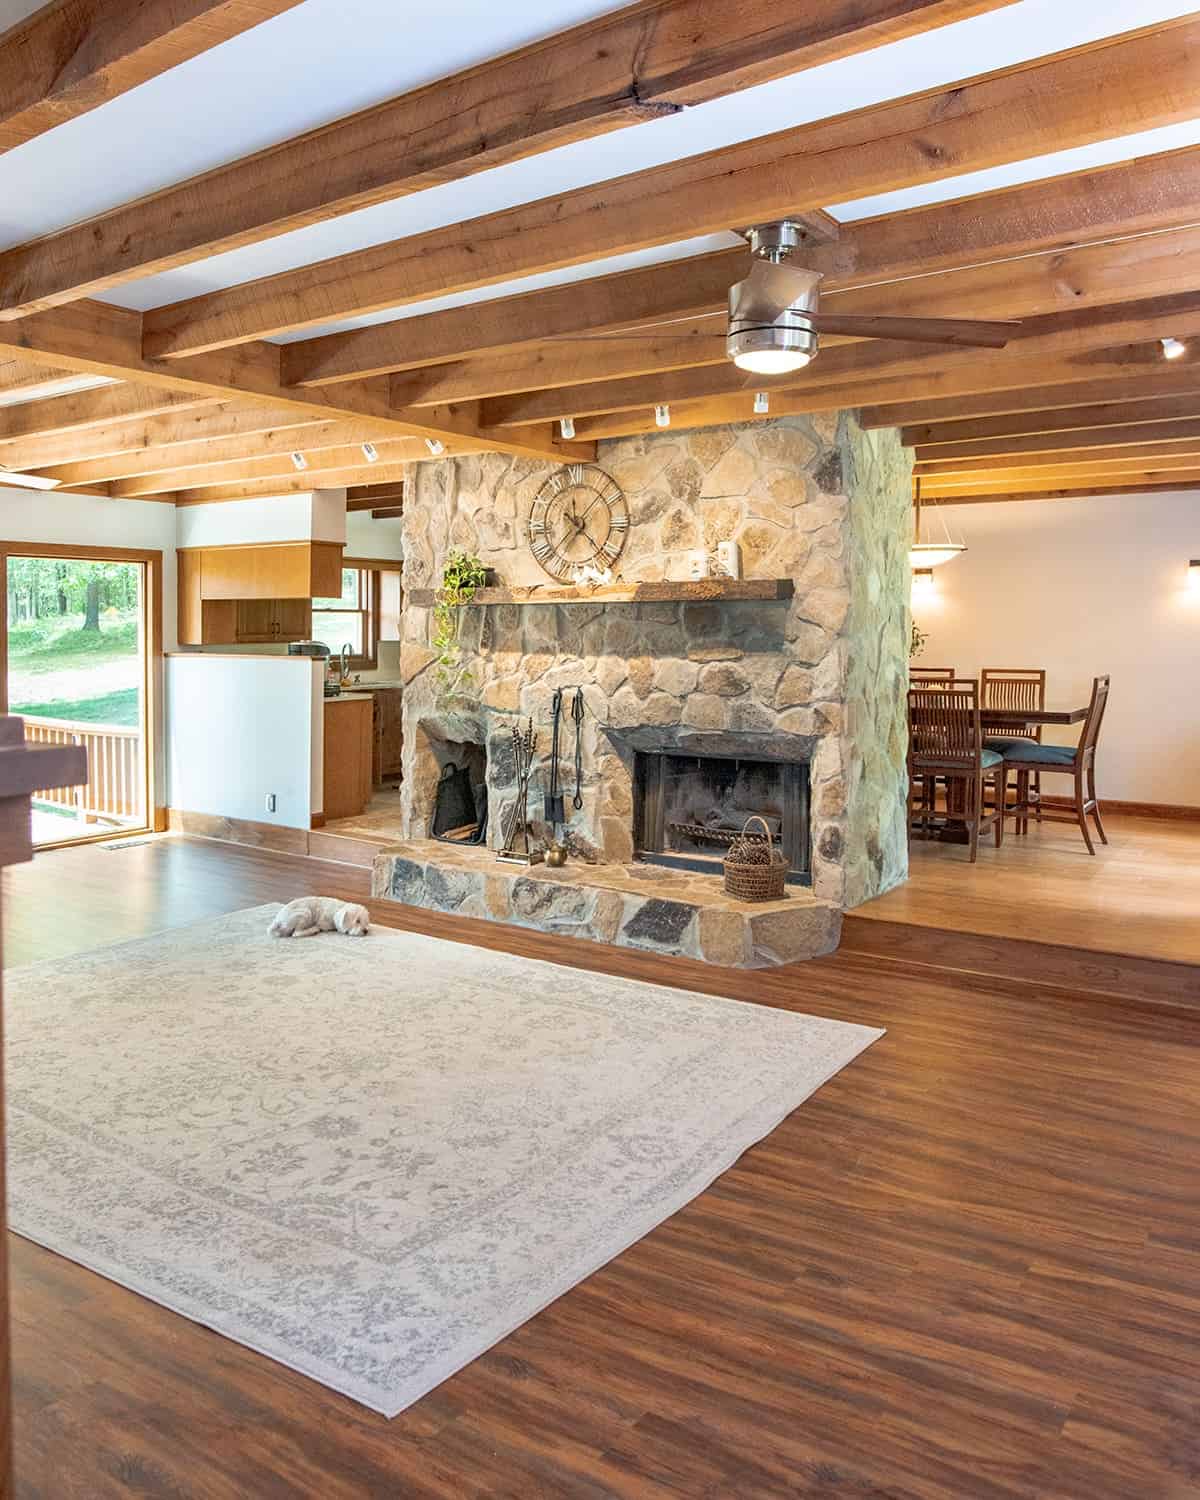
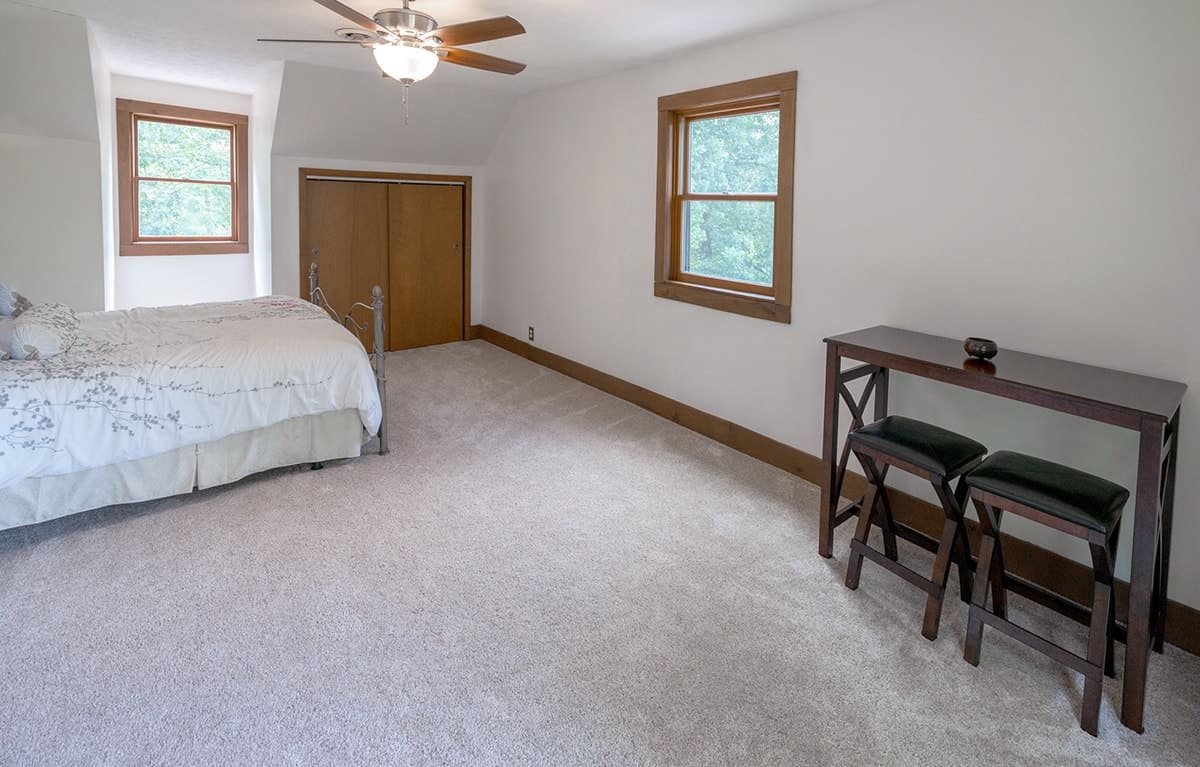
Living Spaces (Bedrooms and Media Room)
The living room area used to have exposed ceilings, which made it quite dark and sound traveled everywhere. The joists you see here are the structure of the house and the center joist runs the entire house. It’s steel that has been surrounded by wood, although the rest of the joists are structural rough boards. My parents added drywall between the joists and trimmed them out with cove molding.
The only other change we made was to install new vinyl flooring that they picked out.
The upstairs bedrooms got new carpet and paint. I shudder over that sponge painting job I did in my old bedroom (hello, 1997!).

It’s certainly not fancy, but that is a pretty dramatic before and after.
Home Remodeling Projects & Tutorials:
- How to Repair Textured Ceilings
- Modern Drop Ceiling Makeover Ideas
- How to Install Vinyl Plank Floors
- How to Repair Cracked Walls
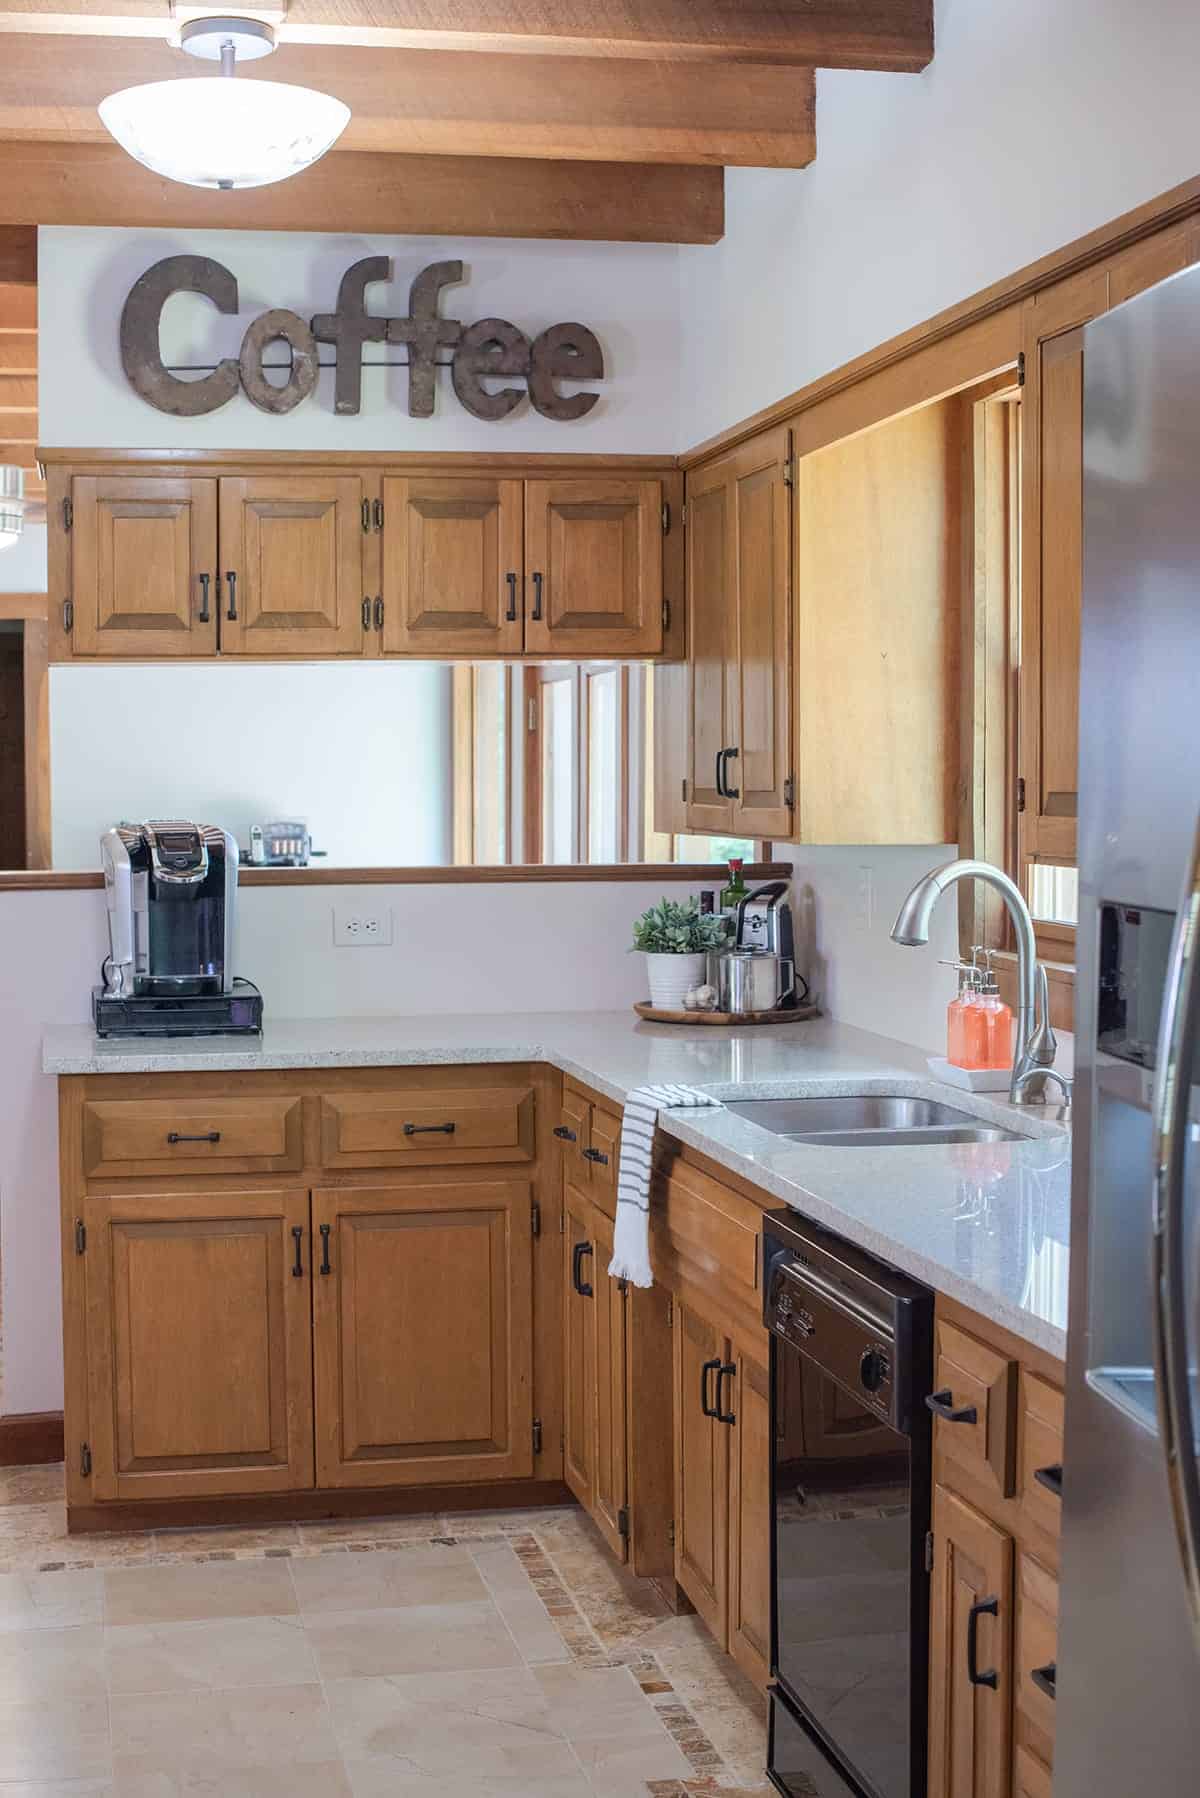
Kitchen
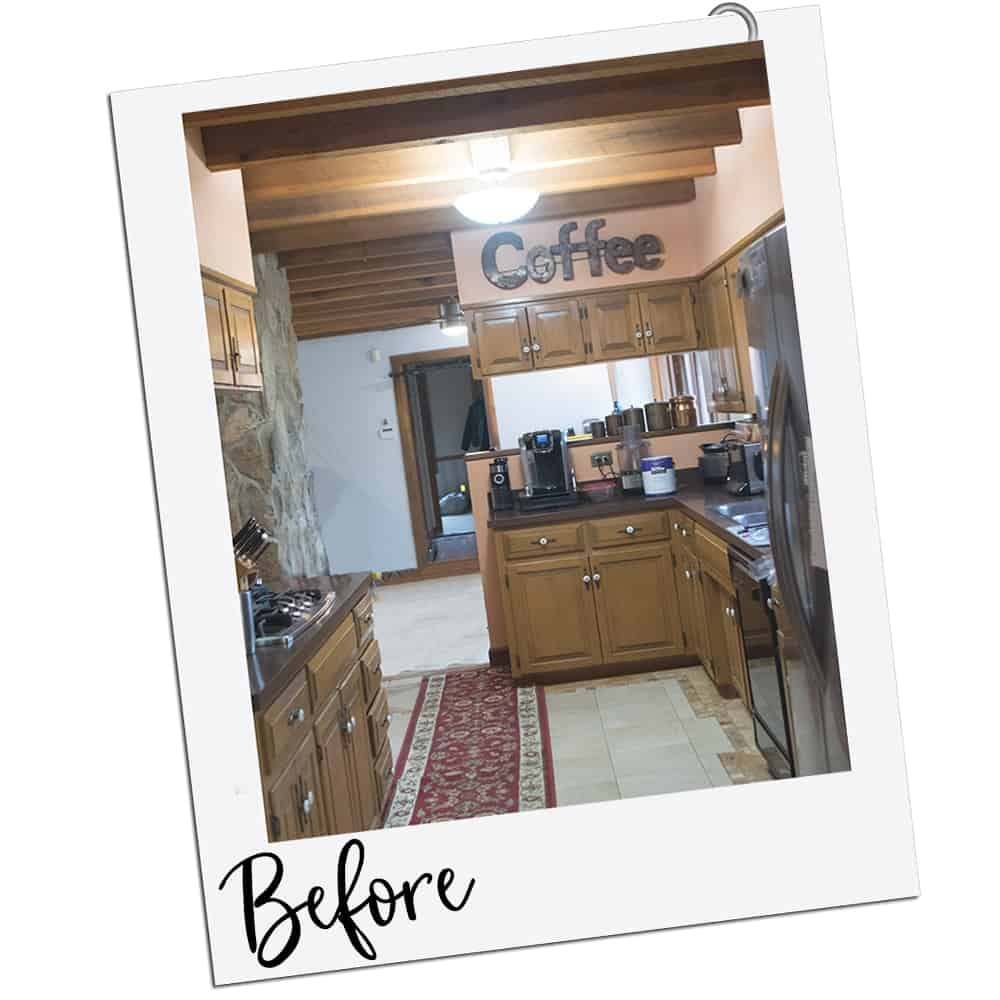
The kitchen was mostly returned to it’s best possible, budget friendly state with all of the cracked floor tiles replaced, new countertops, a peninsula that was made to a single level and widened. We also replaced all of the owl-eye hardware and lightened up the paint to bring in as much light as possible.
Related Kitchen Tutorials
All of these changes don’t even include some of the smaller repairs we made like to rotting wood around windows, finishing many (many!) small trim projects, and other rooms that had to be repainted or cleaned up.
All in all, I estimate my husband, son, and I saved my parents at least $100,000 in just labor alone versus hiring contractors.
Our Next Project
Now that the cabin makeover is complete and the house is sold, my parents have since moved to our area and have all the grandkids around them. There are still plenty of projects coming up at our house, at my parent’s new home, and who knows where else.
In addition, my husband and I will finally get to finish the basement into a sophisticated man cave and family media area. It’s a big job, but it’s already started at the time of writing this, and I can’t wait to see and share how it all turns out. We have BIG plans!
No matter where life takes us, we are excited to see how it unfolds, and we are so thankful for all of you who have been a part of this journey.

Grab our free series "Weekend Home Projects that will Transform Your Life" Sign up below to receive updates including free printables, organization tips, home improvement projects, recipes and more! |
More Home Improvement Posts


PS I love seeing your creations! Be sure to take a photo and tag #cravingcreative on Instagram! You can also stay in touch with me through following me on Instagram, Pinterest, and subscribing to the newsletter!
Julie Hoover says
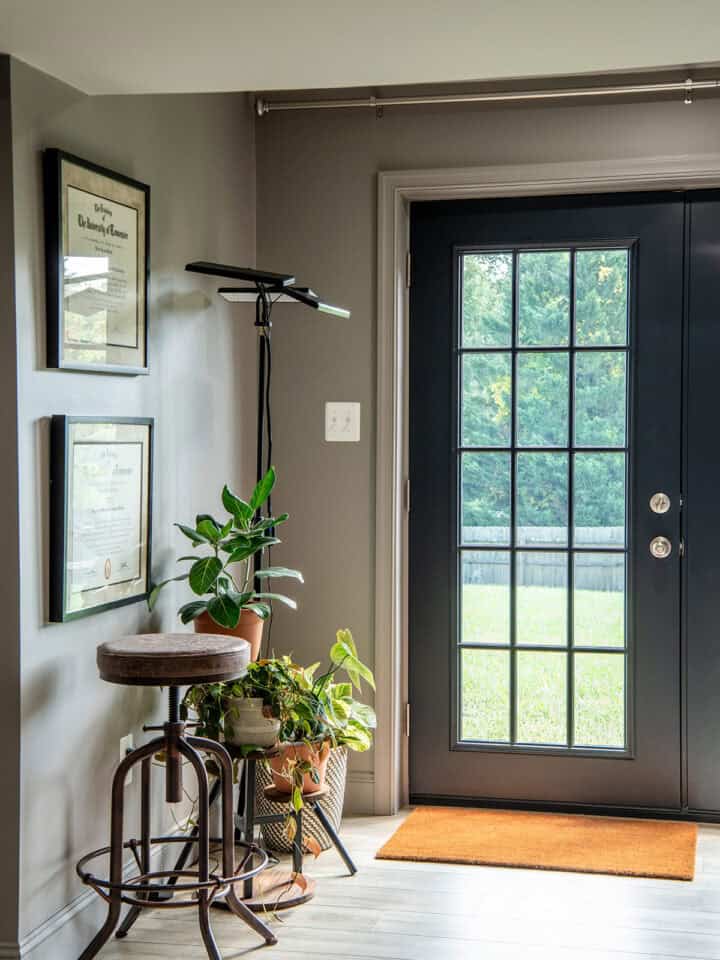
Love this Reno! I am currently renovating a log home and would love to know what color stain this is and the color of the front door please 💕
Rachel says
Unfortunately, my parents had a habit of customizing their own colors, so I don’t have a color card. Please avoid mixing your own colors if possible. It makes it a bigger headache if you ever have to retouch, repaint, or match the color later on. Some of the colors were so old that the hardware store couldn’t even match their own codes. The color on the door, if I remember correctly, is Sherwin Williams Peppercorn.