A floor tile may break due to installation issues, changes in temperature, too much weight, or dropping a heavy object. Learn how to replace a cracked tile in just a few steps! This DIY guide covers everything from preparation to grouting with step-by-step photos and video demonstration. Make your floors look brand new!
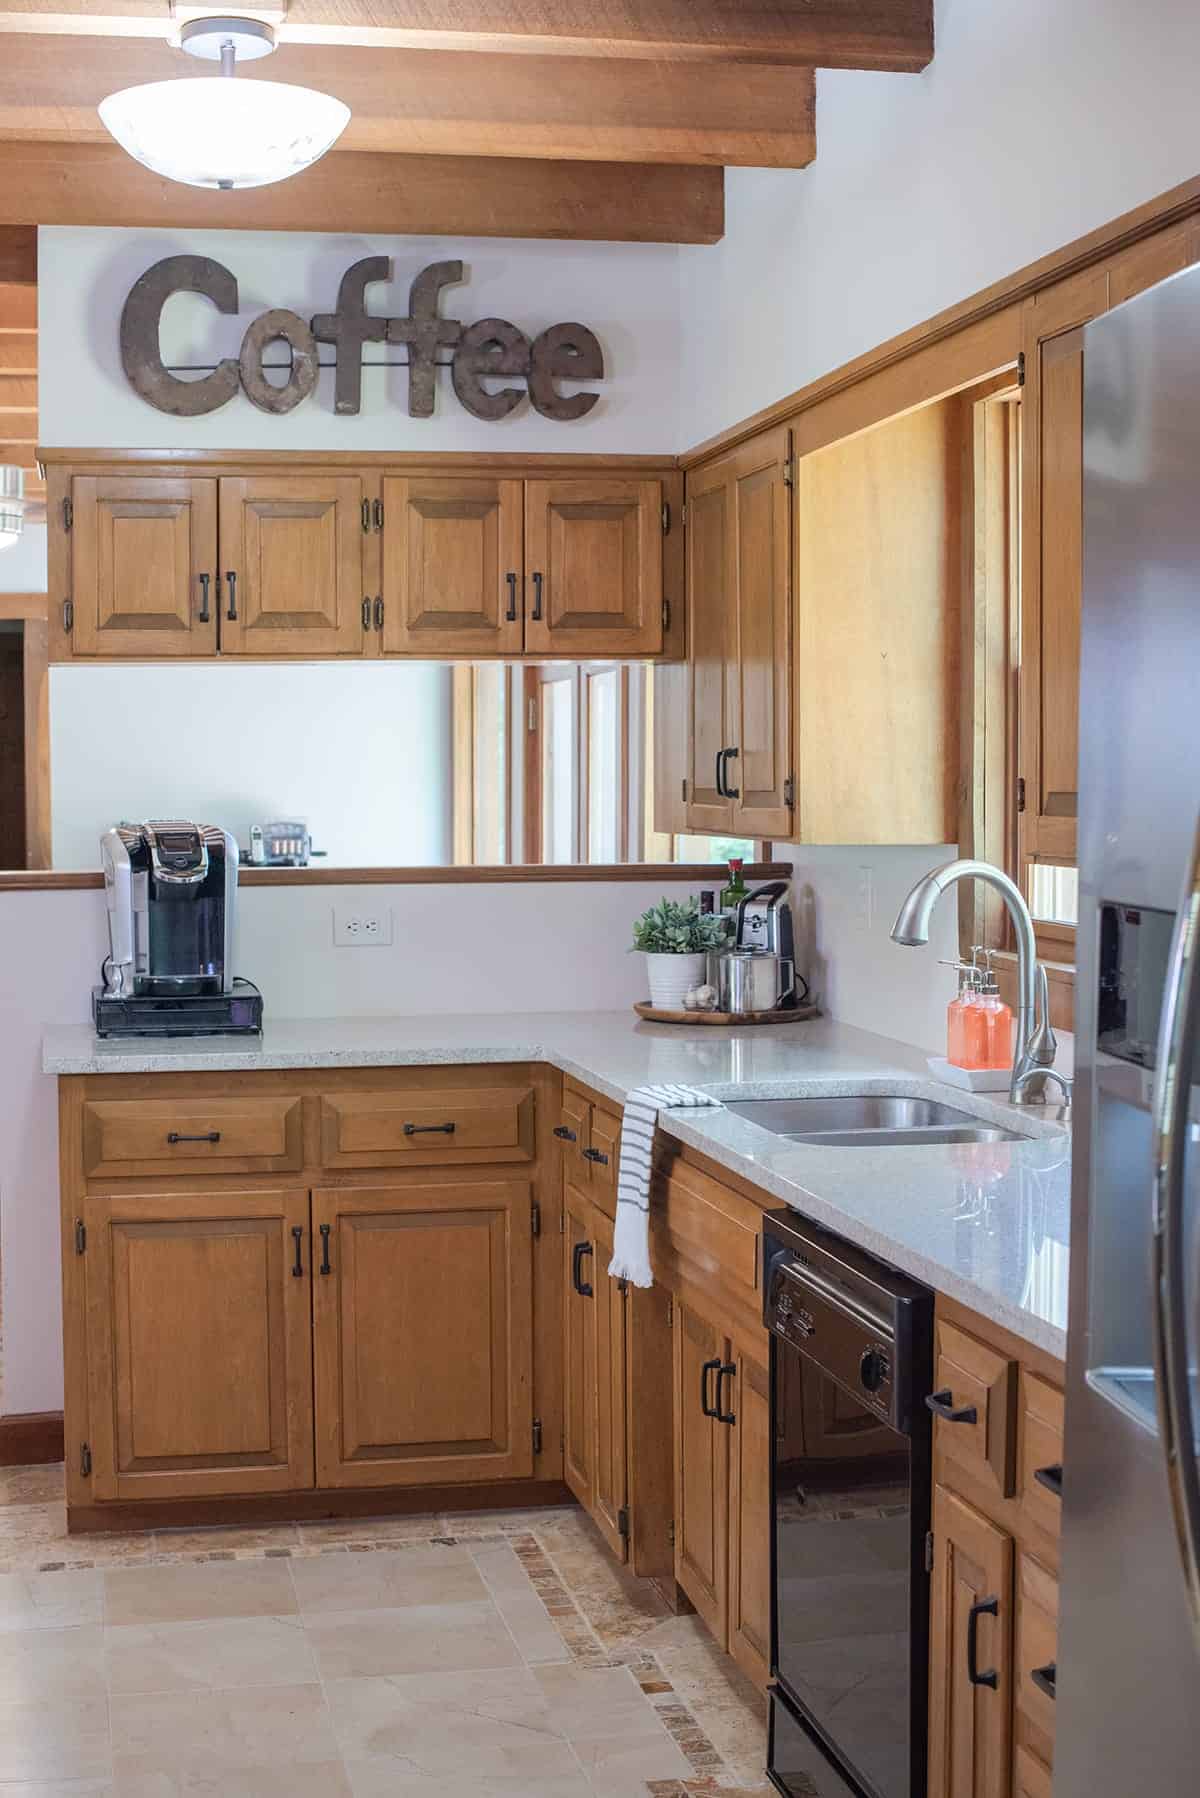
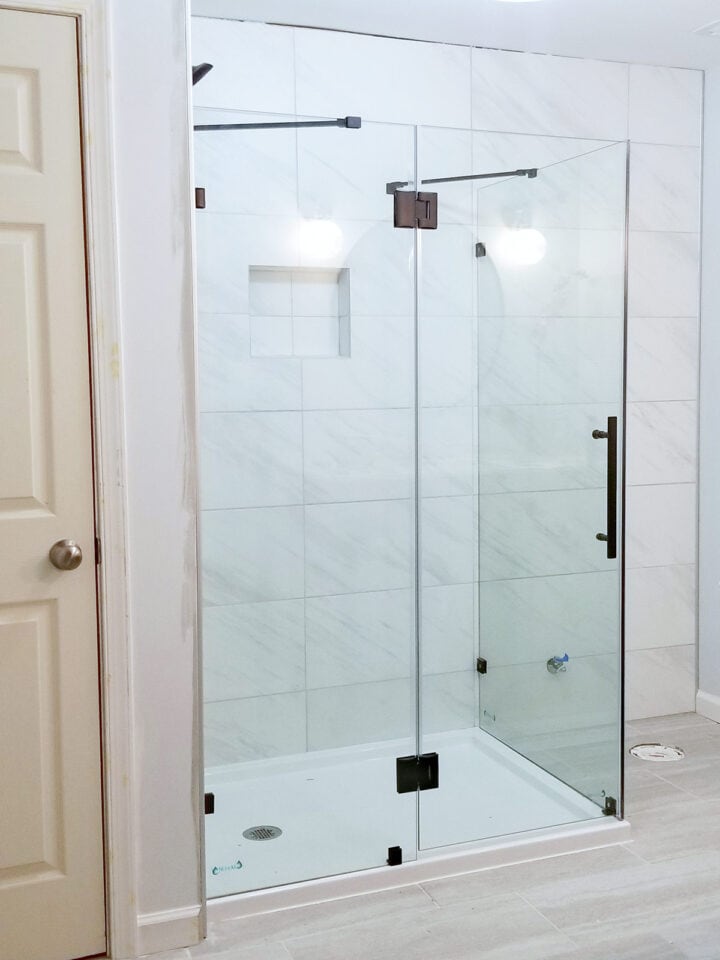
Yep, we are back at my parent’s house finishing up yet more repairs! This time around calls for more tiling projects! We completed a herringbone tile pattern in the modern rustic bathroom, as well as installing groutable vinyl tile. Now it’s time to tackle the kitchen floor repair.
While some might just rip out the entire floor and replace it with a new one, this house is going up for sale. My parents had the foresight to save some in case of needed repairs.
With my free labor, this project cost only a bag of mortar and grout!
Tools and Materials
- Additional same tile (or a matching one in the same size and thickness).
- Oscillating multi tool with grout blade.
- Chisel
- Hammer
- Thin-set Mortar. Premixed is fine.
- Square floor trowel. Usually ¼ inch square notch is good for between 4x4in & 13x13in.
- Vacuum and brush to clean up the debris.
- Rubber grout float.
- Grout in matching color. Premixed is fine.
- Grout sponge
- Bucket of water
Pro Tip: The hard truth is that most cracked tile has a structural problem. Epoxy and other compounds are fine for chips or surface imperfections, but cracks will just crack again. While you might get away with epoxy on a small hairline crack, if the edges of the crack don’t line up exactly, I recommend replacing.
Our Tile Repair Project
I have a step-by-step video and printable instructions at the bottom of this post. In this section I’ll go over tips pertaining to our particular project.
Generally speaking, I’d rather replace a broken piece than trying to save it. This allows me to make sure the substrate (the surface below the flooring) is in good condition and build up from there.
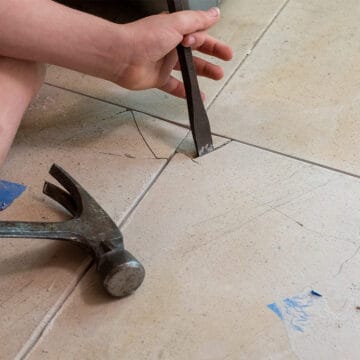
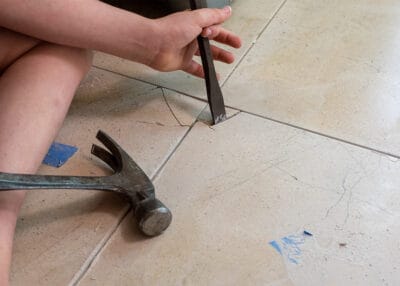
1. Remove the Cracked Floor Tile.

Step one is to remove the old tile and the grout surrounding it. My preferred method of grout removal is to use an oscillating multi-tool. I lovingly refer to it as the “shakey tool.” This multipurpose tool is one of my favorites.
A sturdy box cutter will suffice in place of a “shakey tool,” but it will take a lot of pushing and its often slow progress. Be mindful not to score any surrounding tiles that you’re not intending to remove.
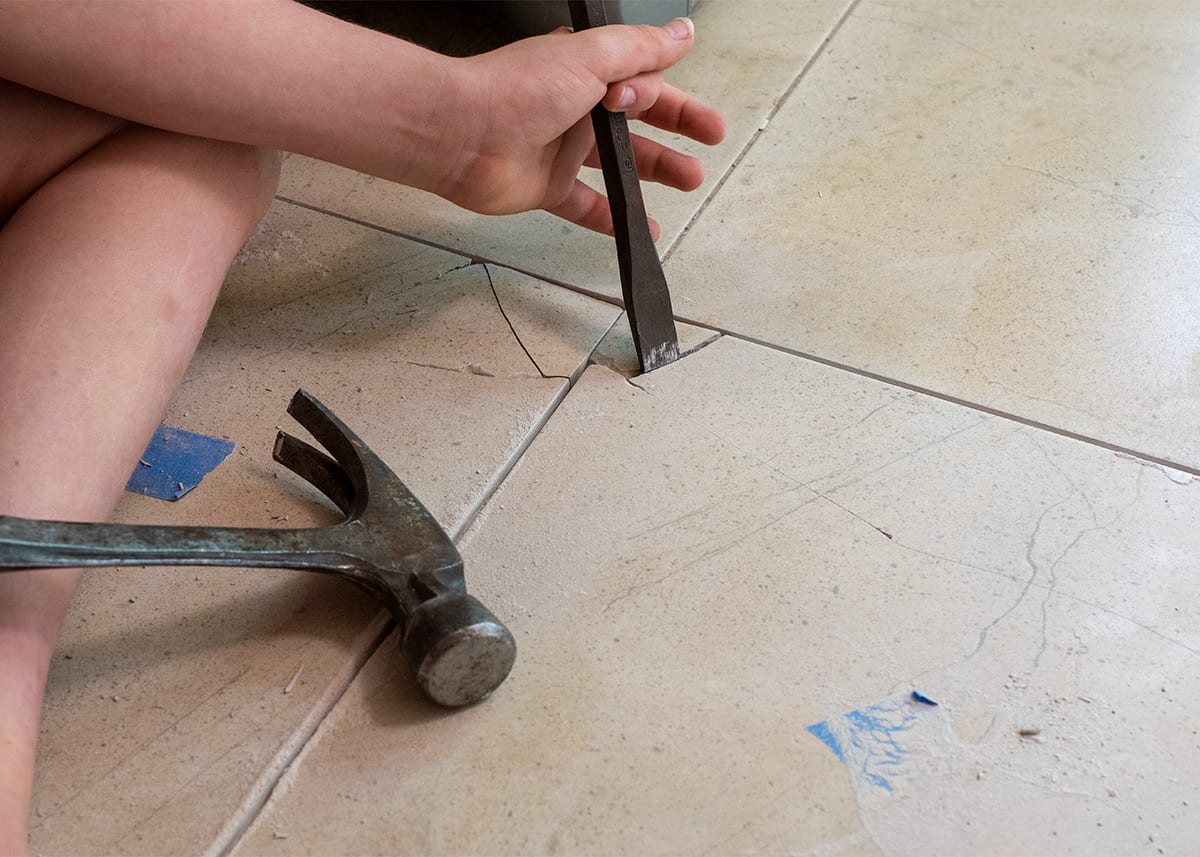
After all of the grout is removed, the tile itself is ready to be removed.
Start at one corner and pry the smallest piece up, then work to get the rest up, always working towards the center. Use a hammer to break it into smaller pieces, if desired.
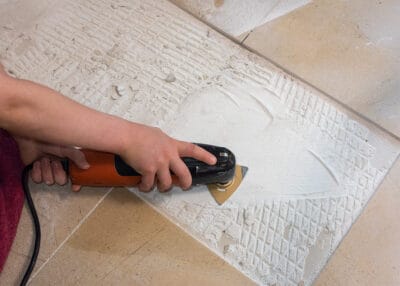
2. Prepare the Floor
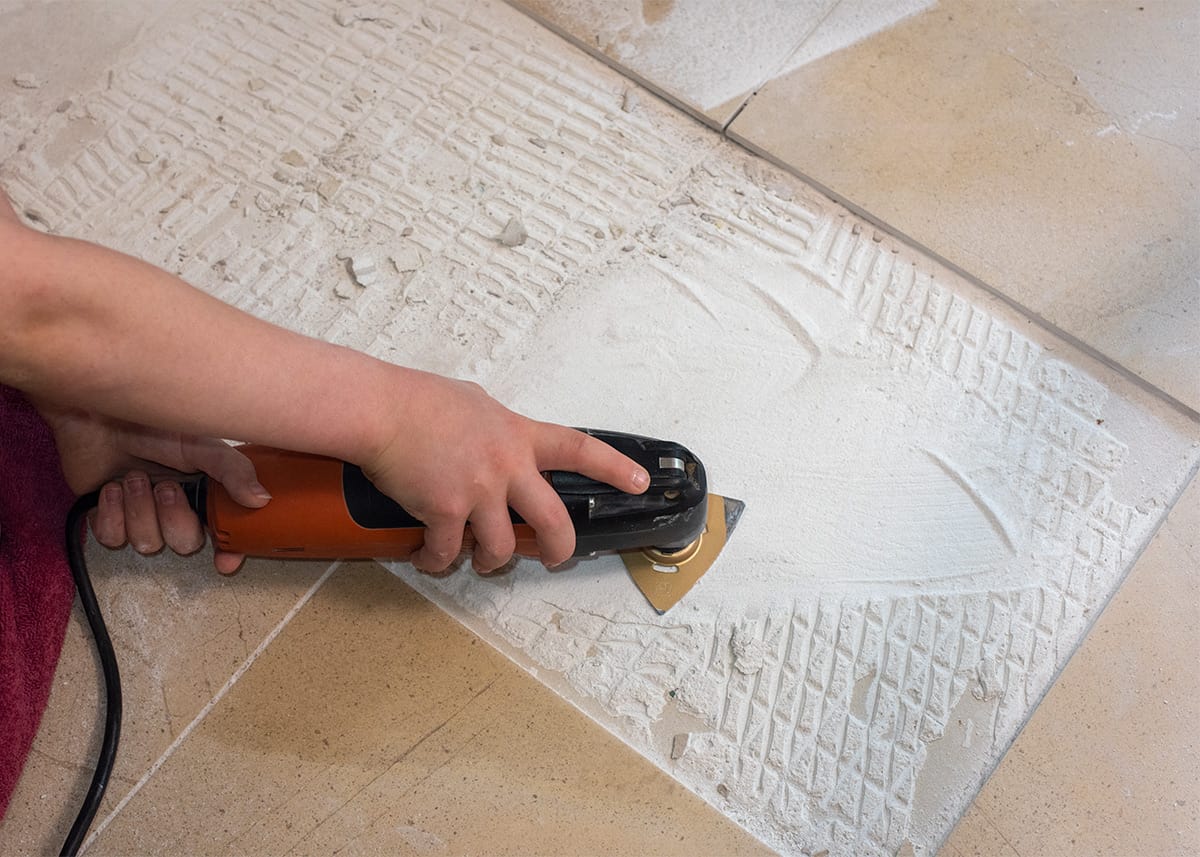
Clean out the old mortar before installing a replacement tile. There’s no need to clean out every speck of existing mortar, but there needs to be room for the new mortar. The goal is that the new tile sits flush with the old ones. An oscillating multi-tool makes quick work of this, but chiseling it out by hand also works.
Check that the subfloor or concrete board doesn’t show signs of water damage or rot.
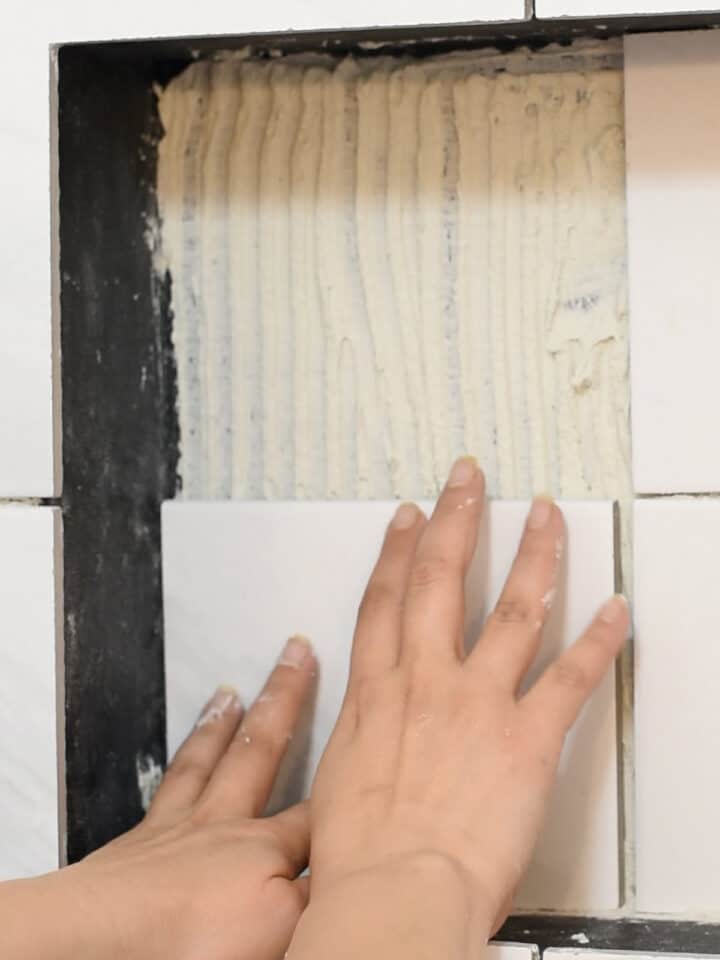
3. Put in the Replacement
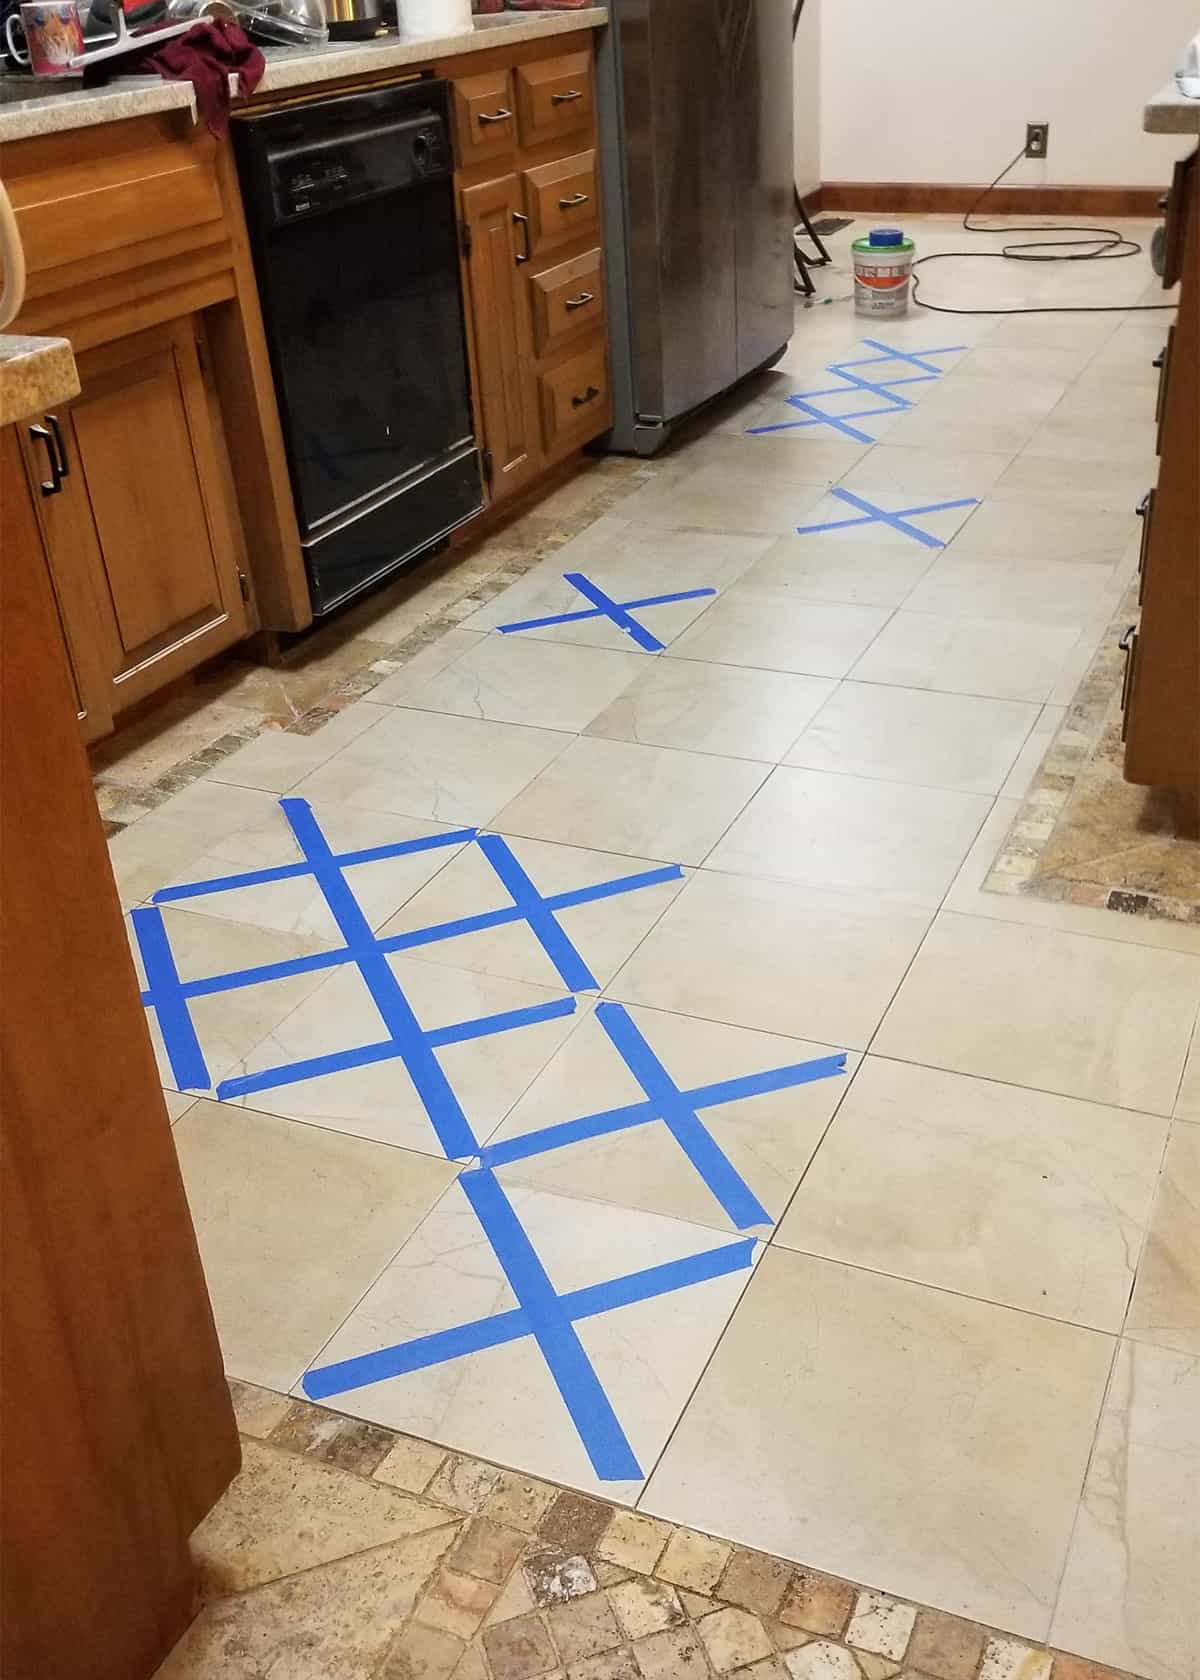
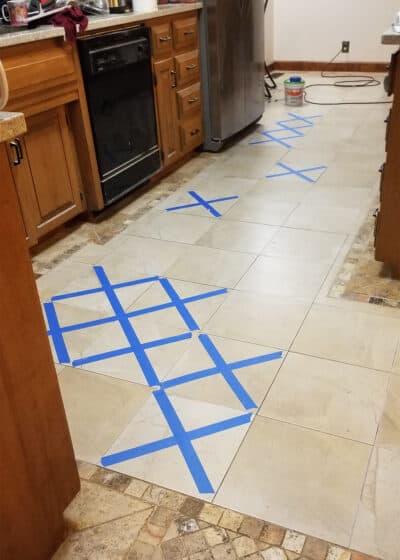
For this project, we replaced as many tiles as we had extras to match. The kitchen is a main walkway and used daily, so I marked the replacements with tape. This prevented anyone from stepping on them while they cured.
4. Grout the lines.
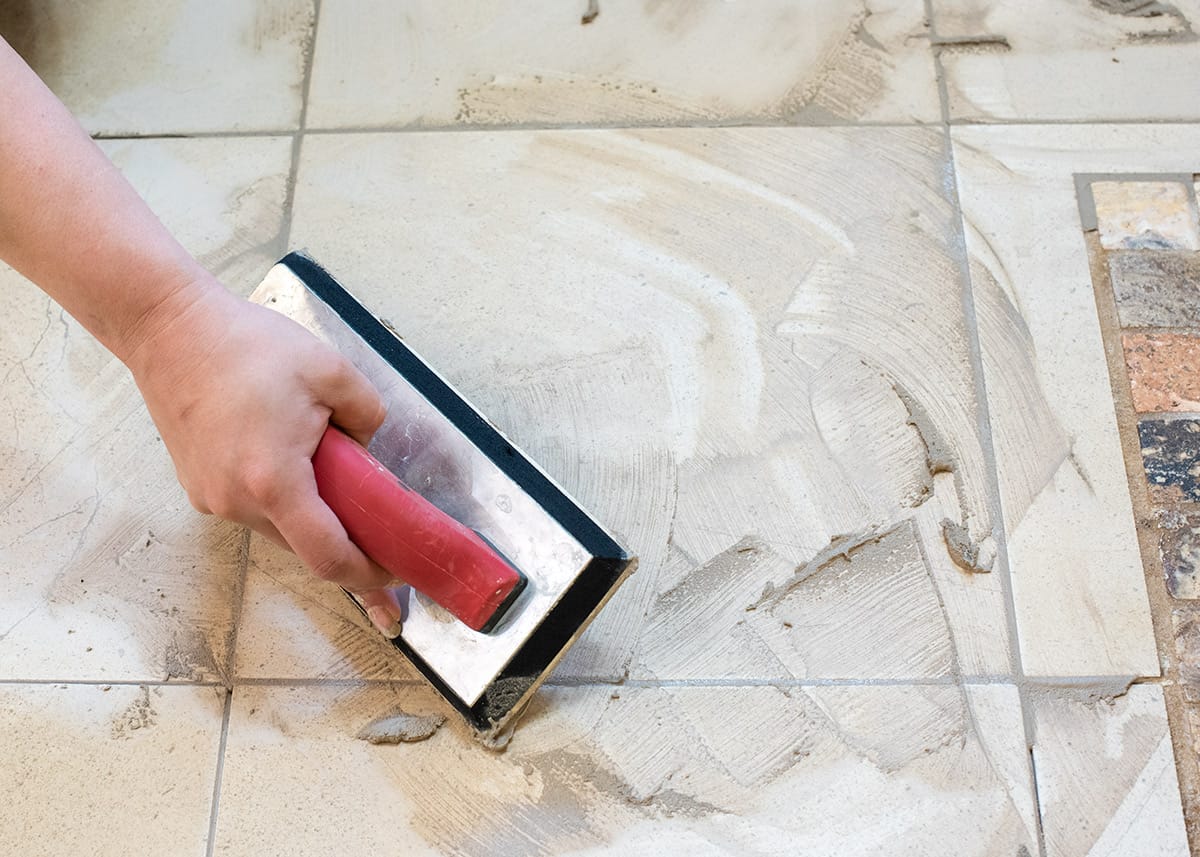
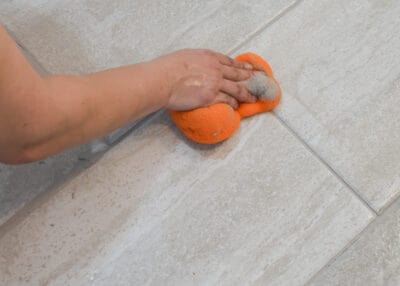
I recommend waiting at least 48 hours to grout, especially floors. Work the new grout into the cracks and wait a few minutes before wiping the excess away with a damp sponge.
After grouting, wait approximately 24 hours before walking on the floor. Remove any leftover haze and grout residue with water and a sponge before 72 hours has passed.
Tips for How to Fix Cracked Tile
- These instructions work well for ceramic, porcelain, or stones like travertine and quartz. I’ve even done this on a marble floor.
- When doing large home improvement projects save a few tiles, floorboards, or bricks for the possibility of future repairs.
- Clean all dust after cleaning up mortar. Use a brush as well as a wet/dry vacuum for a thorough clean.
- For small jobs, using a premixed grout or mortar makes the job a bit easier.
- Protecting adjacent tiles from the chisel and hammer is VERY IMPORTANT.
- Mark replacments with painter’s tape or block the room completely to keep anyone from stepping on the tile while it is drying.
More Tile Installation Tutorials and Ideas
Video Demonstration of Replacing a Damaged Tile
While I admit video isn’t my best skill (I much prefer doing the job), I made an effort to explain this process in every way imaginable. Although this isn’t a difficult undertaking, there’s a specific order of operations to execute it correctly.
Note: I didn’t do the original tile installation. There were many places where the tile never made contact with the backing mortar bed and that’s probably what caused the cracks!
FAQs
Yes and no. Most cracks are not just unsightly, they usually mean the tile isn’t bonded well to the substrate below anymore, causing movement. While you can cover the imperfection, it may crack again over time.
Epoxy is the most common material used when repairing broken tiled floor. Acting like a glue, 2-part epoxy kits work best on chips and superficial cracks if you cannot find a replacement. However, this only repairs the surface to make it more aesthetically pleasing.
Back buttering is generally preferred and especially for large or heavy tile, but when replacing (not laying a new floor), it’s more important that the tile be level and aligned with the adjacent flooring.

Grab our free series "Weekend Home Projects that will Transform Your Life" Sign up below to receive updates including free printables, organization tips, home improvement projects, recipes and more! |
More Tiling Projects
PS I love seeing your creations! Be sure to take a photo and tag #cravingcreative on Instagram! You can also stay in touch with me through following me on Instagram, Pinterest, and subscribing to the newsletter!
How to Fix Cracked Tile
Tools
- Oscillating Multi-tool You can use a sturdy box cutter as well.
- Tile Cutting Saw If you are replacing cut tiles.
- Tile Cutting Blade If you need to cut tile to fit.
- Chisel
- Hammer
- Grout Blade for the Oscillating multi-tool
Supplies
- Mortar pre-mixed is fine.
- Matching Tile
- Grout pre-made is fine
- Bucket of Water for cleaning the excess grout
Instructions
- Remove the grout from around the cracked tile. By far, my preferred method of removing the grout is to use an oscillating multi-tool and grout blade. You can use a sturdy box cutter, but it will take much longer.

- Remove the tile. I start at one corner and pry the smallest piece up, then work to get the rest of the tile up, always working towards the center. You can use a hammer to break up the tile into smaller pieces, to make it easier (wear your safety glasses). The edges of the surrounding tile are brittle so make sure to protect them from the damage.

- Clean out the mortar or adhesive underneath. The area needs to be clean and smooth. There needs to be room for the new mortar, so that the new tile sits flush with the old tile. Use the oscillating multi-tool again or a chisel to chip away the old mortar.
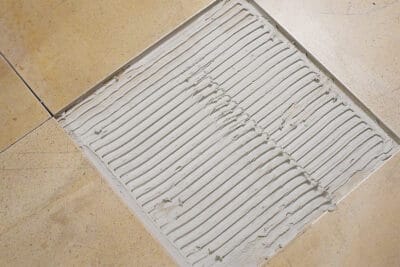
- Add thinset mortar to the tile area. Make sure the area is thoroughly clean of dust and debris with a brush and vacuum. Using a square trowel, add a small amount of thin set to the cleaned area below the tile.

- Lay the replacement tile. Gently place the tile in to replace it and press into place with an even grout space all around. Check that the edges are level to the adjacent tiles. Allow the tile to sit for 48 hours.

- Grout the tile. Use a grout float to push the grout mixture into the lines and then wipe away excess grout. Make sure to push and wipe in multiple directions to completely fill the gap.
- After about 10-15 minutes, use a damp grout sponge to clean excess grout and make the lines smooth. Cleaning as much grout as possible will make haze removal easier later. Wait at least 24-48 hours and wipe several times with a clean, damp sponge to remove any haze. It may take a few cleanings to remove all of the haze.


Hector says
Thank you for the instructions. worked like a charm.
Rafe says
Looks beautiful
Charlie says
Made replacing tile seem a lot easier.
Navarro says
Replacing tile was easier than I thought, thank you.
Nathan says
Thank you for the instructions.
Alaina says
Followed the directions exactly. Worked perfectly.
Victor says
Thanks so much! We were quoted $1700 to fix 5 tiles, but this seems like something I could do since I have leftover tile.
Ivan says
The tape was very useful, thank you for the tip.