Sharing our step-by-step and tips for installing this budget savvy gravel walkway. Using traditional materials, like gravel, mulch or crushed brick, this project is affordable, charming, and beginner friendly.
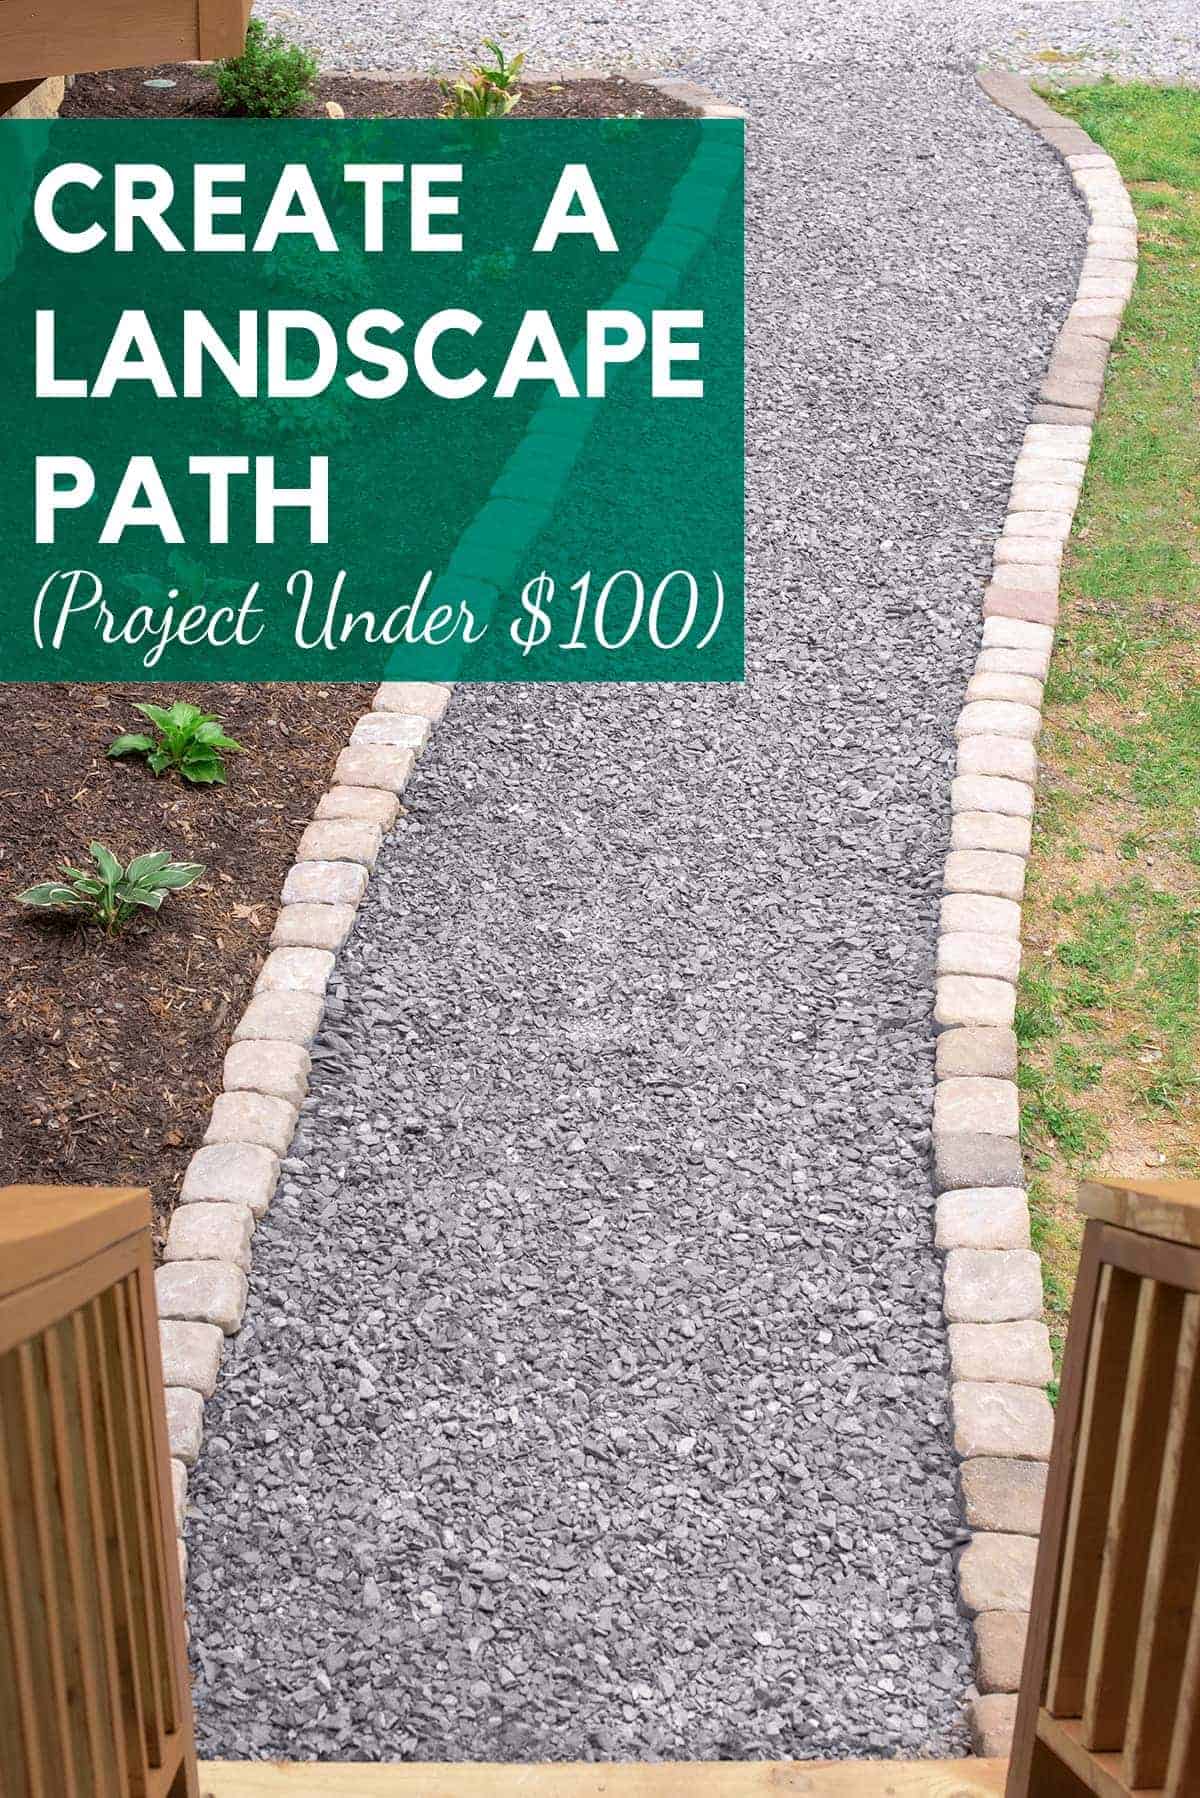
During my parent’s cabin home renovation, one of the biggest goals was to add inviting curb appeal and to spruce up the front exterior. Oddly, there was never a path to the front door. We were on a tight timeline and a budget, so a gravel path was the perfect solution. This simple little project made a HUGE difference!
In about a weekend’s time, you’ll have a natural-looking, weed-free walkway. You can use these steps to create seating areas, fire pits, or cover areas that are hard to mow.
Supplies You Will Need
A full printable version of this project step by step is at the bottom of this post.
- A mattock or shovel
- Spray paint or string to mark the lines of the path
- Landscaping tarp like this (you’ll want something tough enough to stand up to the rock grinding into it while walking)
- Gravel (about 25-30 lbs per square foot depending on gravel size)
- Edging (options discussed below)
Pro Tip: For weed control and a strong foundation, use sand or stone pack for a 2-inch base below the gravel. Landscaping tarp is another budget friendly option but may deteriorate over time.
Types of Gravel for Walkways
The size and type of gravel or crushed stone is a matter of personal choice. We chose 1 inch limestone rock chips.
- Gravel is most commonly made of basalt, limestone, or sandstone.
- You can also purchase tumbled stone, which is rounded and smoother on the surface.
- You can use larger rocks or choose something like a pea gravel walkway which uses smaller, rounded stones.
How To Create the Shape
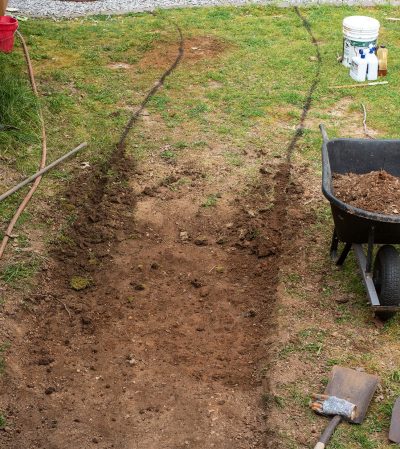
You can create any shape you can imagine! Frolicking curves, narrow or wide, or rigidly straight. We used two garden hoses to perfect the shape we wanted and then spray painted the edge.
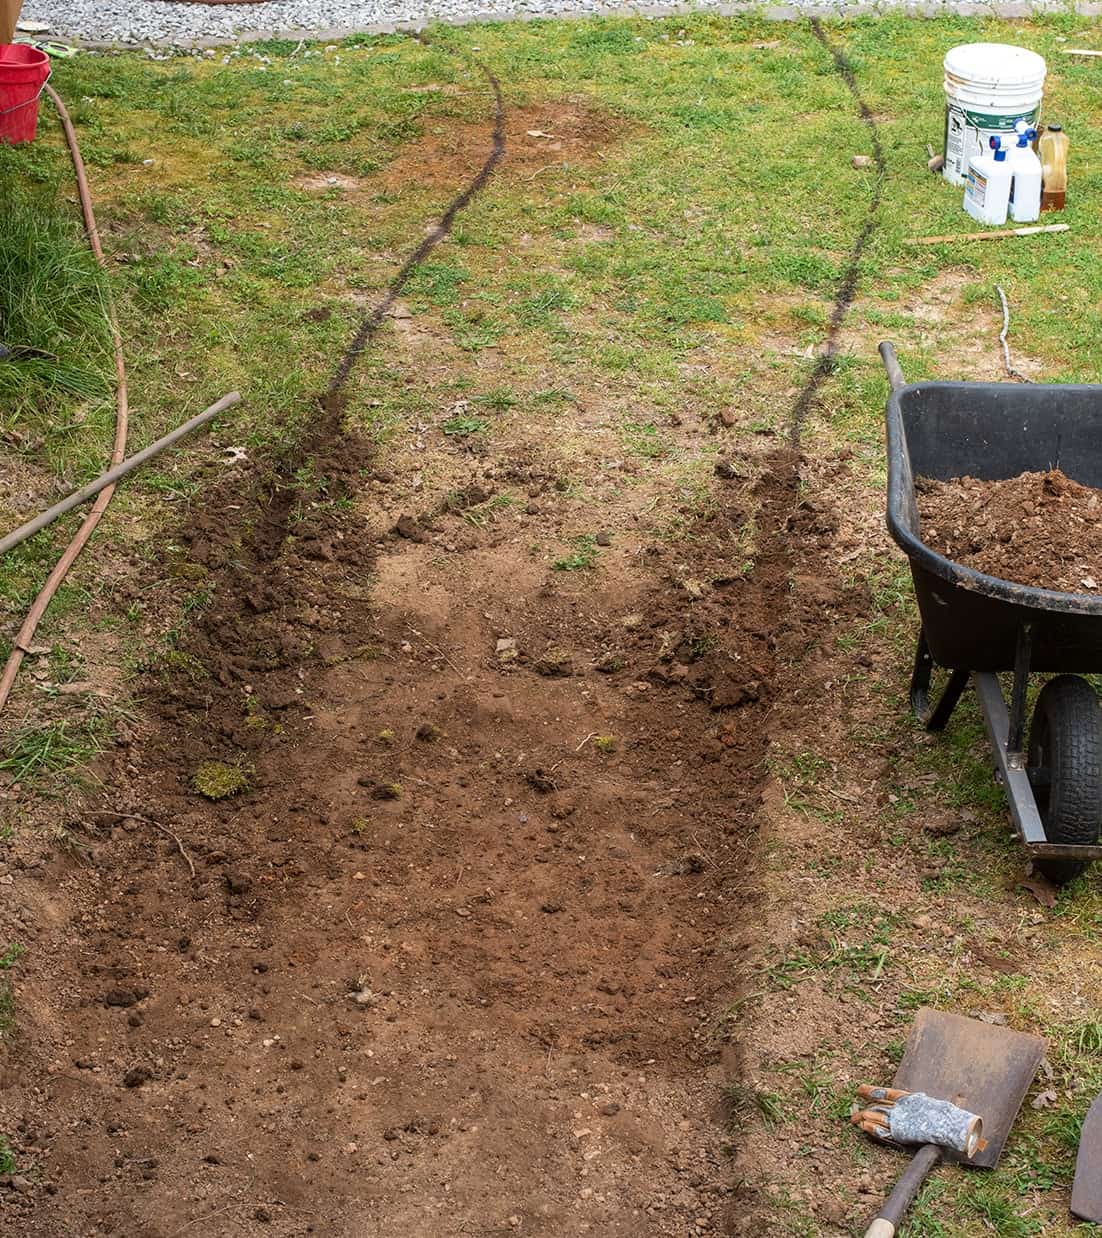
Foundation and Trench
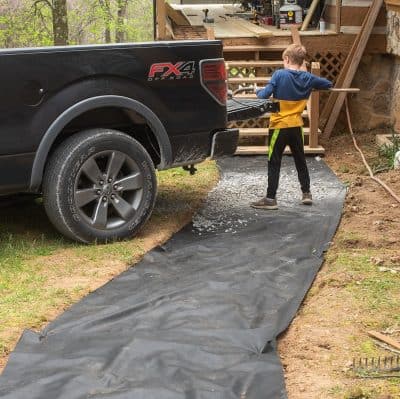
Dig about 4-6 inches evenly throughout the whole path. This allows for enough stone so that none of the bottom will show through. At my parents’ house, the area right next to the steps tends to pool water, so we dug a little less there to compensate for even drainage.
After digging the trench, we laid landscaping tarp over the area to keep weeds and grass from growing in our new path. The weight of the rocks will hold the tarp down, so there’s no need to stake it in the ground.
As stated earlier, a sand or stone pack foundation will last longer. However, we were working in rock-hard Tennessee clay, so the soil is already compacted enough for a great foundation. If you live in a sandy soil climate, you may consider adding some stone pack for a solid base.
Gravel is Heavy
Truth time. I’m not going to sugar coat it; this is a back breaking job if you’re laying a lot of stone.
- We installed nearly 1800 lbs for this walkway. Our new walkway is about 18 feet long and over 3 feet wide.
- We had a local quarry load the stones into our truck, so that saved at least half of the lifting. The gravel was only $1 per 100 lbs at the quarry, so double win!
- Allow for some settling, so we don’t skimp on the amount of stone.
Pro Tip: For a 4-inch-deep trench, you need about 35lbs per square foot of gravel. This does not include additional depth for a base like sand, crushed rock, or smaller gravel.

What can I edge a walkway with?
There are a couple of different options for edging and designing the gravel path.
For a tall edging, like these practical steel sections or these fun wooden logs, I recommend placing them before putting the gravel stone in. Most can come in both curved and straight variations or can be bent for customization.
For interlocking paver stones, they can lay on top of the gravel.
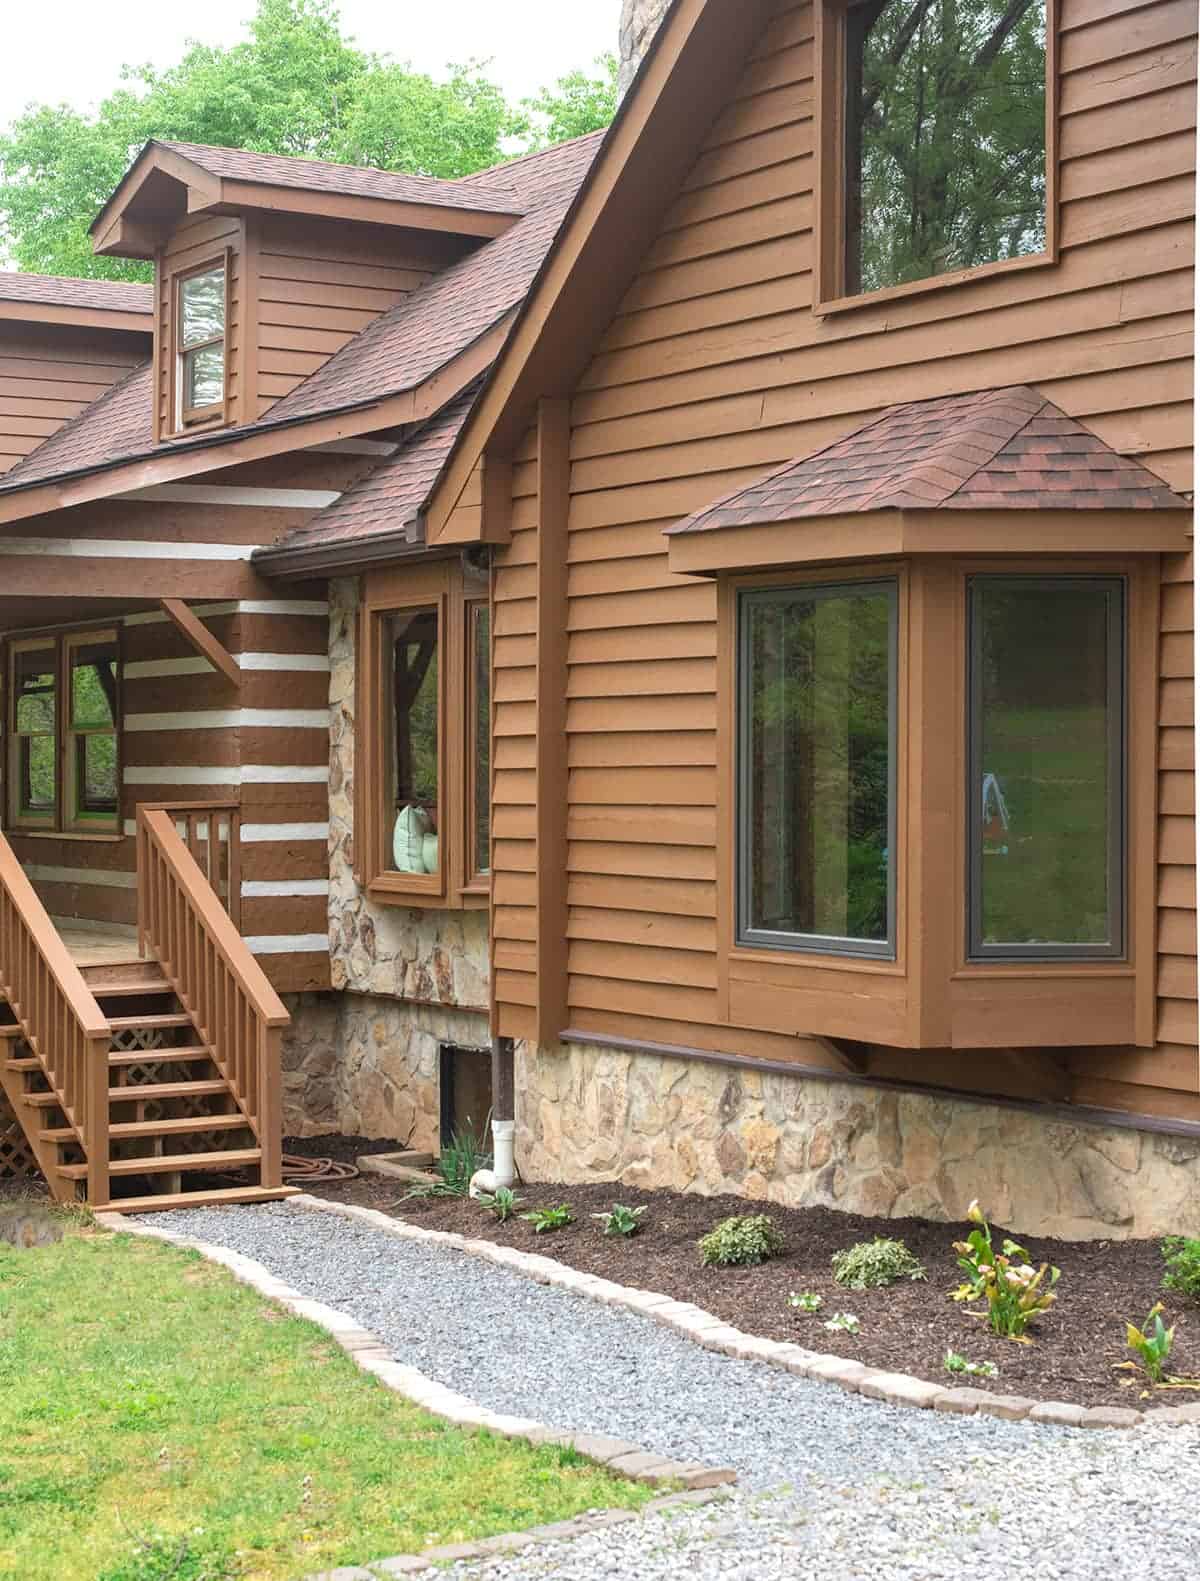
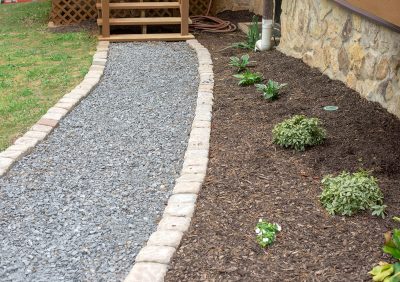
To complement the path, we added new landscaping on the house side. The plants look a little small for now. But in a few years, those bushes will be bursting!
What do you think? Big improvement- right?!
If you’re curious about some of the other improvements we’ve been making to this craftsman log home, check out our other posts (seriously, the BEST before and afters!):
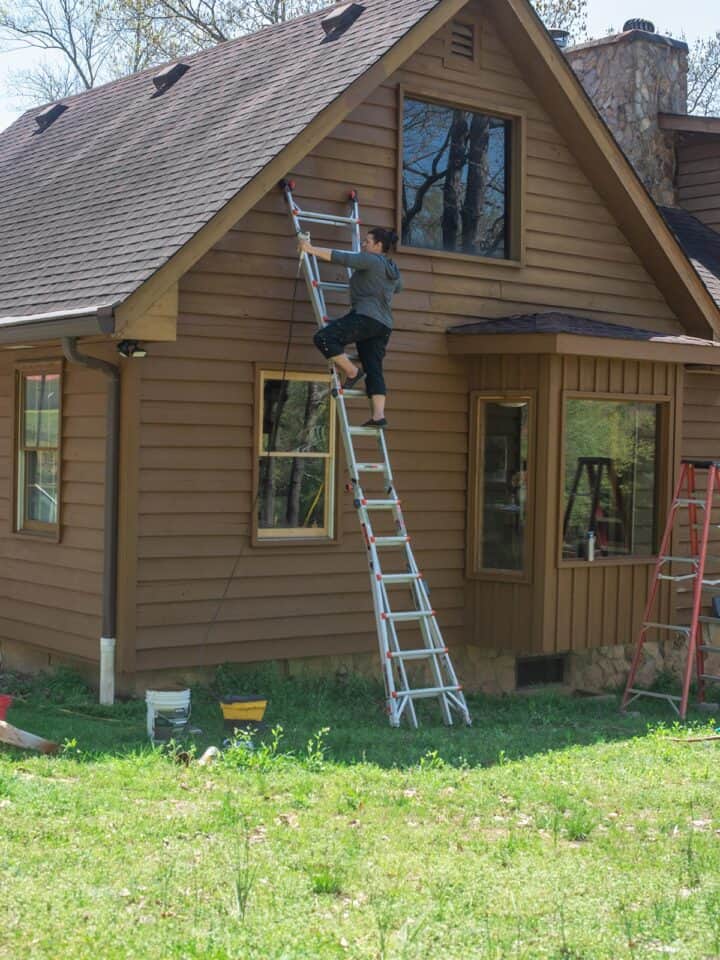
- Painting a House Exterior
- Seashell 80s Bathroom Remodel Reveal
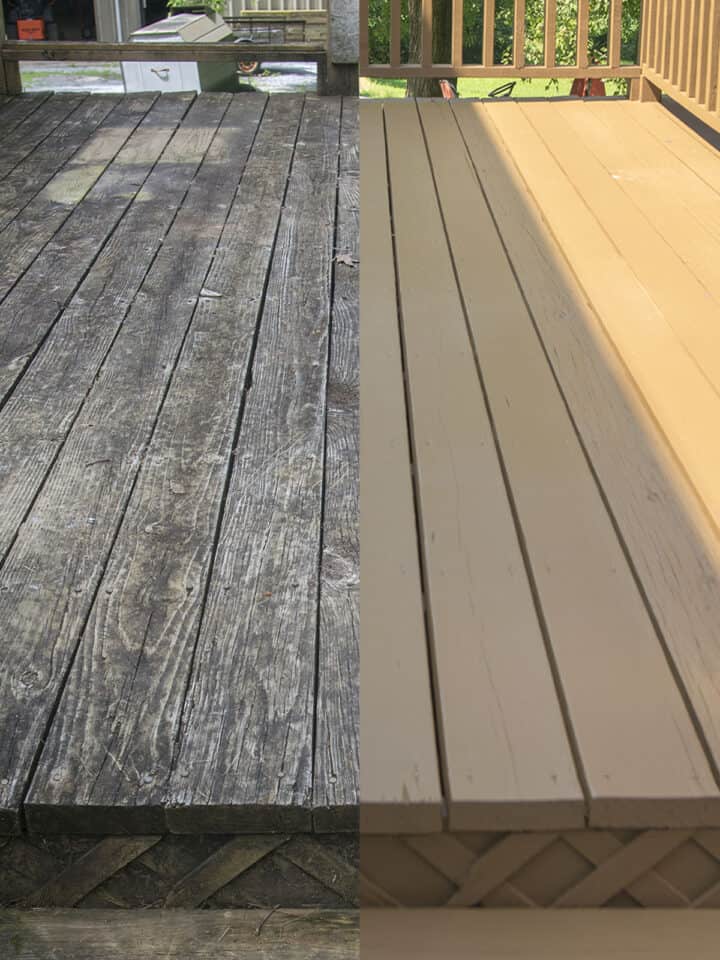
- How To Restore an Old Deck
- Rustic Cabin Before & After
FAQs
For a depth of 4 inches, you will need approximately 35lbs per square foot.
Yes, the instructions are similar to a walkway path. The base needs to be sturdy so I recommend a 2- or 3-layer system with a sand pack base to keep the driveway lasting for a long time.
The gravel top layer should be at least 4-6 inches deep and laid on top of a bottom layer of crushed rock that is ideally another 2-4 inches deep.
A gravel path is comprised of two layers. The layer under the gravel can be comprised of a landscaping tarp, crushed rock, or stone pack if using paver stones.

Grab our free series "Weekend Home Projects that will Transform Your Life" Sign up below to receive updates including free printables, organization tips, home improvement projects, recipes and more! |
More Exterior Home Updates
PS I love seeing your creations! Be sure to take a photo and tag #cravingcreative on Instagram! You can also stay in touch with me through following me on Instagram, Pinterest, and subscribing to the newsletter!

How To Lay A Gravel Path
Tools
- a mattock or shovel
Supplies
- Marking Paint or String to mark the lines of the path
- Weed Control Base *See Notes for options
- Gravel 30-35lbs per square foot depending on size
- Edging Material
Instructions
- Decide the shape of the path. Spray the outer shape with marking paint or use string.

- Dig a 4 inch deep trench evenly throughout. Adjust for areas that may pool water. If you plan to use a 2 layer system, dig at least 6 inches deep.
- Lay a foundation to keep weeds out and to help keep the gravel packed down. For sandy or loamy soils, adding stone pack creates solid base. For hard soils that don't grow grass well, you can use a landscaping tarp to keep weeds out.

- Add the gravel stones. For a 4 inch depth, you need about 35lbs per square foot.

- Edge the path with landscape edging, paver stones, or natural barriers like logs.


Diana says
How much did you spend on the edging stones? I’m having trouble finding anything budget-friendly. I’m in TN also! (Nashville) Did you use any sand as well? I’ve read that it helps keep it leveled and more compacted…
Rachel says
These particular stones were leftover from another project when they edged the car parking area. It was a few years ago so things were certainly cheaper. For stone edging, I would suspect it would be about $250-300 based off of what I currently see at Lowes website, but buying in bulk from a landscaping company may be cheaper. We did not use sand because we were keeping it as cheap as possible – we could get a truckload of rock for much, much cheaper than bags in stores. However, sand is definitely best for weed control and keeping dirt from settling in between the rocks, which can be an issue.
Holly says
Hi – if we put stone pack down, do we need landscaping fabric as well? If so, what order would that go in? Would it be landscaping fabric first, then stone pack, then gravel?
Thanks!
Rachel says
It’s an either/or situation. Stone pack is definitely better long term, so you don’t need landscaping fabric, but fabric is less labor intensive because you have to dig more to accommodate the stone pack layer. We had extremely hard ground in our project and we were selling.
Olivia says
What size gravel did you use? It looks small.
Rachel says
We chose 1 inch limestone rock chips from our local quarry.
Bonnie Evans says
Directions were clear & concise. I ‘can do’.
Romayne says
I’m doing this now. Great and simple instructions.