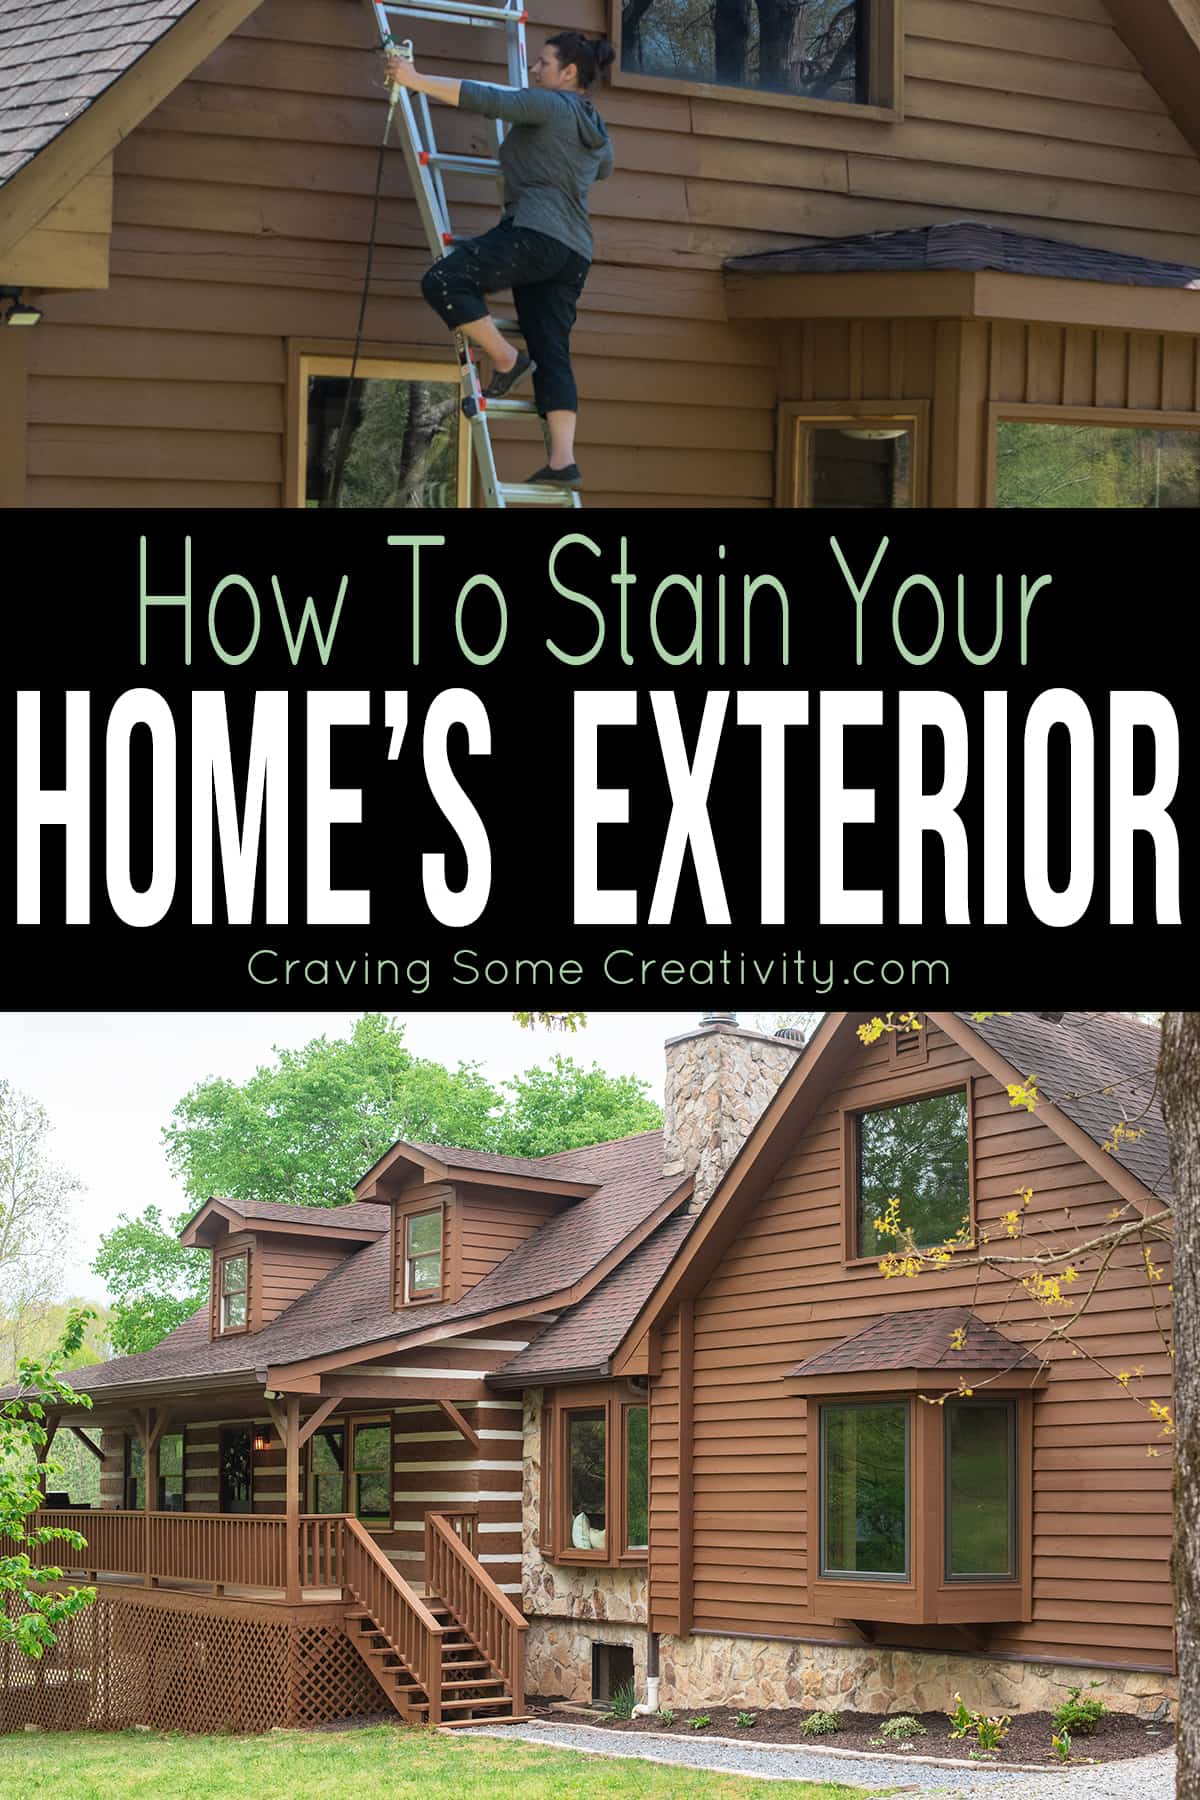
Tips for staining exterior wood siding on a log cabin or cedar shingled house. We walk you through step by step including tips on the best paint sprayers to use, maintenance, and techniques for staining wood to get the look you want.
Twenty-five years of laughter and memories can certainly leave a mark on your heart. It can also leave a mark on your home.
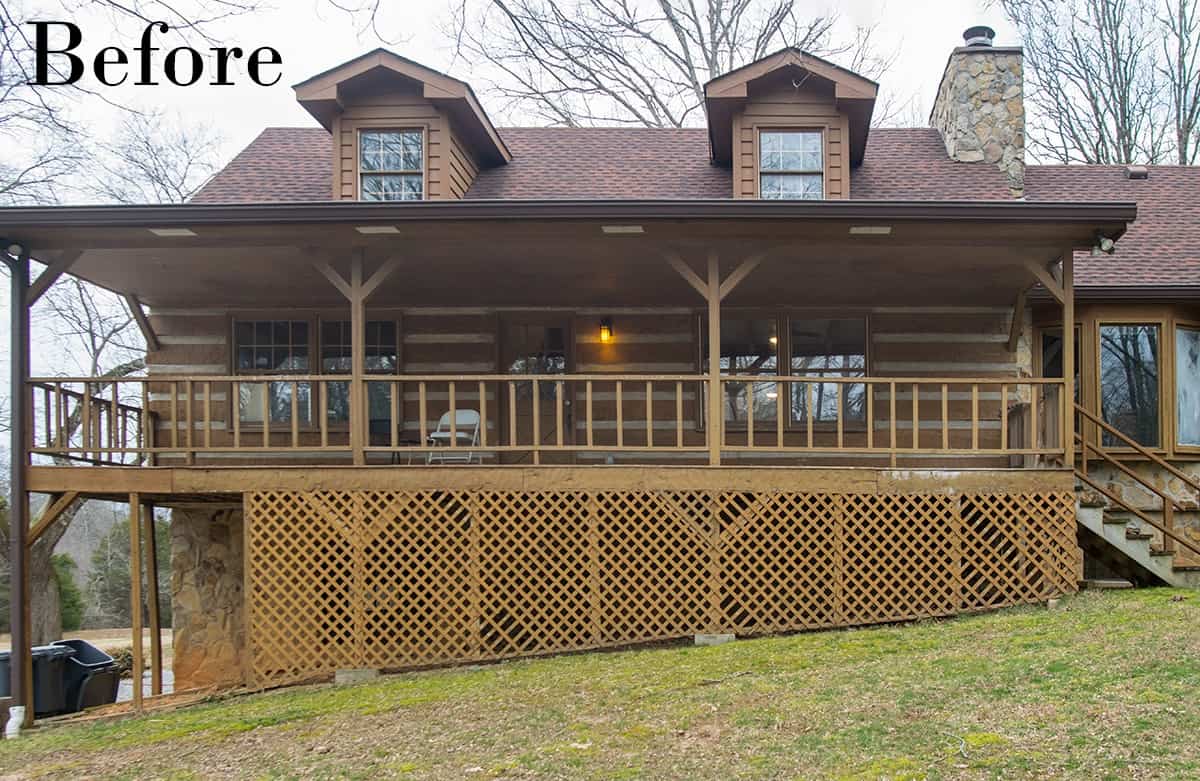
The home I left when I blossomed into adulthood long ago is a special place filled with memories, love, and maybe some really rad green textured paint circa 1999.
Oh, the memories! But times have changed, and it has become very difficult for my parents to keep up with not only the house but an 18-acre farm to boot. Could you imagine 2 retirees taking care of all of that?! The last 25 years they called it their paradise, but paradise has been left a little worn looking.
It’s time for her to find a new family to create new memories and laughter within her walls. But first, to find that perfect family, she needs to shine inside and out!
This house is getting the extreme mommy makeover.
My parents are pretty lucky to have grown kids highly experienced in renovating and remodeling homes. Over the last year and a half, the family has been renovating this craftsman log cabin style home and bringing back her glory in a modern setting. You can see some of our other transformations so far including a modern rustic bathroom makeover, repairing and staining decks, and making a gravel walkway in the front. We still have lots more projects to go!
You can see many of our projects all together in my post on this rustic cabin makeover Before & After.
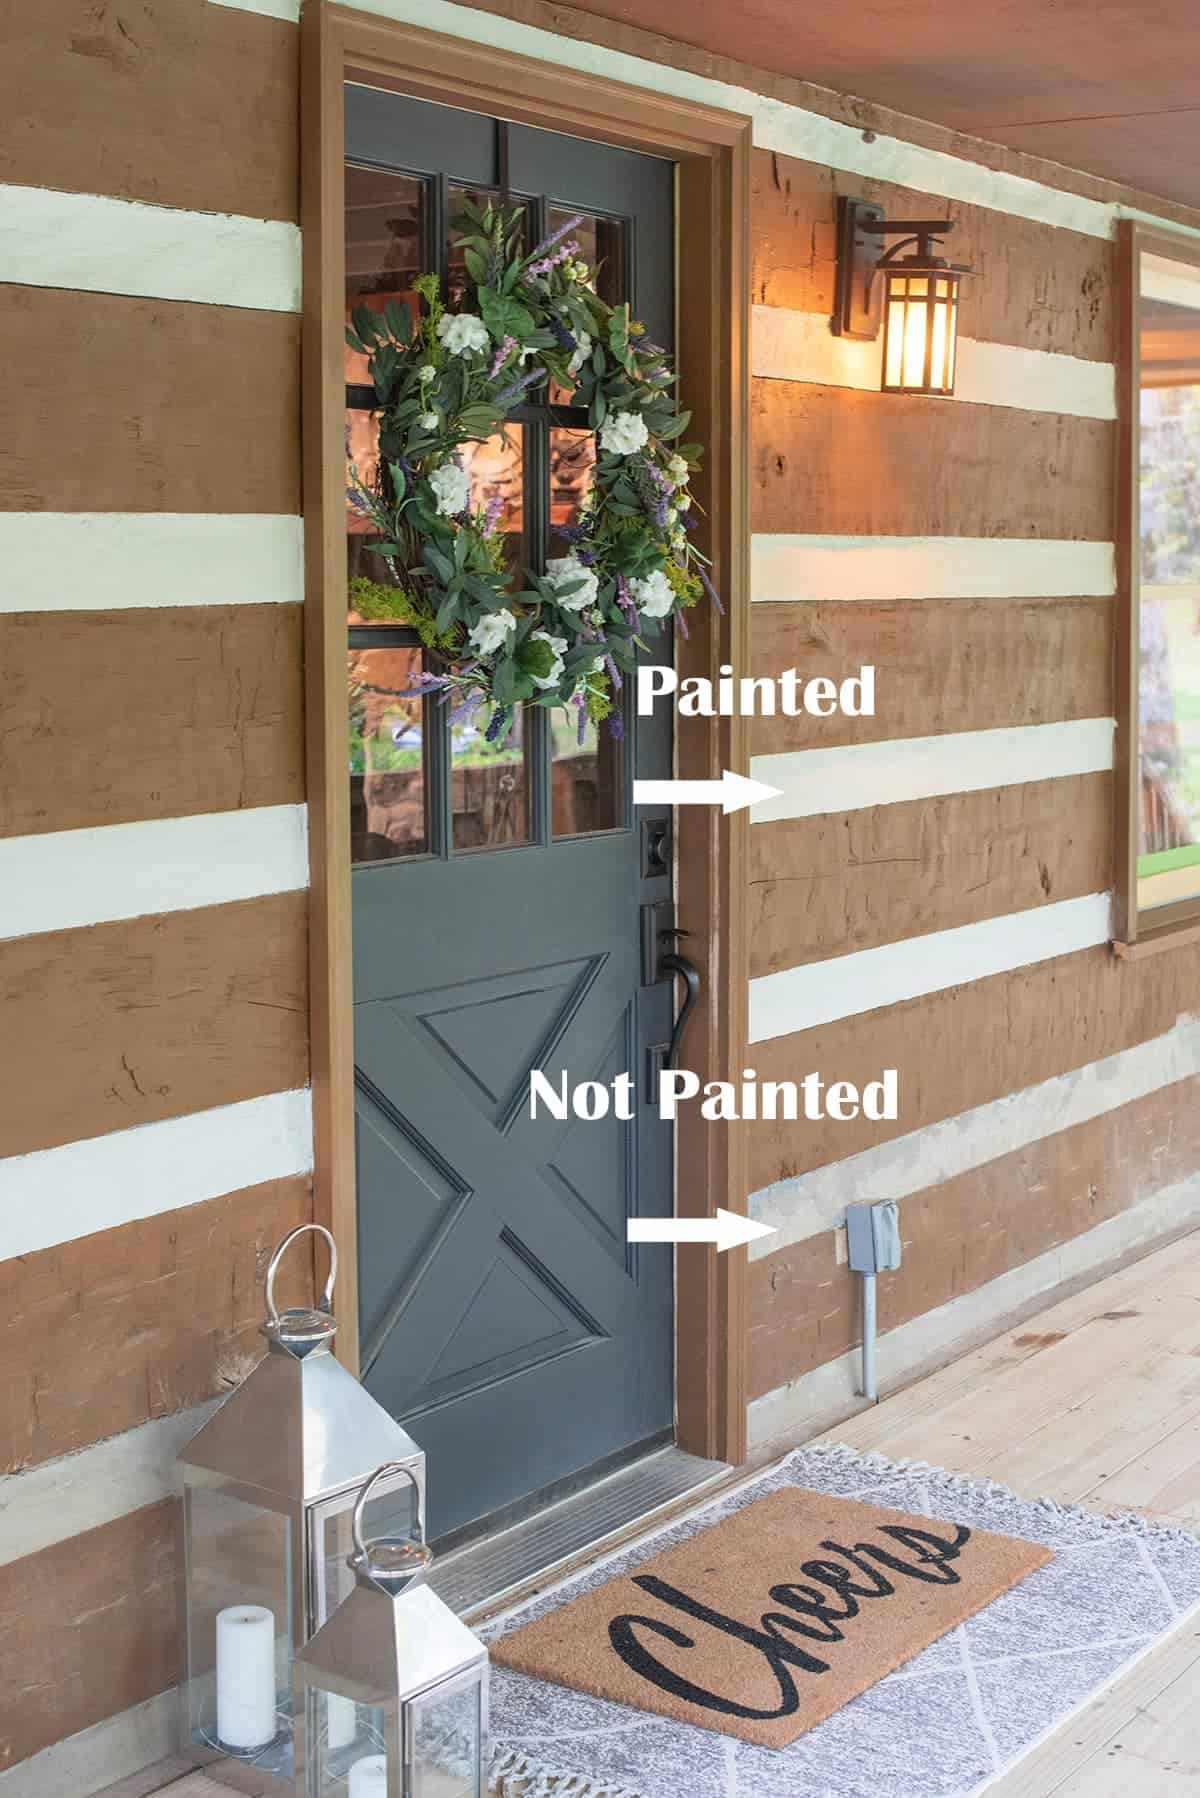
To rehab the exterior situation, one of the biggest changes was staining the exterior wood siding. In this post, I am going to share with you the proper way to stain any wood exterior using a sprayer which will save you immense time and effort.
Solid Stain vs Semi-Transparent
On this home exterior, we used a water-based solid color stain. I would generally recommend a solid color stain for a house exterior instead of transparent because solid color lasts longer and is more durable against weather elements. Solid color stain looks much like paint and even has some color options beyond natural colors like blues, grays, and even greens.
Working with a solid color stain is very similar to paint, but stain tends to soak more into the wood instead of sitting on top of it. There is no need to prime with stain. Over the years, stain breaks down, but it is less prone to peeling and cracking than paint.
Solid stain acts as a sealer as well, so no additional top coat is needed. Transparent and most semi-transparent stains will last longer with a sealer added.
Solid color stain is also generally water-based (read the label), so cleanup with soap and water is the same as with an exterior latex paint.
Recommended Supplies
- Painter's tape
- Safety equipment
- Towels for cleanup
- Paint Brush
- Rollers for Stain
- Garden hose or Pressure washer
- Deck Cleaner
- Masking paper or plastic tarps
- Exterior grade stain
- Stir Sticks
- Airless Paint Sprayer
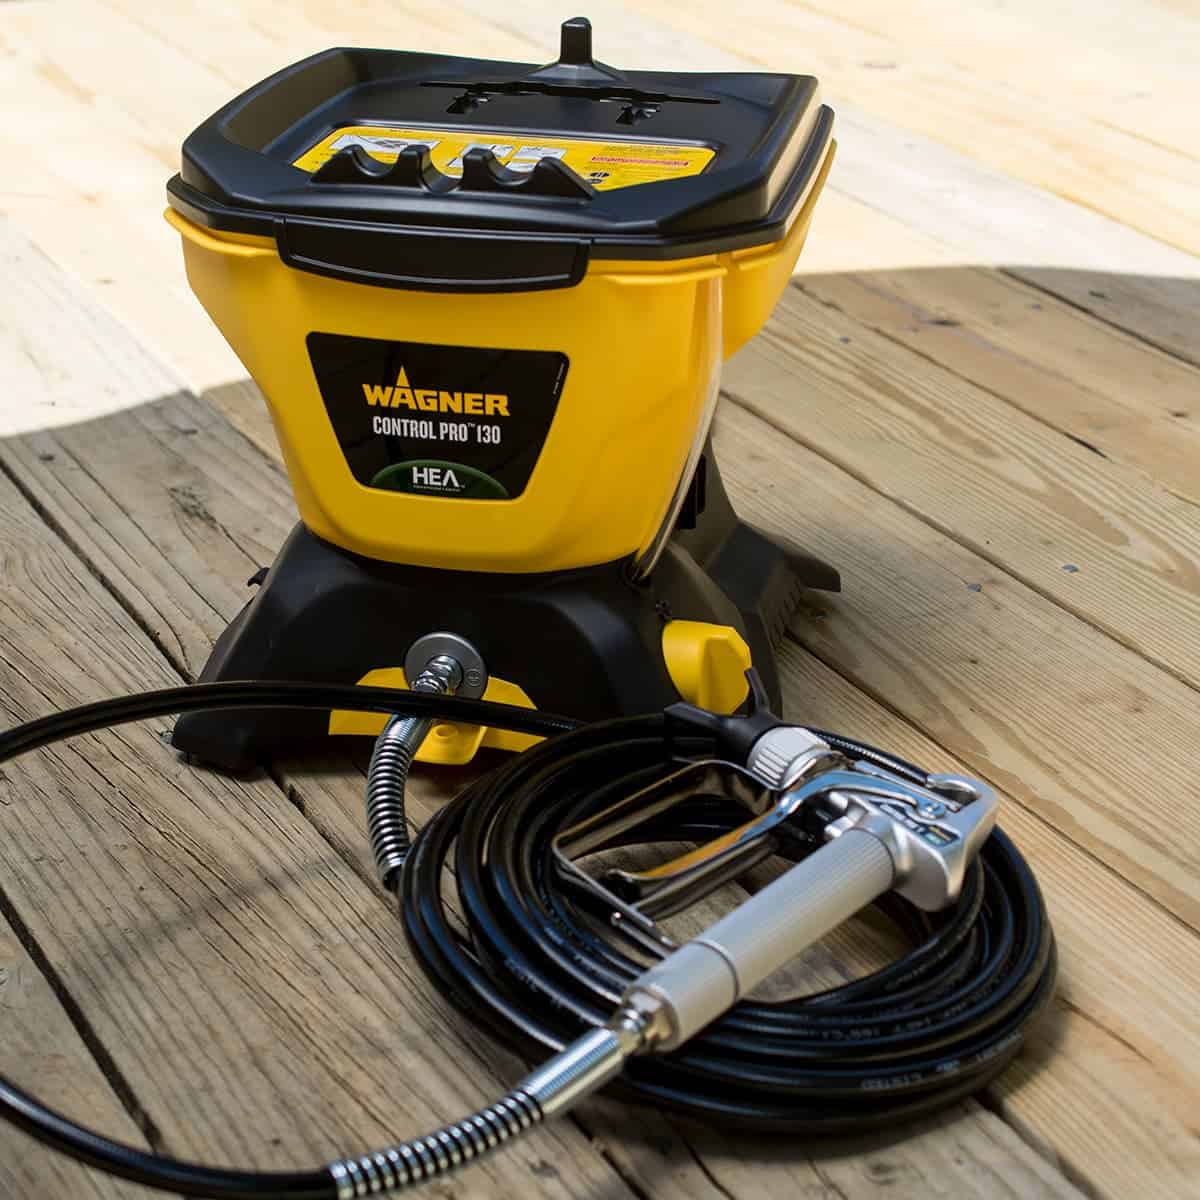
What Sprayer to Use for Large Projects?
I have created a comprehensive post on choosing the best paint sprayer for your needs.
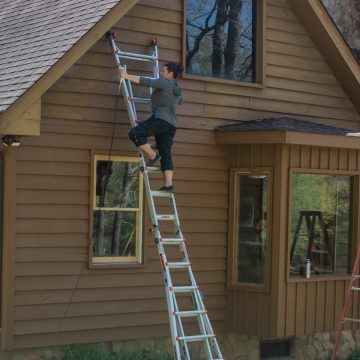
Since this project is generally very large, I would recommend an airless paint sprayer that has a soft fan coat, connects directly to 5-gallon buckets, and has a long spray cord to make working on a ladder a breeze. For this very large project, I generally recommend the Wagner 150 Airless, but you might consider upgrades for other projects.
5 Things To Check Before You Start
Always give your project a thorough inspection so you don't have surprises later.
- Structural integrity. Check underneath and around the entire structure for any movement in the framing, joists, footers, as well as warping, gaps, or severe cracks.
- Rot. Walk around with something like a flathead screwdriver and poke any areas that are darkened, white (fungus), or splintered.
- Tighten loose screws and hardware. If necessary, apply them at a new angle to grab new wood.
- Pest damage. Look for signs of pest damage including borer bee holes, termite damage, and nests.
- Moisture and drainage. Check gutters and eaves in particular for signs of damage. If you have rotting problems or debris are present, repair those first.
How To Prep the Exterior Step by Step
I have the full instructions with a handy printable shopping list at the bottom of this post, but I include this section like a recipe with all of our tips.
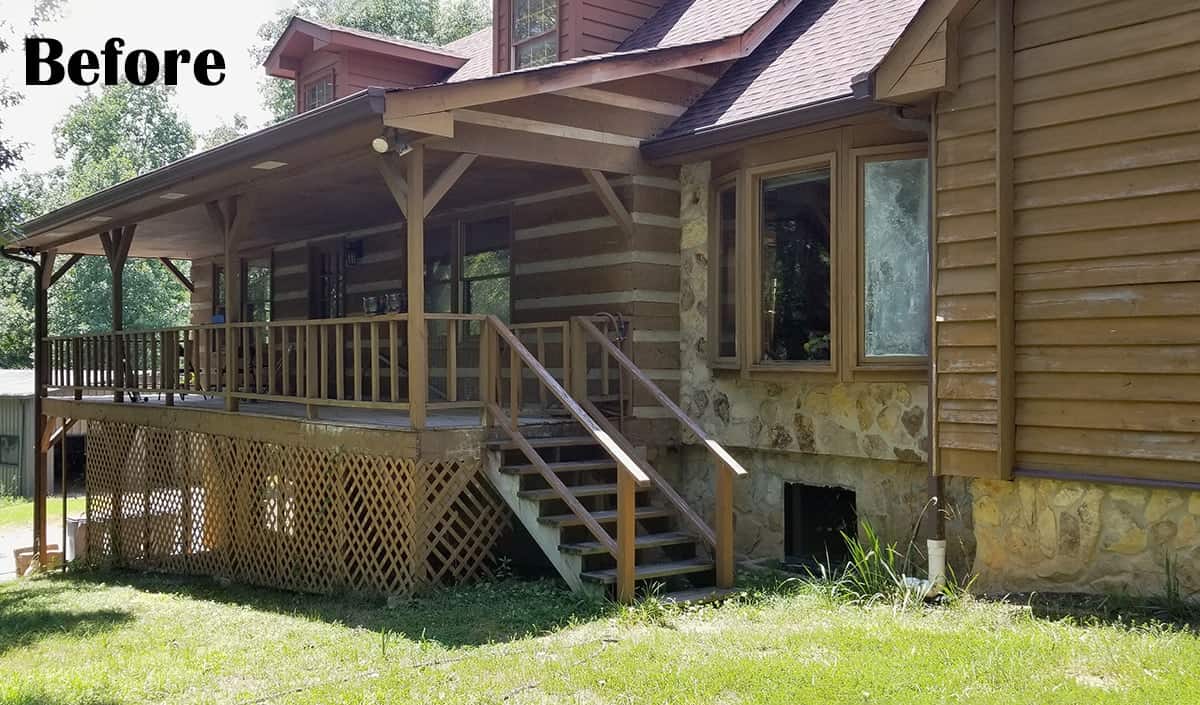
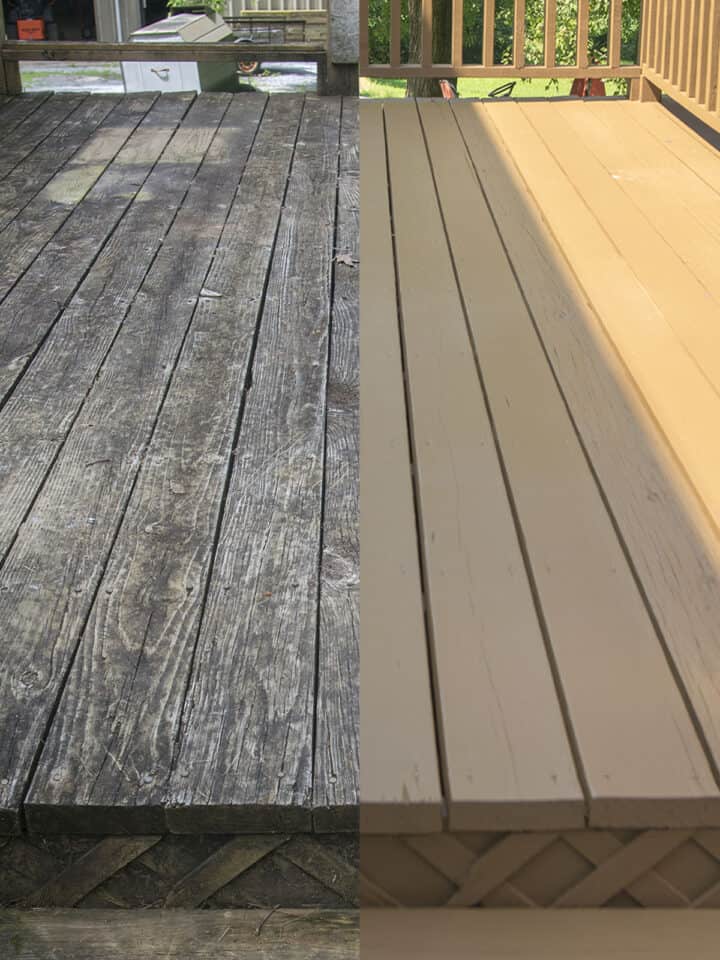
Remove any damaged areas or soft wood. In our project, we had to replace the entire front porch surface, as well as the stairs and the entire railing.
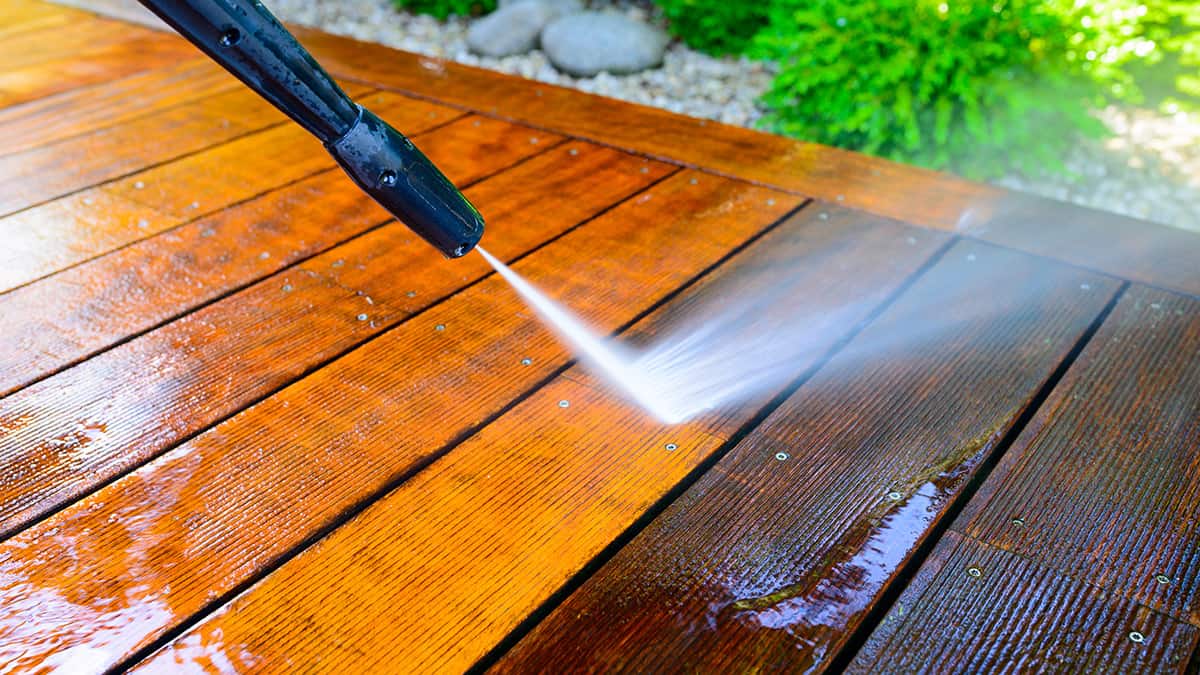
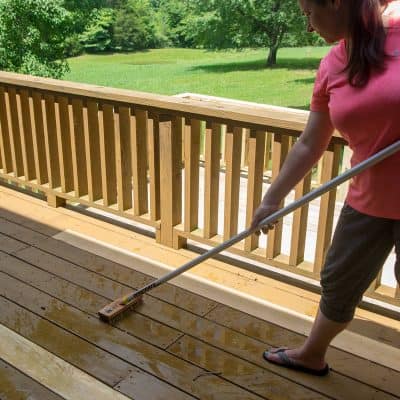
Clean the exterior surfaces. use an all-purpose deck cleaner to remove algae, dirt, and debris. We sprayed the cleaner on to the house with a hose. Additionally, we also used a pressure washer to remove any loose debris and peeling stain.
*Pro Tip: If using a similar brand and color of stain as before, complete removal of the previous stain is not necessary. If covering a semi-transparent with a solid stain, it’s also not necessary.
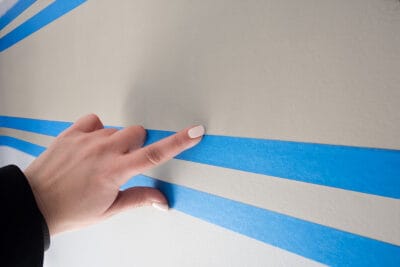
Mask any areas that you don’t want sprayed. Sprayers today are very controlled. If you are careful, you only need to mask off about a foot from where you spray to prevent overspray. Mask off any stucco, brickwork, windows, gutters, etc.
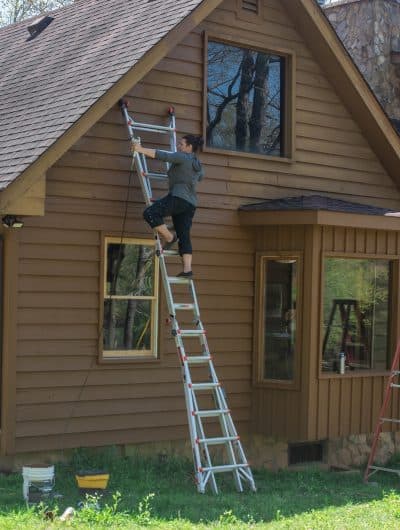
We elected not to tape many areas of this house because I didn’t want to be on the ladder any more than I had to.
Setup Equipment. Make sure to mix the stain well. Stain tends to fall out of suspension rather quickly. I always recommend reading the stain can label for things like recoat times and drying times.
We used the control pro-130 for most of this job, although I recommend the 150 more because we still had to pour the paint into the bucket. The 130 is mostly a point and shoot type of airless sprayer. Cleanup still took less than 10 minutes.
Tips for A Great Result
Let’s face it, this is a rather large task! Here are a few easy steps you can take to make it a little less daunting:
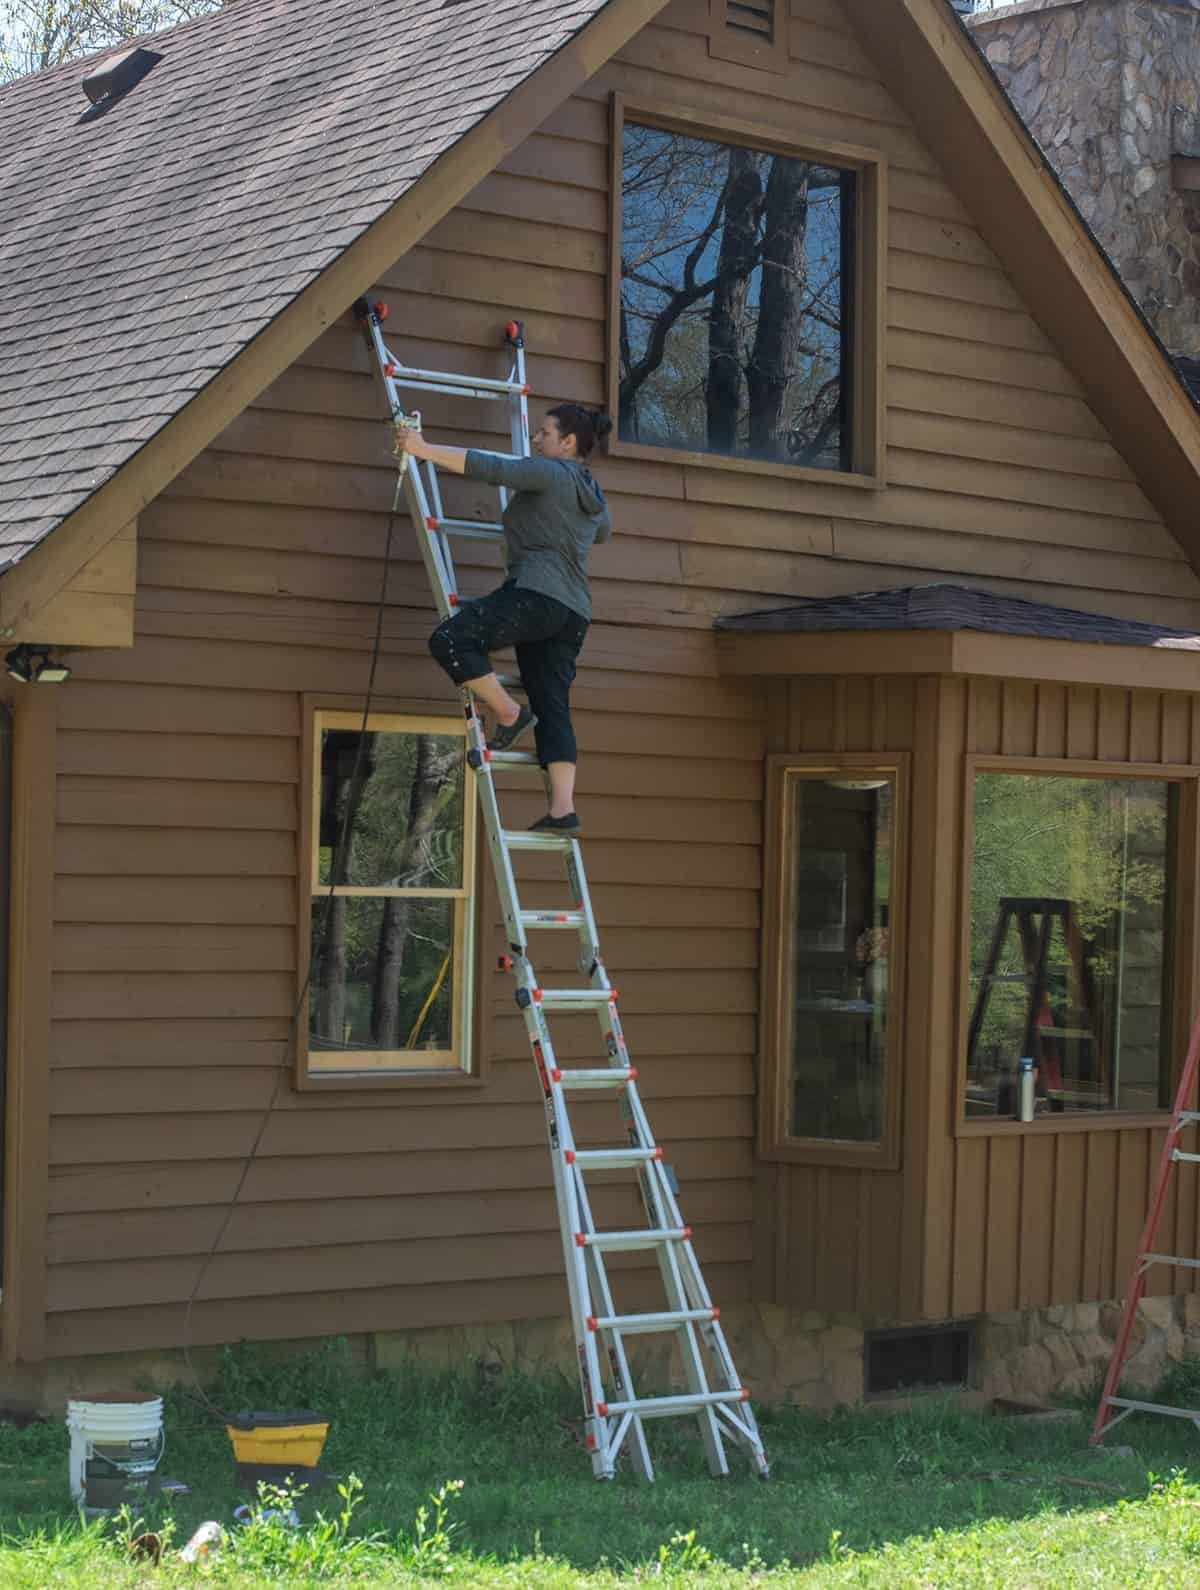
- If you have any areas that are too high or difficult to reach with a ladder, you can rent a boom lift from a large home improvement store.
- I carry a brush with me to catch any drips or rub in crevices to get a good bond.
- The nozzle has a switch on it to turn the spray gun off, so you don’t accidentally engage as you move or climb a ladder.
- You do not have to do this entire project at one time. However, stain and paint have a tendency to fade over time so keep that in mind if all surfaces are one color.
- I usually do at least two coats of stain, 3 for clear or light transparent stain. Check the product labels for how long to wait between coats.
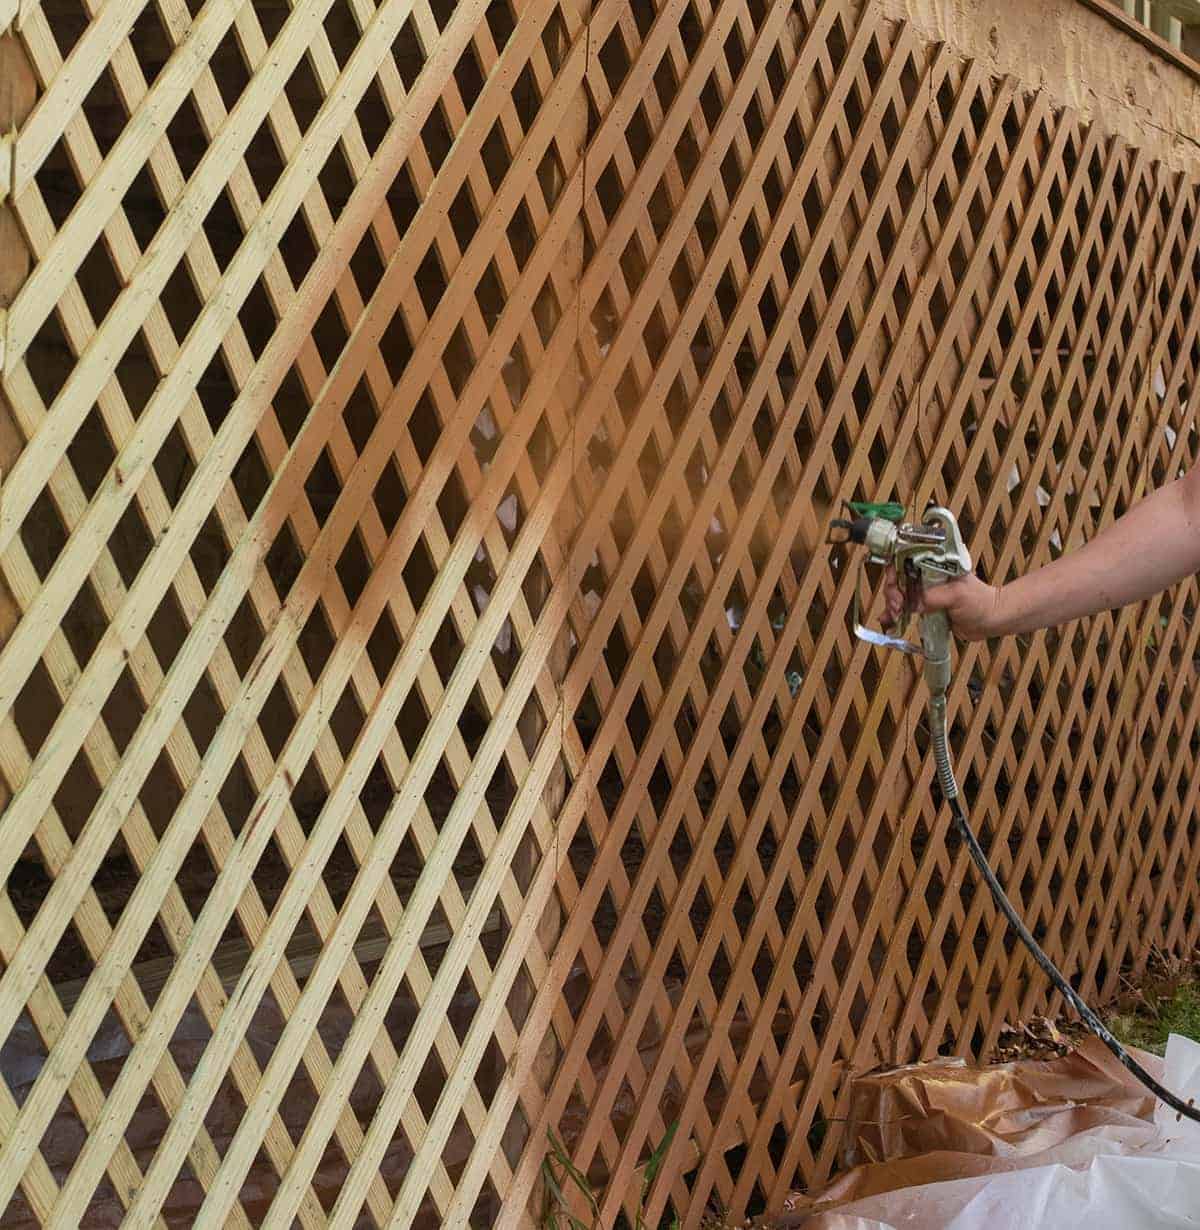
I will never-ever paint lattice again without a sprayer. The deck railings and lattice on the front porch took about an hour with this sprayer. Perfect and pretty now for the underdeck storage systems.
More How-To Renovation Projects To Inspire
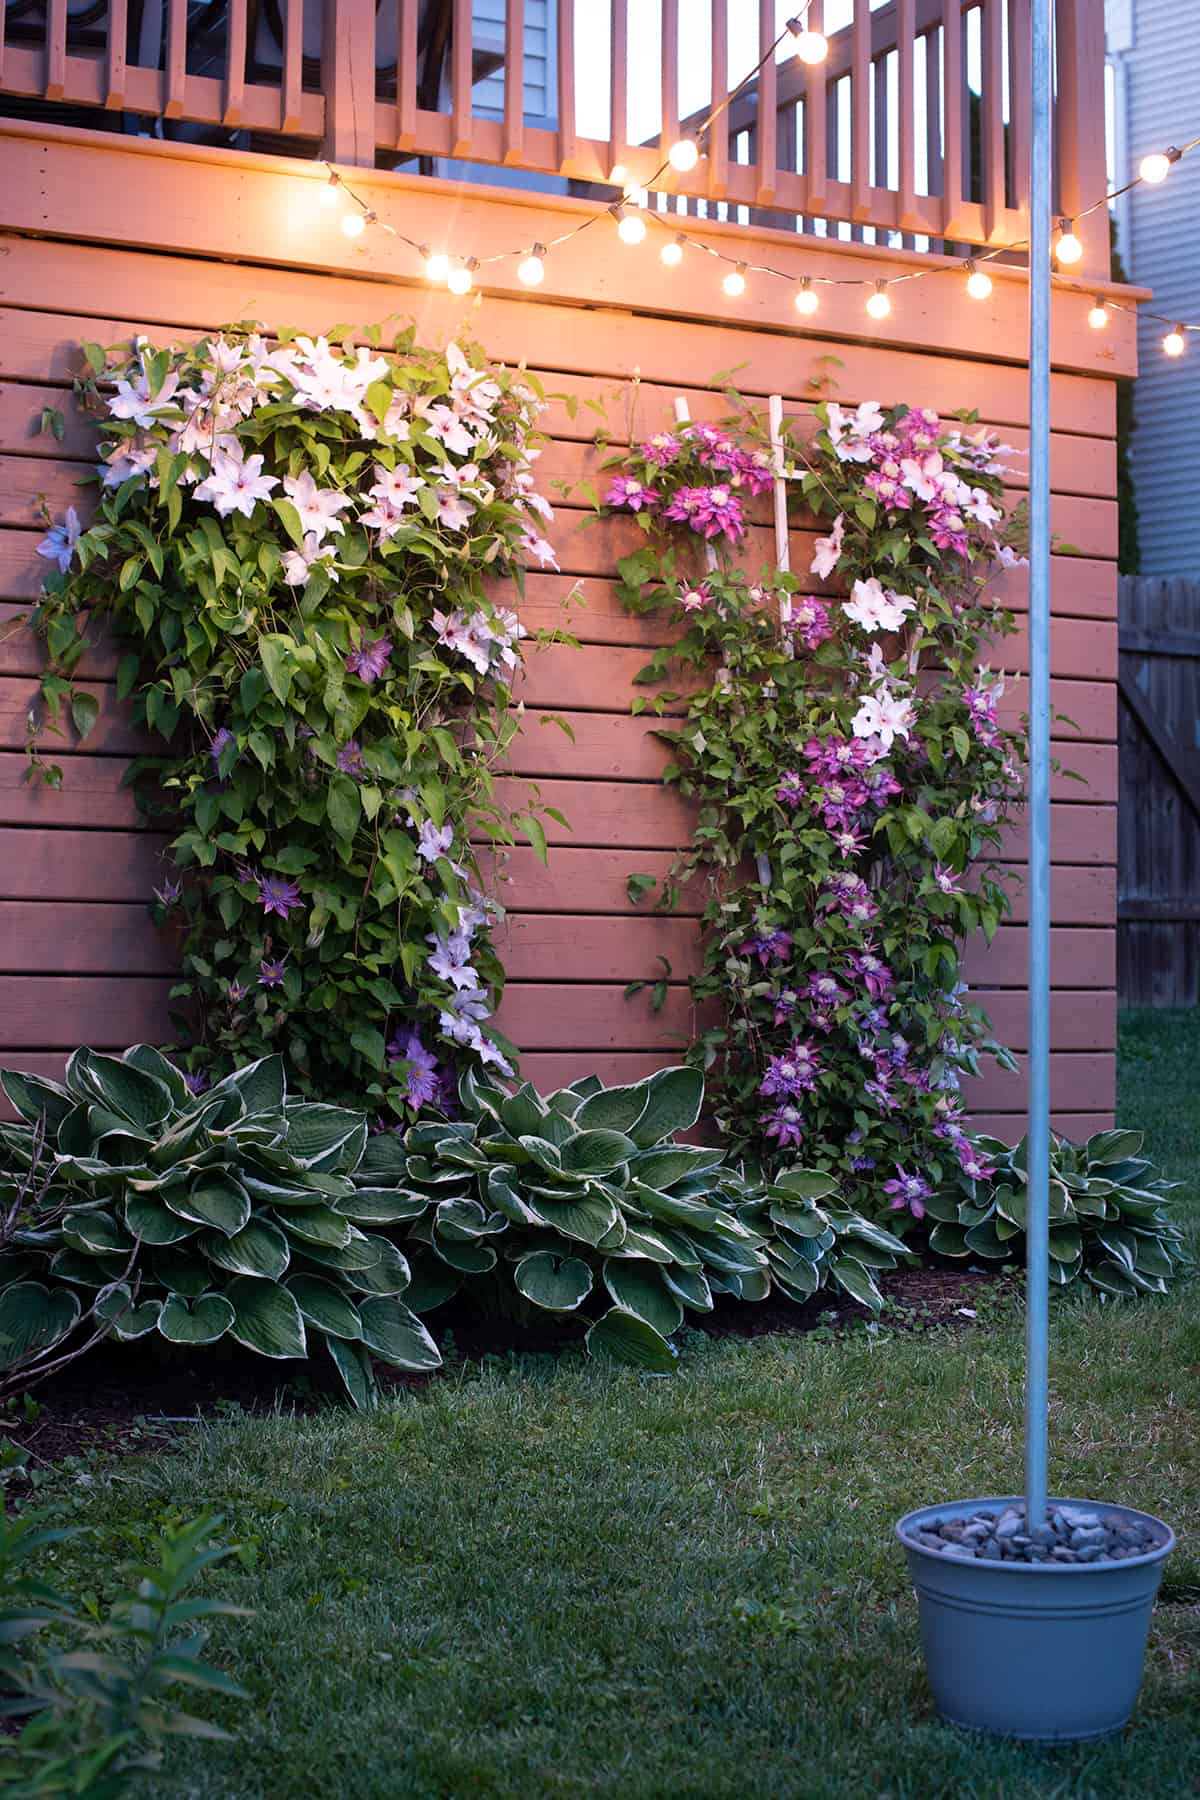
- Learn how to Hang Patio Lights in Your Backyard
- French Doors Vs Sliding Doors: Pros and Cons
- How To Paint Outdoor Concrete such as foundations
- How to Repair Wall Cracks
- How To Paint Garage Doors
Our Project Before & After
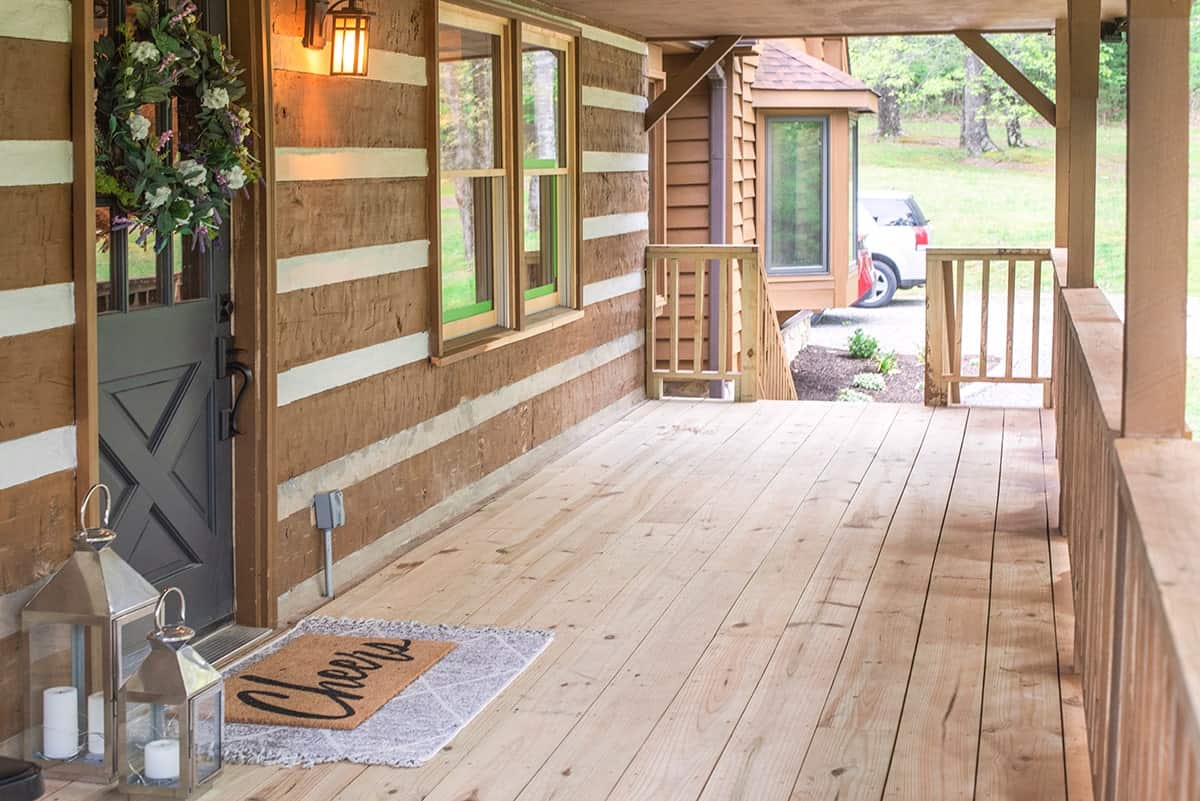
Ok, now for the fun! Nothing could have prepared us for the huge difference in this old home. With all of the projects and time we have been putting into it, I can almost feel her pride coming back.
And after…
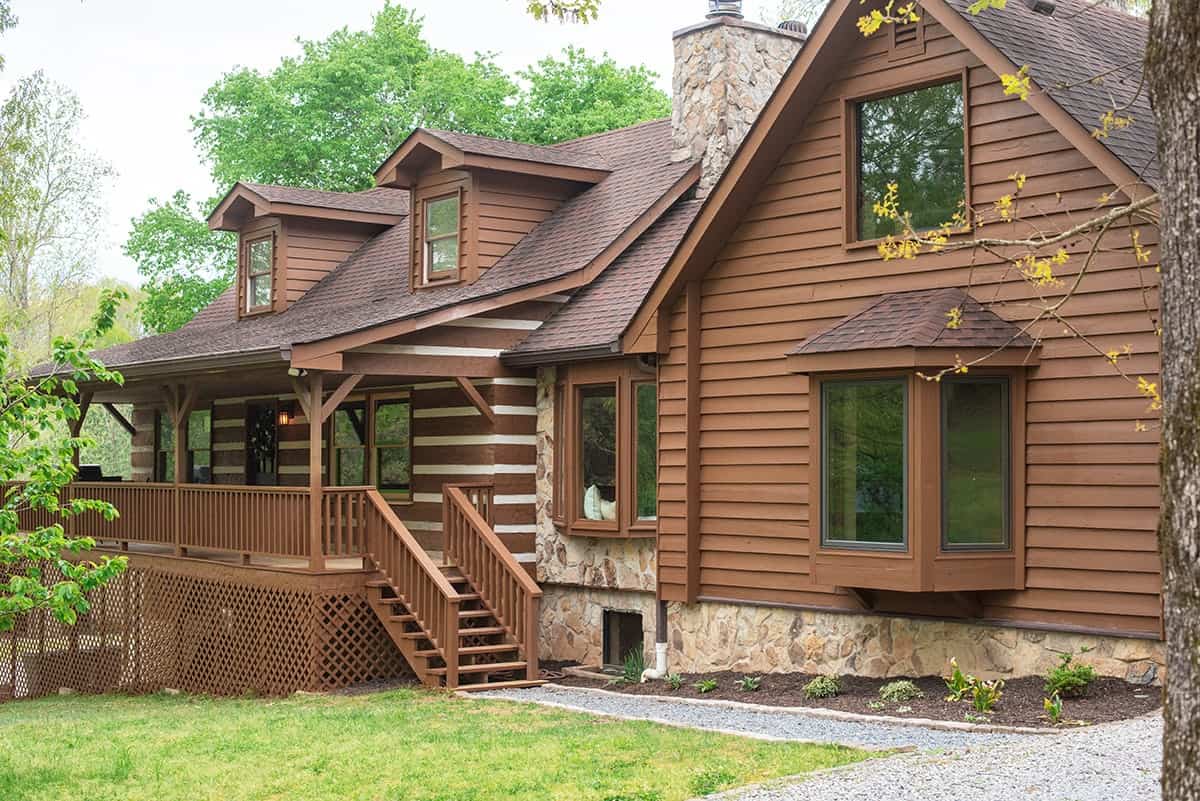
That deserves a second look…
We did a lot of repair work here with new deck surfaces, railings, lattice, staircase, as well as painted the masonry and added a new walkway. It took months to get it this far, but all this work was completed by my husband, son, and myself.

This place is really coming together now!
Frequently Asked Questions
When using solid color stain applied properly, it should last about 10 years. In heavy traffic areas, it may need some retouching sooner.
The best sprayer for this type of project is at least the Wagner Control Pro 150. It has the ability to cover a large area rather quickly with low overspray. It connects directly onto a 5-gallon bucket and features a 25ft cord, which really comes in handy when you’re working on a ladder.
Unfortunately, my parents had a habit of customizing their own colors, so I don’t have a color card. Please avoid mixing your own colors if possible. It makes it a bigger headache if you ever have to retouch, repaint, or match the color later on. Some of the colors were so old that the hardware store couldn’t even match their own codes.
This is a tricky question. Sanding a wood surface will provide a better bond because it opens the pores and creates a good substrate surface. However, sometimes it’s just not feasible such as a whole fence line or house. Generally speaking, I don’t worry too much about sanding vertical surfaces that won’t be walked on or touched excessively.

Grab our free series "Weekend Home Projects that will Transform Your Life" Sign up below to receive updates including free printables, organization tips, home improvement projects, recipes and more! |
More Exterior Project Tutorials
PS I love seeing your creations! Be sure to take a photo and tag #cravingcreative on Instagram! You can also stay in touch with me through following me on Instagram, Pinterest, and subscribing to the newsletter!
How To Stain Wood Siding or Home Exterior
Tools
- Painting accessories
- Stain Brushes
- Safety Equipment
Supplies
- Exterior Cleaner To remove algae, mildew, and dirt. You may need something stronger such as deck brightener for greyed wood.
- Stain Color
Instructions
- Clean the deck and remove any peeling or chipping stain. You can use a pressure washer with up to 2000 PSI pressure, but be careful not to gouge the wood.

- Remove mildew and grayed wood, if necessary. For wood surfaces, a deck brightener will remove the top layer of gray wood and kill mildew.

- Mask any areas that you don't want sprayed. Sprayers today are very controlled. If you are careful, you only need to mask off about a foot from where you spray to prevent overspray. Mask off any stucco, brickwork, windows, gutters, etc with painter's tape and plastic for large areas. (Photo is from another one of our projects).

- Apply stain. I always apply stain with a sprayer and then back brush to work the stain into the grain. A sprayer cuts time by 50-80%.


Notes
- For large projects, I HIGHLY recommend using a quality paint sprayer. It cuts maybe 50-80% out of the work time. Cover nearby bushes and windows with plastic to make cleanup easier, but they aren’t that messy once you get the hang of it.
- Stain top to bottom in sections for less overspray and you won’t have to worry about touching the lower stain.
- Even with a sprayer I recommend brushing the stain in. This helps catch any drips and, for transparent or semi-transparent stain, will help the stain bond with the wood.
- I usually do at least two coats of stain, 3 for clear or light transparent stain. Check the product labels for how long to wait between coats.
Laurie Clay says
Do you have any knowledge / recommendations for an older home with oil based stain? We last had it re-stained with semi-solid Benjamin Moore oil based Arbor Coat. Aren’t solid stains usually water based? How do you make the transition?
Rachel says
This particular home has been stained many times over the years. Originally, it was an oil-based semi-transparent stain. My recommendation would be to ask your local Benjamin Moore store about the Arbor Coat because they have both acrylic/ alkyd (water-based) and oil-based stains. They will know best about their own product in all sorts of conditions and formulas can change over time. However, we made the switch years ago as well as with a few decks. In my experience, once the outer surface is worn or needs stained again, you can move to a water-based stain without too much trouble. Just make sure to prep correctly and test an inconspicuous place that it is bonding well to the surface.
Lee says
What stain and color did you use?
Rachel says
Unfortunately, these homeowners (my parents) had a terrible habit of making custom mixes for colors, so I do not know the exact color. Thankfully, I have gotten them away from that because it caused me so many headaches when it came time to repaint, lol.
jack says
Awesome tour!!! Loved all the family touches and your tree is amazing!!! That tree topper is so unique. Pinned and shared..