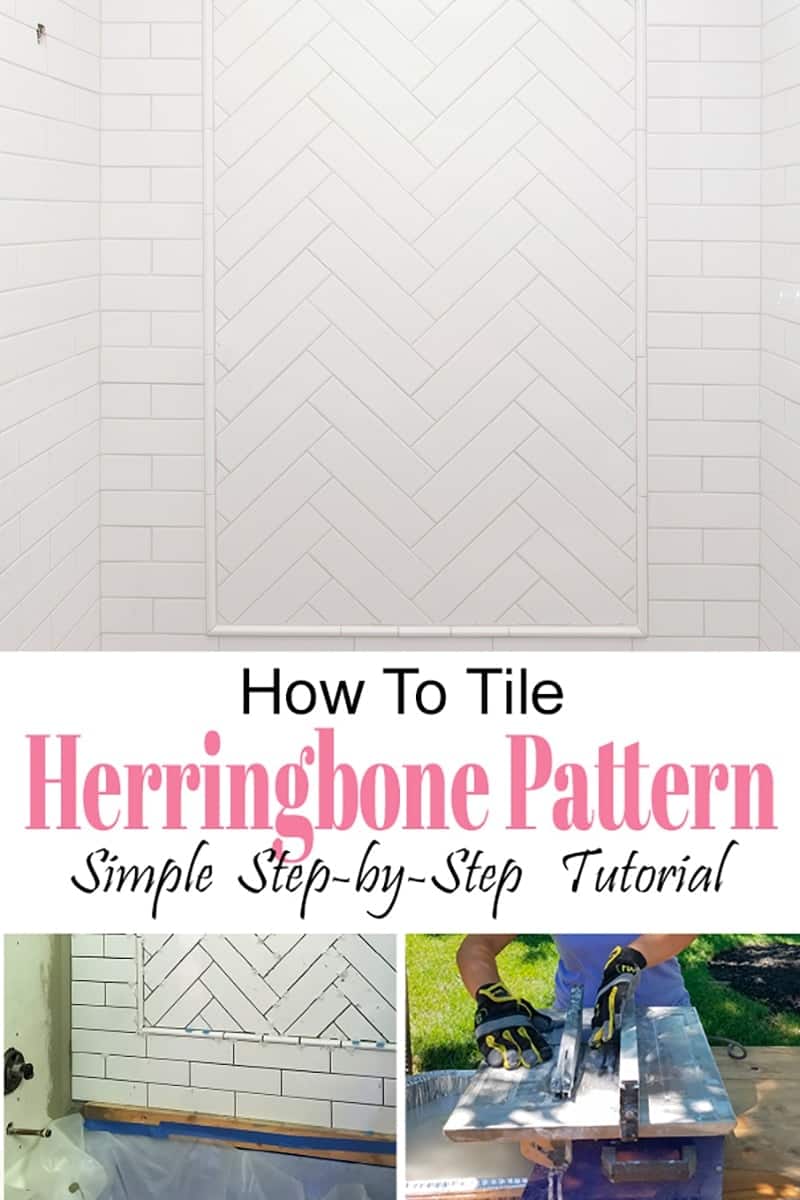
Love a herringbone pattern tile, but worried it’s not easy to create? It’s no harder than other subway tile patterns with this step by step guide that shows how to measure, mark, cut and lay the tiles for a perfect job.
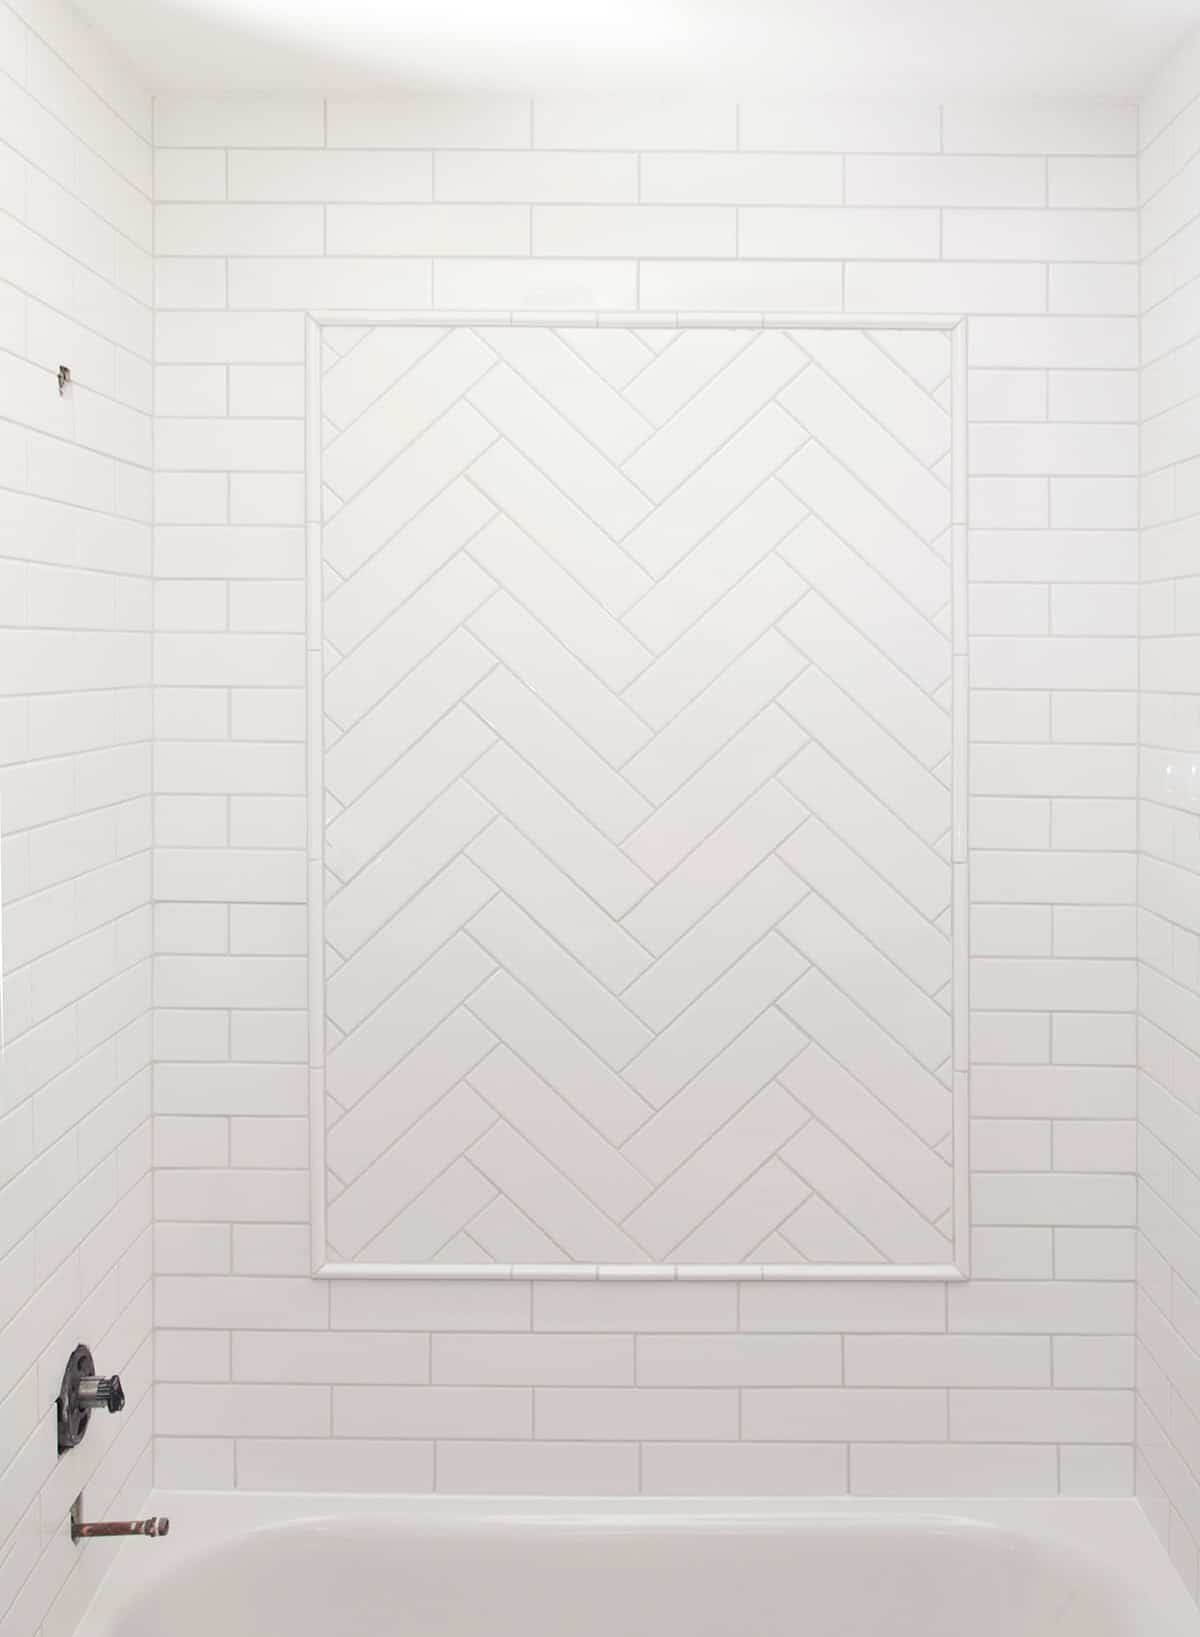
I’ve been getting many questions about the bathroom remodel at my parent’s house, most specifically comments on how intricate and beautiful the herringbone pattern inset is on the shower. We have a post about all the many subway tile patterns you can do, but herringbone is one of the most popular. Quite a few mentioned that herringbone must be so difficult to lay, but that isn’t the case!
Herringbone Tile Supplies
You will need mostly the same general tools and supplies for tiling herringbone vs other patterns. Here is a handy list of some of the items I use and recommend.
- Tile cutting saw with a good blade – This budget-friendly one makes tile cutting simple and is perfect for homeowners.
- Spacers – T-shaped ones and wedge spacers
- A square trowel – There are two sizes. I use a ¼-inch size like this one for smaller tile, and a ½ inch on larger or flooring tile.
General tips for tiling
With any pattern, especially intricate ones, use tile spacers. I usually keep two kinds on hand – T-shaped like these and Wedge tile spacers. I much prefer the T-shaped ones over other shapes like these cross ones, because the T fits well into staggered joints and they are easy to remove. Wedges come in handy because you can trim them to size, so I use both.
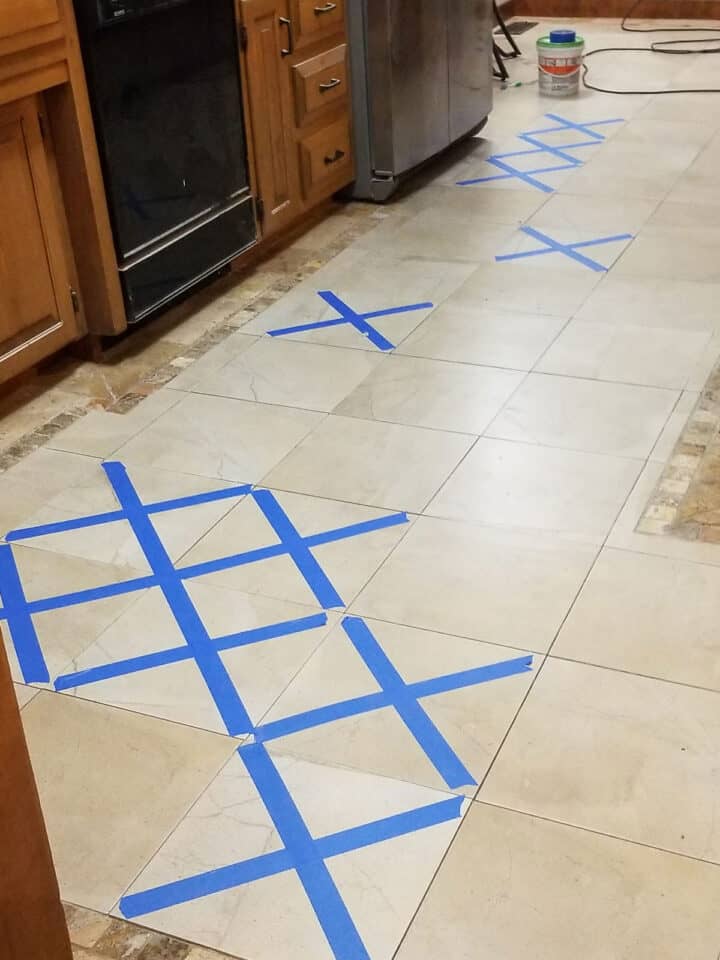
I don’t usually lay tile out before putting on the wall, but it is recommended. Normally, it’s very difficult for me to have a large enough flat surface to everything exact to make the correct cuts before laying on the wall. So cuts are performed as I go.
Always cover and pad anything you don’t want scratched or dinged in case you drop a tile or mortar. In a bathtub or shower pan, I lay down folded towels and then cover with a plastic sheet that is taped around the wall.
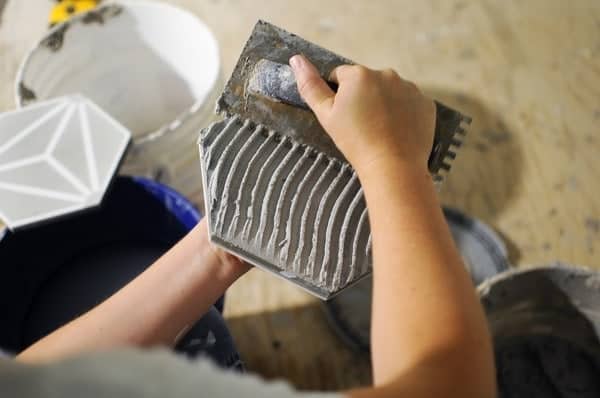
The mortar will harden fairly quickly when it is on the Hardi-backer or other substrate. For intricate patterns or if you are very slow, I recommend spreading the mortar/adhesive on the back of the tile rather than putting the mortar on the wall.
- Spread the mortar over the entire back area of the tile
- Scrape it just like you would do the wall with the spreader at a consistent 30-45-degree angle.
- Stick it onto the wall and give it a little wiggle to make sure it's sticking. Use your spacers to make sure the tile is level & adjust if necessary.
Need to repair some tile floors? We have a post with video dedicated to repairing broken tile here so you don’t have to replace an entire floor!
How To Lay Herringbone Tile Pattern
Step 1: Find the Center Point
The first step in laying a herringbone pattern is to find the center point of the wall. Measure the length of the wall and mark the halfway point.
Step 2: Decide Starting Point
A floor layout is different than a wall. On a floor, you start in the center and radiate out towards the walls on either side, on a wall, we start at the bottom because gravity might cause the tiles to slip downward, ruining your pattern. You can either start at the bottom or use a ledger board in the middle. A ledger board is just a very straight board you screw into the wall that the tile can rest on. When you are done, unscrew the ledger board and tile in its place.
Step 3: Add a ledger board
I always use a ledger board for starting out on a wall, in place of the first row of tiles. I measure it exactly the height of the first row plus grout, like this:
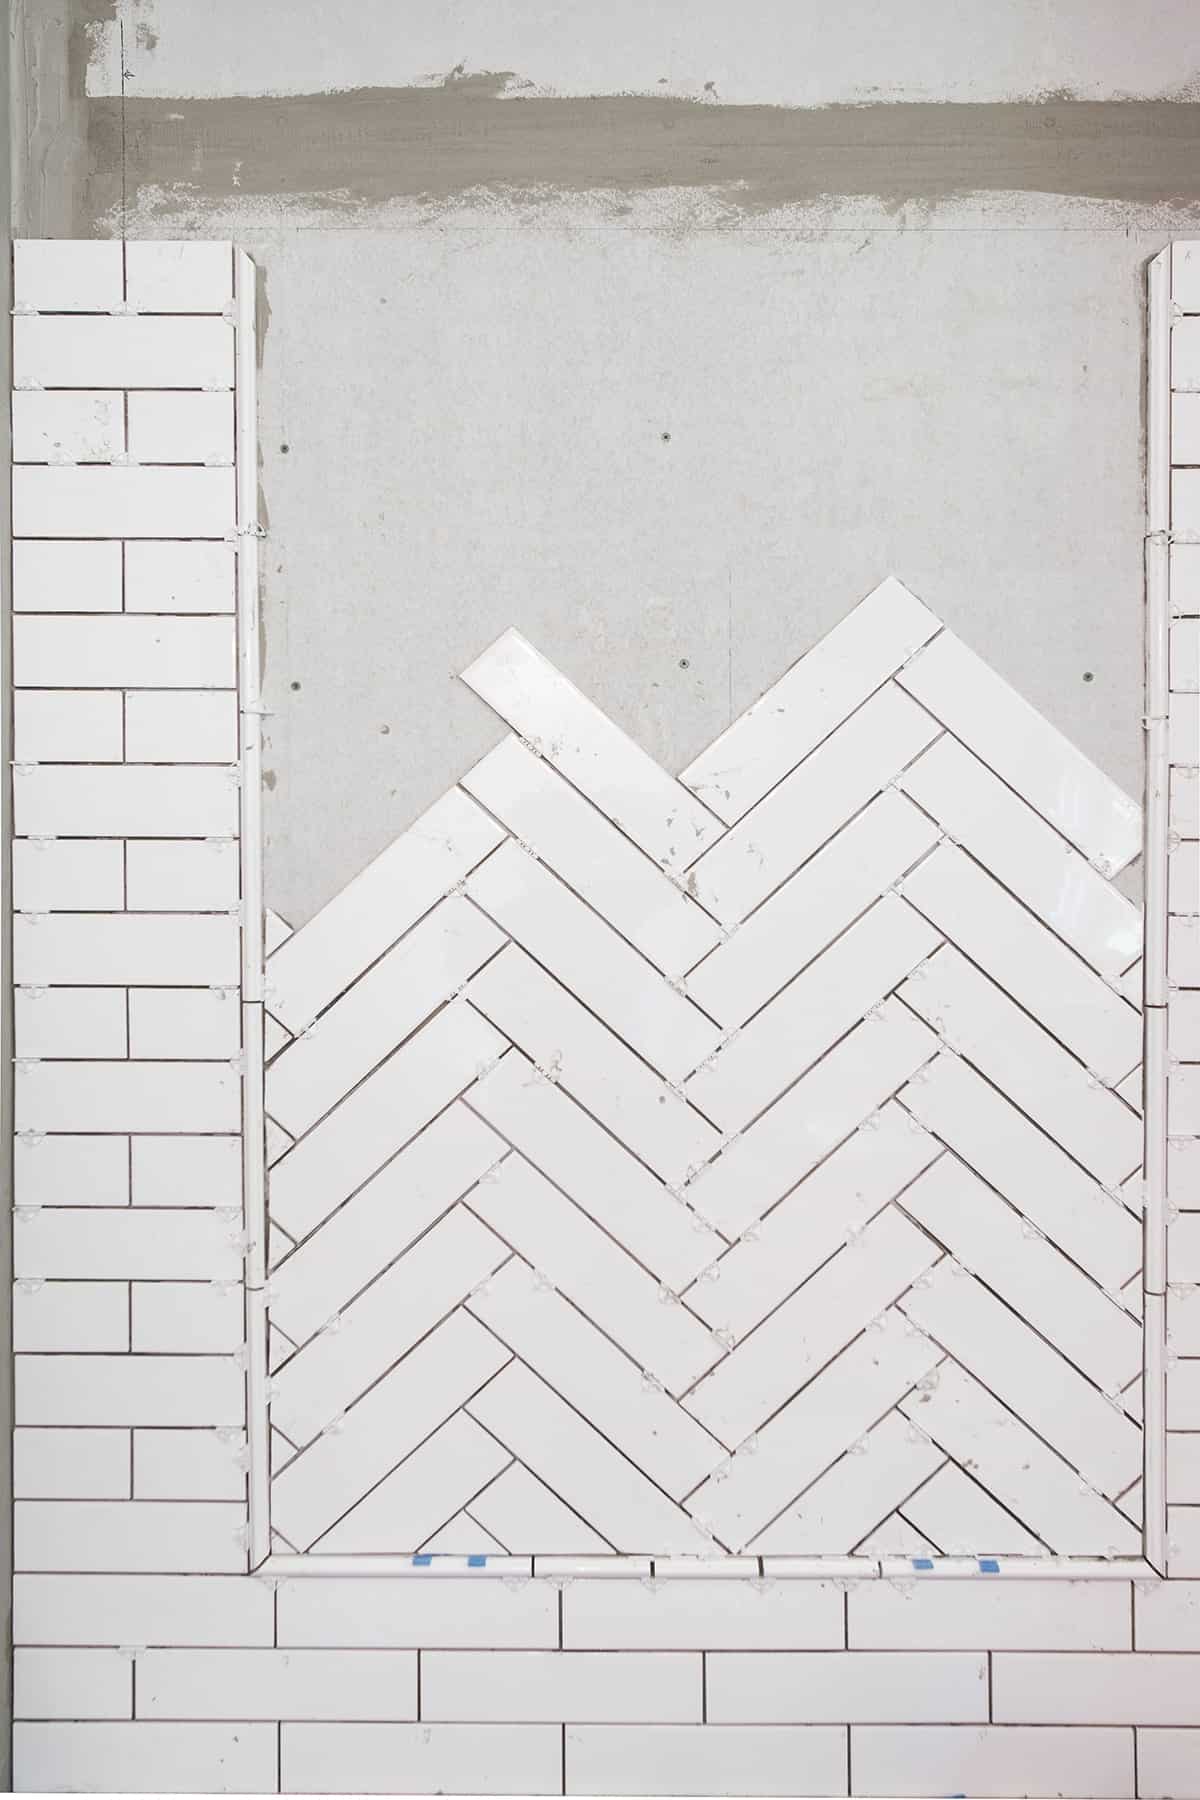
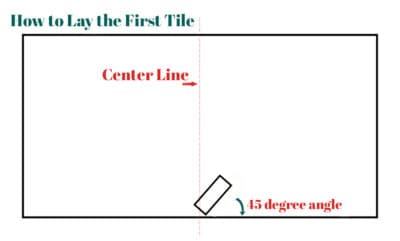
Step 4: How to Lay the First Tile
The first tile is the most important because it sets the pattern for the rest of the tile. In order to make the pattern perfectly even on both sides, start it like the picture below. To get a 45-degree angle, use a combination square (without the ruler) or draw a line with a trim square.

If you have the space, I recommend laying your pattern out on the floor so you can make cuts before laying the tile on the wall. I usually cut about 6 rows at a time once the pattern is set.
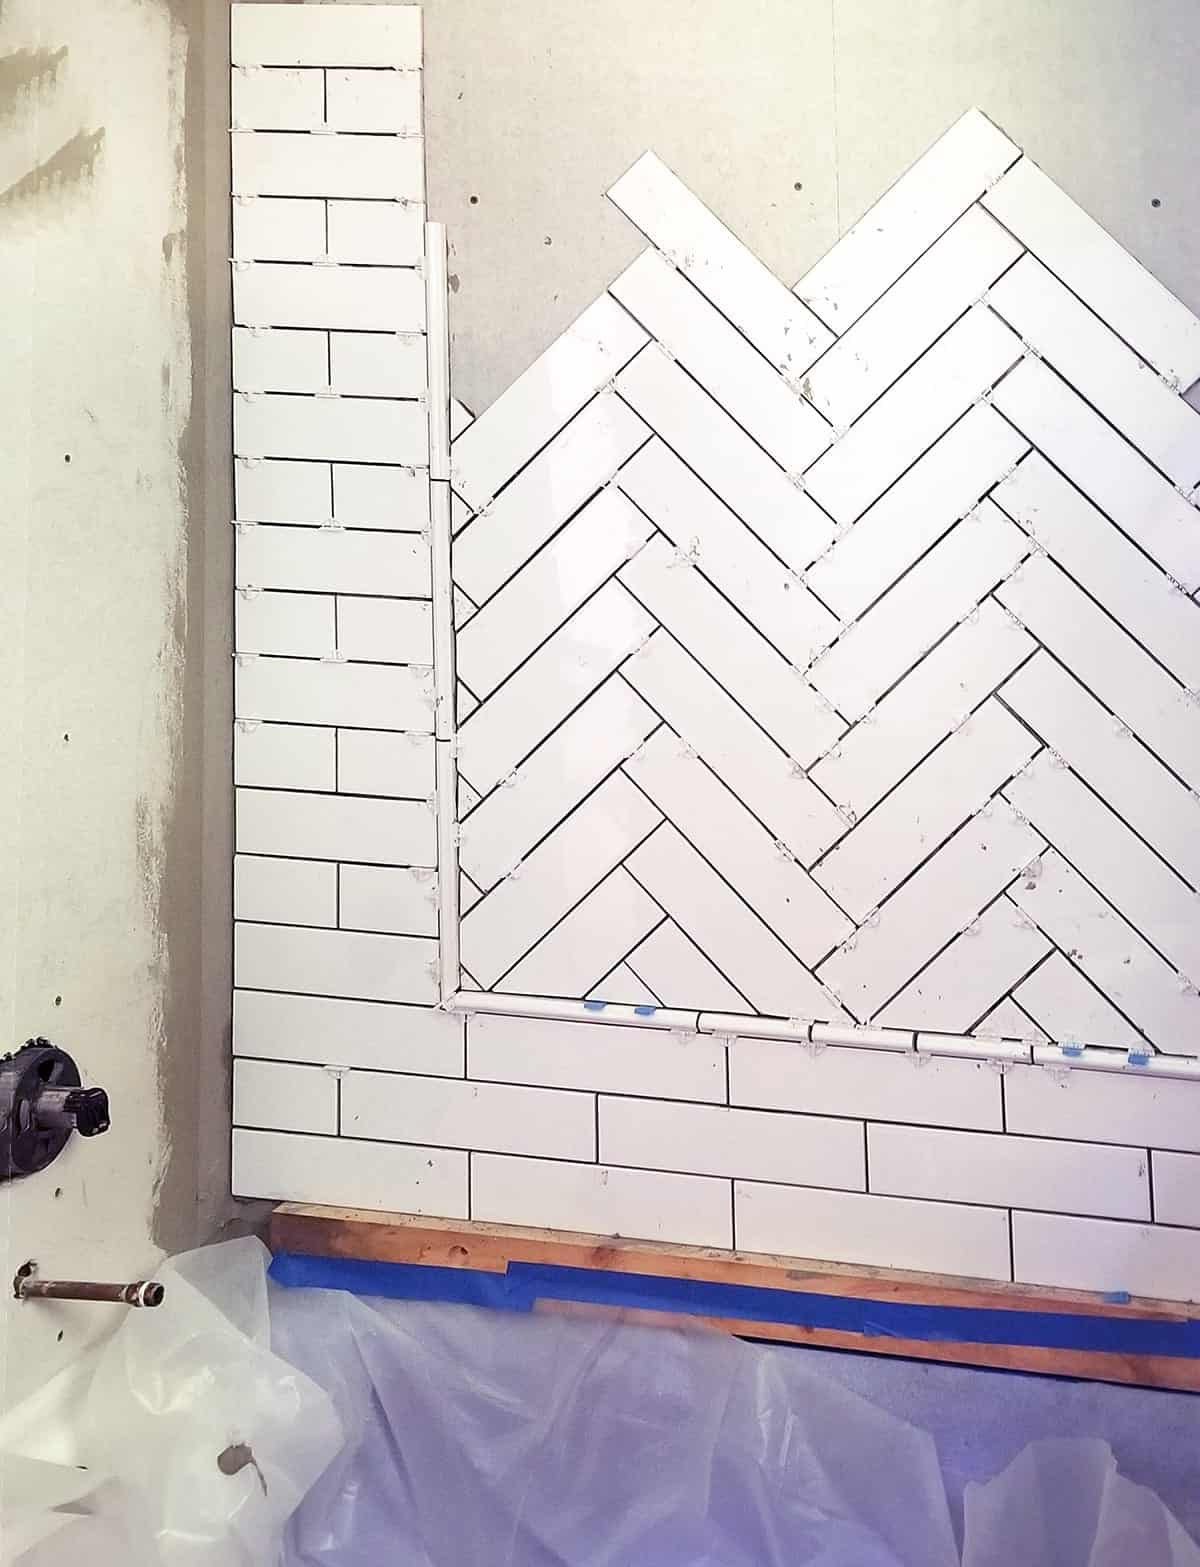
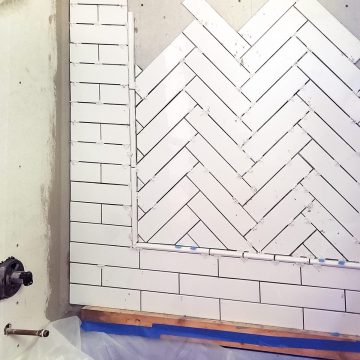
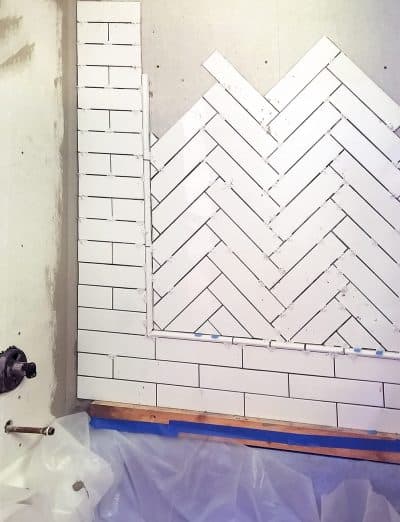
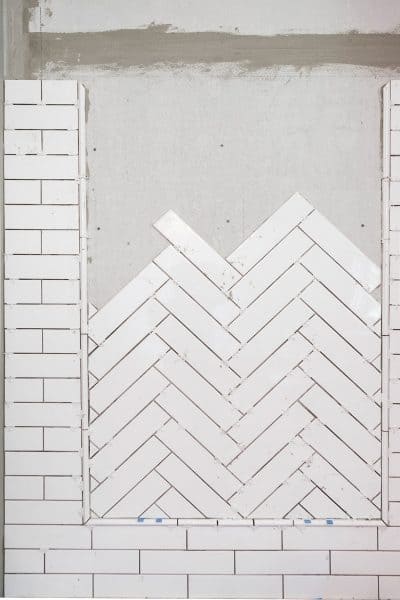
Step 5: Continue up the wall
One neat thing is that once you get that first piece exactly right in a herringbone tile pattern, and start tiling up, the side cut pieces will all be the same size! This is, of course, assuming the walls are straight.
Pro Tip: Every few rows, check for level by putting a level across the top points of the tile. This means the tile hasn’t set long enough so adjustments can be made.
So that’s it! It’s not any harder than other tile patterns once you get that first tile set. I hear a lot that tiling scares beginning DIYers, but it’s actually one of the easier – though tedious – projects to do. If you can get the walls up straight, tiling is a breeze.
We have tiled several project tutorials including installing groutable vinyl tile, LVT plank vinyl installation, and tips for using beveled subway tile. I have even more tiling projects and videos coming up so stay tuned!
Herringbone Pattern FAQs
Herringbone tile is usually laid at a 45-degree angle to the floor or wall that it adjoins. This orientation looks similar to arrows pointing straight up or down. However, it can also be started horizontal, which gives the illusion that the floor moves diagonally.
Yes. With a geometric pattern, there are generally far more cuts involved. When calculating how many tile you need, go with at least 15% for herringbone and 10% for a straight lay.
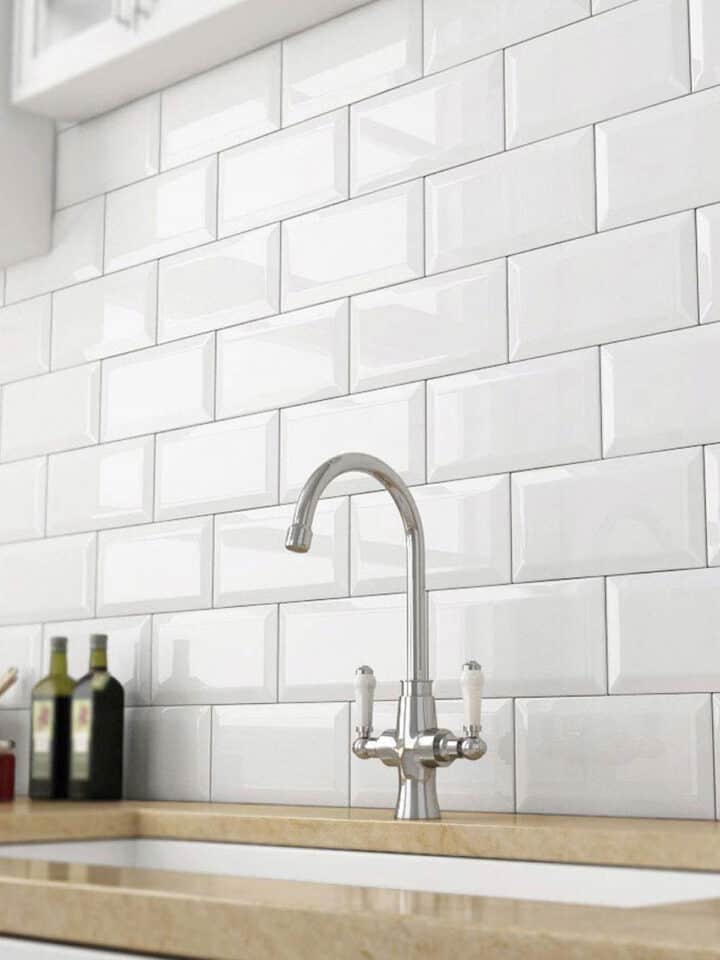
3×12 tile was used in this particular project. However, 3×6 and 2×4 work well too depending on your look. You want a tile where the longer side is evenly divisible by the shorter side (i.e. 12 divided by 3 =4 in our case). While you can use any size tile theoretically, divisible sides are easier to work with.
To some degree. Herringbone has an effect that seems to expand the width of a room or wall. Because of this, herringbone floors are good choices for small spaces like laundry rooms or powder rooms. The effect works best in square spaces.
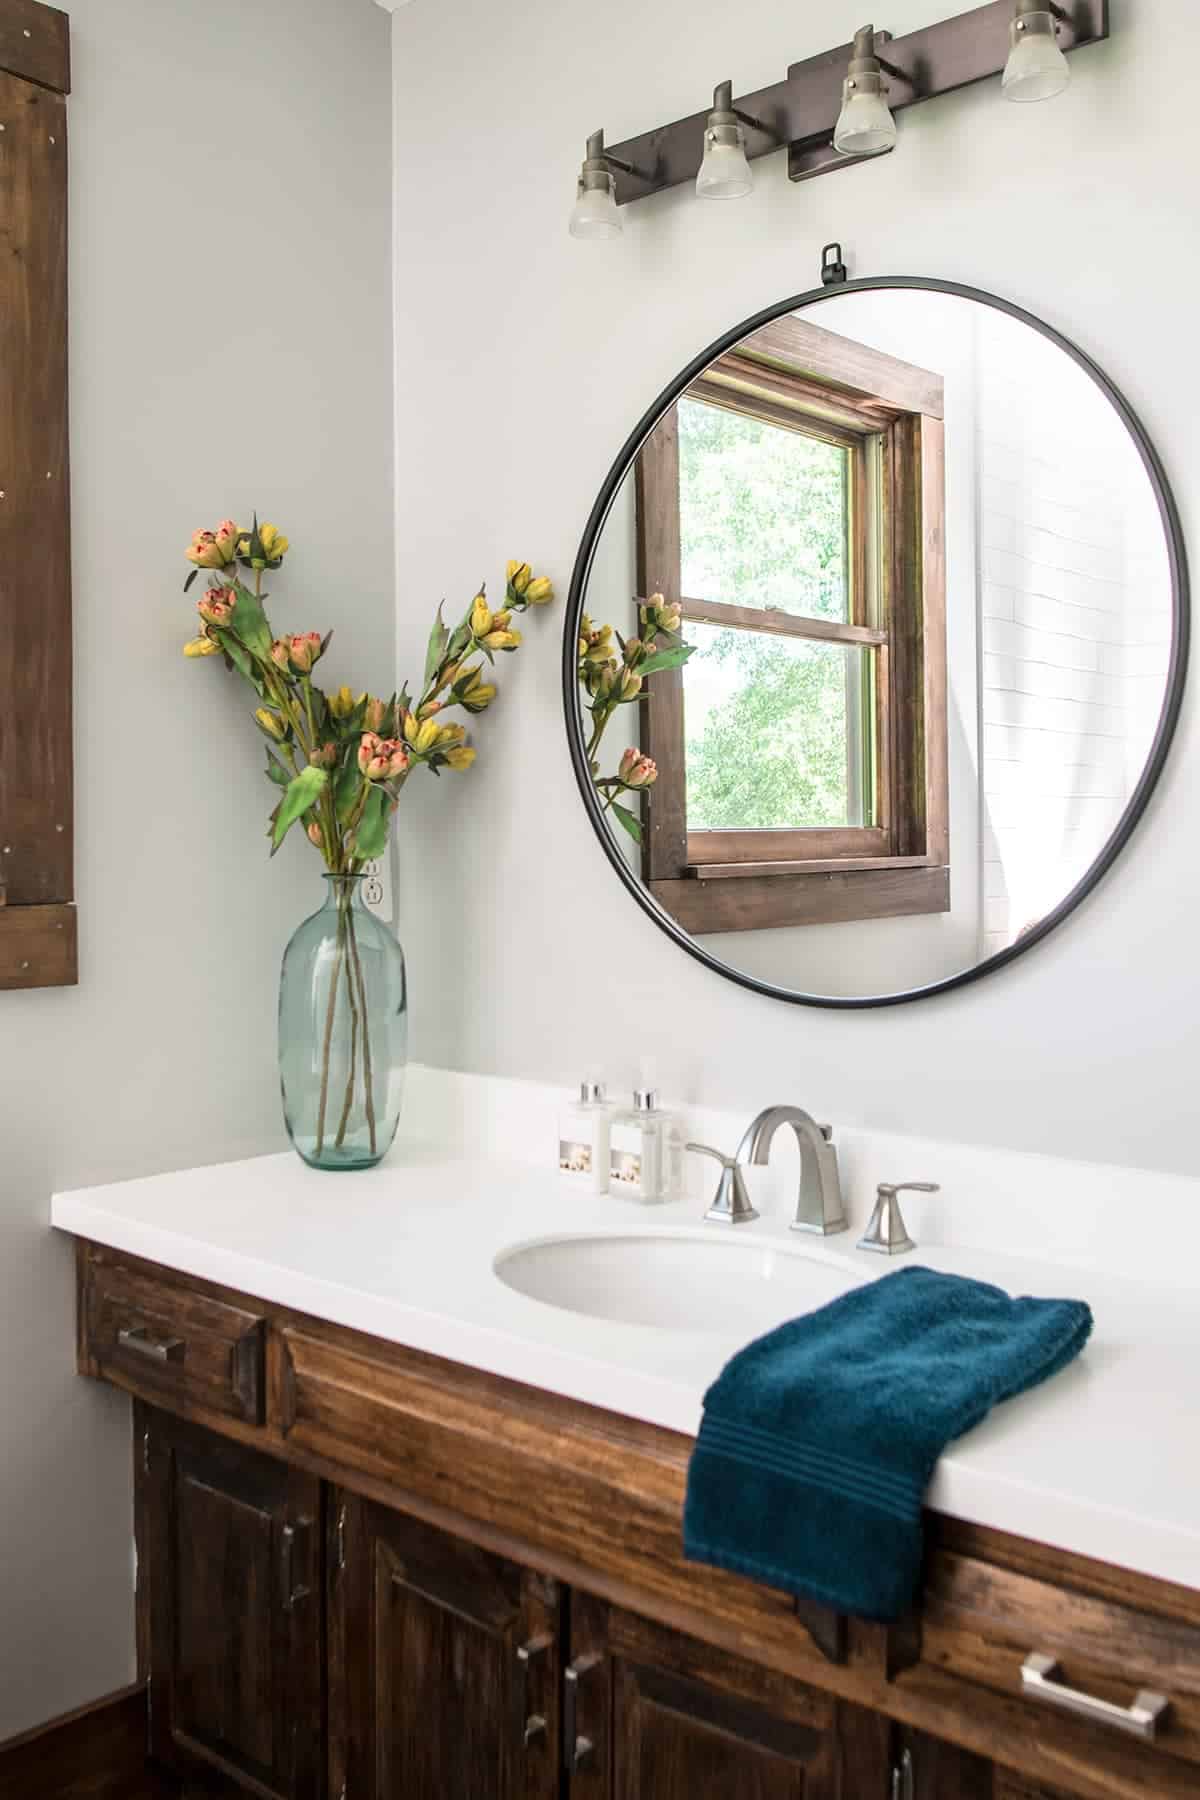
Hope you find this inspiring, because I look at that picture and it looks so comforting and relaxing and modern.

Grab our free series "Weekend Home Projects that will Transform Your Life" Sign up below to receive updates including free printables, organization tips, home improvement projects, recipes and more! |
More DIY Updates
PS I love seeing your creations! Be sure to take a photo and tag #cravingcreative on Instagram! You can also stay in touch with me through following me on Instagram, Pinterest, and subscribing to the newsletter!
How to Tile a Herringbone Pattern
Supplies
- Tile Spacers – T shaped
- Wedge Spacers
- Mortar
- Tile *see not below about sizing
- Grout
Instructions
- Find the center point on the wall. Measure the length of the wall and mark the halfway point from top to bottom.

- Put up a ledger board. You can either start at the bottom or use a ledger board in the middle. A ledger board is just a very straight board you screw into the wall that the tile can rest on. When you are done, unscrew the ledger board and tile in it's place.

- Lay the first tile. The first tile is the most important because it sets the pattern for the rest of the tile. In order to make the pattern perfectly even on both sides, start with the centerline in the center of the short side of of the tile. To get a 45 degree angle, use a combination square (without the ruler) or draw a line with a trim square.
- Continue up the wall. Every few rows, I check for level by putting a level across the top points of the tile as I lay. This means the tile hasn't set long enough so that I can make adjustments. Make sure to wipe any excess mortar off before it dries.

Ann says
What tile did you use to frame out the herringbone pattern? Looks fabulous!
Rachel says
It’s a coordinating pencil tile with a ceramic glaze. Although I don’t have a photo here, I used the same pencil tile to edge the outside of the tub surround, where it meets the drywall.
Jasmine Roy says
Very well written post you share here valuable information you will be share with us, it’s really helpful for me I like to read this article, thank you so much for share this awesome blog.
Mary says
well done
Lara says
worked like a charm.
Anna says
great directions
Ashly says
the pencil tile didn’t look the way I wanted, but the herring bone layout looks beautiful
Robin says
Even as an OCD person, I can’t find a flaw.