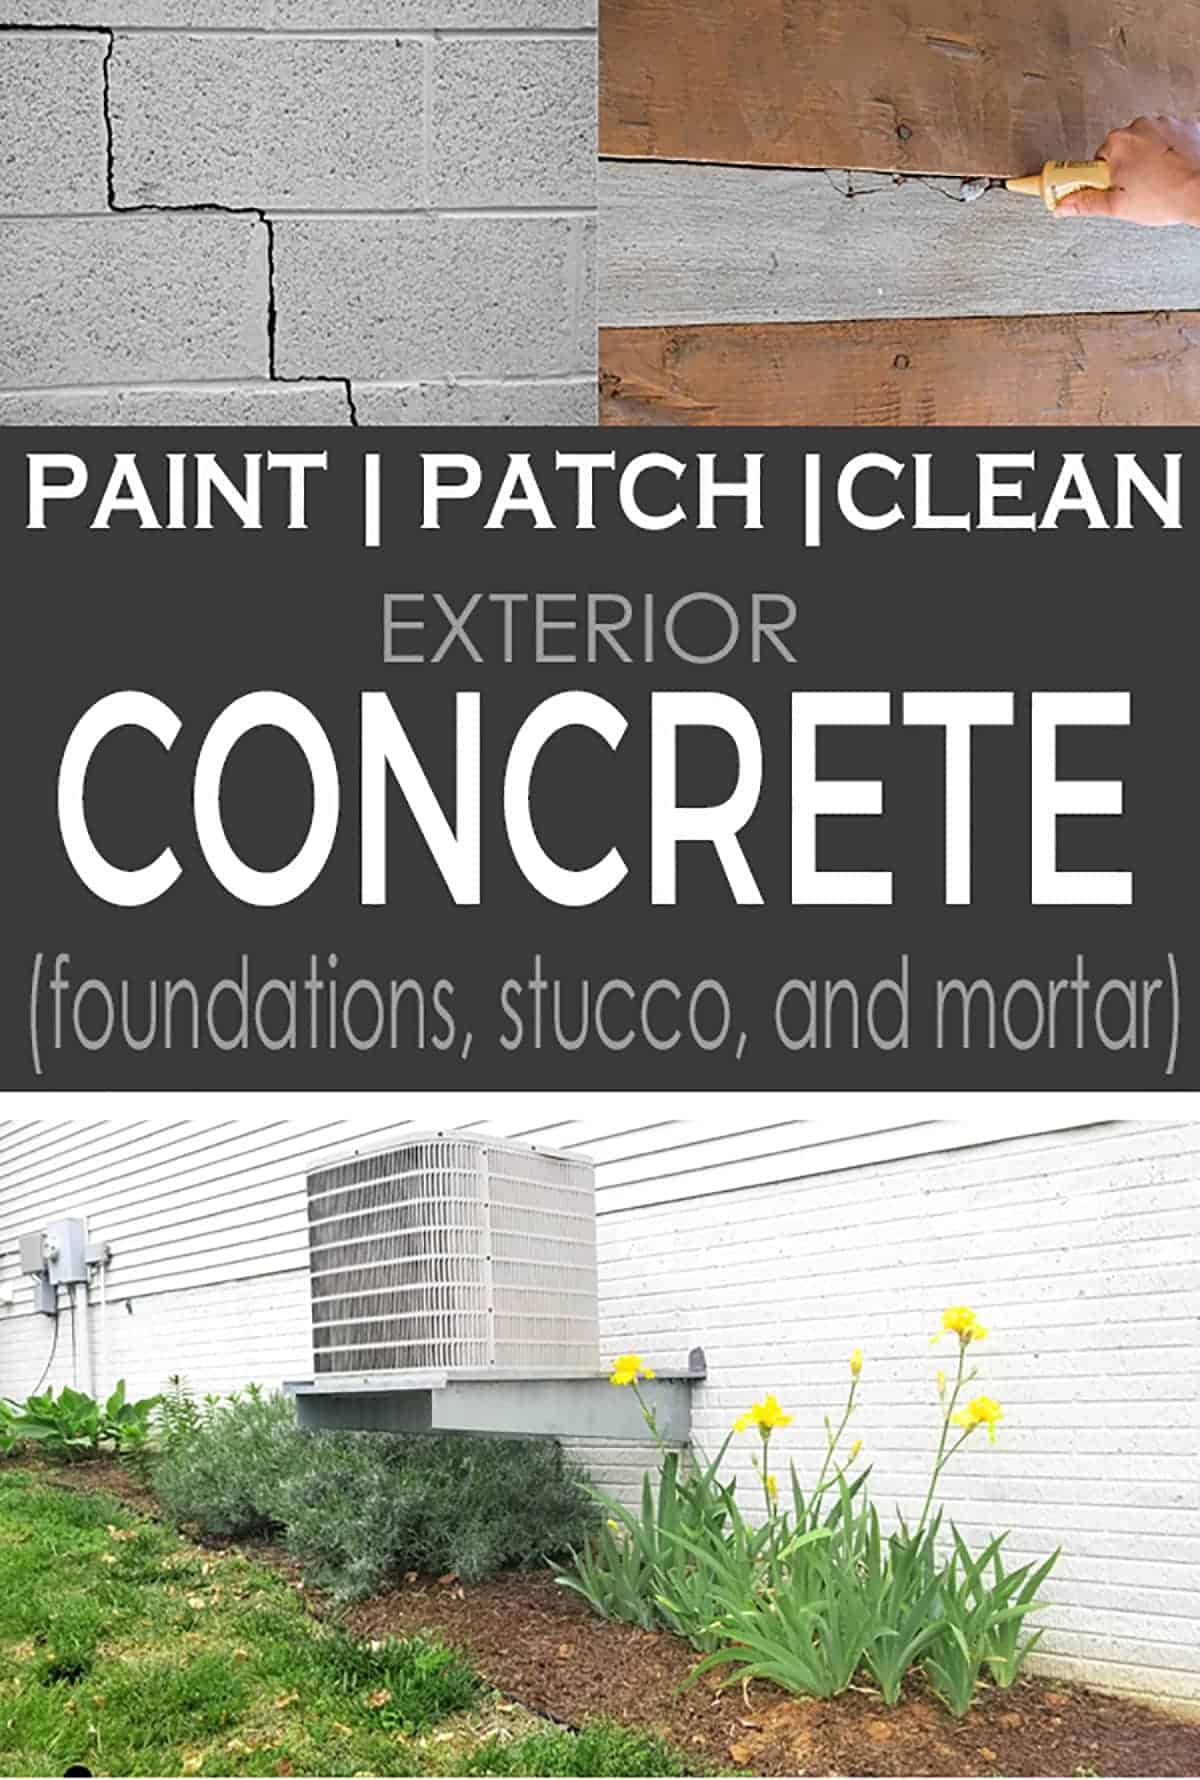
A step-by-step tutorial for painting your outdoor concrete walls like foundations, stucco, and masonry as well as porches and cement. Learn pro tips for a professional grade finish and durable, low maintenance protection that will extend the life of your concrete surfaces.
Have you ever completed a project and thought afterwards, “Why didn’t we do this sooner!” This is one of those!
Just like an old deck that needs refinishing or any home exterior really, concrete areas take their share of wear and tear through time. Painting concrete or cement hides unsightly damage and discoloration to provide a welcome refresh. While working on the remodel of my childhood home last summer, it was apparent the exterior masonry needed a makeover.
More than providing a pleasing aesthetic, concrete paint or stain provides a protective layer to extend the life of your surface. Whether it’s your home’s foundation, front porch, or landscaping walls, painting concrete makes it easier to clean and maintain. Preparation and good product selection are the keys to success.
Today, we are focusing on lower traffic wall surfaces such as foundations, stucco, basements, and cement walls. If you would like to learn more about painting floors, check out our post on painting garage floors.
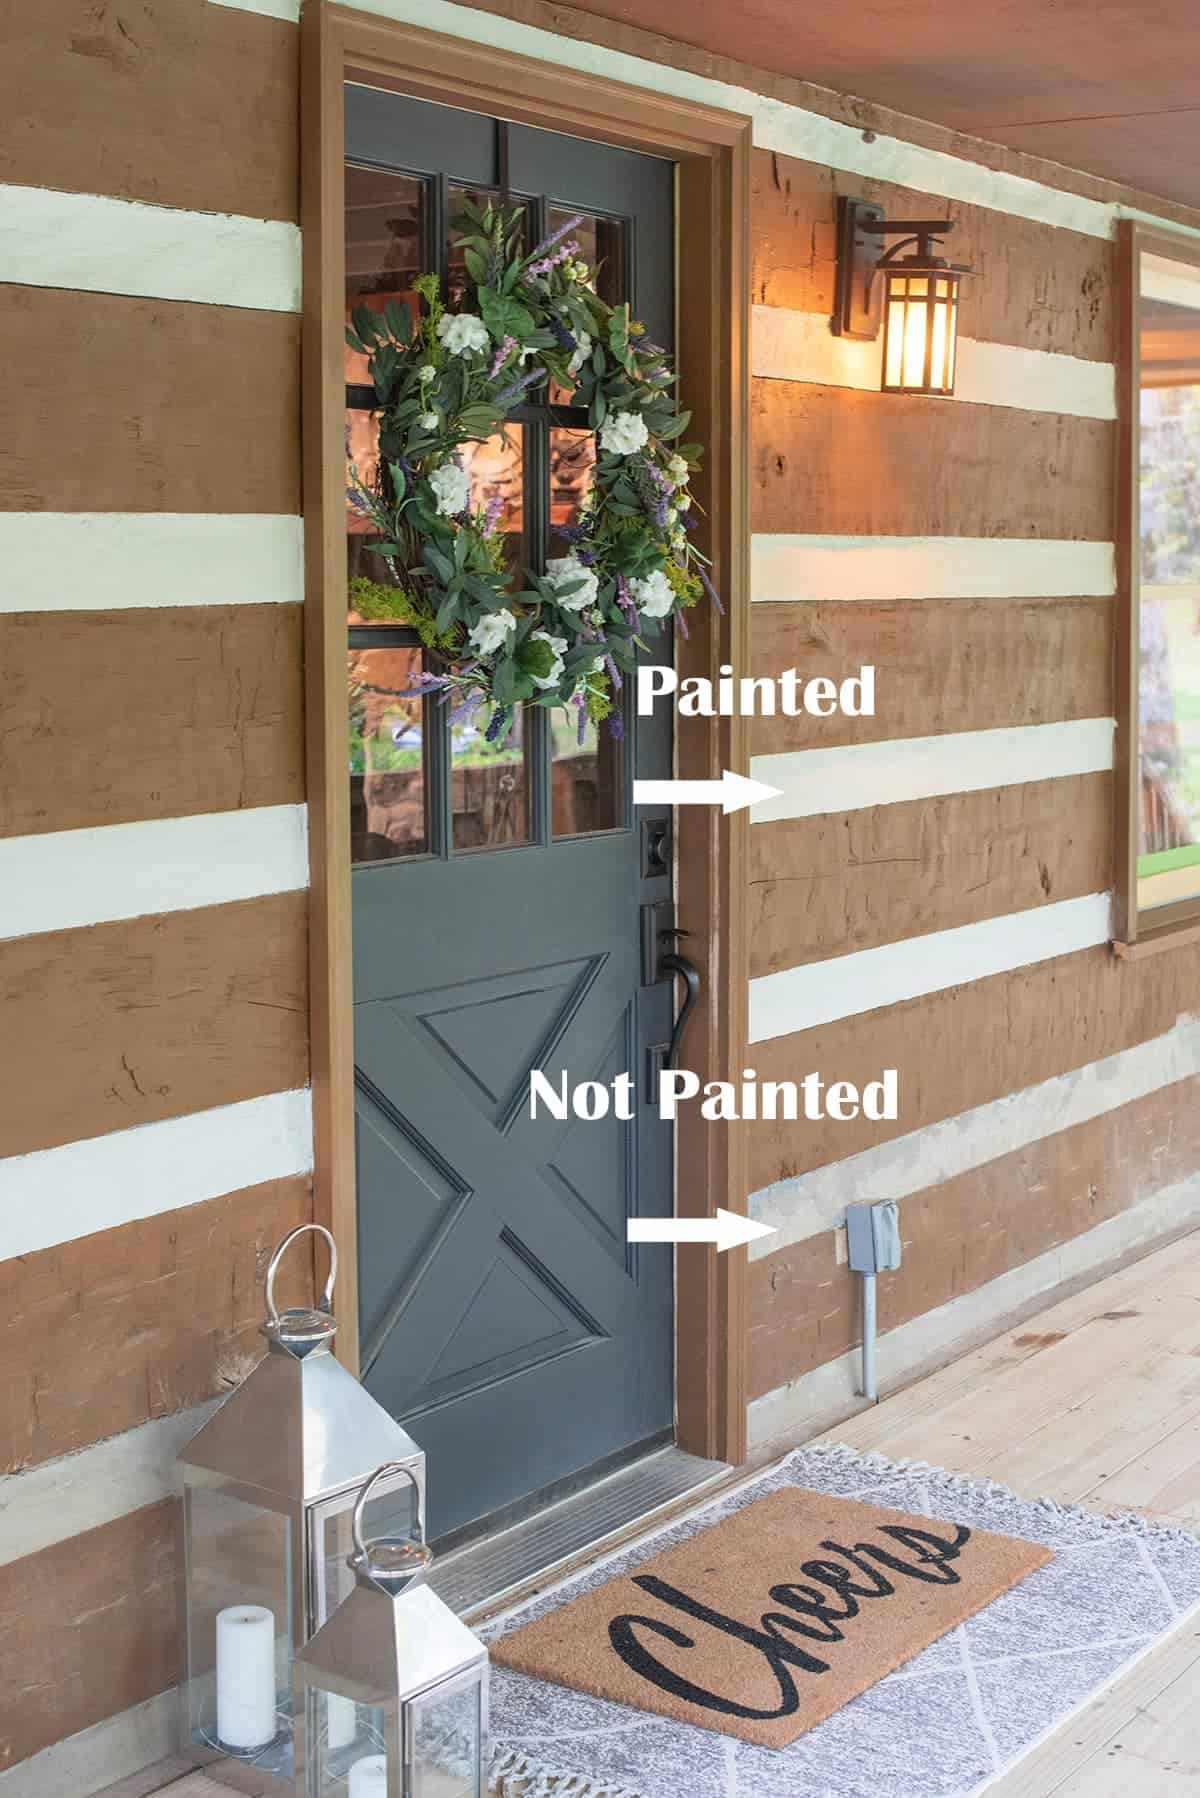
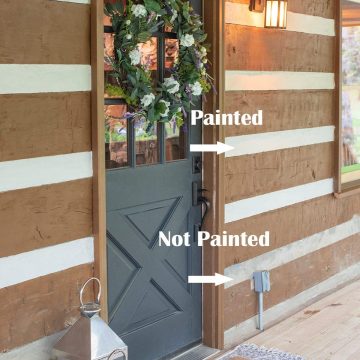
Although this home is log cabin style, this process is exactly the same for areas like cement or brick foundations, cinder block walls, and mortar stucco style walls.
Recommended Supplies & Materials
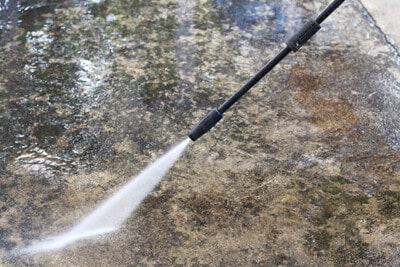
- Power washer (optional)
- Strong Degreaser if you have greasy stains. Deck or House Exterior cleaner will do if you don’t have greasy stains.
- Exterior Cleaner for removing Mold, Mildew and Algae Stains.
- Handheld grinder if you have uneven places or large cracks to repair. You may be able to rent one from the hardware store.
- Patch filler – since this is filling walls. I recommend buying powdered mortar or cement to match to fill in cracks.
- Adhesive roller and Painting pole
- Paint brushes
- Paint – See my best recommendations under FAQs.
- Large stir stick
How To Prep Concrete for Painting
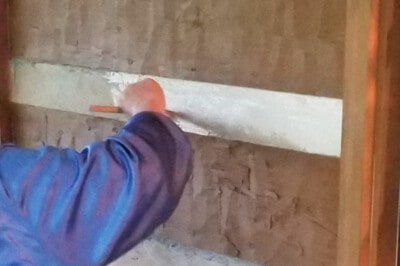
For most uneven parts, a handheld grinder with a 4-inch diameter diamond bit grinder blade work well. The paints that I recommend have very good coverage and options for filling hairline cracks, but the paints will not mask a badly patched or peeling surface.
If the area has been previously painted and the paint is failing in areas (peeling, cracking, or flaking), remove all loose paint with a metal scraper and sand the edges smooth with a concrete grinder.
Tips for Stains & Cleaning
There are several issues you may encounter while painting exterior masonry and concrete. Here are some challenges we had to navigate:
- BIG cracks
- Stains from spills
- Previous patches that didn’t match color or texture
The first step is beginning with a clean surface area; properly clean and dry the concrete. Since we stained the entire house as well as painted the mortar, a pressure washer and exterior house cleaner or mold remover worked very well. It was amazing how much grime and mildew came off!
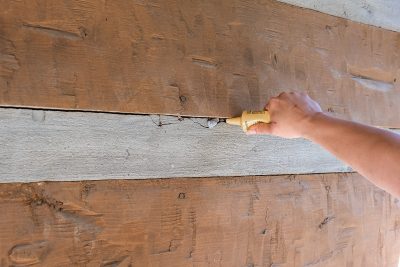
How To Fill Concrete Cracks
If I had this to do over again, the one thing I wouldn’t do is use pre-mixed tubes for patching concrete. It is cumbersome to work with. Half of them broke out of the back, creating a terrible mess. The texture is goopy and too thin for successful wall application. We tried several brands without better luck.

LESSON LEARNED: DO NOT USE PRE-MADE CONCRETE PATCH ON WALLS!
Normally, I would’ve mixed mortar to the consistency of thick peanut butter and filled cracks that way. If you have small cracks, you can use a grout bag like this one. It’s sort of like a piping bag you use for frosting cupcakes.
You can also use a fast setting hydraulic cement like this one to fill cracks in walls. As an added bonus, it acts like a waterproofer for leaks.
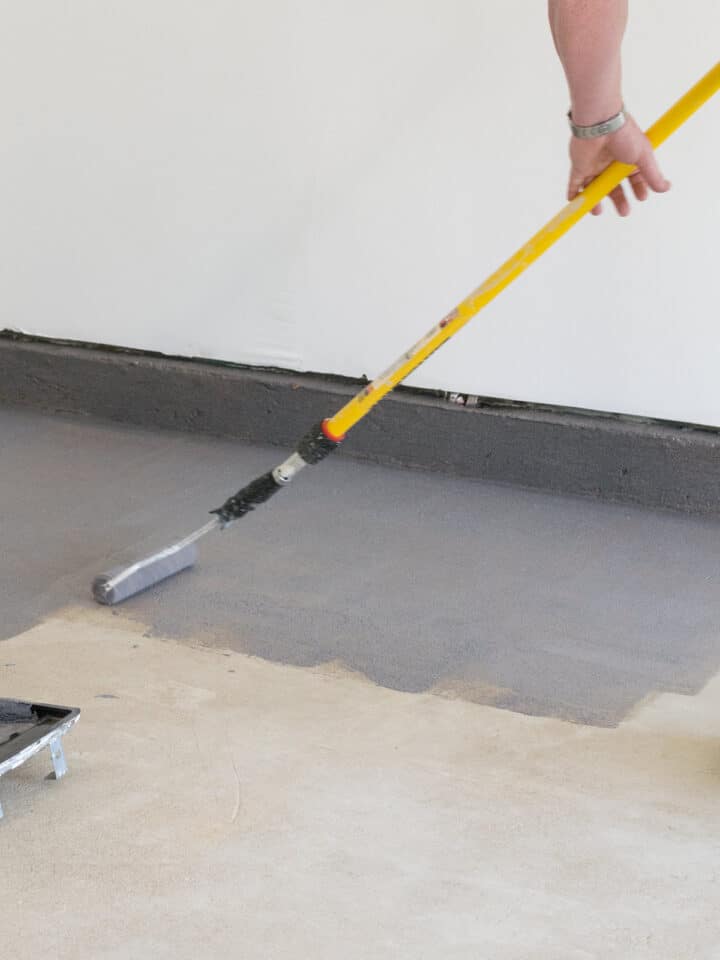
Priming Outdoor Concrete Surfaces
For the most part, concrete is such a rough, porous surface that you won’t need a primer. The exceptions may be for certain stains that can bleed through. In these cases, I would recommend a high-quality sealer type paint. To avoid confusion, the paints that I recommend have the added benefit of a waterproofing sealer. This can be an epoxy or an acrylic paint, so you don’t need an additional product.
However, if you have particularly stubborn stains and removed as much surface level dirt and oil from the stain, the best bet is to give the first coat time to completely dry and seal before doing a second coat.
Painting Exterior Concrete & Mortar
This is where the fun begins! You can use either a concrete sealer or a paint design for concrete and masonry surfaces – do not use latex paint! My recommendations for products are for vertical or low traffic areas. The paints that I recommend can be used on concrete patio floors and pool decks, but I would probably use a thicker coating type of material that has additional protection. I have not used these particular products for that application.
In our project on my parent’s house, I painted all of this surface with a paintbrush. A roller and long handled paint pole would be better for large areas that aren’t too heavily textured.
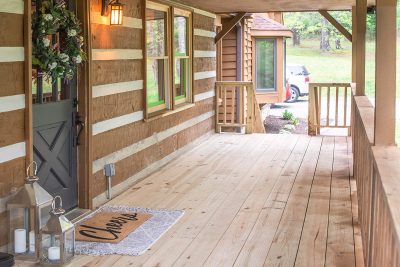
Do you see how much more vivid and uniform the masonry looks? We used a light gray color, but the contrast of the stain made it appear brighter. Since this paint is made specifically for masonry, I know that it is durable and will look great for years to come.
Tips for a Successful Project
- Make sure the surface is completely clean and dry before painting.
- Try to choose a day that is lower humidity and not subject to rain before the paint can dry. Not having direct sun and not when the concrete is hot is best, but I understand that may be asking for miracle conditions.
- Most of the time, product failure is due to improper prep work. Don’t take shortcuts on the prep!
- A good painting technique will have the best finish. Much like painting walls, work in one direction with overlapping strokes and don’t go over paint that has started to dry. Plan out how you are going to paint a section.
- I generally prefer a more matte finish (not super shiny) – Shiny looks unnatural and can make the surface slippery when wet.
Looking for More Outdoor Project Tutorials?
Frequently Asked Questions
There are several choices for exterior vertical surfaces such as basements and foundation walls. All are durable and resist fading over time:
Behr Dry Plus is a waterproofing paint that helps with any moisture issues. It can resist up to 12 PSI of water pressure. This paint is perfect for a basement that is underground or any area prone to dampness. Paint isn’t a substitute to repair leakage problems, but this paint is a quality waterproofer. The one drawback? This product comes in a limited color selection.
One the other hand, Behr Masonry, Stucco and Brick paint is excellent for exterior applications where waterproofing under pressure isn’t needed. It has excellent hide, coverage, adhesion and water repellency. This is the product we chose for our exterior application, and we are thrilled with our results.
The last consideration is Behr Elastomeric Masonry, Stucco and Brick Paint. This product is mostly used to even out a surface. It will fill in hairline cracks, but it won’t perform miracles. You’ll still need to patch anything larger.
Most brands of exterior concrete paint suggest they last about 3-5 years. They may last longer depending on the wear and tear it’s exposed to. It also helps prevent water from seeping into the exposed concrete and causing damage.
Concrete paints and stains help brighten surface discoloration, patching, and signs of age. They can also they extend the life of concrete by preventing further damage and making cleaning easier.
Both have pros and cons. Concrete stain embeds the surface to color but offers no significant protection without an additional sealer. Opaque concrete paint covers the top of the concrete and reduces visibility of stains. However, improper application can be subject t to chipping and peeling.
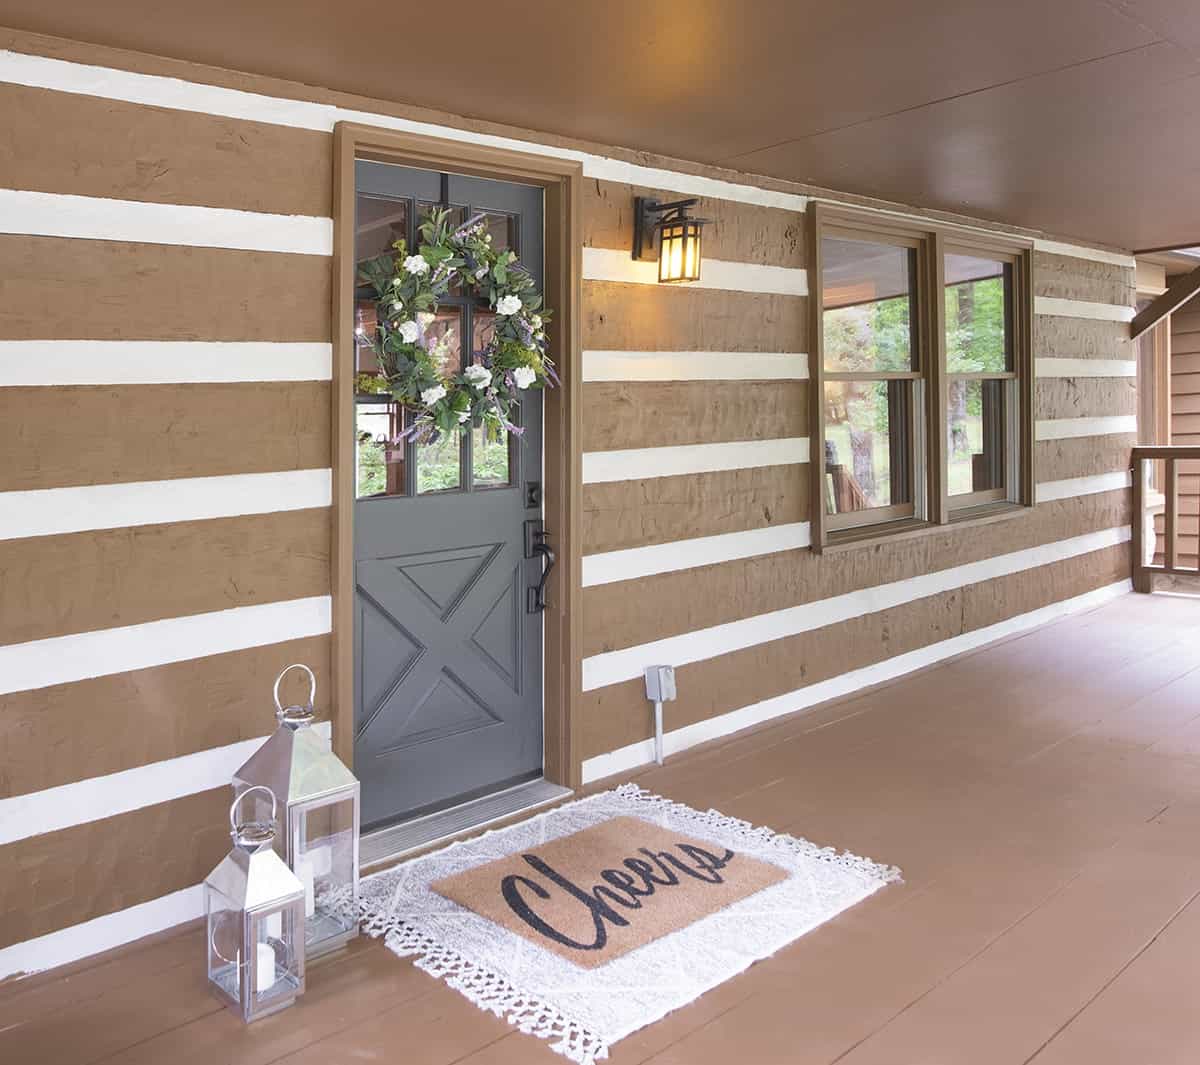
Such an improvement! This porch maintained all of its rustic charm but with a clean, fresh update.

Grab our free series "Weekend Home Projects that will Transform Your Life" Sign up below to receive updates including free printables, organization tips, home improvement projects, recipes and more! |
More Exterior Projects
PS I love seeing your creations! Be sure to take a photo and tag #cravingcreative on Instagram! You can also stay in touch with me through following me on Instagram, Pinterest, and subscribing to the newsletter!
How to Paint Outdoor Concrete
Tools
- Power Washer Optional
- Handheld Grinder For uneven places or large cracks to repair.
- Paint Brushes
- Safety Equipment Safety glasses, gloves, etc if using a grinder
- Painting Supplies Paint tray, stir stick, paint can opener
Supplies
- Degreaser Cleaner If you have oil stains.
- Exterior House Cleaner For general purpose cleaning and algae removal.
- Concrete Patch Filler
- Adhesive Roller
- Paint or Sealer See recommendations at the bottom.
Instructions
- Patch gouged or otherwise damaged areas with concrete filler.

- Clean the concrete surface to remove mold, algea, dirt, and other contaminants.
- Let the surface dry thoroghly.
- Brush or roll the paint onto the perimeter of the concrete area and the roll on more paint to fill in, working in one direction with overlapping strokes.

Cristina says
Pool party scheduled first weekend of May. But the pool deck was a MESS! Not anymore. 💪🙏
Helene says
We are getting ready to list our house and have so many little repairs like this one to do. I’ve been DREADING it…until now! Thank you!
Everleigh says
What an incredible transformation!
Harry says
Thanks for introducing me to fast setting hydraulic cement. Always love to discover products that cut my workload down.
Anastasia says
Bubbles appeared in my paint after the after application. Any idea why?
Rachel says
Hey Anastasia, sorry to hear that. Typically bubbles form because of a prep issue, or from humidity and/or too-high or too-low temperatures. Any one of these factors can prevent paint from setting properly.
Victor says
Great post! Question- is there a specific power washer you recommend?
Rachel says
I don’t have a brand I specifically recommend, but I do like one with a higher PSI, at least 2000. It’s one of those you may not need, but you are glad to have it if you do need a higher psi.
Lorelai says
Love this! Just in time for my upcoming project. Does exterior paint stick to concrete?
Rachel says
I would avoid using exterior house paint on concrete. It’s not intended for this purpose so you’re taking the risk of cracking and peeling.
Lizabeth says
Love the product recommendations! I walked into Home Depot “armed” & ready. 😂
Drea says
These DIY’s truly make me feel like super woman. So empowering!
Bev says
Raise your hand if you’ve been a victim of premixed concrete tubes. 😓Thank you for making me feel like less of a #fail.
Katherine Warlund says
Thank you. Your post was very clear and concise.