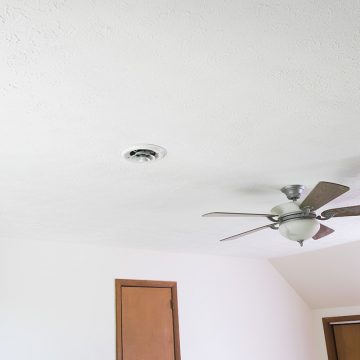
Have water damaged textured ceilings or need to patch a hole? Almost every wall develops flaws at some point, but you can perfectly repair a textured ceiling with these tips and step by step instructions.
I will be the first to admit that I may not be the biggest fan of textured ceilings. While they hide imperfections extremely well, textured ceilings attract dust and are more difficult to paint and repair.
But there are the memories! I can remember staring up at ours and seeing different images in them – sort of like cloud watching. Mostly flowers or stars, but occasionally a witches cruelly smiling face or Snoopy laying atop his dog house.

Now removing a textured ceilings in large rooms can be a very big job. This house is going up for sale, so repairing spots is much more manageable. We love repairing older homes including repairing baseboards, painting kitchen cabinets, and full bathroom remodels, so this was one of our easier jobs!
The specific texture can be a challenge to replicate and match to the surrounding textured surface. But I’m showing you it is pretty easy once you get the right tools!
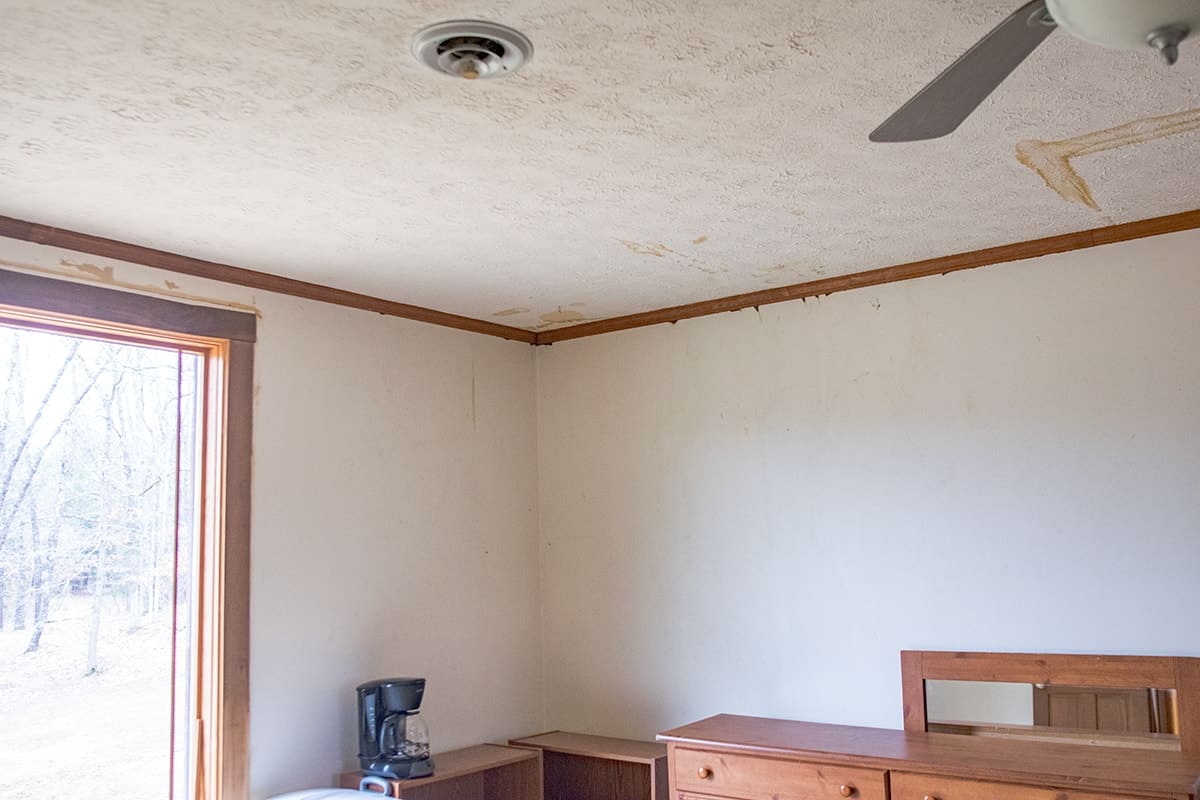
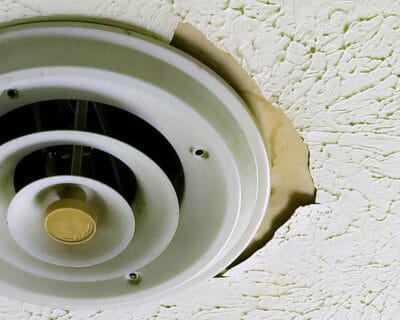
In our case, the damage was from a leaky roof several years ago. The roof had been replaced and there was no mold, so now it was time to repair the ceiling.
How to Hide Ceiling Stains
First, not all water damage requires removing or patching the ceiling. Some damage can just be water stains if the ceiling texture isn’t chipping, falling or molding. In those cases, use an aerosol sealer like my favorite from Kilz. This sealer hides discoloration and stains like smoke, water stains, and cooking oils.
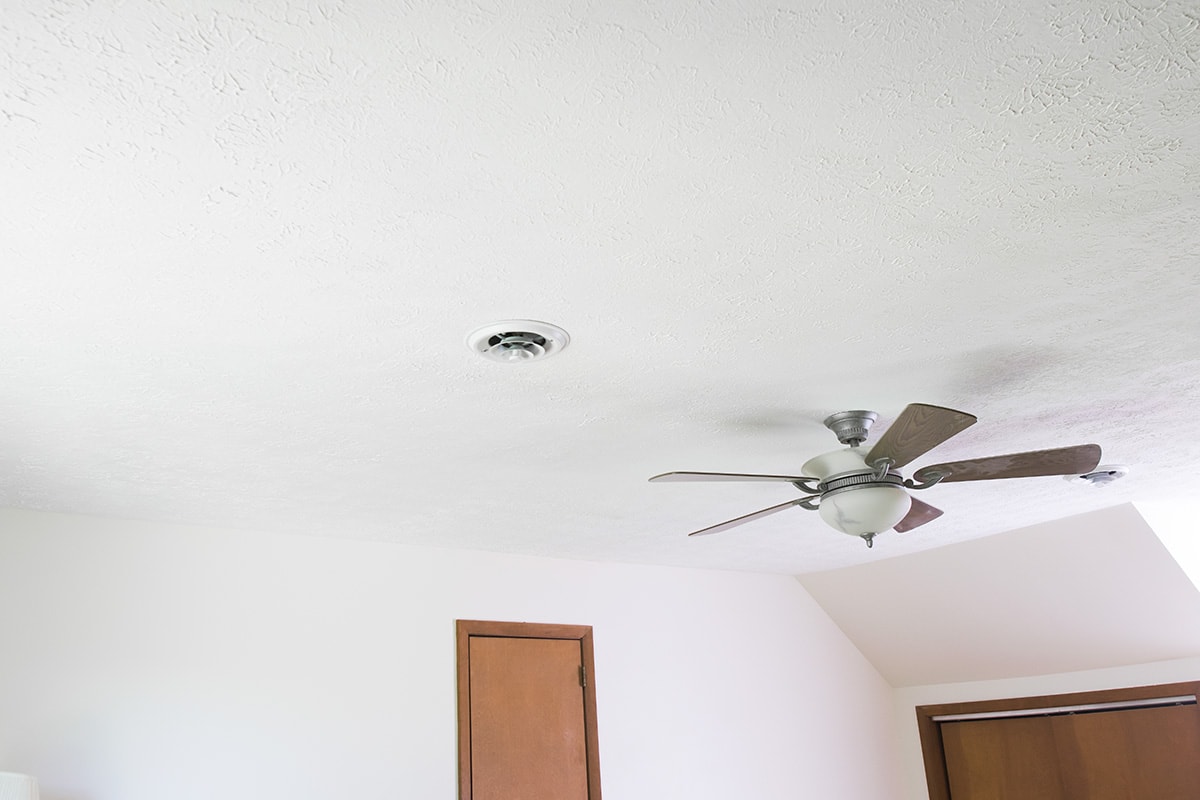
After the sealer dries, paint the area with ceiling paint. You will probably have to paint the entire ceiling since it can be difficult to match the previous color.
Ceiling Texture Types
Repairing a hole or damage to a textured ceiling depends on your ceiling texture type. Types of ceiling texture include
- Knockdown texture
- Orange peel texture
- Crow’s foot
- Popcorn
The single hardest part of this job is figuring out which ceiling texture type you have. Here is a handy list of ceiling texture types and the tools used to create them:

Find them by clicking the corresponding number:
1 | 2 | 3 | 4 | 5 | 6 | 7 | 8 | 9 | 10
Now, this list is by no means comprehensive. There are as many ceiling texture types as there are people who create them. Feel free to ask any questions if you have a particular type of ceiling texture.
Step by Step Instructions
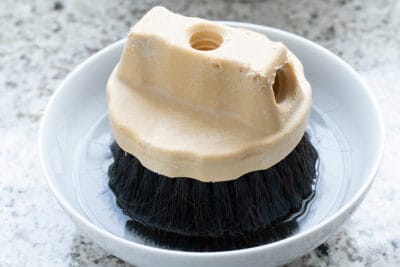
1. Soak Ceiling Texture Brush
With the exception of the orange peel and popcorn ceilings, all of the other textures use joint compound and corresponding brush to create the pattern. For brush textures, soak the brush in warm water for at least an hour, or overnight. This softens the bristles to create the right texture for your ceiling.
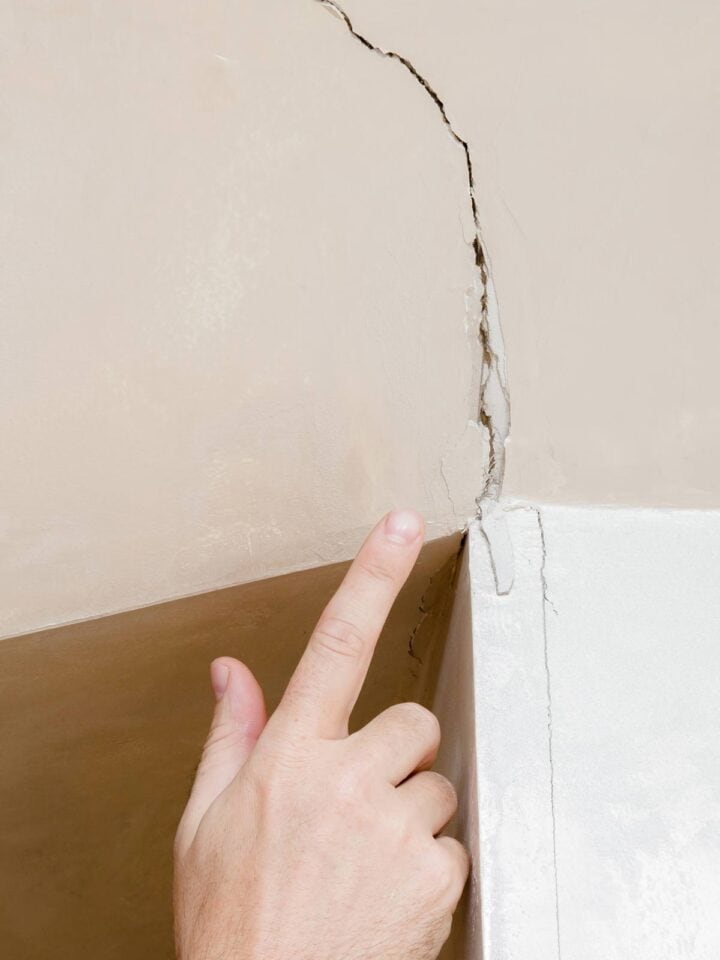
2. Prepare the Surface
Remove any loose ceiling texture from the old ceiling and repair holes. I usually find that if you can get under it with a putty knife, it will come off pretty easily. You wil also need to repair any deep drywall cracks or taping problems.
If you have any water damage, I highly recommend using a stain blocker like this spray stainblocker to keep the old water damage from bleeding into paint.
Pro Tip: The one thing I try to do when patching a textured ceiling is to make sure I don’t have any long, straight lines between the old and new. An irregular edge makes it easier to hide a patch to the observer.
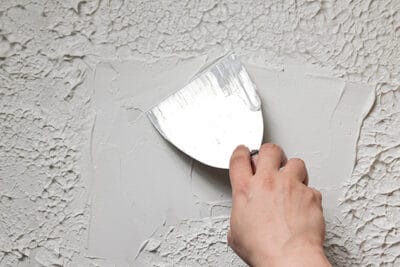
3. Apply Joint Compound
The technique will vary slightly with what texture you are trying to match, but here are the basics.
- Mix the joint compound with a paddle and drill or small portion with a paint stick or large spoon to loosen and remove bubbles.
- Test out your pattern on a spare board or extra piece of drywall until you get the right texture. I find that first working the compound into the brush makes the pattern more even when applying.
- Once you’re ready to move on to the real area, spread the joint compound on with a putty knife across the area to be patched. Try to blend any edges with the existing texture. You aren’t trying to create texture yet, just get it up on the ceiling relatively smooth. Don’t be shy with it either, put it on at roughly as thick as the existing texture.
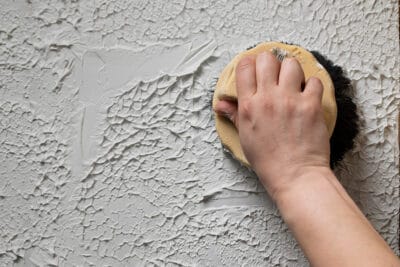
- Using your texture tool, stomp the texture into the applied joint compound in the same fashion as the practice board.
- If you have a knockdown ceiling, you will have to use a large putty scraper to go across the texture to smooth it to the knockdown texture. Wait a few minutes after the applied texture is set before knocking down.
4. Paint
Once you've achieved the pattern or texture you desire, wait overnight or longer before painting.
Pro Tip: White ceiling paint is very hard to match perfectly, so plan to paint the whole ceiling unless you don’t mind a line where you patched.
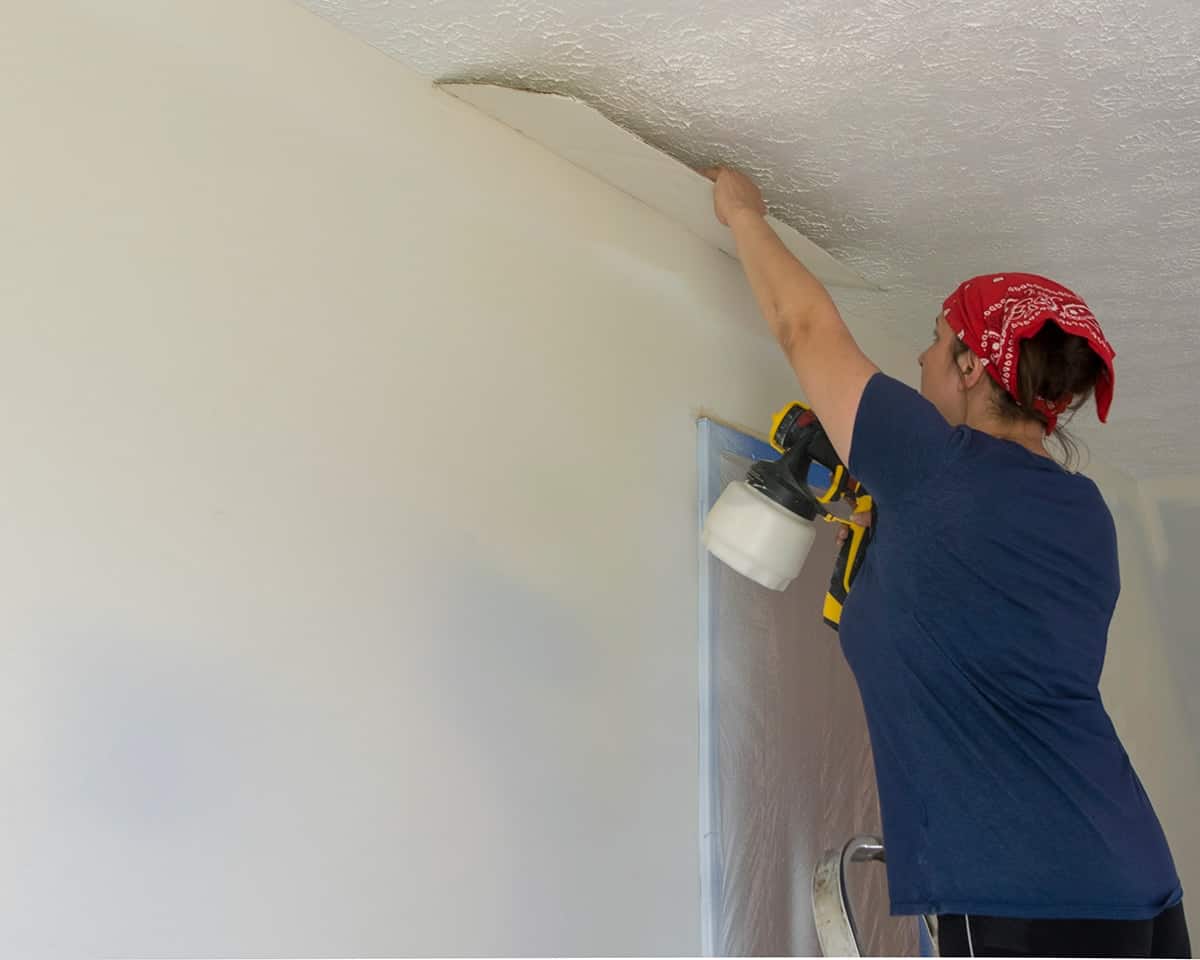
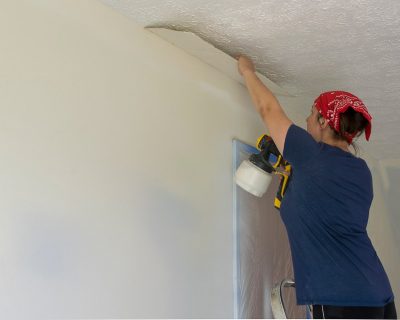
We used our handy paint sprayer to paint both the ceilings and the walls, which made it happen in maybe ⅕ the time it would have taken! Yes, your arms will ache spray painting a ceiling, but honestly, they are going to ache even more with a roller.
FAQs
Textured ceilings are indeed outdated. While they hide imperfections extremely well, textured ceilings attract dust and are more difficult to paint and repair.
Popcorn ceilings are different from other textured ceilings because popcorn is usually sprayed on, whereas textured ceilings are created from applying plaster in a pattern with a decorative brush.
There are no special requirements for a textured ceiling vs a smooth ceiling paint.
Materials required to make ceilings smooth is about $100-150, including stripper, scrapers, and sanding materials. However, this job can be extremely labor intensive if the ceilings have been painted multiple times. Truthfully, in a few cases, I have considered re-drywalling easier than removing the texture because it can be so labor intensive.

Grab our free series "Weekend Home Projects that will Transform Your Life" Sign up below to receive updates including free printables, organization tips, home improvement projects, recipes and more! |
More Painting DIY Tutorials
PS I love seeing your creations! Be sure to take a photo and tag #cravingcreative on Instagram! You can also stay in touch with me through following me on Instagram, Pinterest, and subscribing to the newsletter!
How To Patch a Textured Ceiling
Tools
- Wide Putty Scraper
Instructions
- For brush textures, soak the brush in warm water for at least an hour, or overnight. This softens the bristles to create the right texture for your ceiling.

- Remove any loose plaster by scraping off with a dry putty knife. If you have stains, use a stain blocker like this spray stainblocker to keep the damage from bleeding into paint.

- Apply joint compound. Test out your pattern on a spare board or extra piece of drywall until you get the right texture. Once your ready to move on to the real area, spread the joint compound on with a putty knife or magic mudder across the area to be patched. Try to blend any edges with the existing texture.
- Using your texture tool, stomp the texture into the applied joint compound in the same fashion as the practice board. If you have a knockdown ceiling, you will have to use a large putty scraper to go across the texture to smooth it down to a knockdown texture.
- Once you've achieved the pattern or texture you desire, wait overnight or longer before painting.
Notes
- The single hardest part of this job is figuring out which ceiling texture type you have. We have a handy list in the post to compare.
- With the exception of popcorn and orange peel, all textures are applied using a corresponding brush to create the pattern. Popcorn and orange peel are made using a spray.
- An irregular edge on the patch area makes it easier to hide a patch to the observer.
- White ceiling paint is very hard to match perfectly, so plan to paint the whole ceiling unless you don’t mind a line where you patched.
Stan W. says
I really enjoyed your detailed guide on repairing textured ceilings! The step-by-step instructions are incredibly helpful, especially for those of us who might be hesitant to tackle such a project on our own. I appreciate how you broke down the different techniques for various types of textures, making it easier for readers to find the right approach for their specific ceiling style.
Your tips on matching the texture are particularly useful; I can imagine how important it is to achieve a seamless finish. I also love the idea of using a spray texture for larger areas—what a time-saver!
As someone involved in construction, I’m curious about your recommendations for tools that work best for this kind of repair. Are there specific brands or types of sprayers you find particularly effective for achieving a professional-looking texture?
Rachel says
There aren’t many brands these days making each specific tool for each job or sprayers like for popcorn ceilings, so I don’t have recommendations on specific brands. It’s more about checking the quality and shape of exactly the look you are going for and a fair amount of testing technique until you get the skill right.
Janae says
This is awesome. The recent storm brought in some leaks to my ceiling that will need to be chipped off and re-textured. Also need to work on the flooring. Do you have any tutorials for that? Thinking about getting a specialist involved, not sure if I can do it all myself. Thanks!! ❤️
Rachel says
I have guides on vinyl flooring, installing glue down flooring, and painted floors. I also have some tutorials on tiling floors and click plank vinyl flooring coming soon.
Janae says
Thank you so much! Will check these out ❤️ still haven’t gotten around to it
Patty says
Very interested in learning if this can work for me. I textured a bathroom ceiling to cover imperfections..seems pretty close to shower area a moisture area with previous leakage..102 yr old house. Most turnout pretty darn good cept this one smaller area about 1’x1′ around. Do I scrape area of mention and apply spackle, then when dry possibly next day use said sponge to reapply the texture? Please and thank you!
Rachel says
If you scrape/remove the unhappy section, generally using the same process as before should work. I add the texture while the spackle is still wet, but there may be some limitation to your particular project I am not aware of. Does the moisture area just have a stain or did it crack off? If it is just stain, you can repaint that with a stain blocking primer and then paint. When trying to repair a ceiling, I do find that it is best to not have a straight line between the old and new. What I mean by that is it is easier to hide that you patched in a spot if you don’t remove a perfect square of the old texture. A jagged line generally looks more natural. I hope that makes sense.
Tom says
I need to repair my ceiling.
You mention how hard it is to match the stipple pattern. Do you have a guide that shows the desired pattern to the stipple tool ?
Rachel says
I say that it can be difficult to match a previous stipple pattern because these patterns are handmade by whomever spackled the ceiling. It is almost like a painting. Therefore, replicating someone else’s personal technique (how much pressure they used, swirling, etc) takes some practice but can be done. In repairing a few different styles of ceilings, I always use a practice piece of drywall to get it right.