Garages are usually a storage catch all. Learn how to maximize this valuable space with proper planning and real-life organization solutions. Cut the clutter and create a functional extension of your home for work, storage, and play!
Why does the garage become the catchall for odds & ends, project leftovers, and things we’ll call “maybe I’ll use this again someday?” This valuable space can quickly become a pain point without solid organization.
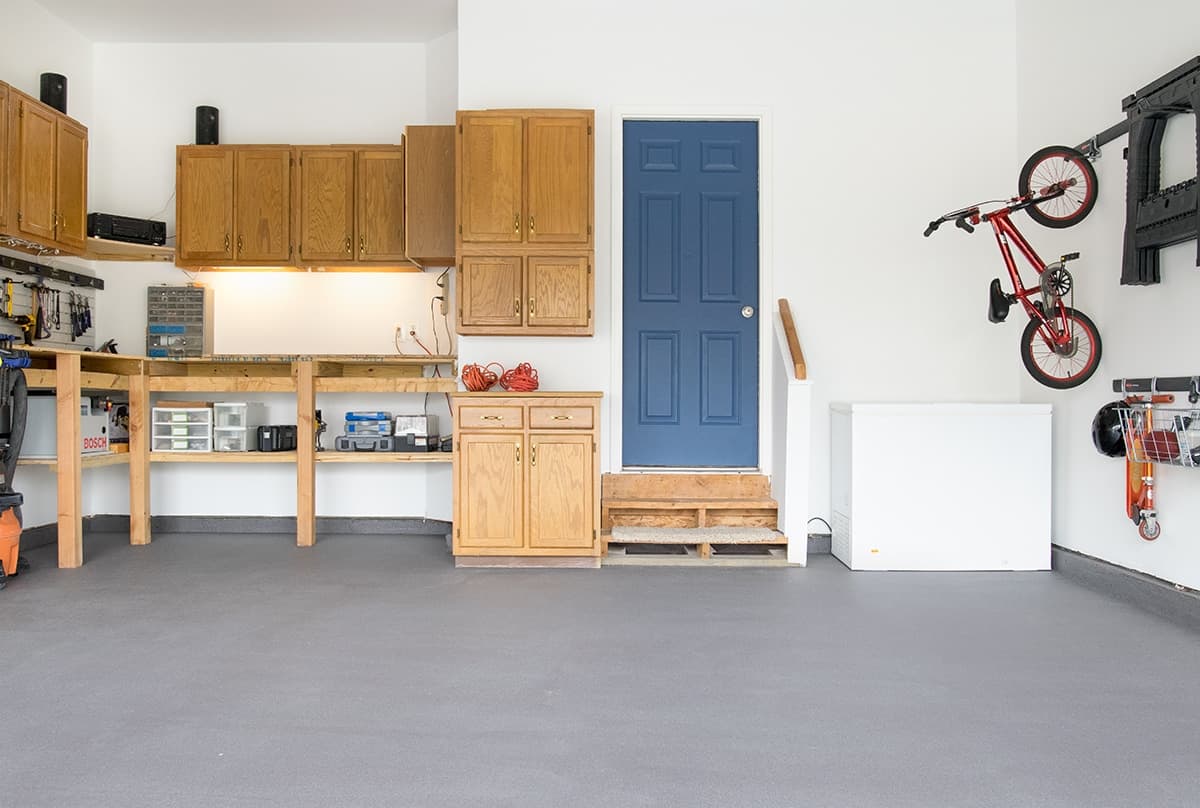
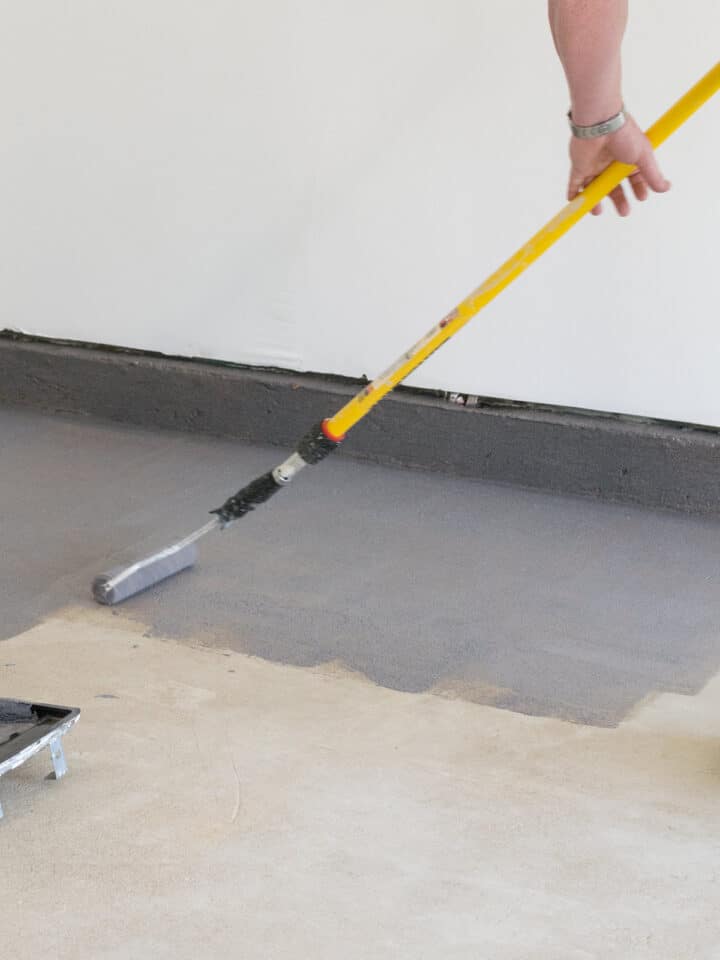
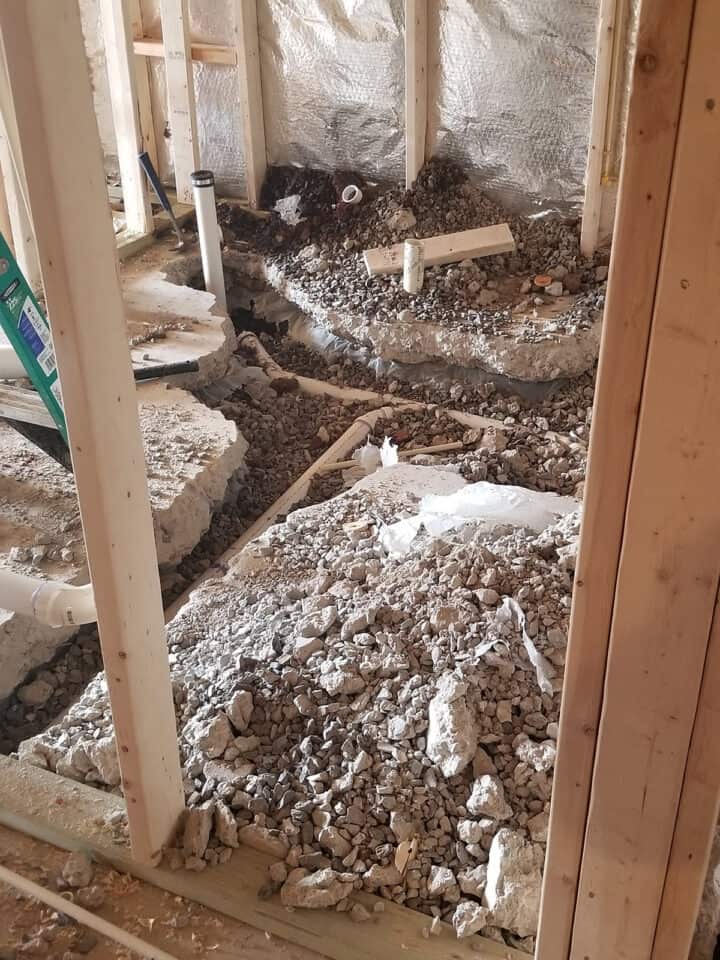
First, we completely remodeled the area including the garage floor coating and mudding and priming the walls. Determined not to let our garage slide back into disarray, we installed several practical organization systems to keep the area orderly year-round.
Organizing the garage shouldn’t take more than a weekend. If the thought of diving into this task makes you cringe, follow our easy guide on organizing any room in one day for time saving tips. Since most homeowners have experienced a love/hate relationship with their garage at some point or another, I’m sharing 15 brilliant garage organization ideas and tips to make your space functional once and for all!
How to Start Cleaning the Garage
Before we renovated our garage, it was cluttered with remnants of DIY tasks. In fact, when we’re knee deep in a big renovation project it kind of feels like we have a garage with an attached house, more so than the other way around. We needed to whip our space into shape! Here are the 5 steps we use to clean out a garage:
1. Evaluate Your Needs
Organization means nothing without function. Start by listing goals for the garage.
- How much space do you need to park the car(s)?
- Prioritize your spatial needs. Does having space for the workbench take precedence over other needs?
- Make goals manageable. Locating the Christmas lights without opening 10 boxes is a sustainable goal, whereas rotating boxes of seasonal items each holiday is not.
2. Make a Plan
If you’ve ever been midway through a renovation, you understand how a fun project can pivot into a powder keg of tension. Streamline the process by making and agreeing to a plan in writing.
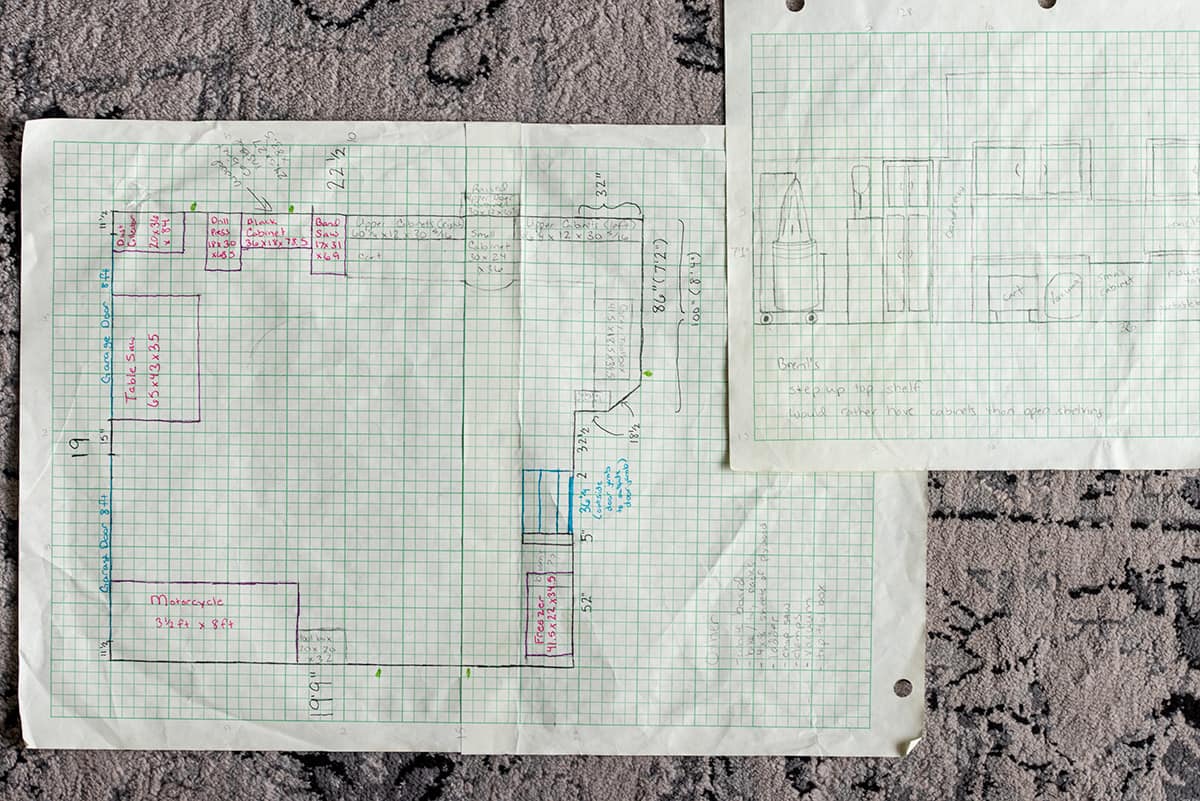
To create a visual reference tool for our garage renovation, I used the same method as I did for my craft room organization. We measured, mapped, and drew everything out on some graph paper.
3. Purge
There’s a famous saying that most of us don’t need more organization – we need less stuff. The garage is infamous for becoming the dumping ground for trash and treasures alike. Decluttering is the most rewarding step though.
Favorite decluttering tips:
- Choose a clear day and pull everything out into the driveway. (Sorry neighbors)
- Set up zones to group similar items.
- Comb through items twice. You may find it easier to part with things during the second purge round!
- Once you assign a new destination for an item (i.e. donation, Facebook Marketplace, etc) do it within one week of the cleanup. These items have a sneaky tendency to creep back into your space and be forgotten about again.
And while you have everything out, why not upgrade the flooring for better aesthetic and longevity?! Read our full tutorial on How to Paint a Garage Floor for a step-by-step project guide and product recommendations.
4. Pick Your Storage Systems
The BEST part of an organizing project is choosing new bins, am I right?! Check out some of our favorite organization bins here.
5. Putting it Away
Here’s the secret about organizing everyone has different logic for their organization method, and no one understands yours without explanation.
Helpful organization tips:
- Create “sections”- lawn care, athletic gear, cleaning supplies, etc.
- Think seasonally. How often do you need access to the object that you’re storing?
- Utilize eye-level storage options for easy access to items that are used most frequently.
My Favorite Garage Organization Ideas
- These stackable and sturdy bins can handle any storage job up to 75lbs.
- Purchase these bins for easy-to-spot storage for items ranging from photographs to linens.
- Small stackable storage bins keep bits and bobbles grouped inside.
- Glass or Plastic jars are ideal for housing nuts, screws, bolts, and much more.
- Keep spills at bay with this handy magnetic paper towel holder.
- A label printer makes labeling a breeze. Or just use some painter’s tape.
Free Standing Open Shelving
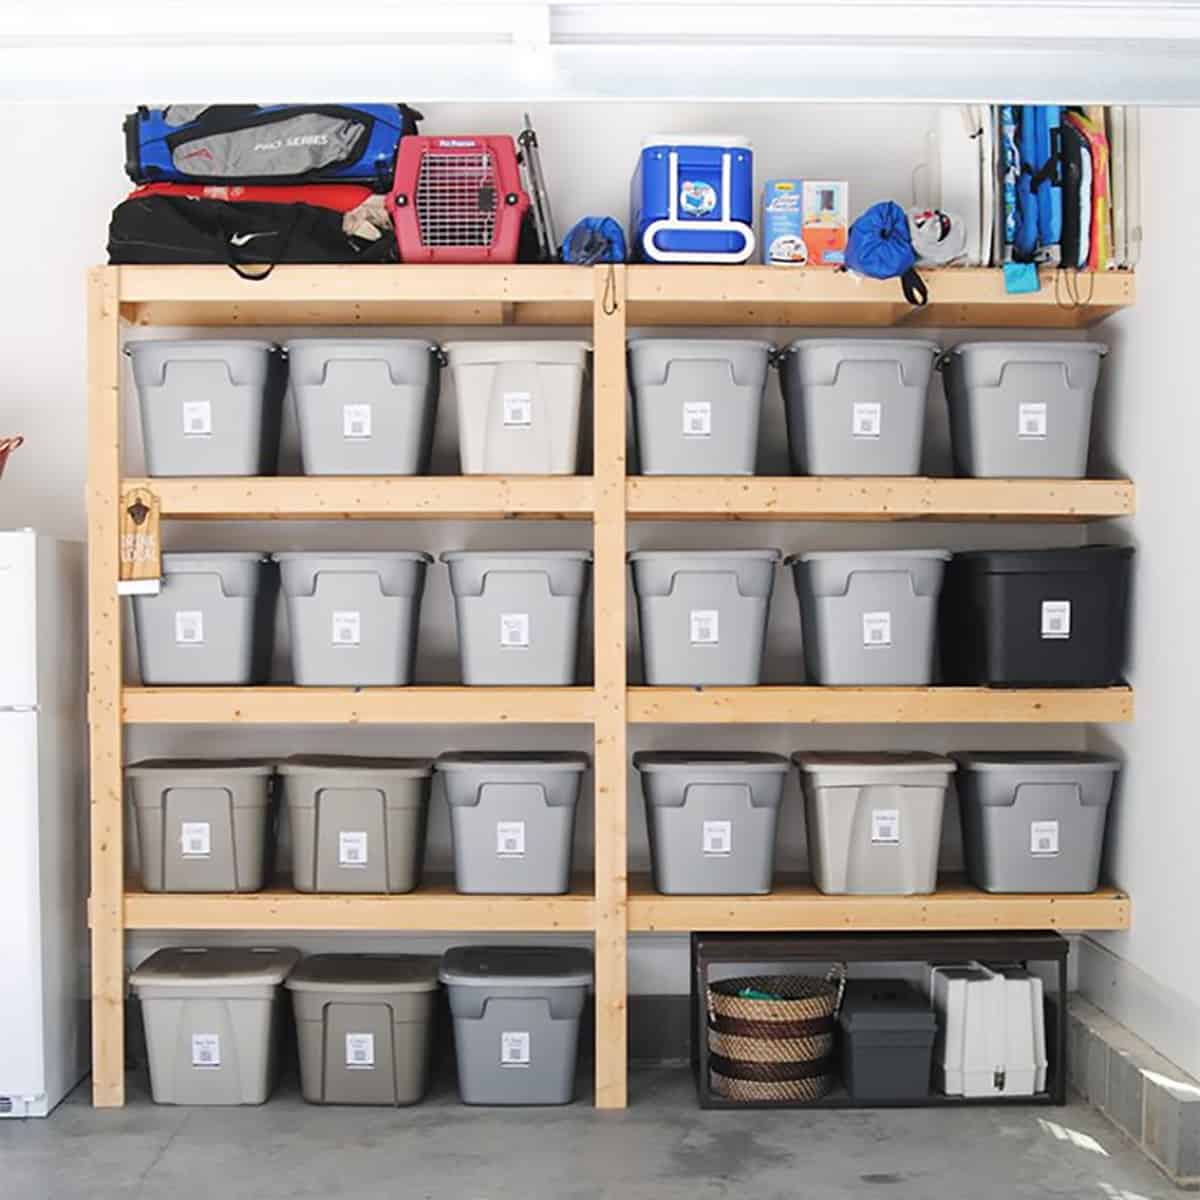
Why does it seem inevitable that the one thing you need always ends up in the bottom bin? So annoying! Avoid the pile pitfall of garage organization with freestanding shelving.
You can use metal, wood, or plastic shelves or build your own!
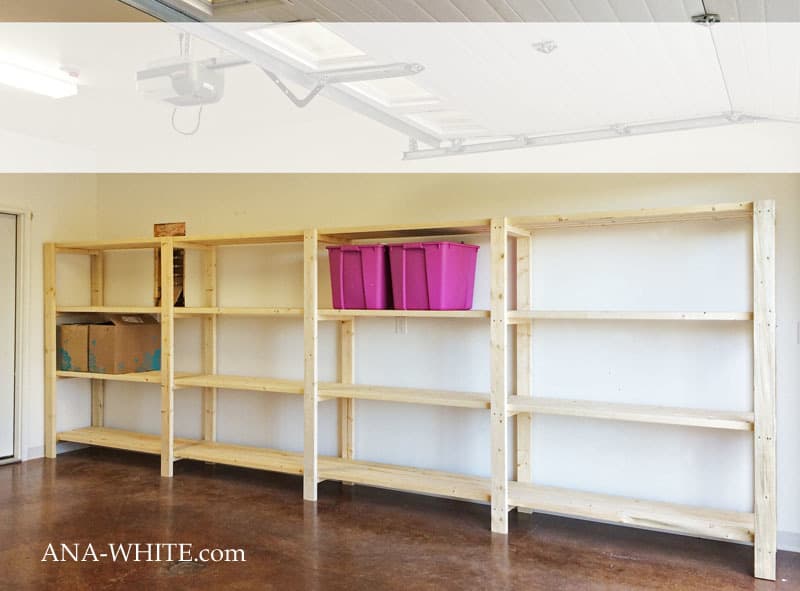
Wood shelves: Hardwood plywood is attractive, affordable, and easy to work with. Avoid using particleboard or MDF for outdoor shelving. These materials are more prone to moisture retention and sagging. Follow this tutorial from Ana White for DIY Freestanding Wall Shelves for a custom plywood open shelving unit.
Plastic shelves are lightweight, easy to install, and completely effective at withstanding heavy storage loads. It may be the most versatile option of all.
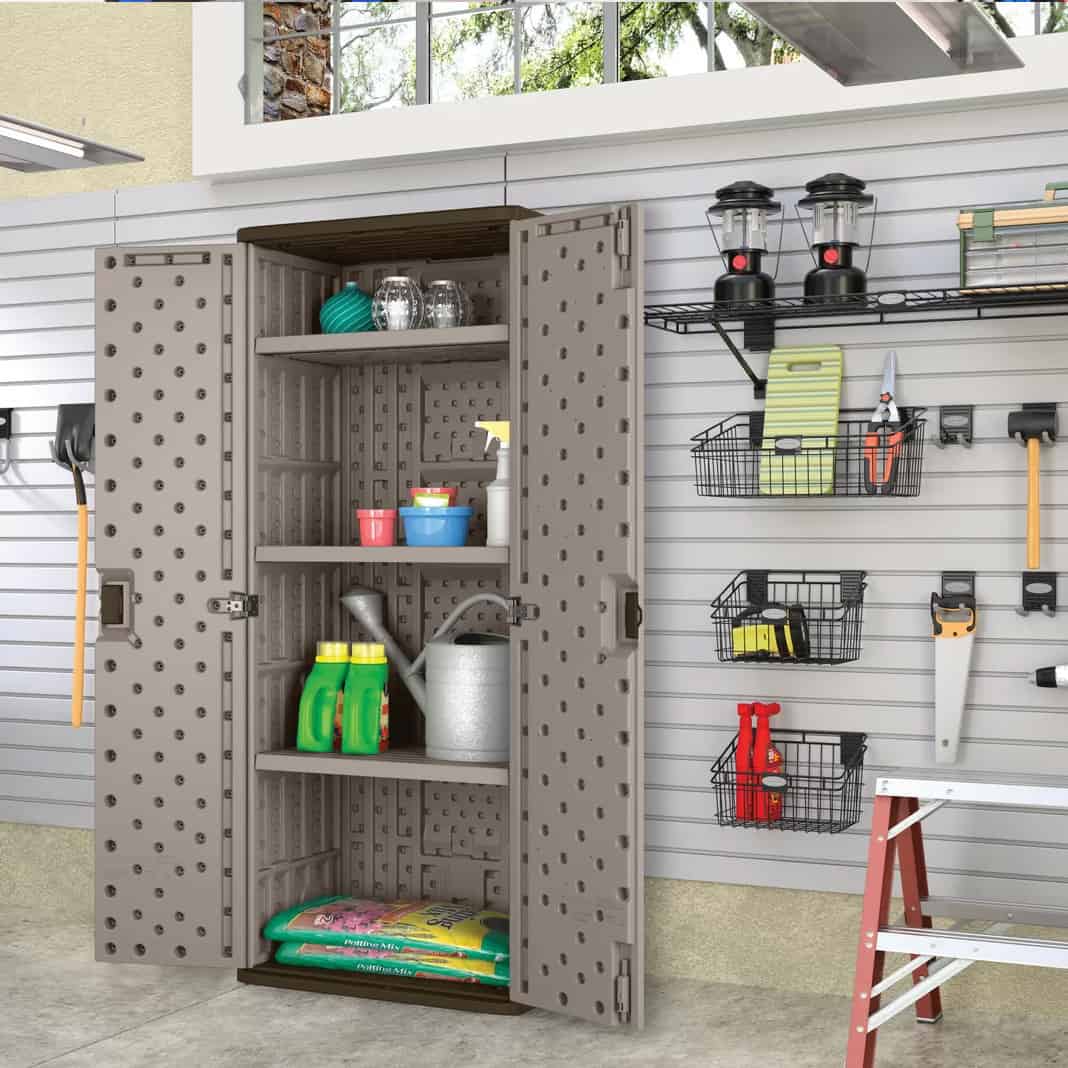
Closed Cabinetry
Similar to open shelving, free standing closed cabinets utilize vertical storage to free up valuable floor space. Closed cabinetry is comparably adaptable but offers additional unique benefits:
- Create a uniform look in your garage with contents neatly hidden behind closed doors.
- Organize cabinets according to themes (sundry goods, gardening items, painting products, etc.) to make it easy to find items and put them back.
- Keep hazardous materials locked up and out of the potential reach of little hands.
- Stored items and valuables are more protected from dusty garage debris.
This steel garage cabinet has lockable magnetic doors for a secure exterior. Interior pegboards and adjustable shelves make this a versatile storage solution for power tools, sporting goods and more.
A resin storage locker on wheels that’s easy to mobilize and built to last. This garage cabinet has three adjustable shelves and is secured by both an upper and lower latch to keep doors secure.
Wall Storage
What’s the secret to successfully maintaining an organized garage? Develop a storage system that easily adapts to your family's changing needs while leaving ample room for work and play.
We give even more options in our post on Garage Wall storage ideas! But here are some keys to success:
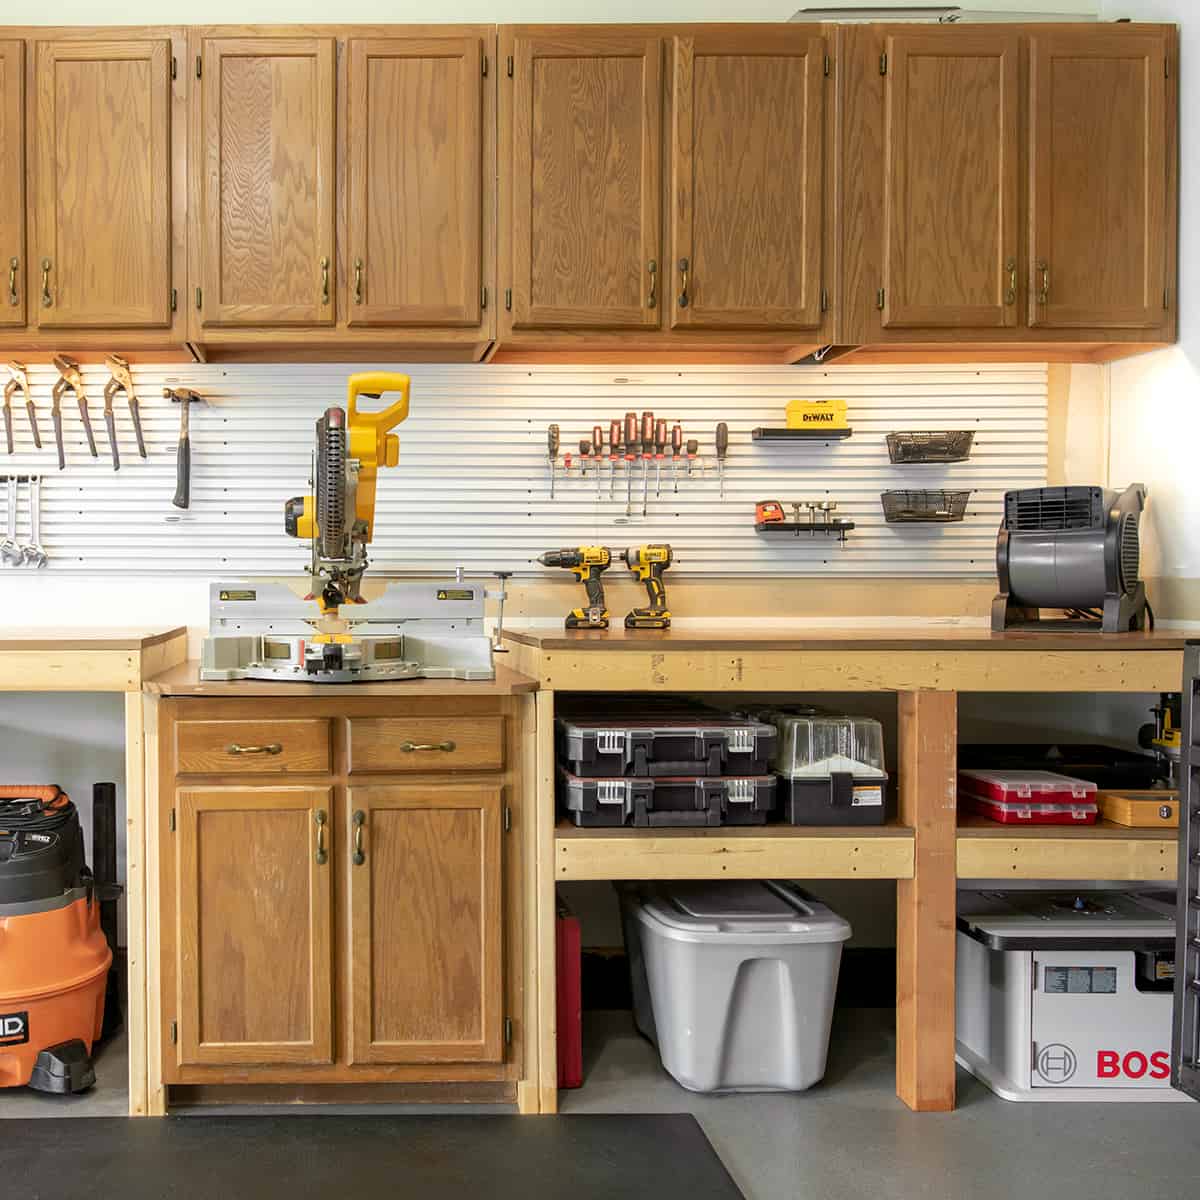
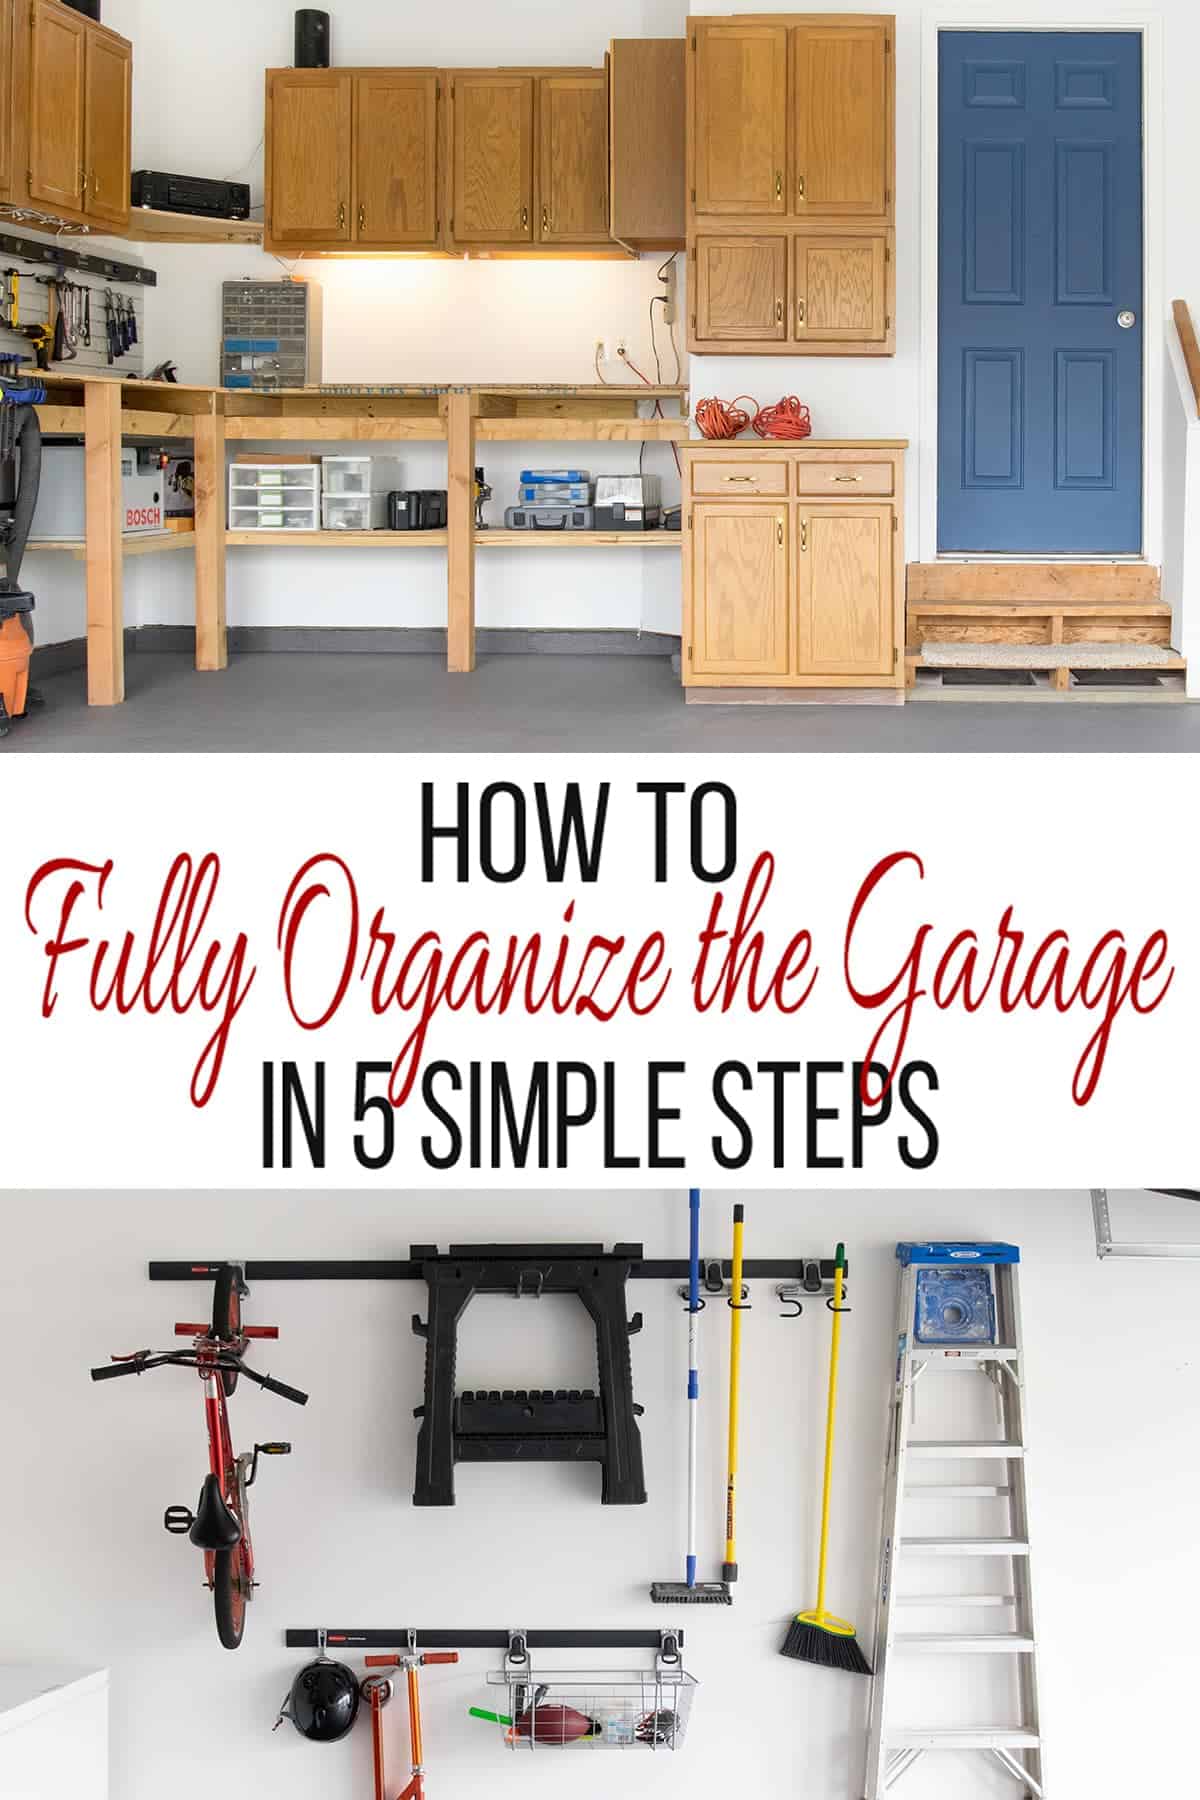
- Wall-mounted Closed Cabinets: Our garage storage includes repurposed kitchen cabinets. Search sites like Facebook and Craigslist for people selling old cabinets during kitchen overhauls. It’s an economical, environmentally friendly and efficient solution.
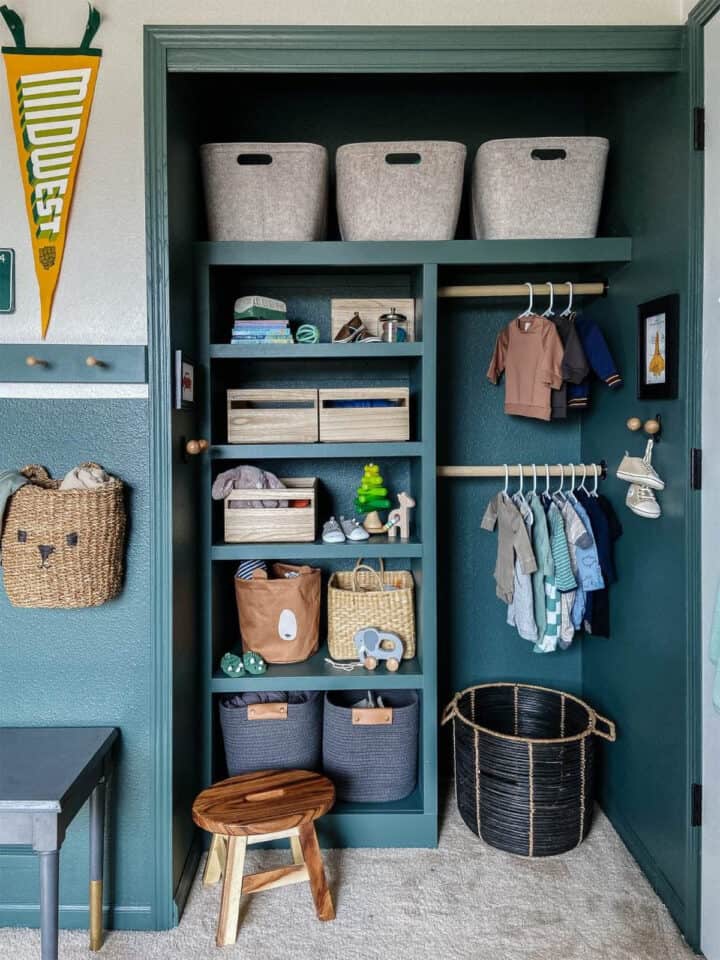
- Wall-mounted Open Shelves: Modular wall mounted shelves can be customized to fit into any space and to meet all of your storage needs. Open wall shelves keep items in plain view while the garage floor remains clutter free.
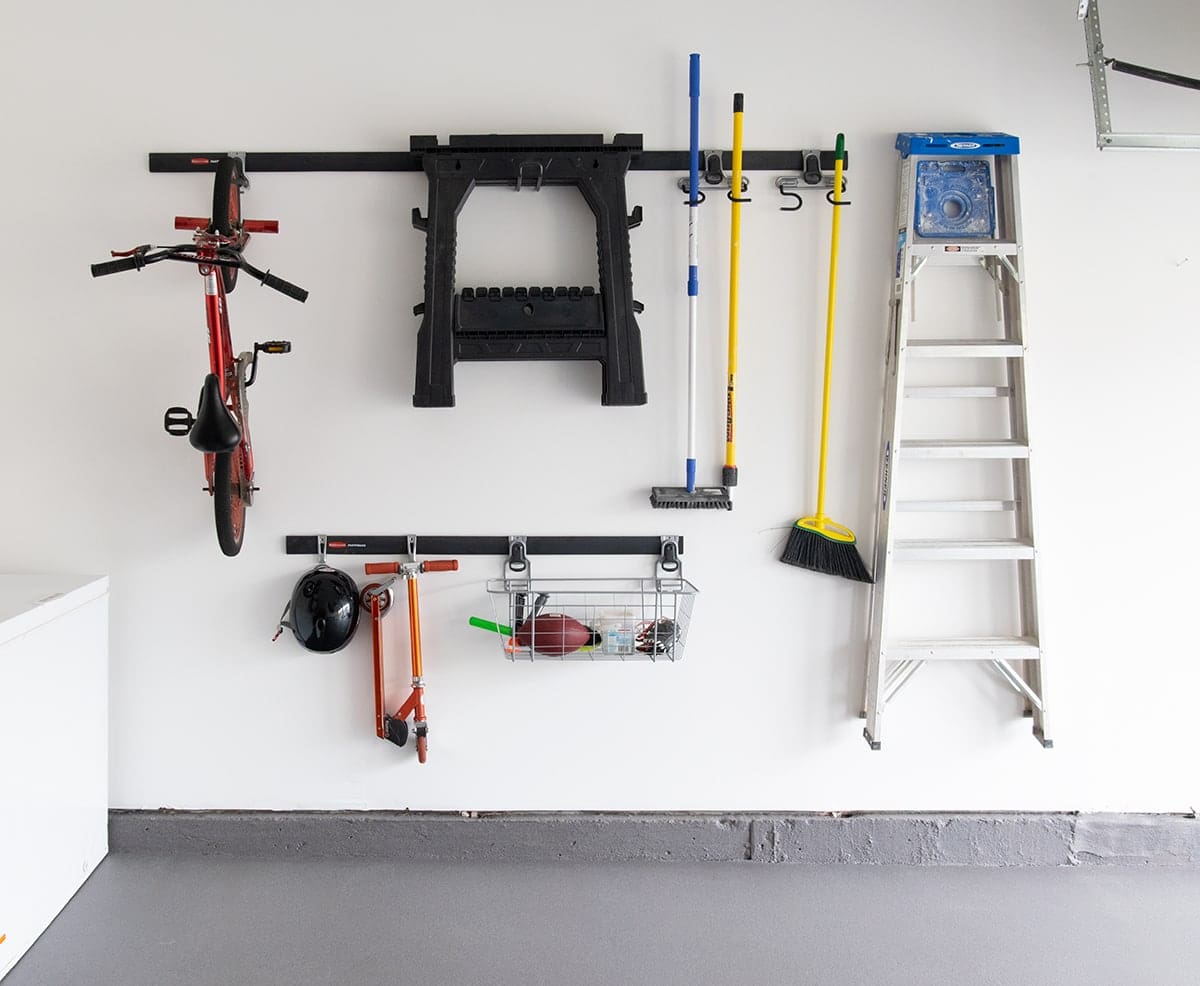
- Rail System: We chose a complete rail system to utilize our own garage wall storage because we wanted a bike rack and large mesh baskets. Rail systems have a plethora of options to tailor the configuration to your needs as they change and grow.
- Peg Boards: Pegboards are the MVP of storage tools. Metal pegboards are as easy to install as traditional pegboards. Reinforced metal holes won’t warp under duress from holding heavy items.
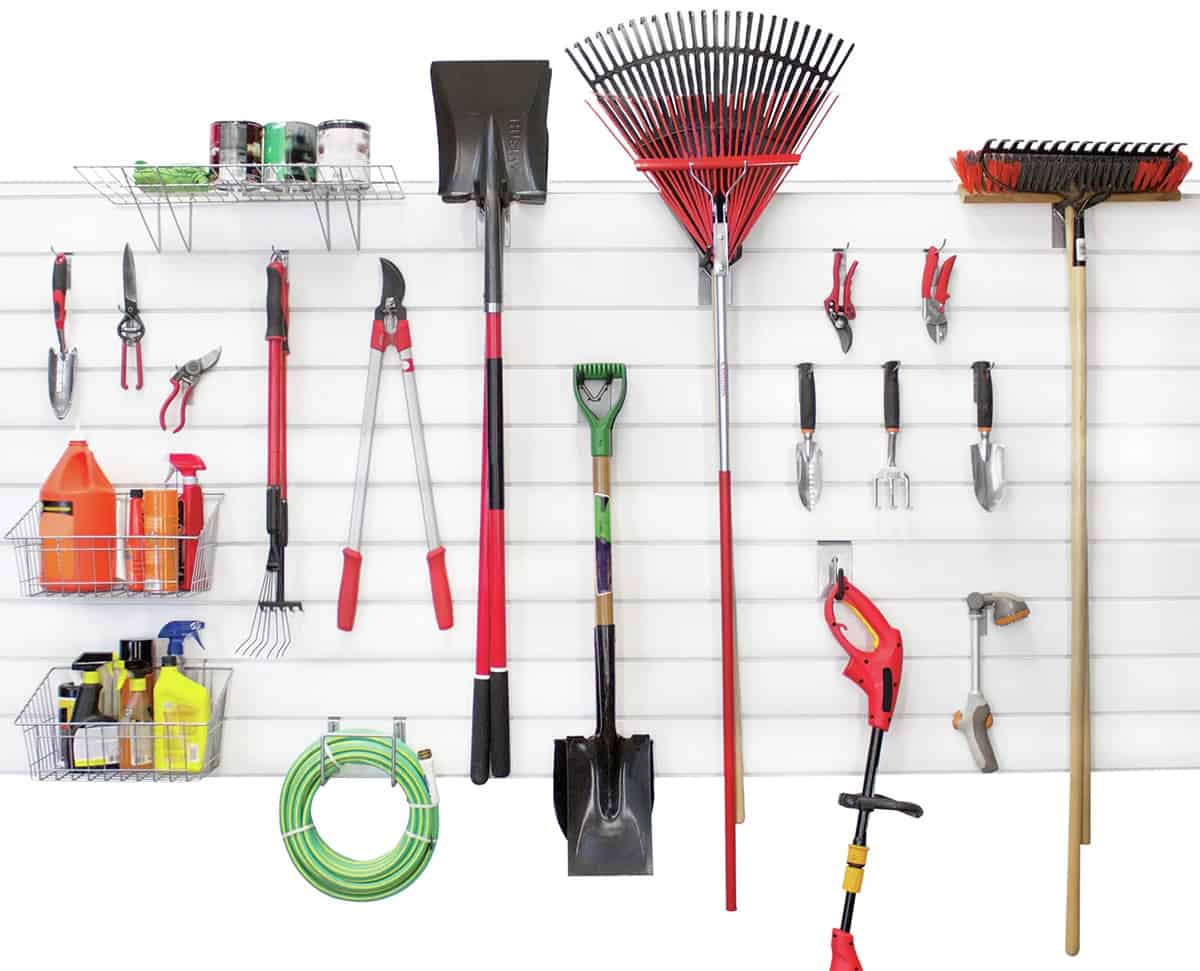
- PVC Slat Walls offer modular capabilities for customized garage storage. The slotted weather resistant panels hold hooks, shelves, and baskets to make a perfect slot for rakes, ladders, tools, and other outdoor items.
Overhead Storage
Another place we use open shelving is the ceiling above the garage doors. Yes, the ceiling! We use ours to store scrap wood boards, but this is excellent for seasonal decor items that only get used once a year like boating equipment or Christmas decorations.
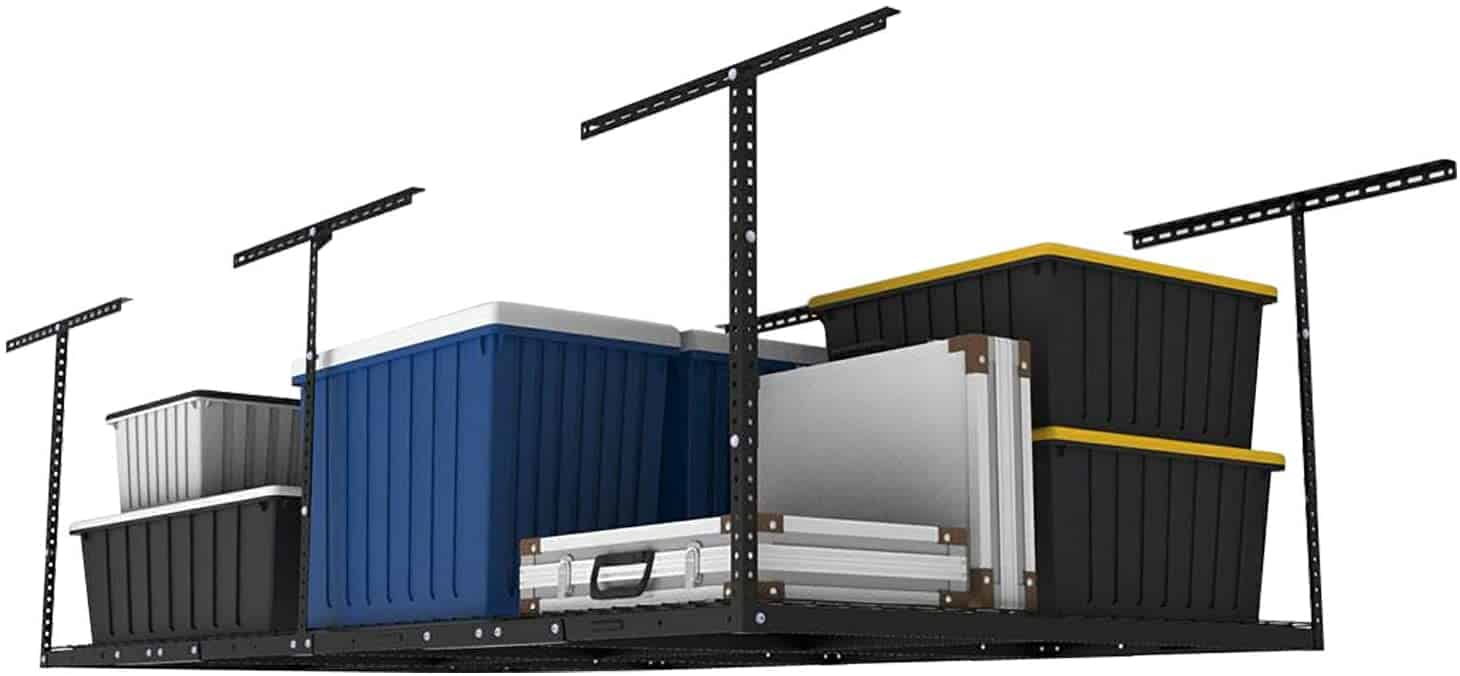
This adjustable overhead storage unit accommodates any size garage. Shelves shouldn’t interfere with your garage door’s operation and should leave enough overhead clearance for your parked vehicles.
Pro Tip: Open ceiling? Create a makeshift overhead shelving unit by laying a piece of plywood across the exposed rafters.
Tool Storage
Is it just me or do your tools multiply as fast as our bathroom toiletries? How did our garage end up looking like an aisle of Home Depot?
Tool Bench: If you’re a DIY junkie or tackle most of your home repair and maintenance tasks, a good workbench is a must.
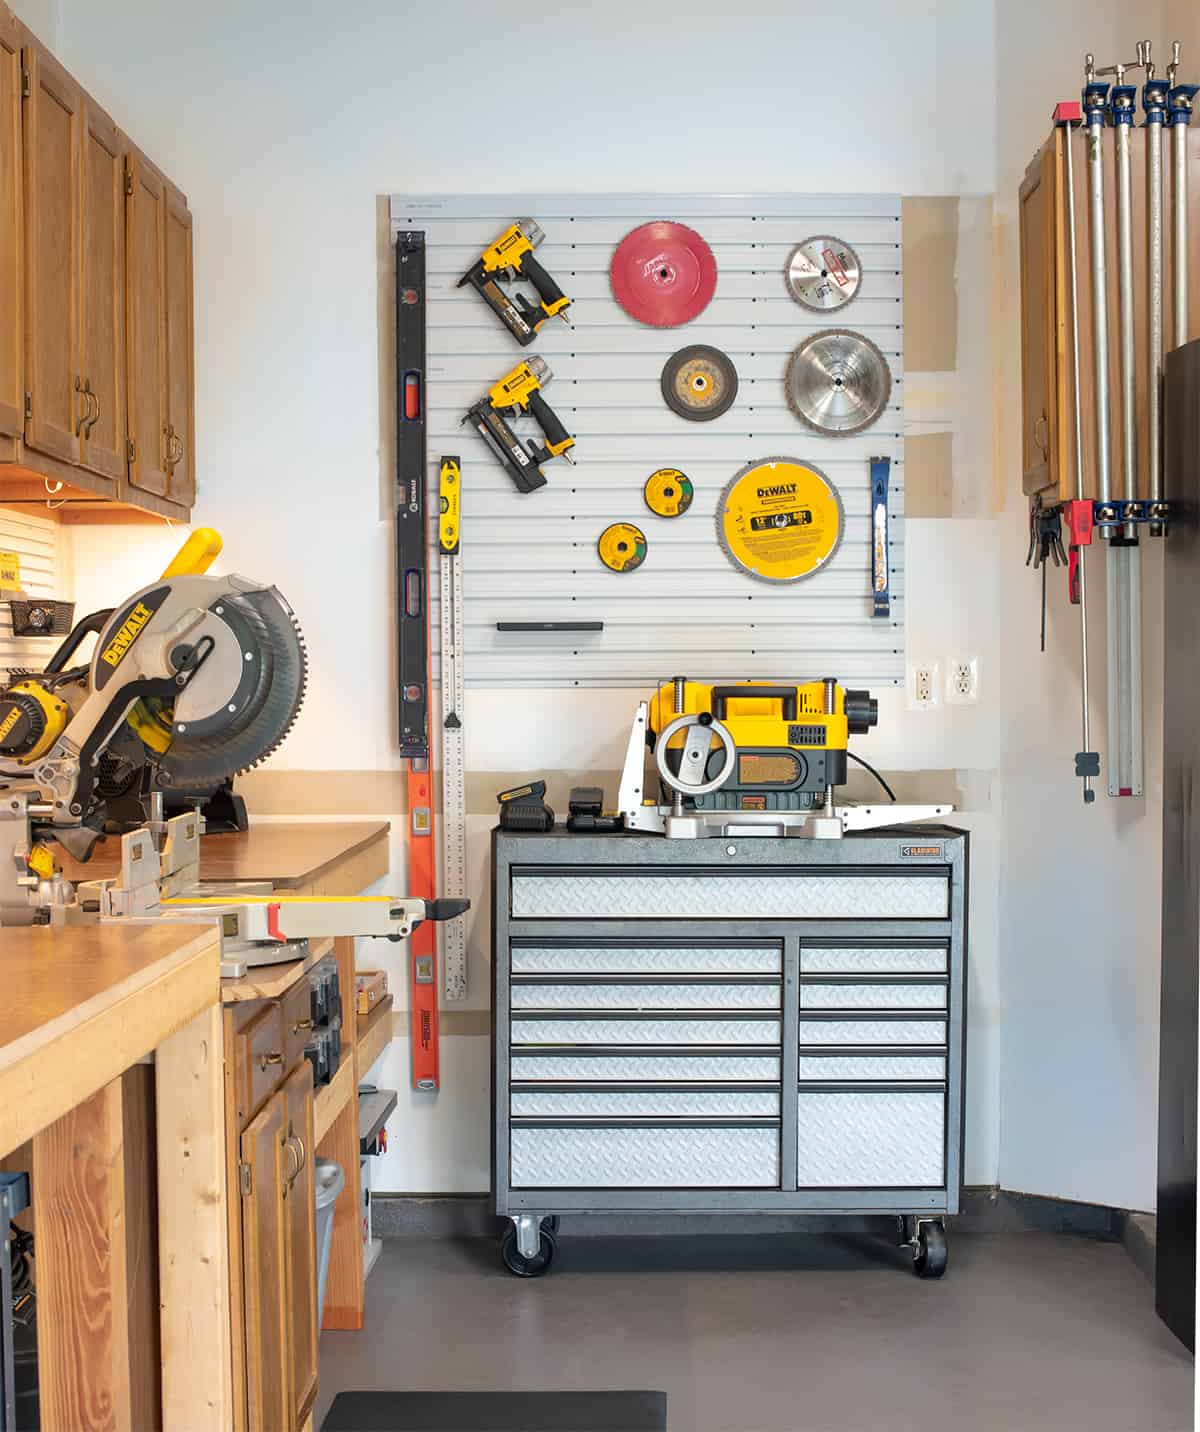
We customized our workbench with a slatwall style backboard, hanging closed cabinets and open shelving below for bulky tools that we keep in heavy rotation.
Magnetic Tool Holder: Keep everything from scissors to wrenches and small parts visible and within reach courtesy of this ingenious magnetic strip. This is easy to mount to your workbench or your wall.
Wall-mount Tool Rack: Finally, an easy organization solution for awkward tools. Heavy duty hooks hold hoses, rakes, leaf blowers, brooms and more. Install in less than 30 minutes and kick the corner clutter to the curb.
Want More? We have tons more ideas to organize your expensive tools in our post on Garage Tool Storage Ideas.
Bulk Supplies
Group like items together in easily accessible bins for fast finding ability.
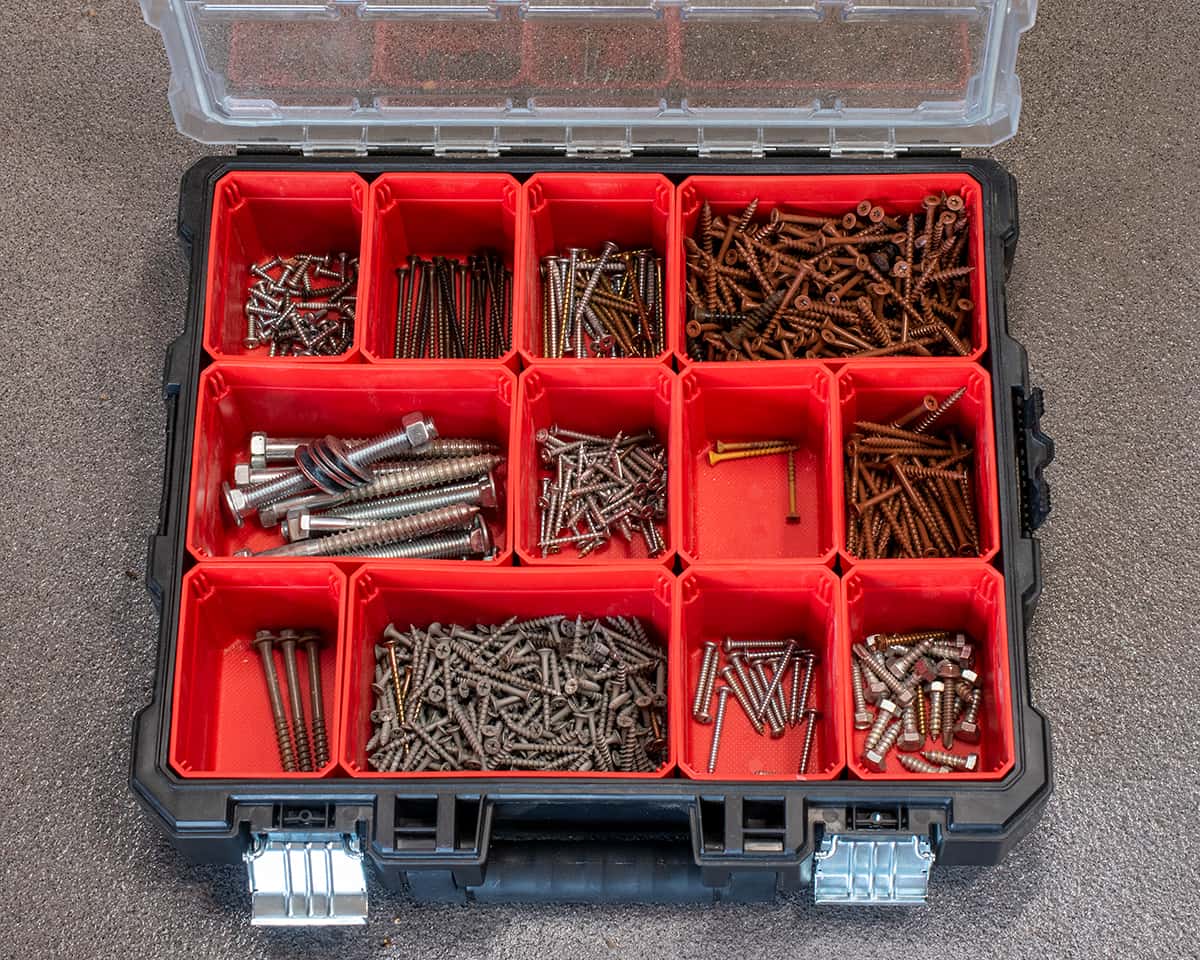
The plastic pegboard bins or travel storage bin pictured above are the quintessential accessory. The bin size is ideal for small parts, hardware, and small tools. Individual color-coded labels make organizing your garage, workbench, or craft room, an easy task. It’s an ideal addition to any workbench and also makes a great gift idea for your favorite handyman/woman.
Pro Tip: Glass jars are easily repurposed to hold baubles and bits. Recycle old baby food jars or purchase glass jars. Pour leftover paint into tightly sealed paint pints to make them easier to store and not dry out.
Toys and Sports Equipment – From Balls to Bicycles
If you have an active household, creating a sports “section” (as mentioned in Step 5) makes a lot of sense.
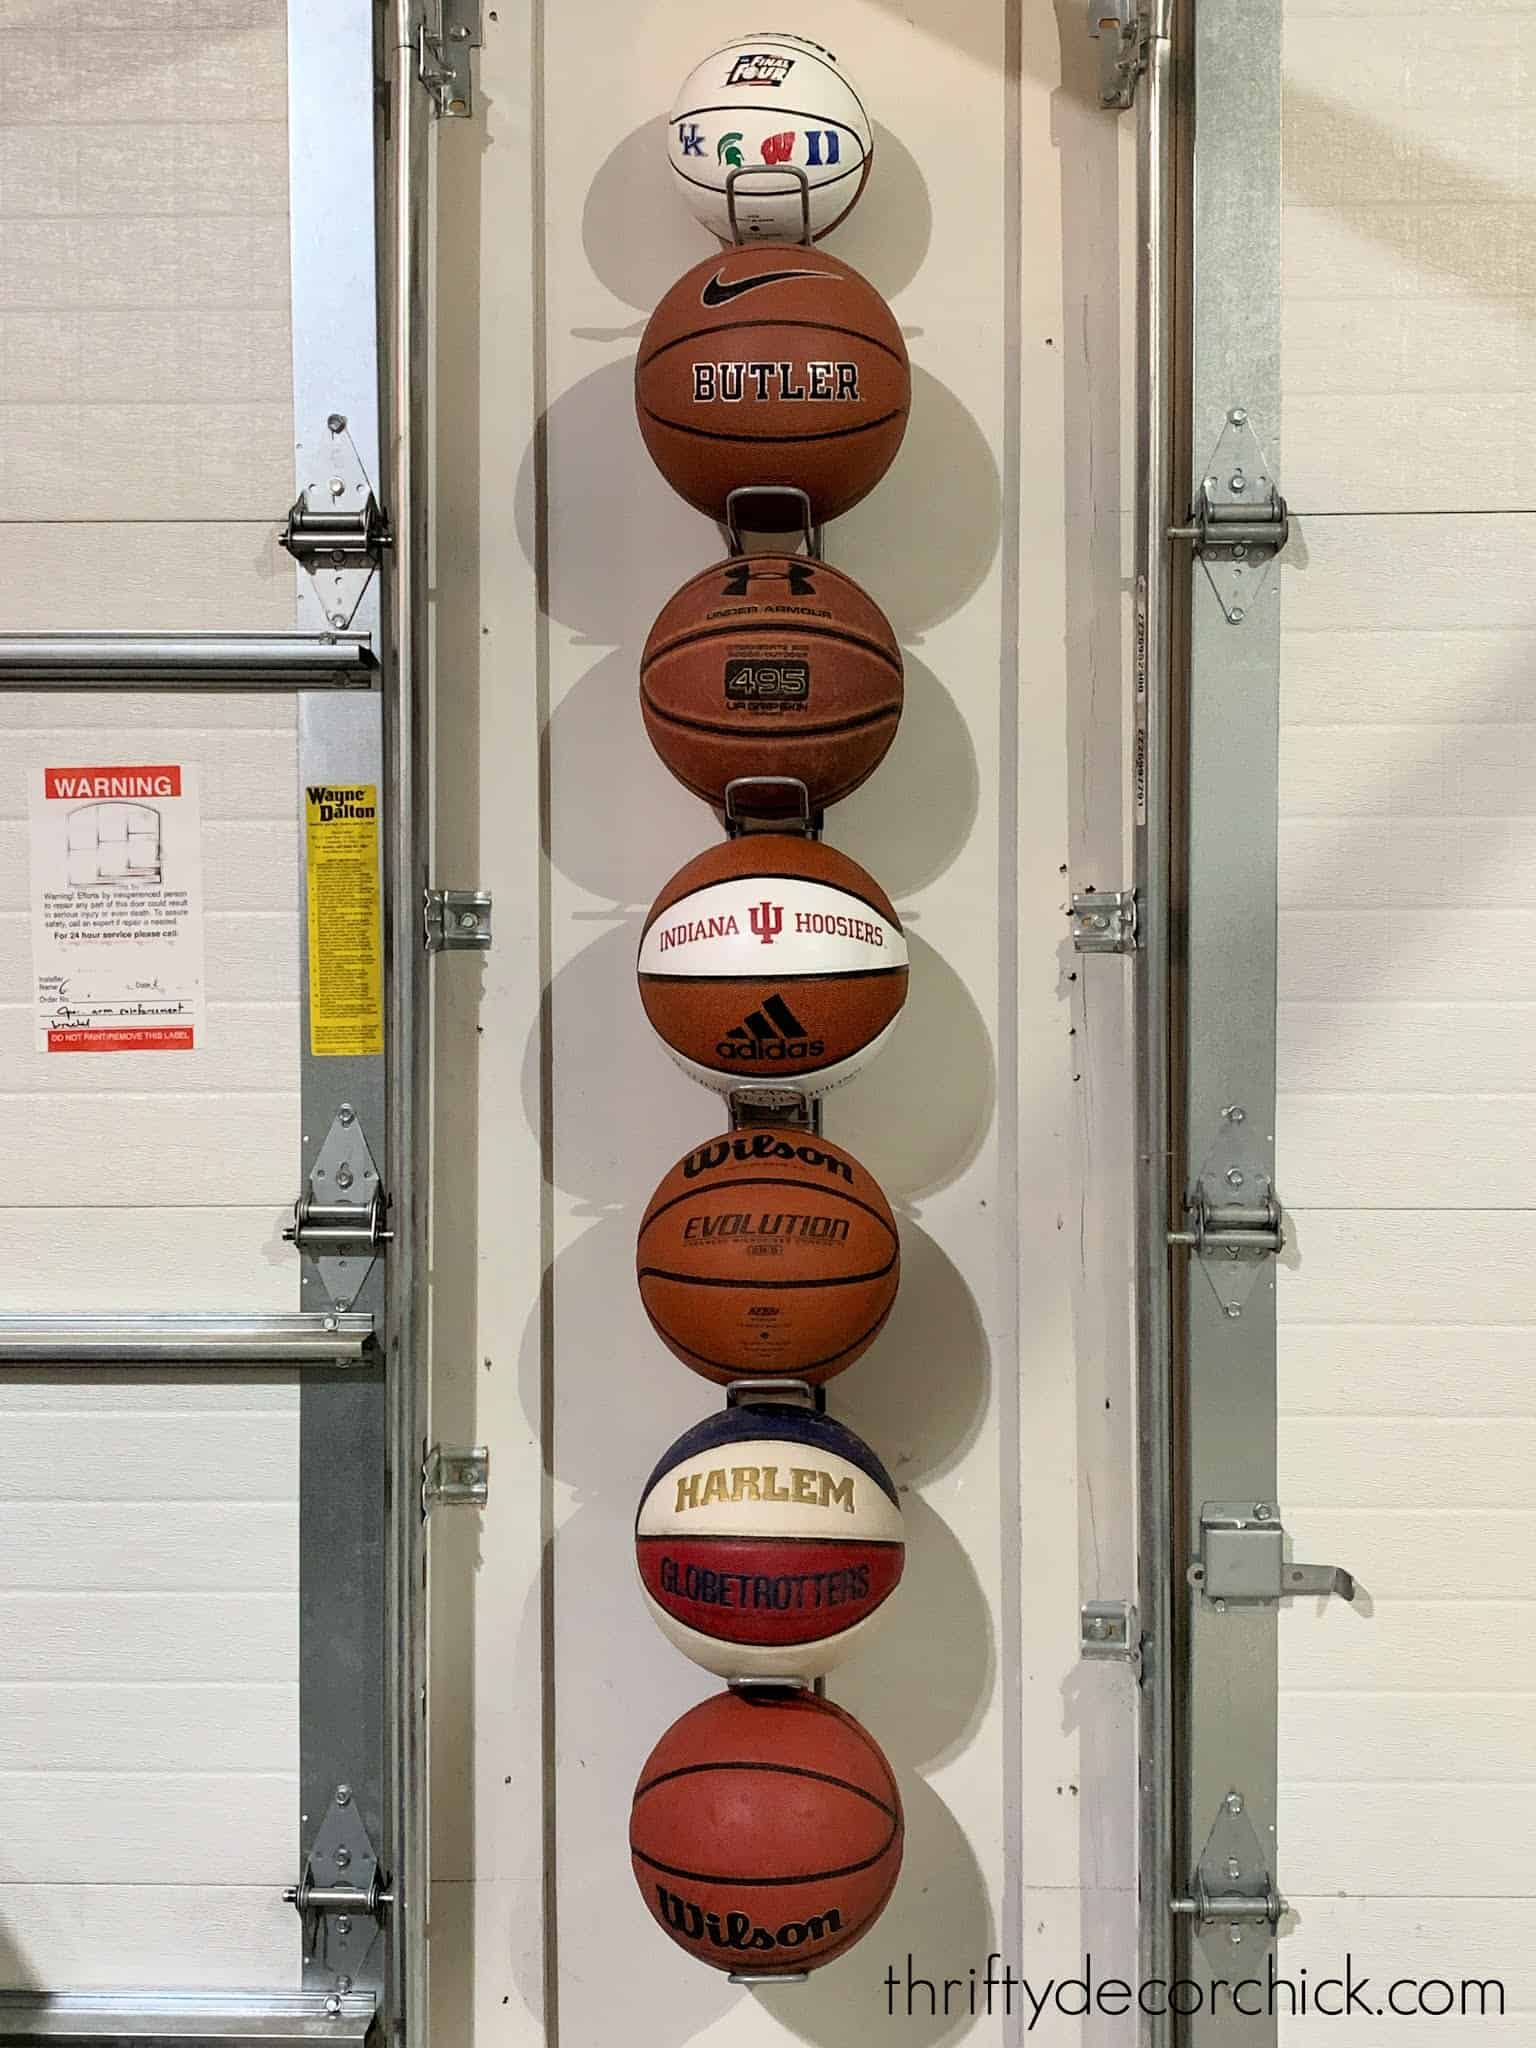
A sleek wall mounted ball holder from Thrifty Decor Chick gives kids (and husbands) a fool-proof way to secure sports equipment between play.
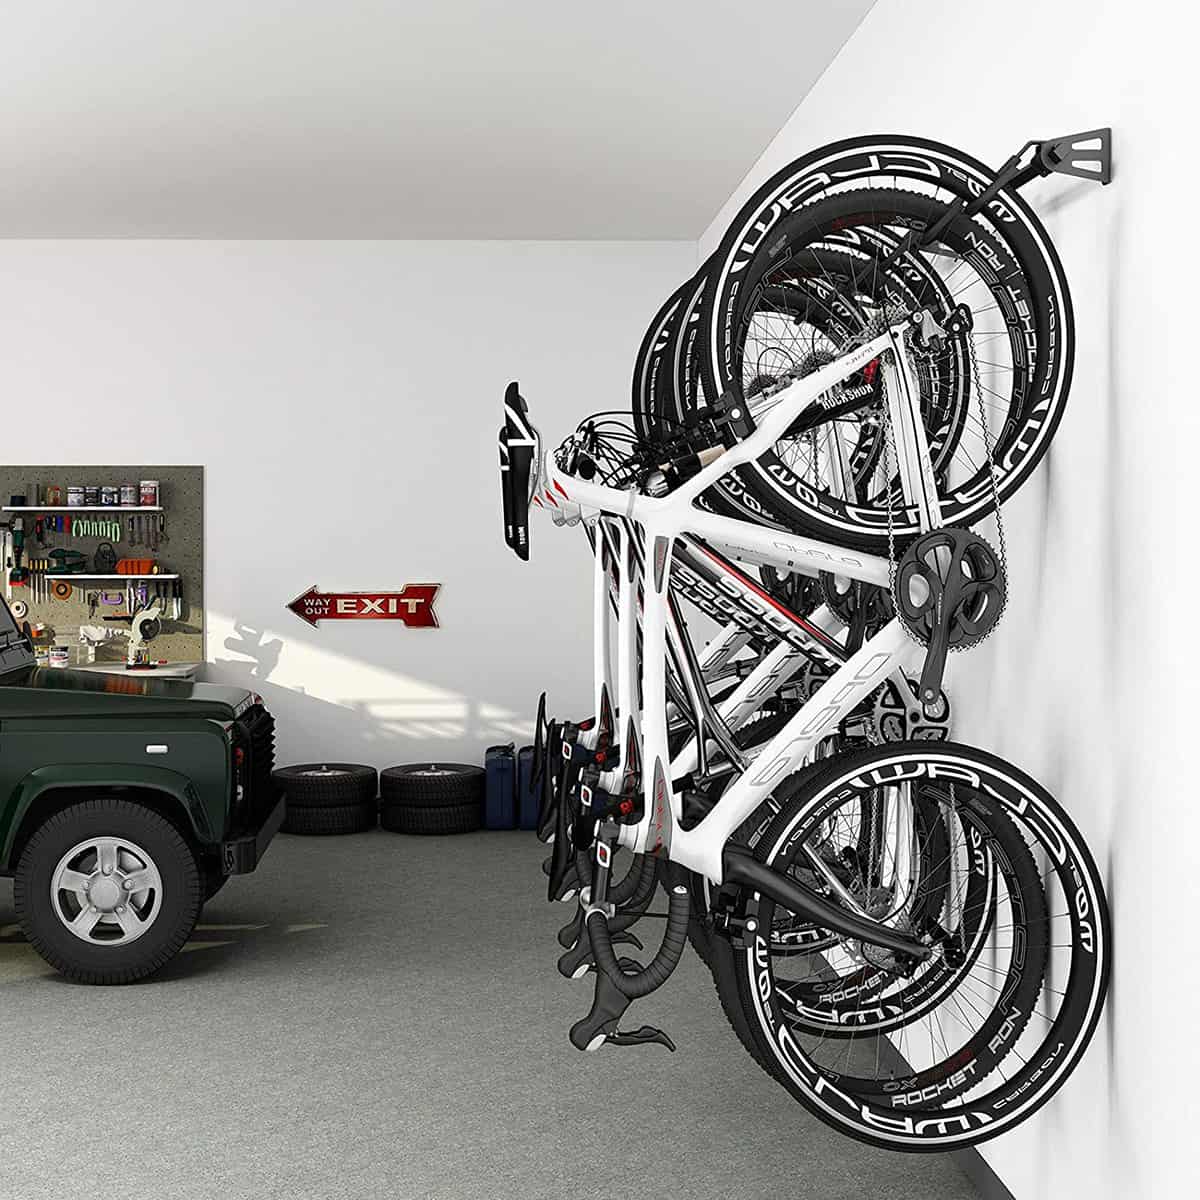
Bicycles can really eat up floor space. This brilliant Hanger Wall Mounted Bike Rack provides secure storage for multiple bikes while freeing up your walkway. Easy installation and easy mount/dismount process! A must-have solution for avid cyclists.
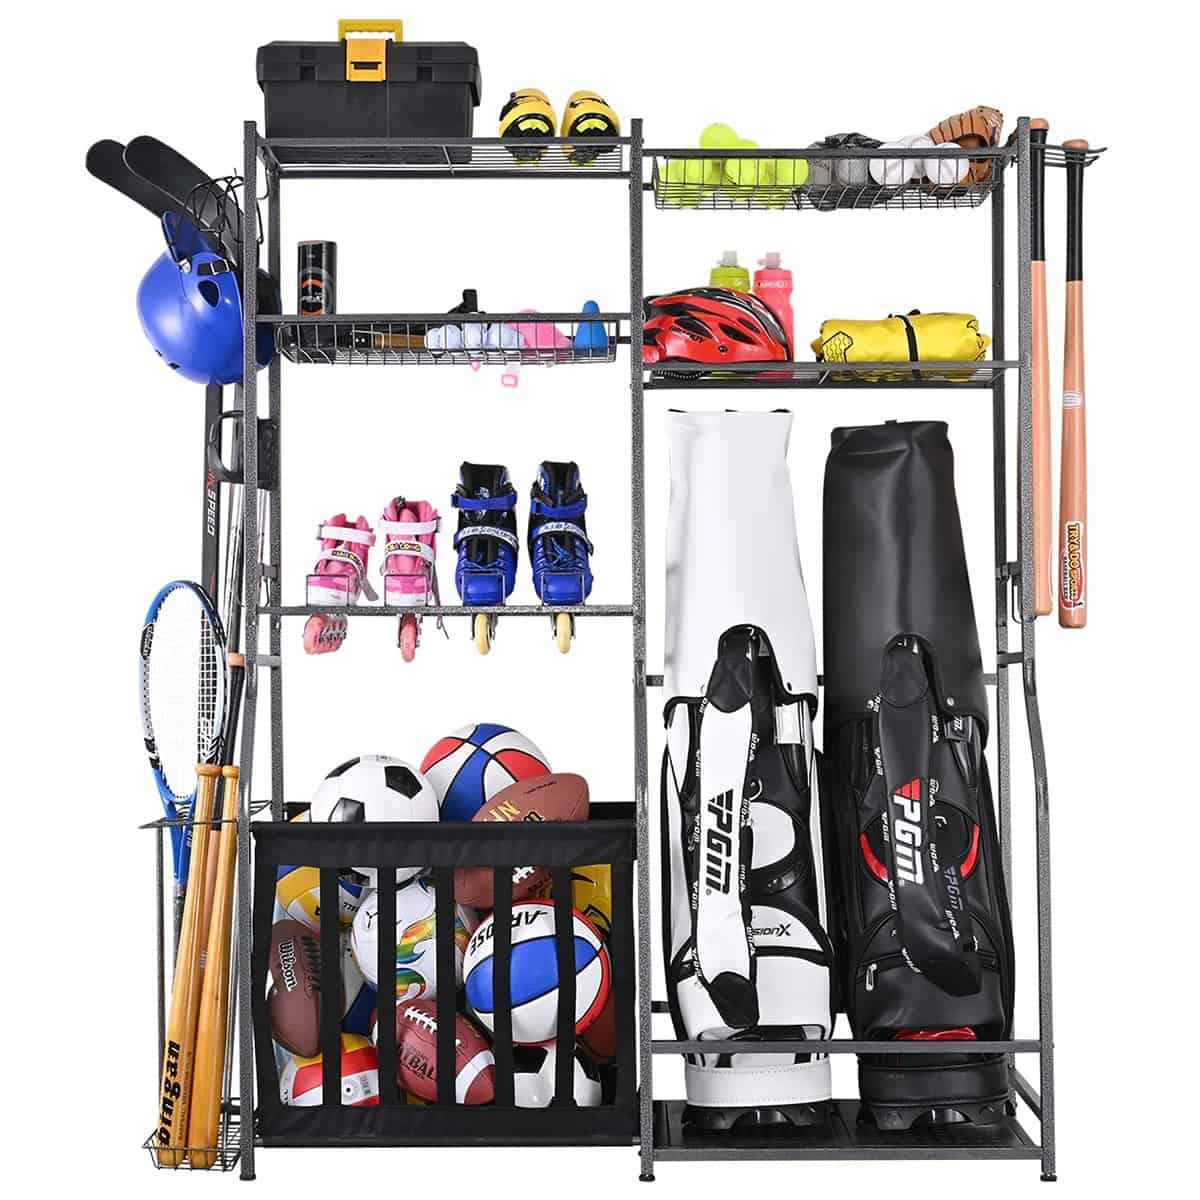
Alternatively, a sports organizer storage rack combines ball storage with a golf bag organizer. It’s a sporting good armory with thoughtfully placed hooks, 4 extra shelves and metal baskets to boot. Also works well for storing kid toys.
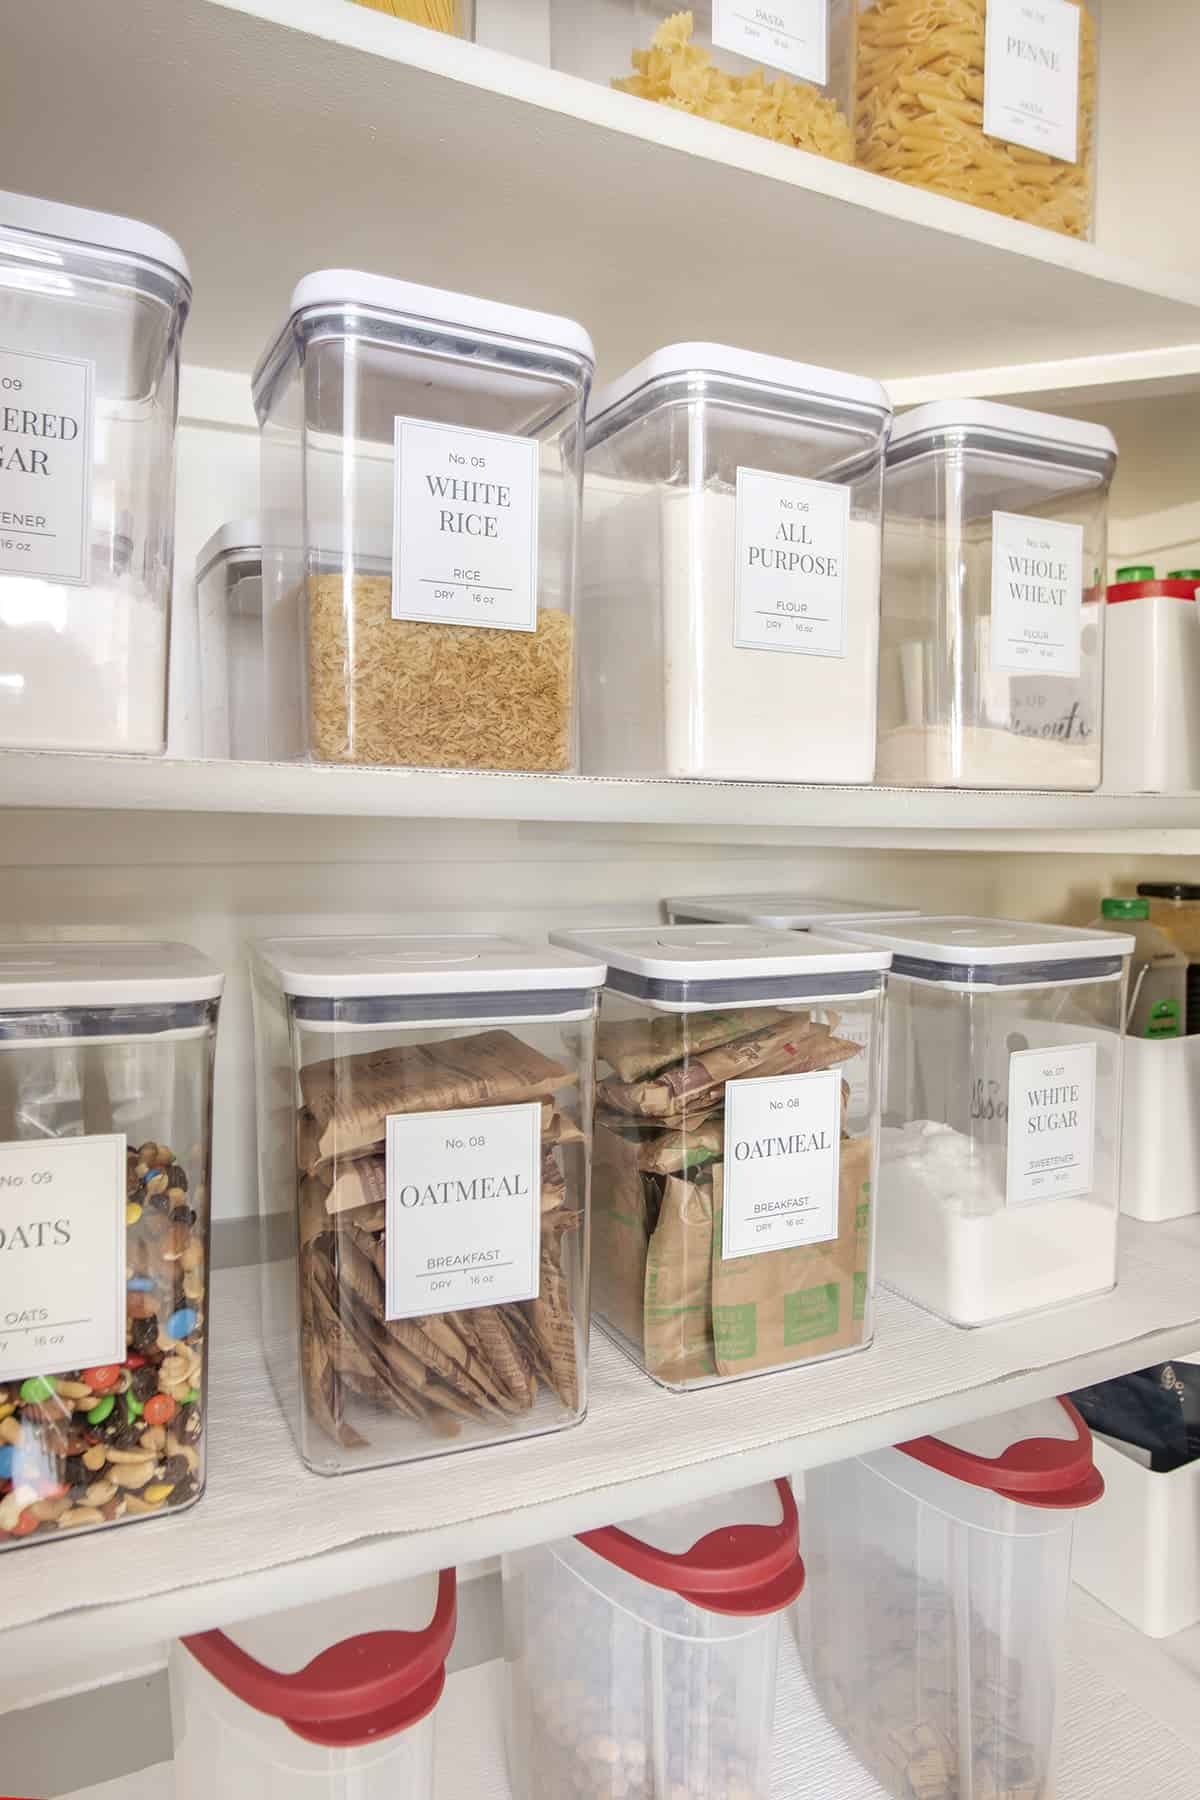
Label Everything
No seriously, label everything! The biggest lie we tell ourselves is “I’ll remember.” It’s so easy to forget despite your best laid garage organization ideas. Invest in a label maker; it’s money well spent! If an item has an “assigned seat” it’s much more likely for it to find its way home.
Pack and Track labels from Duct Tape keep bins orderly in this garage renovation from Making Lemonade. No more harried “treasure hunts” for stored items through random boxes.
Spoiler alert: upkeep is the most important part of this process! What’s the point of cleaning and organizing if it falls right back into disarray? Maintenance is an ongoing process. Reserve a spot on your seasonal cleaning chore list for garage upkeep. A little maintenance goes a long way.
Ready for More Whole House Organization? We have lots of tips and ideas!
- Weekend Projects that Boost Home Value
- DIY Closet Organizers
- Organizing Tips for the Pantry
- Small Bathroom Organization Ideas
- Building an Office Wall Cubby for Craft Supplies
FAQs
Have a garage sale. Seriously though, most of us put too much emphasis on organization and not enough on getting rid of the clutter.
Typical categories include sports equipment, tools, automotive, seasonal decor, garden gear and lawn tools. Evaluate items based on their storage requirements such as temperature and moisture light exposure, etcetera.
It is best to plan for a growth of 10-15% so you are not back reorganizing and decluttering to accommodate new items.

Grab our free series "Weekend Home Projects that will Transform Your Life" Sign up below to receive updates including free printables, organization tips, home improvement projects, recipes and more! |
More Organization Projects
PS I love seeing your creations! Be sure to take a photo and tag #cravingcreative on Instagram! You can also stay in touch with me through following me on Instagram, Pinterest, and subscribing to the newsletter!
Kelly says
I love the way this turned out! It’s such an amazing way to encourage you to stay organized and accountable! #client
simple nature decor says
Not sure if you got my comment, but I wanted to say that it looks amazing, my husband would mess it up in one week, thats my problem.lol
simple nature decor says
This is on our bucket list! your garage look perfect! Is it tough and to keep it that way! My husband is messy. lol
Rachel says
I will say that my husband is a bit of a neat freak, which has it’s own challenges, haha. However, we make time between our plethora of projects to “reset”. That has actually been one of the biggest improvements in our lives this year. We made a list of every project we wanted to do (It was about 40 and we have added since then!) However, we pick 3 and pretend like the rest don’t exist until those 3 are completely done. No more bickering about what the priorities are and we get time in between to clean up our mess.