Everything you need to know for how to install vinyl plank flooring yourself as a floating floor over concrete, tile, existing flooring, or other suitable substrate without demolition. Add a durable, high-end look to your home for less. Includes all our best tips and tricks and a video demonstration!

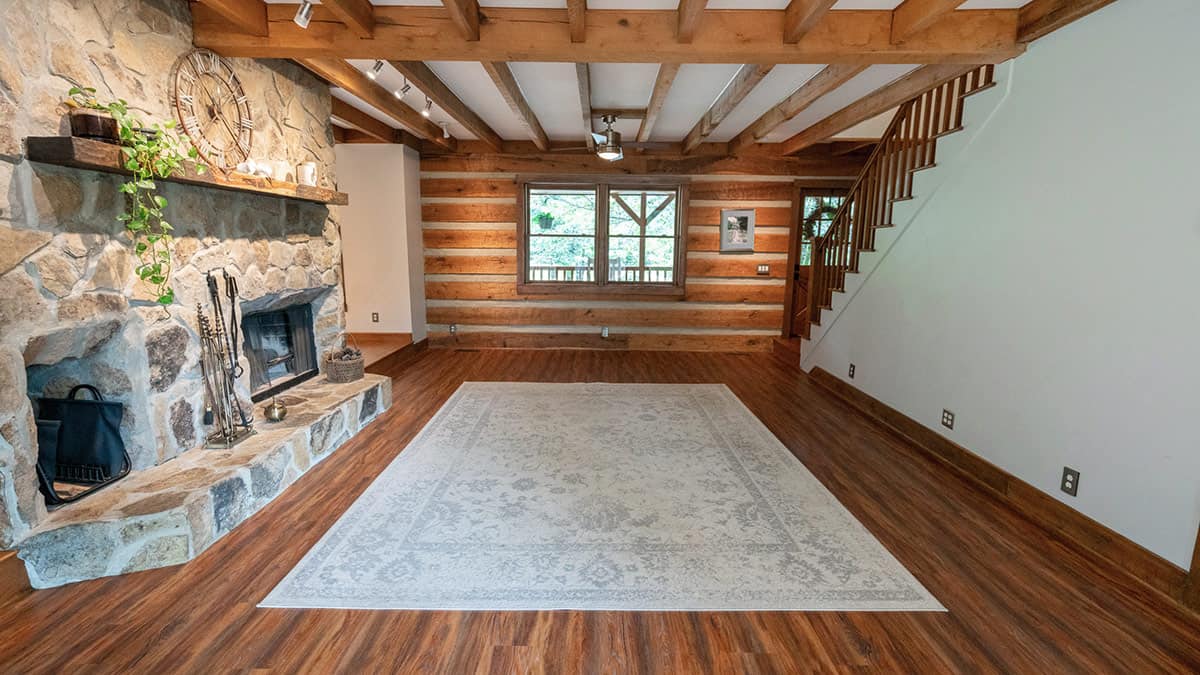
Bye-bye beige carpet and hello to durable, realistic flooring!
I am back with one of our final projects from my parent’s craftsman cabin makeover. It’s a bittersweet ending for this very special and unique home. From the upstairs bathroom makeover to the staining of the house exterior, there isn’t a space we haven’t given a modern makeover while maintaining all of the rustic, cabin charm that makes this property undeniably one of a kind.
Today, I am talking about the new vinyl plank flooring we installed in the living room. It’s budget friendly, durable, and looks so much better than the beige carpet that was there before!
I’ve installed many kinds of flooring including vinyl tile, peel and stick tile, traditional large format floor tile, and even painted floors. LVP is definitely one of the easiest to do yourself so there is no need to be intimidated!
Reader’s Note: We have done many, many vinyl flooring projects. The photos are from a few different projects including our basement finishing project so that we could capture all of the instructions and scenarios appropriately.
The Benefits of LVP flooring
If you are still in the deciding stage of whether luxury vinyl planks flooring is right for you, I have put together an in-depth guide that not only gives the benefits and considerations, but also a great buying guide to choosing LVP flooring.
- Very cost effective compared to traditional tile and hardwoods.
- Durable surface that can be put over many older types of flooring without demolition.
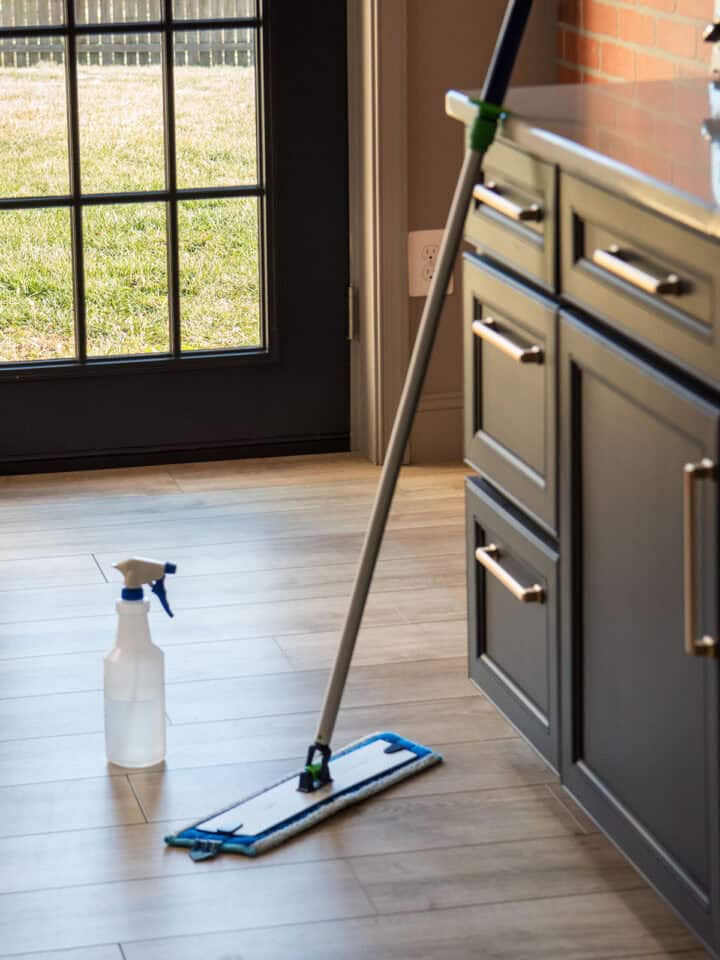
- Easy to clean and resistant to chemical damage or staining.
- Easier to install then tile.
- A huge selection and variety of colors, styles, and grain patterns.
- Scratch resistant and waterproof – although your subfloor may not be.
Considerations for Installing Vinyl Flooring
Proper preparation is the most important part of any DIY project! Rushed prep work is like building a house on a bad foundation – it won’t last and you won’t be happy with the results.
Leveling The Floor
Let me first say that “level” is a little bit of a misnomer because you can install perfectly fine on a slightly sloped surface. What you are looking for is dips or gains over a certain distance. The vinyl plank box will tell you the manufacture’s recommendations.
A smooth and level substrate is essential for the successful installation. Any bumps, large holes, or large cracks should ideally be filled. Also, check for nails, raised screw heads, or staples. These should, ideally, be removed or sunk below the surface level.
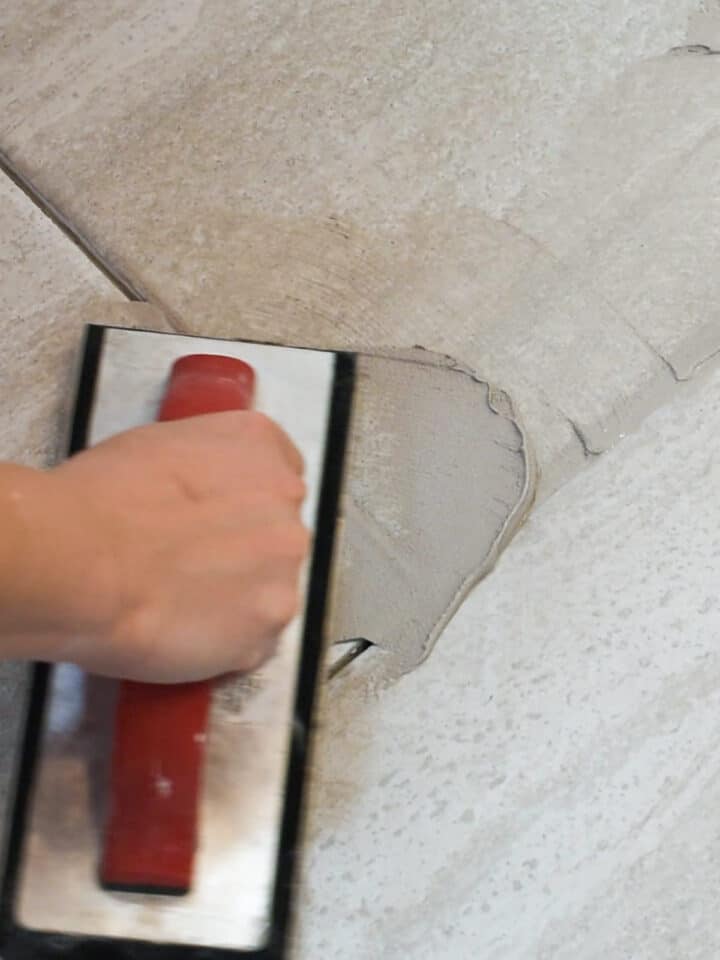
To fix dips, use floor patch for wood subfloors and thin-set mortar or self-leveling concrete mix can be used for patching concrete floors.
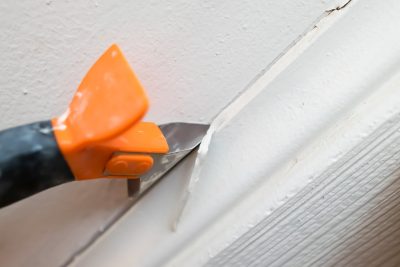
Removing Baseboards
Anytime you change the height of the floor, the baseboards height will need to be adjusted. There are two options. Most installers will lay quarter round in front of the baseboards to cover any gap. However, it’s not the greatest look. The other option is to remove the baseboards and reinstall them. If you gently remove the baseboards, you can oftentimes reuse them.
Check out our post for more information on replacing baseboards.
Door Jambs
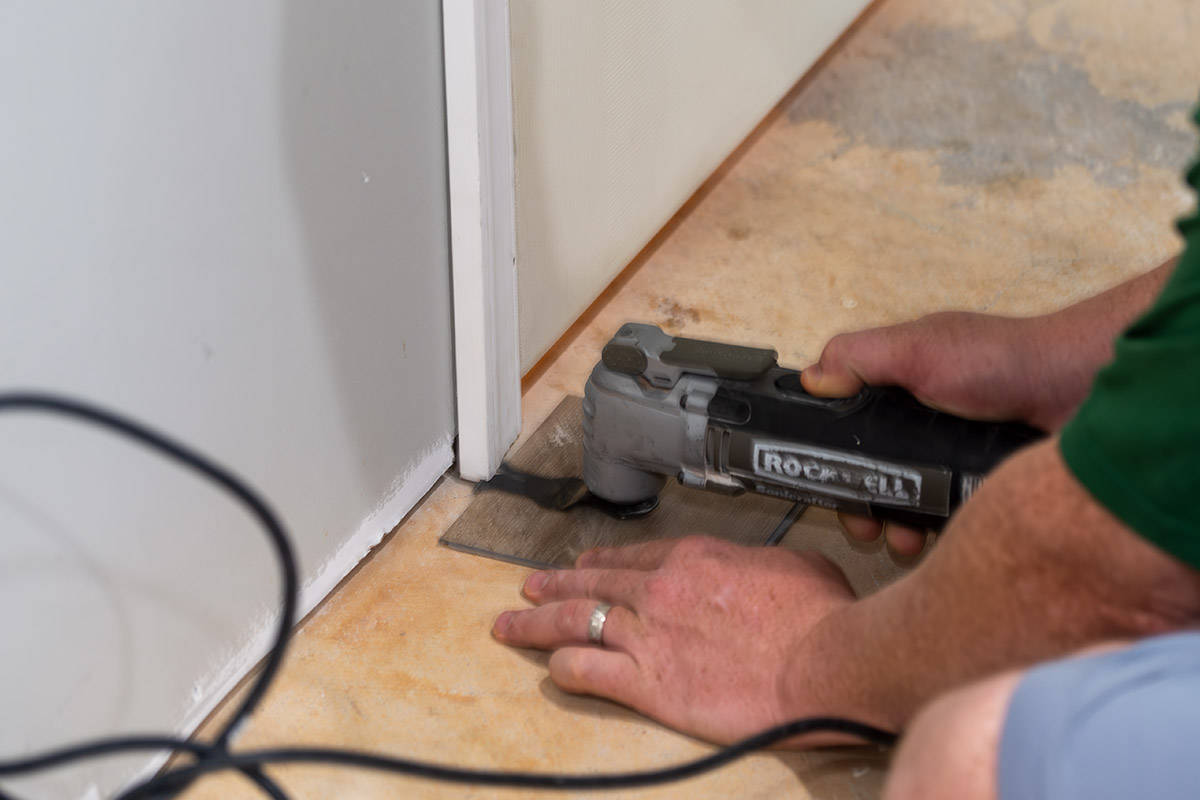
You may also need to cut door jambs to fit the flooring underneath. This is easily accomplished with an oscillating multi-tool. Use a scrap piece of flooring to mark or guide the blade.
Vapor Barrier
For floating floors especially, I do recommend using a vapor barrier if you have temperature fluctuations in the floor or are installing over a concrete floor. A vapor barrier is essential in areas that are below grade like basements.
However, if you have a newer home, it is possible that you may have a vapor barrier installed underneath the concrete slab. We discovered this was true for us because we had to move the rough-ins and drainage for the planned bathroom, which meant jackhammering through the concrete slab.
Acclimate the Flooring
Most products require acclimation at least 24-48 hours prior to installation, but check the boxes which usually have a lot of information. I prefer at least 72 hours for most products, however.
Underlayment
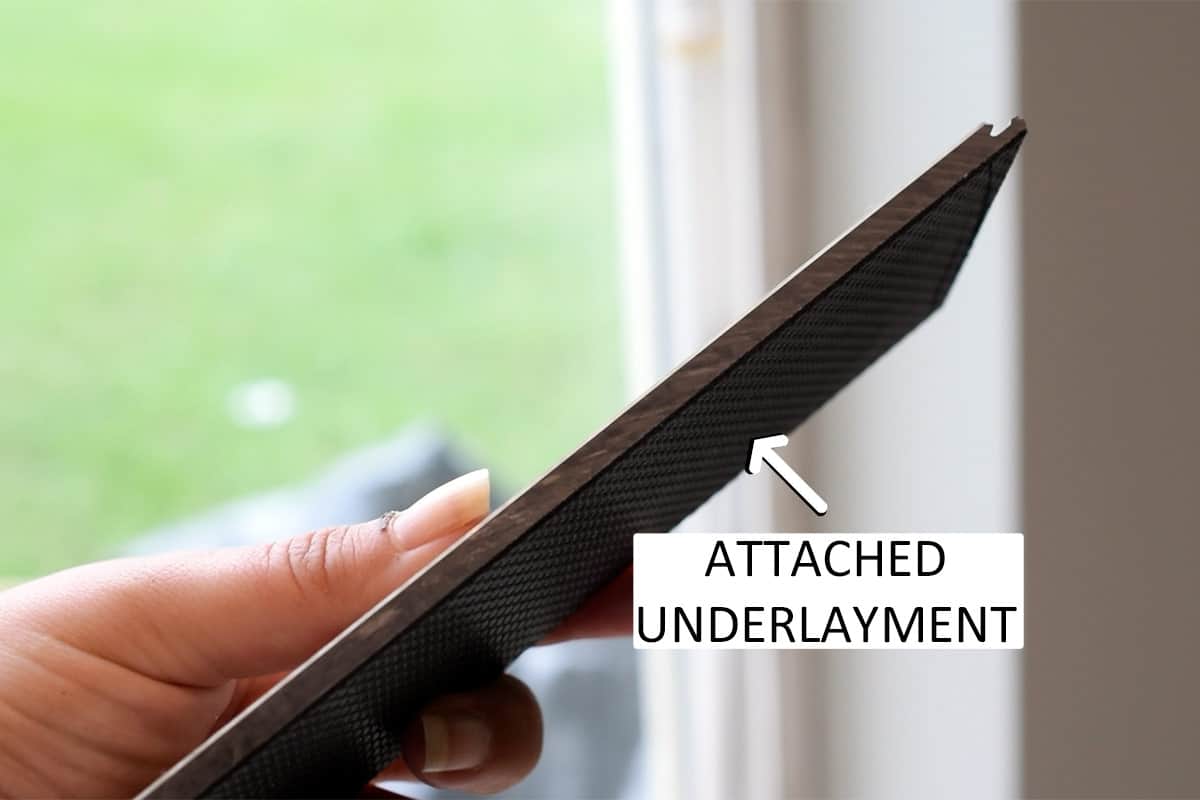
Most vinyl flooring today comes with an attached underlayment – a rubberized backing that dampens sound and gives a slight cushion under foot. In that case, you don’t need an additional underlayment, and it may even void warranty to add one!
If there isn’t a rubber backing attached, the specific flooring should have a recommendation for their product because it does vary depending on the thickness of the plank and the type of core being used.
Our Best Tips for Installing Vinyl Plank Flooring
- I much prefer these spacers than the flimsy plastic ones that buckle under the gap in the drywall.
- With hardwoods, it is usually best to lay in the opposite direction of your floor joists. However, there isn’t a rule like this that I know of for vinyl. Do whatever you feel is most aesthetically pleasing.
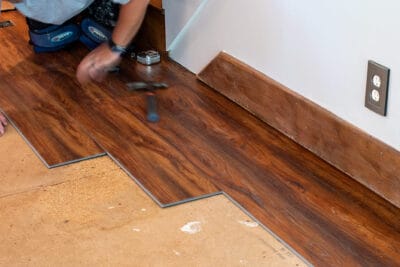
- Depending on the locking mechanism, I prefer to seat the small end of the plank into the previous board and then whack in the longer side – not as much friction.
- A laser or laser level is very useful for checking the straightness of your floor lines (the plank lines) as you go along. A chalk line can also be used.
- Check the floor leveling requirements on your plank boxes. It varies.
- During installation, you can mix planks from different boxes to mix the patterns, which creates a more uniform appearance.
- For a random pattern, rather than staggering, use the ending cut piece from the previous row to start the next row, if that piece is longer than 6 or 8 inches.
How to Cut Luxury Vinyl Planks
1. A GUILLOTINE CUTTER
This is my preferred method generally. While you still need a razor or other tool for intricate cuts, this tool gives a nice clean edge, and you don't have to get off the floor to cut the LVT. For rigid core, I like this guillotine cutter style best. However, you can also use a lever action style like below for thinner materials or those without a separate core.

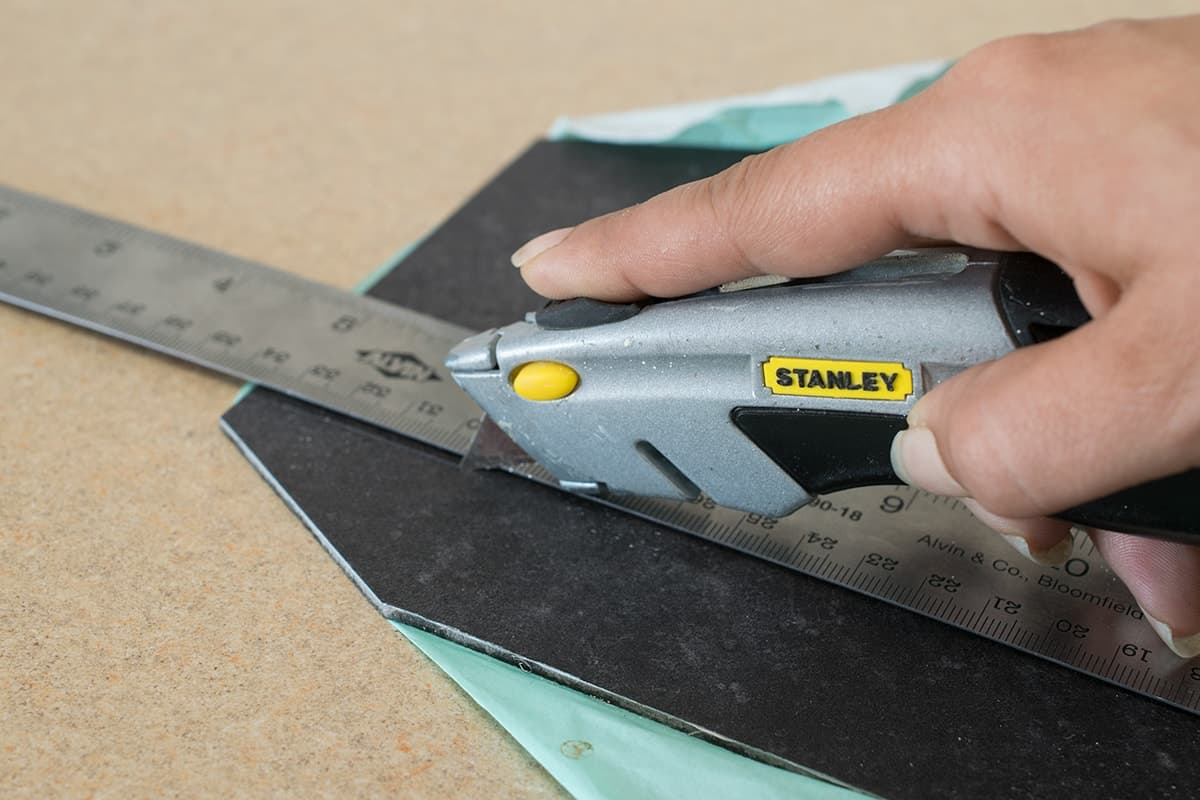
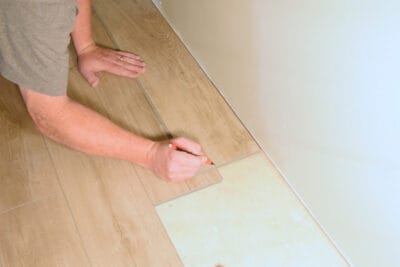
2. A RAZOR AND STRAIGHT EDGE
For thinner tiles, this is a really simple method. Score along the top and you can snap the board upward to break. It may take a few cuts to get through the tougher top layer. This is also how I tend to make intricate cuts like around a corner or plumbing.
3. POWER SAW
You can also use a jigsaw, an oscillating multi-tool, or a miter saw. They may make more mess and require you getting off the floor multiple times to use. However, we used a miter saw with a fine-tooth blade for our rigid core plank installation because it was faster and easier to make clean, straight cuts.
Troubleshooting Tips for Laying Vinyl Flooring
The step-by-step instructions are in a printable format at the bottom of this post, but there are always going to be some very specific situations where you might need to adjust or use a different method. Here are some of the scenarios we have encountered:
Around a corner or in a closet
You may occasionally find that you need to go put the boards in and go backwards, like going around a corner of a new room. To accomplish this, lay a straight line from the doorway around the corner. It will be a bit of a pain to hold the boards securely until you lay them backwards towards to the nearest wall.
The laser level will really help here to keep your seam lines straight.
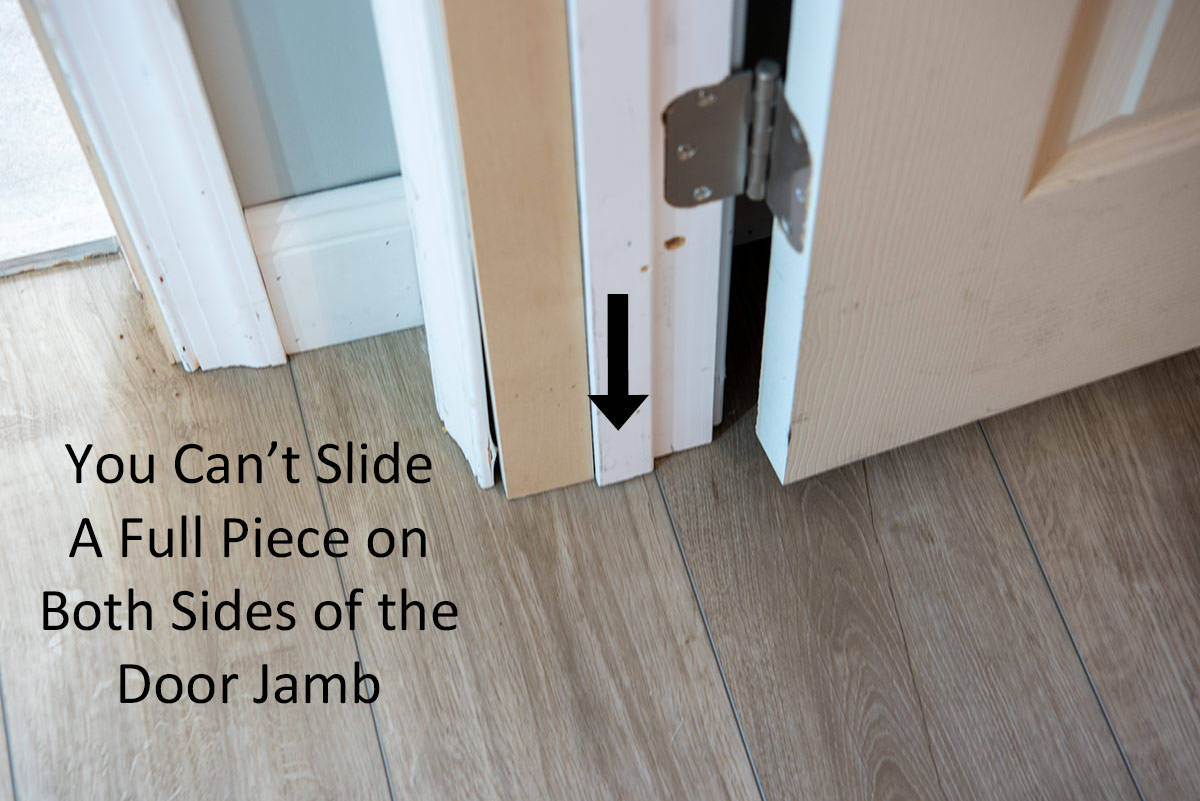
Under a Door
In a doorway, you will want your layout so that the doorway is not a full width board. It’s impossible to slide a board into place on both sides of the jamb, so plan for a seam somewhere in the middle.
When your walls aren’t straight
The truth is that interior walls are almost never completely straight or perfectly parallel or perpendicular to the exterior walls.
Once you draw your centering chalk lines, you can tell how square the room is by measuring each end from the centerline. Usually, it isn’t too much of a problem, and you can just cut the last row at a slight angle lengthwise.
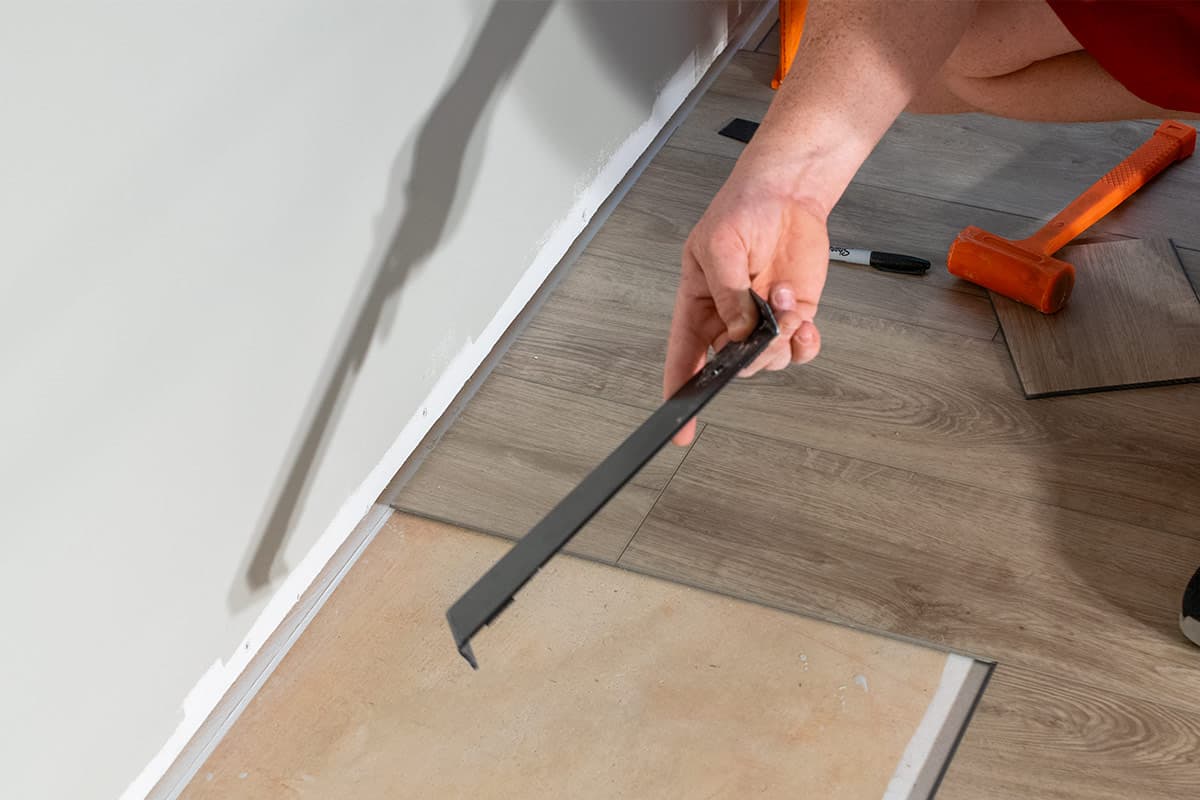
Small Pieces or End Pieces
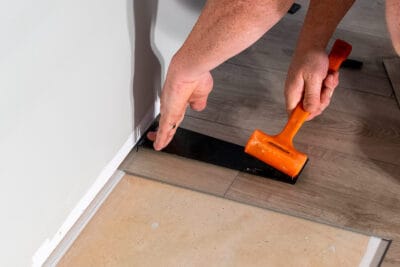
When you run up to a wall, you can’t use the dead stop hammer or tapping block to get the pieces snuggly into place. Instead, you can use a pull bar like this one to pull the last plank into place. You will also need this to secure the final row next to a wall.
Tricky Cuts
In this particular installation, we had a stone fireplace to contend with. With some stones like brick, you could use a quarter round to encase it, but the large stones on this are too varying. I like contour gauges for smaller projects like around doors, but this was pretty large and very jagged.

Therefore, we used a scribe and created a paper template first. The reason we made a paper template is we could test the fit, adjust it easily and then have a perfect cut on the board.
For the particular project, we used two pencils taped together at 90 degrees to create a scribe device (yes, really!). If you want to learn more about scribing and what to use for your project, check out this video on scribing.
Our Project Video Before and After
I did a video my husband and I doing own basement installation to demonstrate some of the processes of prep and installation. While I am quite camera shy, there are some tips in it that show things that are harder to explain in text.
Unfortunately, I don’t have a good “before” photo of this space, but the same carpet that was on the staircase was also wall to wall in the living room. All gone now!
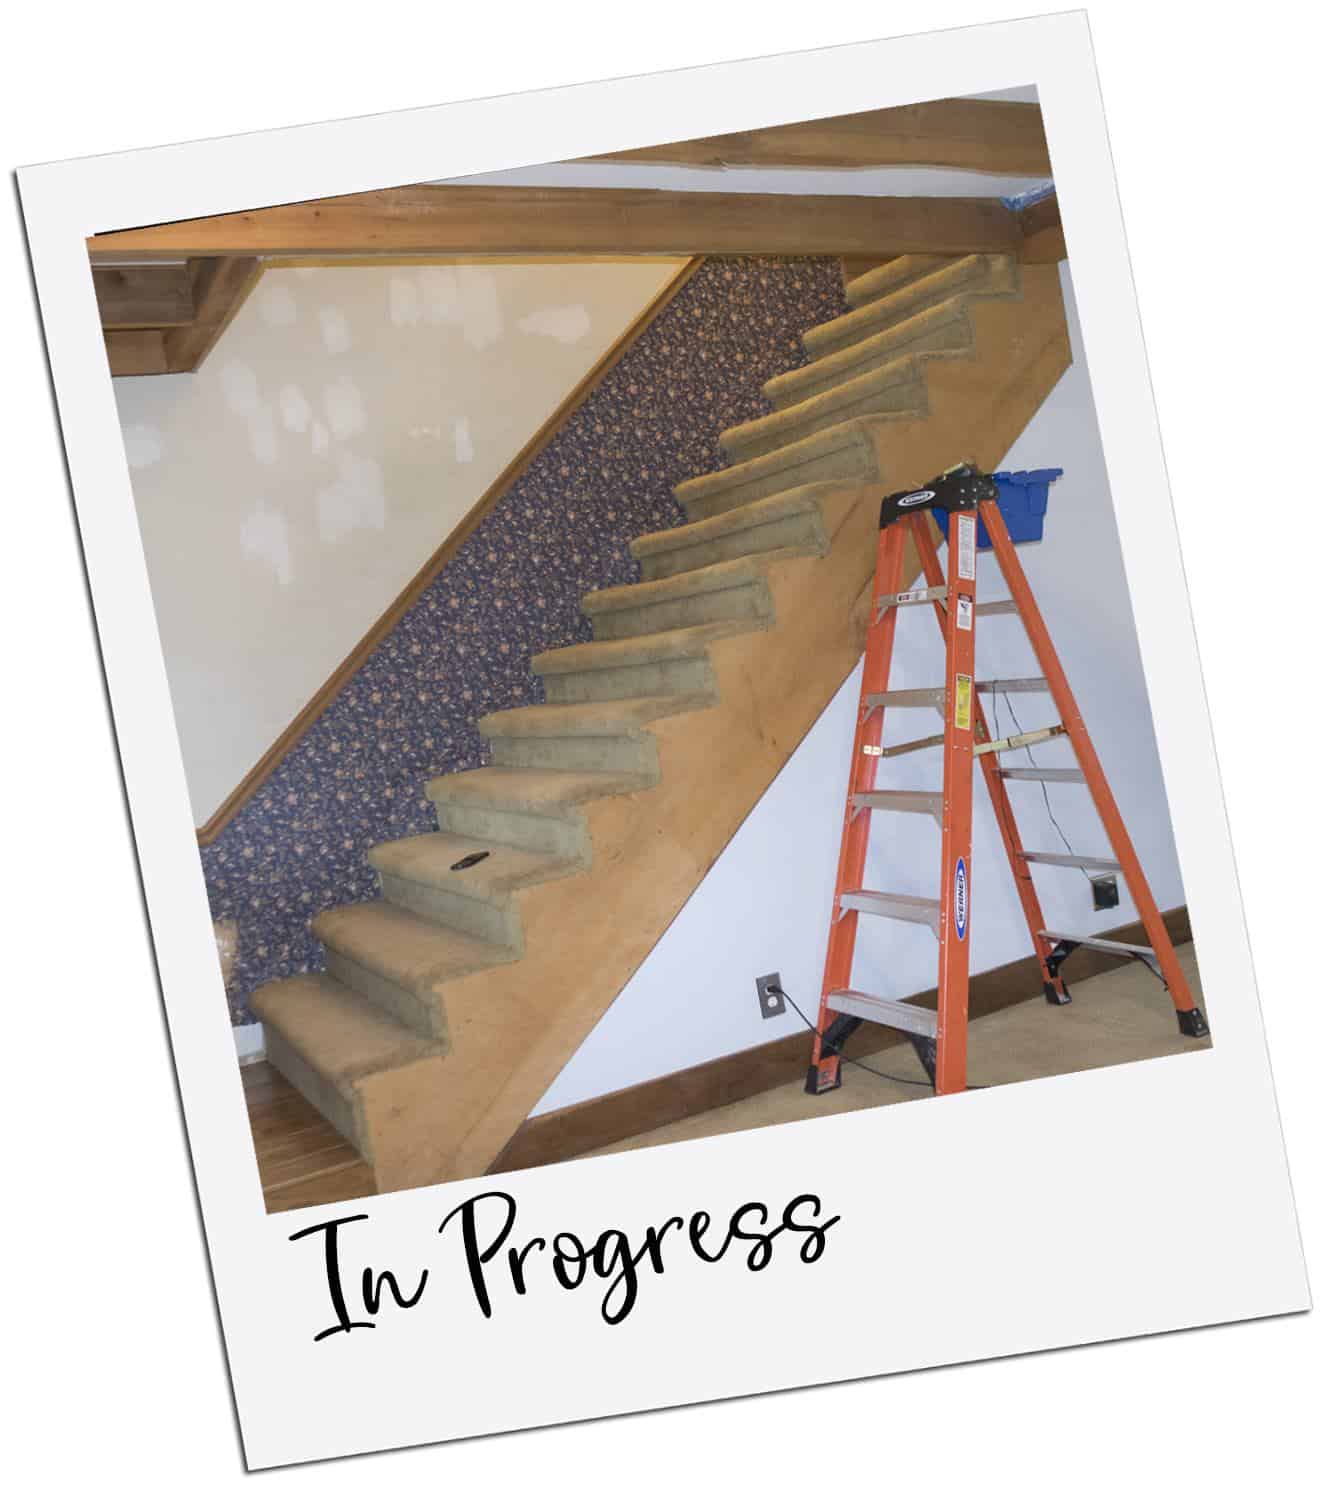
For our project, we removed the old carpet. The stairs were a project that we actually finished at the same time (I’ll be showing that off soon!). But you can see how much of a difference it made in this space:
Other Flooring Tutorials and Projects
FAQs
A floating floor is an interlocking system similar to a puzzle where the materials create a tight bond without the need for glue or nails to attach it. Luxury vinyl plank flooring uses a tongue and groove or "click lock" system to snap planks together, which makes it fairly easy to install.
Technically, LVP can be installed directly on previous vinyl, concrete and smooth plywood as a floating floor. However, the subfloor needs to be smooth and level. Otherwise, the floors may move, or the seams won't line up.
The requirements for how level the floors will need to be will be on the product’s box. It varies depending on the product and type of core used. I have typically seen between ⅛″ over 6 feet and ¼″ over 8 feet.
Over time, flooring shifts slightly and vinyl will conform to the underlying floor. For uneven floors, this may cause unsightly gaps in the seams and may wear on the locking mechanism. Additionally, it makes the floors noisier with a slapping sound as the vinyl moves to make contact as you walk on it.
Vinyl flooring is one of the easiest floors to install. If you have moderate home improvement skills and do research for your project, I recommend this as a good do-it-yourself project.
Nope. What I recommend is laying out a basic setup or measuring the room just to make sure that you won’t have a full plank on one side and like 1 inch strip on the opposite side of the room. Otherwise, start with an outer wall – there is no need for a center chalk line beyond checking for straightness of the walls.
When you're installing flooring, you need to have a gap between the walls and the flooring to allow for expansion due to temperature changes, etc.
Recommendations vary by product, but an expansion gap of about ¼″ is necessary for installing vinyl plank flooring. These spacers are great because they won’t buckle or break.

Grab our free series "Weekend Home Projects that will Transform Your Life" Sign up below to receive updates including free printables, organization tips, home improvement projects, recipes and more! |
More Flooring Ideas and Tutorials
PS I love seeing your creations! Be sure to take a photo and tag #cravingcreative on Instagram! You can also stay in touch with me through following me on Instagram, Pinterest, and subscribing to the newsletter!

How To Install Floating Vinyl Plank Flooring
Tools
- 6 ft Level 6ft, at minimum, or an extremely straight board
- Guillotine Cutter Optional – You can use a miter or saw
- Carpenter's Triangle for marking straight lines
- Safety glasses
- Dust mask If grinding or sanding the floor
- Work gloves
- Knee pads
- Laser Level Optional but very useful
- Chalk line Or you can use a laser level
- Oscillating Multi-tool For cutting door jambs and intricate cuts
- Tapping Block You can use an scrap piece of flooring instead if your vinyl is rigid enough.
Supplies
- Vinyl Plank Flooring
- 6 mil polyethylene sheeting/moisture barrier if installing over concrete
- Flooring Transition Strip If transitioning between surfaces
- Vinyl Floor Spacers
Instructions
Prep the Floor
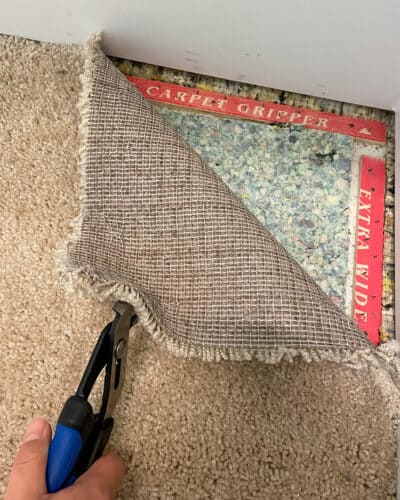
- Remove previous flooring such as carpet. floating vinyl floor as long as they are level and smooth. remove any staples and sink any nails or screws to surface level.

- Remove baseboards. Cut through any paint and caulk to the wall using a utility knife. Then use a pry bar to gently loosen the baseboards.

- Prep your subfloor so that it's level to manufacture's recommendation (usually 3/16 inch over 8 feet). Use a self-leveler on low spots and sand or grind high spots of wood or concrete. Do not sand vinyl flooring.

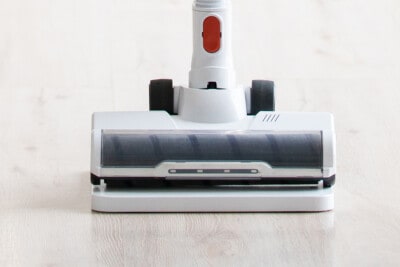
- Clean away any dirt and debris from the surface with a vacuum.

Plan the Layout
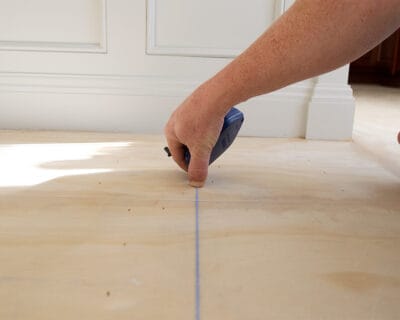
- Measure from the center to 5/16" out from the starting wall. Snap a chalk line between these two marks to get a straight line against the starting wall. Spacers will manage the expansion gap but this line will catch bowed walls.

- Finally, calculate the width of the last row by calculating the width of the room divided by the width of the boards minus the expansion gaps on either end. If it'll be less than ⅓ the width of plank, cut about ⅓ of the plank off the first row to create even starting and finishing rows. Additionally, check for bump out walls to ensure they will not have smaller widths.
Lay the Vinyl Planks
- The first row is always the hardest, so make sure it is absolutely straight with a laser level or chalk line. Place spacers against starting wall for the first row and side walls as an expansion joint.

- The joints of your flooring must be staggered at least 6 inches. It also is not advised to have a piece that is less than 6 inches long on the wall. For the most part, we just use the cutoff from the previous row to start the next row. This gives a randomized pattern without obvious staggering.
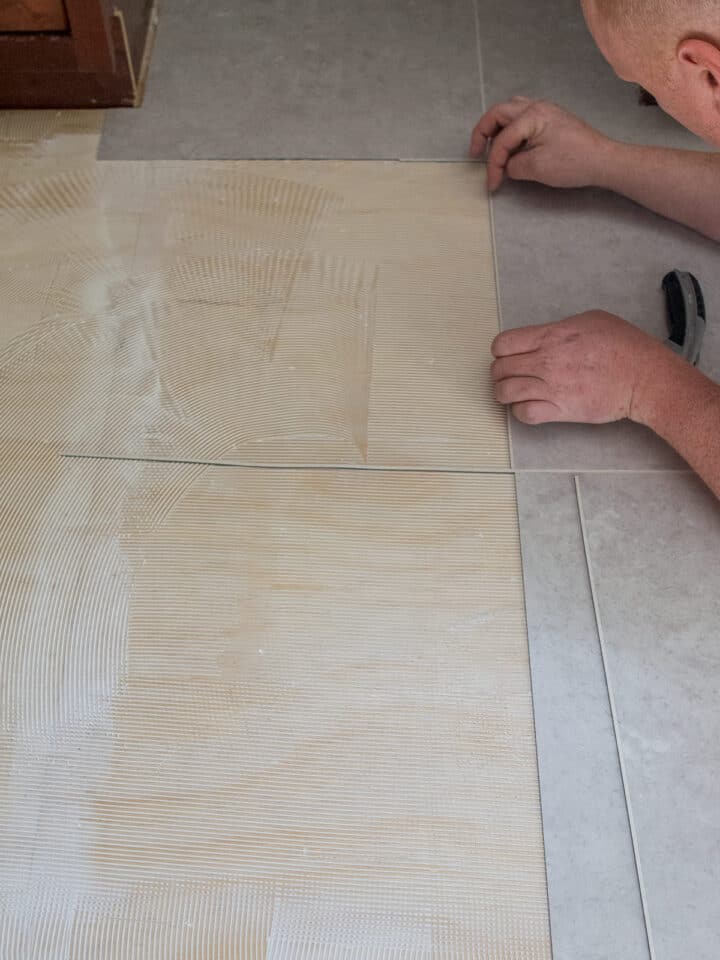
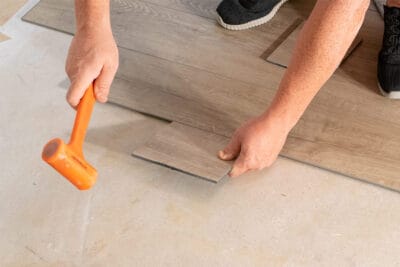
- Insert the tongue of the short end into the previous plank and lower the long side into the groove of the previous row's plank. Tap it into place with a dead blow mallet and extra piece of plank for a snug fit. Lock the planks together by gently tapping the top of the seams with a mallet.
- For end pieces, use a pull bar to pull the pieces together instead of a mallet.
- The floor can be walked on immediately. After laying the floor, you'll need to re-install the baseboards.


Notes
- With hardwoods, it is usually best to lay in the opposite direction of your floor joists. However, there isn’t a rule like this that I know of for vinyl. Do whatever you feel is most aesthetically pleasing.
- Depending on the locking mechanism, I prefer to seat the small end of the plank into the previous board and then whack in the longer side – not as much friction.
- A laser or laser level is very useful for checking the straightness of your floor lines (the plank lines) as you go along. A chalk line can also be used.
- Check the floor leveling requirements on your plank boxes. It varies.
- During installation, you can mix planks from different boxes to mix the patterns, which creates a more uniform appearance.
- For a random pattern, rather than staggering, use the ending cut piece from the previous row to start the next row, if that piece is longer than 6 or 8 inches.
Leave a Reply