With this guide, it is easy to choose the best furniture paint for your project. With years of experience painting furniture for both clients and friends, this guide is crafted to simplify the process for beginners. Explore and learn the what, why, and how of creating beautiful masterpieces.
I can’t think of anything more disheartening than a bad paint job. All the prep and work you put into a DIY project to watch it chip and fail is the worst. And, unfortunately, I have seen it many times with friends and clients.
The truth is that over the many years of painting furniture and refinishing, not all products are created equal.
So, today, I thought I would take some time to share a guide to the best furniture paint that is worth the money and actually lasts! I have used over 15 different product lines and brands and, honestly, different paint types are NOT equal.
The Basics of Good Furniture Paint
When choosing the right paint for a furniture project, there are several characteristics that are important. I look for all of the following traits:
- Maximum Durability
- Sheen, which varies between brands
- Non-toxic (No fumes, very low VOCs, and avoids harmful chemicals)
- Does not require priming over previously finished wood.
- Self-leveling paint is easier to create a smooth finish.
Pro Tip: NEVER use latex paint or wall paint. Latex is sort of a misnomer since there is no natural latex in today’s paint, although sometimes an altered synthetic is used. Wall paint is not designed to adhere well to furniture, and it isn’t durable enough. Choose one of the products from this list for the best results.
Recommended Supplies
- Orbital Sander and/or Mouse Sander
- Sanding Bricks
- Brushes (my favorite brushes are the takylon brushes you can buy at Michael’s and other craft stores.)
- Microfiber rollers (for painting large, flat areas)
- Stir stick or long spoon
- Sprayer (optional, but here is the one we use, or you can read our guide to choosing the best paint sprayer here)
- Drop Cloths
- Blocks of wood or table (for the bottom edges)
How to Prep Furniture for Painting
I also won’t go too much into the prep-work necessary for painting furniture, but if you are interested, we have several articles on prepping your DIY project.
- Removing wood grain (also great for scratches)
- How To Paint Oak Cabinets – this post shows our step-by-step prepping process.
- How to Paint Furniture for Beginners – If your piece doesn’t require much repair, all of the paints that I recommend only need to be cleaned really well with either Simple Green or TSP alternative if you have heavy stains.
- After cleaning, sand well with 120 grit sandpaper. If you want your project to last, I generally don’t recommend skipping the sanding. This will help any type of paint you choose look better. It also leads to a great, smooth surface.
- If you are transforming a piece with knots or stains, add a layer of shellac primer over those spots to keep any discoloration from seeping into your color.
How to Choose Paint for Furniture
The good news is it only takes a few hours of work to see your furniture painting project transform. But first, you need the right products.
I do not use the same furniture paint for every project, nor should you. To get the best results, there are a few questions you should decide:
- Painting method – brush, spray, or roller?
- How smooth and free of brush strokes do you want the piece to be?
- Durability Factor – How often will the piece be touched, banged, or used?
- Sheen Factor – What kind of sheen do you want? Matte, satin, or semi-gloss?
To make this easy, here is a shortcut chart about the types of paint I usually recommend and the situations I use them for:
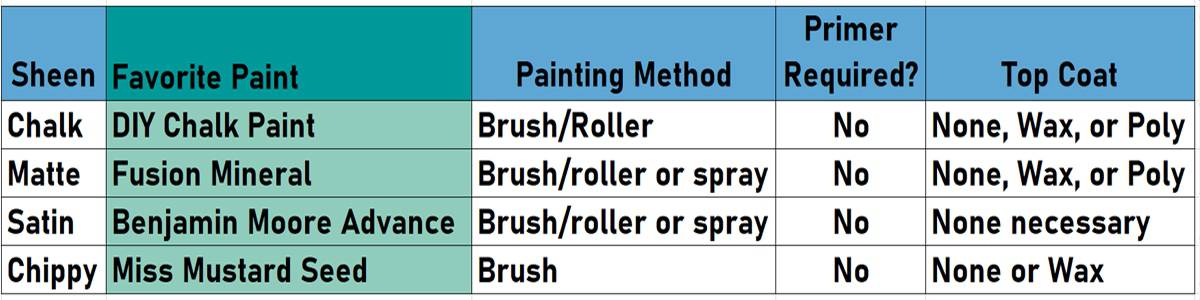
All of the paints I recommend are also very low to no volatile organic compounds (VOCs), so you can paint them indoors with no fumes!
Best Paint By Type
1. Best Chalk Paint
I think it’s a fair disclaimer that I am not a big fan of chalk paint in general. It is simply a personal preference as I don’t like how it feels when dry and I have tried several brands for clients.
I find that Chalk Paint is one of the least durable paints without a topcoat, and, in my boy home, I need maximum durability and cleaning.
However, chalk paint is great for things like home decor signs, picture frames, or furniture that doesn’t have constant handling. There are many pros:
- No priming needed.
- Beginner friendly.
- Easier to get a brush free finish than shinier paints.
- Distresses well for a multitude of styles.

The best I have found is a DIY chalk paint, and it is much cheaper than the fancy brands. Here is the recipe:
- 1 Quart Interior Paint (I usually use Acrylic Paint or a type of paint without primer – I find that certain paints + primer can make the texture gummy, but different brands may not have that problem)
- 4 ounces of Calcium Carbonate The calcium carbonate powder has a long shelf life in a sealed bag.
- Instructions:
- Dissolve ¾ cup of calcium carbonate powder in just enough water to reach a smooth consistency. It shouldn’t be too watery. I would say that the consistency of salad dressing is perfect.
- Pour the calcium carbonate mixture into 3 cups (24 oz) of paint, stirring well. After it is smooth, add a bit more paint to make 1 full quart (about ¼ cup) and stir again. Allow to sit for about 15 minutes and stir often while using.
- This recipe sits well in a cool dry place for a few days, when tightly covered. Just give it a stir before using.
2. Best All Around Paint – Fusion Mineral
Fusion Mineral is the paint I use most often and one of the top picks I always recommend to friends. I love the matte finish, which is still pretty flat but not quite as flat as chalk paint. You can learn more about Fusion Mineral here, but here are my general thoughts:
- Can be brushed or sprayed with a paint sprayer. For large flat areas, I would use a sprayer or a microfiber roller to lessen brush strokes.
- Wax and water-based polyurethanes work great without altering the color as much as they do with chalk paint.
- Controlled distressing is a breeze.
- Some colors can be a bit easier to work with and spread better. This is a boutique paint and is made in smaller batches than commercial brands.
- Good amount of trending colors and several neutral choices.
- Fusion Mineral is very durable, but I wouldn’t use it without a protective topcoat on pieces such as a kitchen table or a heavily used dresser. However, I often use this with a topcoat poly and even painted my kitchen island with it.
3. Most Durable Paint – Benjamin Moore Advance Alkyd Paint
This is my favorite furniture paint with a satin and eggshell sheen finish. Here are the situations where I would use this:
- When I want maximum durability without a topcoat.
- When I cannot use a sprayer but want the most brush-stroke-free finish.
- When I would like a slightly glossy or satin finish.
- It has the widest range of shades and colors available.
All projects I have used this paint for have held up beautifully. It is also easy to wipe off dirty fingerprints. An excellent choice for families!
This paint does, in fact, come in a flat sheen. My store does not have it and thus, I have not used the flat. However, I will say that I wasn’t impressed with the high gloss. The cure time was far too long for me.
The only trouble I have ever had with this paint is when I tried to thin it with water. There are very specific instructions on the paint can for how to thin BM Advance.
4. Best Decorative Paint – Miss Mustard Seed
Miss Mustard Seed Milk Paint is a milk protein based paint. It is all-natural and has a specific finish style. It’s called “chippy” because rather than distressing furniture via sanding it off, the paint sort of chips off to give it that style. It authentically creates an aged finish that looks much more natural than other paints. It offers a fun way to get your old furniture a fresh look easily.
- It is virtually brush stroke free, and much easier to work with than other paints if you don’t want brush strokes.
- It comes in a powder form, so it lasts forever but does need to be mixed prior to painting.
- Miss Mustard Seed works really well on raw wood as well. It is very durable and soaks down into the wood. It does not chip as much on raw wood.
- Probably the most natural ingredient paint you will find on the market. Great for people with sensitivities to chemicals.
- It is a very thin paint, and it takes a bit of practice to learn how it behaves.
If you are interested in learning more about how to use milk paint, I highly recommend watching this workshop on working with Milk Paint.
Buy Miss Mustard Seed Milk Paint Here
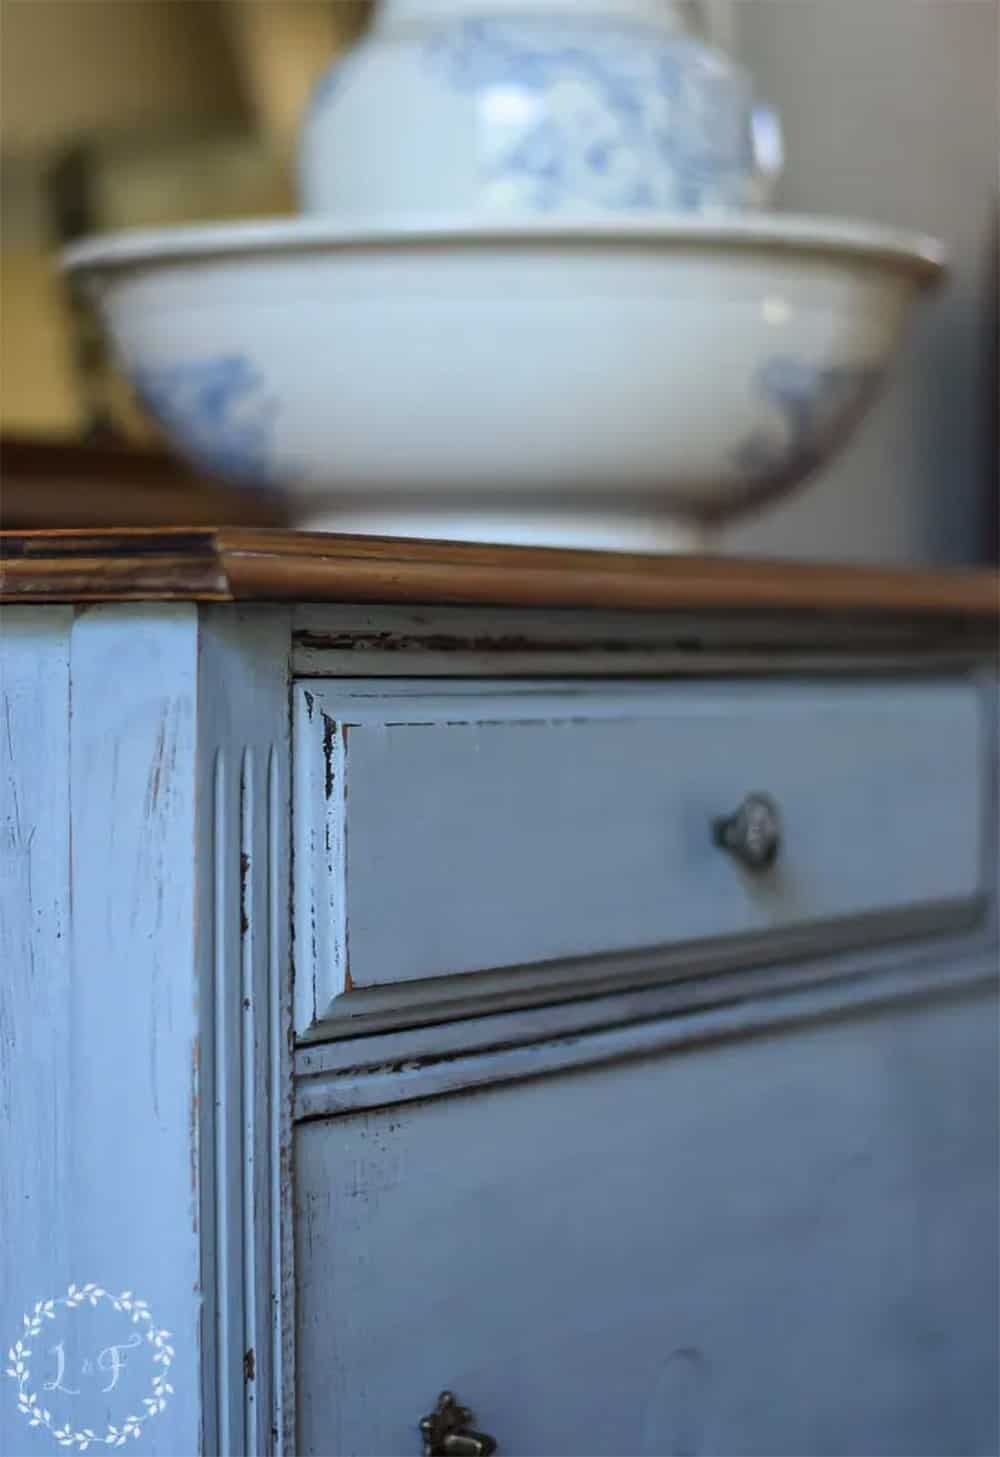
Dresser Painted with Miss Mustard Seed Milk Paint
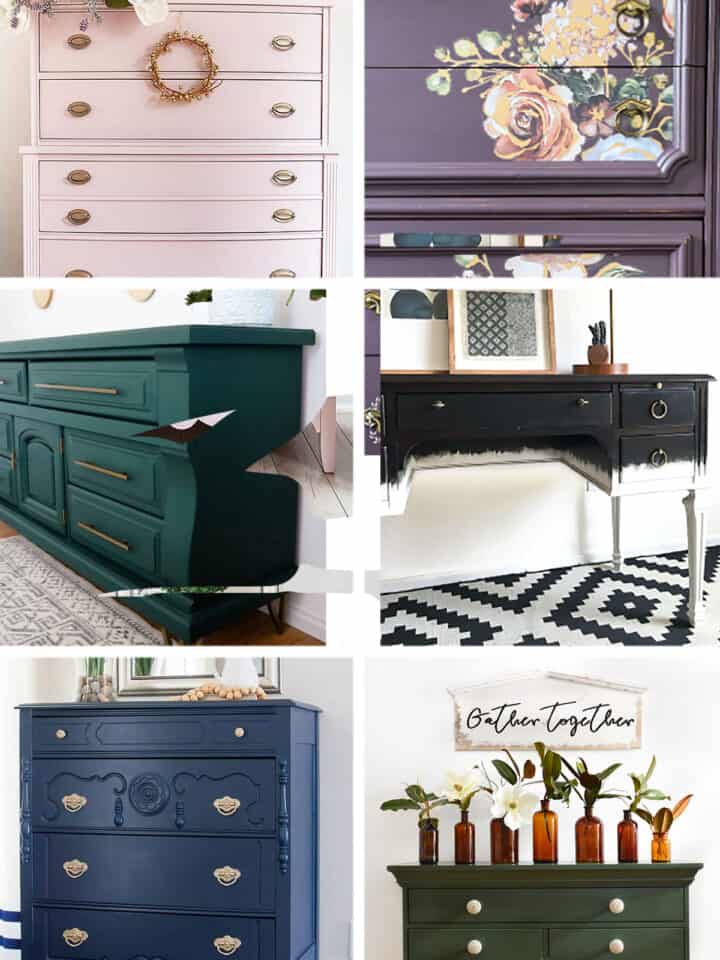
Decorative Finishes for Furniture
There are so many fun finishes out there! Finishes are like adding jewelry to your favorite little black dress. The dresser is wonderful on its own, but that extra touch enhances the whole package.
Here are some of the finishing products that I love for a good furniture makeover and where to buy them:
Fusion Mineral Furniture Wax – Most tutorials show using wax as a protective finish (it’s not great for that), but it is a great decorative finish. Here are some decorative finishes you can do with wax:
- Use dark wax to age a piece. Particularly with a light-colored piece, I lay the wax over a polyacrylic. That’s just my preference so that I get the durability of the polyacrylic and the luster of the wax. This also keeps the wax from seeping into the paint and making it more controllable.
- Mix in metallic cream to give a bit of metallic sheen.
- Mix metallic gilding powder into wax for more of a metallic punch.
- Tint the wax with a bit of paint to layer different colors.
Liming Wax – I love a good cerusing technique and liming furniture is a very beautiful, but specific finish.
General Finishes Glaze – This is a beautiful product that beautifully layer colors for depth or aging. I also use it to tone down bright colors. Here is an example of a dresser layered with glaze.
Tips for Mixing Paint
- Whenever possible, AVOID custom color mixes on a piece of furniture. If you need to do touch-ups later on or want to color match, it is usually very difficult to match paint. From my own experience, they couldn’t mix it even though I had the original label for a custom color.
- If you do need to lighten a color, mixing white paint in a dark color will make the pigment brighter (i.e. it will make a blue appear more saturated and lighter).
- To lighten a color without creating more saturation, add medium or light gray paint.
- If you need to thin a paint, never thin more than 10% water by volume. Thinning paint too much makes it behave differently and may weaken the durability.
- Benjamin Moore Advance in particular doesn’t like to be thinned very much, although I have thinned it for spraying.
More Furniture Painting and Refinishing Projects
- 20 Best Sage Green Paint Colors
- How To Paint without Brush Marks
- How to Whitewash Wood
- Best White Painted Furniture Ideas
- The Best Blue and Navy Kitchen Cabinet Paint Colors
- Our Entertainment Center Transformation
This is a great way to add a durable finish.
FAQs
While sanding will unquestionably give you the best bond and last longer, there are many paints that work well without sanding. I highly recommend the sanding method for high traffic surfaces such as around knobs and tabletops. You can use a high-bonding primer for surfaces that can’t be sanded such as laminate or MDF. Fusion Mineral and Rustoleum Chalk Paint work best without sanding.
No. The only reason to ever sand between freshly applied paint is to remove imperfections or if it isn’t smooth to your liking. Don’t sand the final coat unless you plan to apply a topcoat.
A water or solvent-based polyurethane gives great protection for painted furniture. I have used several brands and explain more in detail the best furniture topcoats here.
Many paints today do not require priming so check the product. However, you may still need to use a sealing primer if painting white or light colors, stains, or if you have heavy tannins (knotty pine, Brazilian cherry) in the wood.
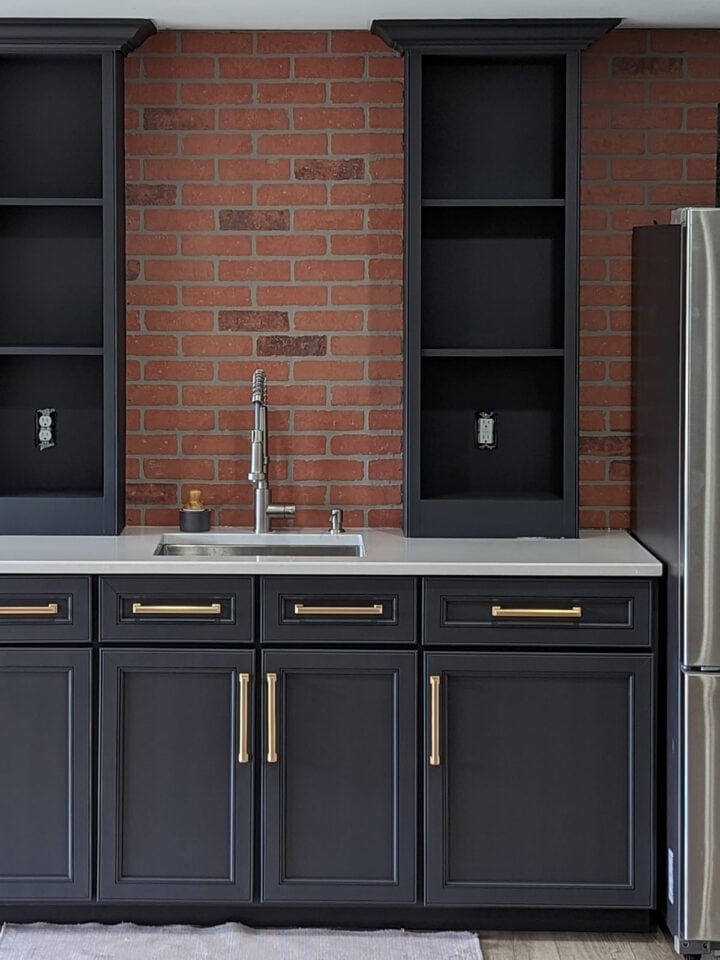
My go-to paint brand for painting kitchen cabinets is Benjamin Moore Advance in a satin sheen. It levels beautifully for a smooth finish, is super durable against chipping and fading, and cleans up easily.
After spray painting many projects, my favorite brand of spray paint for wood and metal is Rustoleum Universal. Prep the surface well and you can add a topcoat if you wish. You can see our DIY painted refrigerator here.
I wouldn’t use oil-based paint on furniture unless it was something I already had. First, oil is harder to work with, harder to clean, and rather uncommon to find these days. With improvements in paint over the last decade, oil-based paints are not even really more durable, so no reason to seek them out.
Chalk, acrylic, enamel, and such are all considered “water-based” since they clean up and can be thinned with water. There are a few solvent-based paints that clean up with water too. What I would not use is wall paint. It’s not as durable with regard to scratches, spills, chemical resistance, or cleaning.

Grab our free series "Weekend Home Projects that will Transform Your Life" Sign up below to receive updates including free printables, organization tips, home improvement projects, recipes and more! |
More Furniture Ideas

PS I love seeing your creations! Be sure to take a photo and tag #cravingcreative on Instagram! You can also stay in touch with me through following me on Instagram, Pinterest, and Subscribing to the Newsletter!
Rene' Irwin says
I wish I could send you a picture of how badly I dropped my kitchen chair. Painted kitchen chair that I just bought now I don’t know how to fix the badly gouged chip paint. Any idea ideas or suggestion suggestions
Rachel says
You can email a photo of it to Rachel@cravingsomecreativity.com If it’s badly gouged, it will most likely need to be repaired either with a wood filler or something that has a fiber reinforcement like woodpecker filler or bondo wood filler (not autobody filler). Then prime and match the paint color. That’s just some random thoughts without seeing it though.
Angela M. Peters says
Fantastic guide! 🎨 Choosing the right paint can be overwhelming, especially for beginners, and your post makes it so much easier. I appreciate the clear explanations and your professional insights from years of experience. Do you have any tips for prepping furniture before painting to ensure the best results? Excited to try out some of these paints on my next project. Thanks for sharing!
Rachel says
What prepping the piece needs will depend largely on it’s condition and what it is made of. This list is from my painting kitchen cabinets post, so it’s a general overview of prepping:
1. Remove all the hardware, along with the cabinet doors, including hinges.
2. Thoroughly clean all surfaces, removing any grime and dirt, using a degreaser or teaspoon cleaner. Remove any residue before proceeding.
3. If needed, repair deep scratches with wood filler. If you are changing out the hardware to a different size, fill any holes from the old hardware.
4. Vacuum and wipe sanding dust off with a damp microfiber cloth or other lint free cloth before painting. I do not like tack cloths as they can leave a residue.
5. Use tarp and painter’s tape to mask off any areas you don’t want painted. This will give you clean edges and makes the end result much more professional looking.
but you might be better served with reading about painting laminate furniture here, Identifying wood, veneer, and laminate?, or the beginner’s guide to painting furniture.
Tammy O'Neill says
What’s your advice – paint or stain honey pine furniture about 20+ years old. Our furniture is Habersham products made in North Carolina. Very well made, I would prefer to refinish instead of replacing.
Thank you – Tammy O’Neill
Rachel says
If the furniture is in decent shape, you can do either depending on your style and skill level. I had a honey pine dresser that I painted because paint is a little easier to prep and cover imperfections. With paint you can lightly sand, whereas restaining would require chemical stripping and removing all of the previous stain and varnish. Pre-stained wood will not take new stain the same way. That being said, I have done both because of the vision I wanted for the piece. Feel free to email me a photo and I can give more specific advice.
When I evaluate if a piece can be restained, I look for anything that isn’t solid wood and how hard any decorative pieces would be to refinish. Even high quality furniture, often but not always, uses plywood with a veneer for straight sides and tops, because plywood is more stable from warping. It can sometimes be a bit tricky to see how thick the veneer is, but you want to avoid sanding through that veneer if you are staining. Those are just my own general tips, but each piece has it’s own history, feel, and considerations. Good luck with your project!
Sahriyar Selim says
Your post is very helpful. Thanks a lot