Why sacrifice natural light for privacy when you can have it all? Window film provides a commonsense solution for renters and homeowners alike. Follow this easy how-to for install tips and style picks you will love!

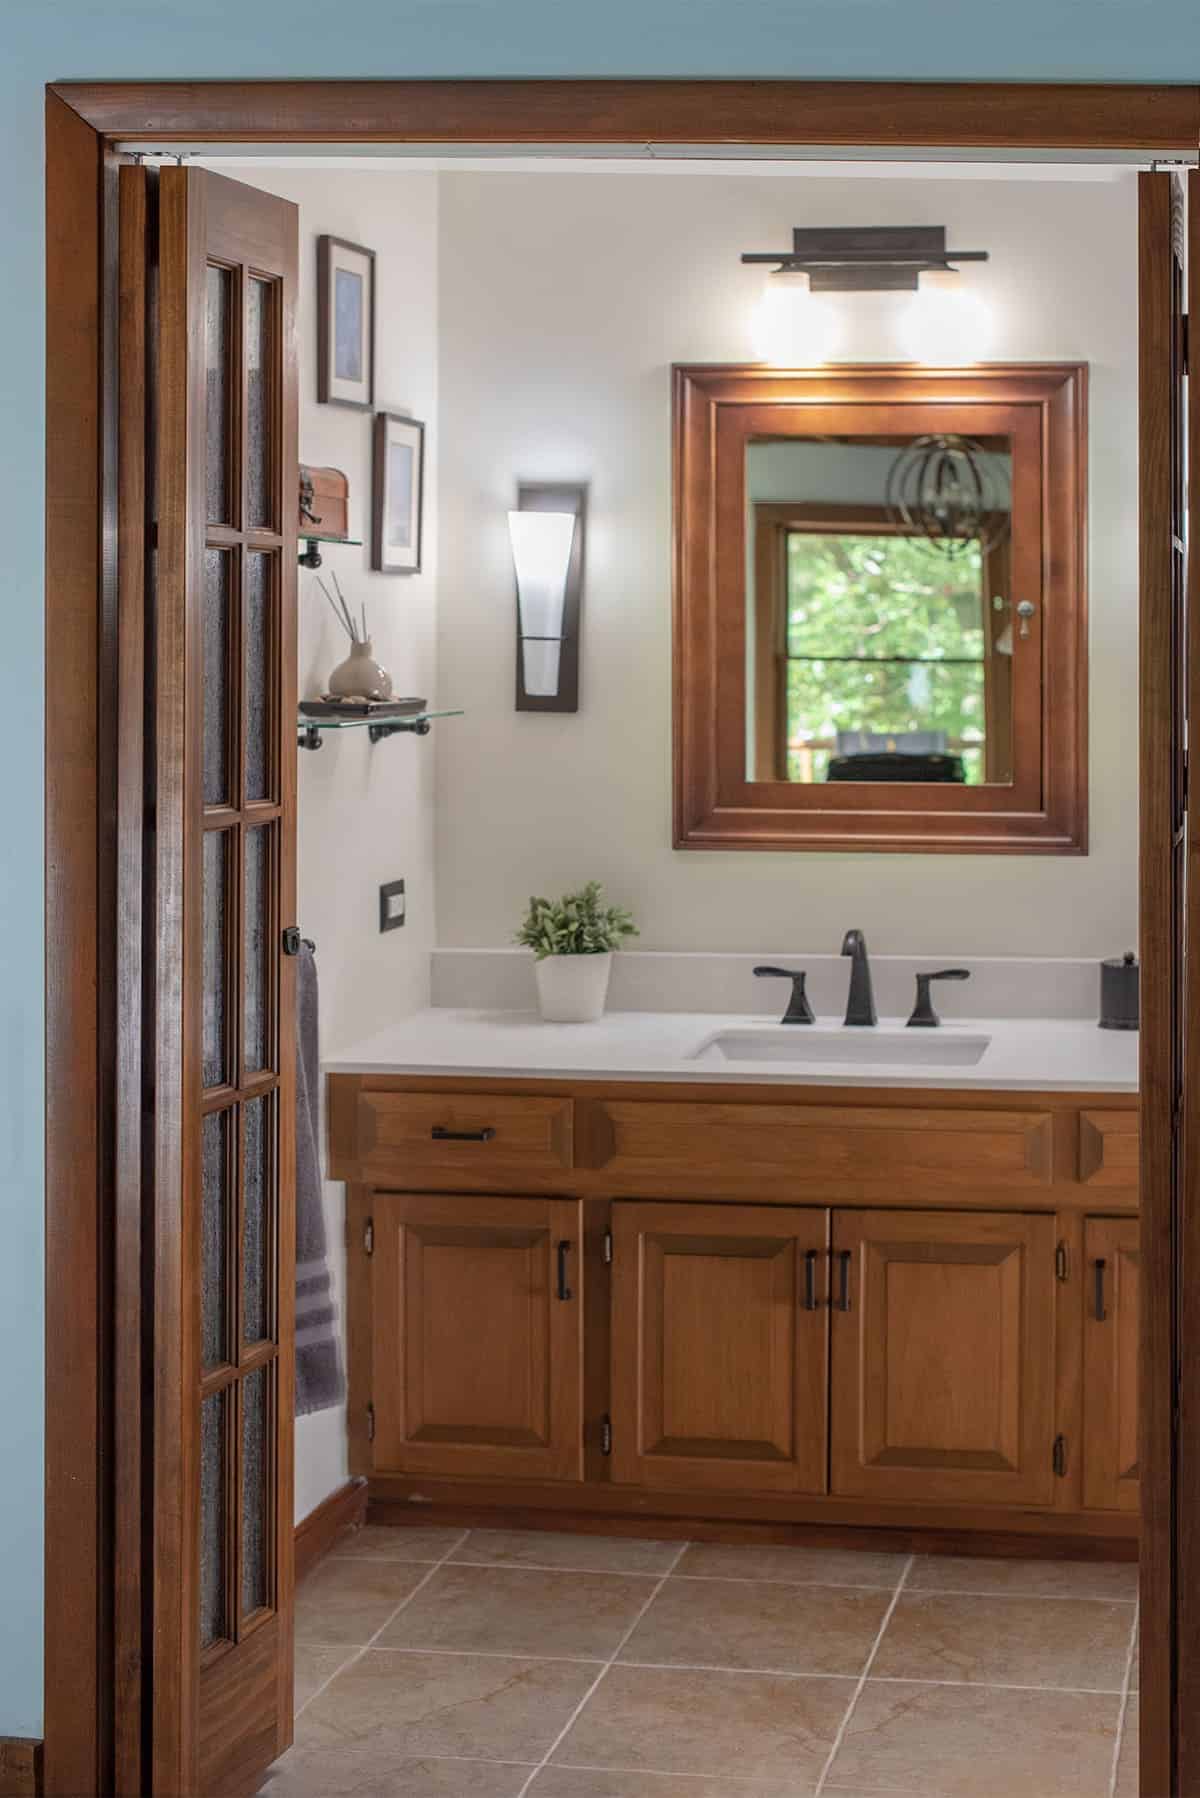
When purchasing an older home, it’s the charming details that often draw us in. My parents fell in love with the light-filled interior of their home thanks in part to unfiltered glass doors and windows. However as much I enjoy natural light, no one wants to feel as though they live in a fishbowl.
Case in point- although the glass doors between their master bathroom and bedroom were aesthetically appealing, they fell sadly short on privacy. It’s a bit unromantic when the toilet is in plain view, just sayin’.
Luckily there’s a modern solution to save the day! Window film provides privacy in many different styles without sacrificing natural light. It works by clinging to a smooth glass surface without adhesive so it’s renter friendly and lasts for years! Even better- it’s a no mess, no fuss, easy DIY home improvement idea.
So let’s dive in with this easy to follow how-to. I’m sharing all of my behind-the-scenes tips and my favorite window film styles.
The Benefits of Window Film
Window film isn’t just for privacy! The benefits are endless:
- Helps with dogs barking at passersby.
- They have some that look similar to fake blinds.
- Give a decorative, stained-glass effect inexpensively.
- Provides UV protection to furnishings and floors.
- Put it in glass around doors so creepy salesman can’t see that you are home.
- A darkened screen that lets you see out but keeps the room cooler and less contrasting.
- Frost your bathroom for privacy but still let in light.
- Give mirrored glass an updated style.
- Add to glass cabinet doors to hide clutter.
Supplies
- Windex or other fast drying window cleaner that won’t leave streaks.
- Lint free cloths – I use these window cloths and they are amazing for cleaning windows.
- Flat razor Blade
- Plastic Scraper or Thick Credit Card
- Scissors
- Window Film – I added some of my favorite options in the post below.
How To Install Static Window Film
The products typically include instructions, but this demonstrates step by step how easy it is to install. I’ve added a few tips that I’ve learned that may not be included in the instructions.
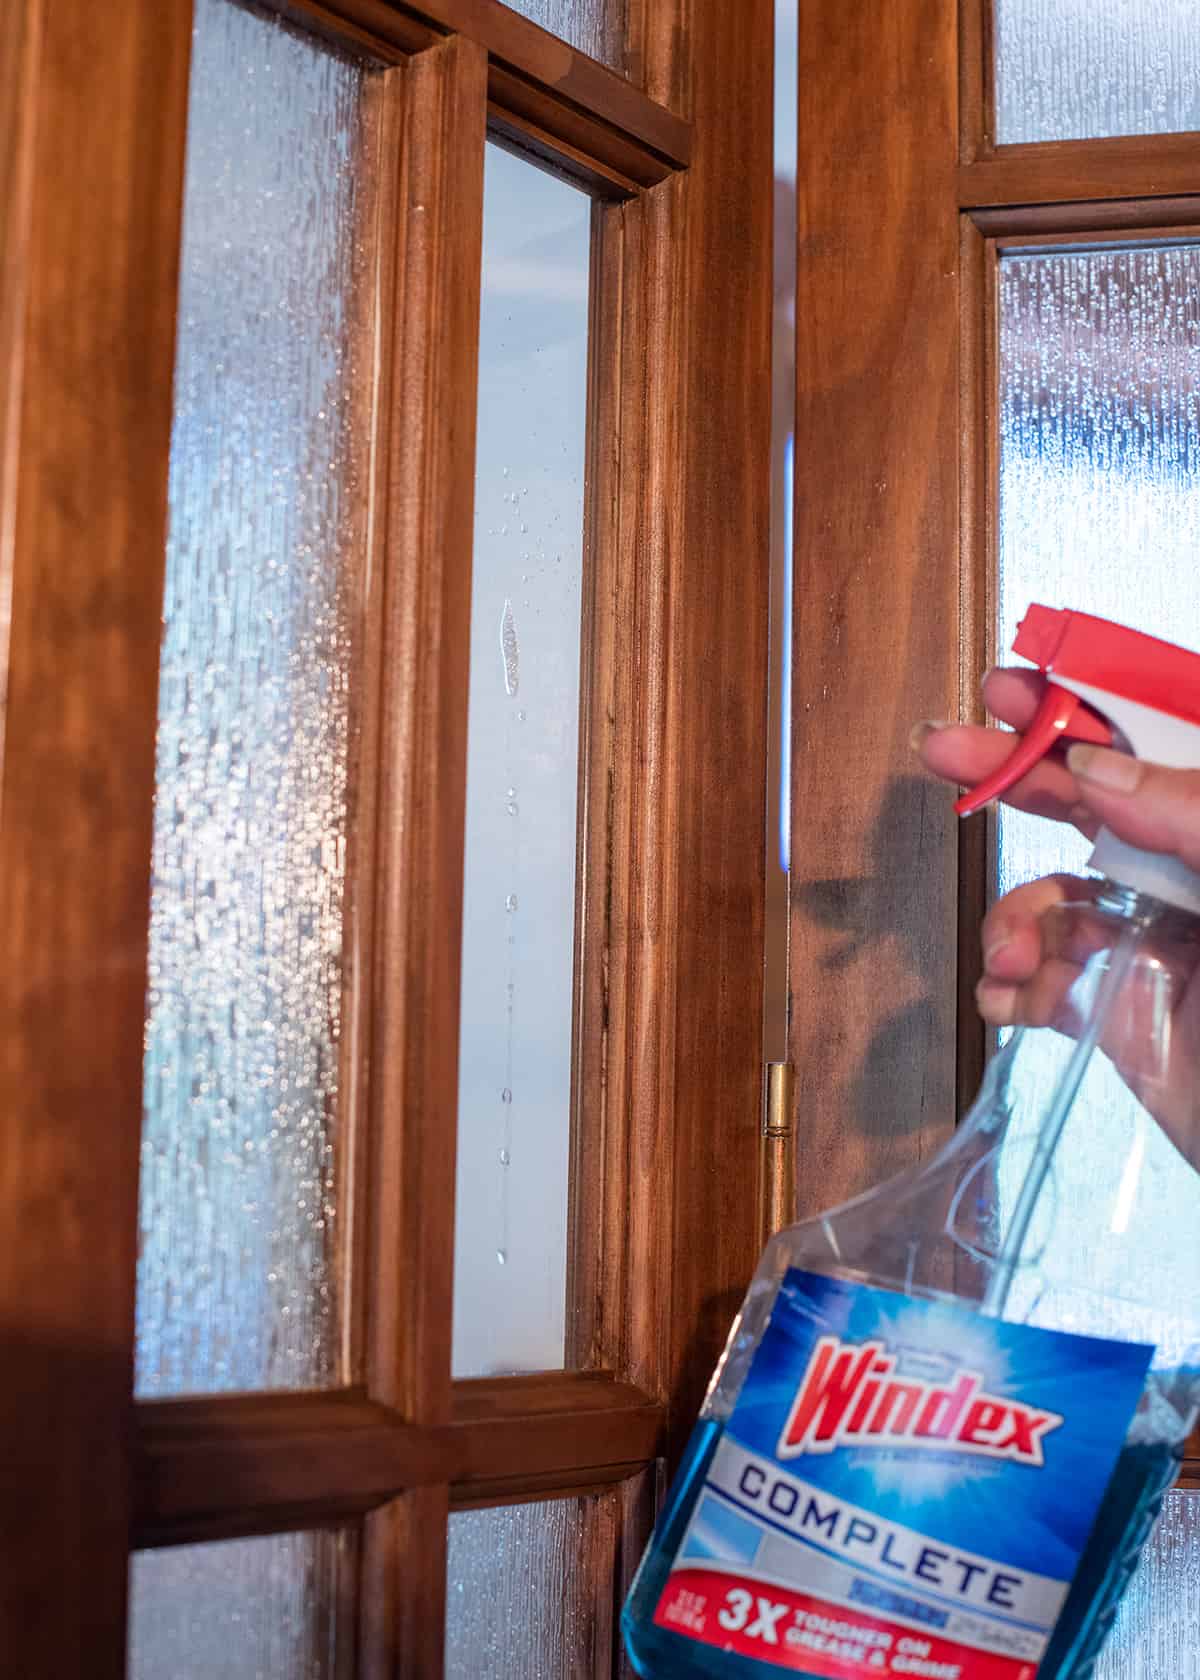
The first step is to get the window bright and sparkly clean. I find that paper towels tend to leave dust and fibers that will cause bubbles, so don’t use those. It’s better to use a lint free towel, like a microfiber towel or the window cloths that I use.
Also, use a flat scraper to remove any paint or rough edges around the panes. If you have previously painted, sometimes it can be hard to cut the window film around these drips and caulking.
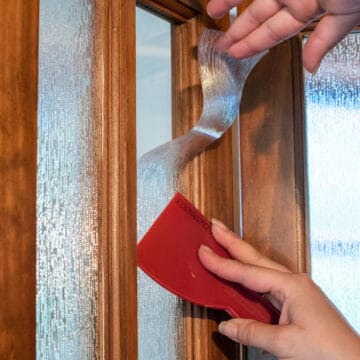
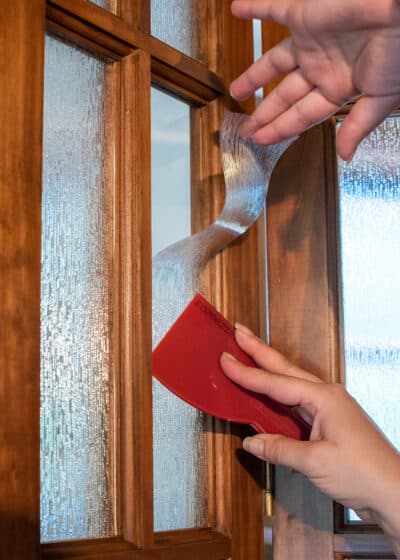
For smaller areas, I cut a template out of regular paper. A few of the panes were slightly wider than others, so I adjusted as needed. Then I cut and checked the window film before attaching.
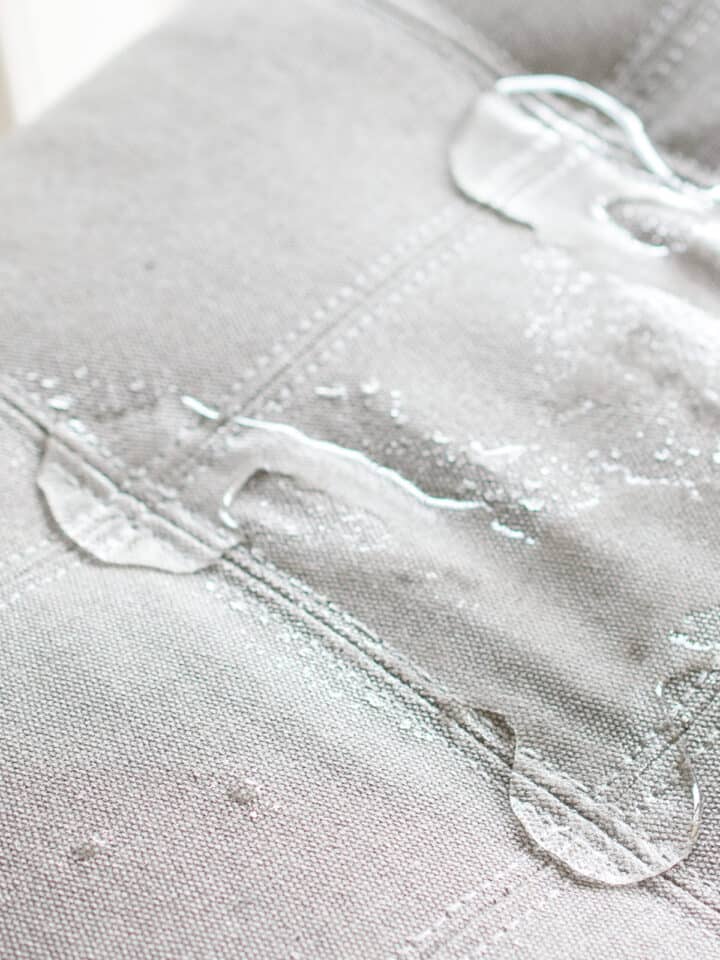
Spray the solution or window cleaner. Some kits include their own solution. You want to lay the sheets while the solution is still wet and covering the surface. Once the solution dries, they stick great with no adhesive. I have had some of these on windows for years and never fell off.
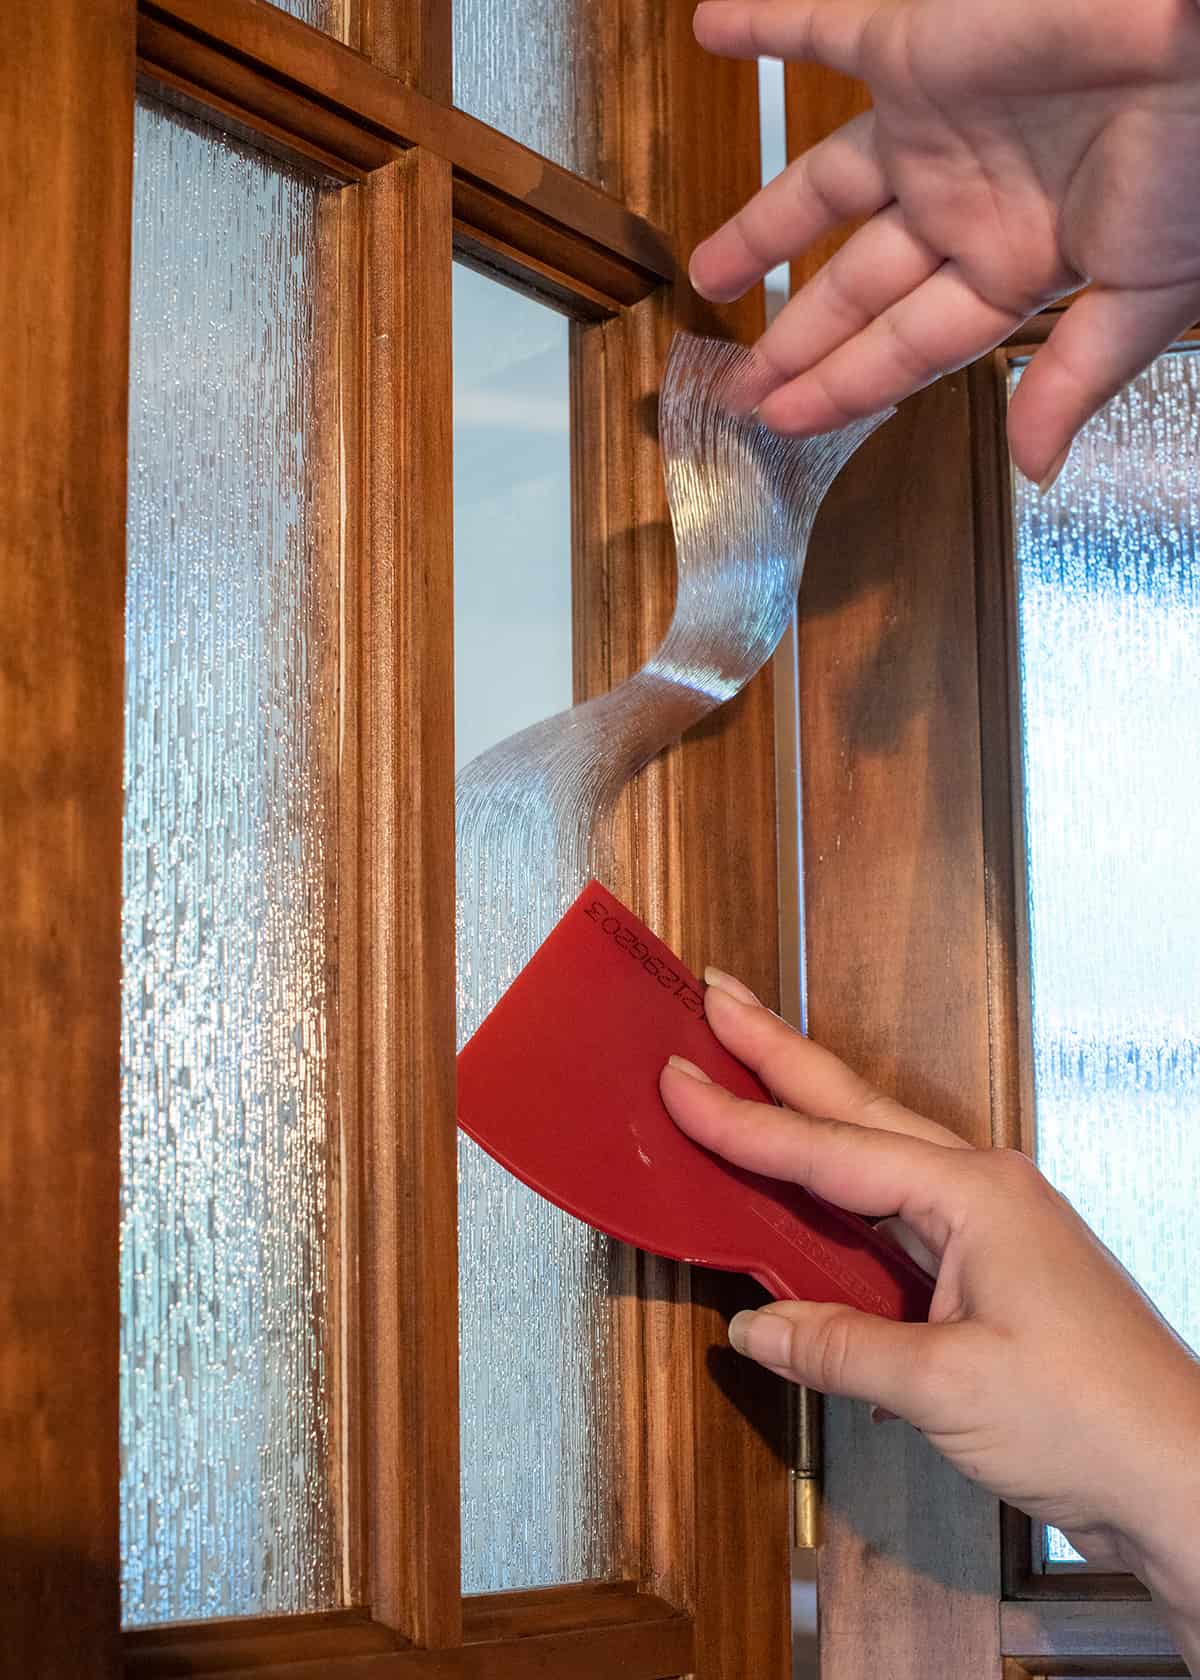
Press film into place. I found it easiest to place the plastic in the bottom of a pane and work upwards, removing bubbles as I went. As long as the solution is still wet, it’s very easy to remove bubbles. If the solution dries, spray a little more or remove the cling and try again. I blot up any extra solution from the bottom with paper towels.
Note: Most of these decorative films are thicker and feel like plastic. While I see tutorials where they place the covering and then cut it with a razor blade in place, I don’t feel that this works well for smaller areas like these tiny panes or side lights.
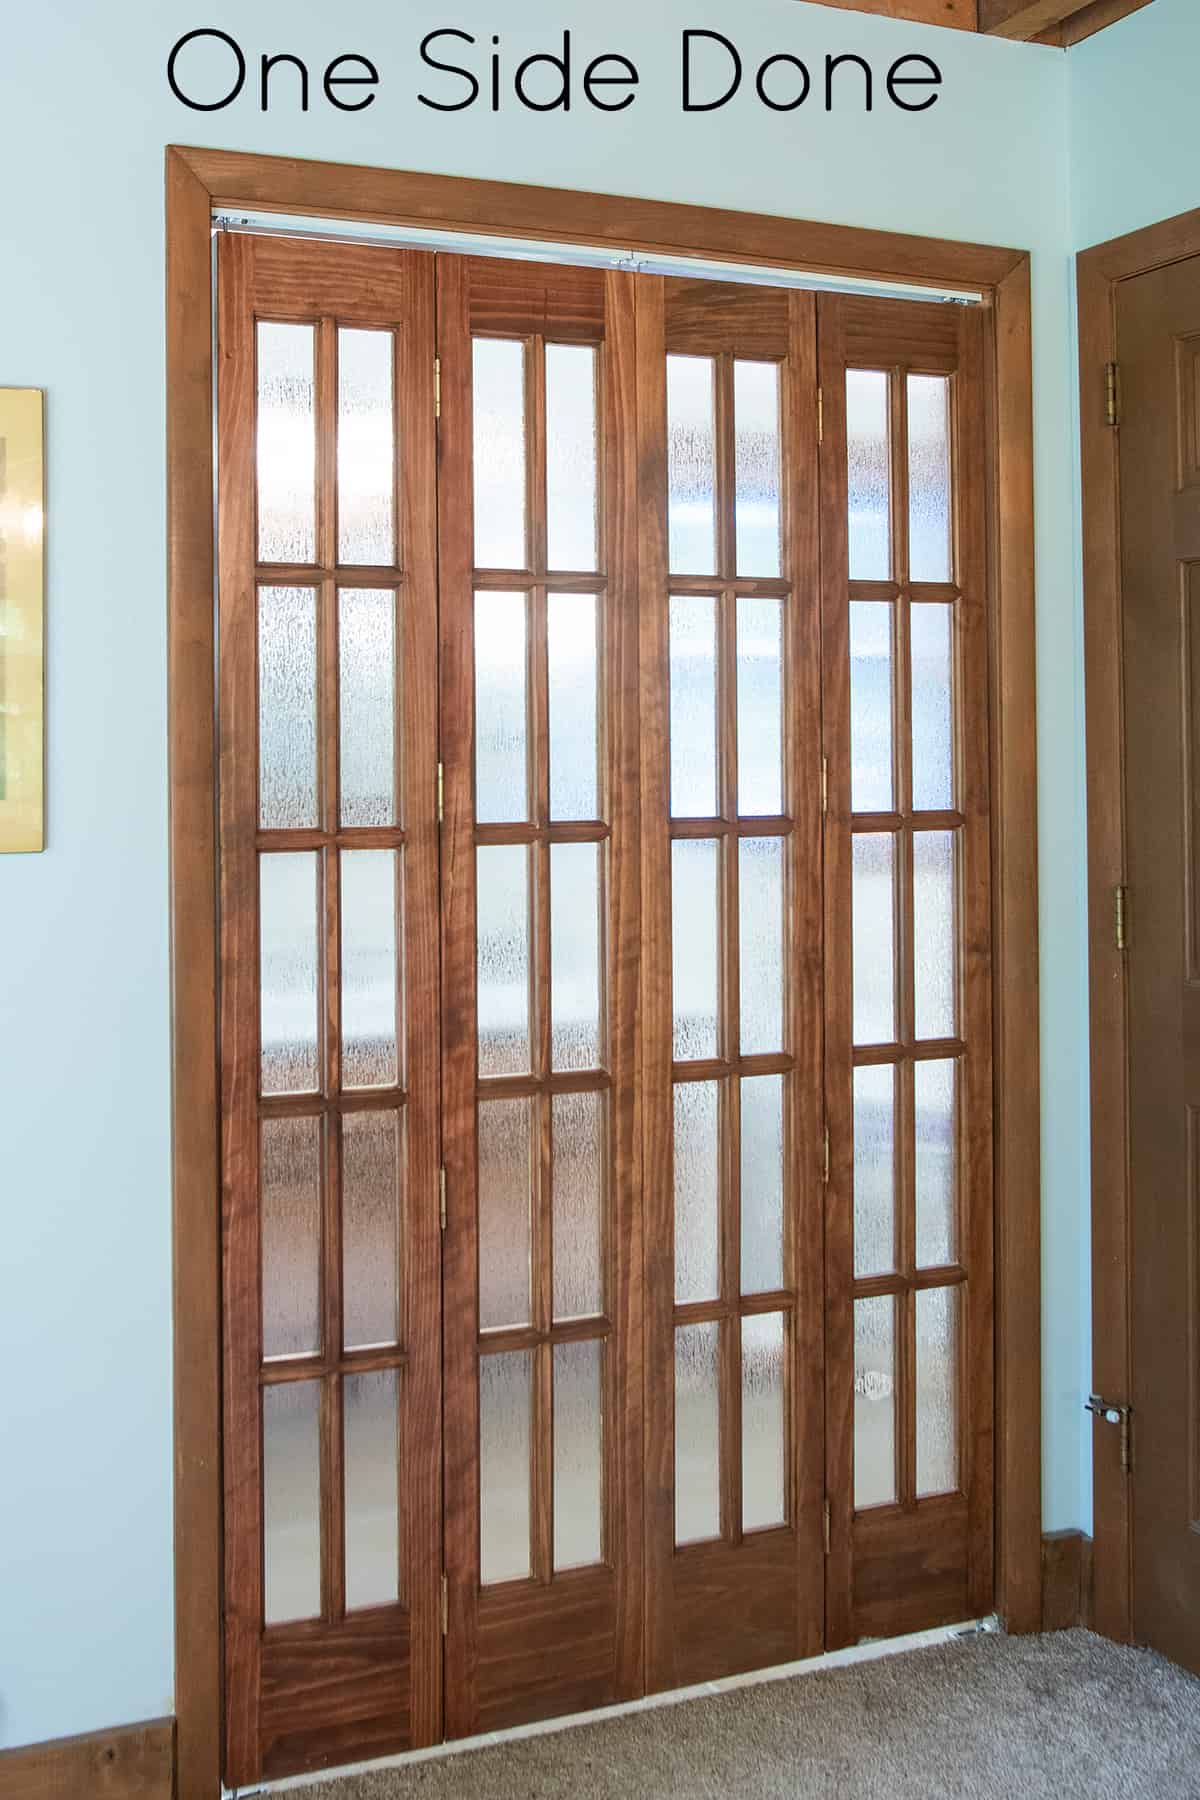
For this particular project, we ended up installing the bubbled paper on both sides. Normally this wouldn’t be necessary, but my parents chose a decorative bubbled pattern that wasn’t the most effective pattern for privacy. Other patterns such as this one I use on my front door and this one I used on a glass bedroom door only required the inside done. Now they are ready for a private spa day at home.
Tips for Applying Window Film with No Bubbles
- It’s totally fine if you have a few mistakes; don’t worry if your first pane doesn’t come out.
- Make sure to scrape any paint drips or spatter before you start installing.
- Check the roll for any defects before cutting to size.
- If you have any tiny bubbles just around the edges, wait for the solution to dry and smooth them out. Do make sure to smooth out the centers immediately.
Our Favorite Styles
You can click on the photo to find purchasing information.


Not Sure
What's For Dinner?
Signup for recipe updates and get a free cookbook of Easy Weeknight Supper Solutions!
More Easy DIY Projects
PS I love seeing your creations! Be sure to take a photo and tag #cravingcreative on Instagram! You can also stay in touch with me through following me on Instagram, Pinterest, and subscribing to the newsletter!
How to Apply Window Film
Tools
- Scissors
Supplies
- Window Cleaner Some kits come with a solution.
- Lint free cloths
- Window Film
Instructions
- Clean the window thoroughly with cleaner and lint free towels. Also, use a flat scraper to remove any paint splatters or rough edges around the panes.

- For smaller areas or repetitive panes, cut a template out of paper.

- Spray the solution or window cleaner on the pane to attach the film. Some kits include their own solution.
- Press film into place. As long as the solution is still wet, it is very easy to remove bubbles using a plastic scraper to move the bubbles out. If the solution dries, spray a little more or remove the cling and try again. Blot up any dripping solution from the bottom with paper towels.


Kristen says
Great tutorial! I like the patterned window film you used to create privacy but still let in the light!