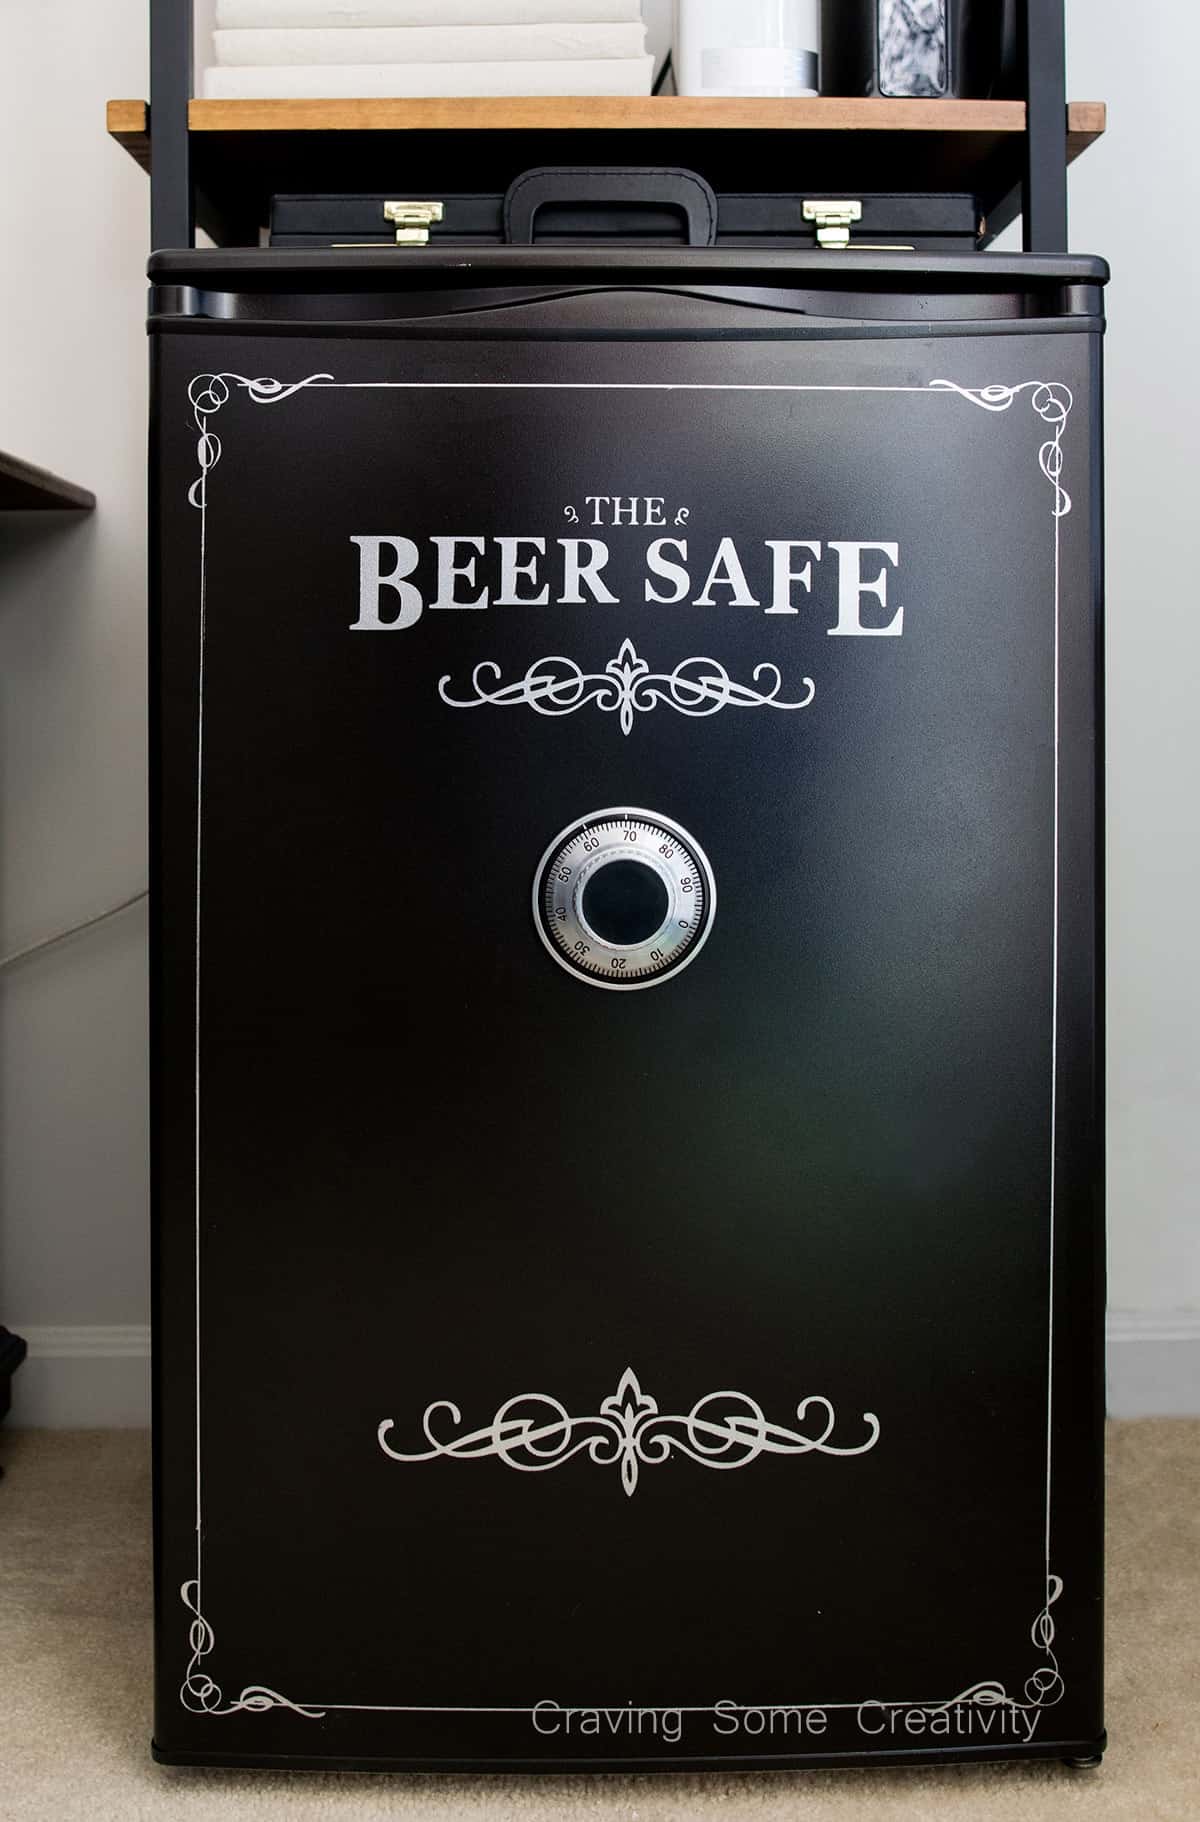
Learn how to paint a refrigerator with a simple, budget friendly method that uses the most durable and tested products for a long lasting finish. From black to stainless steel, and even a fun “Beer Safe” stencil, I am sharing all of my tips and tricks with this step-by-step guide!
Right now… you are probably thinking, “What in the world?!” I find it hilarious but it is pretty outside the box. I completed this makeover as part of the manly office makeover. Part crazy, part not knowing if I could pull it off, and a dash of “this is gonna be awesome!” cemented the idea for me.
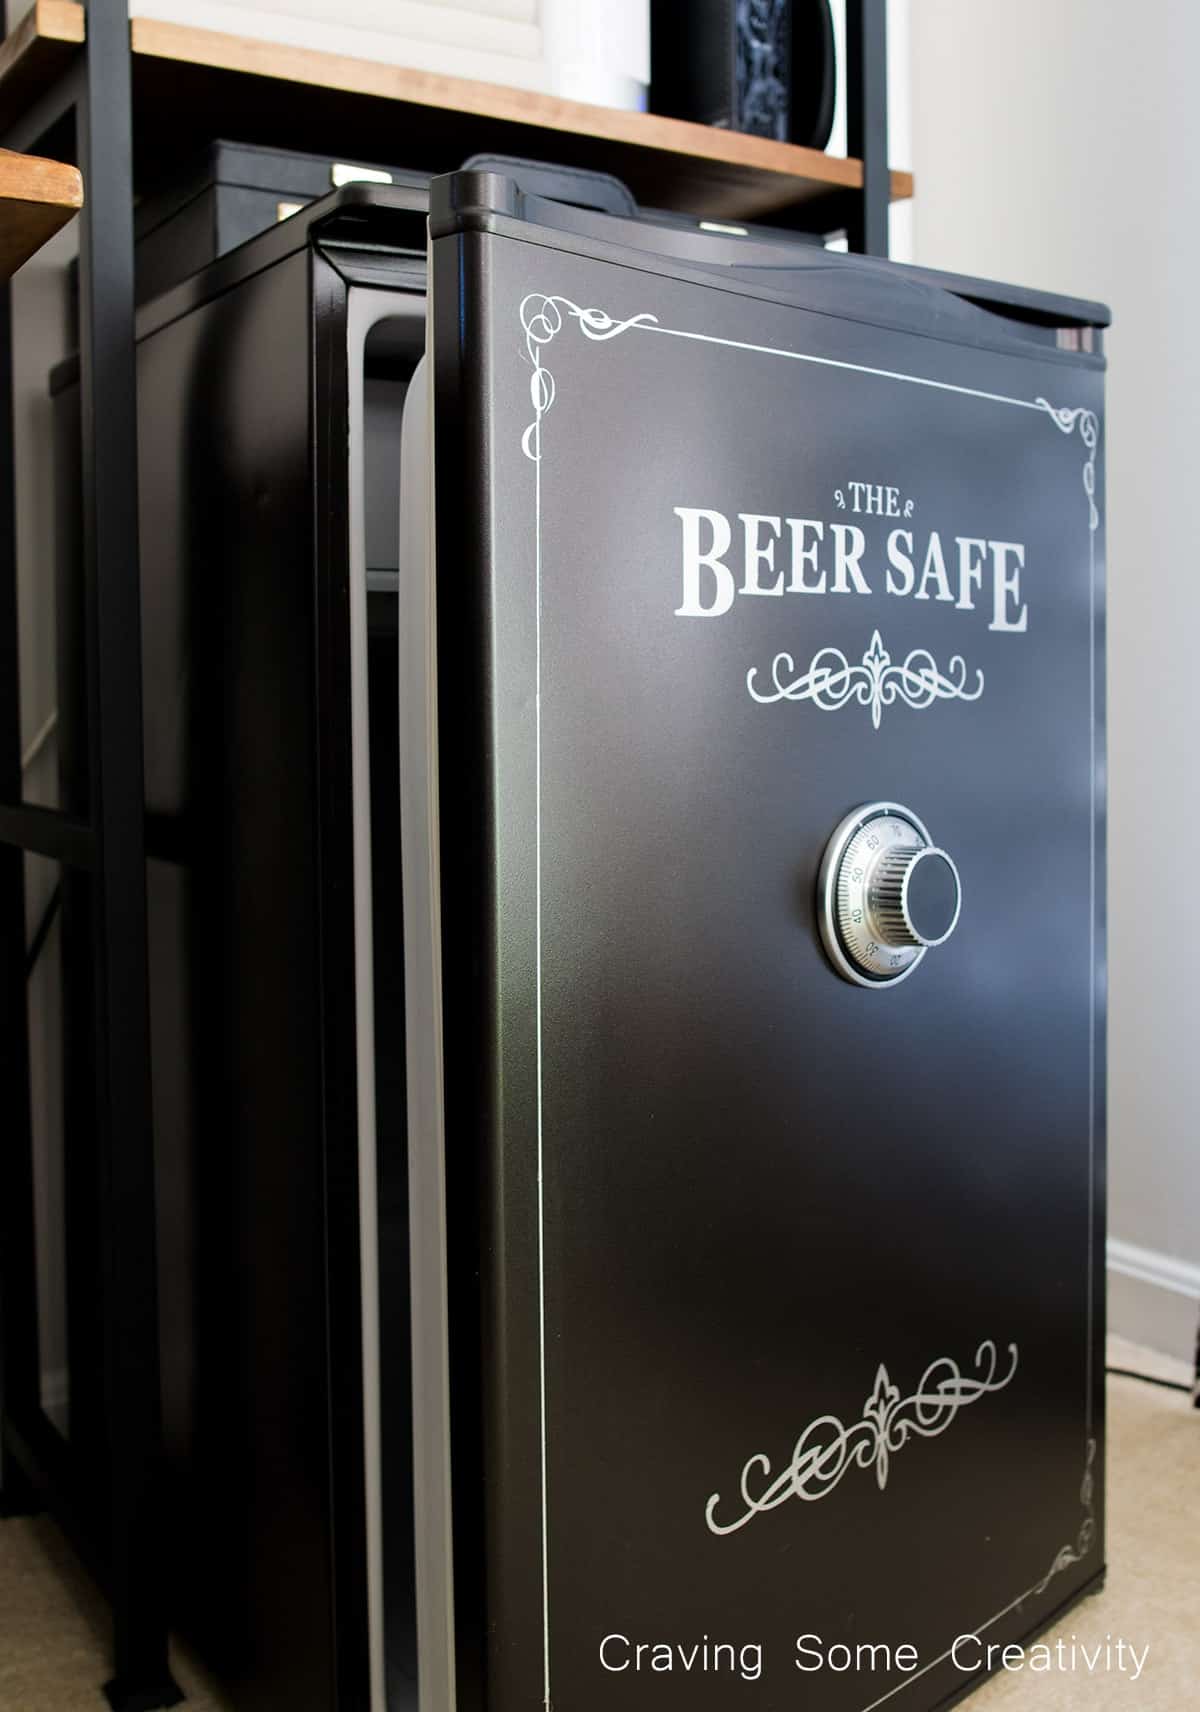
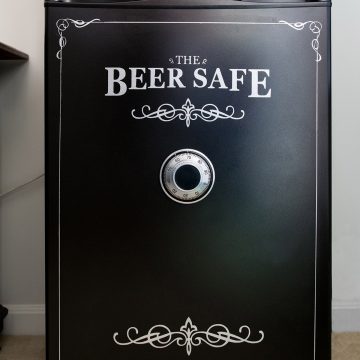
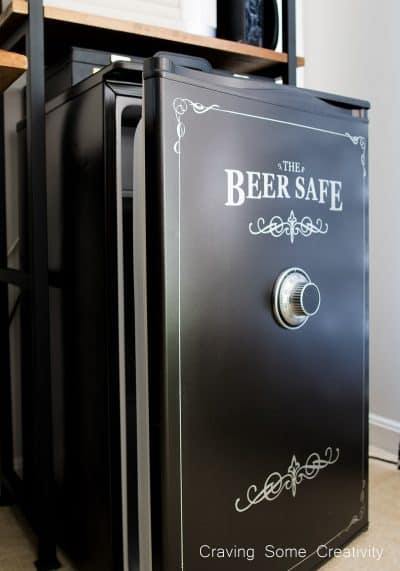
To call it “The Beer Safe” is almost theatrical in its over-the-top-ness. Who thinks to paint their mini-fridge like a gun safe?! It’s even funnier to me since it is mostly stocked with water bottles and soda, although beer does make an appearance.
However, learning how to paint a refrigerator is not only simple, but eye-opening in the options! You can choose from tons of colors and add decorations like we did. All you need are just a few simple tools and you can do this entire project in under $50.
Looking for some inspiration? Check out our list of Creative Refrigerator Makeovers while you are here!
Supplies
- Primer - See notes below on types and brands.
- Paint – See notes below on types and brands.
- Sandpaper - I recommend medium 180 or 120-grit sandpaper and a random orbital sander.
- (OPTIONAL) Roller - using a small paint roller is preferred over a paintbrush because it doesn't leave streaks. However, use a brush if you prefer. Some paints work best with microfiber rollers and others with foam.
Pro Tip: For most spray paints, I HIGHLY recommend using these Spray Paint Handles. They will save your hands from hurting and produce an even finish. They are a wonderful and reusable!
What Paint To Use on a Fridge?
First, the condition of your painting surface should always be taken into account when deciding the right paint and primer for your project.
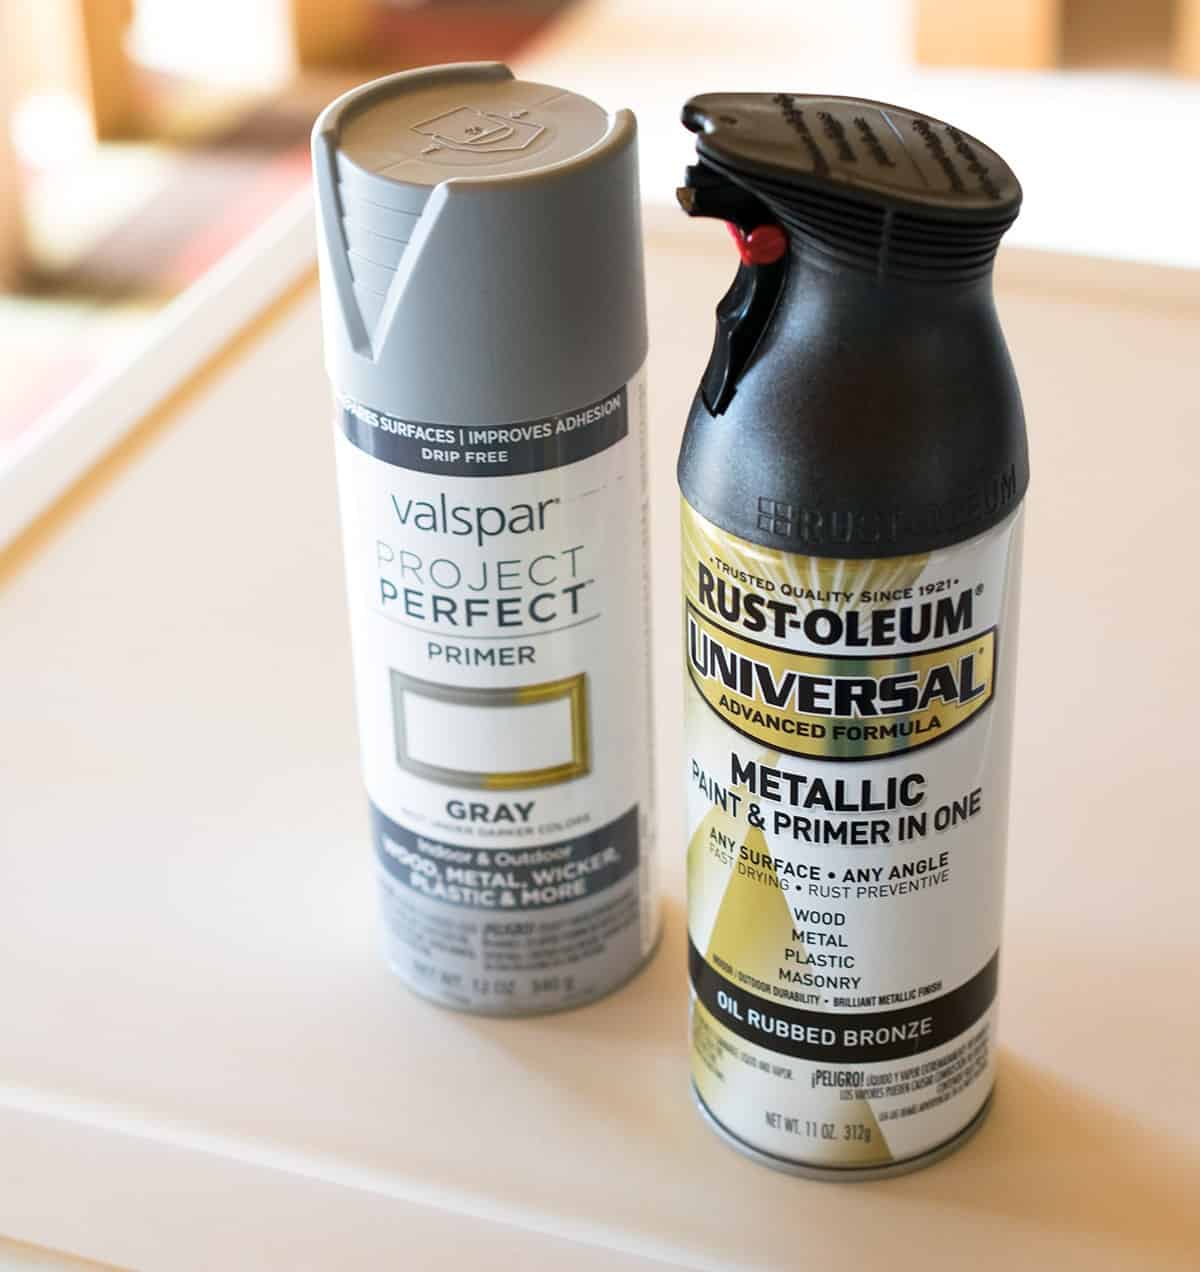
Primer
Not all paints and conditions will need a primer. If your surface is actually in good condition and not bare metal or plastic, you can generally skip priming but check the paint you use. Below are my recommendations based on what I have used and loved.
- Heavily rusted surfaces - Rusty Metal Primer Spray
- Lightly rusted surfaces or bare metal areas- Clean Metal Primer (also comes in quart size you can use with a brush). For just a few spots, most metal primers are fine.
- Galvanized Steel or Tricky surfaces - Universal Bonding Primer (also comes in quart size for painting with a roller)
- For rusty surfaces that can't be sanded - Rust Reformer. I haven't actually used this one without sanding, however it gets rave reviews. Personally, sanding will always give the best bond if you can.
- For surfaces exposed to high heat or in full sun - High Heat Primer Spray. I've used it for an outdoor grill we repainted, and it is pretty good.
- If you have a vinyl wrapped fridge in bad condition, I would remove the vinyl and prepare the surface of what is underneath (Plastic or Metal). Vinyl is a tricky surface to paint or rough-up with sandpaper.
Paint
- Spray Paint – I have used and loved Appliance Epoxy Spray, but it only comes in very few colors. For this project, I used RustOleum Metallic in Oil Rubbed Bronze (which looks black to me, not really bronze). Make sure whatever you use is appropriate for metal or painted metal or plastic if necessary.
- Roller Paint – Durable Epoxy Paint
- Clear Coat – Most options I use don’t require a topcoat, and there aren’t a lot of great inexpensive options. Also, with metallic or stainless options, I feel a clear coat may mess up the finish.
- Stainless Steel Paint – In my opinion, the peel and stick papers look more realistic, especially for novice painters. We used stainless contact paper on our dishwasher, for example. However, there is a Stainless Steel Paint Kit that does look pretty decent from the real-life reviews I have seen.
Pro Tip: For Appliances, I recommend a satin, metallic or slightly glossy sheen. As a general rule, it is easier to clean and less likely to scratch than a flat.
Step by Step Guide to Painting a Fridge
The fridge started out as boring white. We lugged it to the workshop in a properly ventilated area. Spray paint is caustic. Don’t do this indoors.
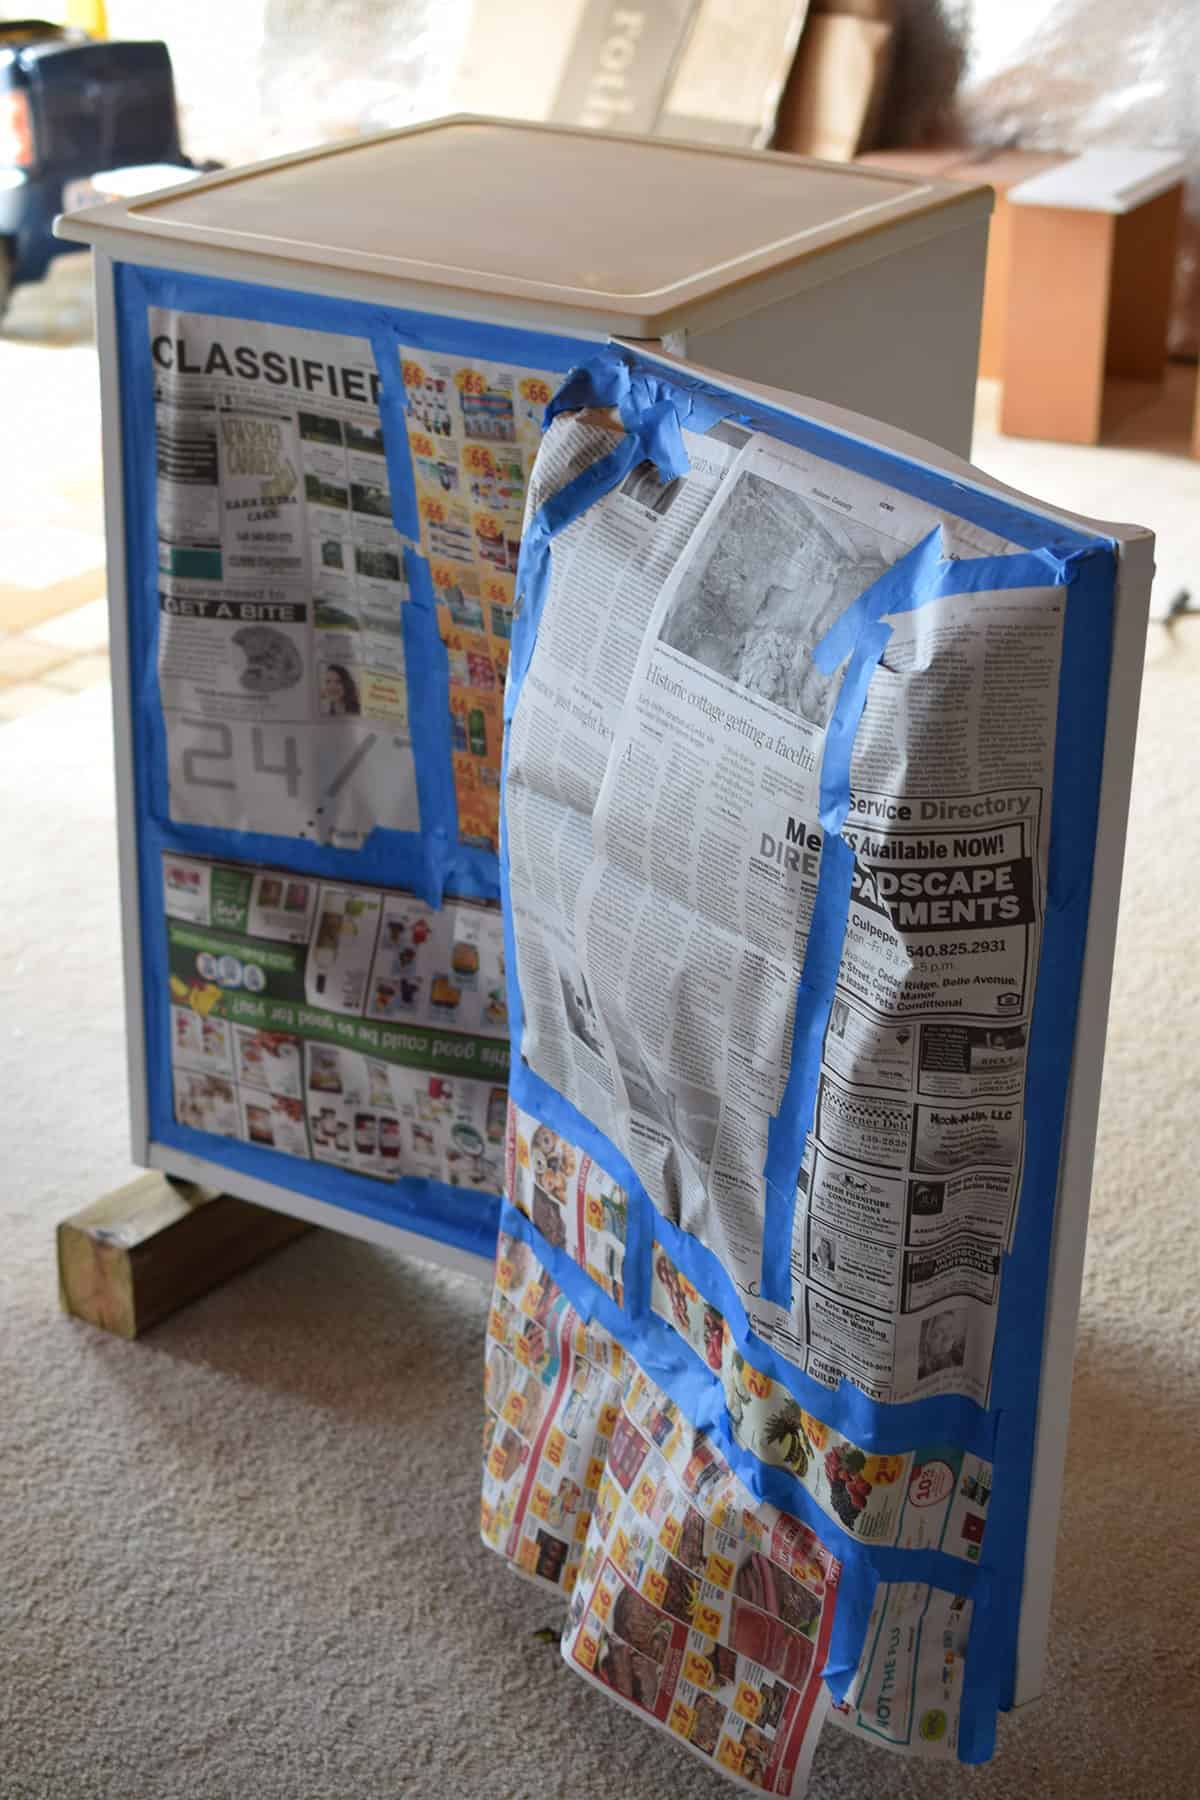
Step 1: Clean and Mask.
Remove any parts like large handles. Clean everything well and then tape off areas not to be painted. I left the rubber gaskets around the door frame as white because I felt the paint would flake off them.
Learn From Our Mistake – I don’t recommend painting where the gaskets touch the opposing surface to close the door. Even months later, the door is hard to open and sticks a lot. However, no paint ever came off from this area. I put a line of mineral oil on the gasket side to help with sticking.
Step 2: Lightly Sand the surface.
Next, the fridge is sanded down lightly. What I mean by “lightly” is that the entire surface was sanded evenly but not so much that I mess with any integrity of the piece or sanding through the existing paint. Make sure to get areas that are often touched well. A random orbital sander makes this a breeze, although hand sanding in some corners and handles may be required.
The dust in the air should be left to settle overnight and then all surfaces wiped down with dry cloth->wet cloth->dry cloth method.
Textured Fridge – If you have a textured fridge, the process is still the same. There is no need to sand the texture off but still need a light sanding. Don’t over-sand otherwise it can lead to removing areas of texture.
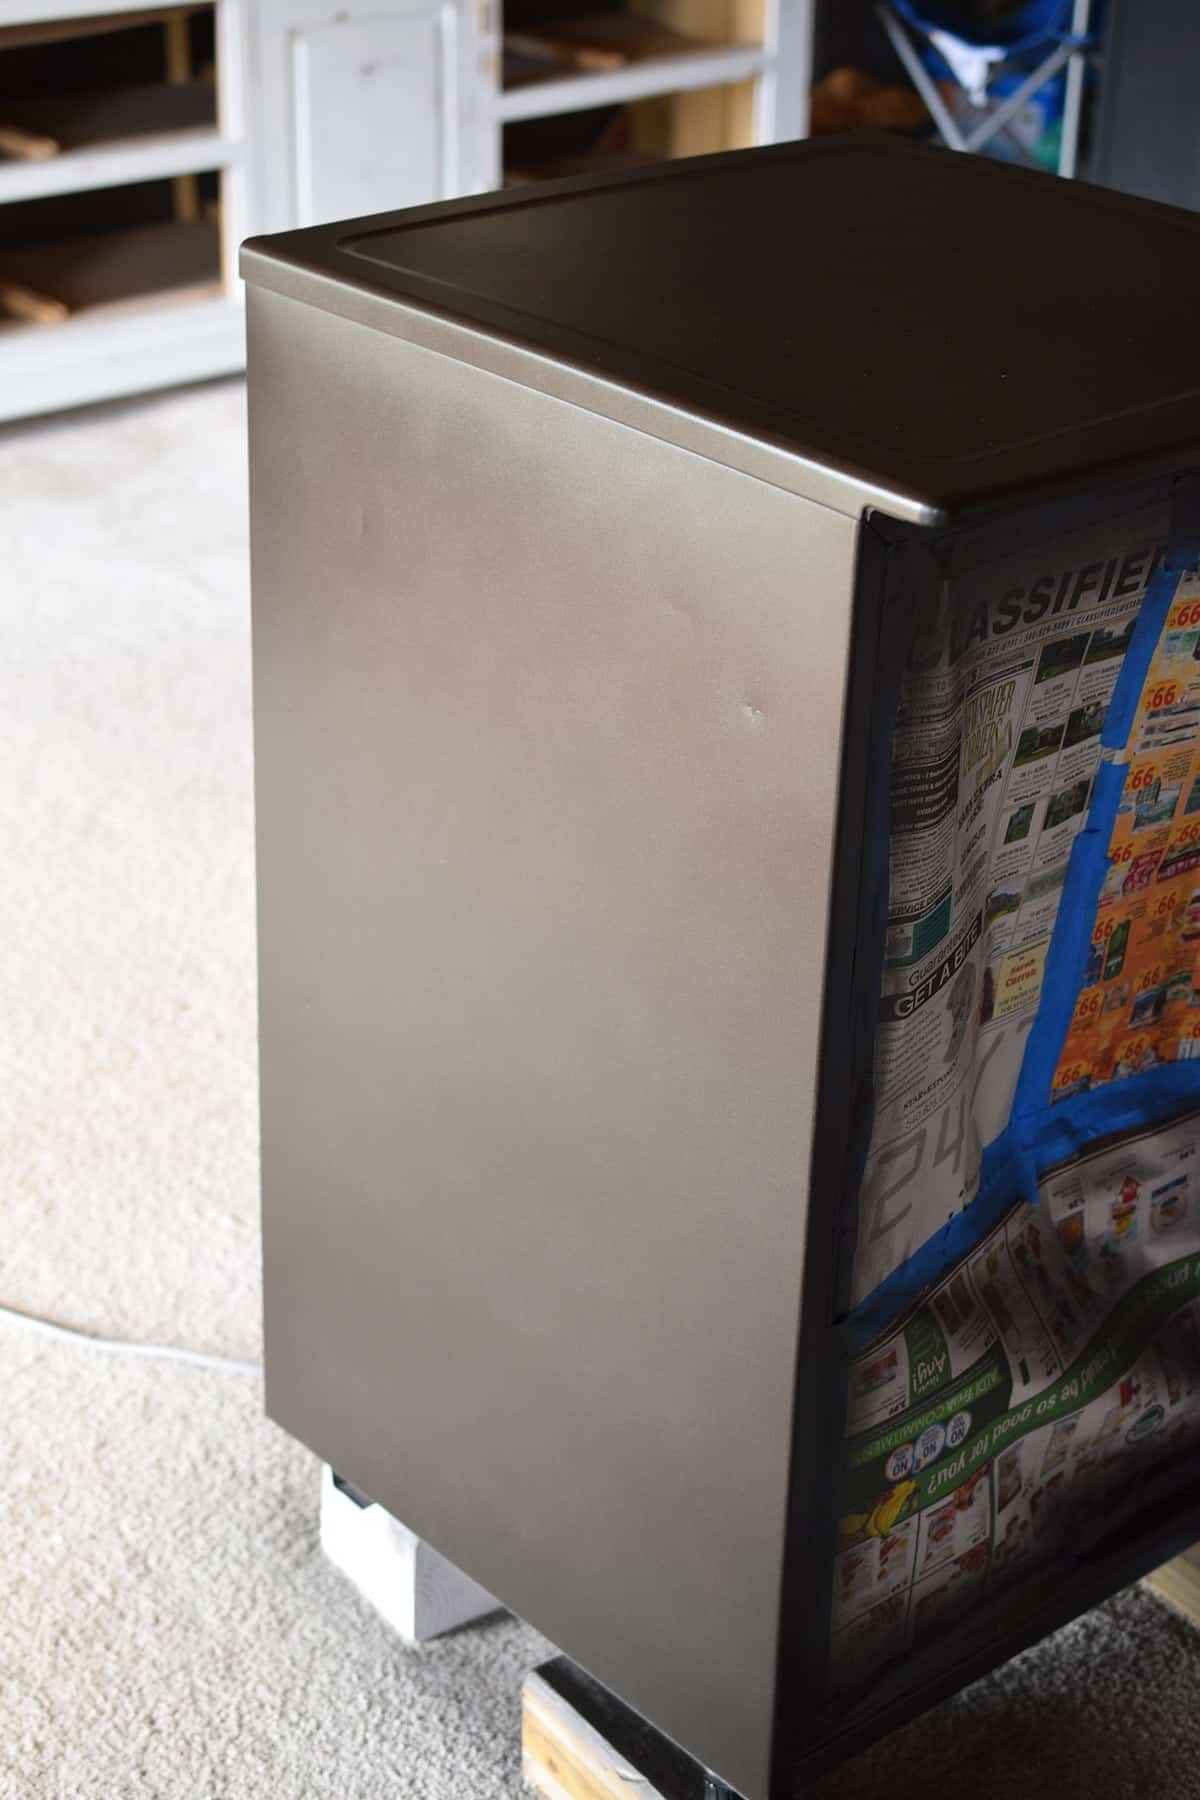
Step 3: Paint.
One coat of spray primer and two coats of the matte oil rubbed bronze was added. Make sure that when you are spray painting an appliance, you use even, light coats and follow the spray paint instructions on the can for dry time and time between coats.
When rolling, make sure to always roll consistently in the same direction for both the primer and paint. If you encounter a drip or other problem, wait for the paint to completely harden (not just dry to the touch) and then VERY carefully sand the blemish away before adding the last coat. It may peel if you don’t wait for the paint to harden.
In order to make sure that the Black spray paint was at its maximum hardness, I let the refrigerator sit for over a week before use. As long as you are careful, you can wait 72 hours or the directions on the paint product.
Stenciling Our Project
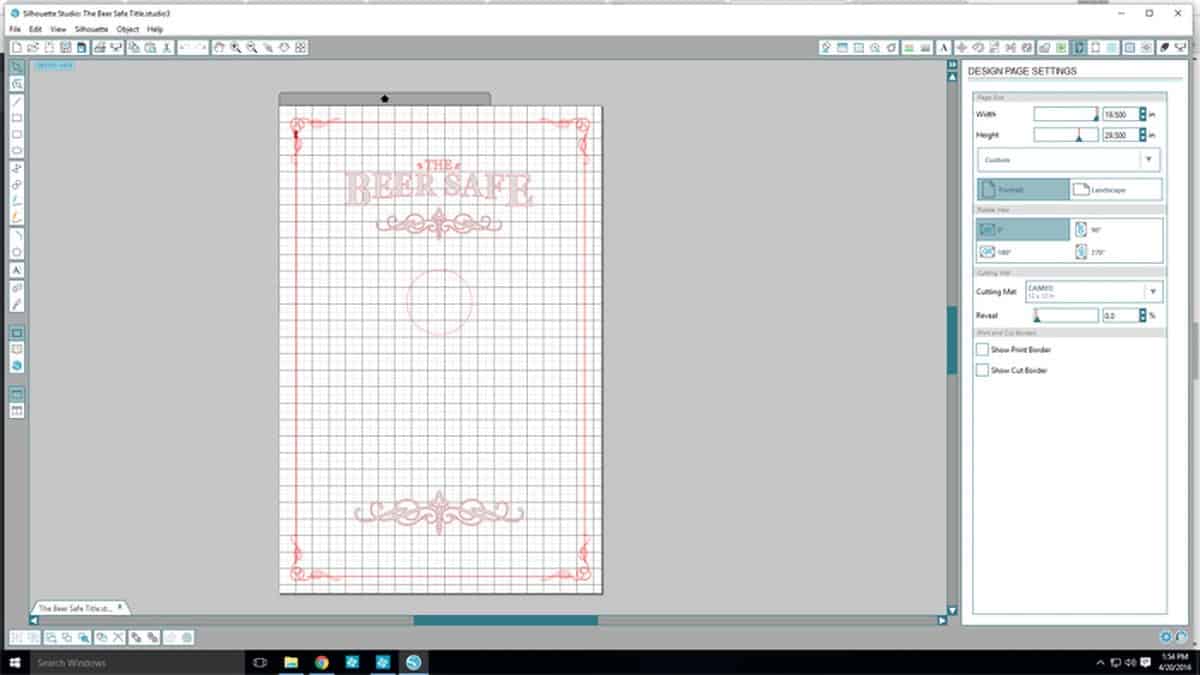
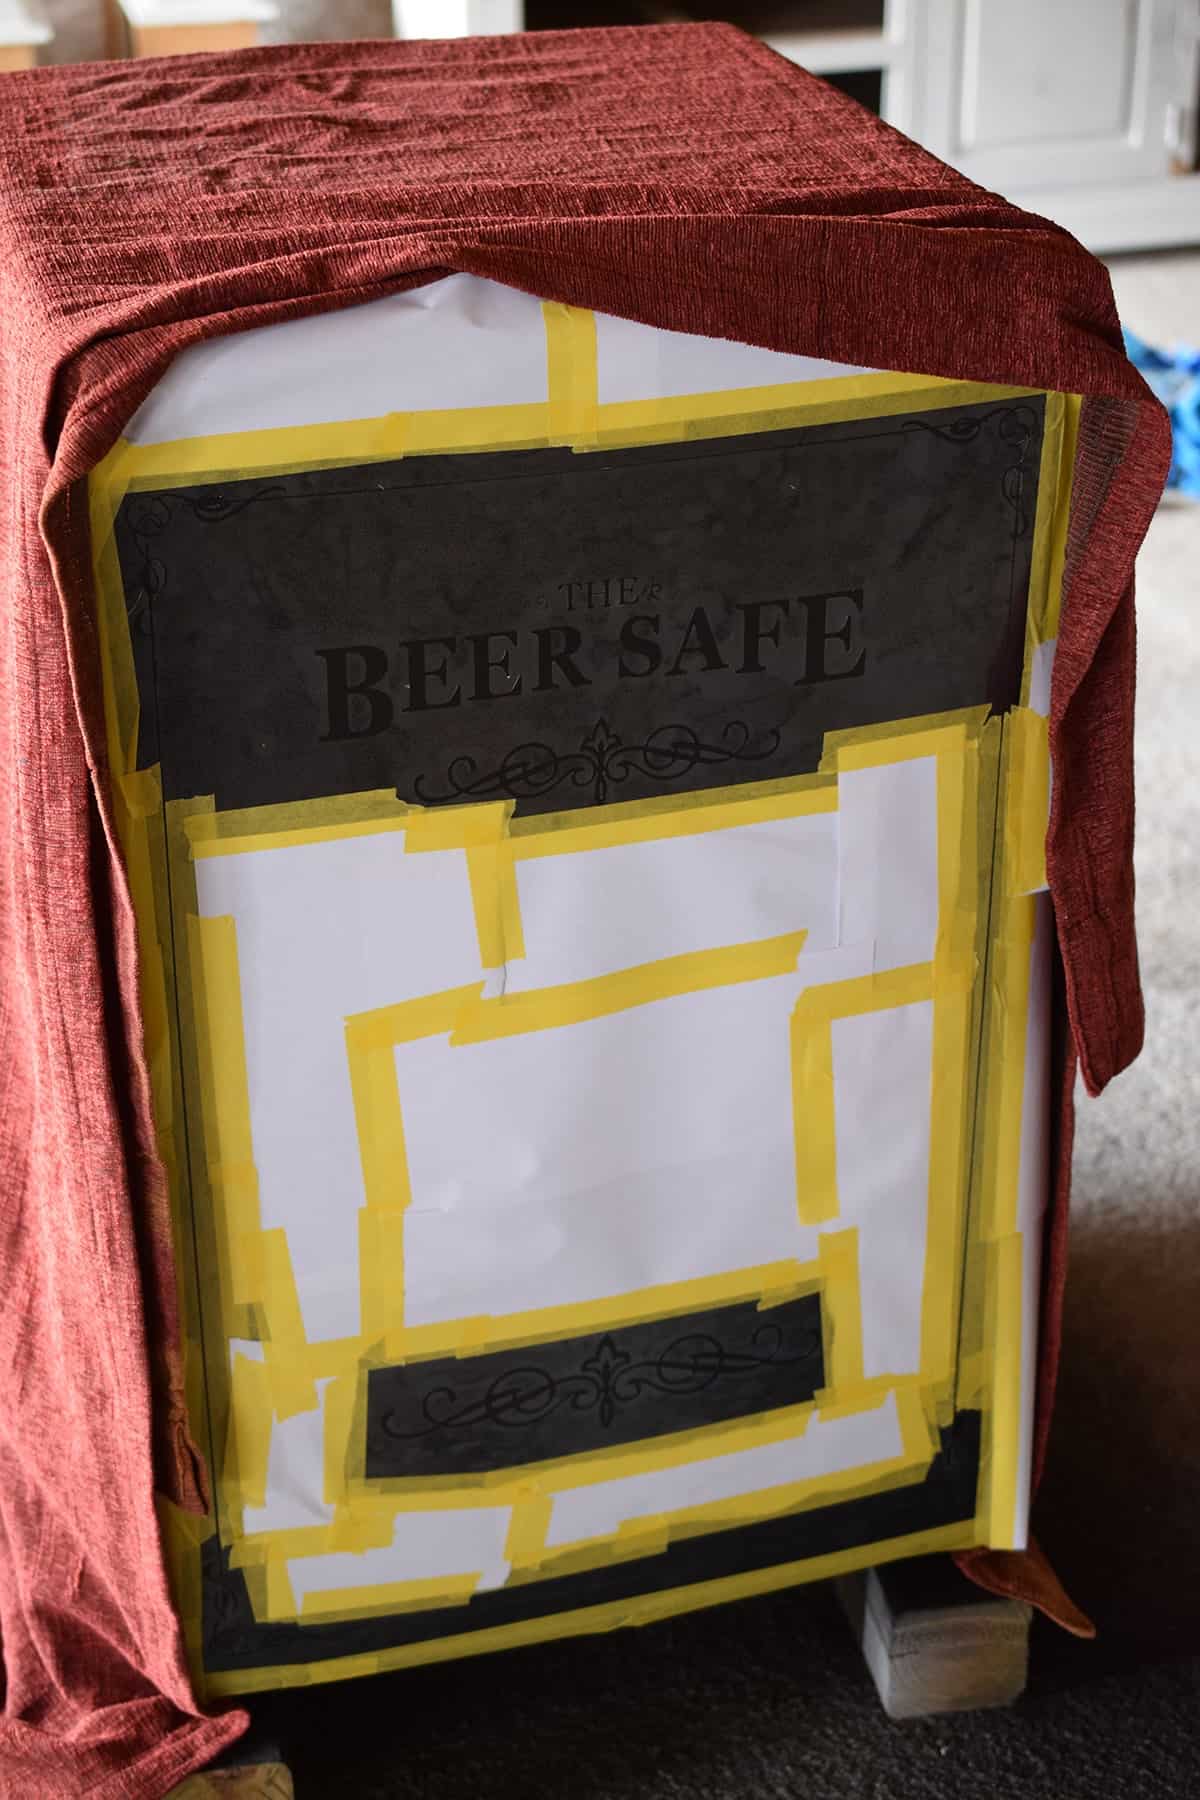
For this project, I custom designed a stencil using my cutting machine. I used Real Stencil Material. This particular design has many tiny, delicate pieces so I used transfer tape to put the design on the fridge.
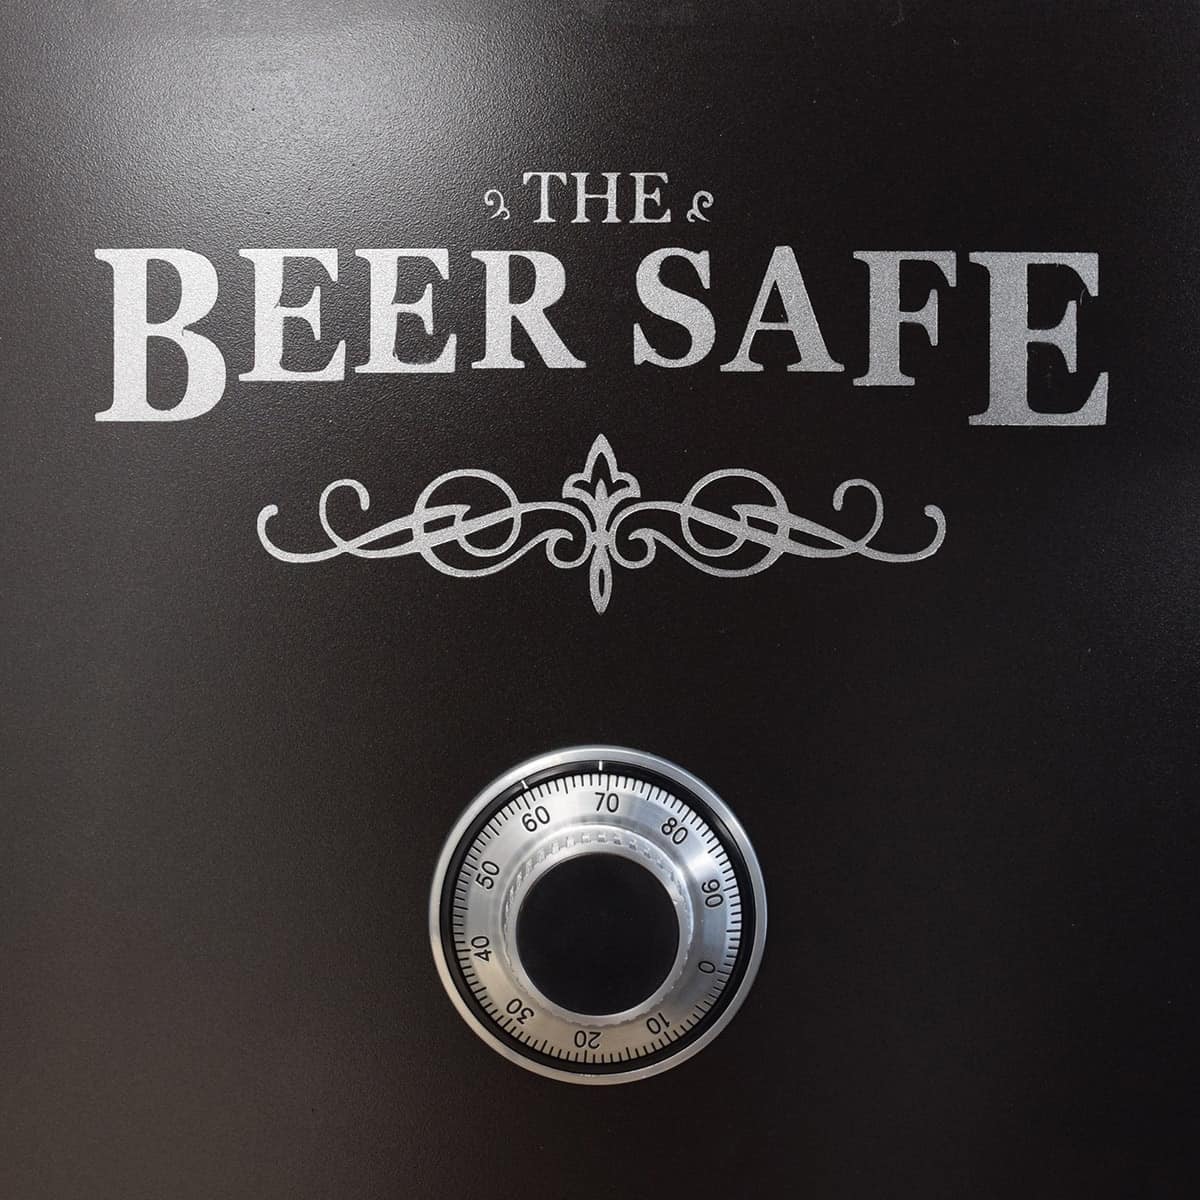
Lastly, we added a real safe dial into the door of the fridge, which we got off ebay. Our particular fridge only has insulation in the door area (no light or coils). The dial spins but it is only for looks and does not lock the fridge.
*UPDATE: I have gotten many requests from readers about shipping the Beer Safe Stencil for those who do not own the equipment. This is a very intricate stencil that I custom made for this project and is copyrighted. I am not currently set up as a merchant/store to sell these (yet!). As an alternative, RM Wraps makes quality covers and has a similar Beer Safe design here. They also have a wide selection of other really cool vinyl wraps to check out.
Want to see more of our DIY projects?? Check out these makeovers!
- Trash to Treasure: Military Footlocker Makeover
- Patriotic Man’s Office Makeover
- How to Paint a Garage Floor
- 15 Amazing DIY Refrigerator Makeovers
So, I would love to hear what you think! Love it, hate it, still laughing at our cheeky little project?
Frequently asked questions:
I did not apply a clear coat when doing this project. I feel a clear coat would alter the appearance of the finish and there are not many good options for this type of project.
Yes, you can chalk paint a fridge, but I can’t fully recommend it. Any kind of flat paint is going to be harder to clean and keep clean. I also do NOT recommend wax as a sealing finish in a kitchen.
If your refrigerator is in perfectly good working condition, but has a few rust spots, don’t worry! You can use products you probably already have at home, like vinegar or a baking soda and water paste to scrub of rust off. You can also sand off any rust spots. Be sure to sand until the surface is as smooth as possible, then remove all the dust.
You don’t need a lot of paint, 3-4 spray cans or a quart of paint. For painting and supplies, it is less than $50 to paint a large or mini-fridge.

Grab our free series "Weekend Home Projects that will Transform Your Life" Sign up below to receive updates including free printables, organization tips, home improvement projects, recipes and more! |
More Makeover Ideas

PS I love seeing your creations! Be sure to take a photo and tag #cravingcreative on Instagram! You can also stay in touch with me through following me on Instagram, Pinterest, and subscribing to the newsletter!
How to Paint a Refrigerator
Tools
Supplies
- Sand paper 180 grit
- Sanding Blocks 120 grit
- Lint-free Microfiber rollers Only if rolling
- Paint trays Only if rolling
- Stainblocking Primer
- Paint
- Primer Optional
Instructions
- Clean and Mask. Remove parts that may get in the way such as large handles or stickers. Clean very well and then mask any areas not to be painted.

- Lightly Sand the surface. What I mean by "lightly" is that the entire surface should be sanded evenly but not so much that you go through the previous paint. Pay attention to areas that are touched often like around handles. An orbital sander takes only a few minutes. The dust in the air should be left to settle and then wipe every surface down with dry cloth->wet cloth->dry cloth method.
- Prime. If necessary, prime the surface with 1 coat of primer.
- Paint at least 2 coats. Coats should be thin and even. Follow the instructions on your paint for dry time and time between coats. If rolling, make sure to always roll consistently in the same direction for both the primer and paint.


Notes
- See blog post for my recommendations on which paints and primers to use.
- Tape off any edges you don't want painted such as inside doors.
- A roller is always going to be the better option over a brush because it is less likely to streak and faster to apply. Some paints work better microfiber rollers and others with dense foam. Test both to see which finish is best.
- You will get the best results if you brush details or corners then roll before the paint has time to dry.
Sam says
Would you consider making another stencil and sending it to me!?! I really want to do this!
Rachel says
I am not currently set up as a merchant/store to sell these. As an alternative, RM Wraps makes quality covers and has a similar Beer Safe design here. They also have a wide selection of other really cool vinyl wraps to check out.
Sam says
Where did you get the dial?
Rachel says
Ebay
Debbie says
Where did you get the letters and border decals?
Rachel says
I custom designed them to make the stencils.
Ann says
Where did you get the “combination lock” for this? This is awesome!
Rachel says
I got the combination safe dial lock off of Ebay.
Kayla says
Where is the shelf from?
Rachel says
You can see more of our office makeover here, including the shelves. The shelves can be found here on Amazon.
Erika says
Did you clear coat anything? I am worried the paint will start chipping or rub off with use.
Rachel says
I did not clear coat this. I am partial to rustoleum spray paints as I have had good luck with their durability when given enough to cure. I have painted items ranging from an outdoor patio set to home decor crafts and found them to be very durable.