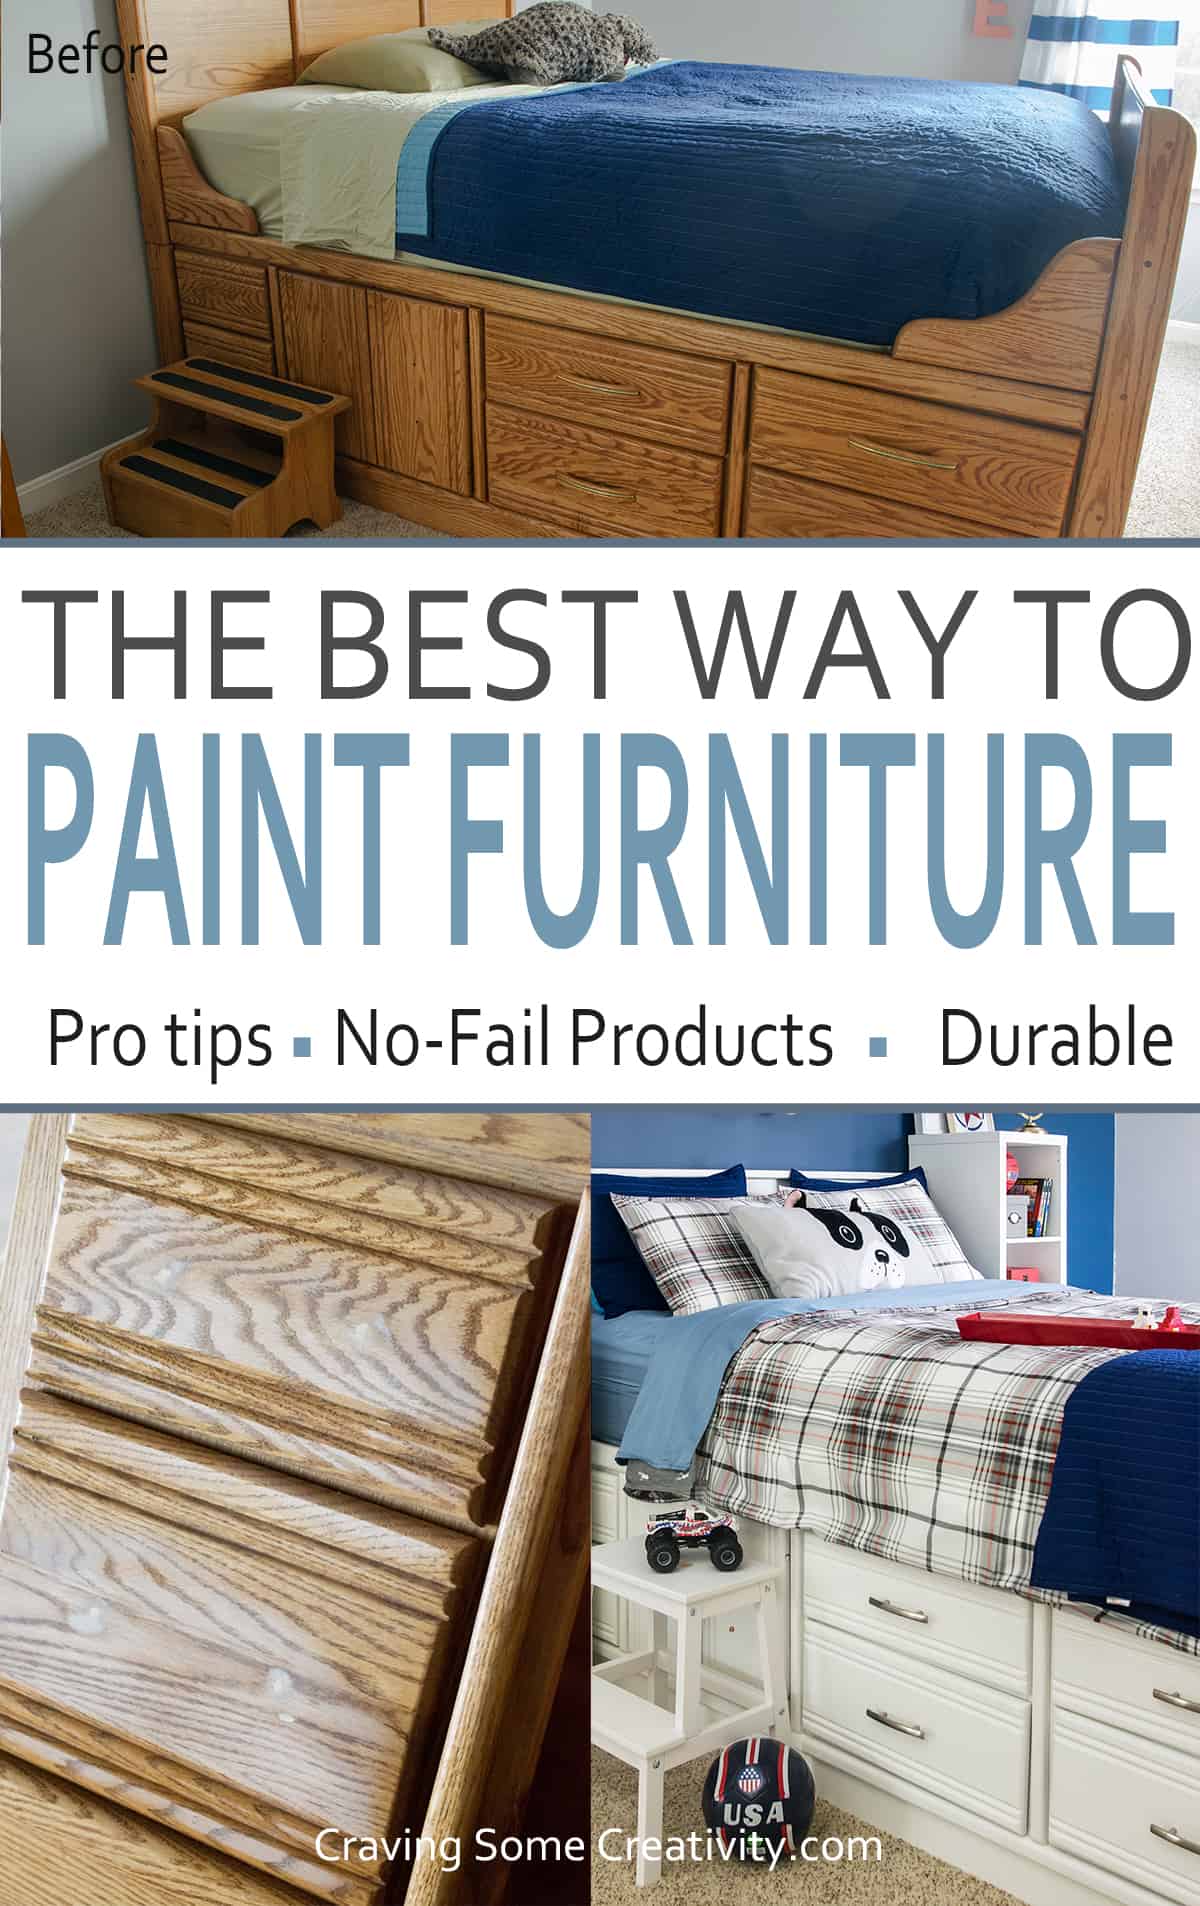
Do you have a tired piece of furniture just needs a little TLC and a fresh coat of paint? Learn how to paint furniture easily with these step-by-step instructions, tips and frequently asked questions. You'll avoid frustrating mistakes and have a long-lasting piece that shines like new!
Painting furniture has been nearly a national pastime the last few years. It’s easy (they say), inexpensive (they say), and will have you bringing life to a furniture piece like you were Bob Ross in the Joy of Painting.
But then there were the frustrations – the dresser that smelled like grandma’s musty clothes, the “this took way longer than expected” musings, and literally picking up the pieces of peeling paint after six months.
But, I promise, it isn’t that painting is hard or that you can’t have that beautiful, durable finish. There is just so much bad advice still floating around that it can be confusing. After refinishing dozens of furniture pieces and living with them for years plus working with clients, I know what works. In this post, I will share with you all of my tried-and-true furniture painting tips and budget friendly tricks!
What’s great about this technique?
- Detailed step by step even if you are brand new to furniture painting.
- Easy to follow with quick to find information.
- The best tips for getting a finish you can be proud of.
- Will last for years to come (kid-friendly).
- Doesn’t use toxic chemicals or expensive power tools.
- I include only the best products that are beginner friendly.
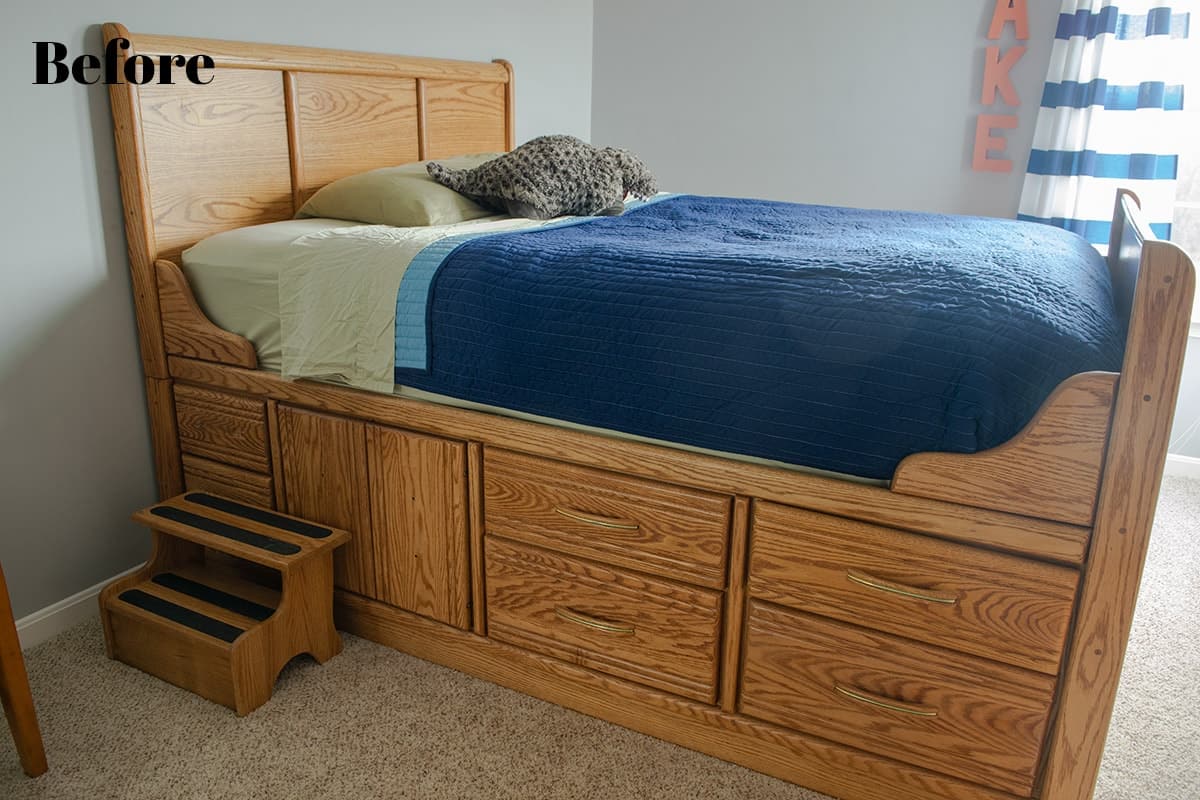
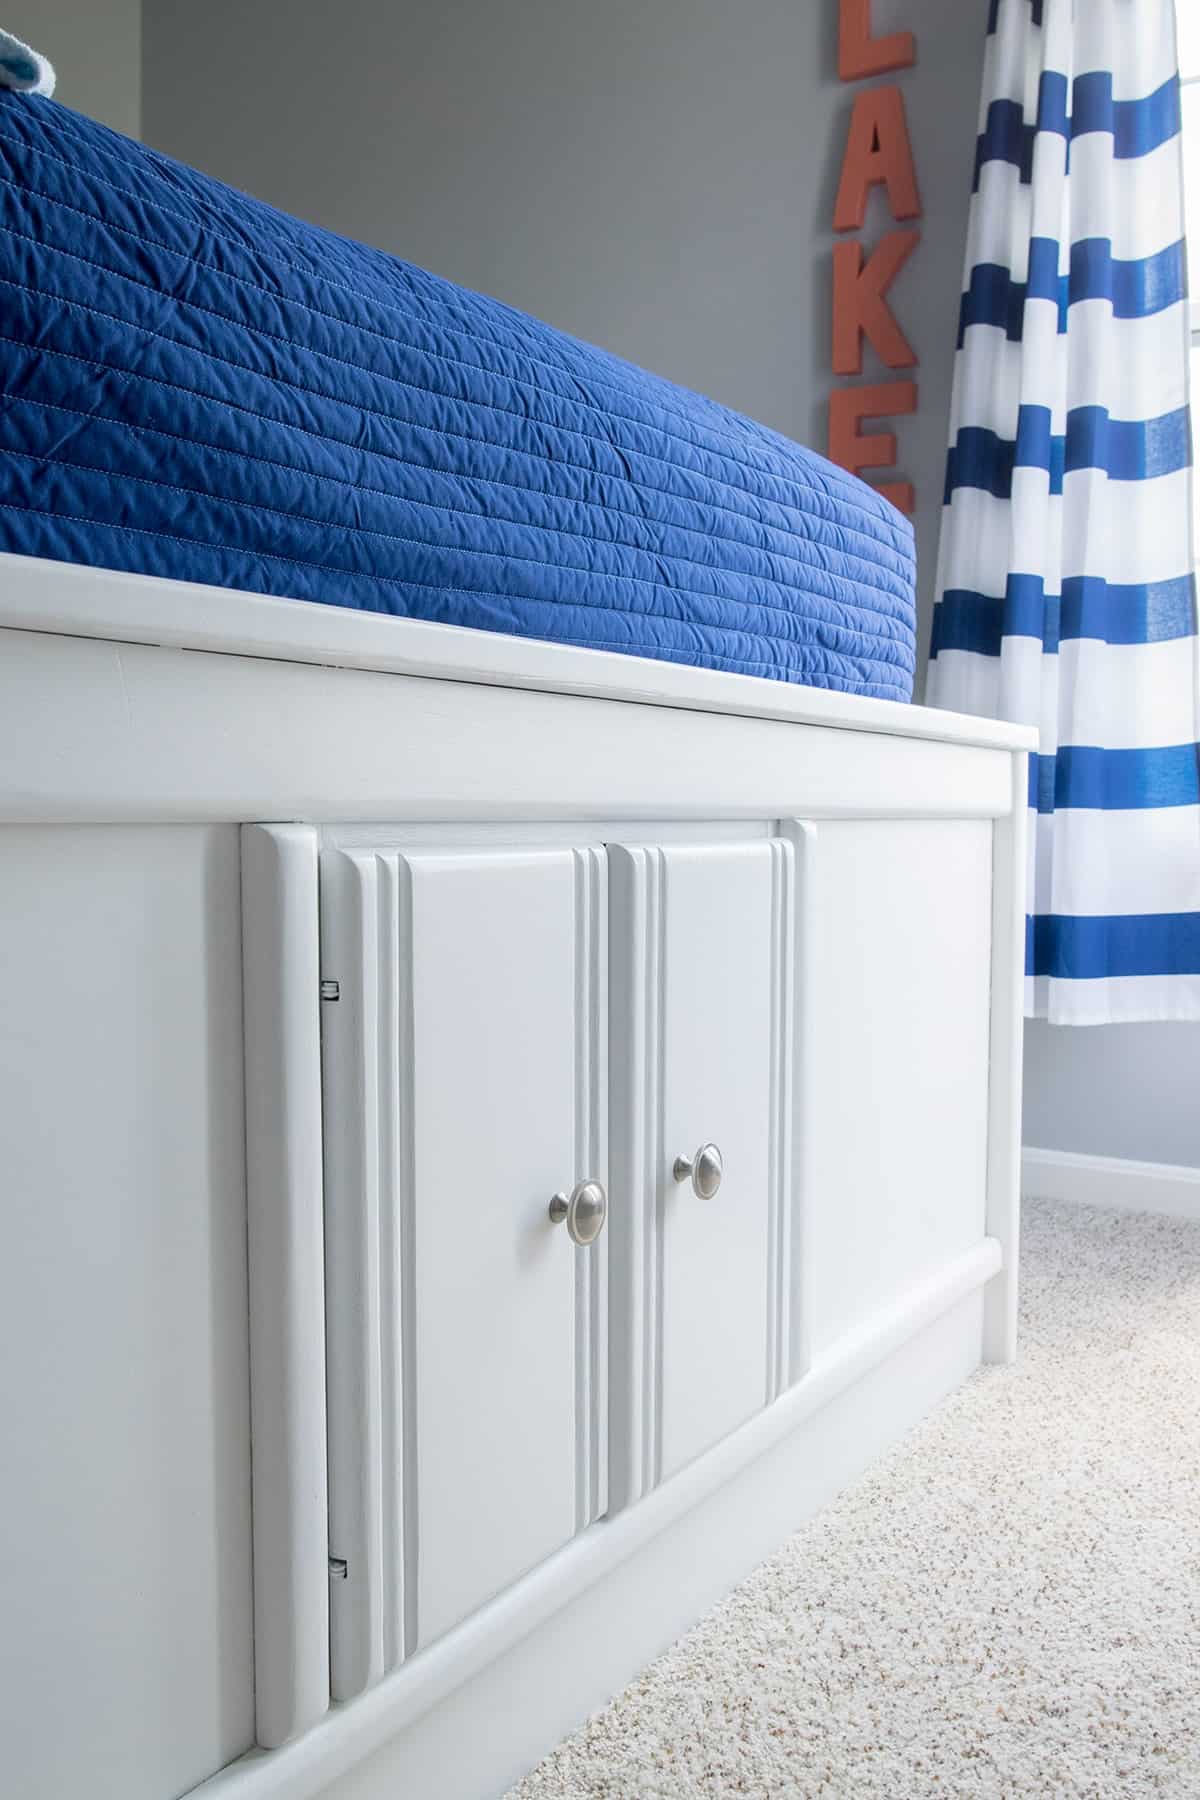
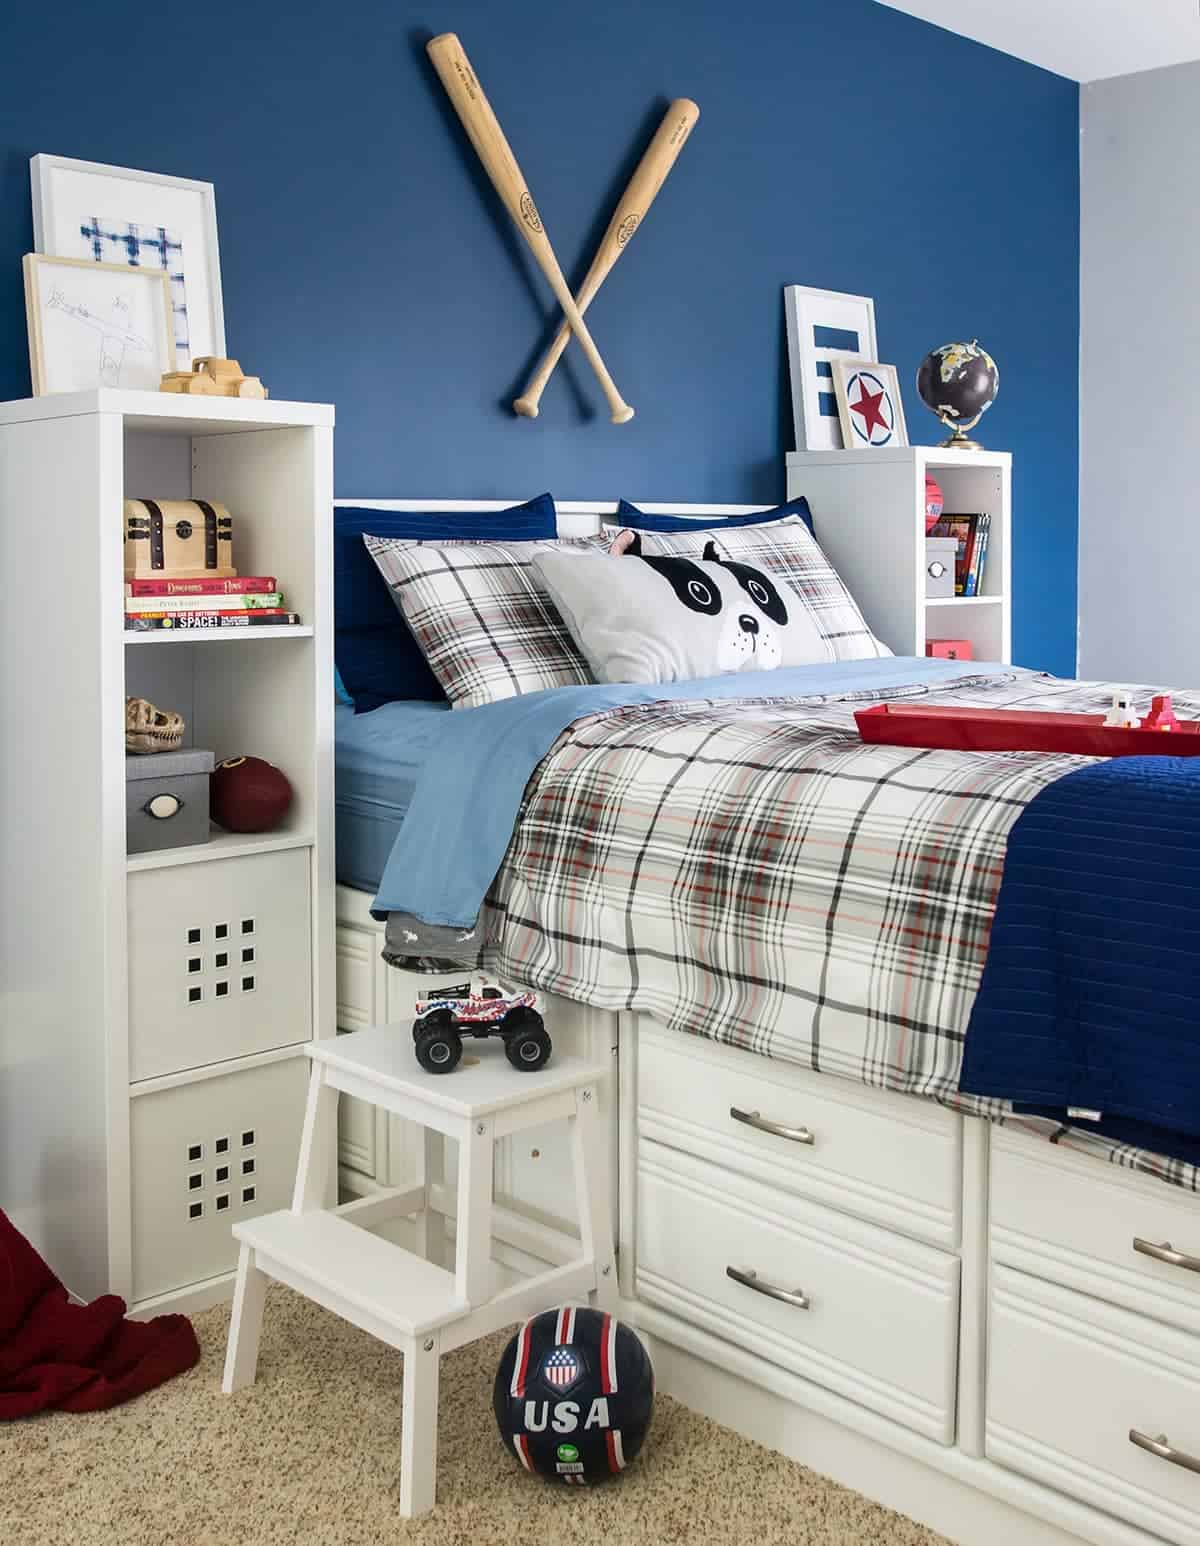
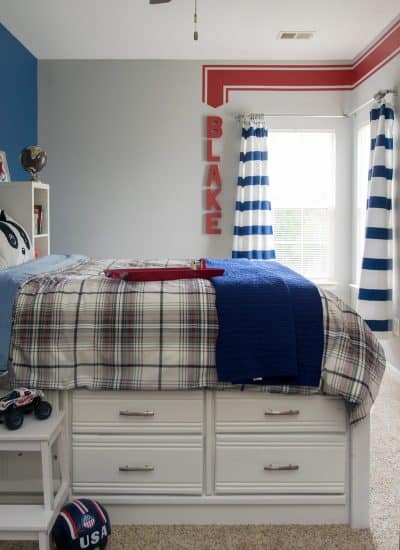
Bed Makeover Before & After
I want to start with the project that I am using as an example today.
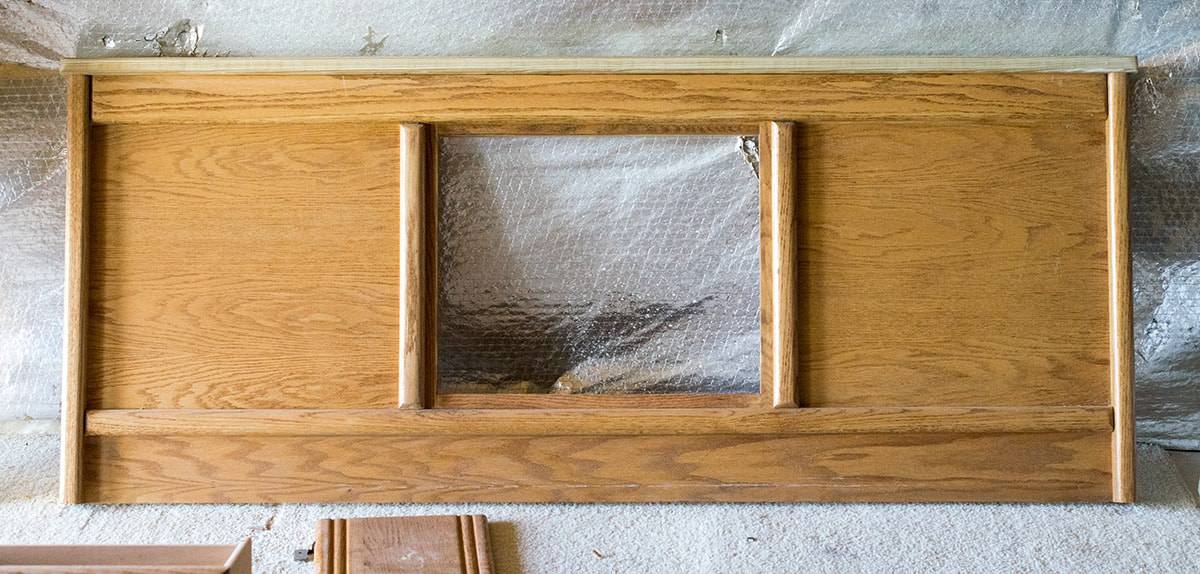
This bed proves that you can really update a piece of furniture that is iconic to another era (and not in a good way!). With all of that storage, you really could not ask for more. Well, if today was 1990 and Zack Morris was still running the halls at Bayside High. But I digress.
Time for a makeover! But wait, this is what it looks like now!
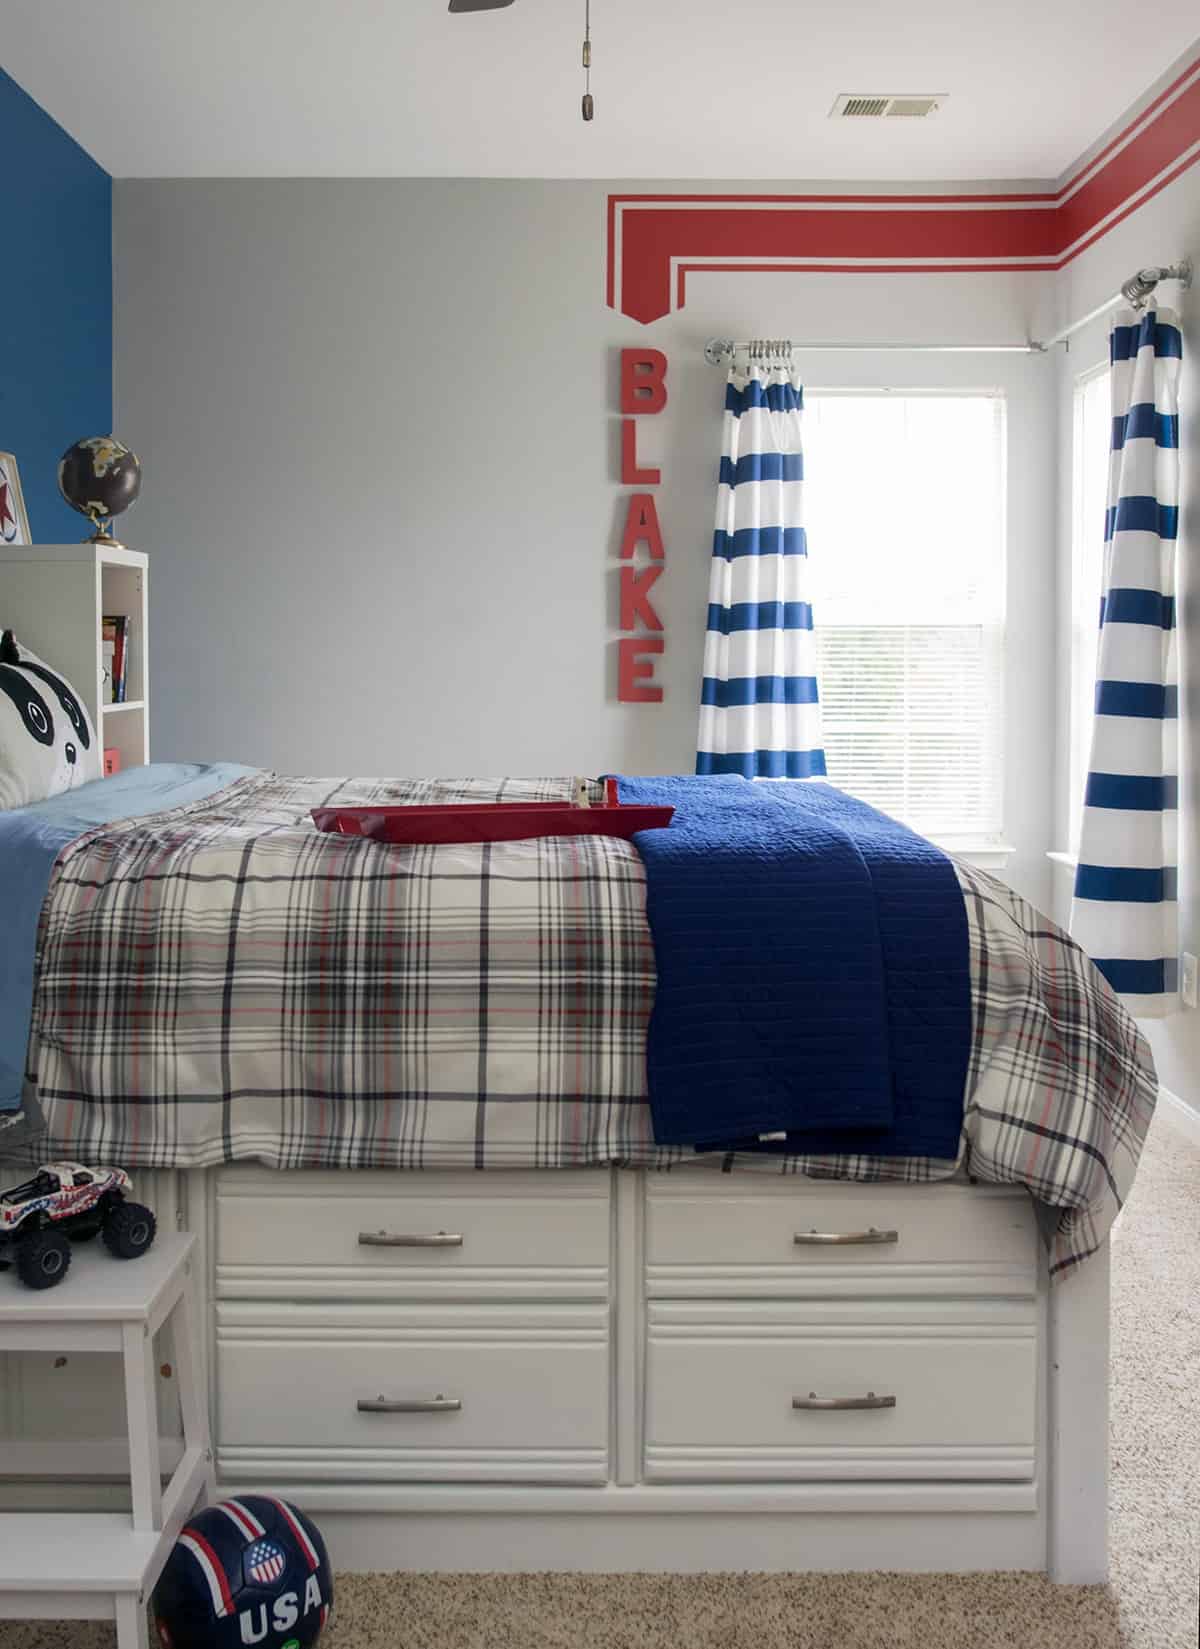
Yes!!!! I actually painted this bed 6 years ago! Despite being extremely rough on it, the paint job is in shockingly good shape. I mean, stepping on the drawer handles to get into bed kind of rough. There are a few dings, but I actually think a factory finished piece would be in worse condition.
Recommended Tools and Supplies
First, the quality of your paint job is only going to be as good as the products you use. You can find an easy printable list and instructions at the bottom of this post.
- Trisodium Phosphate or degreasing cleaner that won’t leave a residue
- Orbital Sander – A nice one with high OPM (orbits per minute) saves time.
- Sandpaper – 100 or 120 and 220+ grit
- Painter’s Tape
- Sanding Bricks – 80 grit
- Paint Brush – my favorite for a smooth finish is 1.5-inch taklon brushes you can buy at Michael's and other craft stores. I have also used Wooster Angled Brushes and Purdy.
- Microfiber rollers – smooth surfaces that won’t shed
- Wood Filler and Paintable Caulk- to repair any holes or dents
- Something to stir the paint with
- Drop Cloths
- Blocks of wood or table (to paint the bottom edges)
- Primer
- Paint
What paint should I use?
That is the BIG question. I have a great post on the best paint brands for furniture. I wish I could give you the shortcut answer right here, but the truth is that there is NO ONE BEST PAINT for all situations. Moreover, marketing terms such as acrylic, latex paint, or alkyld don’t tell you what’s actually a quality paint. You should ask yourself the following questions before buying any paint:
- What sheen do I want? This is the first question I always ask clients because their answer will rule out most options immediately. No matter which sheen you want, there is a quality option, but it may be a different brand.
- Can I move the piece, or does it need painted in place? If painted in place, you need a low or no VOC paint that won’t have fumes. You can rest assured that all of the paints I recommend are low VOC.
- Is this a high traffic piece? Does it need maximum durability and wipe-ability? High traffic pieces are items you touch, use, or set things on almost daily or weekly like dresser tops, dining tables, bedside tables, and kitchen cabinets.
The low down: The paints that I consider beginner friendly include Fusion Mineral Paint and Behr’s Cabinet Enamel. These paints have good coverage, easy to purchase, and level really well for a durable finish. Benjamin Moore Advance or PPG are also great options that are very durable, but not available in all markets. NEVER USE CHEAP WALL PAINT ON FURNITURE.
How To Paint Wood Furniture Step by Step
STEP 1: Remove hardware and parts
The first step when painting furniture is to remove the drawers, door fronts, and any hardware present so that only the frame is left. Sometimes, after painting the frame, I will place the drawers back on to paint them in place.
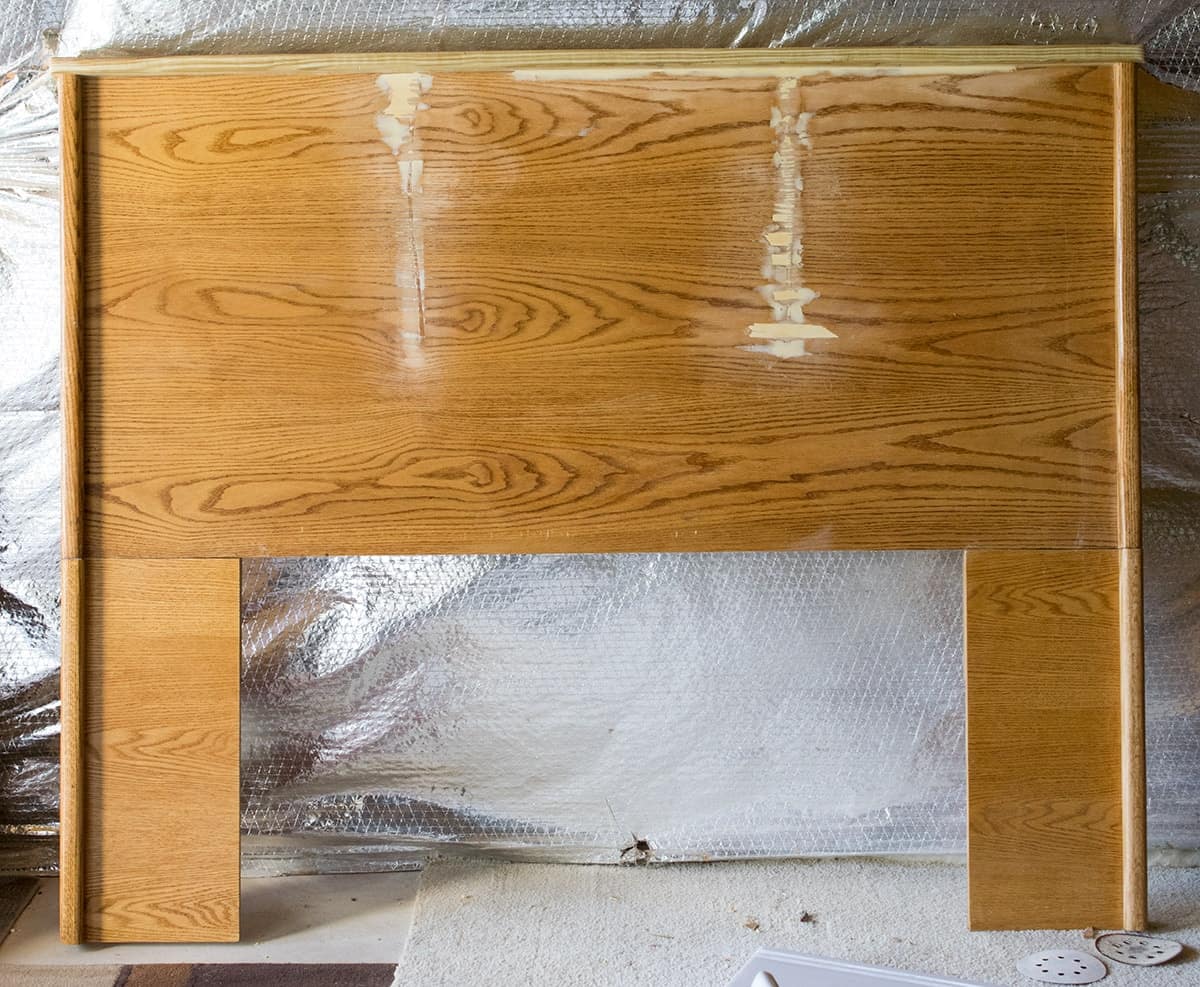
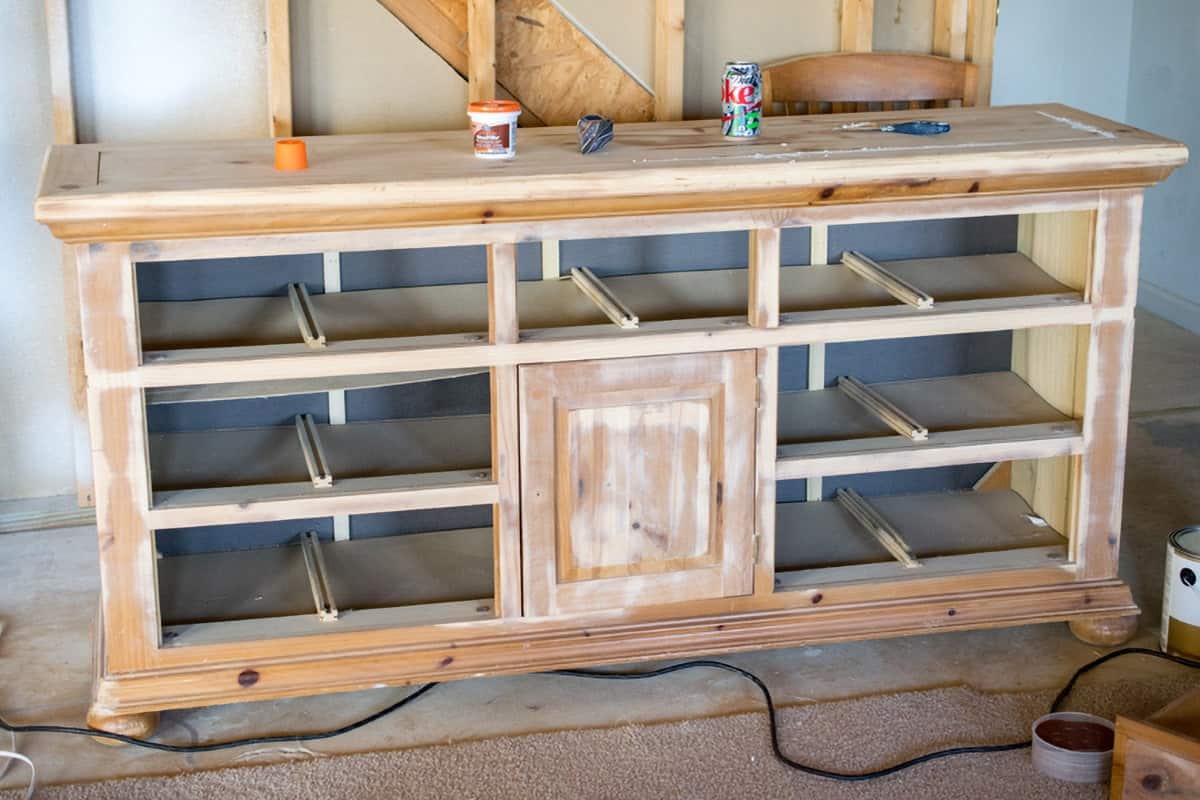
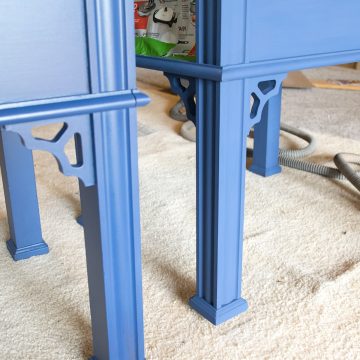
Our example bed: We had to take this very heavy bed apart in 4 sections. We cut the curves off the tops of the headboard and footboard.
Step 2: How To Prep Furniture for Painting
If you are changing out the hardware to a different size, fill any holes from the old hardware.
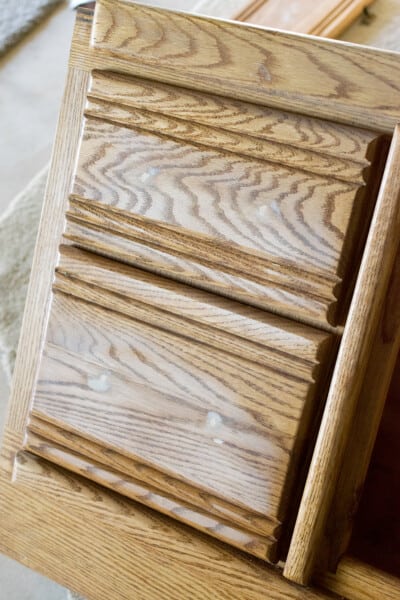
If you desire a completely smooth finish, we have a tutorial for filling in woodgrain on furniture.

Step 3: A Thorough cleaning
While many tutorials (even some of mine) recommend cleaning with teaspoon, you can use any kind of degreaser that won’t leave a residue. I’ve used krud cutter and even Goo-B-Gone for sticky messes.
Make sure to clean everything, even if it isn’t directly on the surface that you are painting. Try not to get it too wet (it is wood after all!) and use a toothbrush for crevices. Make that baby sparkle!
Step 4: Do I have to sand to paint furniture?
After all grime is removed and dry, lightly sand the surface. I generally recommend against skipping the sanding because the best bond requires some sanding. And you want your paint to have the best bond for long lasting results.
It’s not that bad though! Using this shortcut means that sanding takes only 15 minutes to a few hours at most for HUGE pieces like this bed.
For sanding, you only need to "rough up", The point is to make the surface grippy for paint, not completely remove all previous stain and varnish. I use an orbital sander with 120 grit on as much area as I can. For details like curved trim, use an 80-grit sanding sponge.
After everything is sanded, vacuum off the sanding dust and wipe all of the surfaces down with a clean microfiber cloth or tack cloth.
What about surfaces that can't be sanded? You can also use a bonding agent like this one. It's not available at many hardware stores, but you can buy it online. You use it like a primer.
What if you want to sand stained wood to re-stain a piece? In my post on stripping furniture, I give you step-by-step instructions to prep furniture for restaining and minimal sanding.
Best sander to use? A good sander like this one is essential. It’s 12,000 Orbits per minute make quick work of sanding. I don’t even bother with cordless ones.
Step 4: Prime
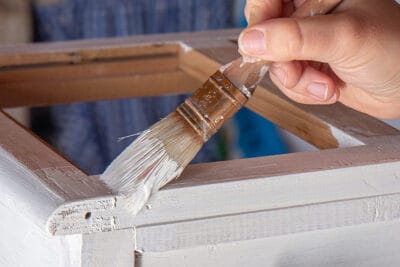
First, for beginners, I am going to assume that everything is painted with a brush. While I love and highly recommend a paint sprayer, we are keeping this budget friendly.
I have tried many, many primers. My never-fail primer bar none is Kilz Premium (not the original!). It passes scratch tests, feels super grippy, and has superior stain protection!
In my experience, there are a few paints that you can skip priming with - Chalk Paint, Fusion Mineral and Benjamin Moore Advance.
There are, however, 2 situations that I would still use a high-quality stainblocking primer:
- Painting over dark cabinets with a light or white color
- Furniture that has bad stains like deeply embedded oil or markers.
- Cabinets with knots in the wood such as knotty pine. – Use a shellac, then prime.
Step 5: Paint
All of the paints that I use almost never require more than 2 coats.

This is such a huge piece of furniture (4 frame pieces, 6 doors, 8 drawers) that it took up most of our entire workshop area. At first, I tried to hand paint it with a brush. That coat took over 2 hours, so we switched to spraying it which took about 20 minutes each coat. If interested, we have listed our favorite paint sprayers here.
Quick Tips for A Smooth Finish
- Get the right tools. A few extra dollars will save you a lot of heartache and frustration. I prefer fine taklon brushes like you find at craft stores for the least amount of brush strokes.
- Tape off any edges you don't want painted such as under countertops or walls.
- Use a lint free -microfiber roller across all flat surfaces for the smoothest finish.
- You will get the best results if you brush then roll before the paint has time to dry.
- With all of the paints that I recommend, I never sand between coats unless there is an imperfection. Sometimes I sanded before the last coat of paint for the smoothest finish.
- Always tint your paint, even if it’s white. You will get better coverage this way.
- To paint the bottom edges next to the floor, I put the furniture up on either wood blocks or solo cups.
Step 6: Acrylic Polyurethane Top Coat (Optional)
A topcoat is a protective and clear layer that is meant to make the paint easier to wipe, reduce scratches or wear, and won’t stain. I don’t always use a topcoat, but I paint for a lot of clients, so here are the situations I recommend to them:
- Kid’s furniture or anyone with young kids
- High traffic Pieces (Kitchen islands, cabinets, dining tables, desks, etc)
- You want the extra durability and scrub ability without removing paint
- Any chalk paint and most matte paints
What water-based poly is right for your project? We have a detailed list of the best water-based polyurethanes that we use on all our projects. I always wait 5-7 days before top coating to give the paint enough time to outgas and harden. I do not sand before adding a poly.
For someone new to painting furniture and doesn’t have access to a paint sprayer, I would probably recommend either Varathane Water-Based Polyurethane (easy to find at Home Depot and brushes well) or Minwax (best budget option and they have a matte spray can option which I have used).
More Furniture Makeovers
- How To Spray Paint Outdoor Furniture
- How to Paint a Bathroom Vanity
- Beer Safe Fridge
- Military Inspired Antique Desk
- Gorgeous Black Painted Furniture
- Tips for Painting a Dresser
- How to Create a Cerused Finish
FAQs
You only need to sand enough to make the surface grippy for paint. It takes maybe 15-30 minutes with an electric sander and is the best way. However, sometimes you can get away without sanding if your surface is well-worn and not glossy, you can either use a deglosser or use a high bond adhesive primer. Chalk paint and mineral paint are generally the best paints to skip sanding and priming.
With many paints, it is possible or even likely that your paint will bubble, peel, or more easily scratch if the paint isn’t well bonded to the wood. Sanding is the best way to avoid this from happening.
I use 100-120 grit sandpaper with an orbital sander or 80 grit sanding sponges. This is just rough enough to speed up the job but won’t leave swirl marks. If I sand for the final paint, it is at least 220.
We have an excellent tutorial with all the tips you need to know to paint furniture white here.
I have an excellent tutorial here on ways to paint furniture without brush strokes.
Many paints contain petroleum-based products that cause problems if too much is inhaled. There are ultra-low VOC and no VOC (fumes) all-natural paints such as milk paint that are safe. However, read the product label as there may be additives. No oil-based paints and limit your exposure such as proper ventilation and wearing gloves.
For the most part, it isn’t necessary and requires a lot more work to paint the insides of cabinets or furniture. If this area needs refinished, I either just use a water-based poly to protect it or contact paper/liners.
Paints today fall under many types, and lots of hybrids to make things more confusing. While you should avoid wall paint for painting furniture, it is more important to use a paint that is made for a wood furniture application than to paint with a particular type of paint such as latex, acrylic, emulsion, chalk paint, alkyd, or other base type.

Ah, such an improvement! One of the most popular questions I always get from my generous readers is about furniture painting. If you have some questions, feel free to shoot me an email or comment below. I love reading feedback and enjoy helping people decorate on a budget, so keep ’em coming!

Grab our free series "Weekend Home Projects that will Transform Your Life" Sign up below to receive updates including free printables, organization tips, home improvement projects, recipes and more! |
More Furniture Makeovers you might enjoy

PS I love seeing your creations! Be sure to take a photo and tag #cravingcreative on Instagram! You can also stay in touch with me through following me on Instagram, Pinterest, and subscribing to the newsletter!
How To Paint Furniture
Tools
- Paint Brush
Supplies
- TSP or Cleaner
- Sandpaper 220 and 120 grit
- Sanding Blocks 80 or 120 grit
- Drop Cloths
- Wood Filler Only for imperfections or filling old hardware
- Lint-free Microfiber rollers Some paints work better with foam rollers
- Painter's Tape
- Paint trays
- Stainblocking Primer
- Paint
- Protective Top Coat Recommended but optional
Instructions
- Remove doors and drawers. Unscrew hardware.

- Clean using Tri-Sodium Phosphate or a mild degreaser for getting any grime and dirt off. Repair scratches with wood filler.
- Sand any glossy varnish or coating off. You do not need to sand every bit of previous stain or paint off if it is in good condition. Sanding is going to give the best bond, and always sand high traffic surfaces such as tabletops, around doorknobs, or dresser tops. Use an orbital sander with 120 grit to make this much easier. Vacuum and wipe all dust off of the panels before priming.

- Prime the cabinets with a quality primer. For very light colors, use 2 coats of primer. Allow to dry 24 hours.
- Paint the dresser with 2 coats of paint. You can use either a paint sprayer or brushes and rollers. If brushing, brush with the grain and always from one end to the other. If paint starts to dry, don't go back over it.


Notes
- Knots – use a shellac based primer
- Gooey stuff/adhesive – I like Goo Gone for gooey messes, but make sure to clean off with a degreaser or teaspoon afterwards to remove any residue.
- Grease stains – clean with a good degreaser like Simple Green to break up what you can.
- Permanent Marker/food coloring/other – Clean as best you can with teaspoon and then prime at least two coats.
- Get the right tools. A few extra dollars will save you a lot of heartache and frustration. I have a helpful post on painting without brush strokes here. I prefer fine taklon brushes.
- Tape off any edges you don't want painted such as inside doors.
- Use a lint free -microfiber roller across all flat or large surfaces for the smoothest finish.
- You will get the best results if you brush details or corners then roll before the paint has time to dry.
Patrick says
Hi Rachel, I came across your blog when looking at which polyurethane I should use on the 30×30” table I just painted. I found it super helpful!…but then started wondering if you’ve ever experimented with a glaze coat (epoxy/lacquer type finish). For reference, here is a link to an ad/demo for the brand I saw: https://vimeo.com/331483189. I’m going for a high gloss look and thought this could turn out awesome…but could also be a disaster, so figured it was worth asking! Thanks!
Rachel says
I have used that exact product and it works very well and is durable. It is basically an epoxy resin, but a little easier to work with in terms of mixing correctly. The only tip I have for using it is to research a few methods for getting rid of bubbles before it sets up. A heat gun, blow torch, or sometimes a very gentle toothpick/bristle for big ones are some methods I have used. Good luck with your project!