Whitewashed wood furniture is a beautiful technique that lightens a piece of furniture without covering the wood or color tone underneath. From beachy weathered wood to pickling, there are many techniques that produce this beautiful style, which I will explain so you can get the desired results!
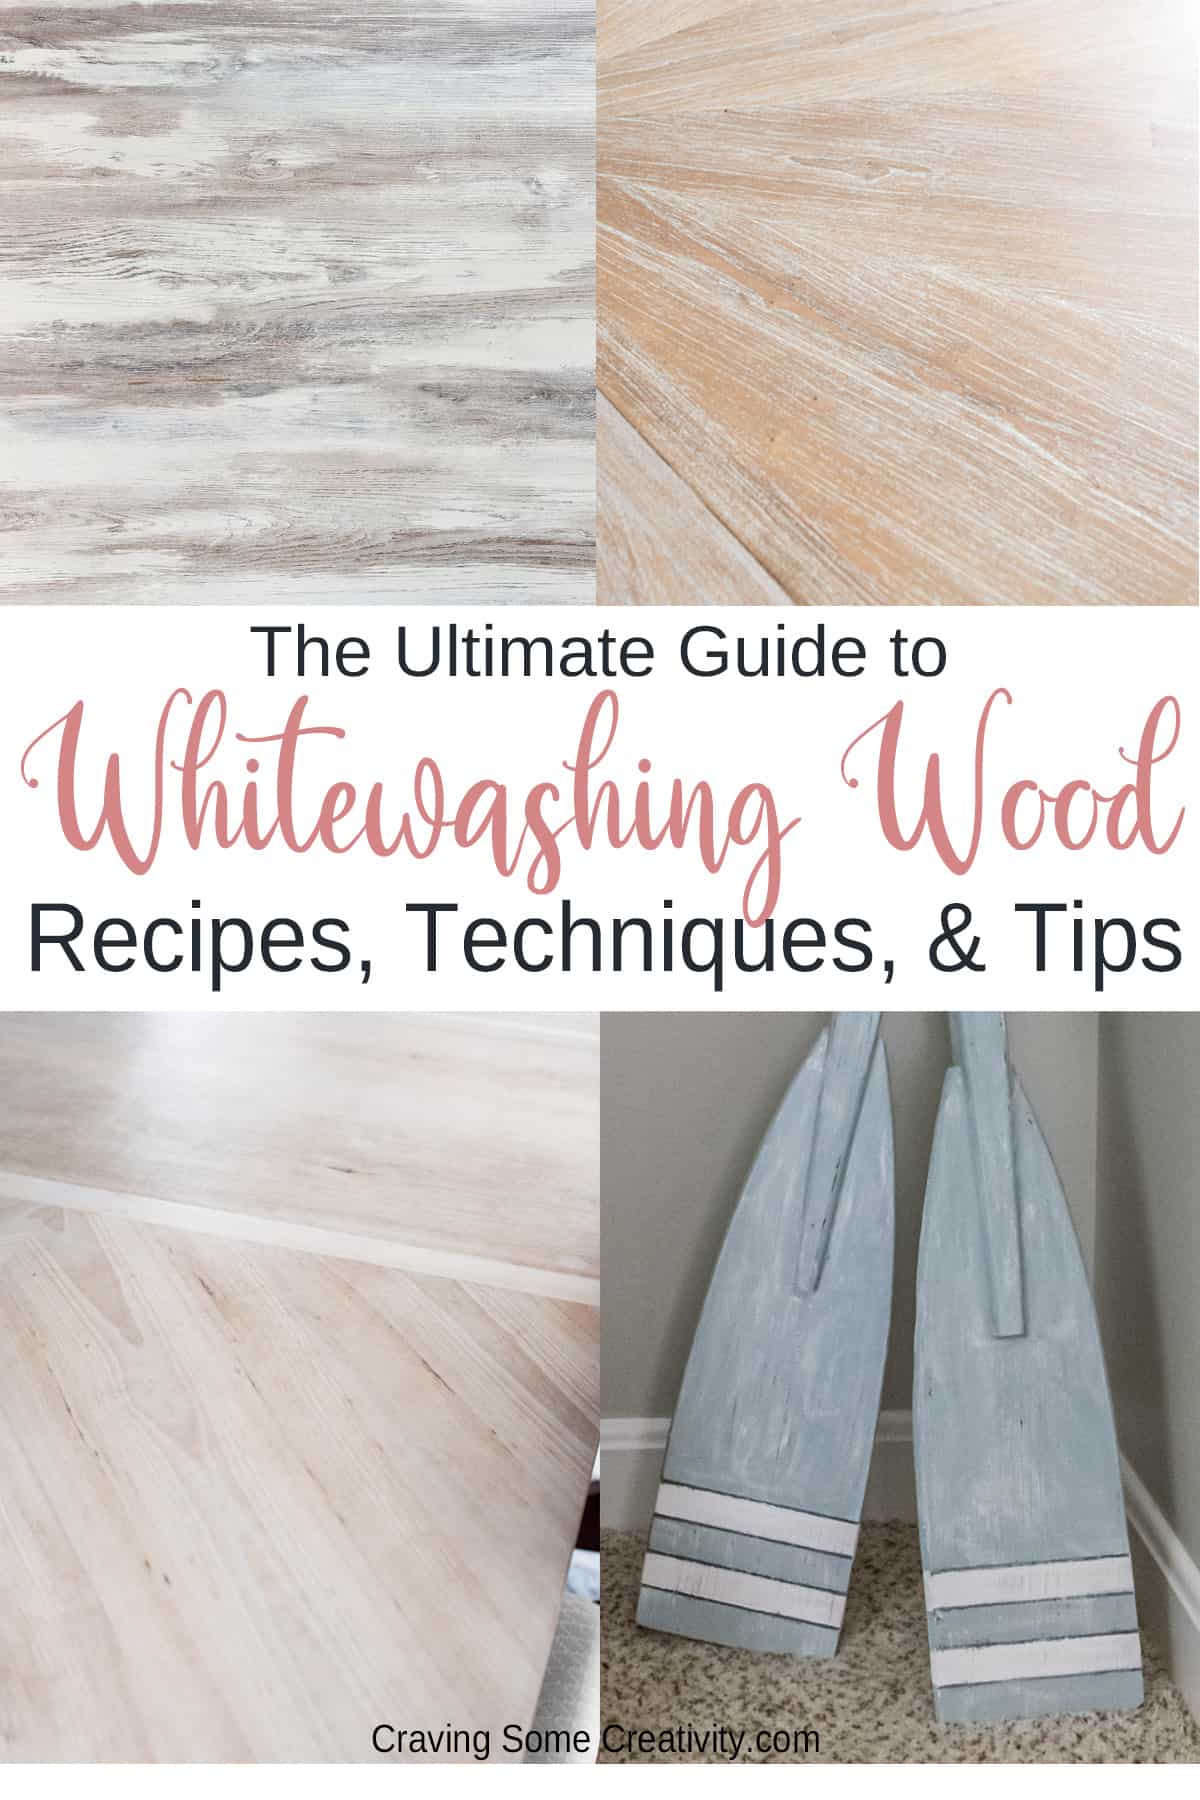
Do you ever wonder how to get that whitewashed wood furniture finish? Have you ever stopped your social media scrolling on a beautiful "white oak" piece of furniture? I have used these techniques in so many ways, so I wanted to show you step-by-step how to create the look on any piece of furniture or home decor.
What I love about this effect is how versatile it is. From beach vibes to farmhouse white, whitewashed wood fits a lot of decor styles. So let’s get started!
Effects Similar to Whitewashing
There are several techniques that create a similar effect, but they are produced in different ways. Getting exactly the effect you want means knowing which technique to use.
Cerusing: This technique uses paint to highlight the grain pattern of the wood, usually oak. I have a full tutorial on how to ceruse wood for a better look at this technique in action.
Lime Washing: Lime washing furniture uses a white wax applied over paint or stain to either highlight the grain or as a whitewash. The difference here is that a topcoat cannot be applied over a wax, and it tends to be more opaque in crevices whereas dry brushing with a color wash tends to hit the high spots.
Color Washing: This is today’s technique, and it involves applying diluted paint and rubbing it into the surface either by dry brushing or using a lint free cloth and wiping the excess off. Some of the residual color is washed over the surface as well as crevices. You can use any color you like including black, white, or a tint similar to your base coat. Here is an example of color washing with teal.
Pickling: This technique is similar and sometimes the terms are used interchangeably, but pickling involves using a pickling stain to create a whitewashed type of finish and highlight the woodgrain.
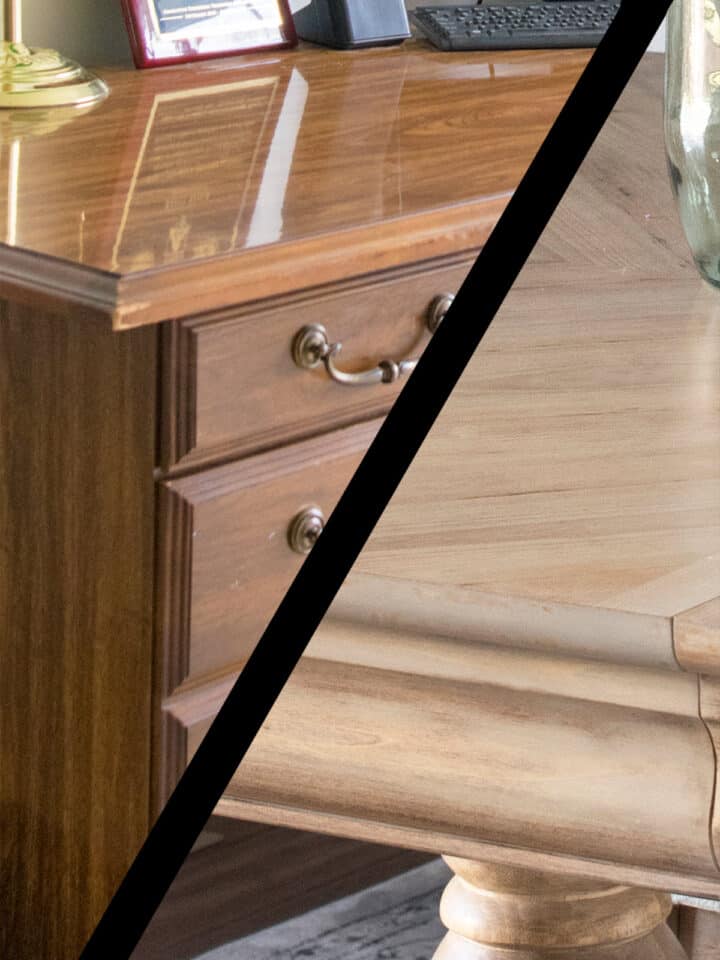
Bleached Wood: This technique often goes along with whitewashing, but in bleaching, an acid is used to remove stains and natural pigments (tannins) from the wood. I used this technique to lighten a cherry stained table, for example. Here is an example showing how to bleach wood step by step.
Recommended Supplies
- White Furniture Paint (Chalk paint, Fusion Mineral, Behr Furniture Paint are all fine. I would not use wall paint). A paint with a longer working time is good.
- stir stick or spoon
- Empty paint can or solo cup
- Water
- Paintbrushes
- t-shirt, polishing cloth, or lint-free rags
- damp cloth
- Protective topcoat for furniture
We have tried many, many brands of furniture paint. Check out our in-depth guide to the best furniture paints with our favorite no-fail products!
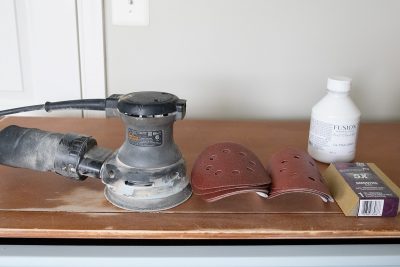
Furniture Painting Prep
The prep, unfortunately, will highly depend on the condition of your piece and what you will be using as your base the whitewashing paint. While I cannot predict every situation, here is a brief overview of how to prep your furniture and base coat.
Paint: If you are freshly painting the surface, there isn’t anything special or different from how you would normally prep for painting. I have a great step-by-step guide on how to paint furniture here if you are interested because that method has never failed me.
Stain: If you are staining as a basecoat, the only thing to keep in mind is that the stain may bleed into white paint, and slightly discolor it. Sometimes that can make the wash finish feel more authentic and weathered, so you may like that. If not, the best bet is to add a layer of non-yellowing water based polyurethane to seal the stain, rough it up with steel wool, and then white wash it.
A Pre-sealed piece: This technique is quite popular on antique pieces or ones that have an existing finish like paint or polyurethane. If the existing finish is in good condition (not gummy or deteriorating), you can just rough up the piece with some #000 steel wool. Make sure to go in the direction of the wood grain with long strokes.
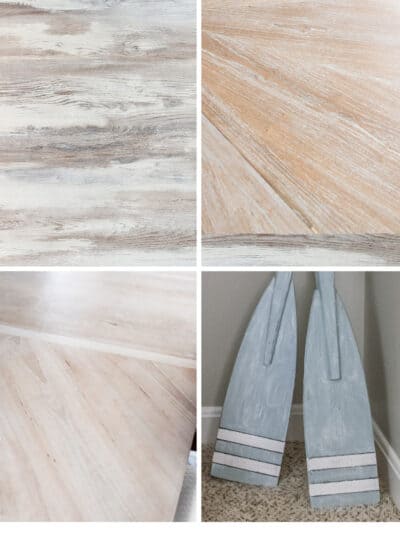
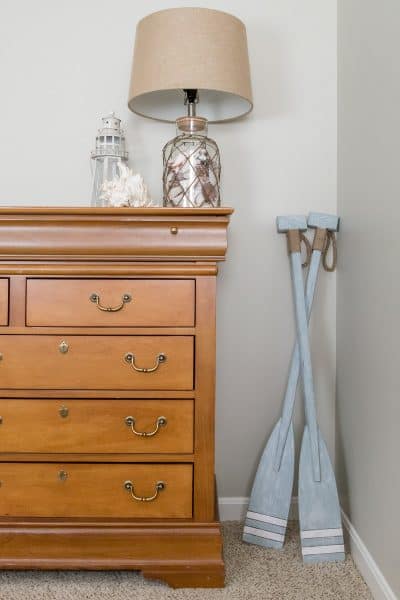
My Oar Project Demonstration
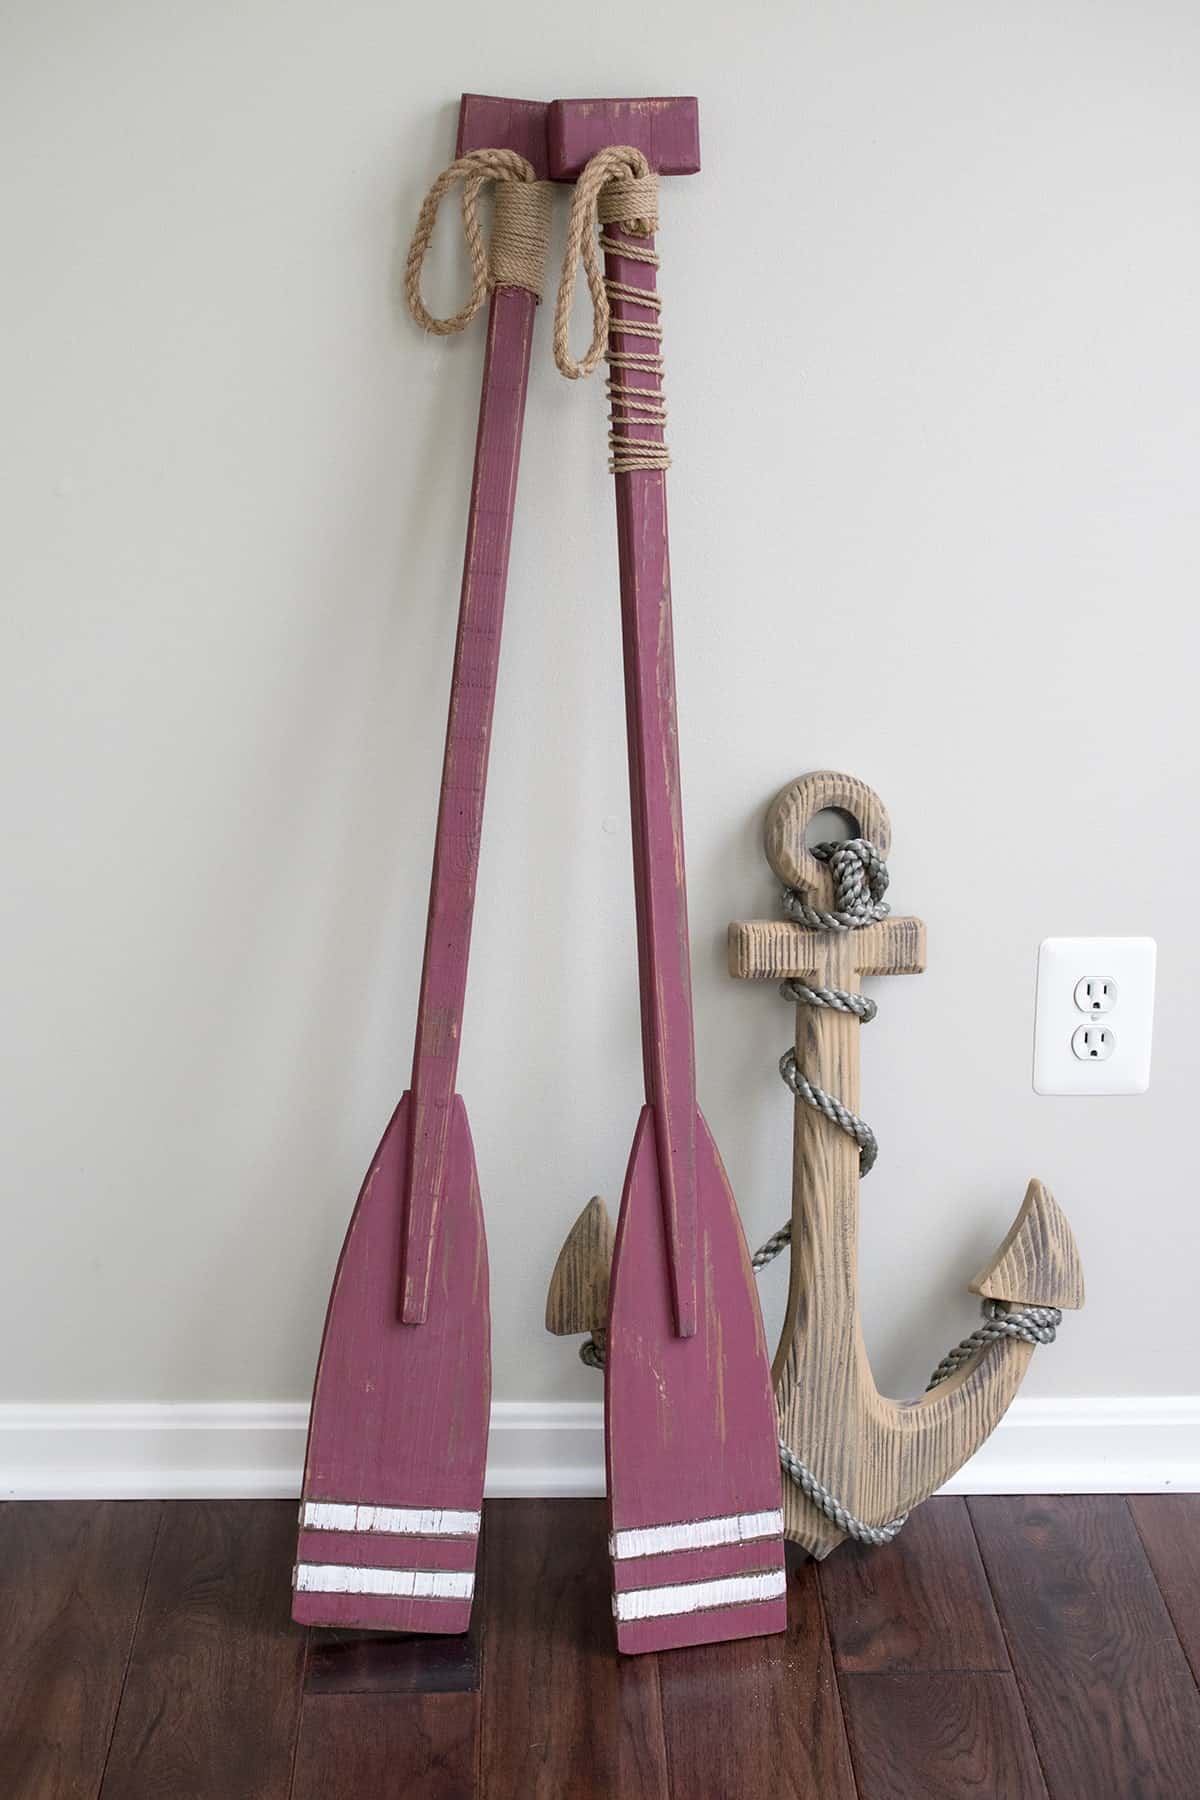
Many months ago, I picked up these cute oars for $3 from a local yard sale. Have you ever been in the store and thought to yourself, “OMG, That is EXACTLY what I have been looking for!…except it’s the wrong dang color!”?
Happens to me all the time. Sometimes it’s fixable, and sometimes it’s not, and sometimes you don’t want to pay full price for something that needs fixing. However, for a $3 oar – yes, I can happily fix that!
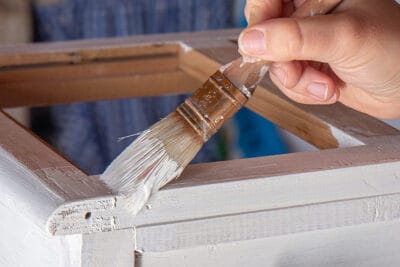
How To Whitewash with Paint
Whether you whitewash over paint or stain, or raw wood, the instructions are essentially the same.
- Paint your base coat. Allow to dry completely unless you want some of it mixing into your wash, which will dull the white color.

2. Mix your whitewash paint. Start by mixing 1 part water to 3 parts of white furniture paint.
Pro Tip: For more contrast, use less water. For a more even and ghostly look, use more water. I don’t recommend more than a 1:1 ratio because it can get really messy and hard to control drips.
3. Perfect your technique on a scrap piece of wood. There are two methods to white washing that I like.
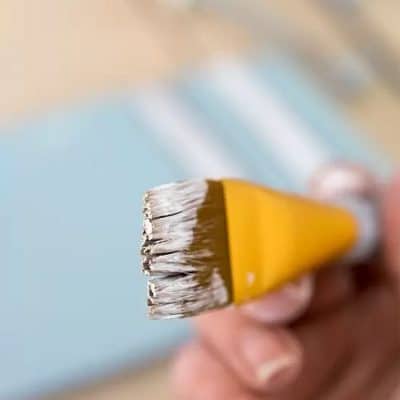
- Dry Brushing with a Paintbrush: This means you dip your paintbrush in the paint and then wipe 90% of it off on a paper towel. You still want to use diluted paint for this. Undiluted paint and dry brushing aren’t friends. It often leave odd marks and doesn’t look smooth. Brush in the direction of the wood grain.
- T-shirt or Rag method: Dip the cotton rag or t-shirt into the whitewash mixture and gently wipe onto wood working in small sections and long strokes. Use a second dry cloth to wipe off and push the paint into the creases or texture of the wood. Work in one direction and try to keep moving before the previous paint dries. Feel free to layer this technique if you like.
- You can try experimenting and mixing the two techniques or altering them to get the exact finish you want. Play around with it!
Tip: Practice makes perfect. This technique should look natural and well incorporated. Don’t try to put too much paint on the wood surface at one time. You can always layer more. Every piece is different and a small change in texture can create different results.

4. Apply the Wash. If you make a mistake, which almost never happens, it is easy to wipe the diluted paint off while wet using a damp towel.
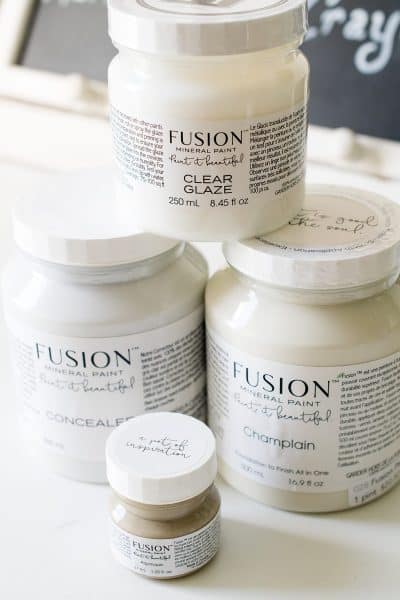
Best Paints to Whitewash Wood
White Washing techniques seem to work best with matte paint or chalk paint. This is because the flat sheens actually have more texture than a shiny sheen. Therefore, the whitewash can fill in the pits and valleys better.
Personally, my favorite matte furniture paint is Fusion Mineral and they have several whites to choose from. You can see a comparison of their white colors here, but Casement is generally their purest white color.
I have also used Annie Sloan, and DIY chalk paint (1 cup latex paint plus 2.5 Tbsp. plaster of paris + 1.5 Tbsp. cool water) that works pretty well if you water it down more.
Looking for More Furniture and Painting Projects? We have lots of inspiration!
- Gorgeous Black Painted Furniture
- How To Paint a Bathroom Vanity
- How to Protect Painted Furniture
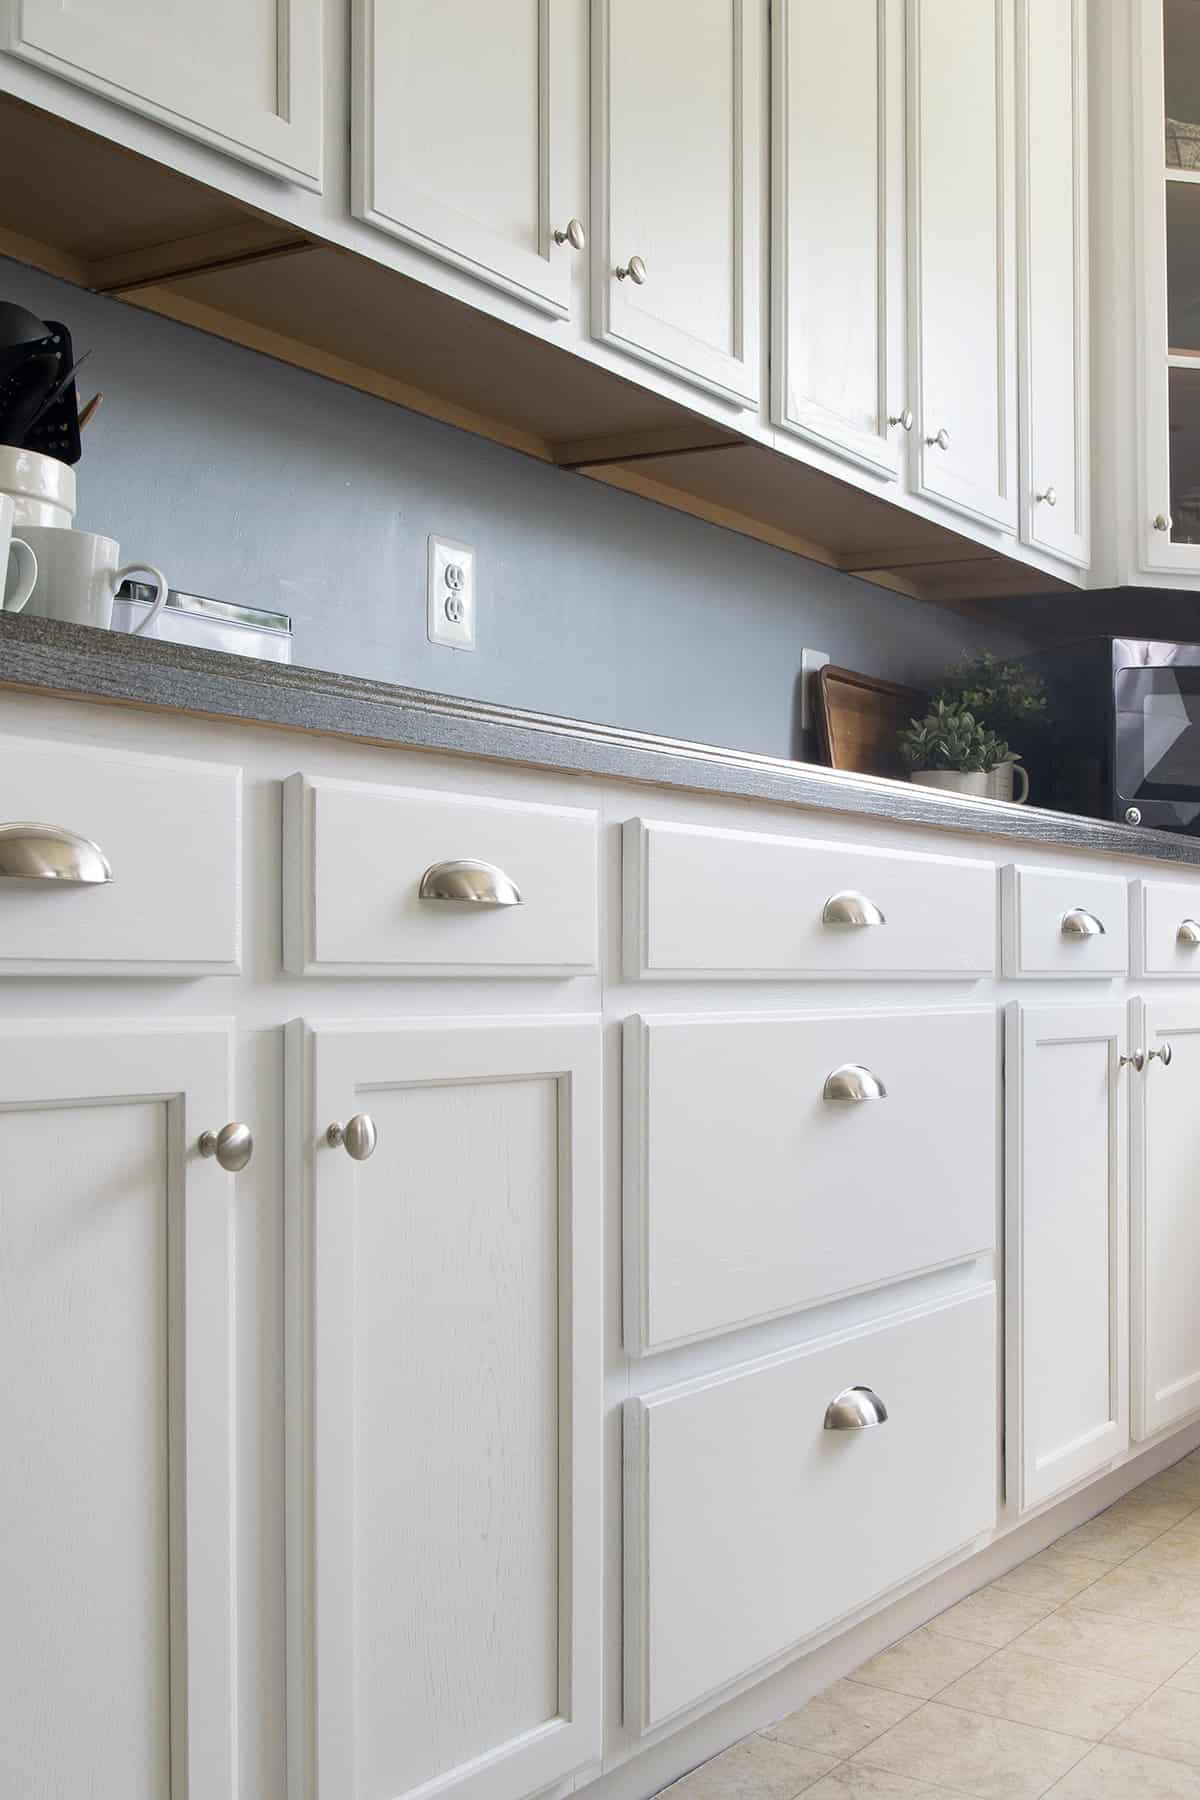
- Tips for Painting Old Kitchen Cabinets
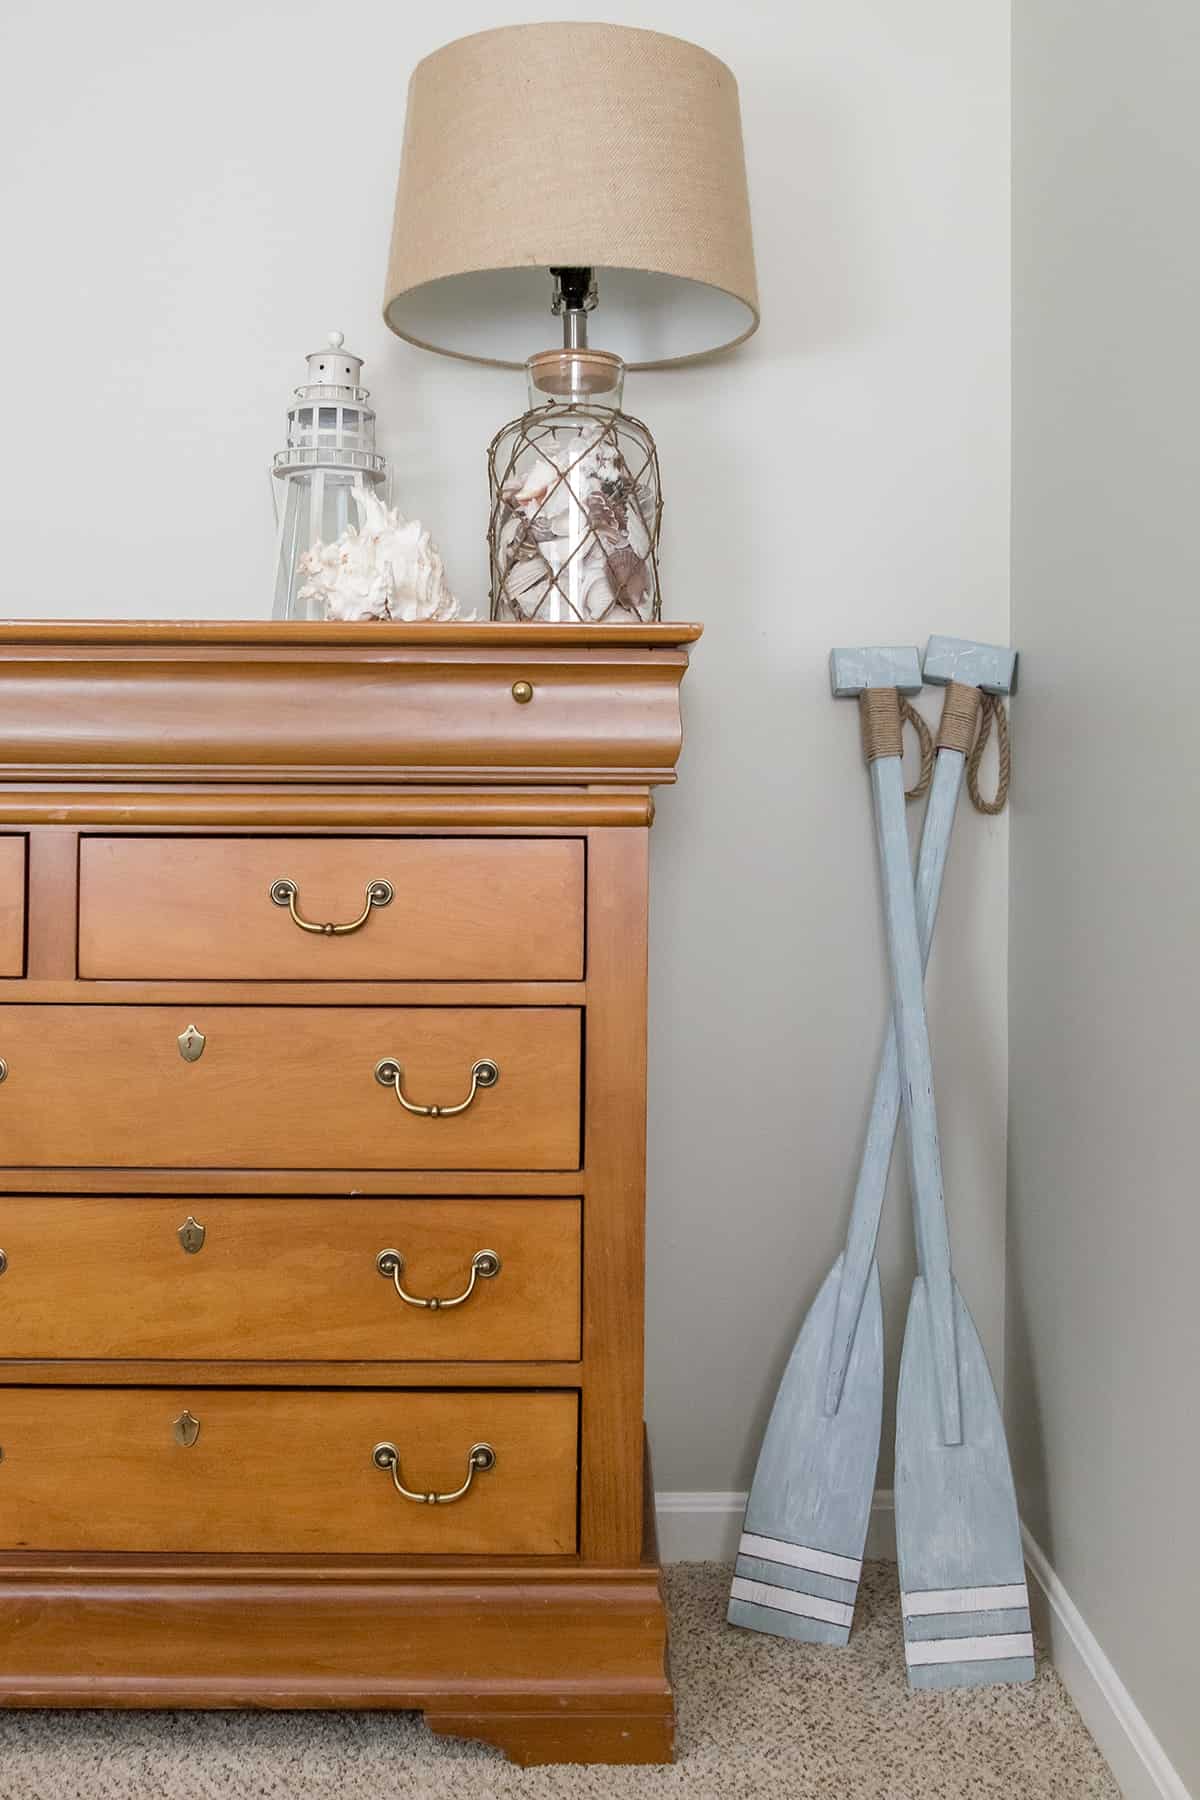
All in all, I am pretty happy with how the oars turned out! They go perfectly with the coastal bedroom ideas that I envision.
FAQs
The short answer is that it is best to seal whitewashed wood.
A sealing protective topcoat such as a polyurethane should always be the very last coat. However, with certain techniques such as cerusing, I may seal before the wash as well if I don’t want any bleeding of stain or color.
Stick to a furniture paint for the wash and don’t over dilute. It is usually more durable and lasting than a cheap wall paint.
Yes! Most stains for this purpose will be water-based stains and they won’t be as bright white as a whitewash. Excellent examples include Sunbleached, Antique White, and White Pickling stain.

Grab our free series "Weekend Home Projects that will Transform Your Life" Sign up below to receive updates including free printables, organization tips, home improvement projects, recipes and more! |
More Painting Ideas


PS I love seeing your creations! Be sure to take a photo and tag #cravingcreative on Instagram! You can also stay in touch with me through following me on Instagram, Pinterest, and subscribing to the newsletter!

How To Whitewash Wood
Tools
- Paint Brush
Supplies
For prepping wood
- Sand paper 220 and 120 grit
- 000 Steel Wool
Basecoat
- Paint or Stain of your preference
- Primer Only if adding paint basecoat under whitewash
Whitewash mixture
- White or Grey Paint Matte or Chalk paint
- Empty Paint Container
- Lint free dust cloths
- Cotton Rags or T-shirt
- Protective Top Coat
Instructions
Prep the Furniture Piece.
- You can use this technique on raw wood or a prefinished piece. If the existing finish is in good condition, you can just rough up the piece with some 000 steel wool. Make sure to go in the direction of the wood grain with long strokes when possible.

- Apply 1-2 coats of water based stain or primer and paint of your choice as the basecoat. Use thin coats. This will raise the grain a bit.
Make the Paint Mixture.
- Make the paint mixture. Start by mixing 1 part water to 3 parts of white furniture paint. You can thin a bit more or less depending on your desired effect.

Choose Whitewash application method.
- Dry Brushing with a Paintbrush: This means you dip your paintbrush in the paint and then wipe 90% of it off on a paper towel. You still want to use diluted paint for this. Undiluted paint and dry brushing aren't friends. It often leave odd marks and doesn't look smooth. Brush in the direction of the wood grain.T-shirt or Rag method: Dip the cotton rag or t-shirt into the whitewash mixture and gently wipe onto wood working in small sections and long strokes. Use a second dry cloth to wipe off and push the paint into the creases or texture of the wood. Work in one direction and try to keep moving before the previous paint dries. Feel free to layer this technique if you like.You can try experimenting and mixing the two techniques or altering them to get the exact finish you want. Play around with it!

- Practice method on a scrap piece of wood until you get the technique you like. You can mix and layer the methods above.

Final Coat
- Add a sealing topcoat. Give the surface a few days at least to dry and harden before sealing. This will make the surface more durable.
Notes
- Always work in the direction of the grain. This includes painting, dry brushing, and removing excess paint. Working across the grain will produce scratches rather than defining the grain.
- Keep your coats thin.
- Some woods have a chemical reaction with steel. Therefore, avoid using a steel brush. Fragments left can blacken the wood and disfigure the finish. Steel wool shouldn’t have an effect if the table is sealed.
- Don’t take shortcuts on the prep work. Prepping the surface correctly is the foundation for a great result. If you remove the existing finish to raw wood, always give a final sanding to even out the color and completely allow the surface to dry.
Tammy says
Thank you for the whitewash with chalk paint tutorial. It was helpful.
Rachel says
Thank you for stopping by! Good luck on your project.
Jaque Christo says
Thank you for the post on the tips and tricks for whitewashing with chalk paint. I like how the oars turned out and they look great even without the dresser being painted. I haven’t tried using an old t-shirt or cloth to paint so I will have to try that next time.