Don't start your project until you read these essential tips for painting cabinets the right way! I’ve been painting cabinets for years both personally and professionally. Save money by skipping the expensive kitchen renovation with this step-by-step guide on how to paint oak kitchen cabinets for a smooth finish.
There's no question that painting kitchen cabinets is a big project. While it’s tempting to slap a fresh coat of paint on and call it a day, if you want your kitchen makeover project to have a smooth finish that lasts, it’s important to take the time and follow the right steps.
I've done countless furniture painting tutorials and troubleshot all kinds of paint projects for clients. This is THE guide and process for achieving a professional finish that withstands the test of time.
Looking for some color inspiration for your project? I’ve scoured the internet to find specific examples and real-life paint examples in our posts on Colorful Furniture Makeovers, 20 Sage Green Cabinet Paints, and the Best Blue Cabinet Paint Colors.
My Go-To Painting Supplies
Here’s a handy list to reference. Many of these may be preference or related to the specific circumstances of your project. I’ll explain more in the steps below.
- TSP Cleaner, teaspoon alternative, or a degreasing cleaner like this. I've used even Goo-B-Gone for sticky messes and grease – it’s important that no residue is left behind though.
- Palm sander or mouse sander
- Sandpaper or Sanding blocks – 120 and 220 grit sandpaper, 300-600 if glossy
- Deglosser (optional, and I don’t prefer this method)
- Primer – Stainblocker or High Binding Primer or Shellac Based Primer
- Paintbrushes
- Microfiber rollers or Foam Rollers
- Paint Sprayer (optional but highly recommend)
- High Quality Paint – My recommended paints for cabinets and why are here.
- Protective Topcoat – Here is my list of favorite protective topcoats.
- Lint Free Rags – I DO NOT recommend using a tack cloth for a good finish.
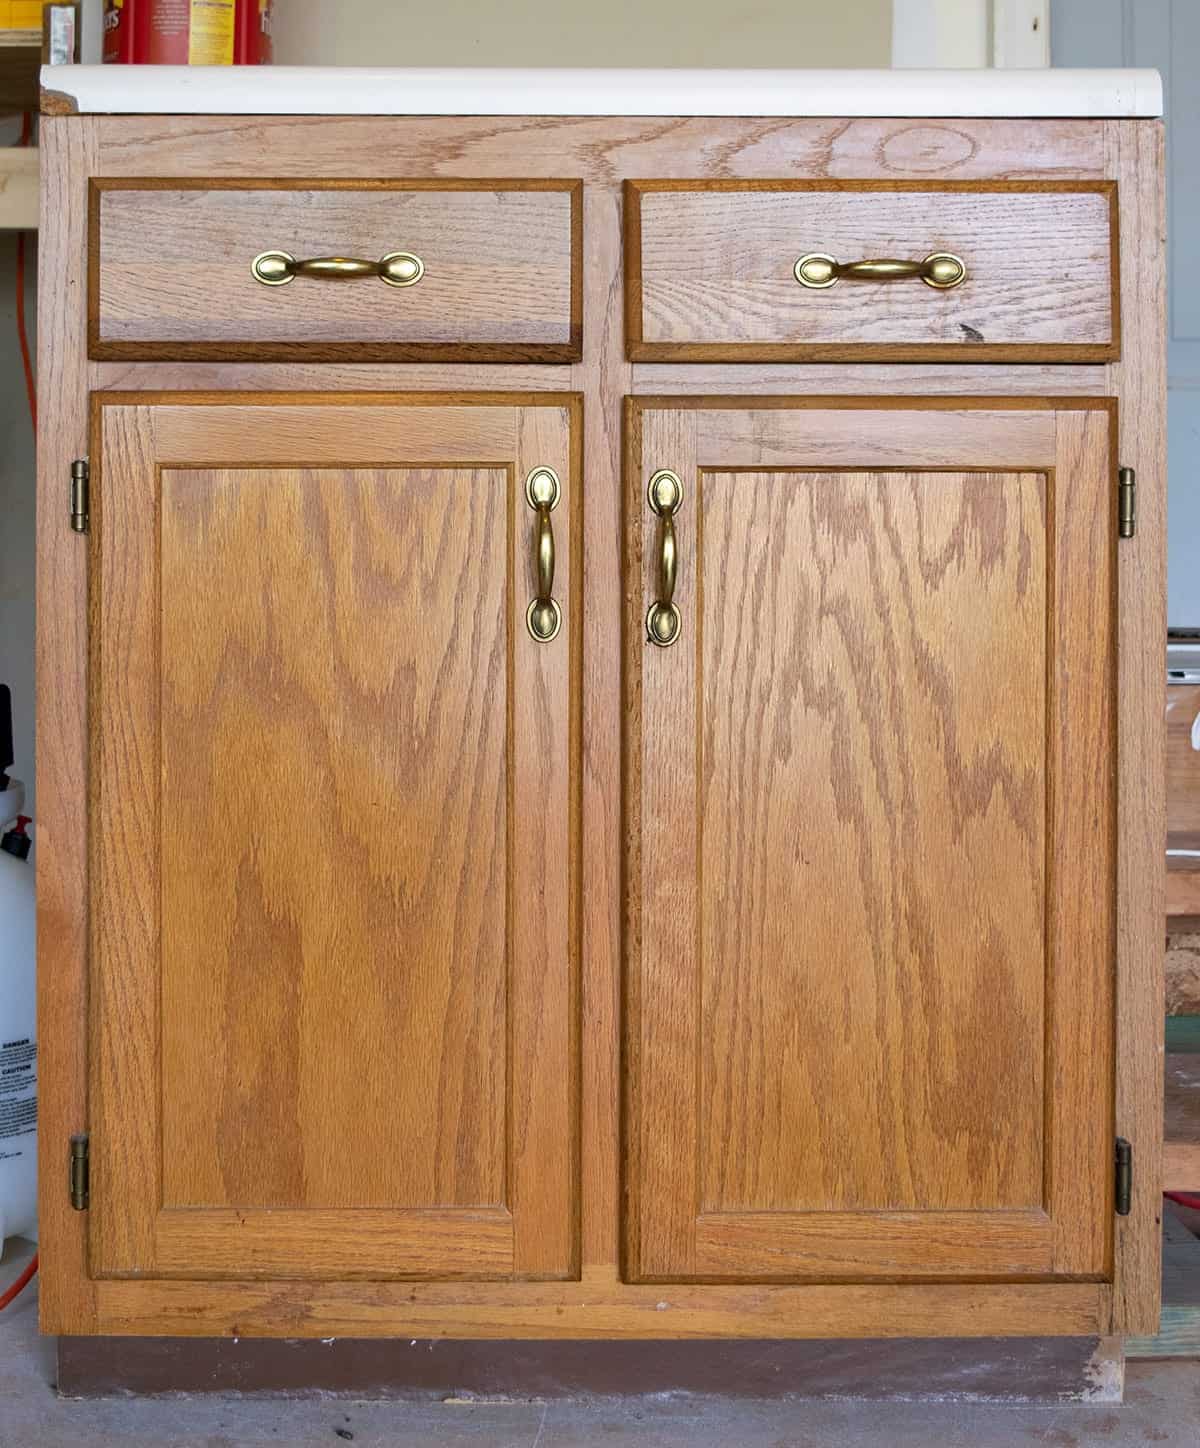
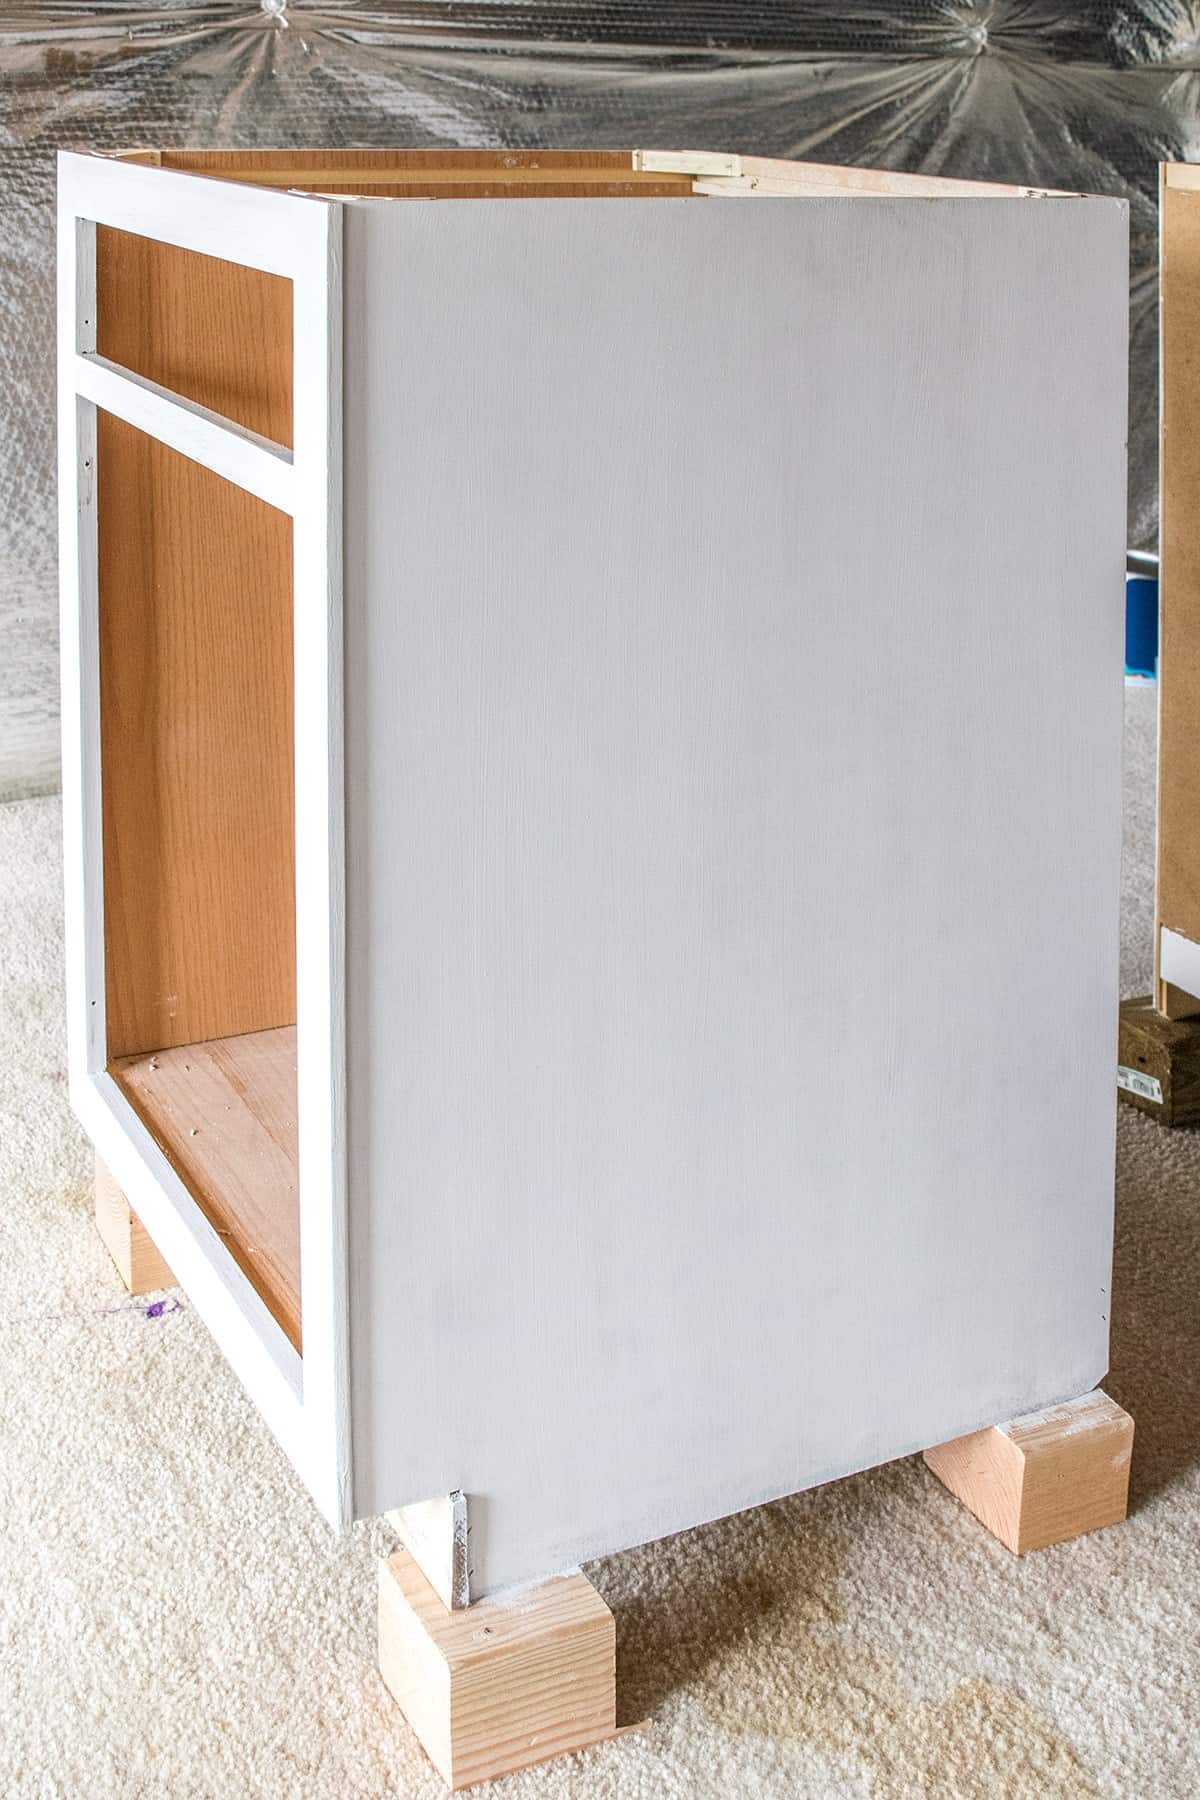
These particular cabinets are solid wood fronts and doors with sides that are laminate covering fiberboard (aka very common style kitchen cabinets). Read more about working laminate vs veneer wood furniture here. Like most of my kitchen cabinet makeovers, we wanted to turn these to white cabinets to fit a particular aesthetic.
Oak has a very distinctive grain that can be tricky to work with. If you’re hoping for achieve a sleek smooth finish, check out my post on removing wood grain with a grain filler.
Setting Up Your Workspace
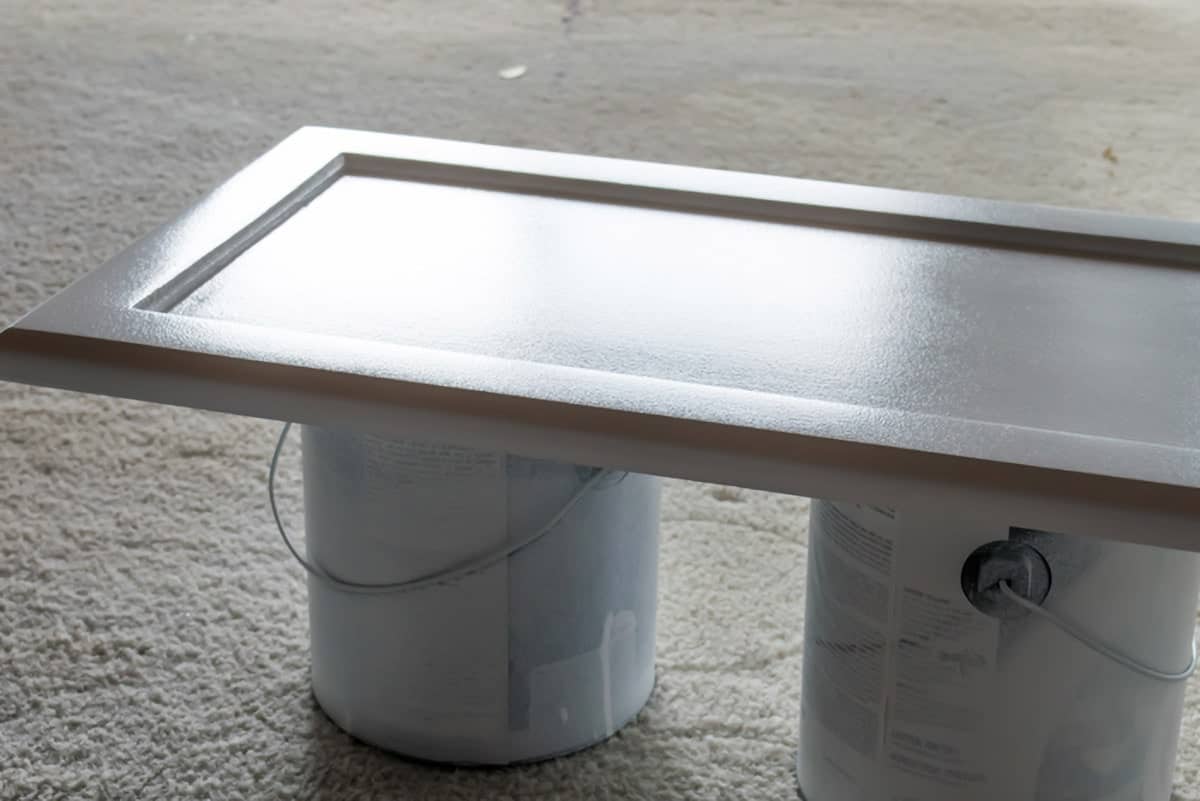
Painting an entire kitchen is a huge project. First thing you need to do is setup a workspace. For painting, my husband and I set everything up in an assembly line fashion for each coat. While we paint on a table raised off the ground, the doors and drawers have to dry away from the project area.
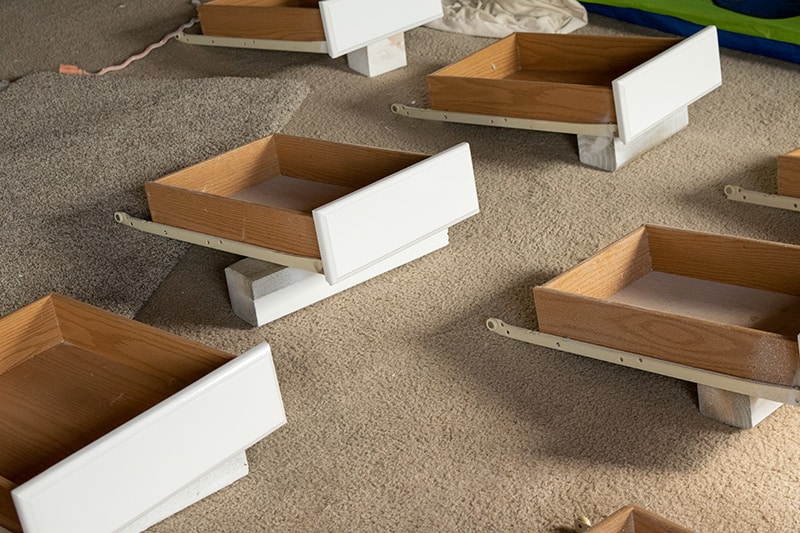
This is how we stored drawer fronts while they were drying, because we did not remove the faceplates in this project. However, in projects for doors or when we remove the faceplates, we stored them like this:
These particular doors are raised off the ground with scrap wood, but I have used solo cups as a cheap alternative that won’t damage the paint.
Pro Tip!: For this setup, I generally finish all of the prep work and sanding of both sides of the cabinet doors. I then start with the backsides and completely prime and paint them, then allow them to sit for at least a week before flipping them over to prime and paint the other side.
How To Paint Oak Cabinets Step-by-Step
1. How to Prep Kitchen Cabinets for Painting
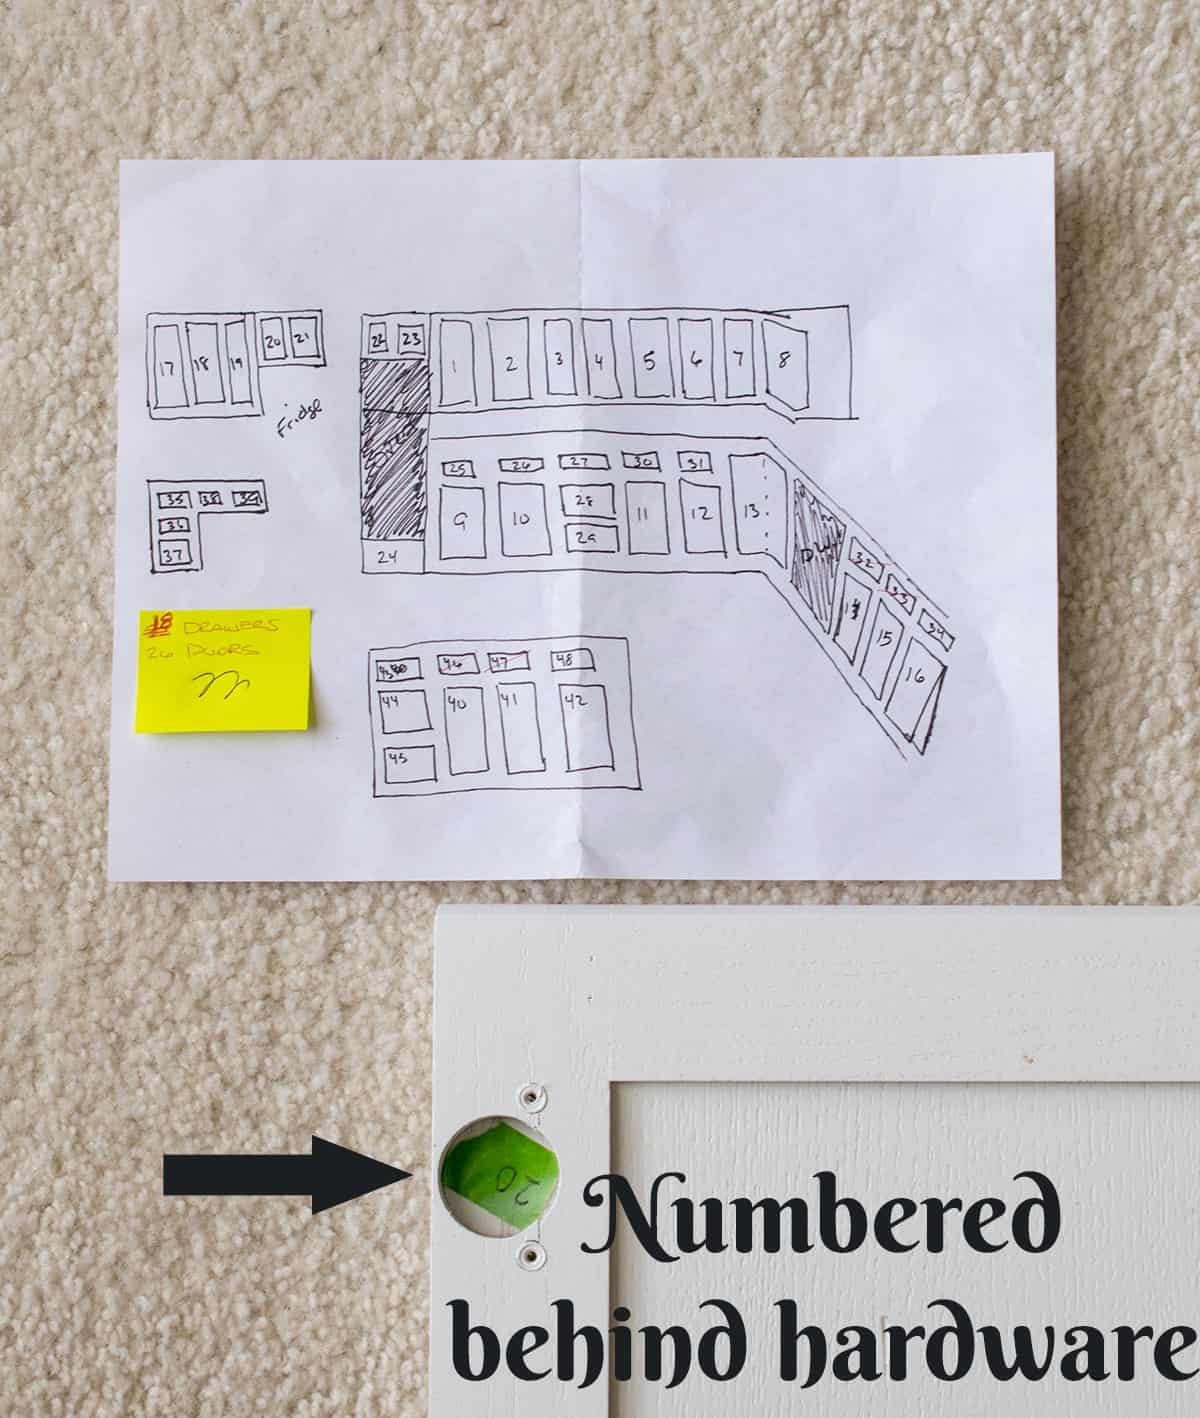
- Remove all the hardware, along with the cabinet doors, including hinges.
- Thoroughly clean all surfaces, removing any grime and dirt, using a degreaser or TSP cleaner. Remove any residue before proceeding.
- If needed, repair deep scratches with wood filler. If you are changing out the hardware to a different size, fill any holes from the old hardware.
- Vacuum and wipe sanding dust off with a damp microfiber cloth or other lint free cloth before painting. I do not like tack cloths as they can leave a residue.
- Use tarp and painter’s tape to mask off any areas you don’t want painted. This will give you clean edges and makes the end result much more professional looking.
Pro Tip!: Number the doors when you remove them so that you know where each one goes when you’re putting the kitchen back together. In the door below, I cover the painter’s tape number with another small piece of painter’s tape while painting to keep the number from being obscured.
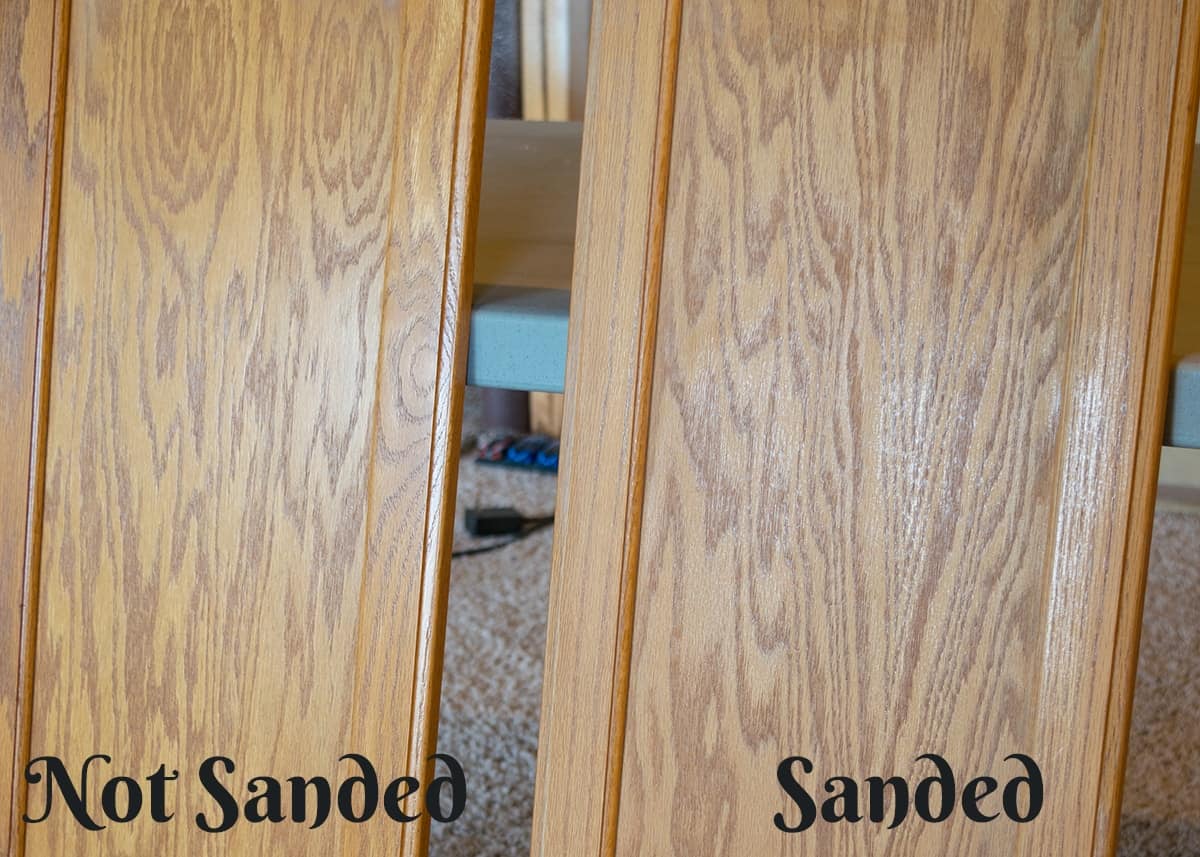
2. To Sand or Not to Sand?
There are two ways of bonding paint to kitchen cabinets: sanding or adding a bonding agent.
Sanding provides the best bond, particularly when painting old oak kitchen cabinets where the topcoat has degraded. I highly recommend the sanding method for high-traffic surfaces such as around cabinet knobs, drawer fronts, and door edges.
It’s not necessary to remove every trace of varnish. My general rule of thumb is to sand the surface until I’ve removed the gloss. Because oak has such deep grain, there will be some shine from the recessed grain.
What about surfaces that can’t be sanded?
- Another method is to use a bonding agent like this or this one for matte paint. It’s not available at many hardware stores, but you can purchase it online. I use these for delicate surfaces that cannot be sanded like paper covered laminate.
- You can also use a deglosser, which puts a coating on the cabinets that paint can bond to. My results, using deglosser in the past, have been mixed.
- Spray it on.
- Test your surface after 15-20 minutes.
- It should look etched or cracked, but NOT gummy or glossy. If it does, the surface may need to be scraped and cleaned again or sanded.
3. Do I need to prime?
The short answer is yes. Priming is key step towards achieving a professional grade finish. Primer acts like a bonding agent, sort of like glue, and a sealer so wood doesn’t absorb paint, causing an uneven finish. It helps to conceal some stains, and it creates a smooth, clean foundation for the paint application.
On occasion, it can be safe to skip priming. There are brands I’ve used that are fine to skip priming in many cases: Chalk Paint, Fusion Mineral and Benjamin Moore Advance. However, certain projects, such as the ones listed below, ALWAYS call for priming no matter what type of paint you’re using:
- Transitioning dark cabinets to a lighter shade or white.
- Painting raw wood.
- Knotty pine cabinets or other knotty grade wood. I recommend a shellac-based primer for this situation. It must say shellac on it.
- Cabinets stained with deeply embedded oil or grease, markers, or dyes. If the topcoat seal is broken or well worn, you should prime.
Pro Tip: Use the same base for all layers. For example, if you’re using a water-based paint (like latex enamel), use a water-based primer, sealer, clear coat, etc. Shellac can be used with oil modified, alkyd, or water-based paints. I don’t have reason to use an oil-based primer or paint because high quality paints have become so common and easier to work with.
For best results I recommend two coats of primer if using a paint sprayer or one coat with a paint brush.
4. How to Achieve a Professional Grade Finish
Now that you’ve done all the proper prep, choosing the right paint is pivotal. We used Benjamin Moore on many sets of cabinets, and I have also used Fusion Mineral to paint our kitchen island and love the results. Read more about the most durable paint options here.
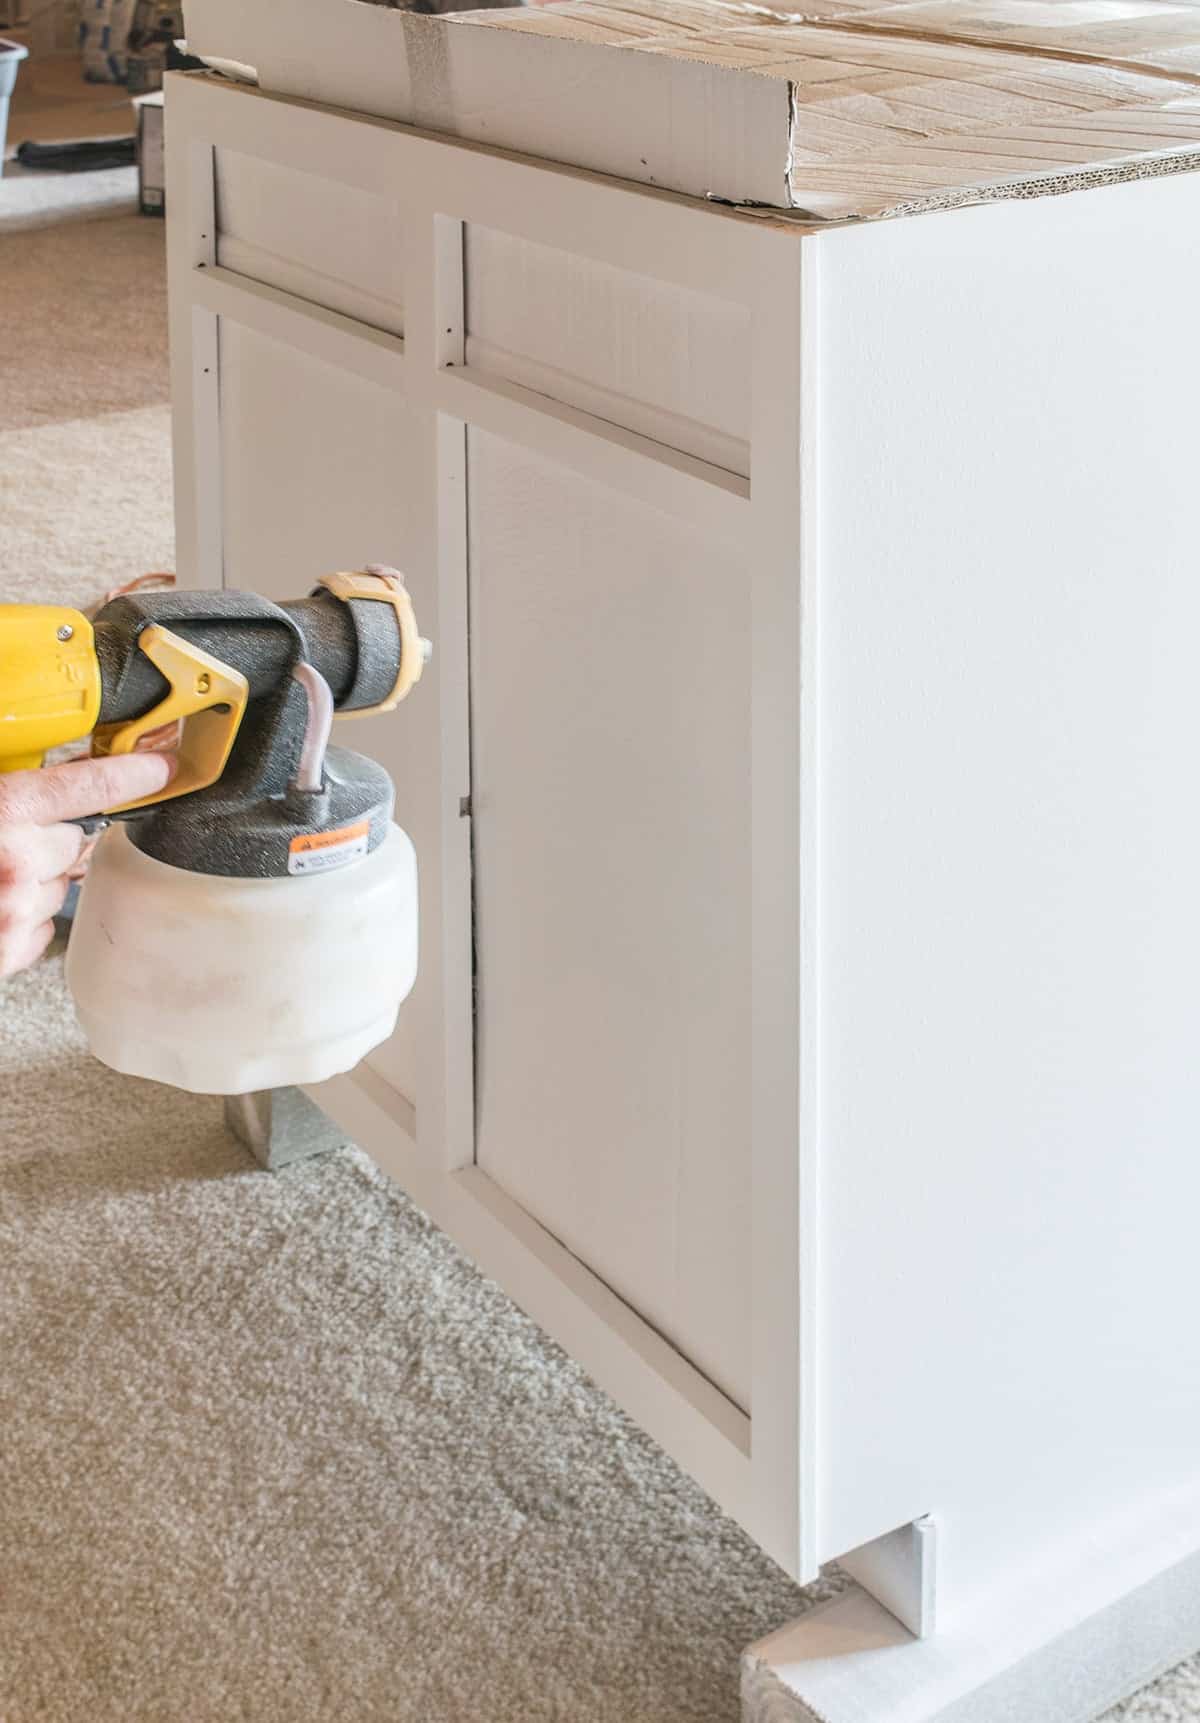
Beyond applying a smooth and durable paint, using a paint sprayer will deliver the most seamless finish. It saves so much time, energy, and there are many affordable and user-friendly options. Read our guide to painting kitchen cabinets with a sprayer that includes how to setup, troubleshoot and achieve the best finish possible.
Related Guide: Choosing the best paint sprayer
Pro Painting Tips
While I love my sprayers, I realize that it may not be available to everyone or suitable for every project. So here are more painting tips if tackling this with a roller and paint brush combination.
- High-density foam rollers or microfiber rollers will help achieve a smoother finish and less work than only using a paintbrush. Use the paintbrush in corners first, then go immediately over the larger, flat areas with the roller while the paint is still wet.
- Apply thin coats of paint but load up enough paint on your paint brush or roller that you aren’t stretching the paint. Stretching will leave more marks and prevent any self-leveling properties of the paint.
- Paint in the direction of the grain of the wood.
- Every paint has a different requirement for paint to set between coats. Read the instructions on the can before starting and make a plan for the timing of coats.
- You don’t need to sand between coats for the paint to bond well. However, a light sanding before the final coat may give a smoother finish.
- Generally, there is no need to paint the insides of cabinets except maybe for glass fronted cabinets or damage restoration.
- Lastly, this is a big job. Don’t push yourself too hard as mistakes and sloppiness will increase and you may not be satisfied with the results long term.
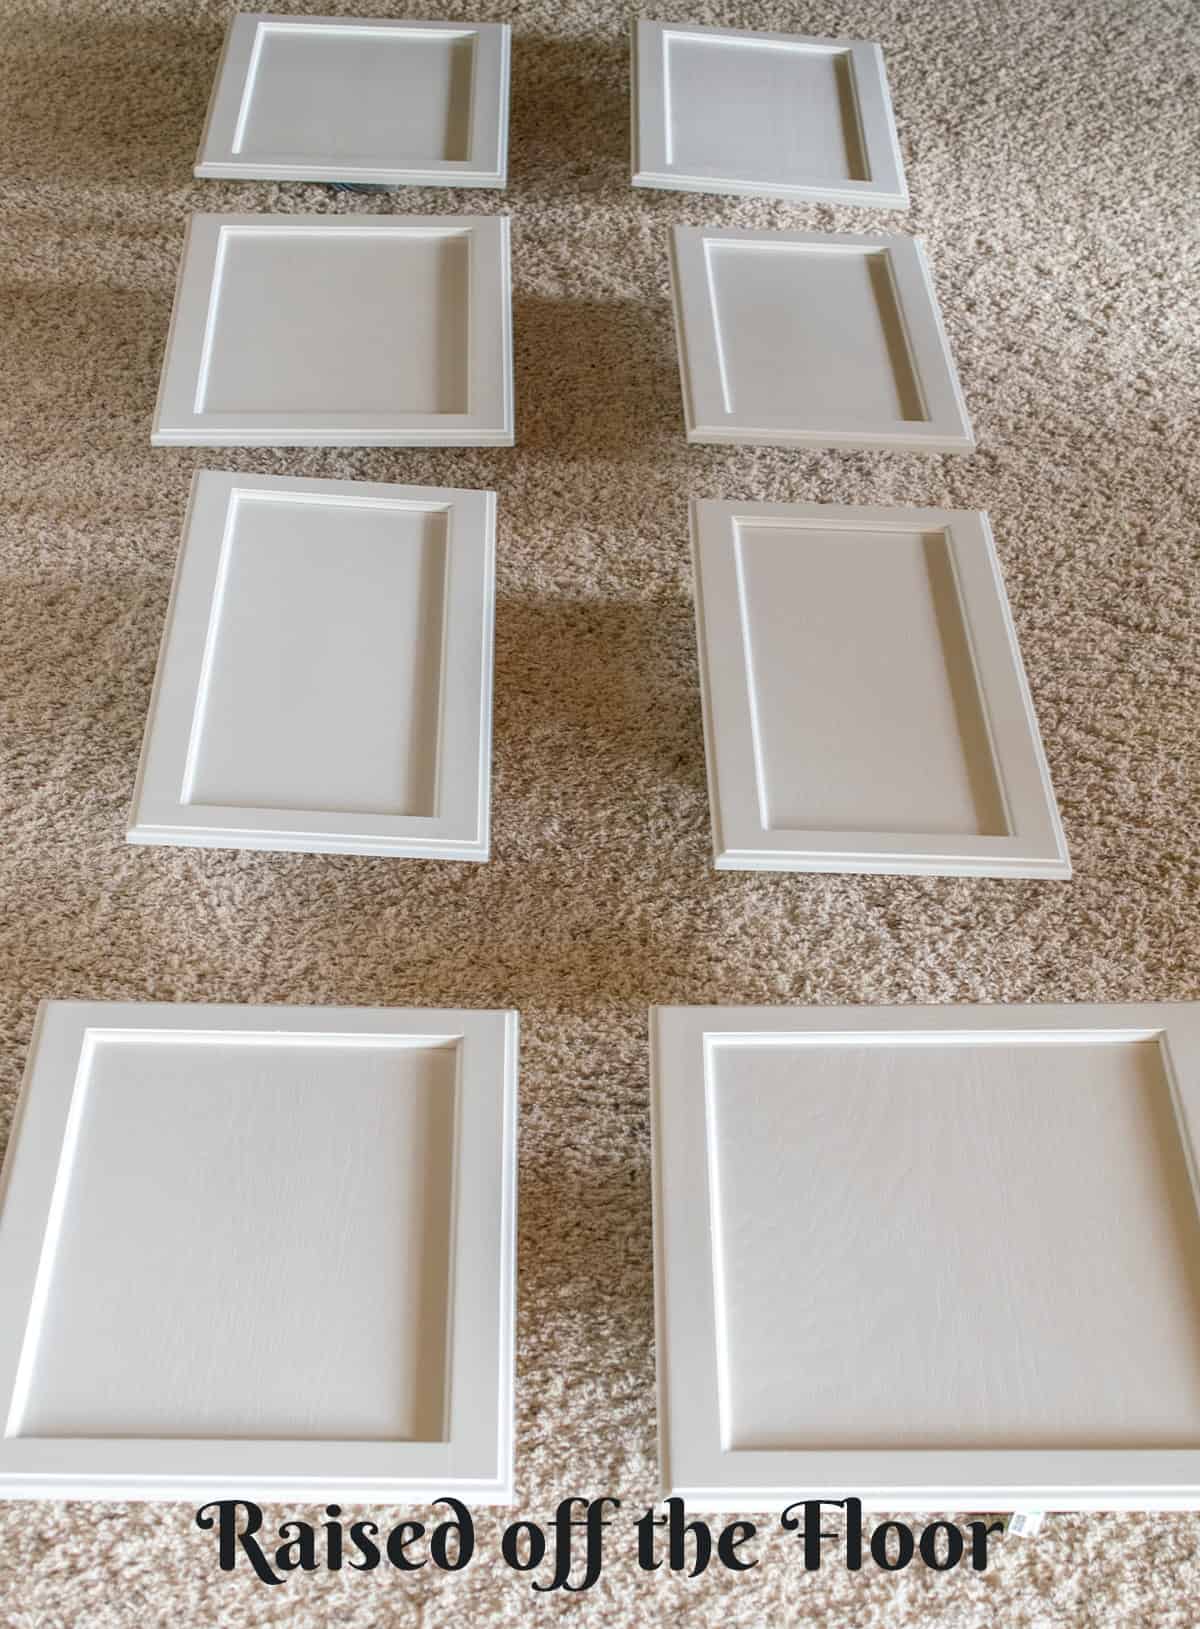
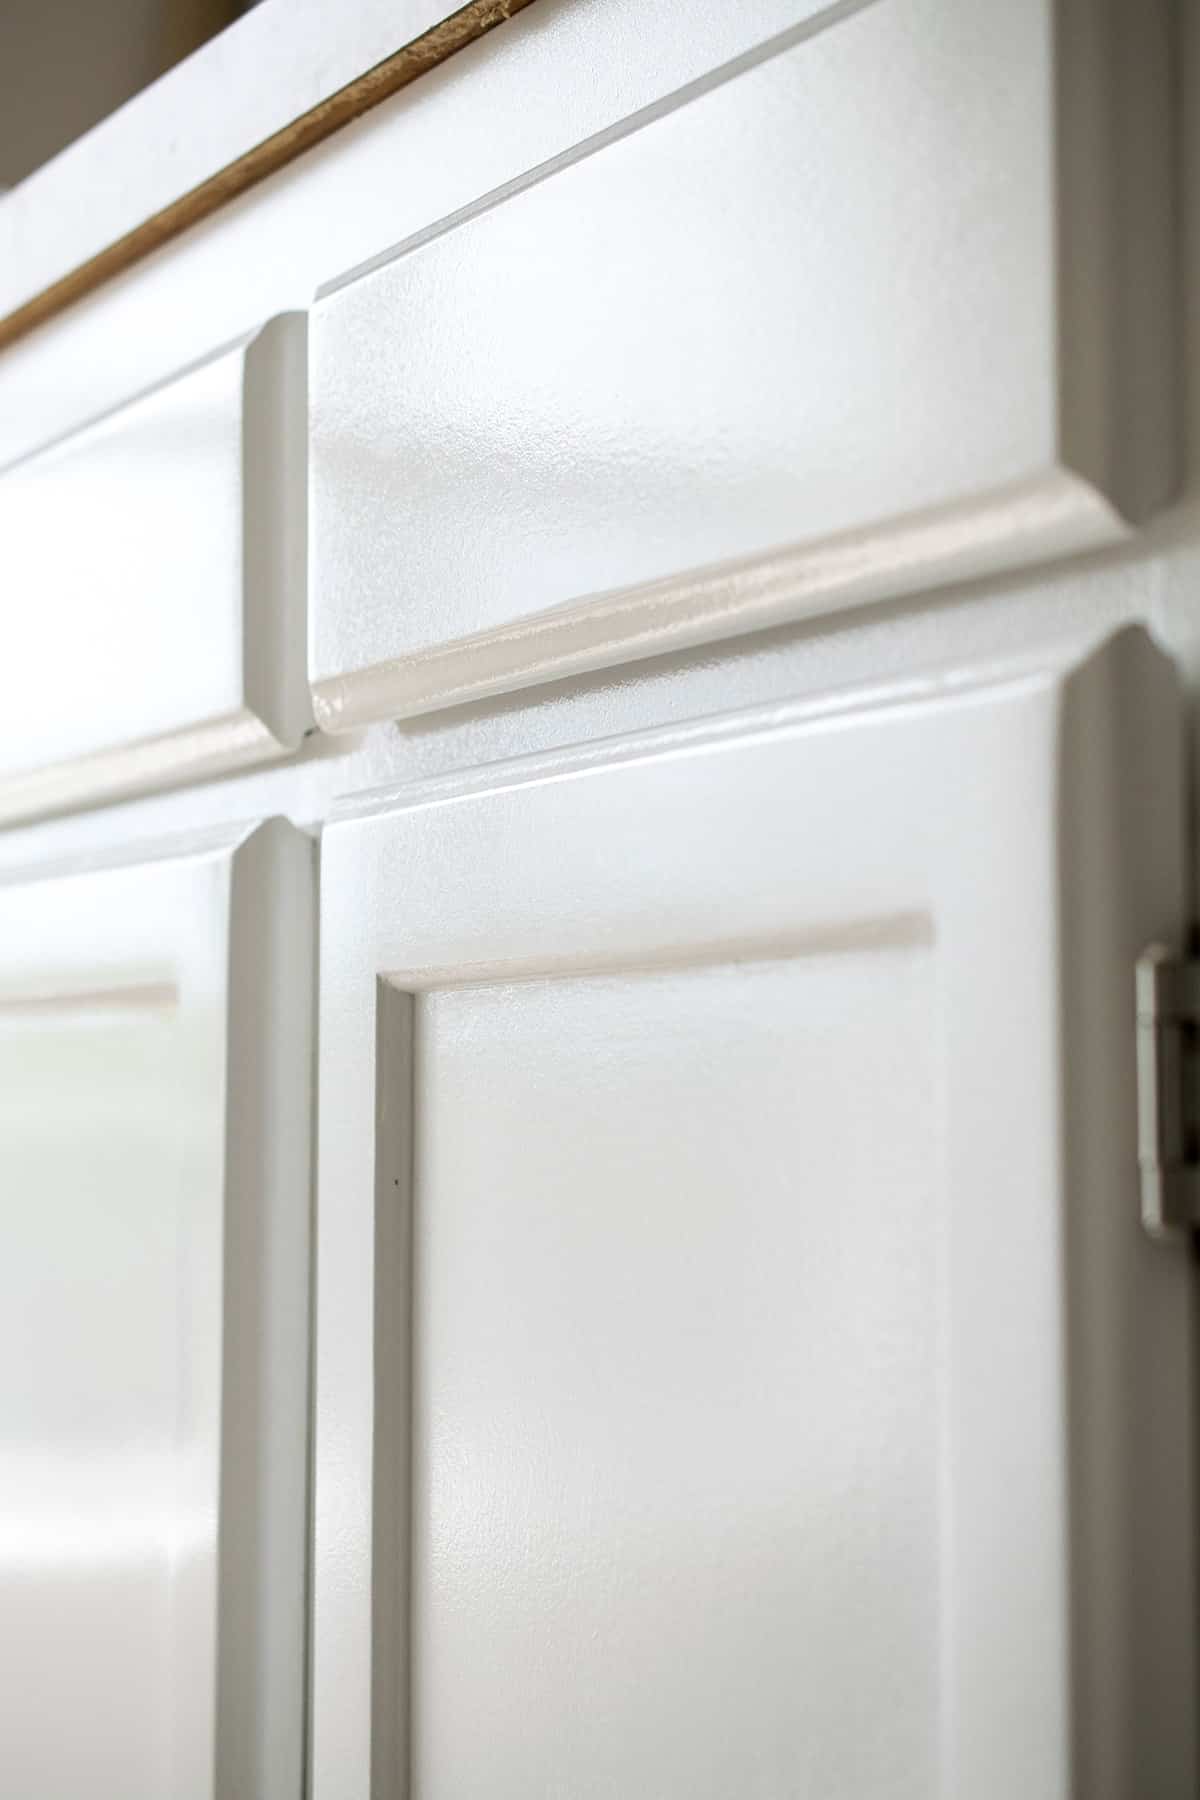
With deeply grained cabinets, you’ll still see some of the woodgrain after painting. To achieve a completely smooth finish as pictured below, I recommend filling woodgrain before painting.
5. Adding a Protective Clear Coat
I always recommend a topcoat to clients. A clear coat provides an even finish with added durability and friction resistance for lasting beauty. It’s a great way to complete and protect your cabinet project. If you’re on the fence, read my guide to The Best Protective Topcoats for Furniture and Cabinets for more in-depth information.
The clear coat I use most often for kitchen cabinets is Benwood Stays Clear Acrylic Polyurethane. First, it comes in 3 different sheens – flat, low-luster, and high gloss. Most clients prefer the low-luster finish. Second, it’s made for painted floors, so I know it is durable. And third, I have never had this topcoat yellow or react with the paints I use.
*Note – Stays Clear is meant to be applied with a sprayer, in my experience. If you use a brush, choose a high-quality finishing brush such as a Purdy or Corona China Bristle or a microfiber roller. Do not use a foam roller!
6. Dry Time vs Cure Time
After installing the cabinet doors and drawer fronts, I left them slightly ajar to allow the paint and clear coat to cure. While these cabinets took about 3 weeks to cure, it can take up to 60 days in high humidity.
What is paint curing? Paint may feel dry to the touch but not be fully hardened and maximum durability. If you have removed something, like a glass vase, from a table and heard a sticking noise, the paint is soft and there's a risk of the paint transferring or pulling off (yikes!). With these cabinet paints, that should not happen if you have allowed the paint to fully cure and left the doors open for airflow. It's imperative to allow enough curing time for a smooth finish that will stand the test of time.
Frequently Asked Questions
There is a method that doesn’t require sanding. You can use a deglossing product, sometimes called a liquid sander. Deglosser only works on wood and varnished veneers. It generally won’t work well on laminate or paper-covered surfaces.
Spending the extra money on quality paint will save you so much heartache in the long run. Cabinet paint must be extremely durable and very easy to clean. I would say that at least ⅓ of my clients have me fix bad paint jobs on cabinets and the number 1 problem is using the wrong paint or not including a topcoat.
My most recommended paints are Benjamin Moore’s Advance Alkyd Paint (satin), Fusion Mineral (Matte), and Behr Cabinet Paint (Budget pick).
Painting cabinets with a sprayer provides a much smoother finish than using a traditional brush method. It cuts down on the time and work involved as well as eliminates the need for touchups or sanding after the fact.
I recently priced cabinets from several large companies. Prices were ranging from $110-400, with around $270 being the most common price per cabinet. You can paint a huge kitchen for around $500 in materials.
To minimize brush strokes on your cabinet surface, use a paint sprayer for larger areas. For using a brush, we have a list of comprehensive tips on how to avoid paint marks here. You can also thin the paint slightly for a smoother application, which is especially helpful when using chalk paint or other water-based paints.
Today’s tutorial was chocked full of informative tips, and even if you have painted before, I hope I was able to give you something new. I would hope this post illustrates the ultimate how-to for painting kitchen cabinets like a pro.
UPDATE: HERE IS HOW OUR CABINETS ARE HOLDING UP 2 YEARS LATER.

Grab our free series "Weekend Home Projects that will Transform Your Life" Sign up below to receive updates including free printables, organization tips, home improvement projects, recipes and more! |
More Information on Painting Cabinets Like a Pro


PS I love seeing your creations! Be sure to take a photo and tag #cravingcreative on Instagram! You can also stay in touch with me through following me on Instagram, Pinterest, and subscribing to the newsletter!
Justin G. Radke says
Great article thank you!
I have a question about which type of paint finish I should use for the kitchen cabinet when I intend to use the Low Lustre Benjamin Moore Polyurethane?
For example, should I use a flat luster paint so the polyurethane bonds/adheres better to the paint? or use semi-gloss paint to match the luster of the polyurethane top coat? or does it not matter?
Rachel says
I have done many sheens from flat to satin with the Low Lustre. The low lustre is still what I would consider a satin sheen, but if applied heavily, it’s nearly a semi-gloss. I use thin layers with a sprayer so it makes it less shiny than a heavier coating, if that makes sense. It would be personal preference, but I generally like the matte paints or eggshell better to control the amount of shine. For the purposes of bonding, I have not seen any real difference over time.
Oren Spanbauer says
Really clear web site, appreciate it for this post.
Karen says
Rachel, thank you so much for all your good info! I also read your blog post about polycrylics. We have recently primed & painted cabinets w/Sherwin Williams latex, and it all looks so pretty! But I have to be honest, I have painting fatigue and want to just get things put back together. Can I get away with using polycrylic on the drawer & door fronts only, or am I going to regret that? Will you appearance be drastically different (doors vs. frames) and/or do you think I’m risking paint chipping all over the place? Thanks again!
Rachel says
You can definitely get away with topcoating the drawer fronts and doors. However, even in a large kitchen, doing the frames with a roller only takes a few hours more. Sherwin williams emerald line is pretty durable so it should hold up relatively well. For topcoating cabinets, I usually look at my clients environment to determine if they REALLY need top coated with a poly. If the surface is likely to get stained or damaged, it’s a no brainer. I ask my clients if they have kids, if they have long fingernails, if they use the kitchen daily, and how much they clean, and how long they want the finish to last. The poly to me is like wrapping your cabinets in a protective plastic almost – it makes it wear better, less likely to stain or discolor over time, and easier to clean.
Sheilla says
Can you paint the unfinished inside of a wood cabinet? My cabinets are rough & unfinished on the inside which makes it difficult to wipe out. Is there a way to finish the inside so that it’s smooth and easy to wipe out?
Rachel says
You can paint the inside with a very durable paint and top coat. There are some considerations depending on the type of shelves you have. If you have a very porous wood like mdf, I would be very careful since mdf often bubbles when it soaks up moisture of any kind. For MDF or something that isn’t a solid piece of wood, I generally recommend using something like contact paper or just a lining that can be changed out when necessary.
Nicole says
Hi! I’ve been following this tutorial to repaint our kitchen and it has been so helpful so thank you!!
I typically use oil primer, but I’m worried about cleaning it out of my sprayer. Can I use two layers of the Kilz Max as a primer by itself or would you recommend using an additional primer underneath? Did you have to thin it out at all or did the sprayer handle it ok?
Thanks!!
Rachel says
Yes, you can definitely use the Kilz Max by itself. It has the performance of an oil or shellac, but is water-based.
As for thinning it out, I generally thin just about all paints and primers, usually just a little. It definitely depends on the sprayer and other factors, but I seem to find that for me personally, I almost always seem to get a better overall finish and smoothness. I always test unthinned first. It may just be the user, so I recommend testing and then slowly adding a thinning agent like water for water-based paints if you want to. In case you are interested, I just released a post about painting cabinets with a sprayer at this link. Some of the info is particular to my sprayer, but it does have other good information. Good luck with your project and I always love seeing the completion photos!
Barbara says
We have a vacation home that has ok cabinets. We hired a “painter” to paint them. He said he sanded them a little and used Sherwin Williams Latx satin paint. This is less than a week now and they are chipping. He came back and touched them up but am afraid they will chip again. Should we put a Polyacrylic on top and will that help?
Rachel says
A polyacrylic will definitely help, and you can see my recommendations on polyacrylics here. and I am guessing he used regular satin wall paint, which should not have been the case. I just finished painting a set of cabinets in Sherwin Williams’s Emerald Line of paint. It’s quite pricey, but it has a beautiful sheen and supposedly very durable like Benjamin Moore Advance. However, it’s only been a week, and I know that paint takes a month or so to become fully hardened, so I tell my clients to be gentle for the first few weeks and to leave all the doors and drawers ajar to prevent sticking/pulling of the paint. Good luck with your project!
Sarah Fenili says
What exact brand and type of paint did you use for your cabinets? Thank you!
Rachel says
For my cabinets, I think I used Lowes Furniture Paint. However, it isn’t a paint I highly recommend, especially without a strong top coat. I have another chair with it and even though the chair is not used much, it is already showing wear. There was no top coat like with the cabinets. The brands that I generally recommend are Benjamin Moore and Sherwin Williams Alkyld or Acrylic Paints for cabinets. Do not use latex. I have other paints that I love if you are looking for a specific sheen or process.