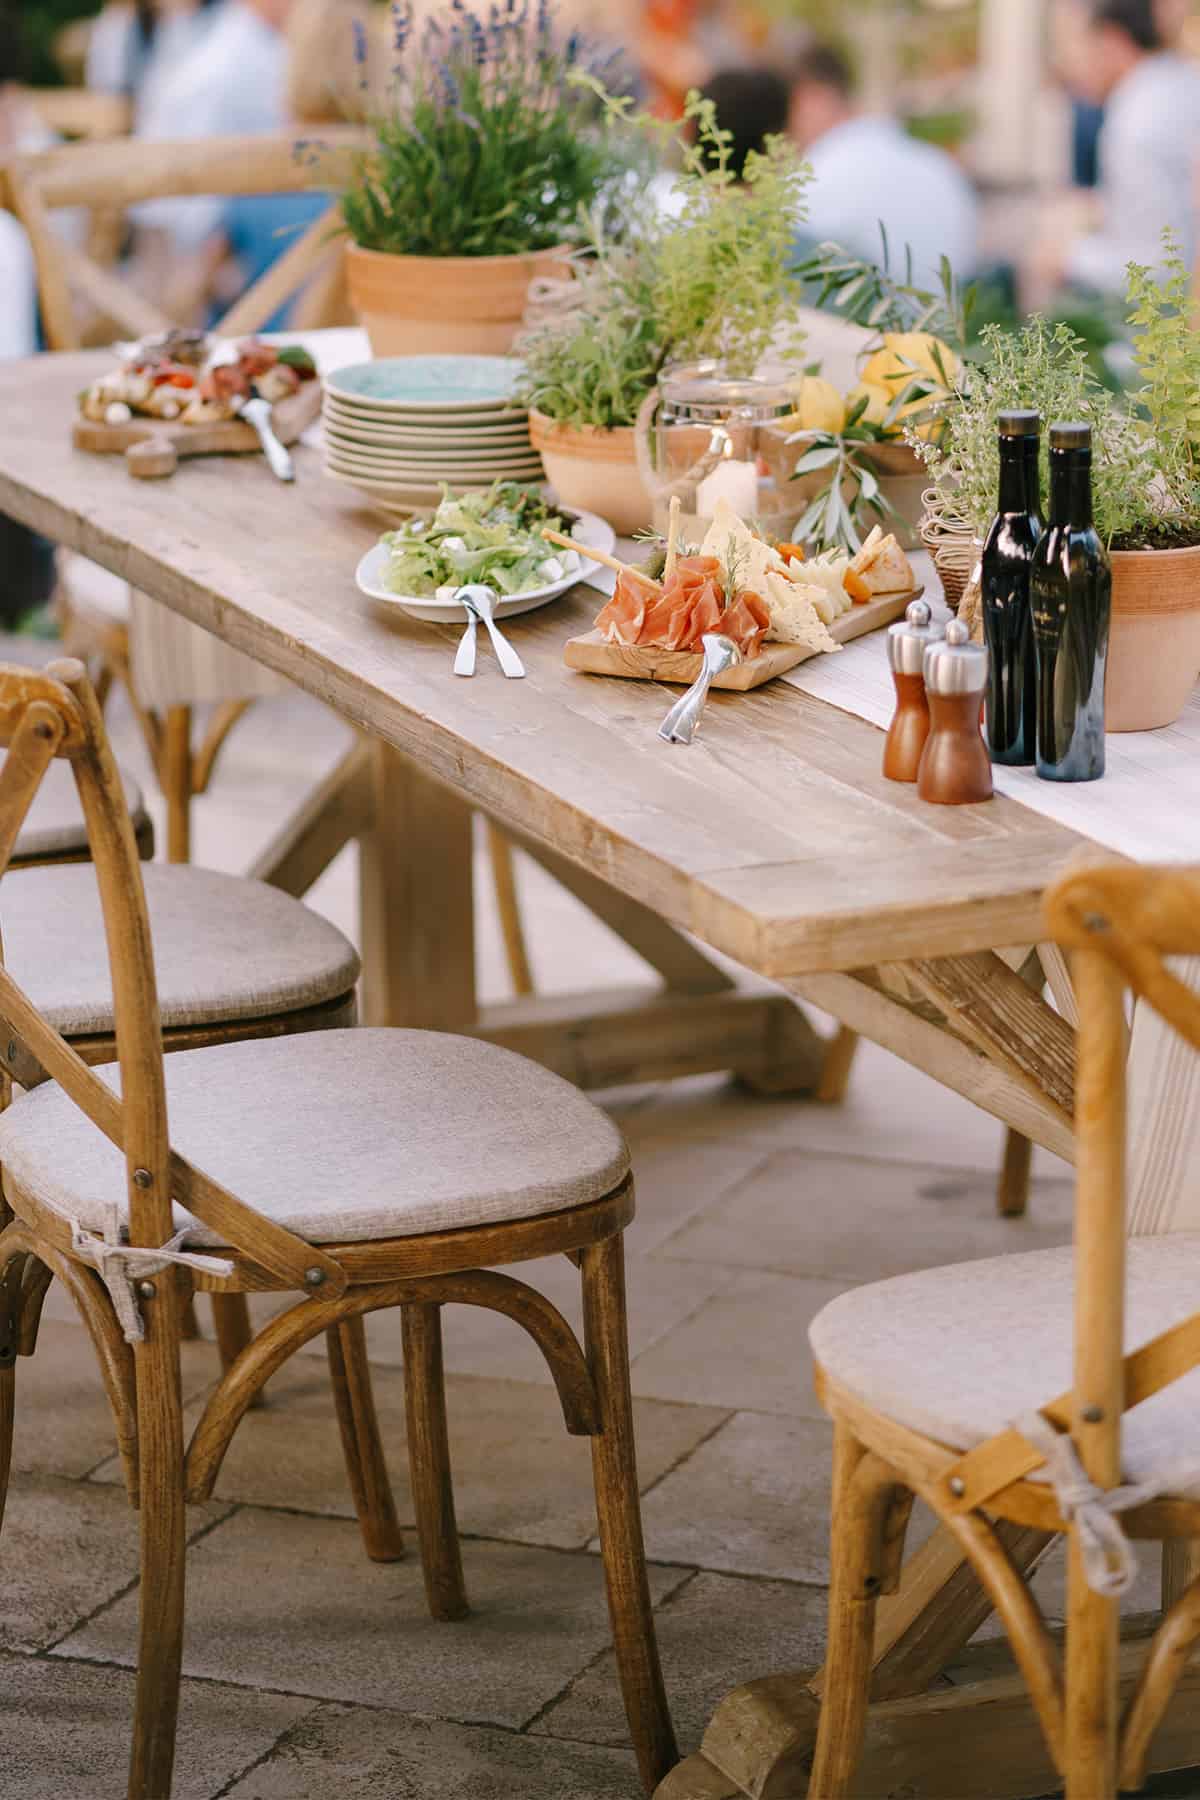
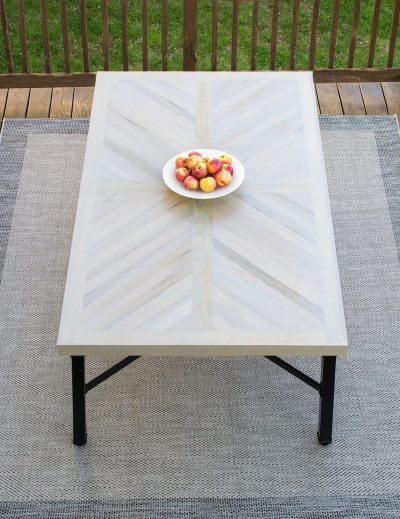
Enjoy the warm, beautiful weather with family and friends this summer with this budget saving diy outdoor table. We show you how to build this herringbone patio table with step-by-step instructions, free plans, alternatives, and handy list of tools.

It’s the spring of outdoor DIY projects and we’ve been sprucing up our favorite outdoor spaces. From the porch decor makeover and DIY plant stands, we’ve made a lot of progress in this beloved bonus space on our deck.
I’m excited to walk you through how we built this beautiful outdoor dining table. After seeing tons of these outdoor farmhouse tables pop up in decor magazines, it turned out even better than I envisioned! I would classify this as an intermediate woodworking project. There are some basic tools required, but it’s mostly tedious cutting rather than requiring a lot of technical building experience.
The money we saved, and the beauty of this table is definitely worth it. In fact, all of our neighbors keep asking us if it’s our dining room table! Truthfully, it could work well as a dining table build or a DIY picnic table too. Although we used a thrift store find to save mega money, I include options for building the base and legs as well.
Count me in for spending the lazy summers outdoors sipping on some blackberry sangria and enjoying afternoon grilling outdoors!
Our Project Before
For this table, we utilized a thrift store find to get the chairs and the table legs. But it was definitely needing an update:
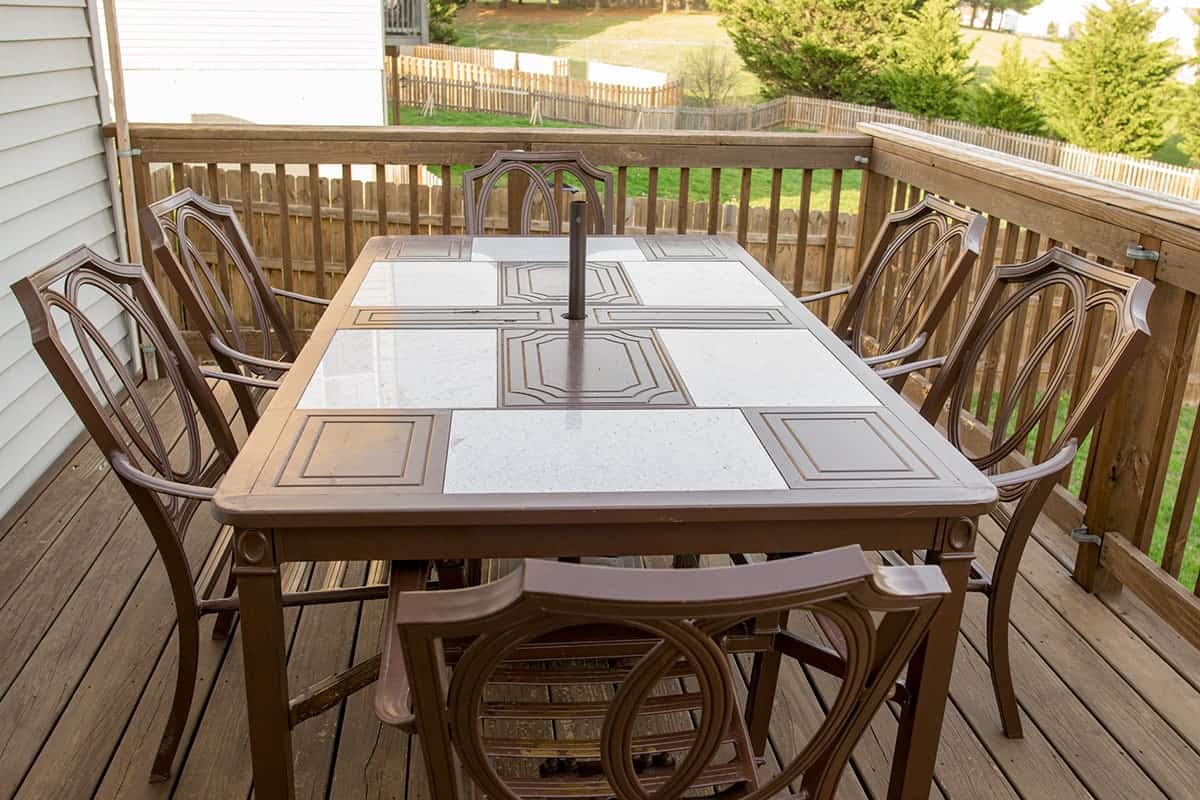
The table was in good structural condition. We painted the metal furniture here to give it a refresh, but the top left me desiring something completely different. I also wanted it to better match our existing patio furniture and deck area. This was just too much brown.
Recommended Tools
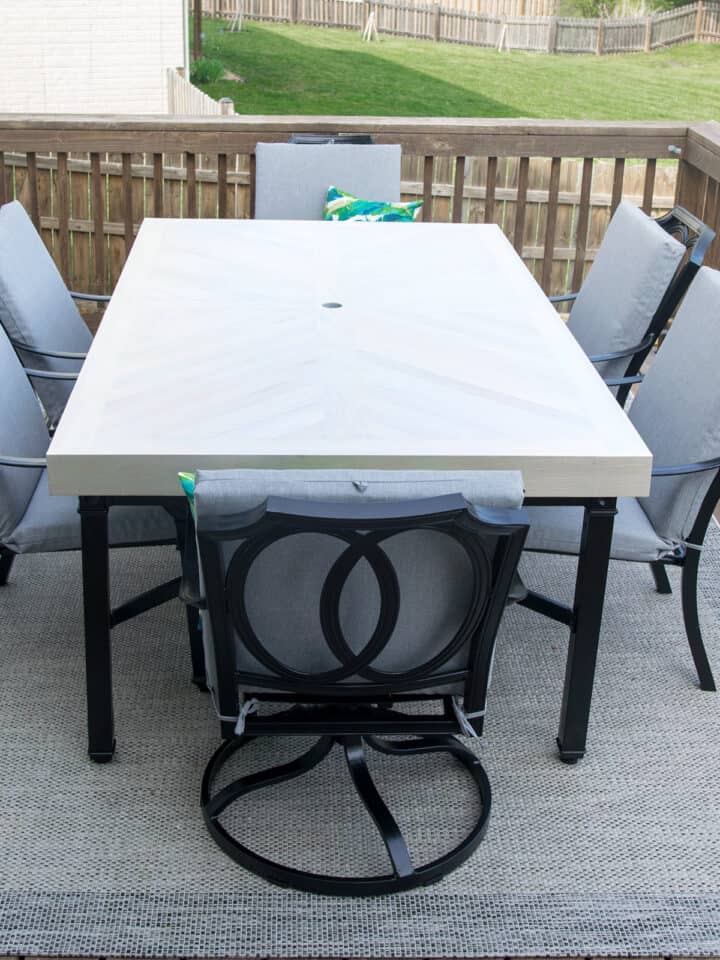
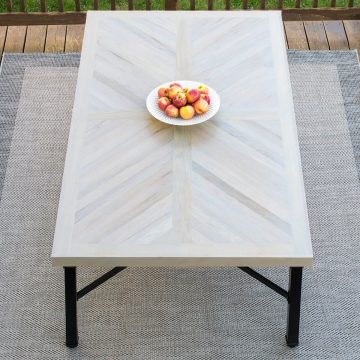
This particular build is 41×72 inches, not including the wrap around skirting which adds about 1.5 inches to both the length and the width. I chose this size particularly to maximize the long framing boards, which are exactly 6 feet.
Equipment
- Miter Saw
- Pocket Hole Kit
- Outdoor Wood Glue
- Drill and bits
- 1 ¼ Screws for pocket holes – fine thread for hardwood
- Brad Nailer
- Planer – Very optional. This just helps the wood line up on top beautifully with minimal sanding.
- Hole Saw – for Umbrella Hole
- Orbital Sander
- 120 and 220 grit sandpaper
- Carpenter’s Triangle
- Tape Measure
Wood sizes for Purchasing, not Cut Sizes
- 1×4 – (2) 8ft boards, (1) 6ft board, and (3) 4ft boards for frame and skirting
- 1×3 – (2) 6ft boards, (2) 3ft boards
- 2×4 – (3) 6ft boards
- 2×6 – (2) 6ft board and (2) 4 ft boards
- The slats in our example are 1×3, but you can use 1×4. The amount needed will vary a lot based on actual thickness of the boards, where you start and any spacing between the boards. I would recommend at least (10) 8ft boards.
- Table Legs – I give a variety of ideas in the instructions.
What kind of wood to use?
The wood must be rated for outdoor use for furniture. Common species of wood that are suitable for outdoor furniture include white oak (never use red oak), cedar, teak, redwood, and cypress. You can also use treated lumber for outdoor use, although it is more prone to warping, and wood plastic composites.
DIY Outdoor Dining Table Plans
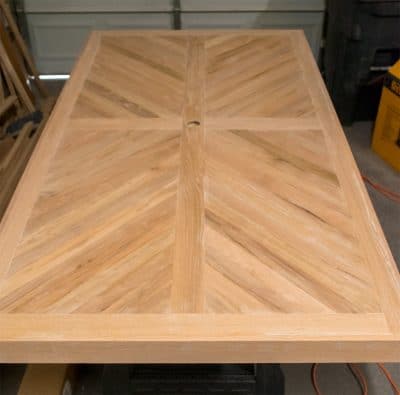
After sketching out a few designs, I settled on what I am calling a Cross-X pattern. What I love about this pattern is that small differences in board widths won’t be noticeable like with a herringbone or chevron pattern.
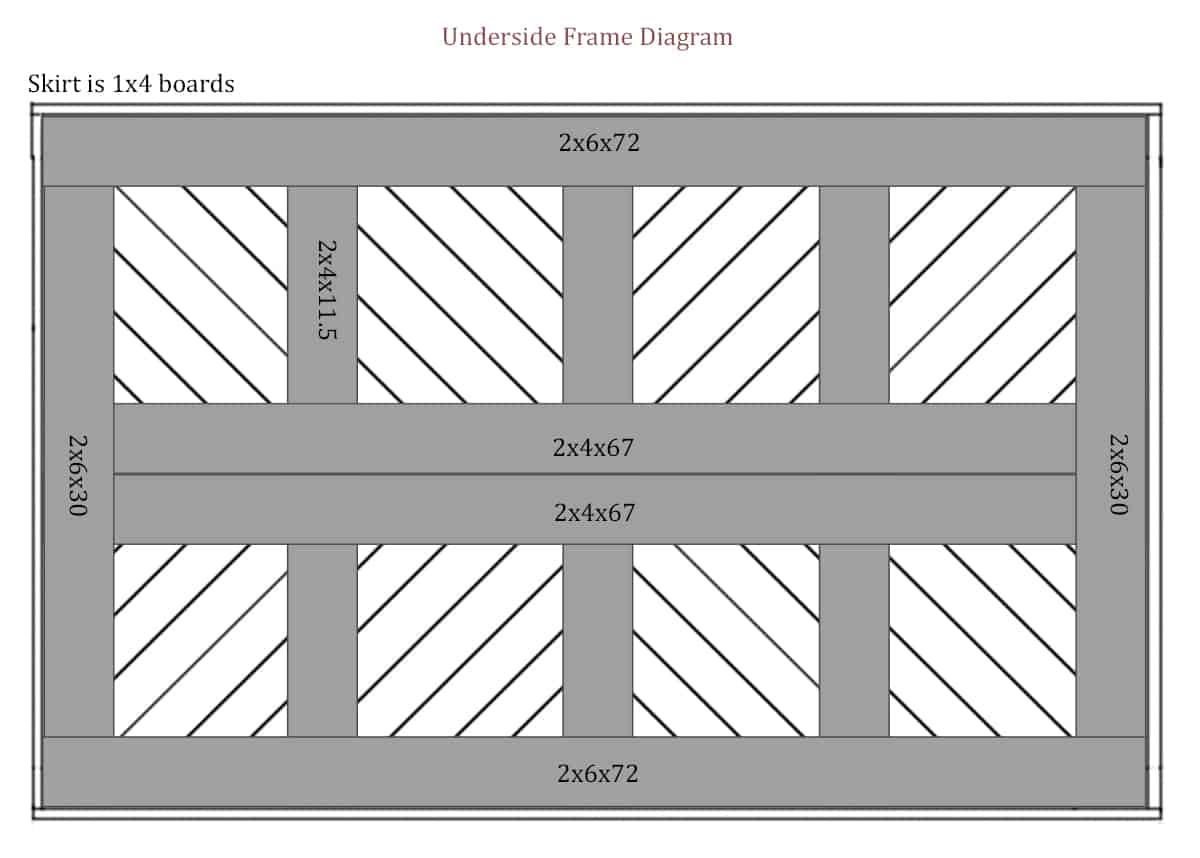
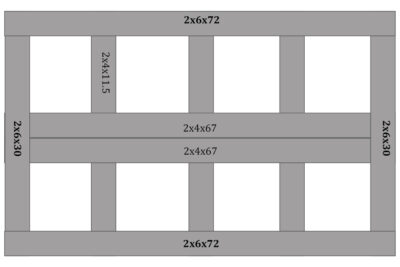
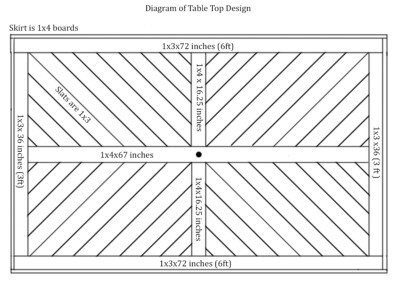
If you are wanting to build your own DIY Outdoor Table, the diagrams are below. There are essentially two frames, one on top of the other. One is the support frame which is wider than the top frame.

I use 1×3 boards on the outside of the frame because the skirting adds ¾ of an inch. It’s picky but looks more balanced. You can use 1x4s if that is what is available, but it will change the herringbone pattern length slightly.
Reader’s Note: Because of variances in materials, all measurements except the 2x6s are approximate. I never recommend cutting all your pieces before measuring.
How to Build an Outdoor Dining Table
There are step by step printable instructions at the bottom of this post. I include this section as a step by step of our project along with tips, tricks, and the ideas behind my thinking.
Step 1 – Build the bottom frame
Start by building the bottom frame first. The reason I say this is because this will best determine your final outdoor dining table size. This is also the supporting structure for the whole tabletop. The longest outside 2×6 boards will be exactly 72 inches long. The shorter 2×6 boards are 30 inches.
This will make a patio table that is 42.5×73.5 inches after skirting. If you want to make adjustments to the length or width, this is the time to do so.
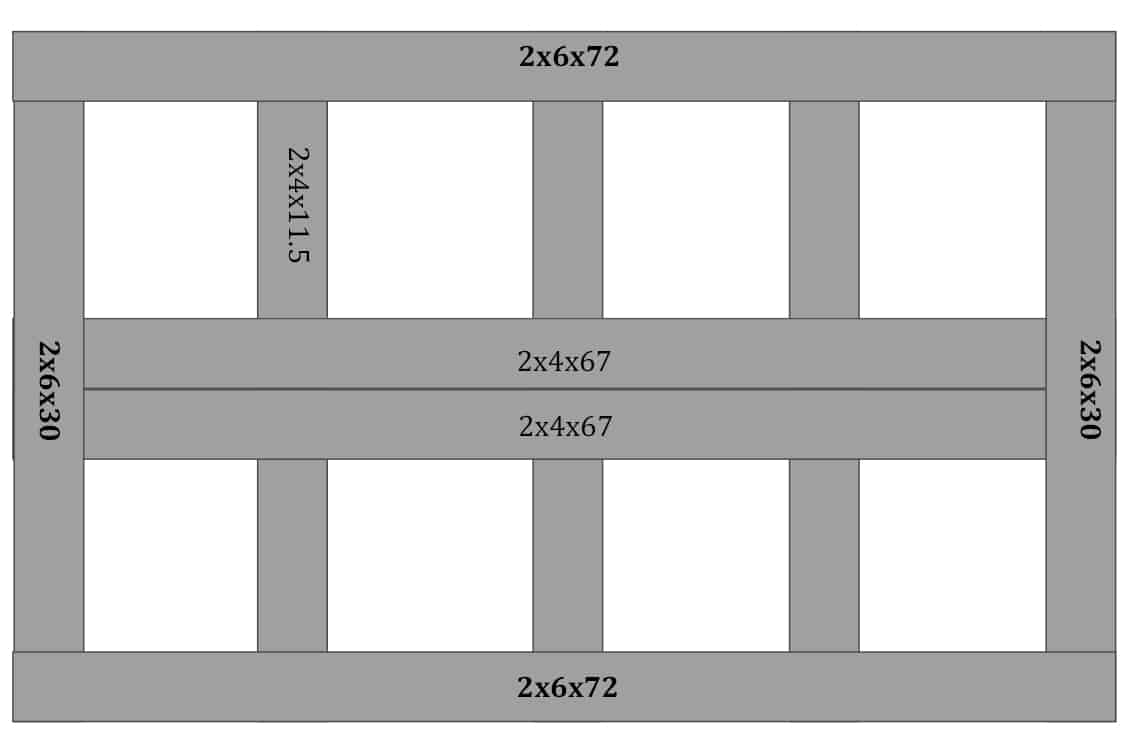
After building the outside of the bottom frame, add in the center supports, cut to fit as shown in the second diagram above.
*Pro Tip: To make sure the frame is completely square, use a Square or a Carpenter’s Triangle.
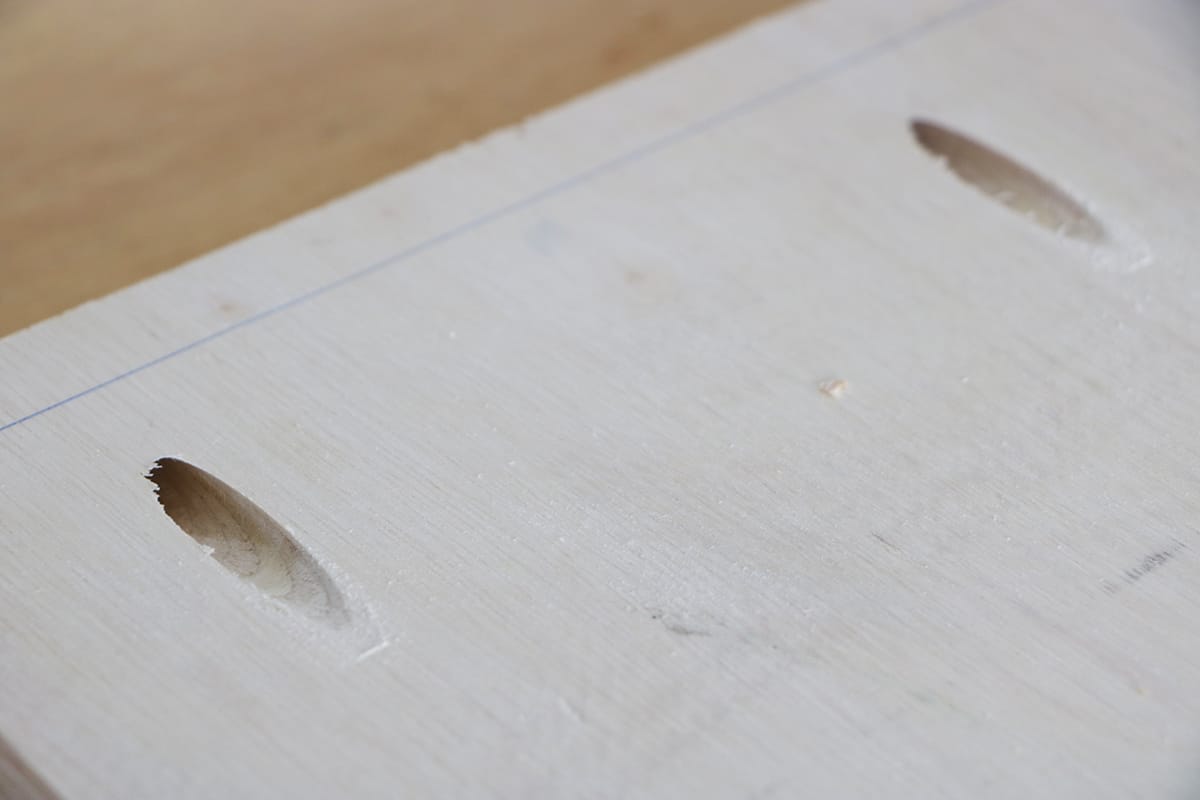
For the support frame, we used a Kreg jig to create the frame and screw the boards together. This allows the frame to sit flush and prevent the frame boards from moving.
Step 2: Build the Top Frame
The top frame is built similar to the bottom frame – build the outside square and then add the inside “cross”. The long side also measures 72 inches.
We used a brad nailer to attach the top frame to the support frame, but you could use nails and outdoor wood glue.
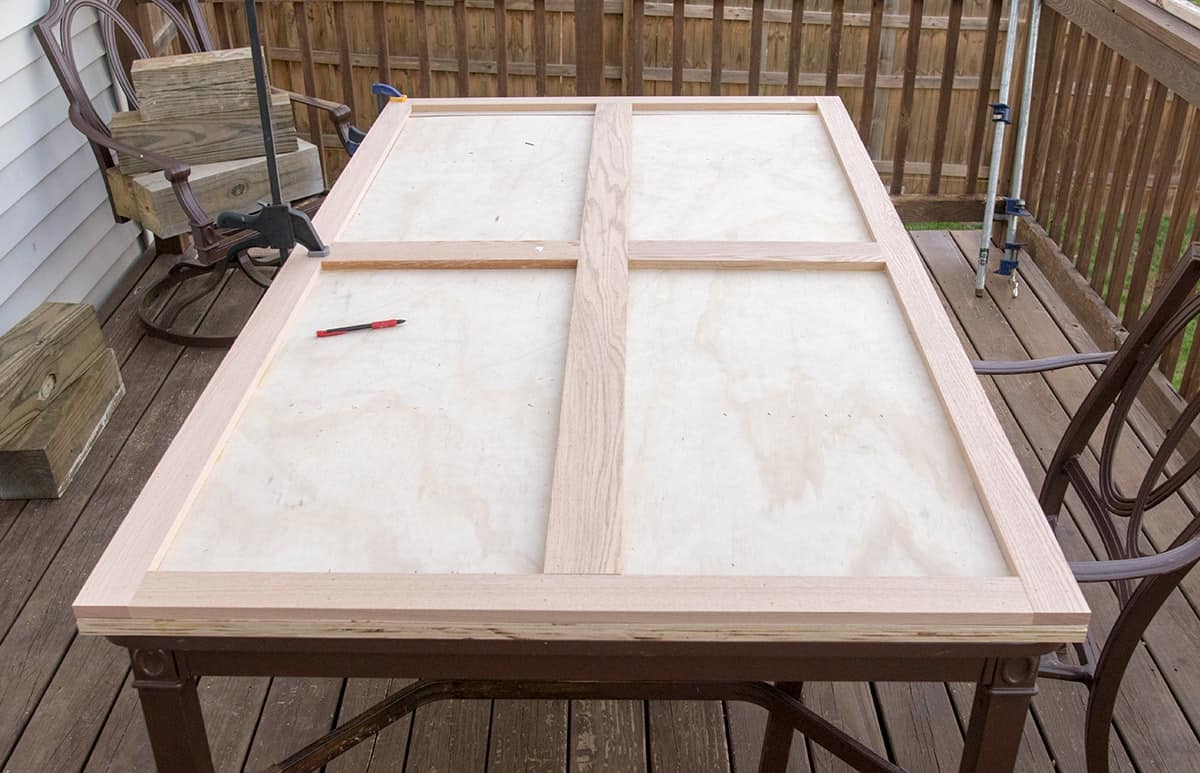
***Reader’s Note: In most of the pictures, you will notice a large sheet of plywood sandwiched between the two frames. DO NOT USE PLYWOOD ON AN OUTDOOR TABLE. The reason that you see this sheet in our example is because we used reclaimed wood, which is generally warped, skewed, and otherwise not completely flat. We needed a smooth straight surface in order to check everything. After we cut all of the pieces and checked level, we removed the plywood sheet for another project.
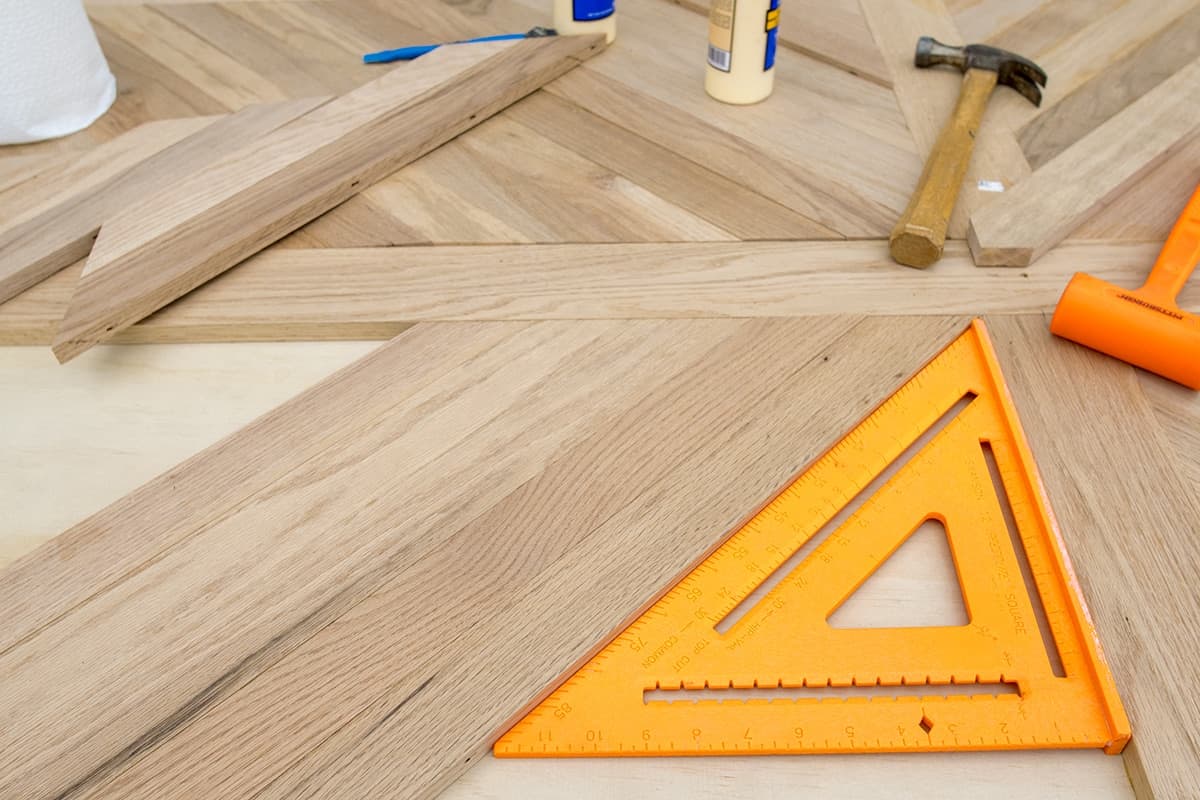
Step 3: Add the Slats
Now to lay the pattern! This step took most of a day to do. Starting at the inside corners of each square, we cut one end of the slats at a 45-degree angle with our mitre saw.
Then we laid the board on the table, marked the length, and cut to fit. Because the bottom frame is wider than the top frame, it creates ledges to attach the slats to. We used a brad nailer here as well.
***Pro Tip: The slats should either be completely snug to each other or have a gap for water to drip through. Because we were planning these boards, we elected to put them snuggly into place and use a polyurethane wood glue for extra waterproofing. It was a lot of wood glue!
We bought a new planer for this project so that all of the boards would be perfectly level and identical thicknesses. However, a planar was more for personal preference, and not required for this project if you are using new boards.
Step 4: Adding the Skirting
After getting all of the boards in place, we added the skirt with brad nails and glue again.
Then I filled any nail holes or small gaps in the wood with either outdoor wood glue or filler. I finished it off with a thorough sanding.

Step 5: Build the Legs
For this build, we used the legs and base of an old patio table. However, there are several ways to make or find legs that are appropriate.
- Use 4x4s for the legs (straight down) and then brace them to each other at the bottom for maximum sturdiness.
- Purchase pre-made table legs. There are many great metal options on Etsy and online including A-Frame, X pattern, and Square.
- Build an X pattern legs out of wood. Here is a good video tutorial.
- Add matching benches on either side for an adorable picnic table.
Step 6: Add an Outdoor Umbrella Hole (optional)
We added a 2-inch hole in the center for an outdoor umbrella pole. To do this, we drilled with a hole saw.
If you are interested in how we finished this table with staining and sealing, check out this post>>>How to Waterproof Wood & Outdoor Furniture
Tips for an Expert Patio Table Build
- Prevent cupping by choosing boards that are quarter sawn. There are other ways to prevent this problem as well. If you are interested in learning more about the problems of cupping, this video explains cupping in detail.
- Be sure to use wood that is appropriate for outdoor use.
- Protect the outer surface from pests and the elements with stain and urethane.
- Use a fine-tooth blade (60+ tooth for an 8-inch blade, but higher is better).
Like this project? Check out more Outdoor DIY ideas:
Frequently Asked Questions
Use Pure linseed or Tung oil to create a beautiful and protective finish that is waterproof. You can also seal the wood with coating of outdoor polyurethane or lacquer or use a stain and sealant combination.
You can’t put your regular dining table outside. However, outdoor dining tables can be made of wood or wood composite materials if they are composed of suitable wood and weatherproof materials. Suitable wood includes white oak, cypress, teak, and treated lumber.
These free plans are adjustable and include options for various styles of legs or no legs at all if you already have legs.
It is important to start with the outside framing, which will give you a visual reference of how large the table is. You can adjust the measurements at this point to your liking, although all other pieces will change with the adjustments.

Grab our free series "Weekend Home Projects that will Transform Your Life" Sign up below to receive updates including free printables, organization tips, home improvement projects, recipes and more! |
More DIY Project Ideas

PS I love seeing your creations! Be sure to take a photo and tag #cravingcreative on Instagram! You can also stay in touch with me through following me on Instagram, Pinterest, and subscribing to the newsletter!
DIY Outdoor Table for Deck or Patio
Tools
Supplies
- Outdoor Wood Glue
- 50 1 ¼ inch Screws for pocket holes
- 2 8ft boards 1×4
- 1 6ft boards 1×4
- 3 4 ft boards 1×4
- 2 6 ft boards 1×3
- 2 3 ft boards 1×3
- 3 6ft boards 2×4
- 2 6 ft boards 2×6
- 2 4 ft boards 2×6
- Table Legs
- 10 8 ft boards 1×3 for center slats The slats in our example are 1×3, but you can use 1×4. The amount needed will vary a lot based on actual thickness of the boards, where you start and any spacing between the boards.
Instructions
- Build the bottom frame. Cut 2-2×6 boards 72 inches long. Cut 2-2×6 boards 30 inches. This will make a table that is 42.5×73.5 inches with the skirting. If you want to make adjustments to the length or width, this is the time to do so. Screw the boards together with 2 pocket holes per attachment area. Cut the center support 2x4s to fit into the box frame. Attach with pocket holes.

- Build the top frame. The top frame is built similar to the bottom frame - build the outside square and then add the inside "cross". Cut 2-1×3 boards 72 inches long. Cut 2-1×4 boards 30 inches.

- Add the herringbone pattern. Starting at the inside corners of each square (as shown in the photo), cut one end of the 1x3s for the herringbone pattern at a 45-degree angle. Lay the board on the table, mark the length and angle. Cut to fit inside the square. Attach to the bottom frame with glue and brad nails. Repeat until the entire square is filled.
- Add the skirt. The skirt is 1×4 that wrap around both frames for a finished edge. Cut to length and attach with brad nails and glue or screws.

- Build the legs. There are several ways to create legs for the table. Use 4x4s for the legs (straight down) and then brace them to each other at the bottom for maximum sturdiness. There are also many great pre-made options including A-Frame, X pattern, and Square. You can also build X pattern legs out of wood.

- Drill an umbrella hole, if desired. Use a 2 inch hole saw bit in the center of the table.


Tiffany says
I’m planning on using this plan for a smaller version of this table. 2.5 ftx5 ft. What are your thoughts on replacing the middle 2-2×4’s on the bottom frame with 1 single 2×6? Would that put too much strain on the support frame? Or would it work since the table is smaller?
Rachel says
I don’t think it’s a problem with the weight or strain. The reason we used 2 2x4s is because that gives us more lip for the top herringbone boards to rest on and nail into. A 2×6 actually measures 5.5 inches and a 2×4 measures 3.5 inches. The closer you get to the edge when nailing, the more likely you are to split the wood. That’s my only reservation.
Haley says
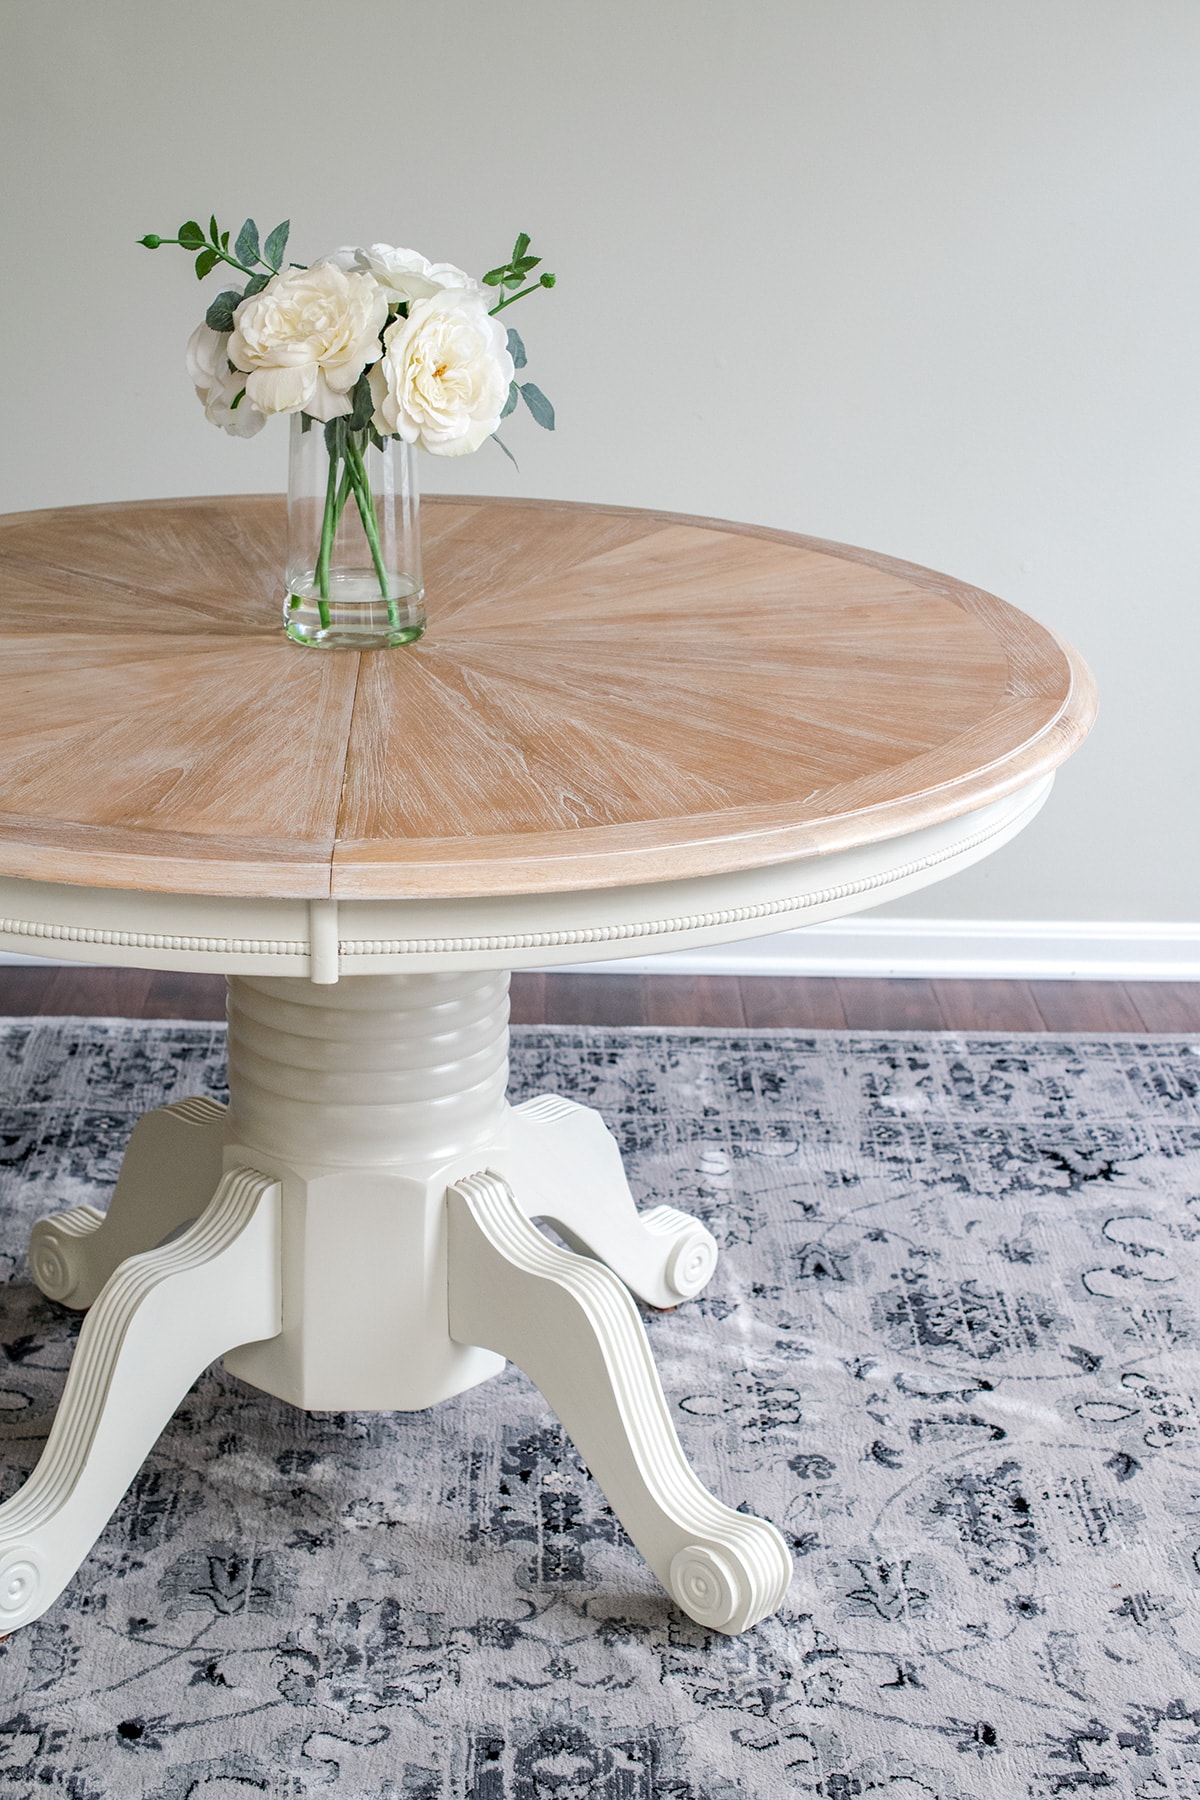
What stain did you use on this to give it the white/gray wash?
Rachel says
I used Varathane Sunbleached.
Tim Zielinski says
Hey I was wondering what your overall dimensions of the table were. Very beautiful. I am assuming you ordered metal legs for this table.
Rachel says
Fortunately, or maybe not, I was right in the middle of rewriting and updating this post when I received your question. The updating is not entirely done but it’s mostly technical additions at this point (a better diagram with measurements, printable instructions, linking to materials, etc), so I decided to republish the updated (but not quite finished) version to get you the best help I could. It now includes a step-by-step tutorial and a materials list as well as tips. The table, as we built it, is 41×72 inches not including the skirt around the edge. The sizing can be adjusted, but it is based off of the 2×6 long boards on the bottom frame being exactly 6 feet long. I hope this is more helpful, and I hope to have the updates done next week.
David says
Thanks for the inspiration! I just wrapped up my dining room table based on this design. We went with a natural stain and bought black squared metal legs to go underneath for a more modern look.
Jessica says
Looks beautiful! Did you sand the table in between coats of Spar Urethane?
Rachel says
Great question! I did not sand between coats. I generally only sand before the last layer and that is only for a shiny finish.
things to do says
I love how it turned out! Thank you for the inspiration! Gotta find my next table at thrift shop.
Rachel says
Thank you!
Mom says
Fabulous job! Looks great.