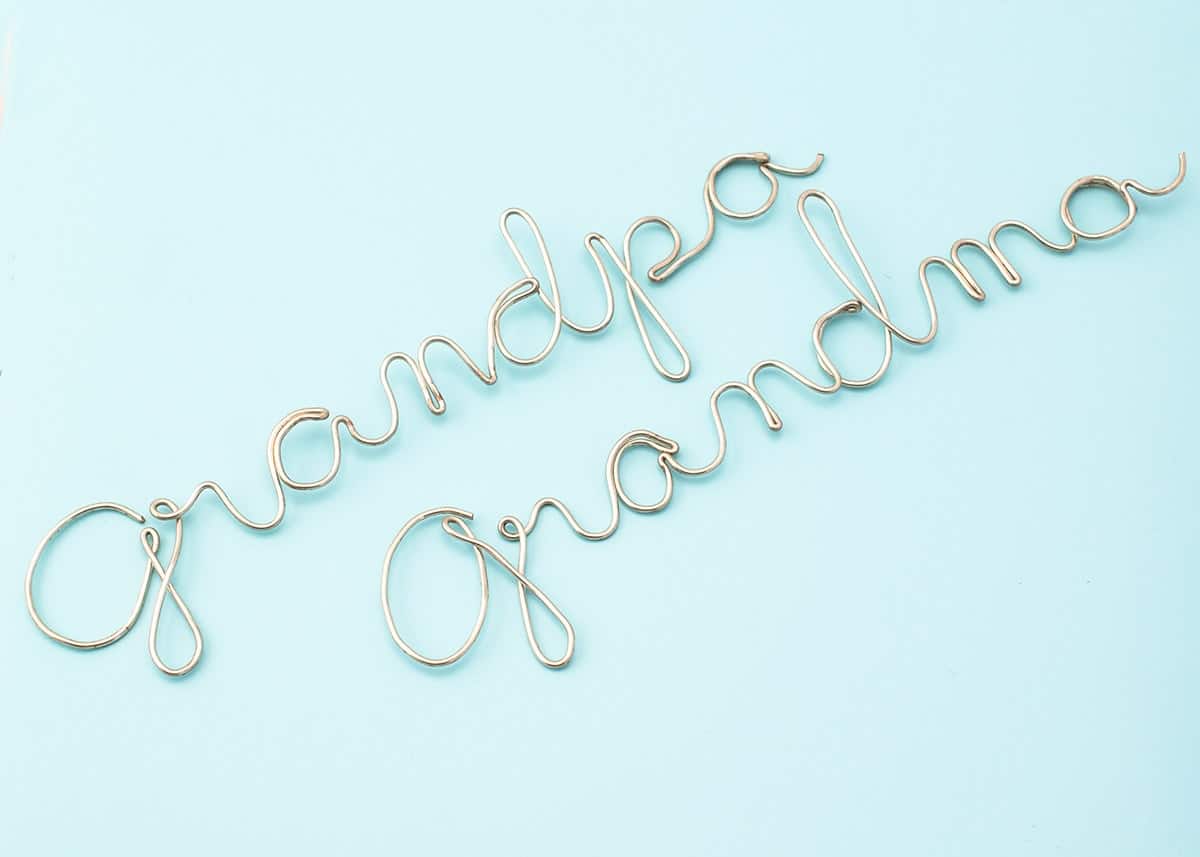
A few simple tools and 15 minutes is all you need to learn how to make wire word art! Create personalized gift tags or hang your favorite quote on the wall! The fun and possibilities are endless.
I have been deep in Christmas crafts each year! Something about the lights on a Christmas tree makes me feel so buoyant and cheerful. I had this brilliant idea (well, I think so) to make a very special Christmas tree with our Family’s names.
But that brings me to today’s super easy project! Wire word art has been a fun addition that I have seen all over home decor, but it’s so easy and cheap to do yourself!
Supplies to Write Wire Names
- 16 guage soft wire (for small writing. For larger art, use thicker gauged wire).
- Set of Jewelry Pliers (find them here)
- Heavy duty clippers or wire cutters to cut the ends of the wire
- A printout of a font you like (I used this one)
*Choosing Wire Tip – With the wire, you want something that is pliable but not super, super soft. I did notice a difference in softness between brands. What you are looking for is a wire that is easily bent with your fingers but resilient enough that once you make the word it won’t be easily bent out of shape. If making larger wires, use a thicker guage wire.
How To Make Wire Writing
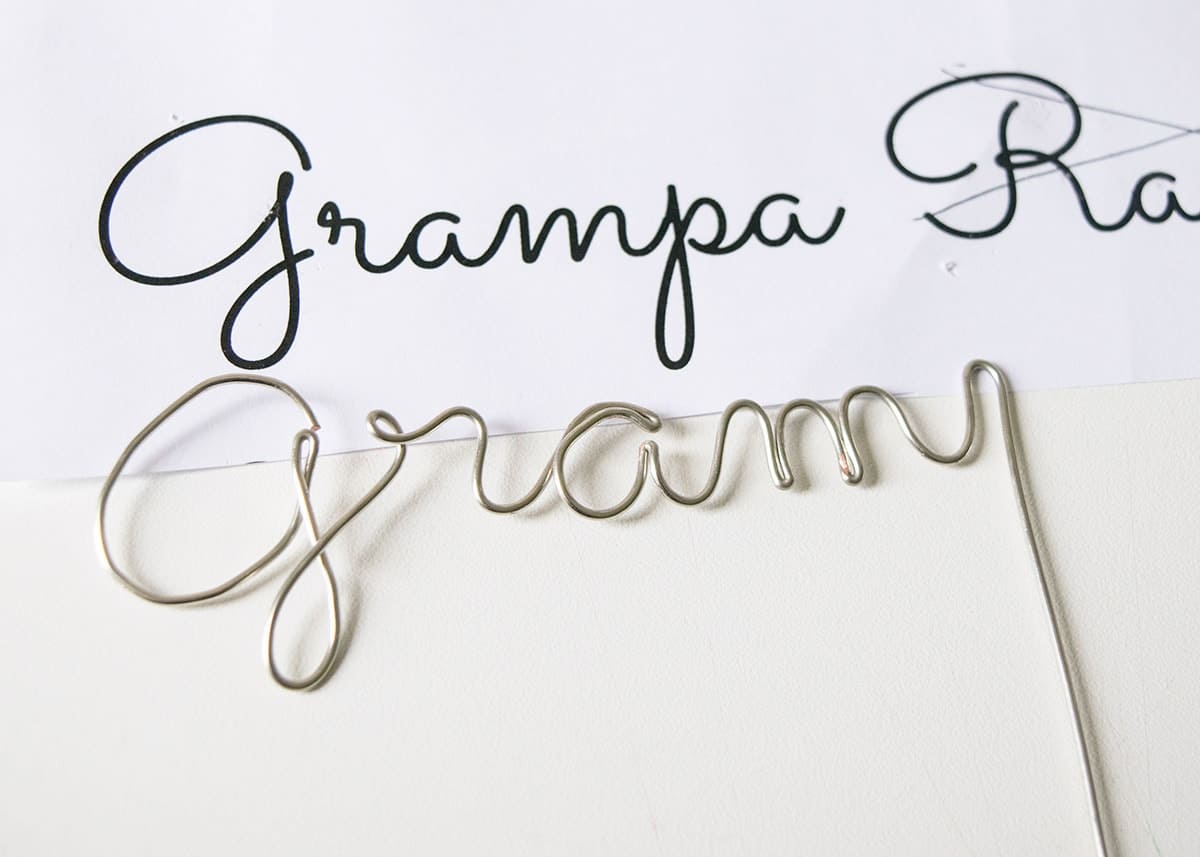
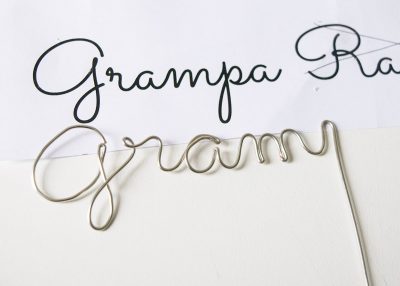
Step 1: Print out a font you like or handwrite a guide.
For the font, I used Sacramento, but others that will work include Brannboll Fet, Allura, and HaloHandLetter. The font is only a guide to help keep the letters all the same size and straight. As you can see below, mine ended up being a bit bigger than the printed writing.
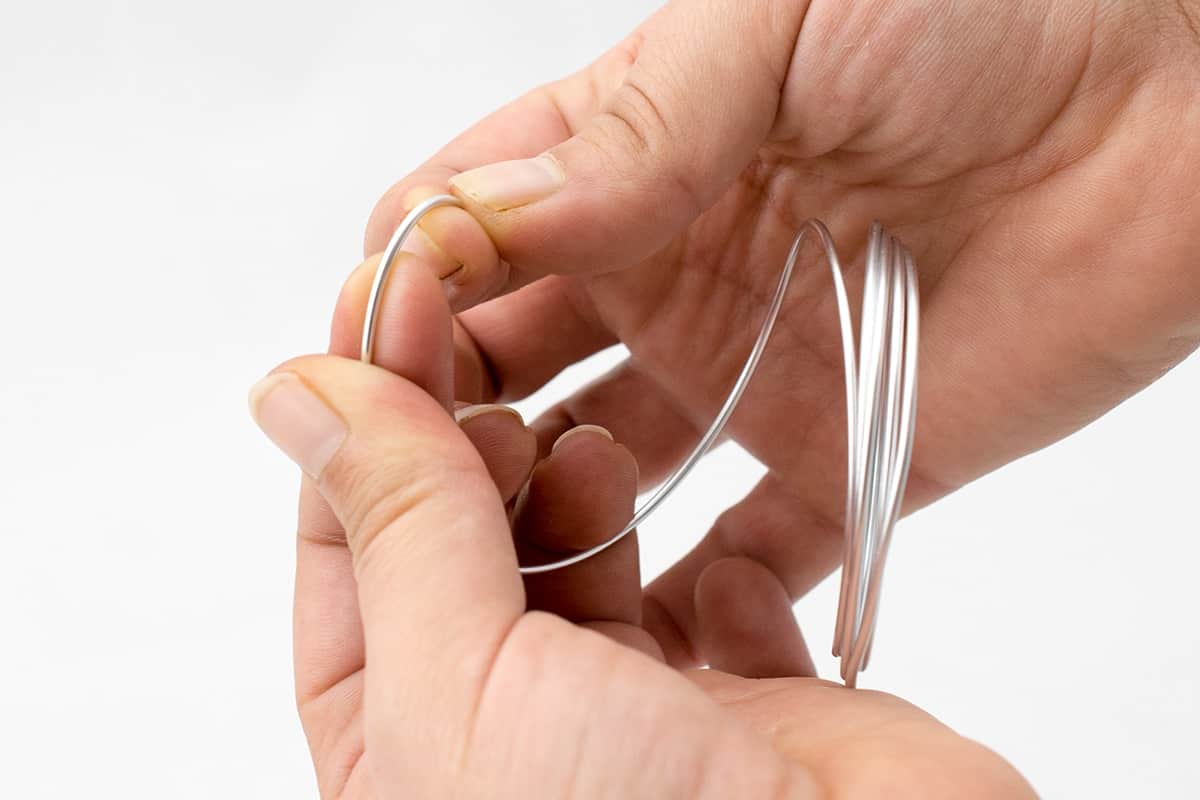
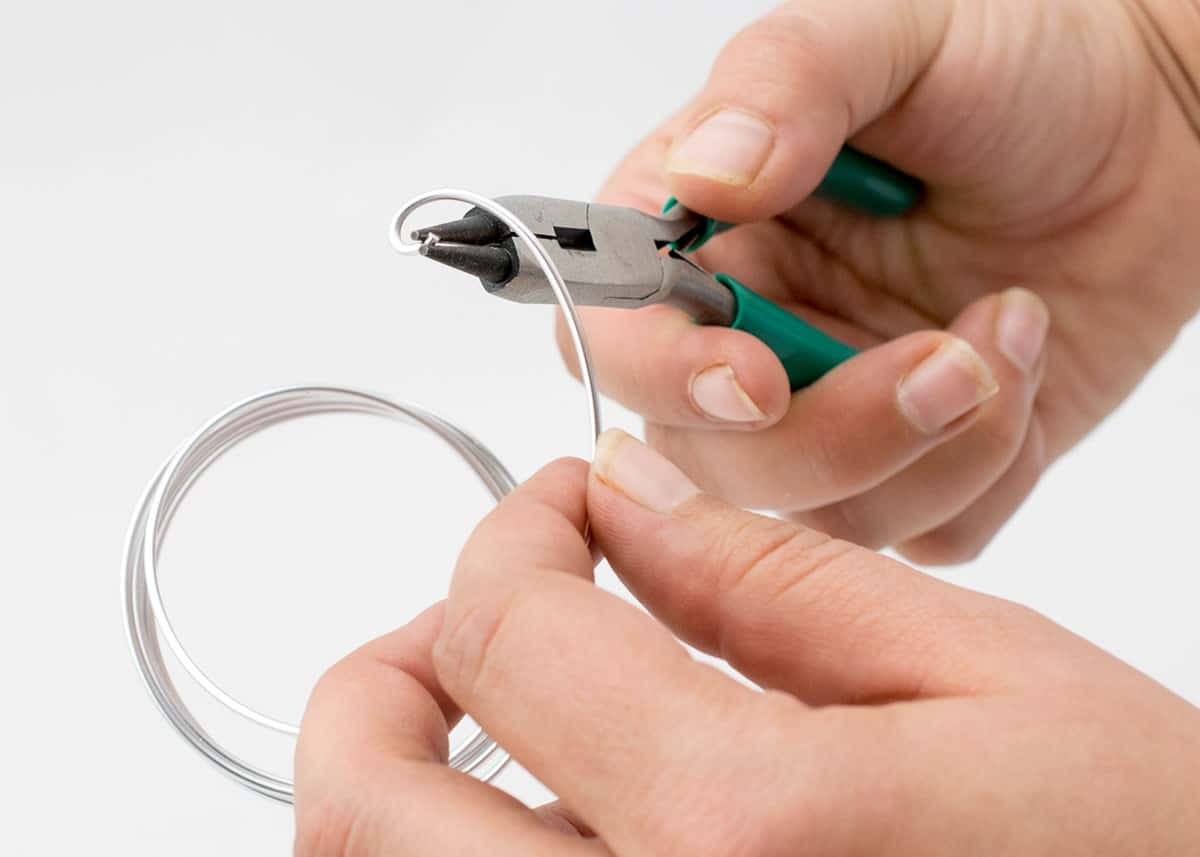
Step 2: Using the guide and jewelry pliers, bend the wire into letter shapes.
You can easily bend most of the curves with your hands, but there are two places I used a pair of pliers. For very tight curves like “r”, “s”, and “e”, I used the round tips to create small loops more easily than with my hands.
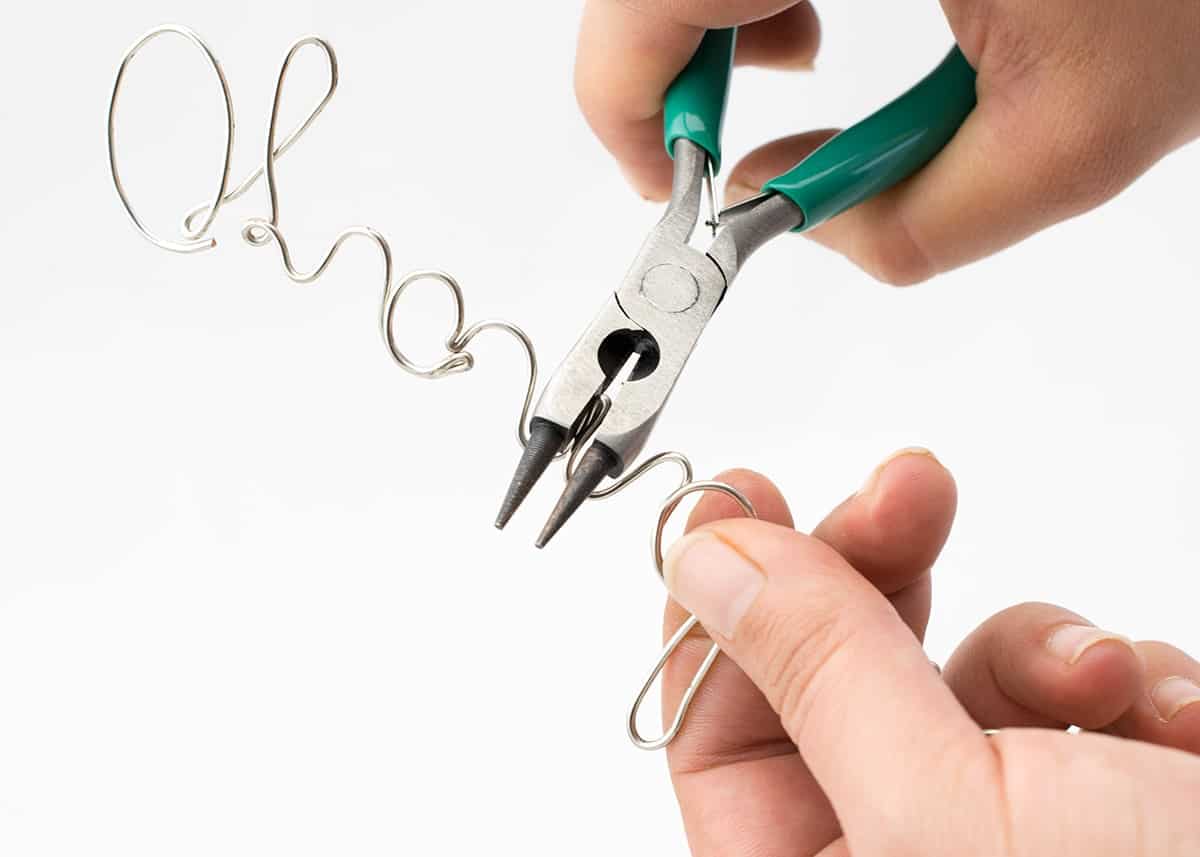
Step 3: Crimp together letters that bend back on themselves with the flat area of the pliers. Example letters include “a”, “m”, and “n”.
Each name only took a maybe 10 or 15 minutes and I got to catch up on my favorite shows while I worked on them.
Step 4: Attach and use as you like.
How you attach these or hang them depends on your intention.
There are lots of uses for these really. You could use them for tags for presents, ornaments, frame them in some wall art, or whatever your imagination can cook up.
I have used this method for a few different projects. I used them to make a Family Christmas Tree which you can see here. For that, I hung them with plastic wire I had and sewed them to tiny present boxes.

I also made a large wire word art in our guest bedroom. That I used clear push pins to hold it up since it is pretty light weight.

More Easy Craft Ideas To Check Out:
- DIY Arrow Wall Decor
- DIY Time Zone Wall Clocks
- Menu Board
- How To Transfer Images to Fabric with a Home Printer
- Easy Designer Candles
- Recycled Animal Planters
- Amazing DIY Bath Bombs
- 20 Printable Valentine Cards for Kids

Grab our free series "Weekend Home Projects that will Transform Your Life" Sign up below to receive updates including free printables, organization tips, home improvement projects, recipes and more! |
More Easy Crafts
PS I love seeing your creations! Be sure to take a photo and tag #cravingcreative on Instagram! You can also stay in touch with me through following me on Instagram, Pinterest, and subscribing to the newsletter!

Wire Word Art
Supplies
- 16 guage Wire For smaller sized projects
- Font see note below for ideas
- Printer Paper
Instructions
- Print out a font you like or hand write a guide.

- Using the guide and jewelry pliers, bend the wire into letter shapes.
- Crimp together letters that bend back on themselves with the flat area of the pliers. Example letters include "a", "m", and "n".
- Attach and use as you like. To hang on the wall, clear push pins or metal nails should hold it up. The wire can also be bent around objects such as hoop wreaths or decorative objects.


Sherry says
Thank you for the “Wire Word Art” idea! Have never seen this. Very clever.
Kaitlin says
Can’t wait to try this tutorial! What size wire did you use for the bigger dream word you made?
Rachel says
I’m not exactly sure since that wire was much harder and I believe came from the hardware store rather than a craft store.
Michelle Sheehan says
Thanks for the tutorial Rachael. Can I ask how do you stop the wire getting scratched when you are doubling the wire back on itself.
Rachel says
My wire shaping tools aren’t abrasive so I didn’t notice any trouble with scratching, as long as I was careful.
Kathy says
I just saw to carefully dip metal instruments in plastic dip. It add a plastic coating which protects the wire from knicks. It can be reapplied when needed
Lucy says
I want to make these for my twin girls names (coming this summer) and put them in the center of the nursery wreaths I made for them, above each crib. I’m not super crafty, but I’ll give it a try! Thanks!
Rachel says
Congratulations Lucy! Oh, that will look so adorable in wreaths. I have been trying to decide what to do for our front door wreath and you may have just given me a great idea. For someone who says they aren’t super crafty, you are crushing it!
Maya says
That’s so cool! I’m doing something similar for my friends as a holiday gift. Congratulations, Lucy!
taycimecham says
I love this! I am loving the look of wire/metal and wood together and this will add a personal touch to my new projects!
Rachel says
Thank you! I have used this technique for wall decor and gift tags. Good luck with your new projects. I am sure they will be lovely as wire and wood together is a very nice look.
Meredith @ The Palette Muse says
What a fun way to personalize anything! I wouldn’t have thought it was this easy. Thanks for the inspiration!
Rachel says
That’s so sweet coming from such a talented and creative gal such as yourself! The best part about this is I have TERRIBLE handwriting, lol, but people can actually read these.