• Skip to primary navigation
  • Skip to main content
  • Skip to primary sidebar
  • Home
  • DIY Home Projects
  • Recipes
  • Spring
  • About

Craving Some Creativity logo

menu icon
go to homepage
search icon
Homepage link
  • DIY Home Projects
  • Home Tour
  • Recipes
  • About
  • Free Email Series
    • Facebook
    • Instagram
    • Pinterest
  • ×

    Home » Home Decorating » DIY Home Decor

    Published: Sep 30, 2021 by Rachel

    Easy Stamped Candles (with Video)

    This post may contain affiliate links. Read my disclosure.
    237 shares
    • Share
    • Tweet
    Jump to Tutorial Print Tutorial

    Want to make a personalized gift in just a few minutes? This easy candle stamping method uses a few inexpensive craft tools to create personalized candles with names, milestone dates, or a favorite quote in just a few minutes!

    Halloween Decor Stamping on Candles using tissue paper transfer technique
    Contents show
    1 Supplies Needed
    2 How To Emboss Candles Step by Step
    3 Looking for more Easy Crafts? Check these out:
    4 Video Tutorial
    5 FAQs
    6 How To Stamp Candles

    Have you tried stamping candles with custom designs?! It is an easy and inexpensive way to create custom candles for holiday decorating, gifts, weddings, and graduation.

    This method is fool proof too! No worry about messing up because if you do, it’s only wasting a piece of tissue paper, not a $10 candle. I have done several versions for Christmas and Halloween, as well as sentimental gifts.

    If you are interested in making more gifts, I’ve done many image transfer methods like the best image transfer to fabric and transferring images to wood. However, today’s method is one of the fastest since it uses candles.

    Two lit candles with stamped Christmas designs.

    Supplies Needed

    • Tissue Paper (Kleenex type nose tissue or bathroom tissue works)
    • Wax Paper
    • Assorted Candles
    • Pigment Ink (You don’t want an ink that is prone to spreading)
    • Stamp of choice (wood, acrylic, or flexible all do great)
    • Craft Heat Gun like this one
    Supplies for stamping candles including stamps, tissue, and heat gun.

    How To Emboss Candles Step by Step

    Step 1- 
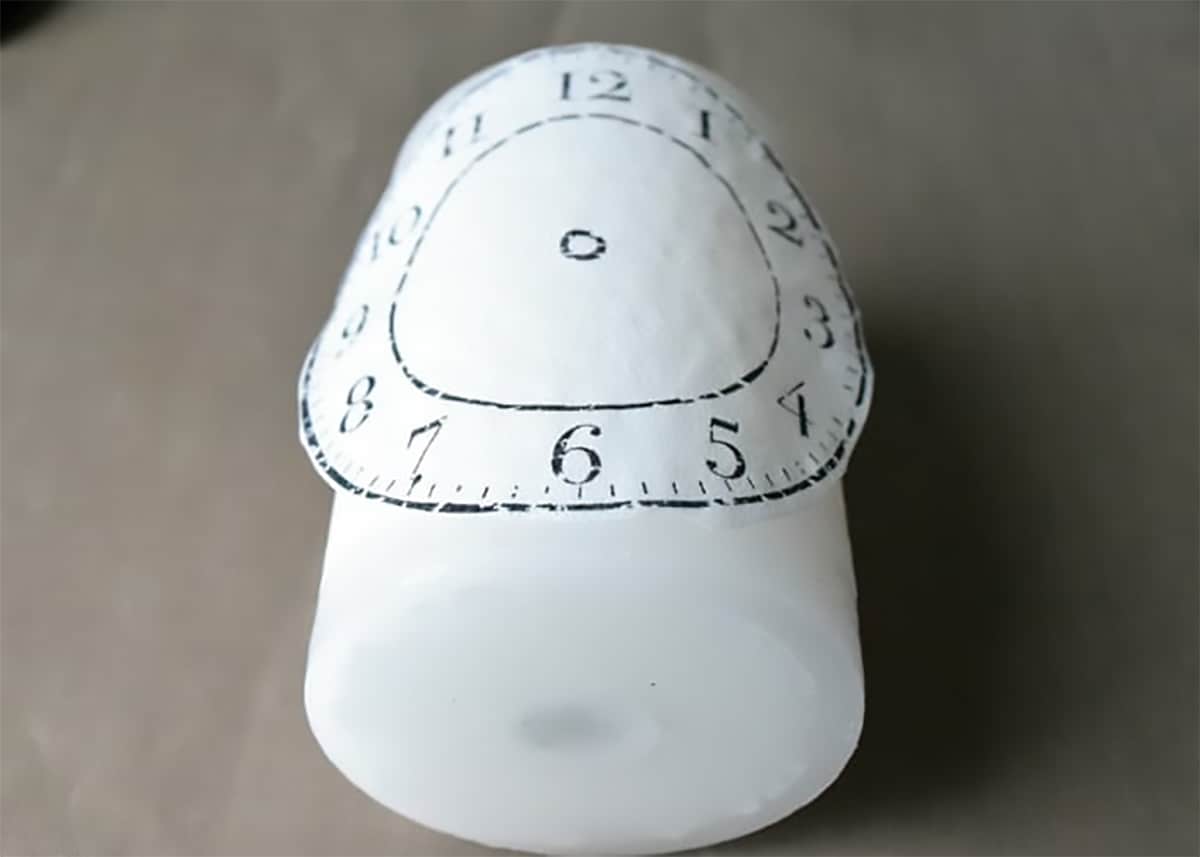
Stamp the image onto a single ply of tissue paper. You can use any rubber or acrylic stamp. A pigment-based ink is going to work best as it won’t bleed as much and will stay wet longer than a dye-based ink.

    *Tip – You can also use embossing powders for a fun effect! The trick is to use a clear embossing ink and an embossing powder or glitter. You don’t need to burnish (heat) the embossing powder until you melt it into the candle, but don’t use any wax paper with embossing powders.

    Step 2- Cut excess tissue paper around the image. If a multiple layer or thick tissue, you will want to separate the layers and use only the top layer.

    Tissue with stamped image laid over a candle.

    Step 3- Position onto candle as shown above. Lay wax paper over the image and hold so that the image is flat against the candle. The wax paper isn’t always necessary, but it will keep the tissue paper from blowing around.

    Step 4- Use a heat gun over the surface of the wax paper/ candle. Starting from the center and working towards the edges – you are just trying to melt it a little. You don’t have to burn the candle wax. If you have good lighting, you can see the wax paper start to stick to the candle wax. Make sure all edges are properly sealed.

    Step 5- Peel off the wax paper. Voila! The tissue paper has magically melted into the candle. If done properly, you will not be able to see a texture difference between the tissue paper and the candle.

    Halloween designed mantle with grouping of white candles, Edgar Allen Poe themed accessories, and stamped candles with black and white garland.

    Looking for more Easy Crafts? Check these out:

    • DIY Pumpkin Topiary
    • How to Transfer Images to Fabric with Your Home Printer
    • How To Transfer Images to Wood
    • Soda Bottle Animal Planters
    • Over 30 Easy and Fabulous Halloween Decorating Ideas

    Video Tutorial

    I also made a video of myself working with these candles if you would like to check it out.

    FAQs

    Can embossing powder be used in candles?

    Yes. The trick is to use a clear embossing ink and an embossing powder or glitter powders. Emboss ink the stamp and stamp the tissue paper before adding the embossing powder. You don’t need to burnish (heat) the embossing powder until you melt it into the candle.

    Is a heat gun hotter than a hair dryer?

    A heat gun is much hotter than a hair dryer, depending on the type of heat gun. Craft heat guns can be about 200-300 degree F, while industrial heat guns meant for metal can be upwards of 700 degrees F. A typical hair dryer is about 80-120 degrees F.

    Weekend DIY project. A pegboard organizer in the craft room above the desk workspace.

    Grab our free series "Weekend Home Projects that will Transform Your Life"

    Sign up below to receive updates including free printables, organization tips, home improvement projects, recipes and more!

    Looking for more Holiday Crafts? Check out these tutorials:

    Plastic bottle animal planters on a window sill. Includes a pig, rabbit, and frog planter.
    Soda Bottle Animal Planters
    Final Photo Transfer of a Brightly Colored Horse Head
    How to Transfer Images
    Several Images transferred to wood slices.
    Transfer Simple Images
    Paper 3-D star atop tree. Star is stamped red and white with glitter.
    DIY Christmas Tree Topper

    PS I love seeing your creations! Be sure to take a photo and tag #cravingcreative on Instagram! You can also stay in touch with me through following me on Instagram, Pinterest, and subscribing to the newsletter!

    Halloween decorated candle with stamped design.

    How To Stamp Candles

    This easy candle stamping method uses a few simple craft tools to create personalized candles with names, milestone dates, or a favorite quote in just a few minutes.
    5 from 13 votes
    Print Pin Rate
    Project Time: 5 minutes
    Total Time: 5 minutes
    Author: Rachel
    Cost: $10

    Tools

    • Heat Gun

    Supplies

    • Tissue Paper Kleenex type nose tissue works best
    • 1 piece Wax Paper
    • 1 Candle
    • Stamping Ink That won't spread
    • Stamp

    Instructions

    • Stamp the image onto tissue paper.
      A patterned rubber stamp transposes an image onto a single ply of tissue paper with a pigment based ink.
    • Cut excess tissue paper around the image. Lay image on candle in position.
      Tissue with stamped image laid over a candle.
    • Use a heat gun over the surface of the wax paper/ candle.
      I'm using a blue heat gun over the surface of the wax paper wrapped candle.
    • Peel off the wax paper. Allow to cool before touching.
      Halloween designed mantle with grouping of white candles, Edgar Allen Poe themed accessories, and stamped candles with black and white garland.
    Tried this Project? Tag me Today!Mention @CravingCreative or tag #CravingSomeCreativity!
    « Double Chocolate Zucchini Bread
    30+ Easy DIY Halloween Decorations »

    Reader Interactions

    Comments

      Leave a Reply Cancel reply

      Your email address will not be published. Required fields are marked *

      Recipe Rating


    1. Heather C says

      October 05, 2014 at 6:46 pm

      5 stars
      Want to make, but I’m a dweb when it comes to directions, are you referring to tissue – like you blow your nose, or tissue you wrap presents. I know the answer should be so obvious, sorry.

      Reply
      • Rachel says

        October 05, 2014 at 7:52 pm

        Oh, that could be confusing! I used a regular kleenex type tissue. I hadn’t thought of wrapping tissue paper but that makes sense and I will clarify in the directions. Thank you for asking!

        Reply
    2. Katherines Corner says

      October 05, 2014 at 2:25 pm

      5 stars
      SO cute! Thank you for sharing at the Thursday Favorite Things Blog Hop. Watch for your feature on Monday xo

      Reply
    3. Laura says

      October 05, 2014 at 12:44 pm

      5 stars
      These candles are so spooky and cool!

      Reply
      • Rachel says

        October 05, 2014 at 8:02 pm

        Oh thank you so much! Link it or lump it is such an amazing party! I will definitely grab a button.

        Reply
    4. Kimberly says

      October 04, 2014 at 6:49 pm

      5 stars
      This is so cool! Pinned. Amber has chosen this as her favorite and it will be featured at our party that starts Monday at 7 pm.. Woo Hoo! I hope to see you there. Happy Saturday! Lou Lou Girls

      Reply
    5. Jamie @ anderson + grant says

      October 03, 2014 at 3:51 pm

      5 stars
      These are fabulous….they remind me of something that Pottery Barn would sell for some outrageous price! I don’t decorate much for Halloween, but these are totally something that I’d add into my fall decorations. Thanks for sharing with us!

      Reply
    6. Amy | Canary street crafts says

      October 02, 2014 at 1:51 pm

      5 stars
      Rachel these are awesome! Love how they turned out!!

      Reply
      • Rachel says

        October 04, 2014 at 10:41 pm

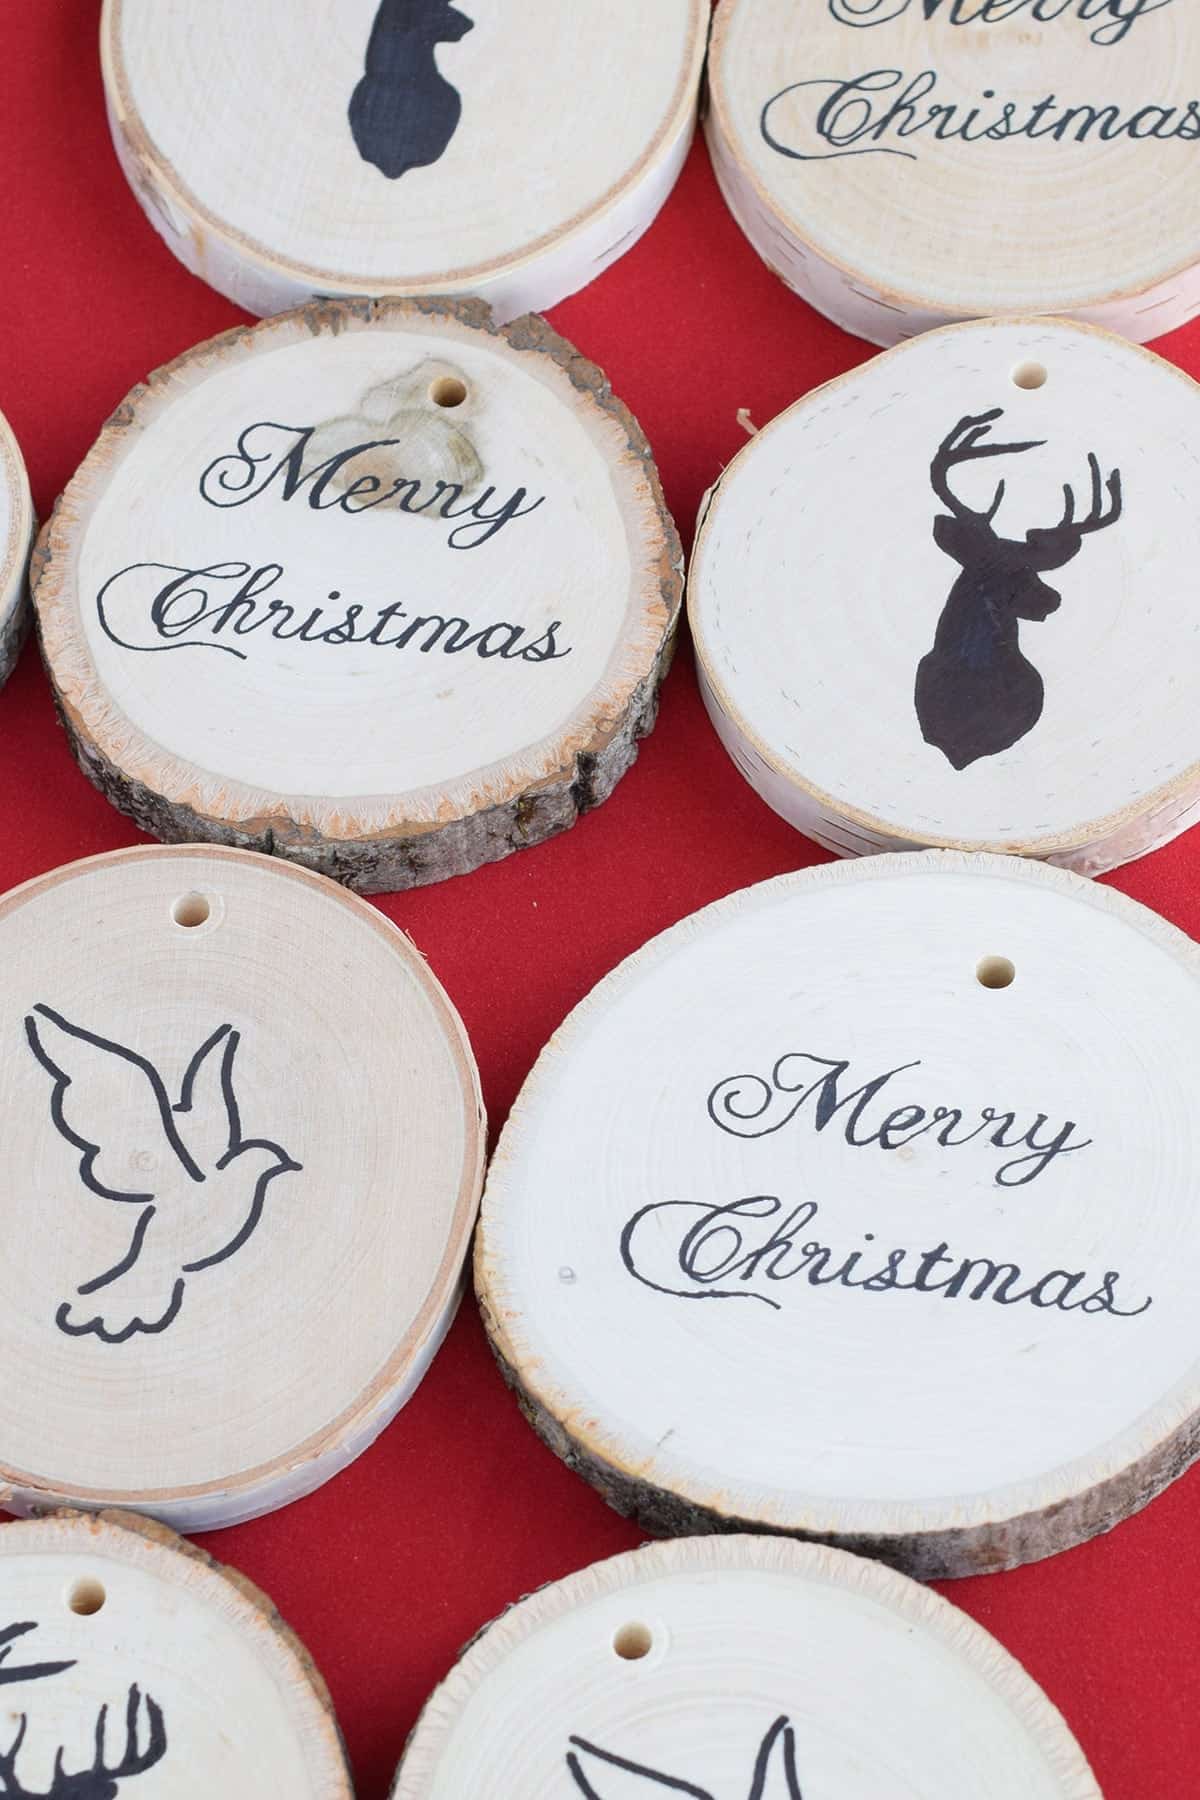
        Thanks so much, Amy! I think I am going to do a bunch more of these for Christmas. I have lots more Christmas themed stamps. Maybe even give them as cute gifts.

        Reply
    7. Marla Martenson says

      October 02, 2014 at 12:36 pm

      5 stars
      I love these! Halloween is my favorite holiday. Love the decorations. I am visiting from Katherine’s Corner. xx

      Reply
      • Rachel says

        October 04, 2014 at 10:40 pm

        Thanks for stopping by, Marla! I adore Halloween too.

        Reply
    8. Rebecca says

      October 01, 2014 at 10:46 pm

      5 stars
      DAMN GIRL! You are good! This is so amazing for everything, not just halloween! I mean, I don’t know what a heat gun is but I think I need one in my life. Google search to follow! Everyone’s getting a candle for christmas! LOL

      Reply
    9. Alice Megan says

      October 01, 2014 at 6:39 am

      5 stars
      I love these what a great idea!

      Reply
    10. Bobbi says

      September 29, 2014 at 9:43 pm

      5 stars
      These are awesome! Love them. Pinning it 🙂

      Thanks for sharing!

      Reply
      • Rachel says

        October 04, 2014 at 10:33 pm

        Thanks for the pin!

        Reply
    11. Miranda @ Someday Crafts says

      September 28, 2014 at 11:24 pm

      5 stars
      I LOVE these candles! They’re just perfect for Halloween, and they look so darn easy to make. I’ll be featuring them over at Someday Crafts tomorrow!

      Reply
      • Rachel says

        September 29, 2014 at 8:17 pm

        Oh thank you so much! I have had this technique in my back pocket for a long time. I guess this was my someday craft, haha. I am always impressed with how well they look afterward. I will definitely check out the feature and share it with others.

        Reply
    12. Carrie @ curlycraftymom says

      September 25, 2014 at 12:20 pm

      5 stars
      I have never seen this before, this is so neat! And, they look rather spooky, too! 🙂

      Reply
    13. Leslie says

      September 25, 2014 at 9:59 am

      5 stars
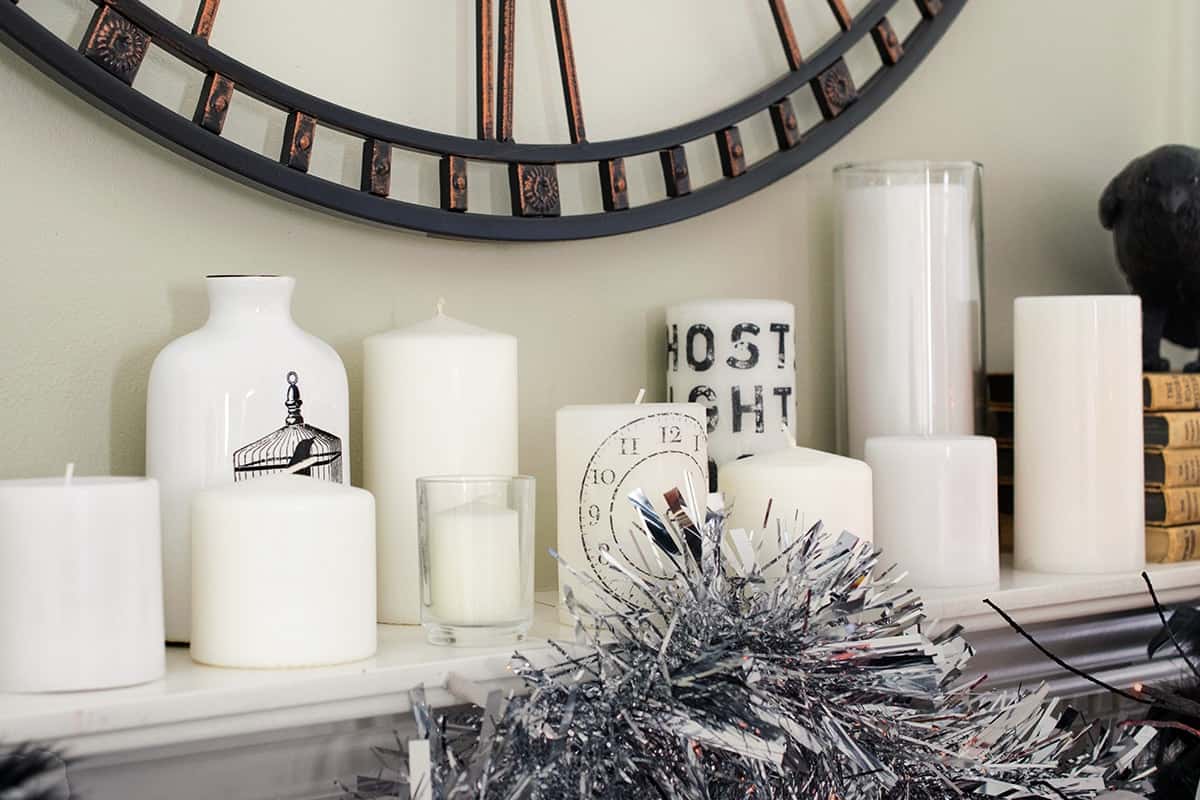
      Loving this! I love the one with the clock, how cool! I love all things Halloween.

      Reply
      • Rachel says

        September 29, 2014 at 8:15 pm

        I am so excited for halloween because I haven’t been in the mood to decorate in for-e-ver. I seriously doubt I will get to do too much with all the house stuff going on but it is stil exciting!

        Reply

    Primary Sidebar

    Headshot of Rachel Beach, the author of Craving Some Creativity.

    Hi, I'm Rachel!

    Creativity makes me energized and fearless. My husband and I have been renovating homes for over a decade and love to share our passion for all things home. Follow along for remodeling tutorials, recipes, and entertaining ideas sure to inspire!

    More about me →


    Popular Projects

    • Midnight blue vanity with brass handles in a grey and white bathroom.
      How to Paint a Bathroom Cabinet the Easy Way
    • Man holding up baseboards for a corner.
      How To Caulk Baseboards like a Pro
    • Behr Midnight blue painted cabinets in a classic old world kitchen with modern white accents and backsplash. Wicker chairs, copper light fixtures, and wood floors add warmth.
      The Best Blue and Navy Kitchen Cabinet Paint Colors
    • Organized linen closet with white towels and grey bins on wire shelves.
      How To Beautifully Organize Your Linen Closet
    • White painted kitchen cabinets with stainless drawer pulls.
      How To Paint Cabinets with a Sprayer
    • Completed oak painted stair railing with black handrail and white balusters.
      How to Paint Stair Railings that Last

    Featured On

    Collection of Expert Features including Better Homes and Gardens Magazine, Apartment Therapy, Angie's List, This Old House Magazine, The Huffington Post, Delish, Wayfair, and Real Simple Magazine.

    Most Popular Recipes

    • Restaurant style Mexican white Cheese Dip with pico de gallo topping in wooden bowl on dish cloth with chips.
      Mexican White Cheese Dip {Queso Blanco}
    • Ricotta Stuffed Shells with Sausage makes an easy italian meal for the whole family!
      The BEST Sausage Stuffed Shells
    • Strawberry Poppyseed salad on a platter with blueberries, mandarin oranges, pecans, red onions, and grilled chicken.
      Strawberry Poppyseed Salad (Panera Copycat)
    • Closeup of blueberry muffins on a table.
      Ultimate Lemon Blueberry Muffins
    • Shrimp etouffee in a bowl on a table.
      Shrimp Etouffee {My Louisiana Family Recipe}
    • Two glasses of blackberry sangria with straws on a wood background.
      Blackberry Sangria – Amazing Summer Cocktail Recipe

    Sweet Spring Recipes

    • Stack of lemon bars on parchment paper with top lemon shortbread having a bite removed.
      Lemon Bars
    • Slice of homemade carrot cake on a plate with walnuts sprinkled on top
      Carrot Cake with Pineapple
    • Top down view of Southern Punch Bowl Cake in a trifle bowl.
      Southern Punch Bowl Cake (Potluck Dessert)
    • Key lime pie on blue plate with a slice cut out to show texture.
      Key Lime Pie
    • Strawberries on top of cheesecake layer and rice krispies crust.
      Cheesecake Rice Krispies Bars
    • Banana Chocolate chip muffins in a muffin tin with one muffin broken open to show texture.
      Banana Chocolate Chip Muffins

    Footer

    ↑ back to top

    About

    • Privacy Policy
    • Disclaimer
    • Terms & Conditions
    • Accessibility Policy

    Favorites

    • Blog
    • Shop
    • Our Home

    Contact

    • Contact

    Copyright © 2022 Craving Some Creativity