A DIY Menu Board adds cozy charm to your kitchen or dining space. Stay on track of weekly meal prep goals and let everyone know what’s cooking with this practical and pretty kitchen art. Comprehensive supply list and step-by-step tutorial included.
The world clock gallery display featured in the Masculine Office Makeover is a clean and timeless (pun intended) display for any home or office.
Of all the rooms in the house, I do find that the kitchen can be the trickiest to decorate. I am uncompromising about it remaining uncluttered – I need space to be a messy cook! However, I want cozy and charm, so the few decoration I have must earn their place.
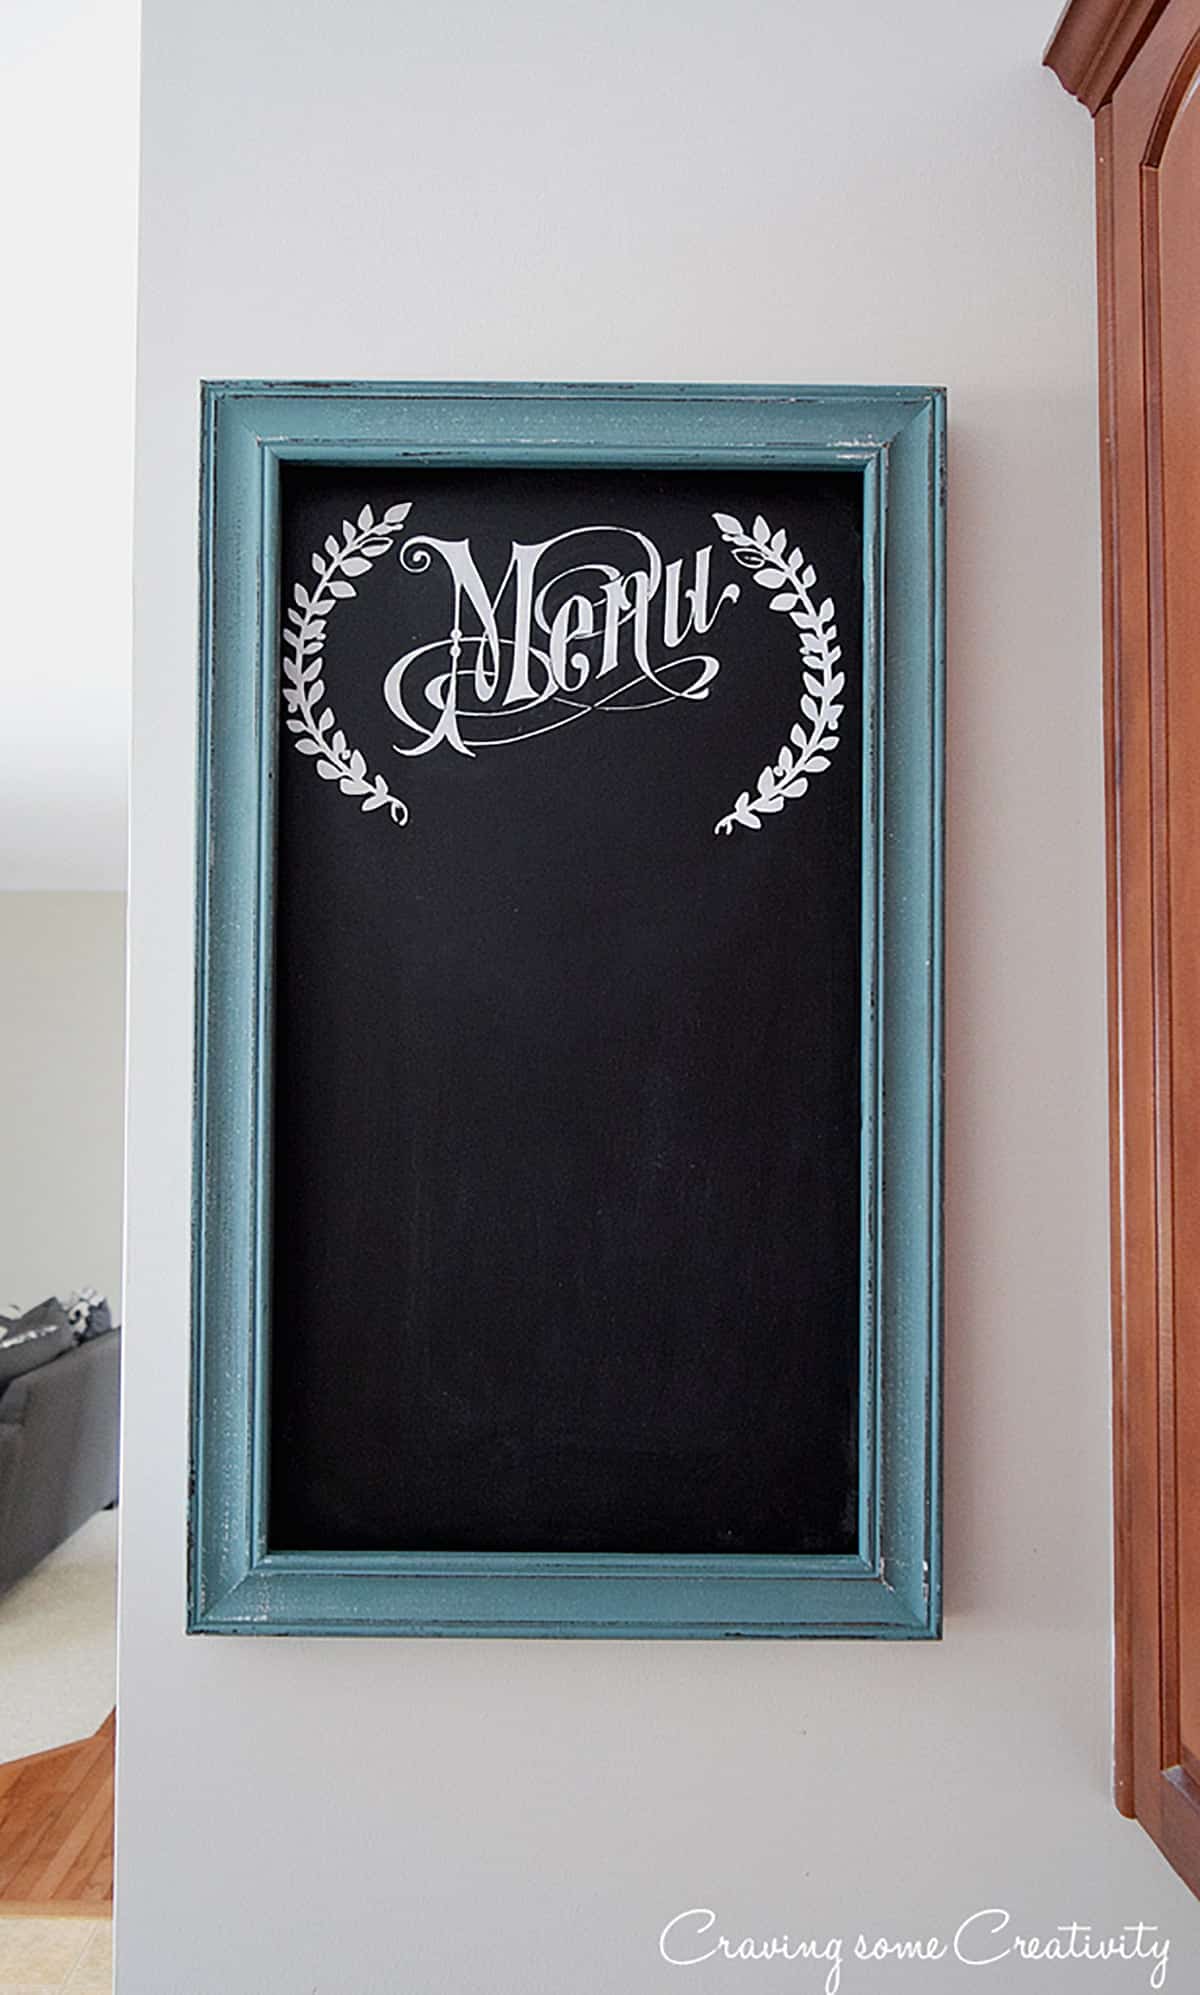
One I think I love is weekly meal planning, and this DIY menu board featured in our kitchen remodel adds charm while keeping our busy household on track. It’s simple to stay the meal prep course when our weekly menu is posted in black and white for all to see!
WHY YOU’LL LOVE THIS PROJECT
- Completely customizable for your aesthetic.
- Hang it for a dinner party or regular weekday meals.
- No power tools required.
- Budget friendly DIY decor- a great way to upcycle!
- Update the menu board with seasonal themes: Thanksgiving menu, hot cocoa bar, etc.
Materials and Supplies
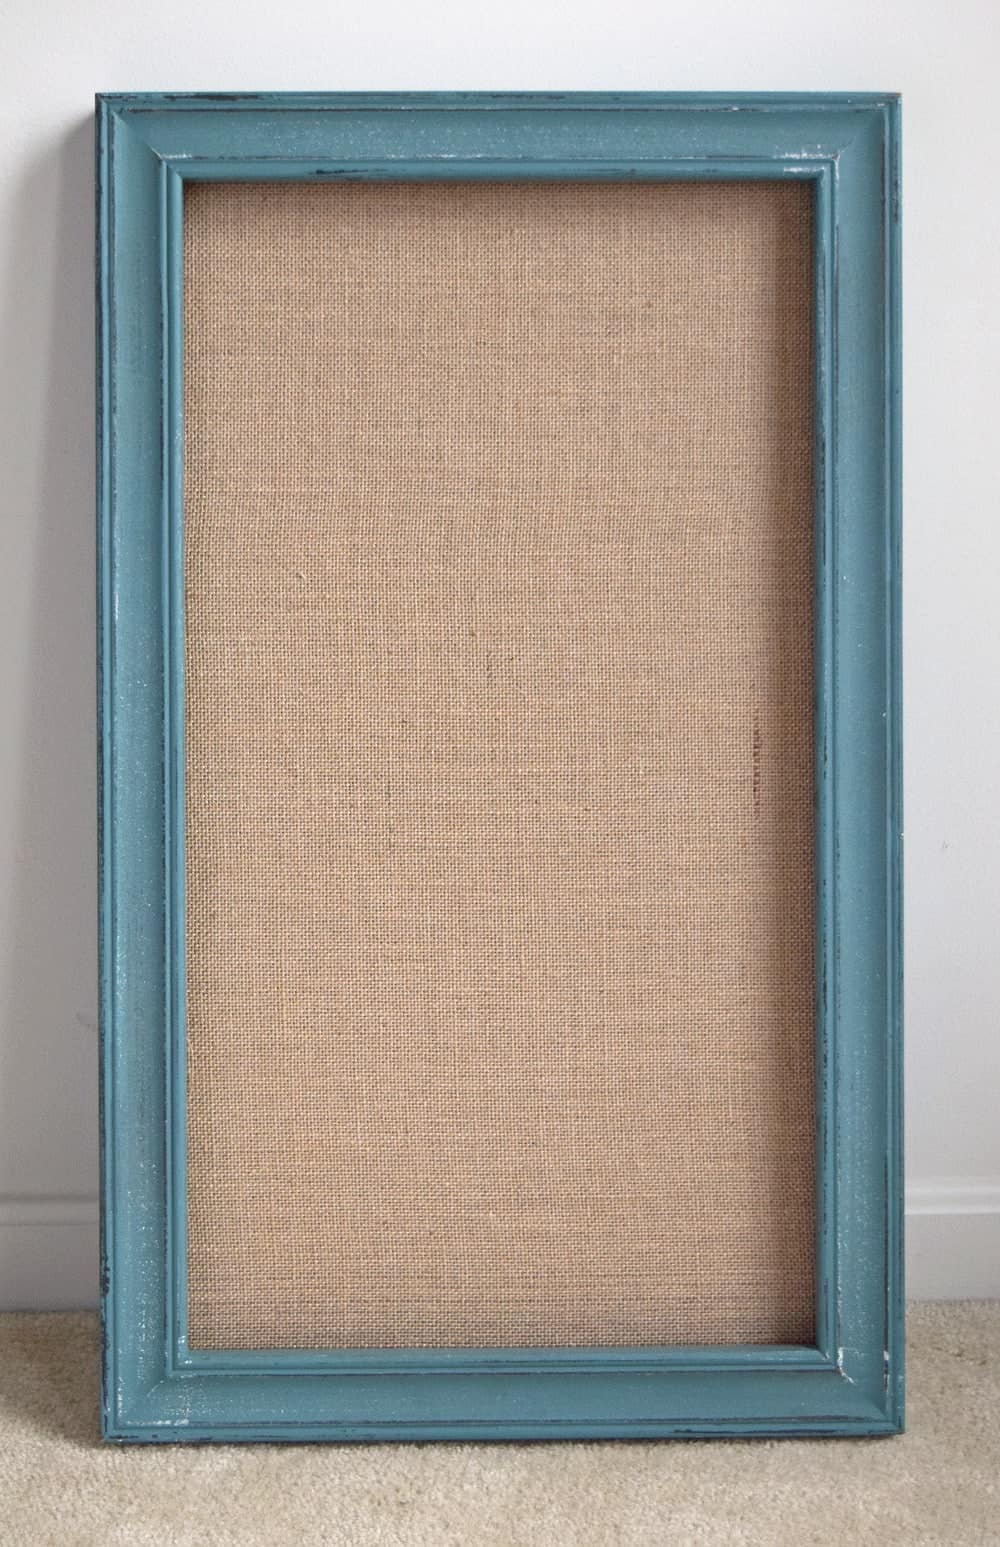
- Frame for your weekly menu. I bought this shadowbox for $18 at HomeGoods.
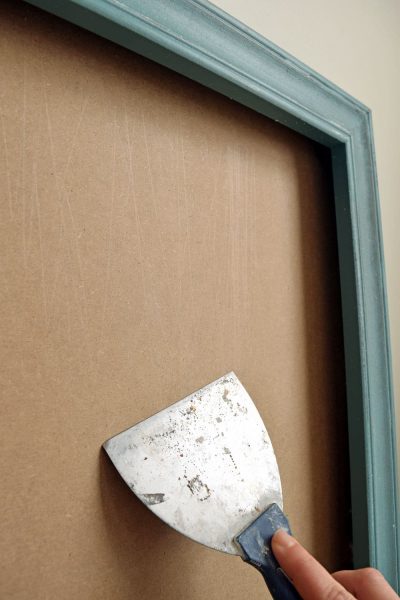
- Paint scraper
- Black Chalkboard Paint or Chalkboard Vinyl
- Paint brush & Small foam roller
- Chalk
- Cutting Machine (Optional)
- Multi-surface or Chalk paint
- Transfer paper or Painter’s tape
A step-by-step tutorial card is posted at the bottom of the page for your convenience. Feel free to print it out by hitting the print button.
Where to Find Stencils for Lettering
I try to make these little projects as versatile as possible for different situations. There are several ways to cut a letter stencil:
- Print out large letters from Microsoft Word, Google Docs, etc. Cut them out or use a simple transfer technique.
- A cutting machine such as a Silhouette Cameo or Cricut.
- Purchase a large lettering stencil. So many options available!
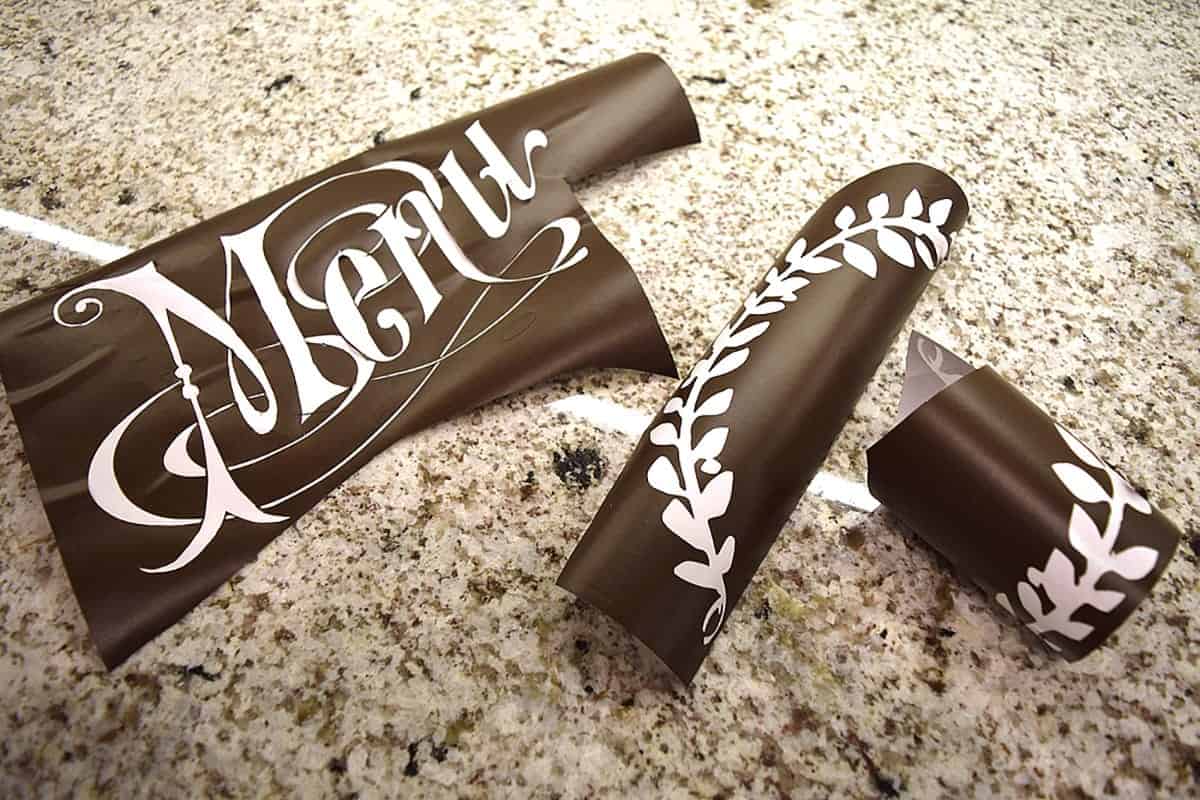
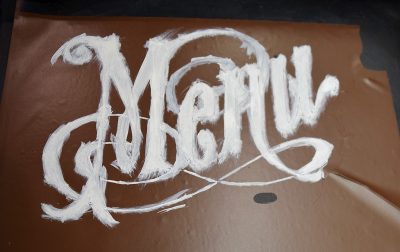
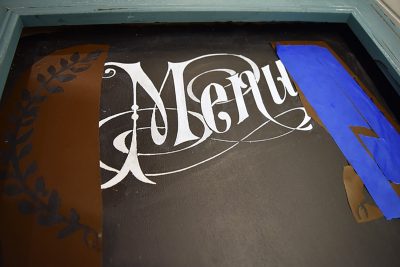
I purchased the laurels and menu stencils on our menu chalkboard from the Silhouette store. I cut them on transferable vinyl.
More Decorative DIYs You May Like
I’m so happy with how my chalkboard menu project turned out! That frame had me at “Hello.” I’m so glad I trusted my gut.
Have you DIY’ed your own menu board? I’d love to see what you’ve created at home.
FAQs
Adding a menu board to your home is a charming way to incorporate your cooking routine into your decor. Display in the kitchen for weeknight meals or use it for your next big gathering. Let everyone know what’s cooking!
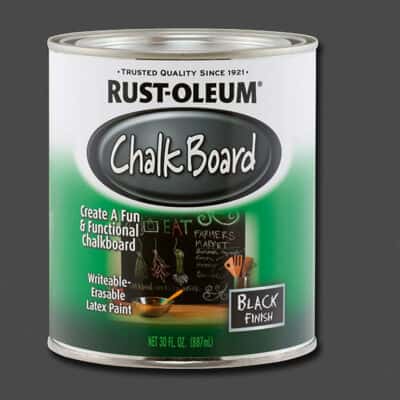
There are many good options for different projects available. I used a personal fav, Black Chalkboard Paint by Krylon, for this project. My other top picks are Rust-Oleum Chalkboard Spray Paint and American Crafts DIY Shop Chalkboard Paint.
Chalkboard paint doesn’t require priming for most surfaces – a clean surface and 2-3 coats will suffice. However, check the back of the product for specific instructions.
Chalk paint is a mineral based paint that often contains plaster of paris or calcium carbonate to give it a matte chalky finish. It’s often used for antiquing/refinishing furniture. Chalkboard paint turns any surface into a working chalkboard and is often water based.
Most paints are resistant to water after a day or two. However, paint won’t reach maximum hardness until about 21 days of air drying.

Grab our free series "Weekend Home Projects that will Transform Your Life" Sign up below to receive updates including free printables, organization tips, home improvement projects, recipes and more! |
More DIY Wall Art Ideas

PS I love seeing your creations! Be sure to take a photo and tag #cravingcreative on Instagram! You can also stay in touch with me through following me on Instagram, Pinterest, and subscribing to the newsletter!
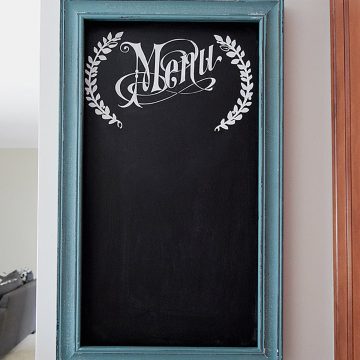
DIY Menu Board
Tools
- Paint Brush
- Small Foam Roller
- Stencil See post for ideas
Supplies
- 1 Shadowbox frame
- 1 Chalkboard Paint or
- 1 Chalkboard Vinyl
- 1 piece Chalk
- White Chalk Paint for any permanent markings
- Transfer Paper or painter's tape
Instructions
- Prep the backing material if necessary. Clean and sand smooth. For a fresh or raw surface, prime with a high quality bonding primer.

- Paint two coats of a high-quality Black Chalkboard Paint. A small foam roller usually provides the smoothest texture for the board. Allow to dry completely for at least overnight.

- After the paint is dry, use white paint to add any decorative details that will be permanent.

- For intricate patterns use a stencil and lay the stencil using painter's tape or transfer tape. Make sure stencil is completely flat and attached to the board so that paint won't get under the edges.

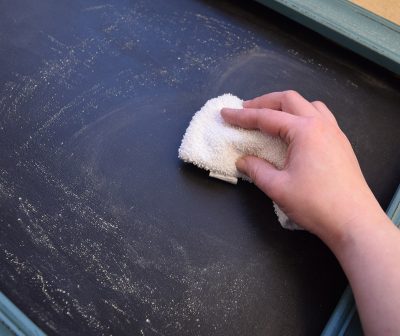
- Season the chalkboard. take a bit of chalk and rub it all over the chalkboard lightly. Then use a soft cloth to wipe it off in circular motions. It may take a few times of doing this to get the real chalkboard effect.

Melissa French, The More With Less Mom says
Homegoods is dangerous, I can’t go in there alone. Thanks for posting. Hello from Nifty Thrifty Sunday.
TwoPlusCute says
Very creative and great design, too!
Rachel says
Thanks so much!
Cathy says
This is awesome! What a creative idea! Pinned because I need to make this! 🙂 Thank you so much for sharing on Making Memories Mondays! 🙂
Cathy
Debi @ Surroundings by Debi says
Thanks for sharing at the Thursday Favorite Things Blog Hop! Stopping in to let you know your wonderful menu chalkboard will be featured on Tuesday Treasures! Stop by and take a peek!
Rachel says
Oh thank you! I will definitely be stopping by and thank you for hosting!
Carmia @ Clementine Creative says
Wow, what a great project! I never would have known how to make this myself. Thank you for the inspiration!
Jennifer Dawn says
What a gorgeous menu board! I do love a great chalkboard project! Thanks for sharing!
laci says
So glad you posted this i have paint just sitting and need to-do this asap. glad you linked up @ the home matters party!
Laci @ sequinsinthesouth.com
Katherines Corner says
it’s lovely! Thank you for sharing at the Thursday Favorite Things blog hop xo
Amberjane says
I would be proud to have this in my kitchen it looks great – Thanks for linking up to Pin Worthy Wednesday, I have pinned your post to the Pin Worthy Wednesday Pinterest Board.
Jennifer says
This is super cute! Love it! Visiting from the Friday Feature Link Party
Erlene says
Looks great. I like the idea of using painter’s tape for transferring the vinyl.
Crystal {Penny Love Projects} says
Thanks so much for linking up to our party! I have a giant chalkboard at home, can’t wait to try out your tips ❤️
Pam@over50feeling40 says
Great project…it looks so good…thanks for sharing with the Thursday Blog Hop!
Carrie @ curlycraftymom says
This is great! I never thought about using a shadow box so the chalk could set inside. I also like the Menu graphic from the Silhouette store! I love Silhouette projects! I just did a chalkboard project, too.