Thinking of creating more living space with a finished basement? This essential guide walks you through key considerations before finishing a basement. From permits to moisture control, plan for success.
How do you have time to do all that?! That’s a question I am often asked when taking on large home improvement projects. And, yet, here we are in our BIGGEST home remodeling project ever – finishing an 1100sq ft basement.
The honest truth is this project was actually started in 2021. It took us nearly 3 years to complete since we both have jobs and other projects such as finishing my parent’s log cabin house makeover.
Completing these types of large-scale projects has taught us a lot about making the process better, more efficient, and less work. So, let’s take a look back and talk about what advice I would give someone at the beginning of finishing a basement.
1. Measure, Measure, Measure
In order to prepare for such a huge undertaking, the very first thing we did was measure everything – every wall, every I-beam, every alcove. We did it twice, switching who read the tape just to be absolutely sure.
2. Make a detailed plan
This is our layout for the basement area:
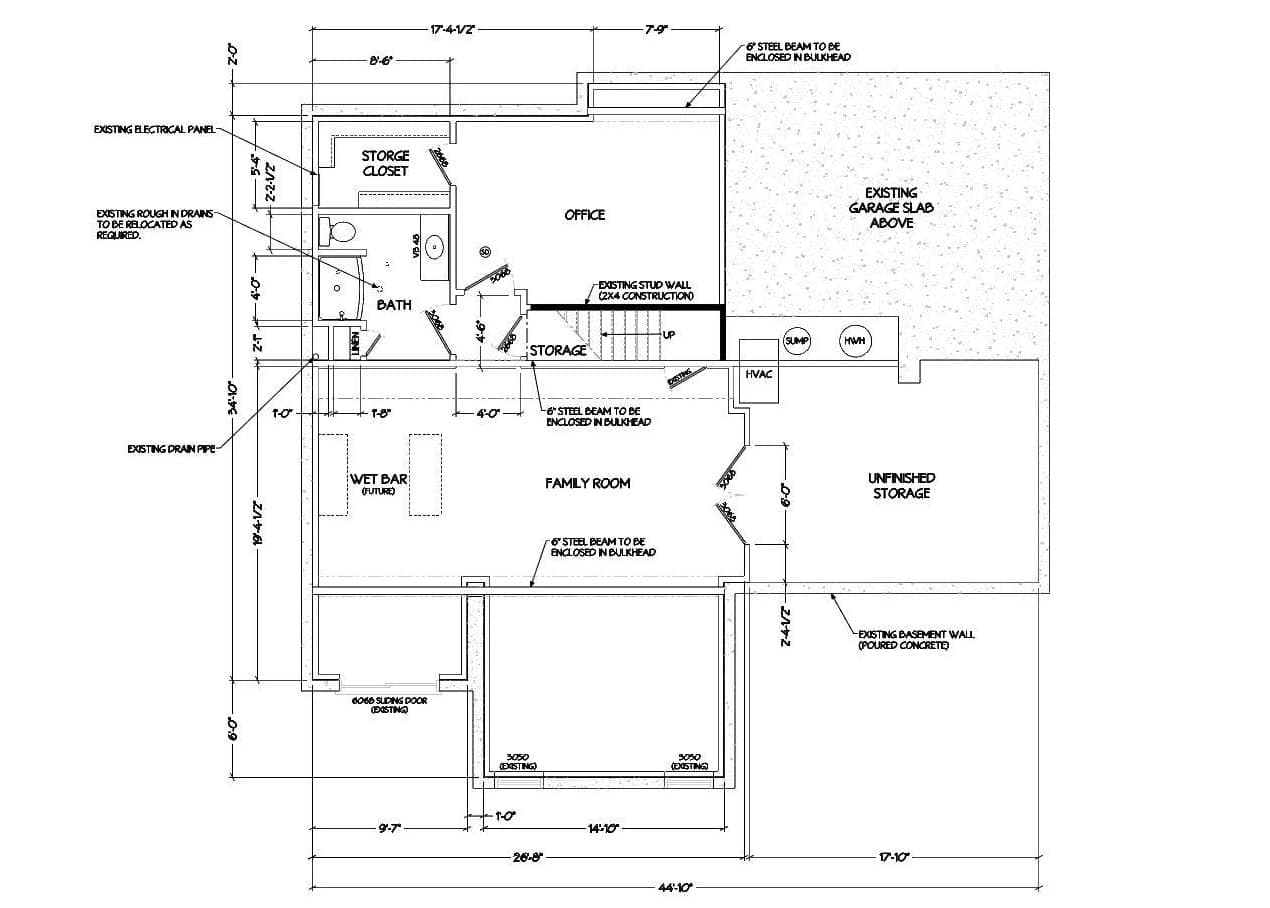
While we had a friend who drew plans up for us, it doesn’t need to be this professional. You can do it with a ruler and grid paper. However, having a professional plan like this one may help with permitting.
Your personal plan should include things like:
- All wall measurements
- Functional areas
- Large furniture placements
- Door openings, swing direction, and sizes
- Obstructions such as load bearing walls, ducting bulkheads, and I-beams
- Precise Measurements
- Sink locations and drain locations (for pipes to come out of the wall and if you need to tie into the main drain pipe)
- Utility locations such as electrical box, HVAC, and existing plumbing
- Windows
Having this on hand and a copy to give the contractors made communication so much easier and saves headaches in the long run. I could simply point to the paper to show them that something wasn’t right.
3. Budgeting
In my area, contractors are out of control on their prices (in my opinion). A completely finished basement around 800 square feet starts at $50,000 minimum and can easily be over $100,000 if you have cabinets, a full bathroom, or trim work.
For our basement, we hired contractors for moving an AC line and adding registers, framing, plumbing and running new electrical. That cost us $17,000. My family and I have been doing the rest when we can. Know your real budget (including furniture), capabilities, and time constraints.
4. Check Contractor’s Work Often
Truthfully, everyone makes mistakes, some more egregious than others. Do keep an eye on the work as contractors progress and try to educate yourself about what you are looking at.
For our basement, we had to bring the contractors back to fix several problems. Some examples include the toilet was hooked up to the hot water, there were areas of shoddy framing, and the plumbing guys stapled through an electrical line. It pays to pay attention.
5. Permitting
It is NOT worth it to skip permits. I understand that some localities are a bigger pain than others. However, you can hire this out if it’s too hard to navigate.
In my city, if you try to sell a house that wasn’t permitted for a finished basement, the city can request that you tear the walls out so an inspector can see inside. The permitting process for my locality was, thankfully, easy. It only required the plans as drawn above, a simple form, and one inspector to come out before we put sheetrock on the walls.
6. Moisture and Vapor Barriers
It’s somewhat common to have moisture problems in basements. These need to be addressed before any construction begins. Signs of a moisture problem include:
- Damp or high humidity feeling in the air, even if inconsistently.
- Puddles or areas of water
- Darkened or bowed walls
- Musty smells
If you have a poured concrete foundation, there is usually a moisture barrier added underneath. There isn’t an easy way to be sure, unless you break into the slab like we did to move the plumbing:
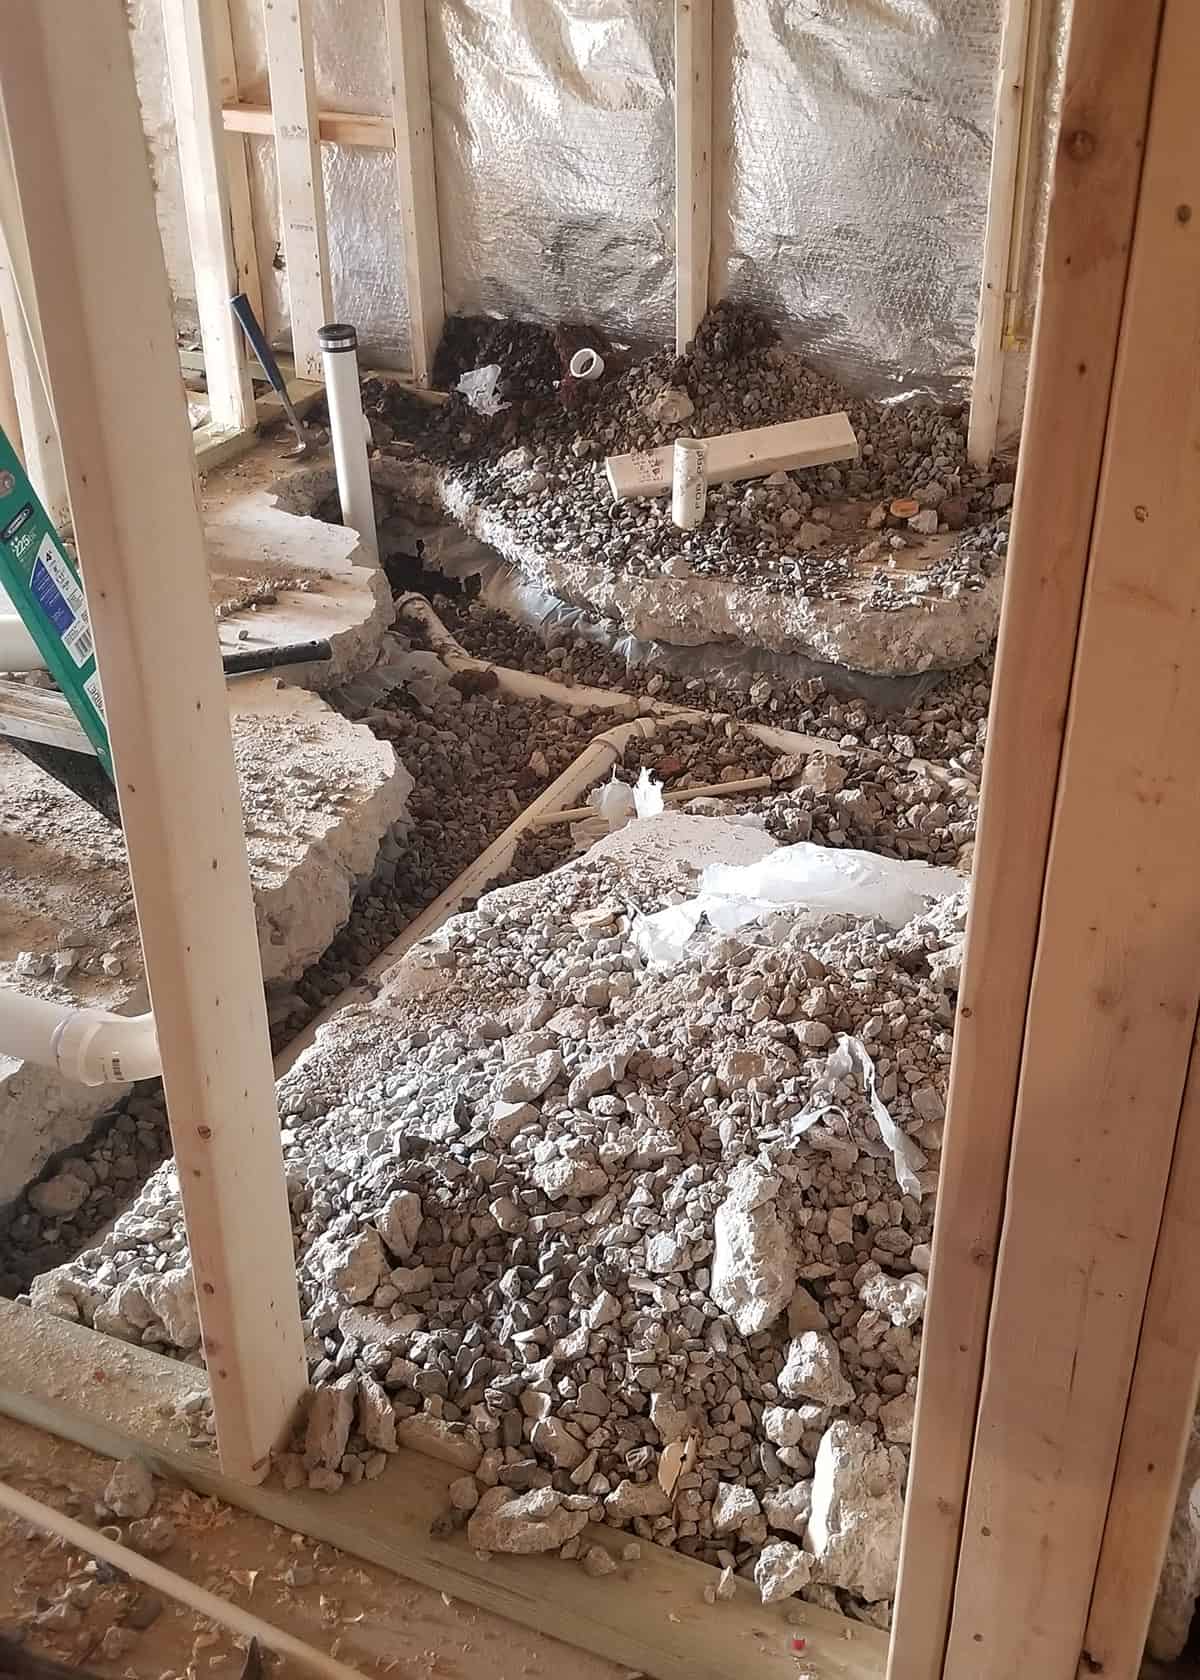
Do you see that plastic sheet underneath the concrete that they jackhammered out? That’s the vapor barrier.
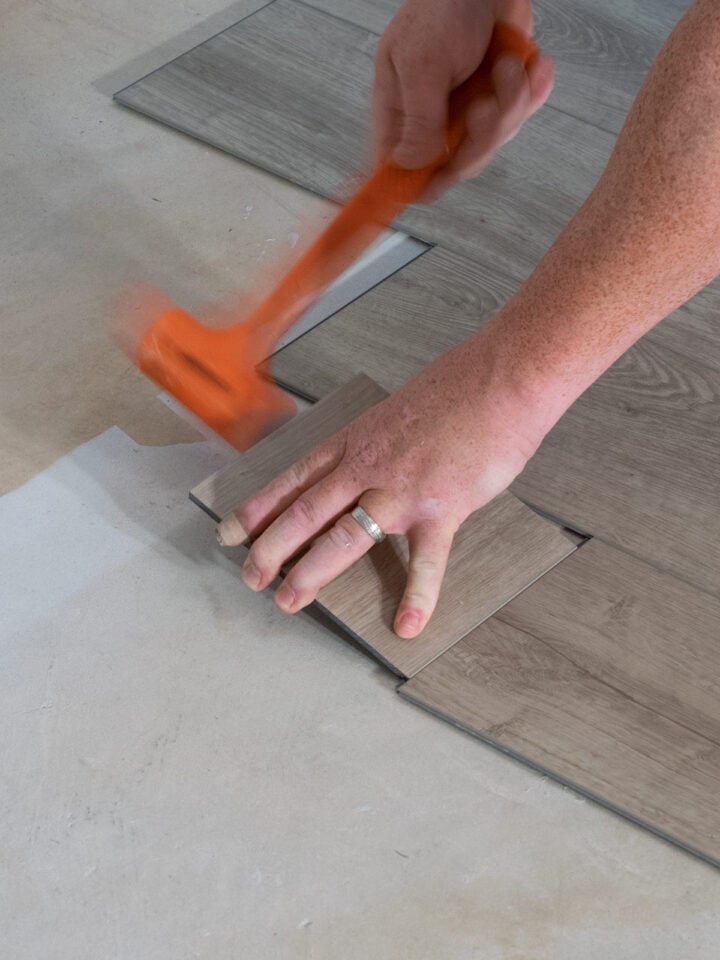
7. Do floors need to be leveled?
While carpet does not require a level floor, tile and vinyl plank (LVP) flooring have some requirements. What you are looking for is dips or gains over a certain distance. The vinyl plank box will tell you the manufacture's recommendations or you can read more in my guide to the types of vinyl flooring.
Any bumps, large holes, or large cracks should be filled. Also, check for nails, raised screw heads, or staples.
To fix dips, use floor patch for wood subfloors and thin-set mortar or self-leveling concrete mix can be used for patching concrete floors.
8. More Considerations when Planning
- Plan your outlet spacing accordingly.
- Do you need to add or change HVAC system/ducting?
- Light switch locations and functionality.
- Do you need extra bracing for a ceiling fan or just pot lights?
- Ceiling Types – a modern drop ceiling gives access, while sheetrock looks more like a living space.
- If you have a furnace or boiler, and plan to close it in, make sure it will still have enough air circulation. This is often written in the building code.
- Fire plan and emergency exits.
- How do you see using this space in 10 years? (Grown up kids? Mother-in-law suite?)
What I would have changed about our project?
Because we did such a detailed plan, we were able to solve many problems before they were realized. For example, we left a large enough space for a new refrigerator that when our older model broke, it was easy to replace.
However, we ran into one problem. This basement space is intended to be a entertaining spot or sophisticated man cave of sorts. We ran all new cable for the TV and outlets. However, after living with the space for a bit, it because quickly evident that putting the TV opposite a wall with 3 huge windows was a mistake.
The glare from these windows caused us to rethink the layout and rerun all that cable wire again.
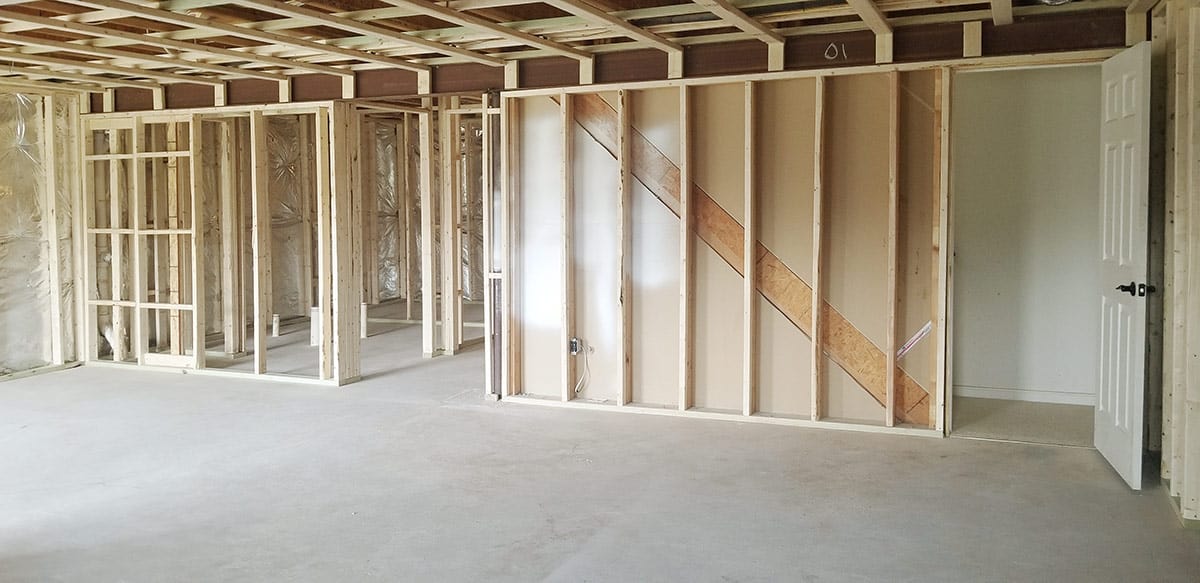
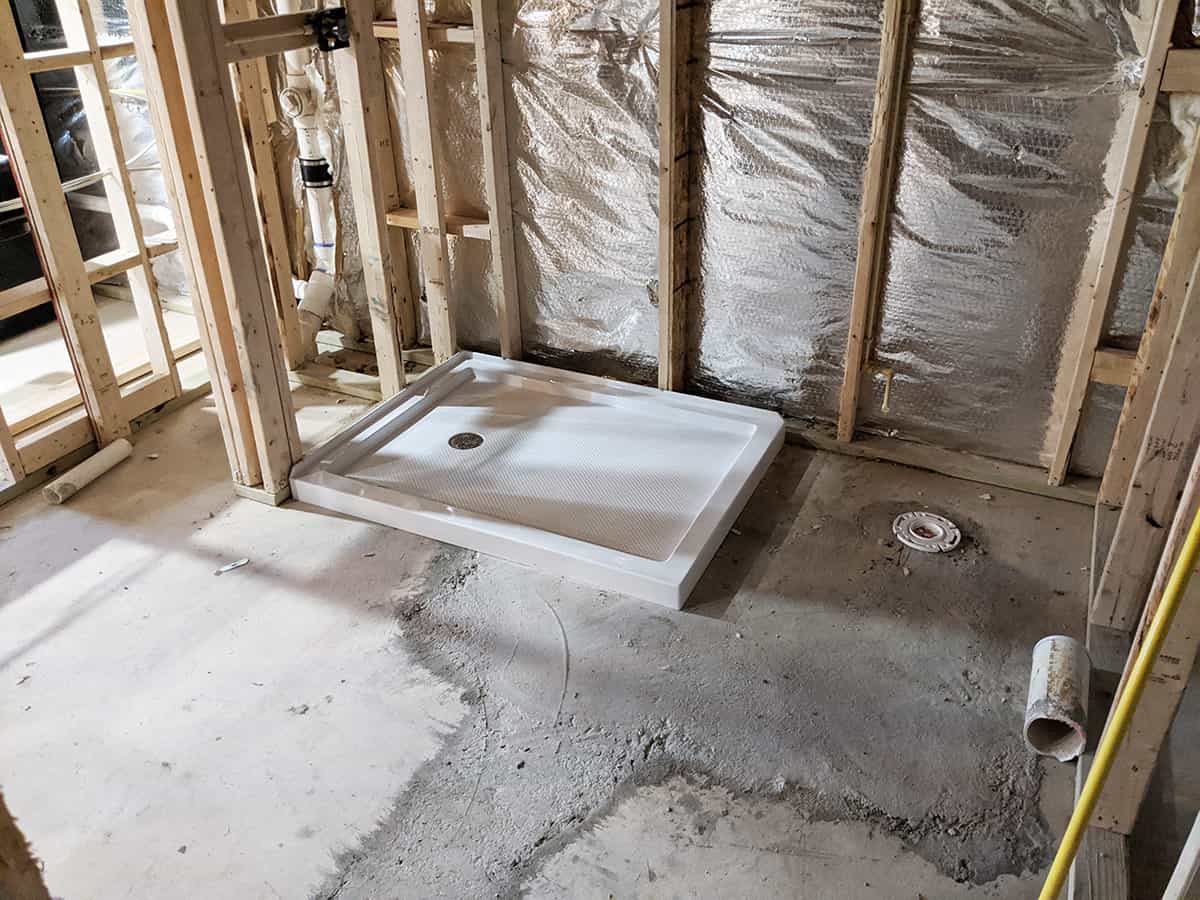
Next up, we will be taking your through most of the projects for the new full bath, which looked like this after the contract work:
As I said, this project started 3 years ago and today, we still have some trim, paint, and finishing touches to do. I cannot wait to see it come together and I hope this post helps anyone considering taking on such a large project.

Grab our free series "Weekend Home Projects that will Transform Your Life" Sign up below to receive updates including free printables, organization tips, home improvement projects, recipes and more! |
More DIY Home Improvement Projects


PS I love seeing your creations! Be sure to take a photo and tag #cravingcreative on Instagram! You can also stay in touch with me through following me on Instagram, Pinterest, and subscribing to the newsletter!
Leave a Reply