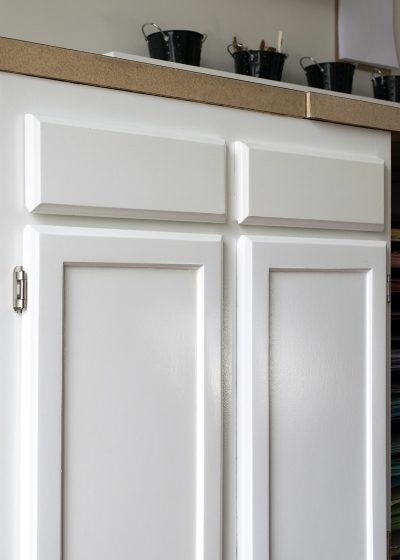
One of the distinguishing features of oak is the highly visible wood grain. Learn how to fill wood grain when painting cabinets or furniture with the best products and simple techniques. Painted Cabinets never looked so good!
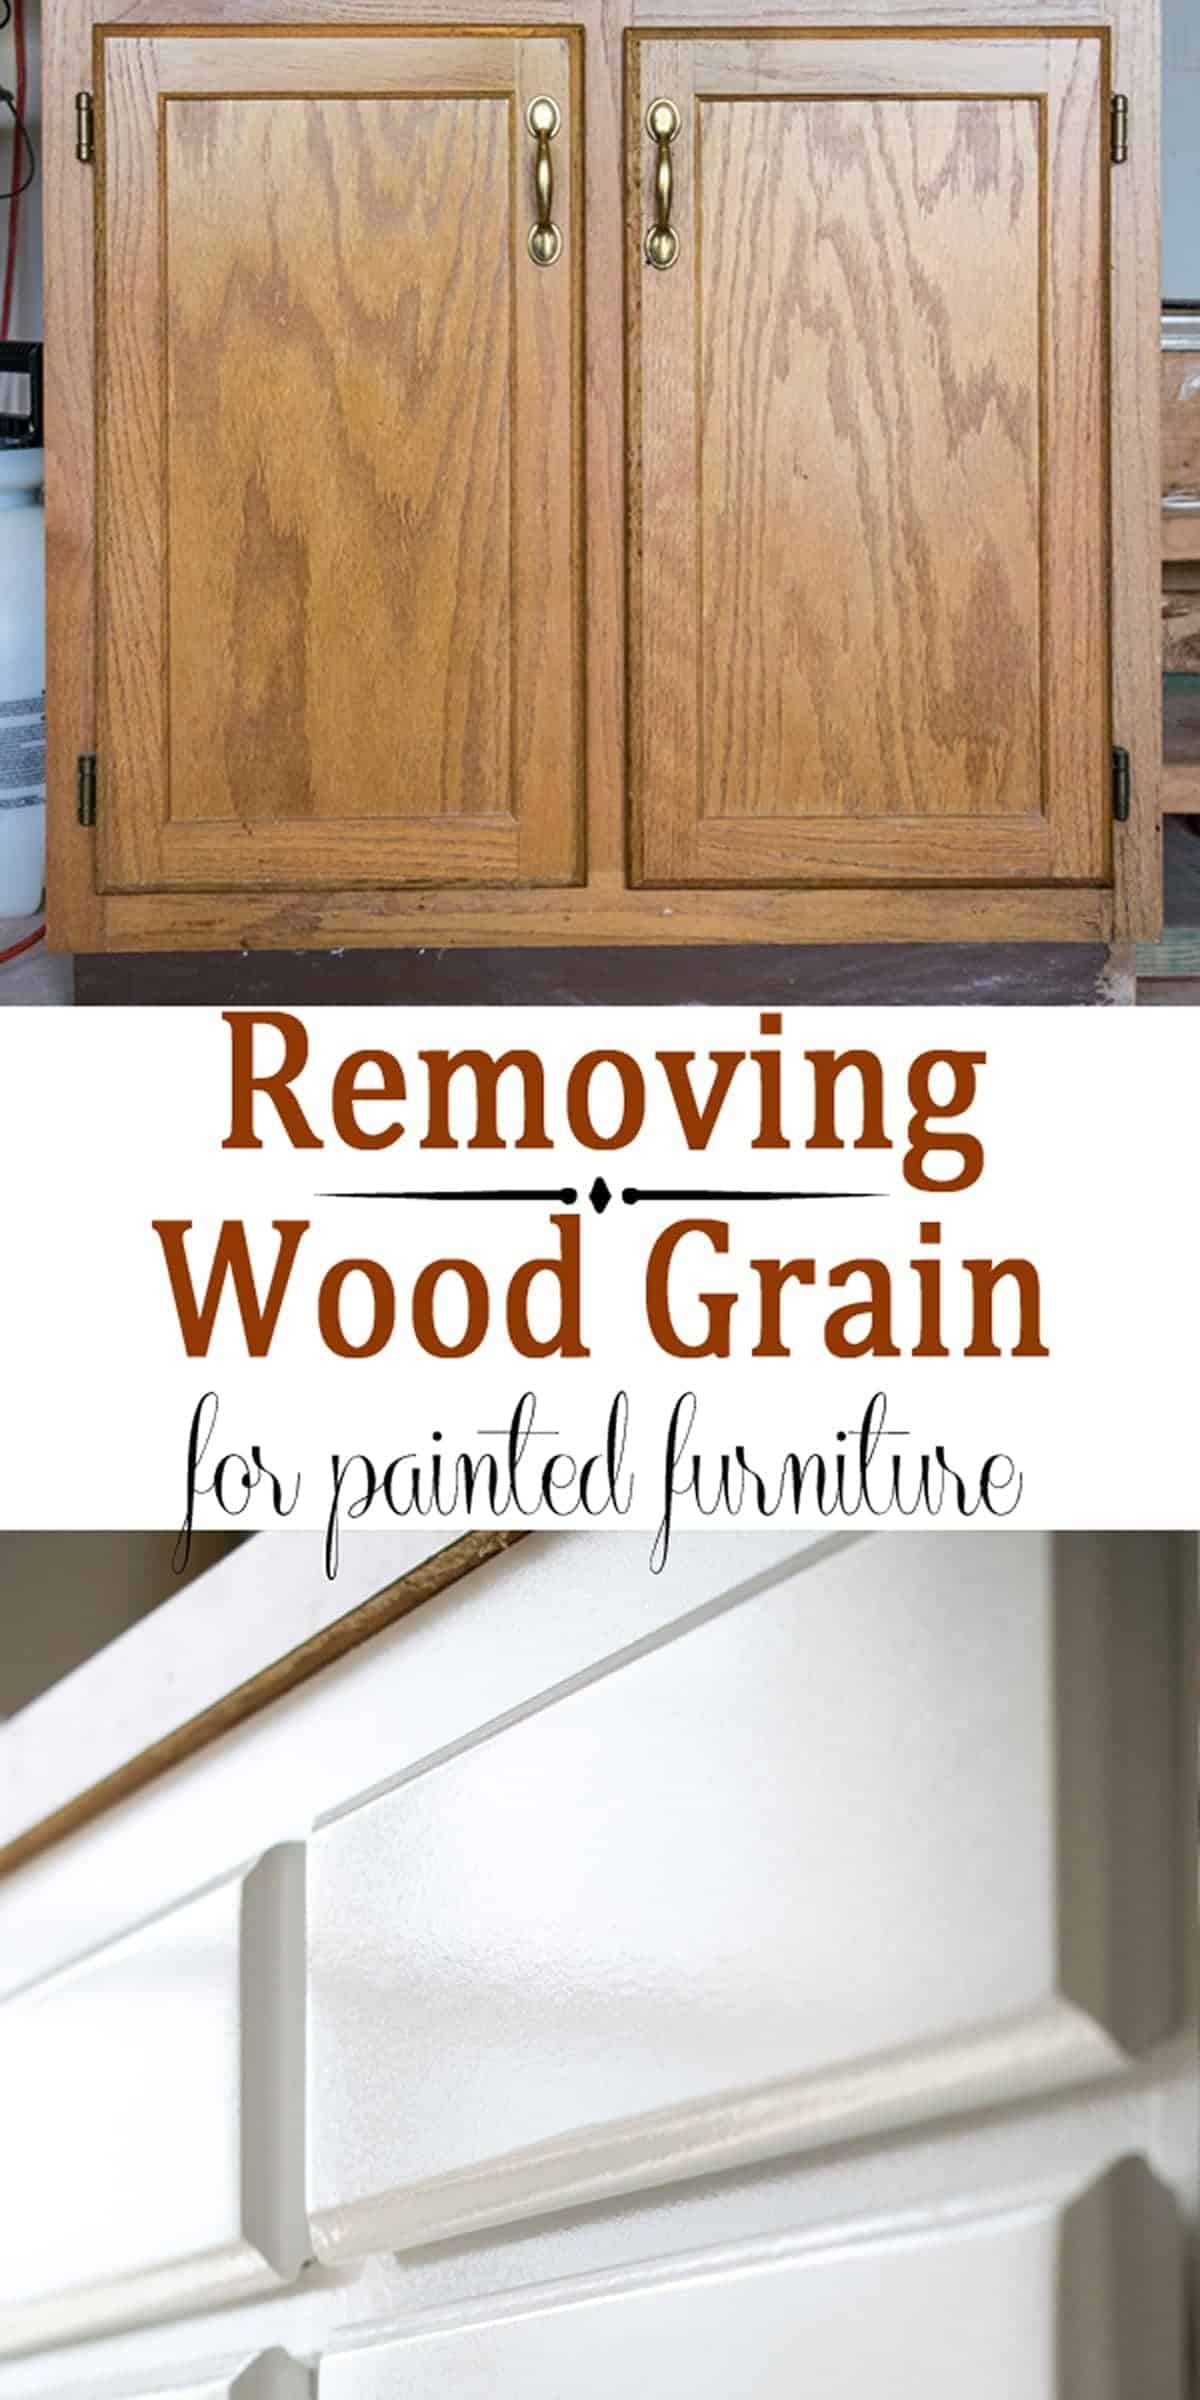
One of the most popular projects in home improvement is to paint cabinets, especially the dreaded honey oak cabinets that are very common in builder and older homes. The problem is that even if you paint oak cabinets, the grain will still show and you essentially just have white painted oak cabinets. However, I do have a solution if you want smooth cabinets for your painting project!
My method for filling wood grain has been a READER FAVORITE tutorial for years!
And it’s because:
- Filling wood grain is time consuming, but it creates a modern and uplifted appearance on painted furniture.
- This process also works great with scratches, pits, and smaller holes too.
- I have 15 years experience in woodworking and home repair – I’ve seen a lot!
By the end of this post, you know the method to fill wood grain in your woodworking projects to create a smooth finish. While I wouldn’t recommend going out to buy oak to fill it, sometimes you have to work with what you have.
You can also check out my post on the definitive guide to painting kitchen cabinets as well.
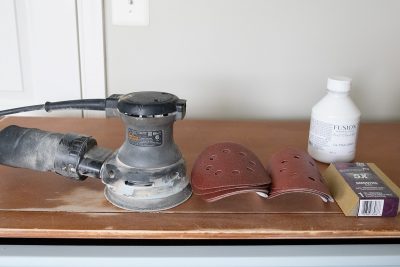
Supplies and Recommendations
Here is an overview of the equiptment I use for these projects.
- Wood filler *See notes below to decide which is right for you.
- Flat Edge Scraper – I prefer a larger one with a little flex to push the wood filler in the grain, but not too much.
- Palm Sander – This will save your hands from all that hand sanding!
- Mouse Sander or oscillating multi-tool – optional, but highly recommended for inside corners
- Sanding Blocks – I generally like the angled sanding sponges rather than paper on blocks. With sanding sponges, I use 80 or 120 grit because sanding sponges have less grit for the same rating. (i.e an 80 grit sponge will feel closer to a 120 sandpaper). For sanding paper on a block, I use 120 grit for sanding and 220 for light finish if necessary.
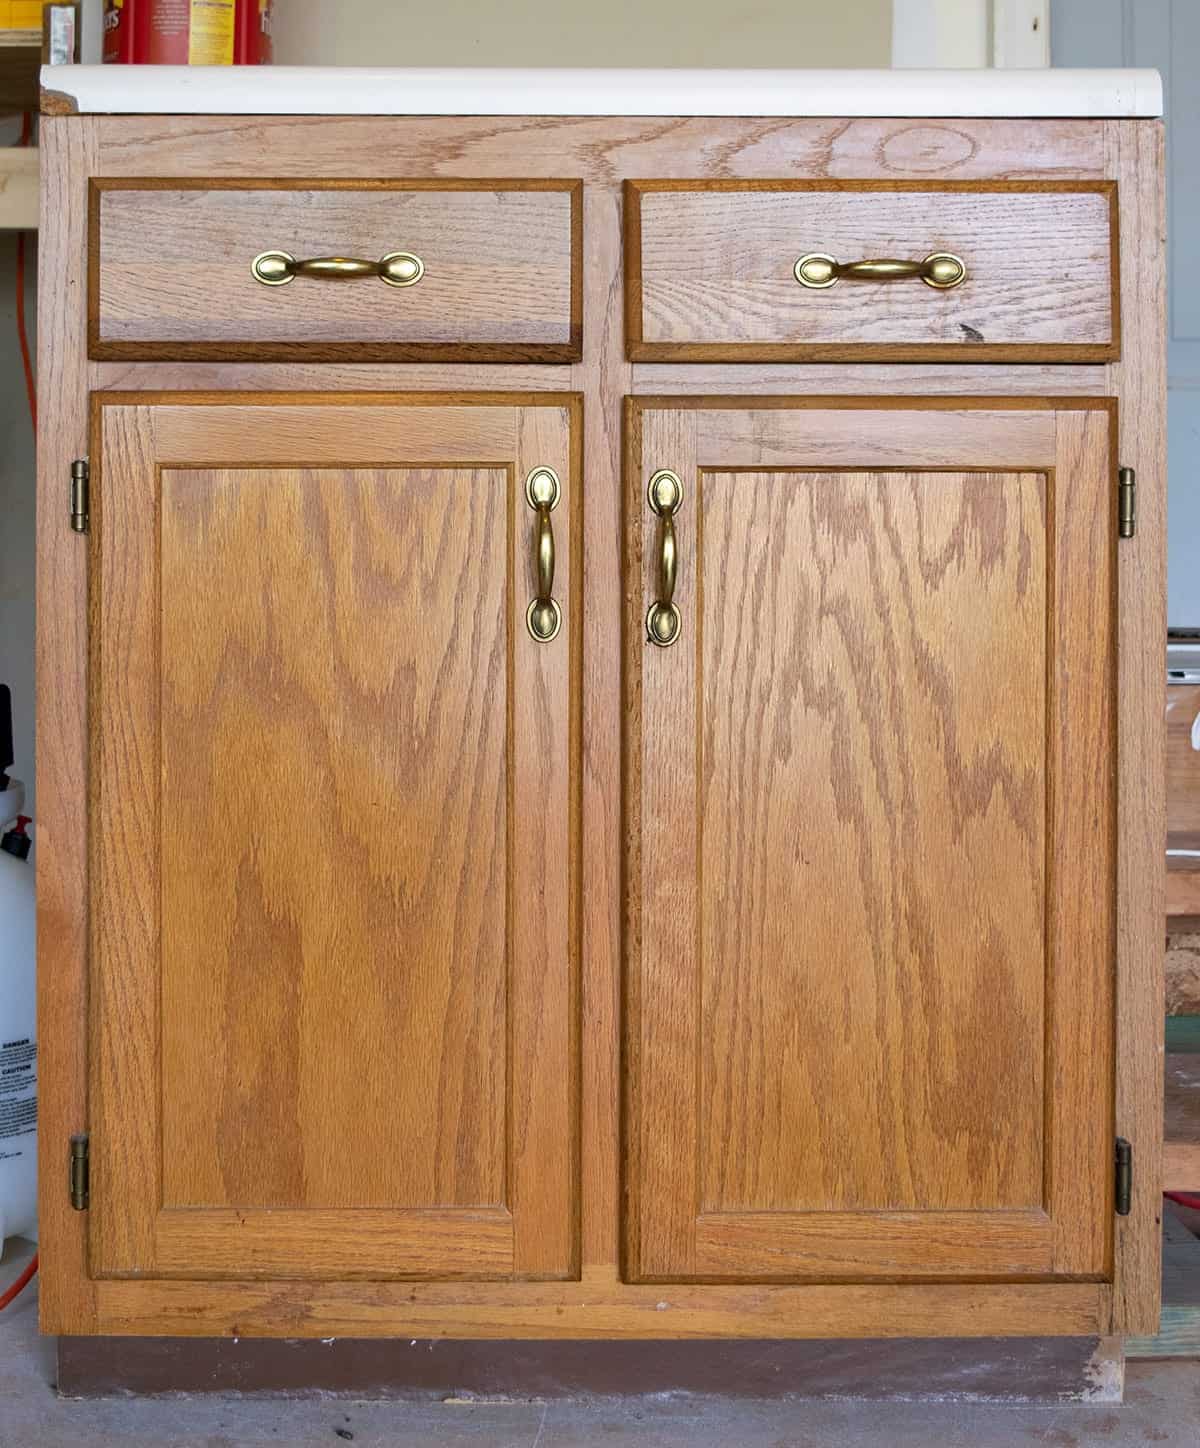
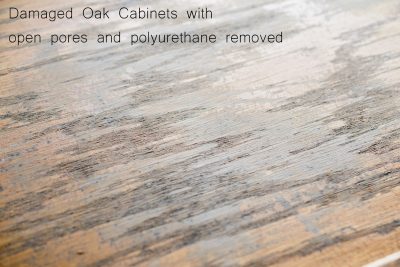
Here is a before shot of the cabinets we are working with. You can see the age, pitting, and deep wood grain.
The Best Wood fillers to Use
To truly seal the pores and level out all the ridges and valleys in the wood grain, I recommend a quality wood filler. The primary purpose of wood filler is to camouflage imperfections in the wood but to do so without impacting the way the surface itself looks.
I have used many, many wood fillers and this one is by far my favorite to use for all-purpose. For single use projects, I also really like this DAP wood filler as well, but it dries out in the can, so you can’t save any for a future project.
Also, unless you have large gaps or structural repairs, I do NOT recommend Bondo or Epoxy filler for filling grain. These products definitely have their uses but, the level of effort and skill needed is much higher without delivering a particularly better finish.
How to Fill Wood Grain Step by Step
Ok, let’s get down to the business of learning how to fill wood grain texture, shall we? The prep work is much the same as preparing cabinets for painting.
Step 1: Clean the Wood Thoroughly
Remove the hardware and clean the surface thoroughly with teaspoon or degreaser product that won’t leave a film.
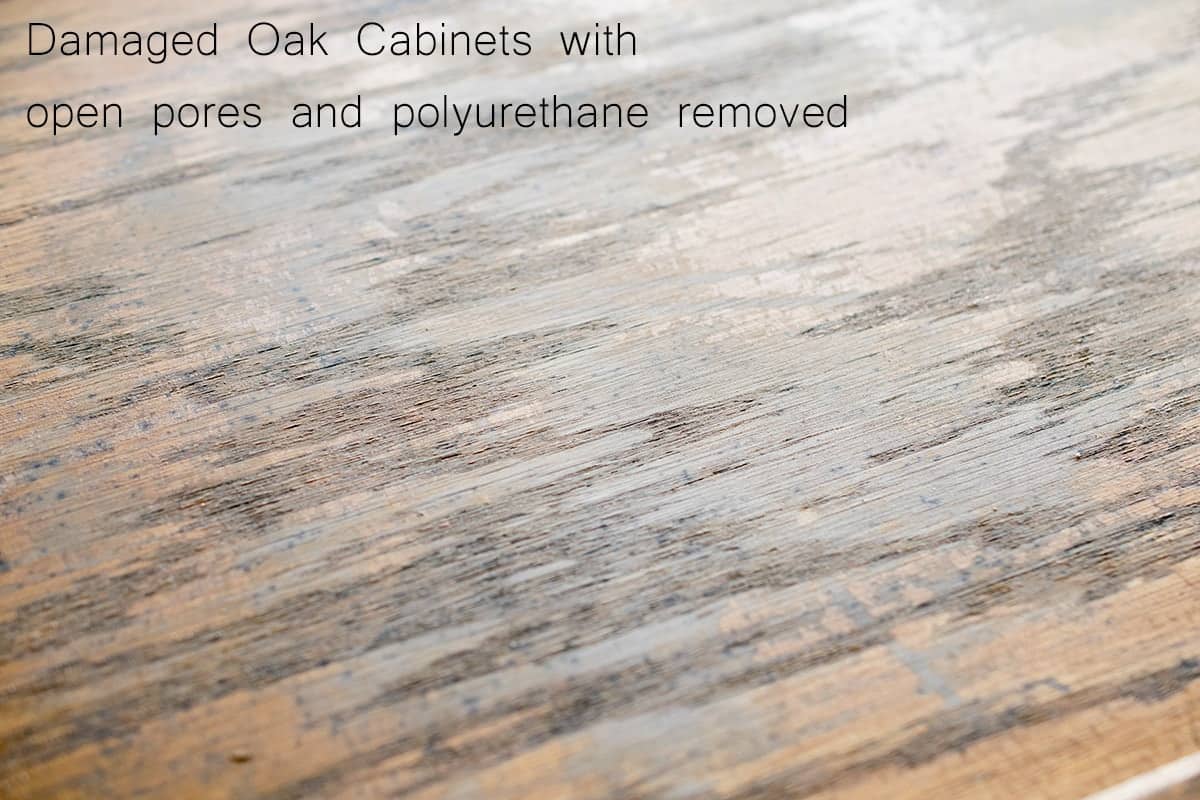
Red Oak is well known for its recessed wood grain as it dries out. Unfortunately, this means that the pores of the wood are open and will easily soak up contaminants and humidity if not sealed. The damage pictured is from the wood soaking up kitchen oils and other contaminants over the many years of their use. There was no sign of rot.
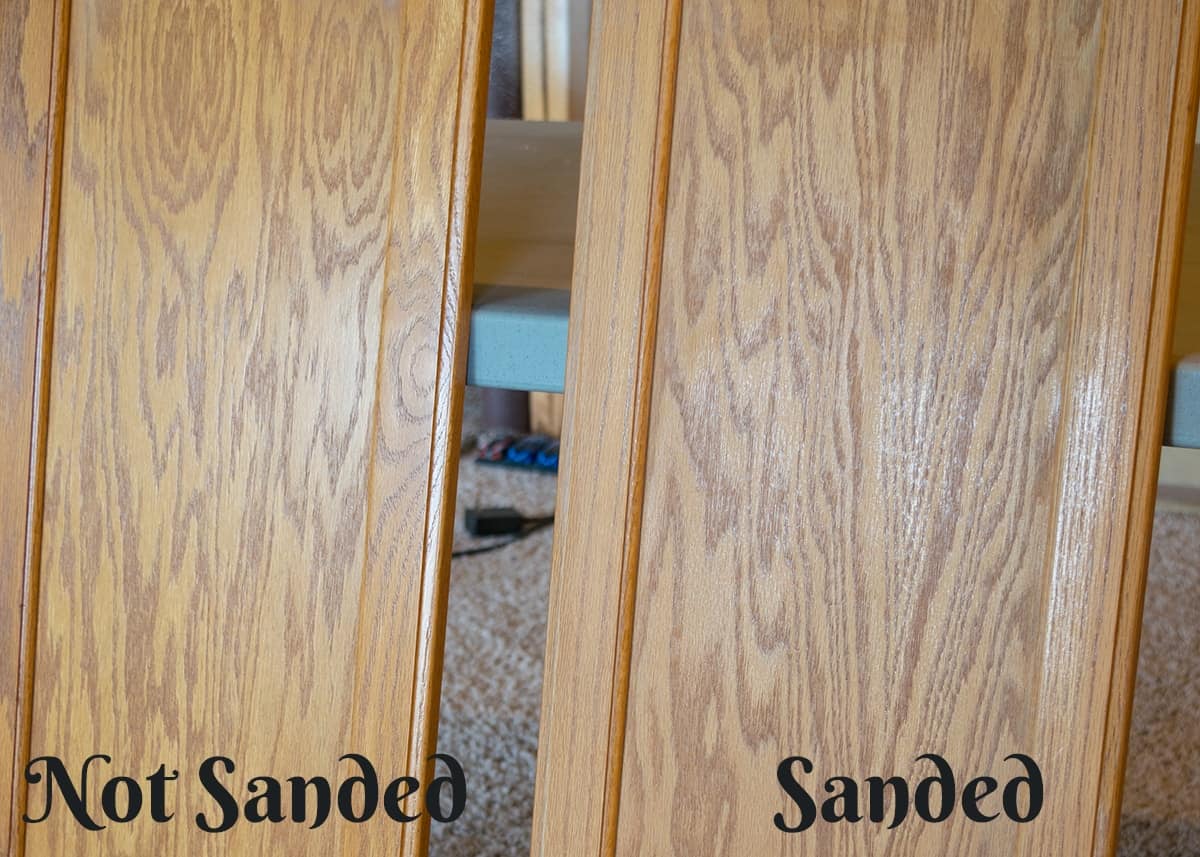
Step 2: Sand to Increase Bond
The glossy varnish needs to be removed or “roughed up” by sanding. Wood filler is designed to bond with raw wood best, so I would not recommend using a deglosser. I have used wood filler over previously painted surfaces without problem, but it is noticeable that the bond is better with raw wood.
Wood Filler is designed to work best with raw wood, so I do not recommend using deglosser or an etching product.
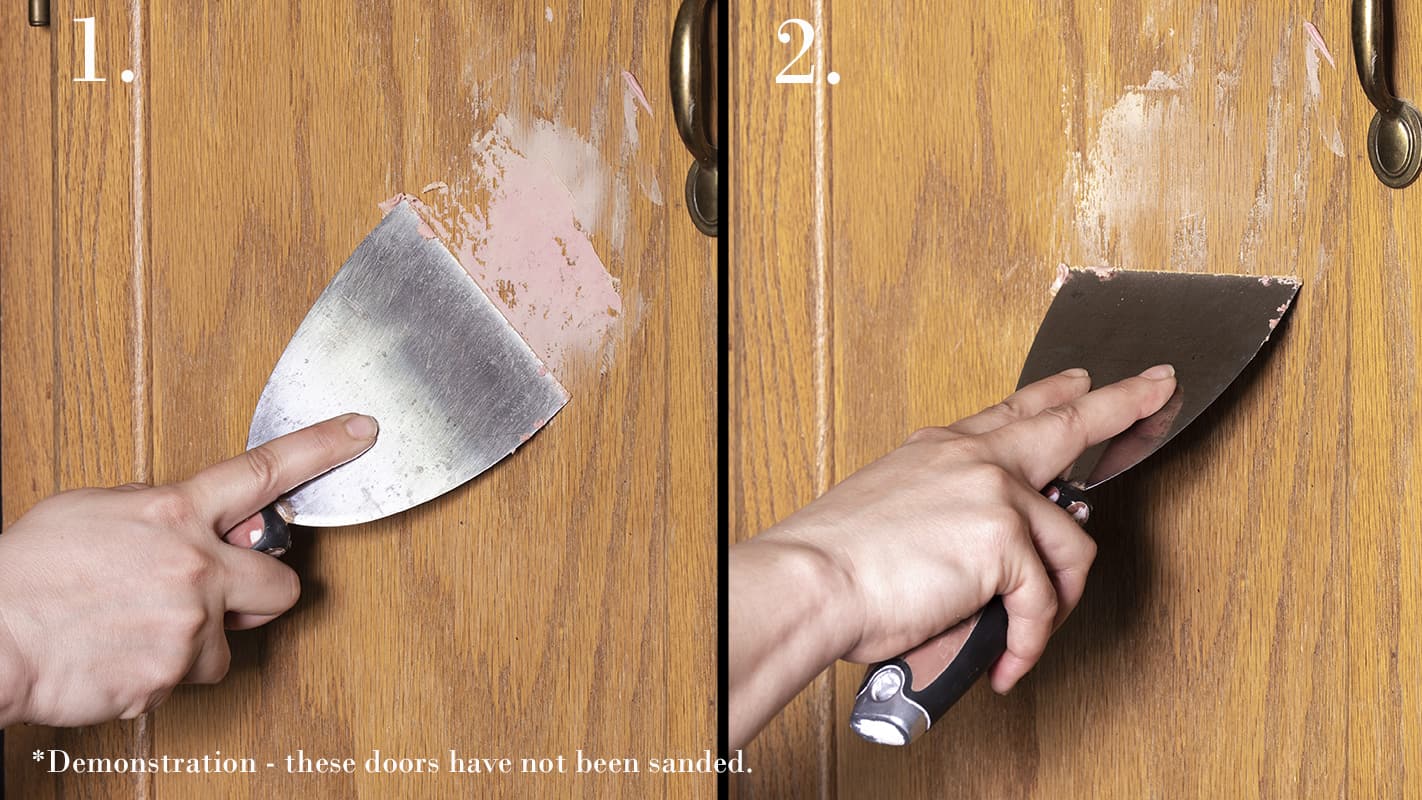
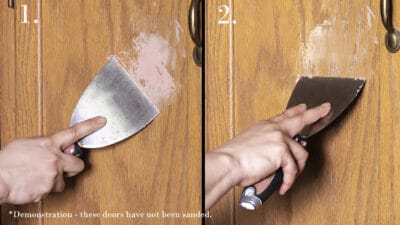
Step 3: Apply the Wood Filler
To use the wood filler, add some to a 3-5 inch scraper and spread it out over the wood grain areas. Push down on the scraper and use different angles across the grain as you spread.
Scrape the excess off to save time and effort sanding.
Step 4: Sand to smooth
Using a palm sander with 120 or 220 grit works well on all flat areas and saves hand sanding. I use an orbital sander to create the smoothest finish.
Unfortunately, orbital sanders are usually round so you will either need to hand sand corners and molding, or use a corner sanding tool. I use an oscillating multi-tool to get into corners, but a mouse sander also works pretty well. I hand sand rounded edges.
Step 5: Reapply as necessary
It is important for the transitions from wood to wood filler be smooth. If you can feel ridges or depressions, you may have to apply a second coat and sand lightly again. Before painting clean with a vacuum and cloth to remove any dust.
Expert Tips for Using Wood Filler
- Keep the layer of wood filler as thin as possible. Wood fillers are not flexible. Thus, it is more prone to cracking and thick layers will make it even more so.
- Make the transitions between wood and filler smooth and seamless. This is why I recommend a palm sander.
- If you are intending to stain rather than paint, you can match the wood filler to the wood grain and make it stainable. However, this will not look right unless you only have small, individual pores to fill. Large swatches like I was attempting to smooth out would not work with a stained piece. If you have small, tight pores, you may have an easier time with products such as aquacoat.
- Make sure your inner corners and molding are as smooth as possible when you let the wood filler dry.
- To reduce hand sanding in corners, use a mouse sander or multi-tool. Keep that in mind and save yourself as much work as possible!
- Make sure that the first layer of paint or primer is a thin layer. Excess moisture in the paint can reactivate the filler since most are water based. You would notice a bumpy or rough texture come through.
- Most wood fillers are water-based, so if you need to thin it a little, you can do so by adding water.
Looking for more furniture or painting techniques? Full tutorials:
- How to Choose Paint Colors: Easy Tips and Tricks
- The Best Paints for Cabinets and Furniture
- How to Protect Furniture
- The Easiest Way to Paint Cabinets (still a big job)
- Amazing Furniture Transformations
Frequently asked questions:
No, paint will bond with wood filler just fine. However, the raw wood areas will need primer, so it is best to use one coat every. A thin coat of primer
The amount of time necessary to allow the filler to dry will depend on the depth of the wood grain and type of filler. This typically takes 20 minutes to up to 2 hours.
Wood filler is made up of wood fibers or saw dust in a binder. Wood putty is generally made of epoxy, plastic, or fiberglass and does not harden the way that wood filler does.
I have used many, many wood fillers and this one is by far my favorite to use for all-purpose. Wood filler tends to be thick. For tight grain, you can use a product such as aquacoat.
As many people have pointed out to me, I could have simply painted many more coats of paint and sanded between each to remove wood grain & get a smooth front. However, that idea was FAR more work than a few layers of wood filler because of the depth of the ridges and pits. Paint simply doesn’t fill grooves very well. Also, the purpose of the filler is to seal the pores and diminish any future recessing of the grain.
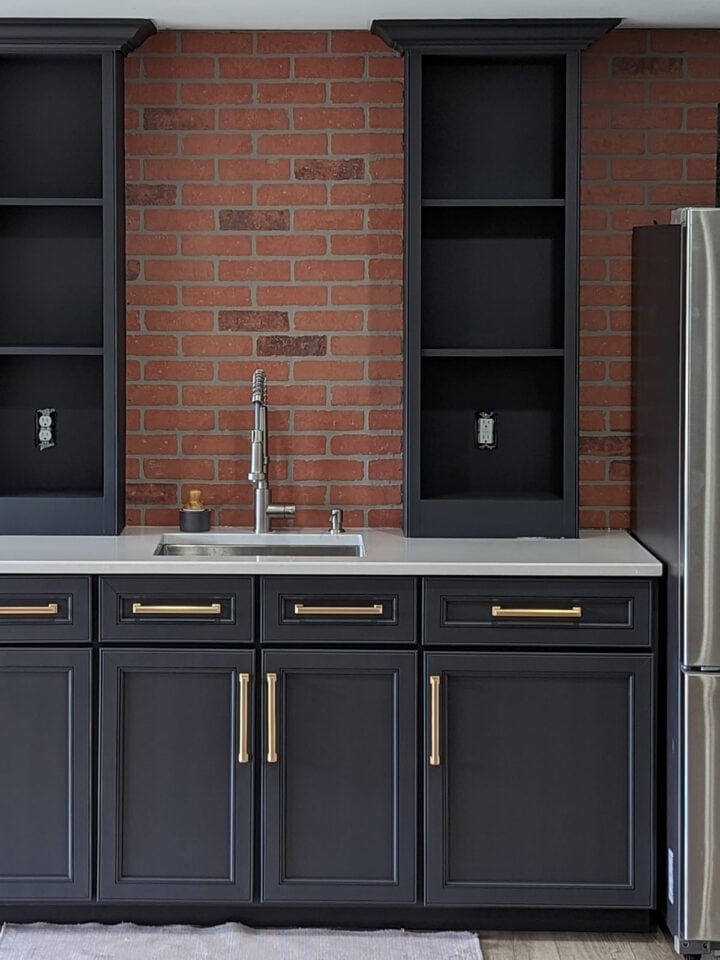
See how these painted cabinets turned out in the Craft Room Makeover

Grab our free series "Weekend Home Projects that will Transform Your Life" Sign up below to receive updates including free printables, organization tips, home improvement projects, recipes and more! |
More DIY Tutorials

PS I love seeing your creations! Be sure to take a photo and tag #cravingcreative on Instagram! You can also stay in touch with me through following me on Instagram, Pinterest, and subscribing to the newsletter!
Filling Wood Grain Before Painting Cabinets
Tools
- 3-5 inch putty knife
Supplies
- TSP or Degreaser
- Wood Filler
- Sand Paper 120 or 220 grit
- Lint free cloths for removing dust
Instructions
- Remove the hardware and clean the surface thoroughly with teaspoon or a degreaser product that won't leave a film.
- Sand the entire surface. The glossy varnish needs to be removed or "roughed up" to increase the ability of the wood filler to bond.

- Use a 3-5in. putty knife to apply wood filler and press down as you spread it into the wood grain. It is helpful to use a scraper that bends slightly. Apply in different directions to completely fill the grain. Scrape any excess filler before it dries.
- Sand the filler smooth. Using an orbital sander with 120 or 220 grit works well on all flat areas and saves hand sanding. Unfortunately, orbital sanders are usually round so you will either need to hand sand corners and molding, or use a mouse sander.
- It is important for the transitions from wood to wood filler be smooth. If you can feel ridges or depressions, you may have to apply a second coat and sand lightly again. Before painting clean with a vacuum and cloth to remove any dust.
Notes
- Keep the layer of wood filler as thin as possible. Wood fillers are not flexible. Thus, it is more prone to cracking and thick layers will make it even more so.
- Make the transitions between wood and filler smooth and seamless. This is why I recommend a palm sander.
- If you are intending to stain rather than paint, you can match the wood filler to the wood grain and make it stainable. However, this will not look right unless you only have small, individual pores to fill. Large swatches like I was attempting to smooth out would not work with a stained piece. If you have small, tight pores, you may have an easier time with products such as aquacoat.
- Make sure your inner corners and molding are as smooth as possible when you let the wood filler dry.
- To reduce handing sanding in corners, use a mouse sander or multi-tool. Keep that in mind and save yourself as much work as possible!
- Make sure that the first layer of paint or primer is a thin layer. Excess moisture in the paint can reactivate the filler since most are water based. You would notice a bumpy or rough texture come though.
- Most wood fillers are water-based, so if you need to thing it out a little, you can do so by adding water.
Controlsgirk says
I was at a wood working concerning and sat in at a lecture on finishing. I believe the guy said to use Danish oil before lacquer or poly to fill in the grain. He showed us examples and the finish was extra smooth.
Rachel says
Yes, there are several ways to fill in grain depending on your project. For painted furniture like this project, I would not use Danish Oil.
Bonnie Mann says
I have had great results using dry-ex to fill the oak grain. Another tip is using an old credit card to help smear it in the grain.
Danielle says
I’ve been working on filling the grain also. Used aquacoat and timbermate and can see grain with both. Is this the filler you used Durham rock hard water putty? Says it’s a powder?
Rachel says
Especially with deep grain, it may take a few coats to get a smooth finish. I have used Durham once for skim coats but it isn’t my favorite because it can suck up the moisture from the paint (even after dry) and leave a grainy texture. I have used regular interior decently well, but it depends on the situation.
Leah says
Durham is a powder, follow directions to make liquid, do thin coats as thick coats will crack. This turns rock solid will need sanding so get a palm sander so your hand doesn’t fall off. I used to fill cracks in floor, whew. Learned as I went !!thin coats lol
Robert says
Do you recommend DAP Plastic Wood? I’m doing my kitchen cabinets. And you’re right! What a chore. I’ve got 7 cabinets on the bottom and 11 on top. Maybe done by Christmas. 🙂
Rachel says
I actually do like DAP, but I have only used this one. The problem that I have with it is that it dries out fast in the can. As in you would have to buy a new one for every project. I have had it dry out few days after opening even with the lid on. It does however dry wonderfully and hard and I have painted over it with no problems.
Dawn says
Very nice! I see that you updated the post to say you are no longer using Timbermate because it could swell. Have you experienced that? The guys at Woodcraft are encouraging me to use Aquacoat since my cabinets have an existing stain and I am not completely stripping (they say Timbermate is best on raw wood). But I will say the Timbermate is my preferred choice, but when I read your note I was concerned again. I thin out the Timbermate pretty good with a good amount of warm water so that is it not too thick, sand and then prime with Bin Shellac. However, this has only been on a test piece and has not been put to the test in real life.
Rachel says
The reason I stopped recommending Timbermate is because a reader and a fellow woodworker both started to experience this swelling with water-based paint, recently. I had not had this experience because I have been using another product lately that I got from a trade show. My friend is convinced something has changed in the formula, and it seems unlikely that these two would have both received a bad batch. Once they laid the paint was when the trouble started and the Timbermate developed a rough texture. If you already have done some priming with no problems, I wouldn’t worry about it.
jess says
I emailed Timbermate and they said that could happen, b/c water reactivates the product. I’m still gonna use it, but am going to top it off with an oil-based primer to seal it before painting. Goodness help me. eep!
Kela says
Hi Rachel,
Your cabinets look beautiful! My husband and I are in the planning phase of painting oak cabinets in our kitchen. Can you tell me what type of primer and paint you chose? How did you apply the paint? Did you seal them with anything? Lastly, how are they holding up? Is the grain visible now?
Thank you for your time!
Rachel says
Hi! For kitchen cabinets, there are a few paint options that I recommend depending on what kind of sheen you want and whether you are brushing or spaying. First, I highly discourage most anything latex based because it will peel and won’t hold up to touching unless you use a polycrylic over top. Benjamin Moore makes a paint called Advance. I have satin white/black on my stair banisters and it has been excellent. It can be sprayed or brushed, does not need sealing or top coating, and it levels very well even with a brush. The downside is that I don’t think they have matte options, with the lowest sheen being satin. Either way, I find the staff to be very knowledgeable for what will be best for your project. I think Sherwin Williams also makes a paint specifically for cabinets although I haven’t used it. For a more matte finish, I love Fusion Mineral paints from Homestead House. No priming and very little sanding required. If you are going to a light or white shade from oak, you can save some money by using the concealer before painting. It also lasts a long time, I used 3 pints to cover a 12 foot entertainment center. Both Benjamin Moore and Fusion Mineral are zero VOC so you can paint right in your house with no fumes. Chalk paint is not my personal preference because I am not a fan of how chalk paint feels, but if you like that look, you can also use that too. Most brands don’t require priming or heavy sanding to adhere, which is nice. You will need to seal it with a Polycrylic though. I, personally love Benjamin Moore’s Stays Clear because it won’t yellow. However, it is really expensive (like $70 a gallon I think). Minwax makes a polycrylic top coat that many people like if you aren’t worried about yellowing (i.e. you aren’t painting your cabinets white). I have known two friends who have had it yellow on them.
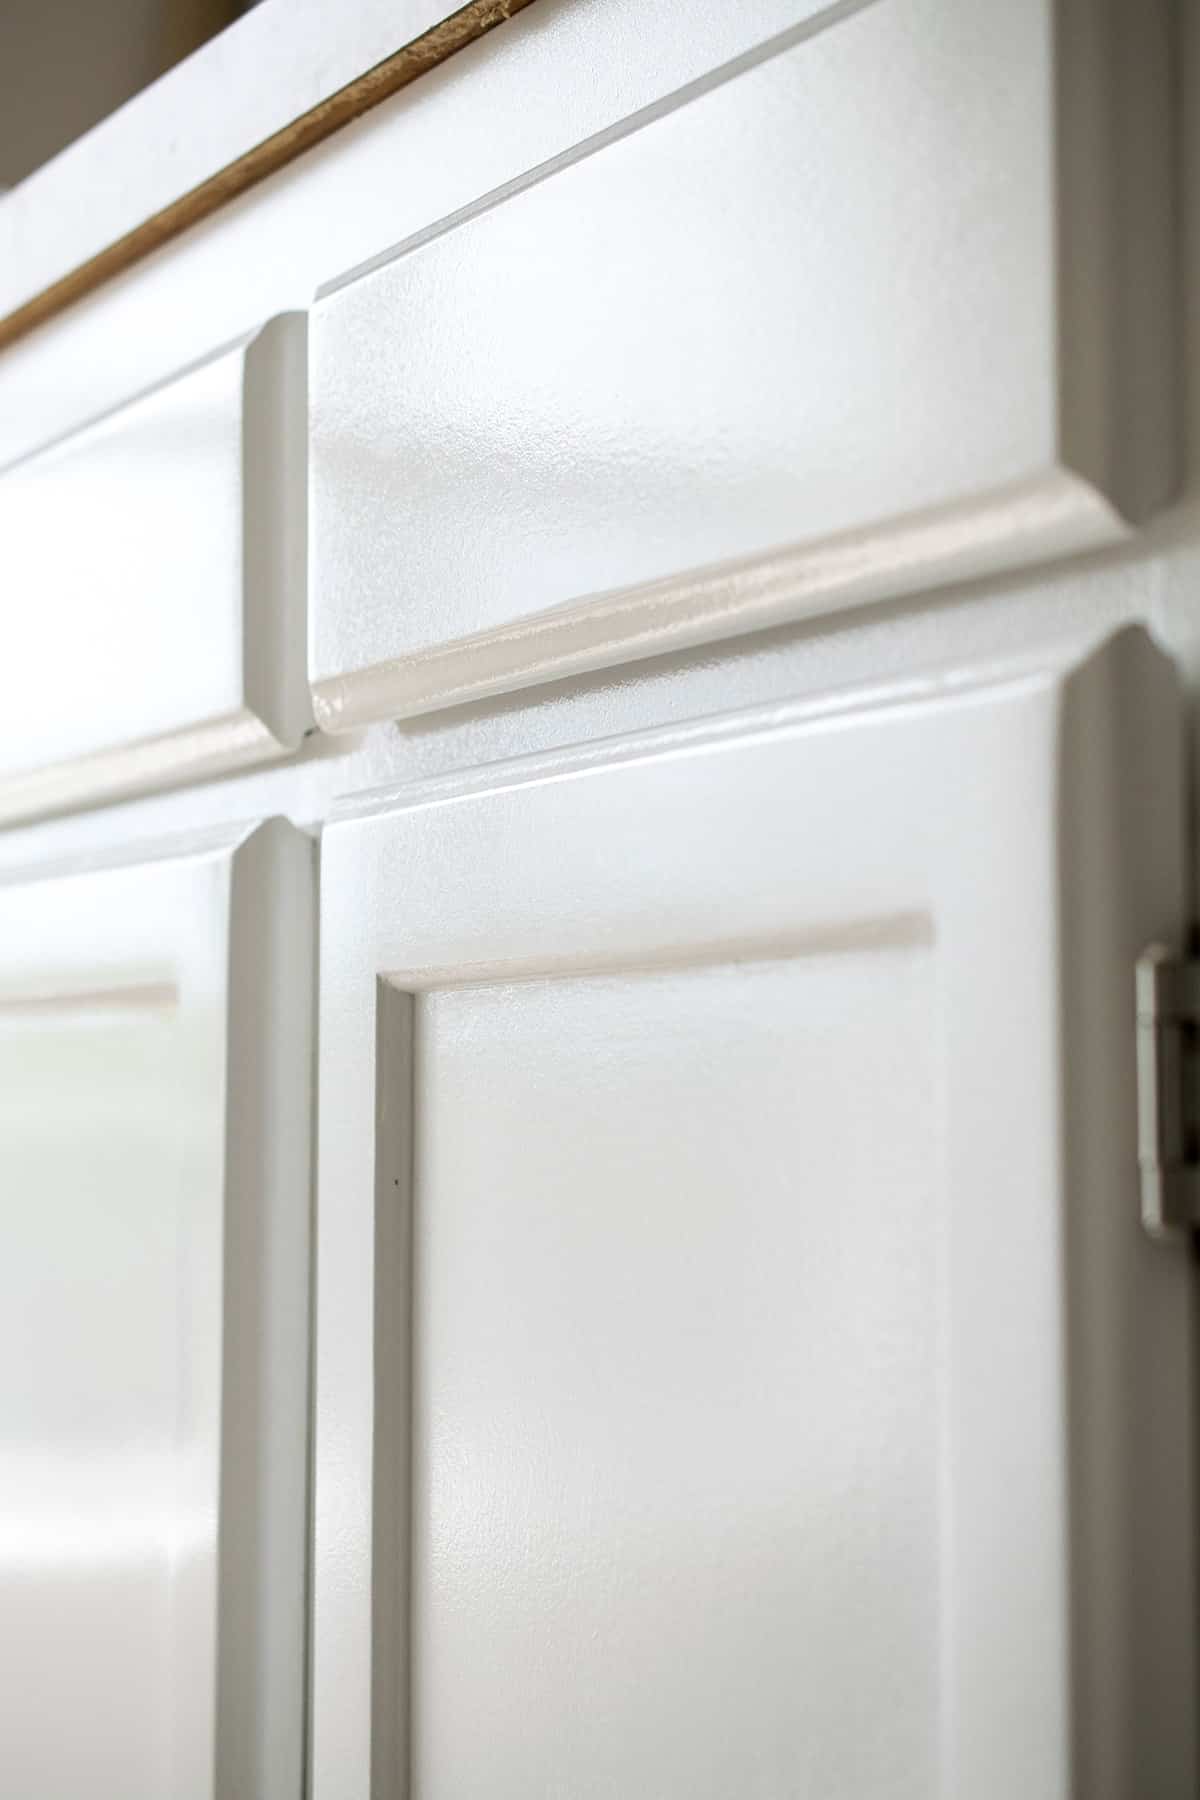
As to your last question, my cabinets look brand new even two years later. Originally, I used a regular furniture paint and I actually wasn’t fan of it because of the coverage. I sprayed Stays Clear on them because they are subject to a lot of abuse and I can only find one chip on a drawer. I even spilled an entire paint can down the front not too long ago and it all cleaned up. The wood grain is not visible at all and has not receded. Sorry to write a book, but I know there are a lot of considerations when taking on such a big project. Hope that helps and feel free to write any more questions if you need! I have done tons of painting projects.
Christine says
You mention Timbermate in your post, but then talk about Durham’s wood putty. I admit, I’ve always found Timbermate a breeze, given its water soluble-ness. (Yes, I made that up.) I also like the way the Timbermate actually bonds with the wood. But either work, I’m told.
I laughed at this: “I could have simply painted many more coats of paint and sanded between each to remove wood grain & get a smooth front.” It just screams the word “Just.” You could have “just” done this or that. Why do people do that when 1) it’s a whole bunch more steps and 2) you’re done very successfully?
A practice MIL I had once didn’t want us to sand 1940s, very damaged floors we had. We could just buff and blah and blah and blah. We looked at each other, sanded, poly-ed, and DONE. Beautifully, I might add!
Anyway, you did a lovely job. I did this back 15 years ago and those cabinets (painted with Cabinet Coat) still look beautiful. Recently I’ve gone the other way and am Citristripping EVERYTHING to be able to get to the grain, weather it and revel in the soft look. Go figure. The pendulum swings, doesn’t it?
Rachel says
I really appreciated reading your comment and loved your stories! The pendulum does swing and I find that so many projects have different needs in process and product. For instance, we just painted a huge entertainment center. The ends of which weighed maybe 400lbs each. I know they are a lot heavier than the fridge so there was no taking them out to the workshop and I had to paint them right in the living room. For that, I need a zero VOC paint. Wood fillers are the same for me. Although I love timbermate, I also keep a flexible wood filler, and I like the new one from DAP for when I need a quick fix. Unfortunately, I have to buy Timbermate online so I give options.
I also completely agree with your comment about the “just”. I get so many comments and looks about that because I guess people only see it as an extra step. However, without that extra step, it does take so much more work!
Marilyn says
Hi! This was so informative! I am considering doing this to a small oak bathroom cabinet. Did you remove the cabinet hardware? If so, did you replace it with new ones?
Rachel says
In these particular cabinets, I removed the knobs and did not replace them. I originally planned to but never got around to it and, frankly, it doesn’t both me since they are easy to open. The holes from the original knobs were filled. I did replace the original hardware that allows the doors to swing open with a similar set in brushed nickel. Good luck on your bathroom cabinets! I plan to do the same to our guest bath in the future so I would love to see what you do with yours.
Lisa Korba says
Thank you for all this awesome info! I have a 1994 built mobile home with 36 of these type of oak cabinets, mine have the cathedral top insets and some have some old yucky glass inserts too but a lot of them are missing though too. I asked a ton of questions on the Hometalk website on your painting your cabinets article. I know this whole process of redoing my cabinets will take me forever! lol but it will be worth it when they are done. Have you ever heard of dlawlesshardware? on their blog on Fridays they do a free hardware friday, where they put up a couple different knobs or pulls and anyone can email in and get as many as they need for free and all they ask in return is pictures of the finished product and a shout out of where you got them from. They have a ton of things on their website and awesome prices too!
Rachel says
So happy to help, Lisa! If you have any more questions, feel free to send me an email or comment. I hadn’t heard about dlawlesshardware. Thank you so much for that tip because I do furniture makeovers and knobs can be expensive. Will definitely check them out.
Debbie Irvine says
This technique is similar to what I did to my cabinets over 5 years ago, and they look just as good today as when they were freshly done! I did water down my wood filler a bit though – I can’t remember what brand it was. Watering it down allowed me to spread it even thinner. After filling, sanding, priming (and more sanding!), I finally finished with 2 coats of Aura semi-gloss Cloud White. It’s amazing just how well they’ve stood up, even with 5 little grandchildren who visit often. Your cabinets looks wonderful. Great work!!
Rachel says
It’s so nice to hear that your cabinets are holding up so well and thank you for your sweet comment. Ours are a year old and I am happy that not a scratch is present from all my son’s banging against them. I like your tip about the wood filler. I hadn’t thought of it but I did occasionally add a bit of water to my wood filler as well. I did that mostly because it sometimes would become gummy from air exposure, but thinning it out for the process is very helpful.
Adrianne Selsor says
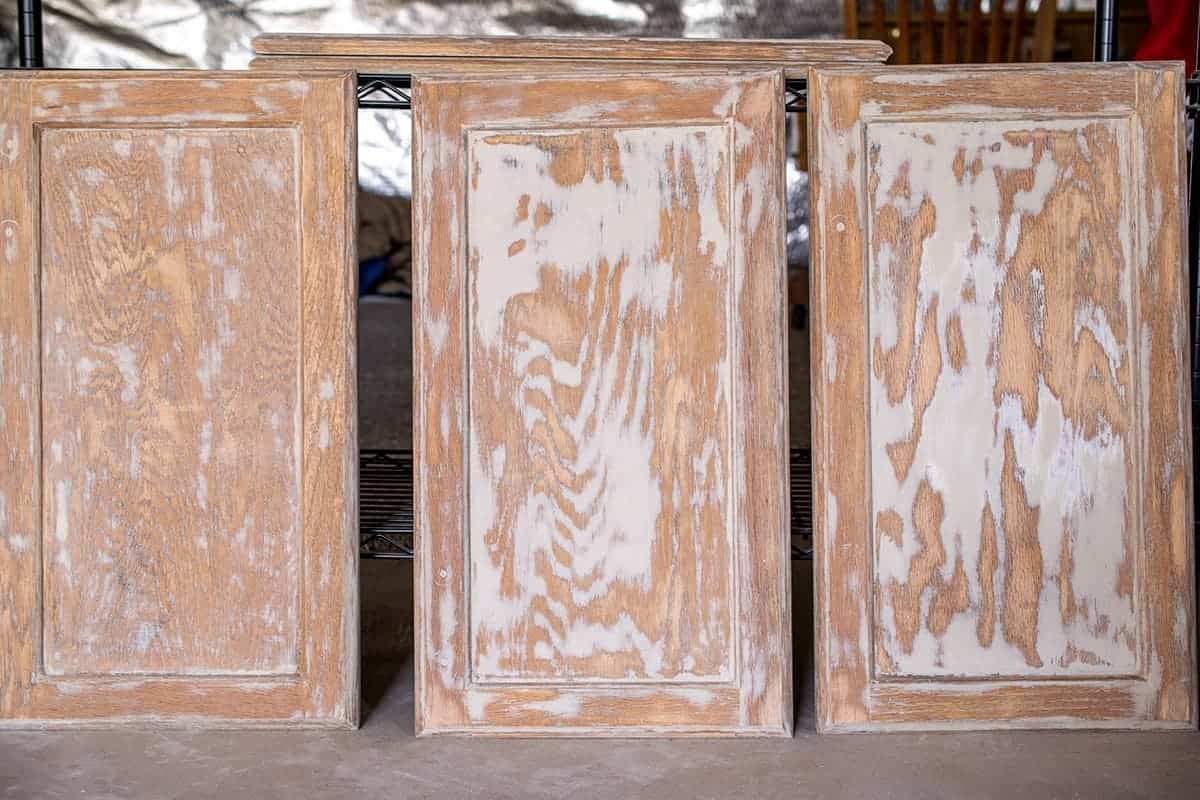
Your end result looks fantastic! Do you have any pictures of what the cabinets looked like in between adding the wood filler and priming the cabinets? I know it would help me so so much to see what it looked like for you.
Rachel says
Hi Adrianne! Forgive me, I am not sure if I am understanding your question quite right. The fifth picture (the one that looks like the wood has light tiger stripes) is after I had sanded the wood filler down and just before priming. Oak usually recesses over time so you are just trying to even out the peaks and valleys. The idea is that you are only filling the “valleys” with the wood filler. The point is that your door won’t be entirely coated in wood filler because you want to avoid a really thick filler layer. You will see streaks of filler and, hopefully, even more areas of wood. The most important aspect is that the transition from filler to wood is seamless or it will show in your paint. If it does, you can still sand and fix it later. My cabinets have been in place in the office for almost a year and I could not be happier!
Teresa says
What kind of wood filler did you use?
Rachel says
I used Durham’s water putty on my cabinets. At first I bought a Elmer’s pro-bond wood putty. Unfortunately, it had these little wood pulp pieces in it which made that product a nightmare to work with. However, the Durham’s was easy to get smooth and sand after it was dry.
Gayle says
Did you add any water to the wood filler? Or did you just use it and spread it thin?
Rachel says
I didn’t add anything to the wood filler I used. I just spread it thin and made sure to get a good adhesion to the wood. Thanks for stopping by!
Melanie Gaylord says
I saw in the post you recommended famowood but here you said you used Durhams…which is better?
Rachel says
You are correct that I have used Durhams, however, I don’t recommend that method anymore. I have used Famowood on several projects and it is so much easier to work with. My second choice would be Dap’s wood-x, but I explained what I don’t like about that one in the post.
Vineta @ The Handyman's Daughter says
What a difference! Your cabinets look amazing now. All that hard work was worth it!
Rachel says
Thank you so much!
Erlene says
You’ve been so busy! I’m trying to repaint a piece for my dd and I agree that the sanding in between paint layers is VERY time consuming.
Rachel says
Yeah, this project took some time. The sanding is the longest part and you never feel like you’re moving forward! Doing 4 cabinets at once was quite a project and pieces were scattered all over the basement for about a month.
Jen says
Those turned out super cute! I completely agree with your sander primer philosophy, because I have found the same to be true!