I am so excited to share the completed craft room makeover today! Hubby and I worked hard on it all summer long. And let me tell you – it feels gratifying! But first, let’s take a step back in time to February.
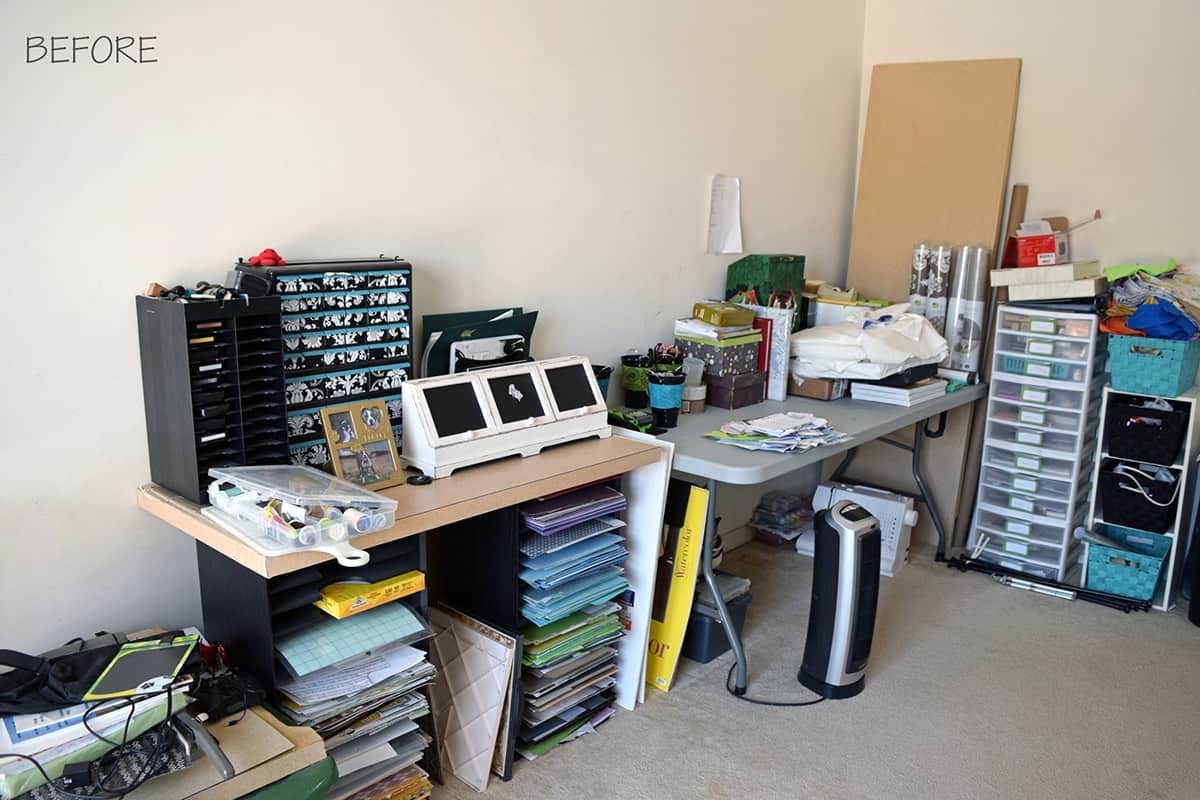
Isn’t that scary? Messy, messy even though that room is actually clean. I just had NO WHERE to put anything. I honestly did most of my crafting on the floor and I bet some of you know that experience well.
The opposite wall (not pictured) is my husband’s desk and office space to do what he wants with. Ok, moving on to the craft room makeover finale! Are you ready for this??
The New Craft Room Makeover:
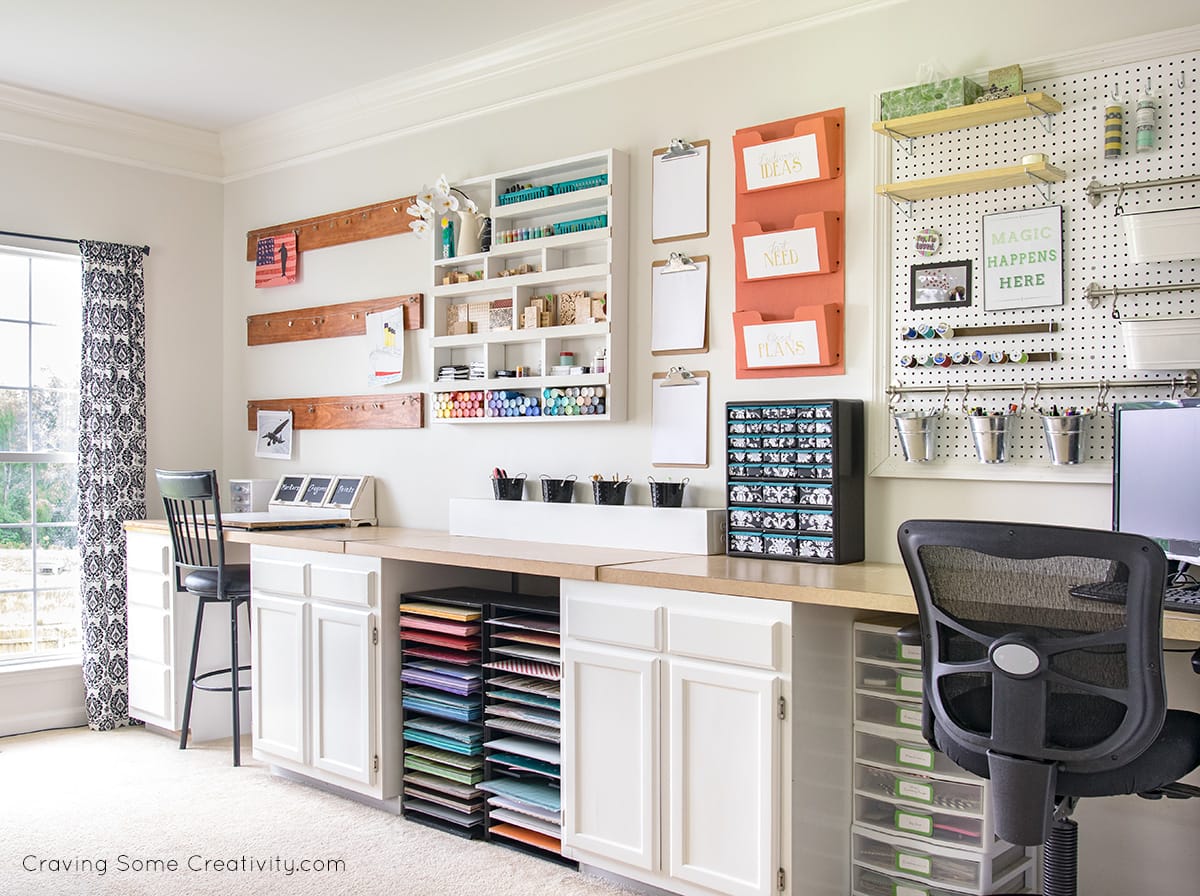
And another angle:

Obviously, this craft room makeover was no weekend project as everything in this room was either DIY transformed or custom-built. In fact, the only item purchased as is was the office chair, I think.
The main driver of my design is that I wanted an artist’s office with craft supplies on full display, not tucked away in cabinets and boxes. Because my supplies are quite colorful in themselves, I chose not to pick a specific color scheme and just use what I love. Otherwise, I kept everything mostly neutral and light to take advantage of the window light.
Craft Supply Organization
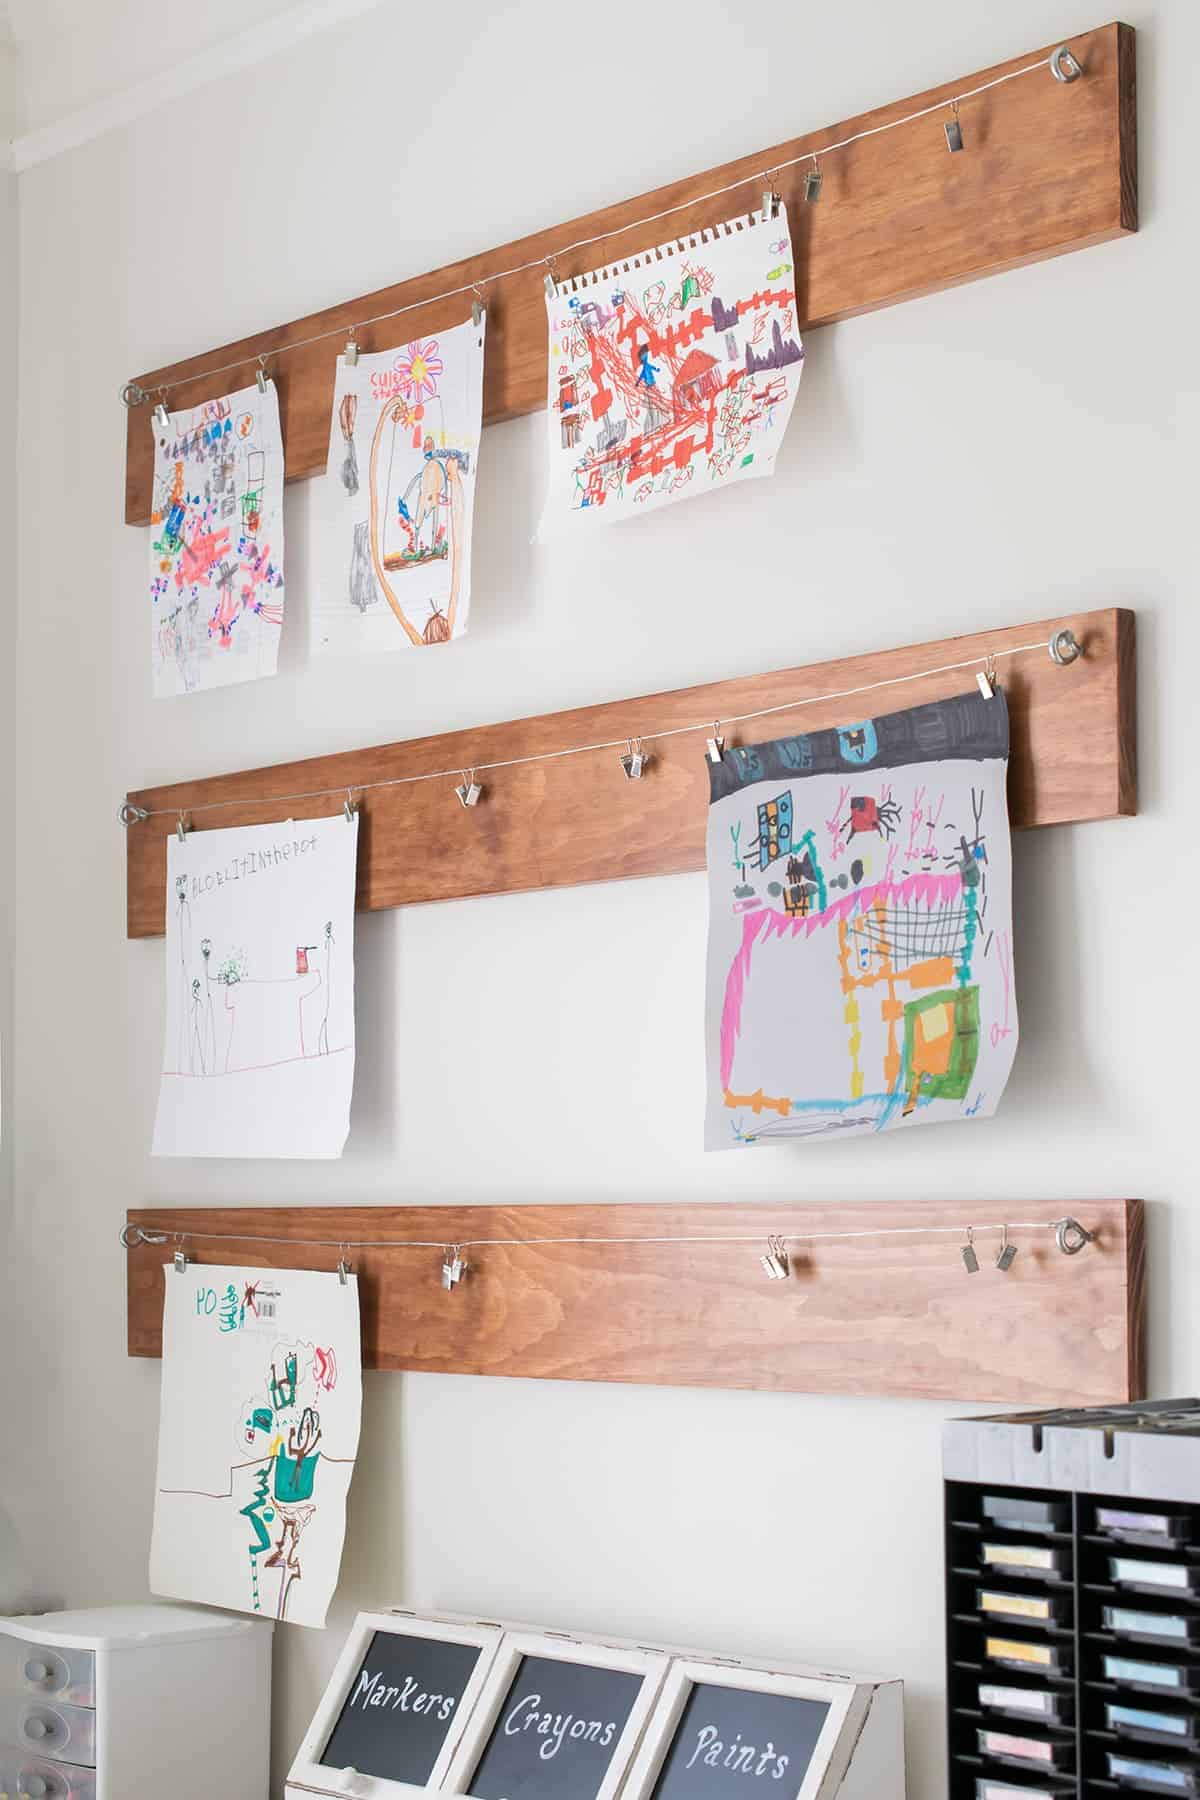
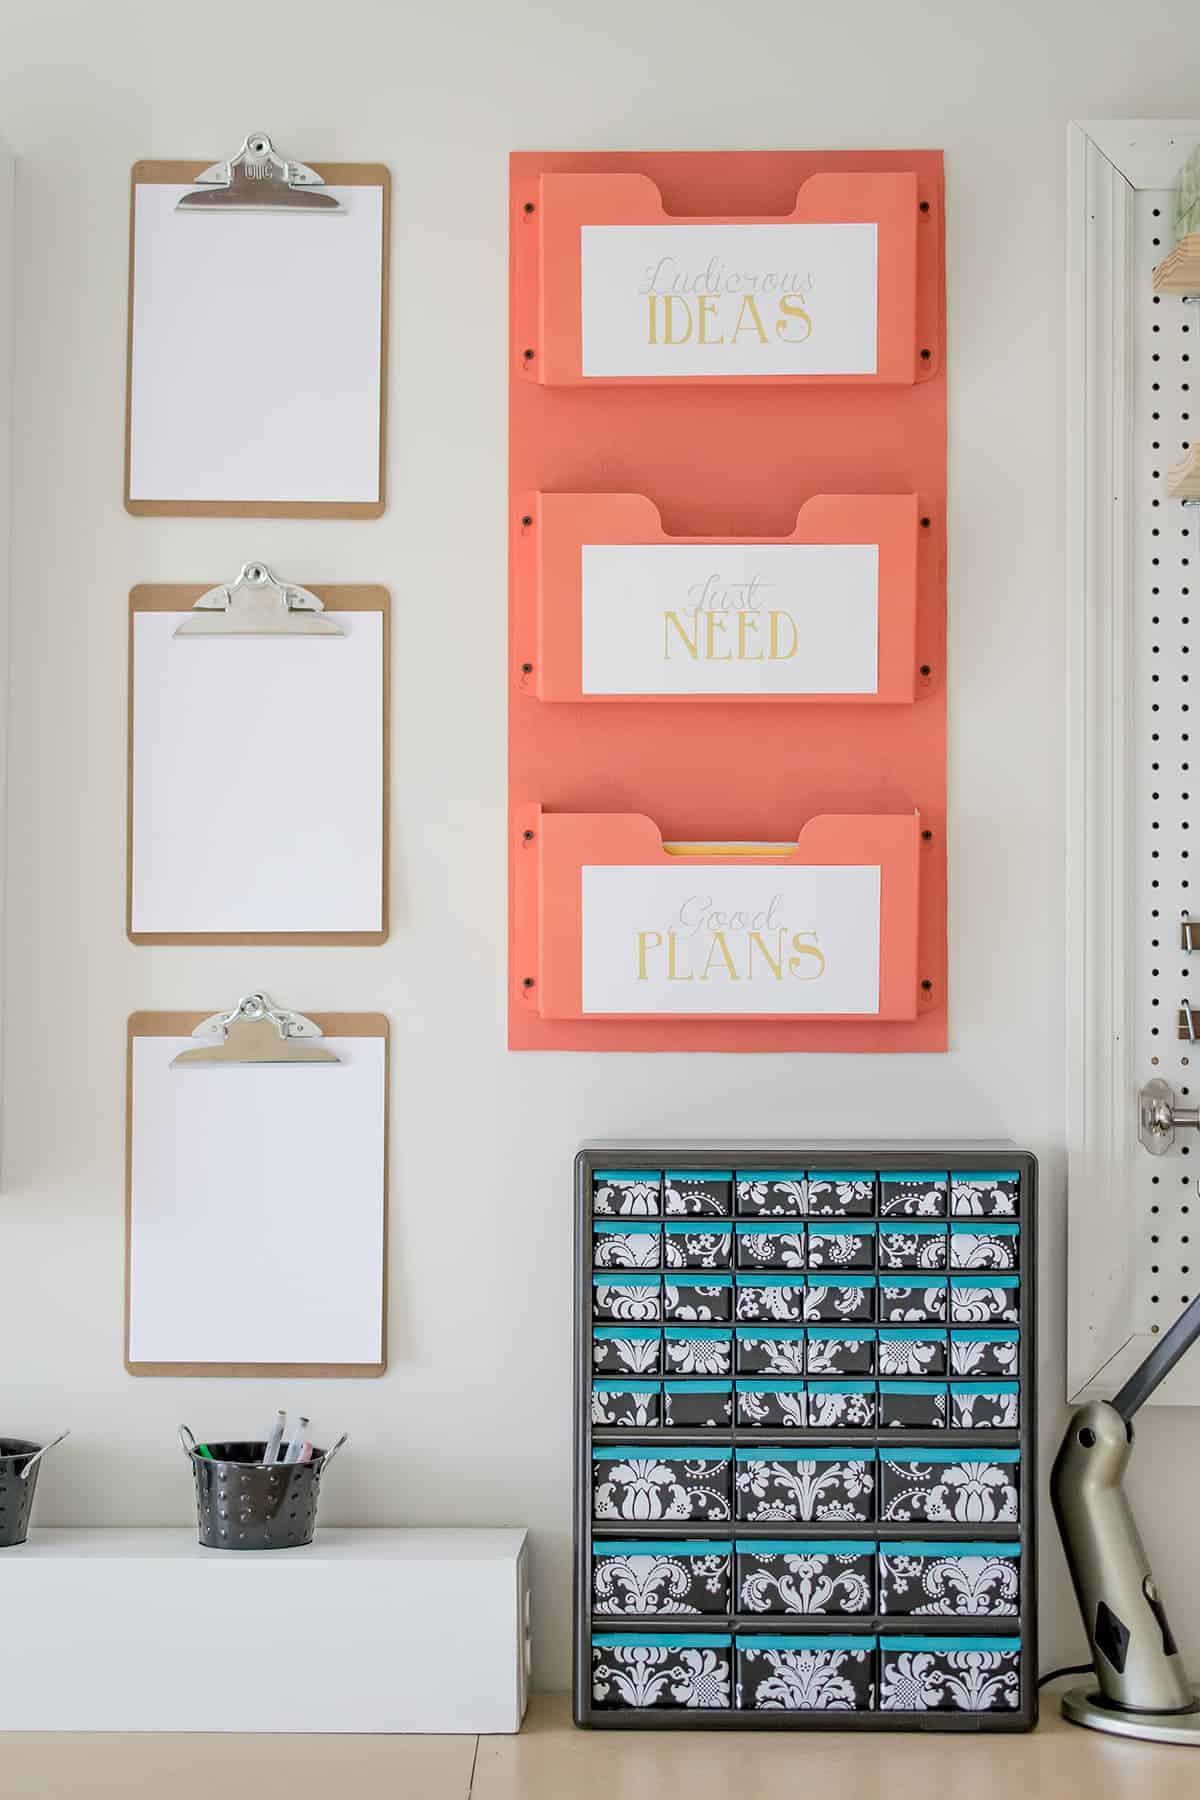
So, let’s start with all the wall organization units, shall we?! On the far corner, I made my son an art station with a gallery wall and a special space for his supplies. You can read more about how I did that on my post children’s art display.
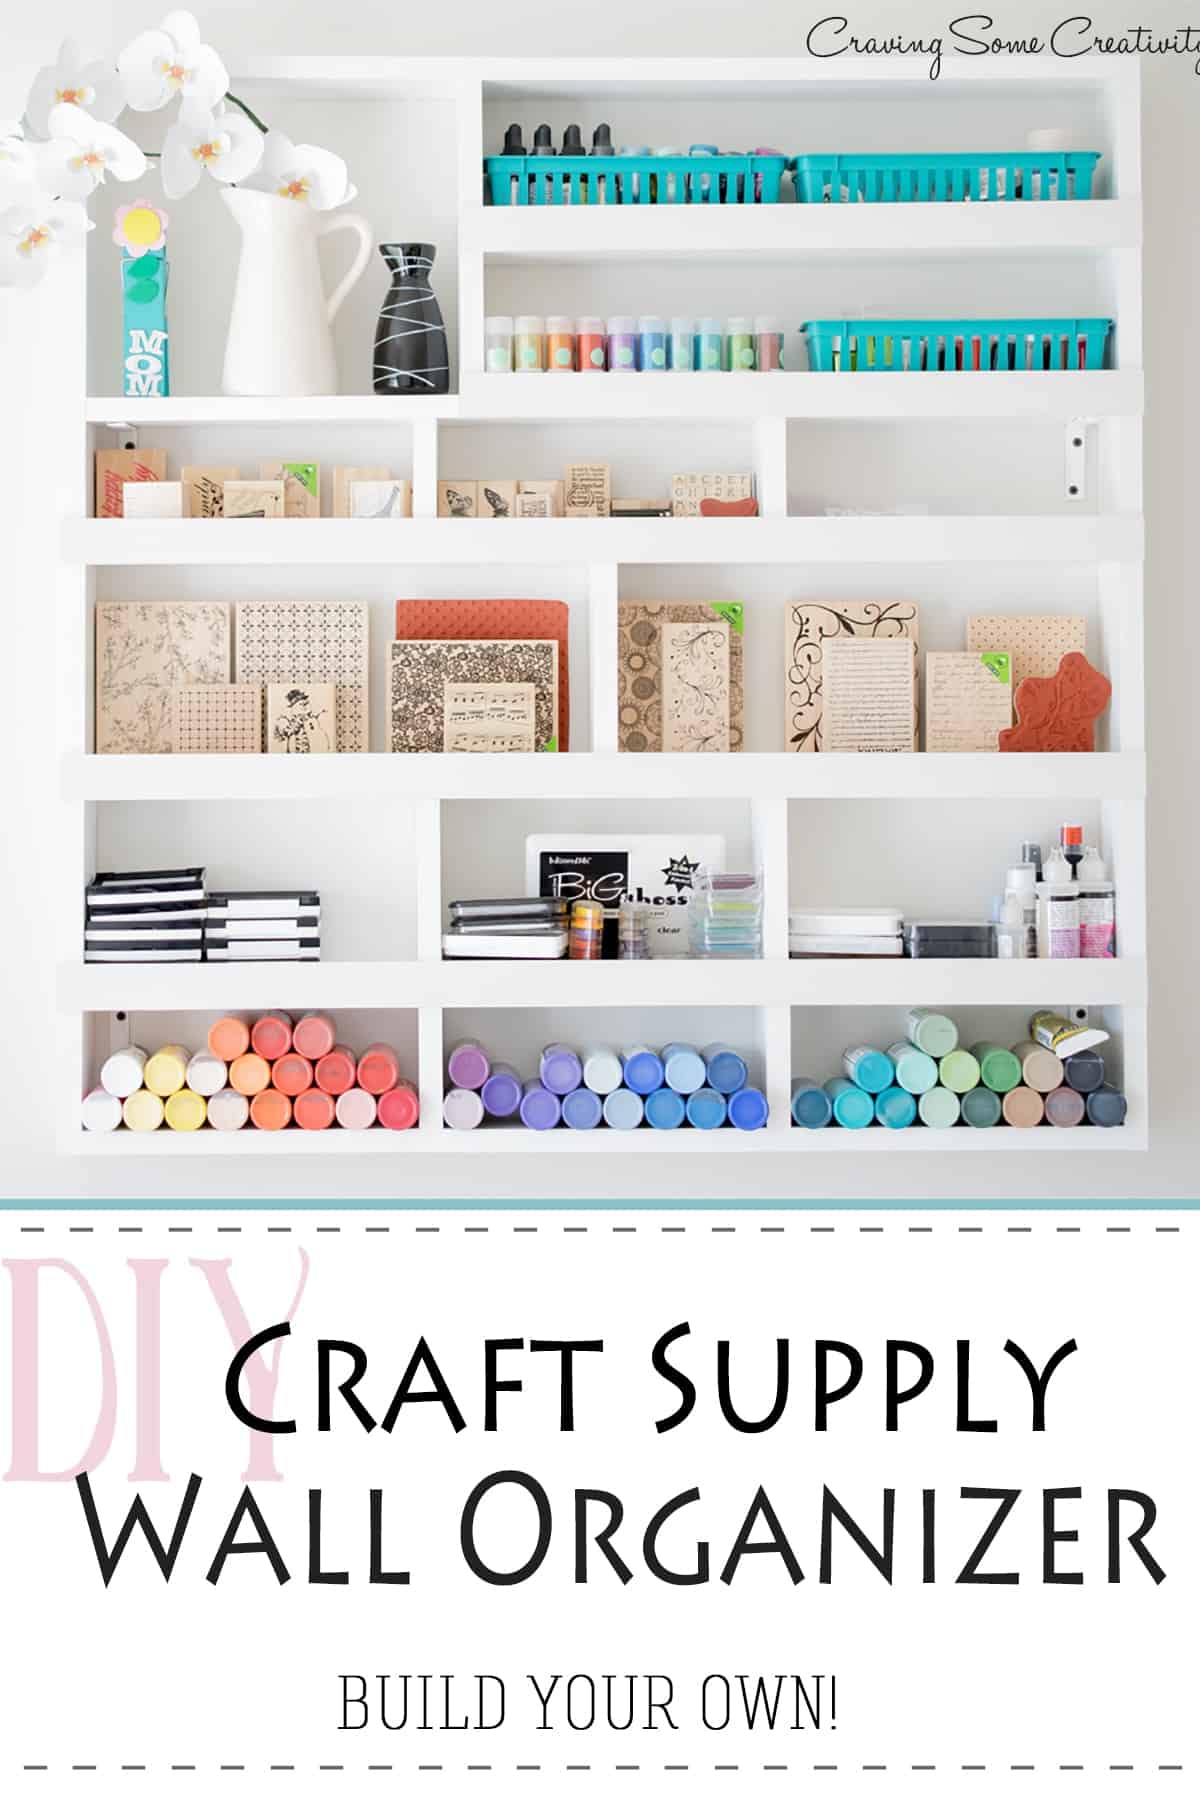
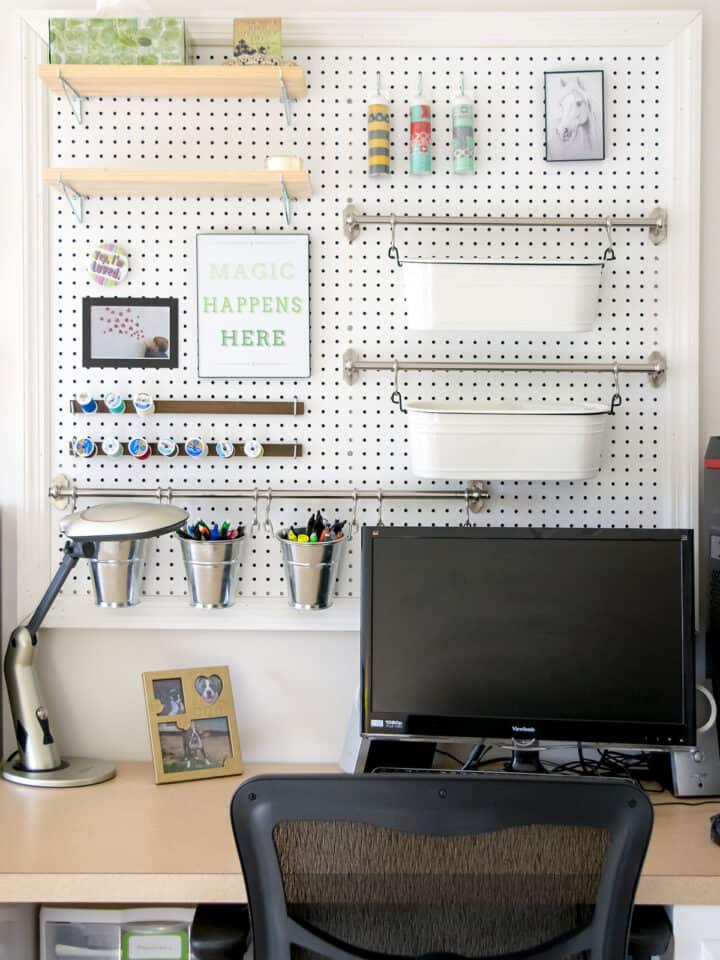
If you saw my Craft Room Inspiration post, you know that I really wanted a wall organizer for all of my craft supplies. I wanted to display my art supplies and utilize their rainbow of colors. Hubby and I designed and built this wall unit. It’s very simple and I love it! Here is the tutorial on how to build a DIY wall organization unit.
Reusing Old Items in New Ways
I included several new and old pieces to suit my needs. The black multi-drawer organizer is one I swiped from the garage and wallpapered it.
The vibrant coral sorter consists of 3 mail sorter bins and a MDF backer board, which were spray painted. I added the “Ludicrous ideas just need good plans” quote which is one I came up with at like 2am after reading 100’s of quotes by other people and finding nothing. For a DIYer, that quote “gets it”, lol.
The counter tops are recycled from our old kitchen renovation (as in free, ya’ll!).
More Craft Room Organization Ideas
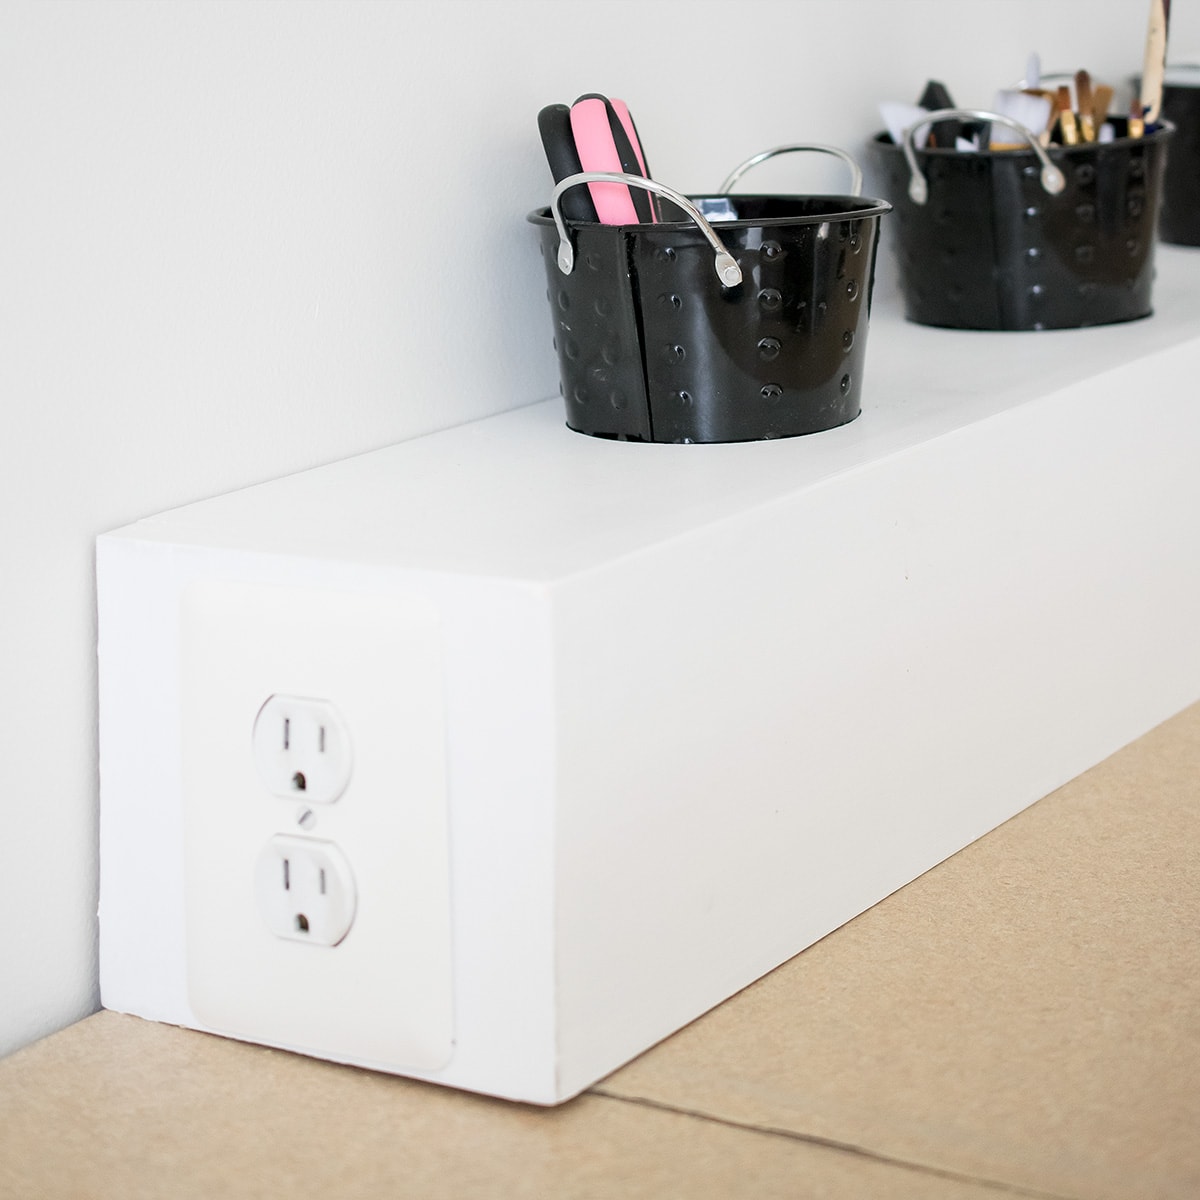
In order to get outlets on top of the desk without breaking into the wall, we built these boxes. I added some storage caddies into holes created with a large hole saw.
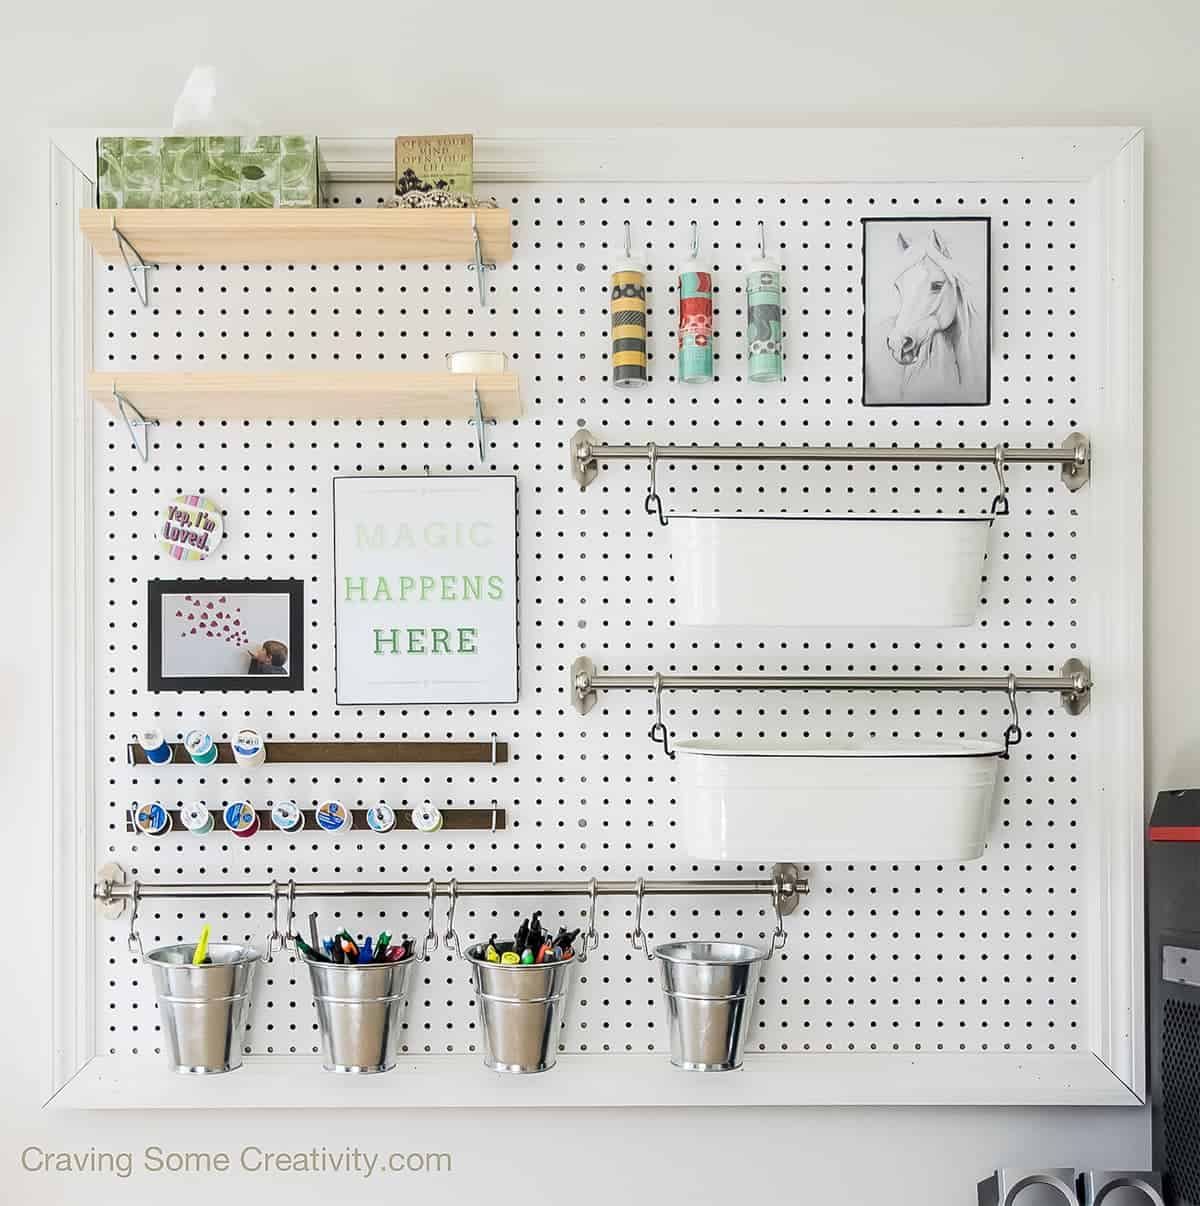
The last area is my computer area and pegboard. A pegboard was one of the first items I knew that I wanted for the room. I added some Ikea storage bins to hold my adhesives, pens, pencils and a few items that are special to me. Like most pegboards, I can rearrange the items in case I need more room to grow. If you would like to build your own, we have a full tutorial for making your own pegboard organizer.
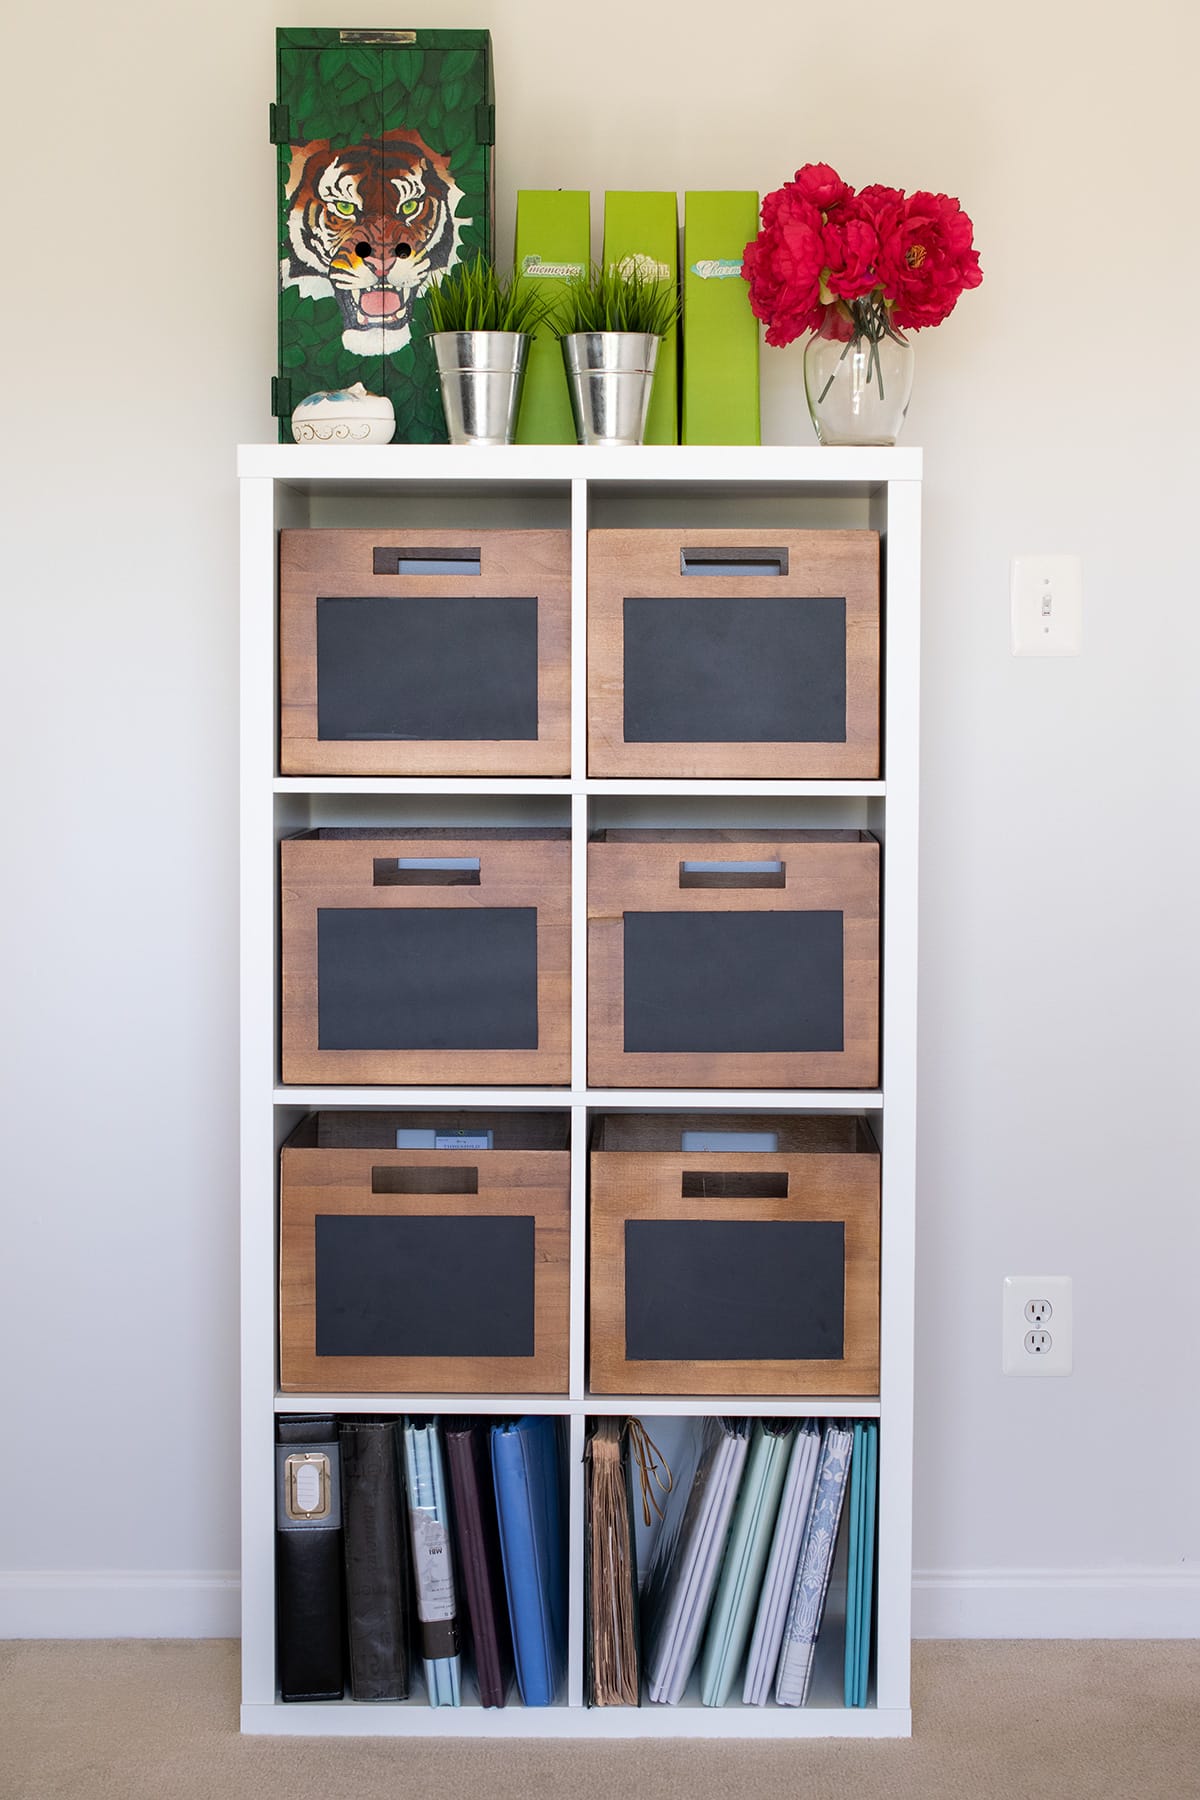
I don’t think any craft room makeover is complete without some Ikea storage. Their no frills, boxy gloriousness is perfect for storage. I put my scrapbooks on the bottom shelf and the bins hold fabric, ribbon, punches, and vinyl supplies.
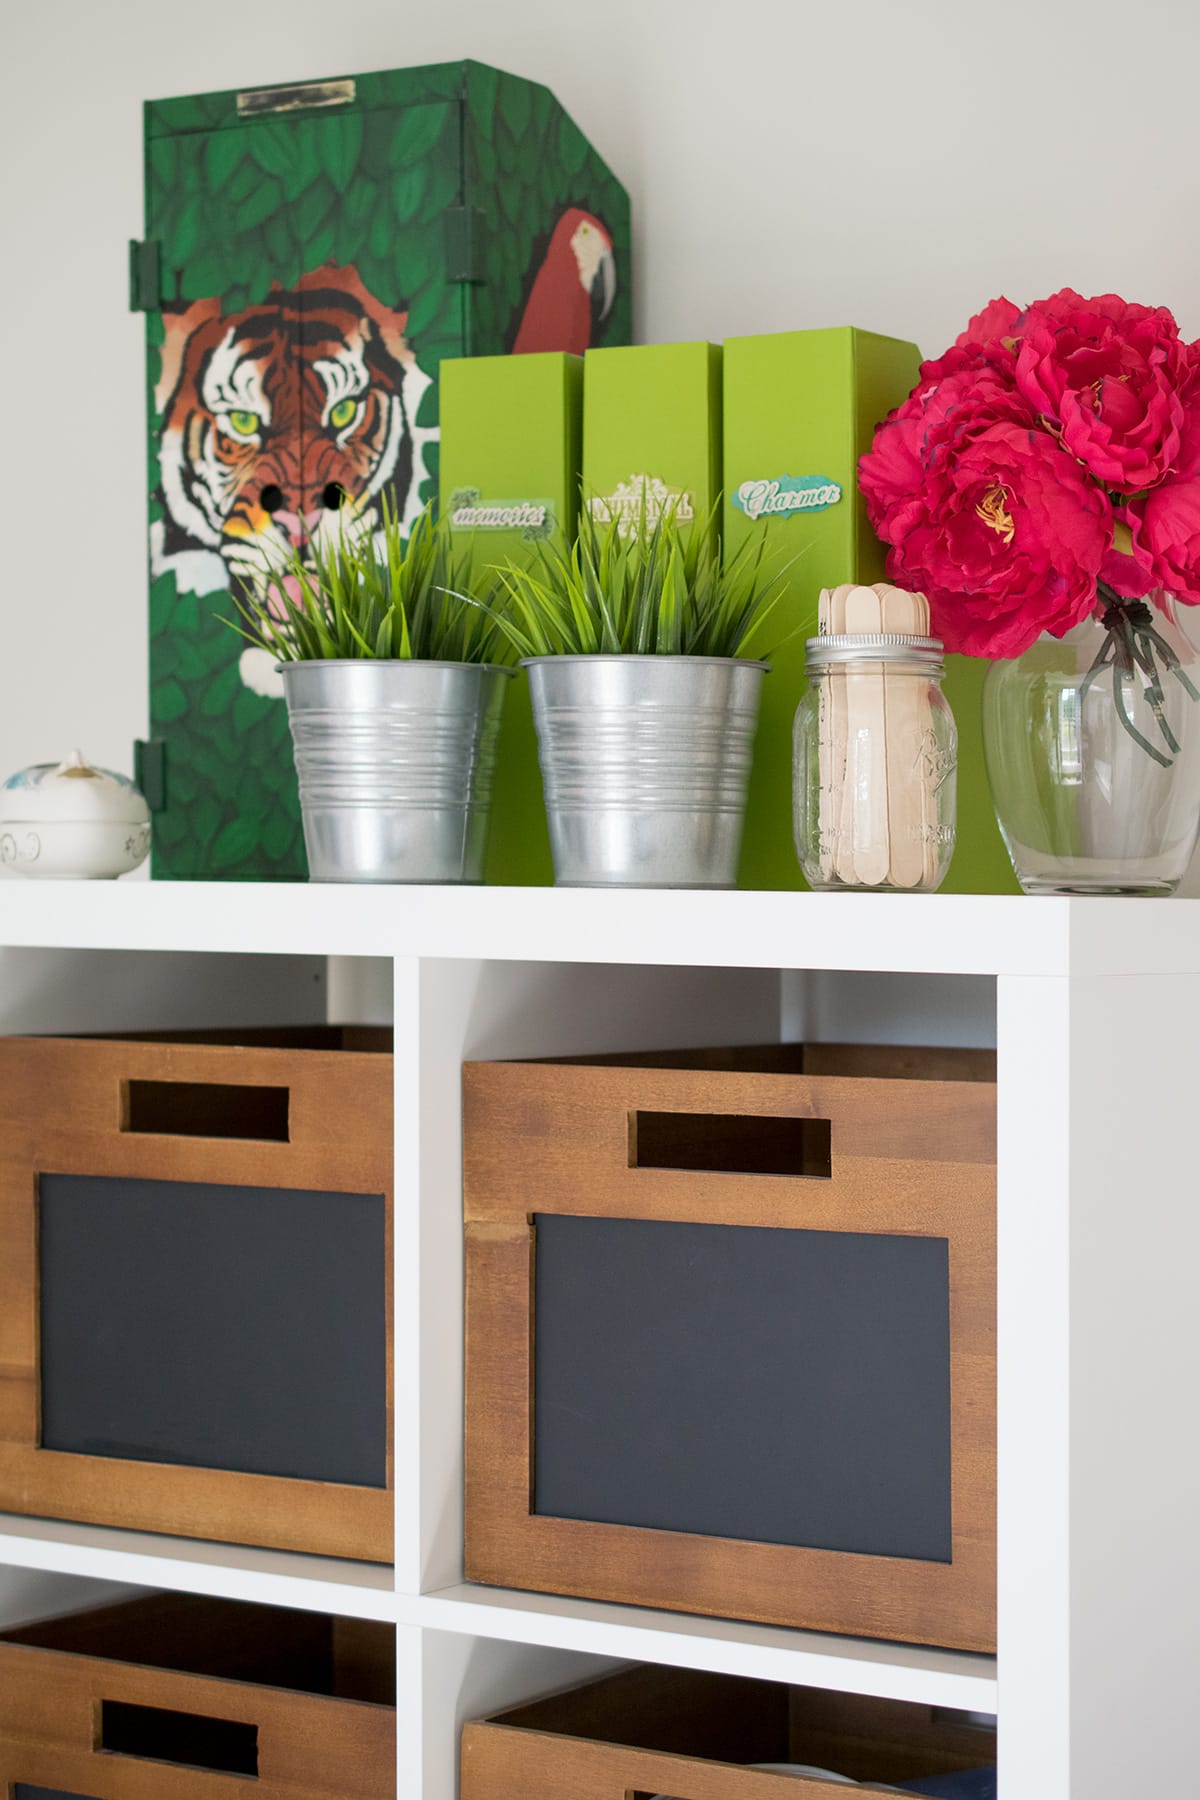
On top of the cabinet is a vignette with cherished mementos. My jungle animal cabinet began life as a Burger King dessert display case. I was really into animals growing up, especially exotic ones. While it was painted in high school, I can’t believe it has survived so long.
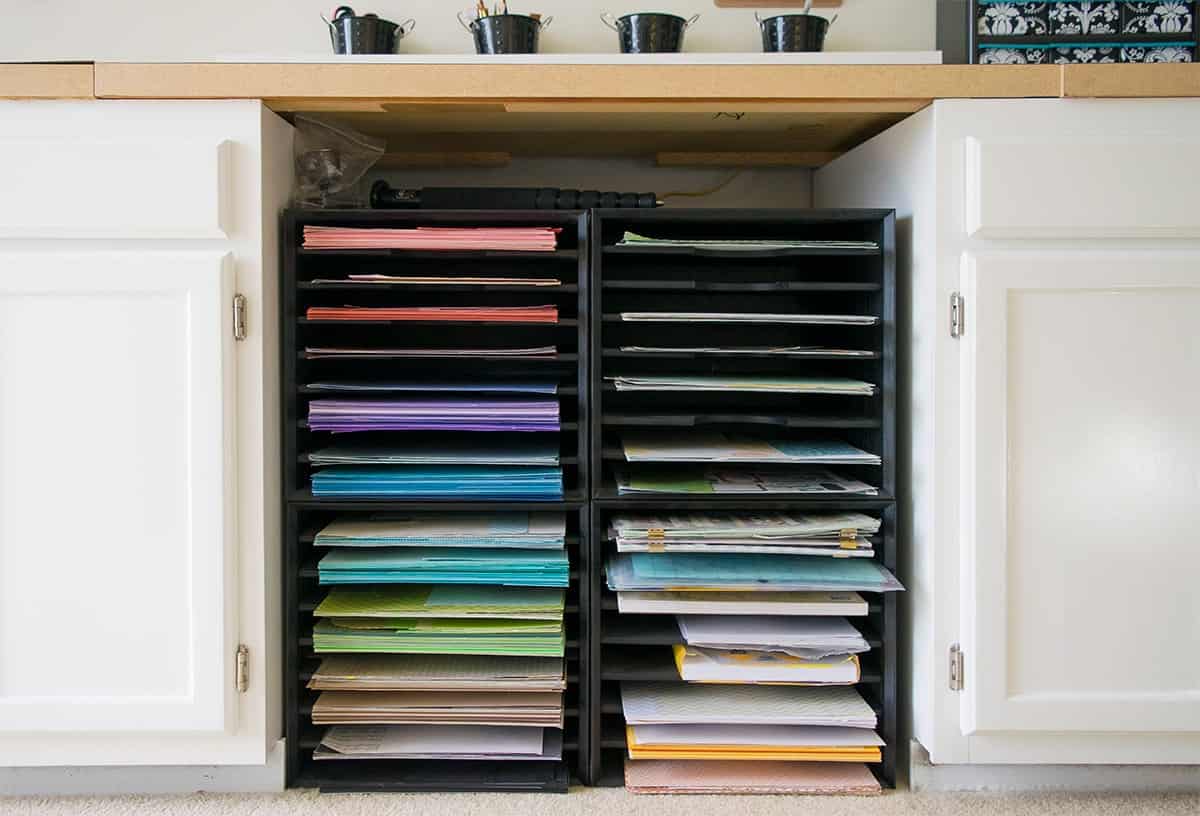
Under the desk and countertops are these paper sorters to organize cardstock and scrapbook paper. Love the rainbow!
Painted Oak Cabinets
However, the biggest DIY project was the cabinets. We found a contractor on Craigslist that did kitchen renovations and we purchased 13 oak cabinets for $325. Since I only needed four base cabinets, so the rest went to the garage for wall organization.
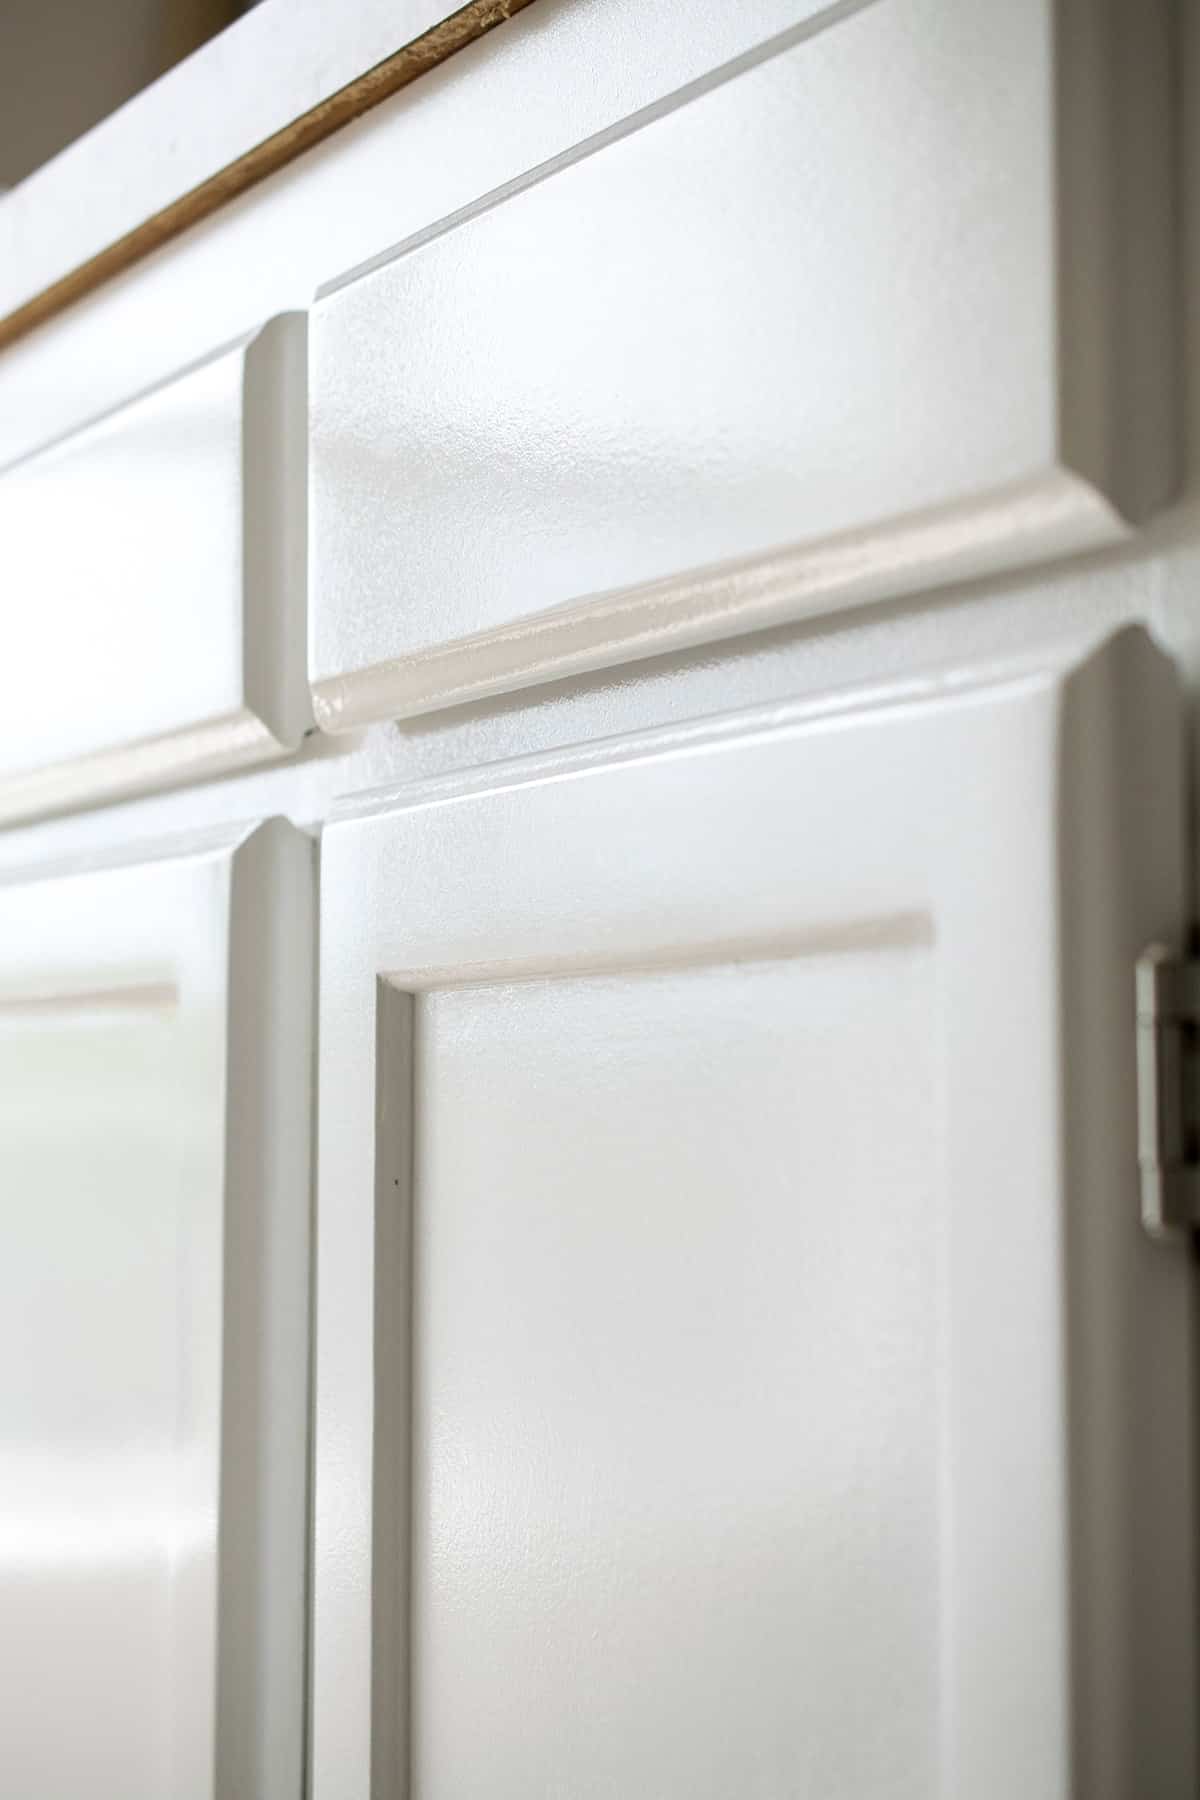
I’ve painted furniture before, but these cabinets need to be ultra-durable. With at the time a 6-year-old and his art supplies, I knew that white was really risky. I mean the kid was up at 7am every morning pretending to be the loudest ninja in history. Seriously, he is superb at explosion sound effects.
If you are interested in learning more, I have a step-by-step tutorial for how to paint oak cabinets.
Where did my inspiration for this room come from? These articles show you how:
Click here for more inspirational craft room ideas!
Craft Room Makeover Price and Source List
- Cabinets – these were a craigslist find from a kitchen renovation. We purchased 13 cabinets for $325. I only used 4 so my cost was $100.
- Paint and Stain – $125. The wall color is Valspar Asiago.
- Counter tops – FREE (recycled from our own kitchen renovation)
- Wall Organization Materials– $30 for poplar art display wood and accessories, $58 for pegboard and hanging brackets, outlet apparatus, and craft supply organizer (all custom built)
- Ikea Organization – $130 – for Kallax and pegboard organization supplies
- Wooden Crates – These are similar to mine
- Clipboards – $7
- Mail sorter and backboard – $36
- Drafting office chair – birthday gift but originally $283 (Total splurge but absolutely worth it!)
TOTAL- $591 not including the birthday chair
It’s such a dream now and I feel inspired and comfortable in my new room! I sit here typing up this post and looking around in awe. I can’t help but smile and, dare I say, beam with a little DIYer pride. What do you think? Do you have a dedicated space to craft and call your own?

Grab our free series "Weekend Home Projects that will Transform Your Life" Sign up below to receive updates including free printables, organization tips, home improvement projects, recipes and more! |
More DIY Project Ideas


PS I love seeing your creations! Be sure to take a photo and tag #cravingcreative on Instagram! You can also stay in touch with me through following me on Instagram, Pinterest, and subscribing to the newsletter!
Dawn M McElligott says
What material are the countertops you are using and did you just bracket them countertop to shelving units?
Wondering if there will be a lip where the two countertops join at seams?
what are your thoughts. Was going to do a l shaped with backsplash but really dont need all of that?
Rachel says
Those are laminate countertops we pulled from our own kitchen remodel. There are two seams, because it is actually three pieces. I used them because they were free. You don’t have to get a backsplash or a 4 inch lip if you don’t want. That will save some money. Also, if you are buying and having a laminate installed, the seam wouldn’t have a lip and it would be fairly minimal, although I find granite and quartz seems to be less. Laminate countertops are usually screwed to the cabinets. I have a post about our kitchen countertop removal that uses these particular countertops as an example.
Leeann Anderson says
Hi! I’ve noticed the ceiling trim in your craft room…it really adds a special touch. Could you tell me what molding pieces I would need for that look? I just looked at hundreds on Lowe’s site and still not sure regarding what I would need!
Rachel says
Although the craft room crown molding was already there when we bought the house, we have installed it in a few other places around the home. The molding is only two pieces – a large crown molding piece and then there is about a 5 inch gap, and then a smaller decorative cove molding piece below. It makes the crown molding look much thicker without the cost.
Lynnette says
What a great transformation!! My craft room currently looks JUST LIKE your before picture. Transforming it into a real studio is on our list of things to do the next few months. Your big reveal has inspired me to get started on my space!! Thank you for sharing!!
And Happy Creating!
~Lynnette
Rachel says
Hi Lynnette! Oh that is such a beautiful thing to say and it warms my heart. I love having a space my own that I can work on all my projects and future plans. I know that you will too! So excited for you!
intabe says
This is so amazing! I can’t believe that this is the same room 😮 and all of them are DIY transformed and custom-built 😮 The result is so awesome!
Maria says
Hi! I love your craft room! I would have liked to see how you organized those kitchen cabinets though 🙂 maybe next time! Thank you for sharing! I will be doing the same here soon but your blog really helped!
Rachel says
Thank you for your kind words and I am so happy to have helped. The organization of the cabinets isn’t really all that special. I am a big fan of categorizing items to keep them together so the cabinets are mostly organized by type of craft. For instance, one cabinet is my sewing machine and accessories. Another has my printer/silhouette cameo/vinyl and the third one is pretty much everything else (markers, a paper cutter, paper, cards, etc). Also the drawer set on the end is my son’s art area to store his supplies and small toys. The bins on the IKEA cubbies are sorted by paper punches, fabric leftovers (x2), ribbon, aerosol cans, and glue gun/corded tools and accessories. Good luck with your project! I am sure you will be very happy; I know I am!
Linda Moore says
Re: PAPER SORTER
First, and most important, I really enjoyed your article. I’m looking forward to reading more of them. Your craft room is lovely.
One of my biggest challenges is paper storage. Does your paper sorter hold 12×12 paper? That’s a requirement for me.
🙂
Rachel says
Hi Linda! I know your pain with finding paper sorters that will fit 12×12 paper. The black one that I linked to is the closest I could find to my own and measures 13 wide, 9 1/2 front to back, and the top to the bottom is 10 7/8 inch. So they will fit 12×12 but there is some overhang, which I also have in mine. That doesn’t bother me, but if you are looking for a true 12×12, there are these desktop stackable paper sorters in clear
Linda Moore says
Thank you! Thank you! Thank you! It helps immensely. We moved two years ago and I was supposed to have my own scrapping room. Suffice it to say, it hasn’t quite worked out that way – children have moved out, moved back home with children, and moved out again. Now my room is empty again and in a moment of clarity, I realized I have enough “stuff” to fill a small store! Hmmmmm, I wonder how that happened? The problem? I don’t know where to start. I feel like I’m simply moving really cool things from one place to another and not solving the problem. Do you have any suggestions? Just now, my husband very sweetly said, “You DO know you still have four containers in the shed, don’t you?” As an FYI, said containers are the size you can fit a dead body into. Someday I’ll have a room as beautiful as yours, but first I’m going to work on having a place for everything.
Carol says
Absolutely love your crafting space! You mentioned you didn’t want anything behind doors and yet all looks so neat and tidy. I’ve been looking for ideas on how to fix my craft room because it can be seen from the living room and needs to be pretty and tidy. Do yo mind telling me the dimensions of your room? Thank you and again congrats you did a great job.
Rachel says
Awww, thank you so much! Actually, keeping my craft supplies on display like I did had a good side effect that I keep it more tidy. It makes makes it easy for me to put away fast and find it again. I used to be terrible about putting anything away until I was completely done with it. The room is really long and narrow. The dimensions are about 16’x9′ and my husband’s office is actually on the opposite wall of the same room.
mom2210s says
Very nice job! I am in the process of creating my craft room and found yours on Pinterest. It is lovely! I agree with you about the peg board. Definitely going to have one in mine too.