Learn how to paint strips on a wall, whether they be horizontal stripes or vertical stripes, with the right tools. It doesn’t matter if you are a beginner or never drawn a perfectly straight line in your life!

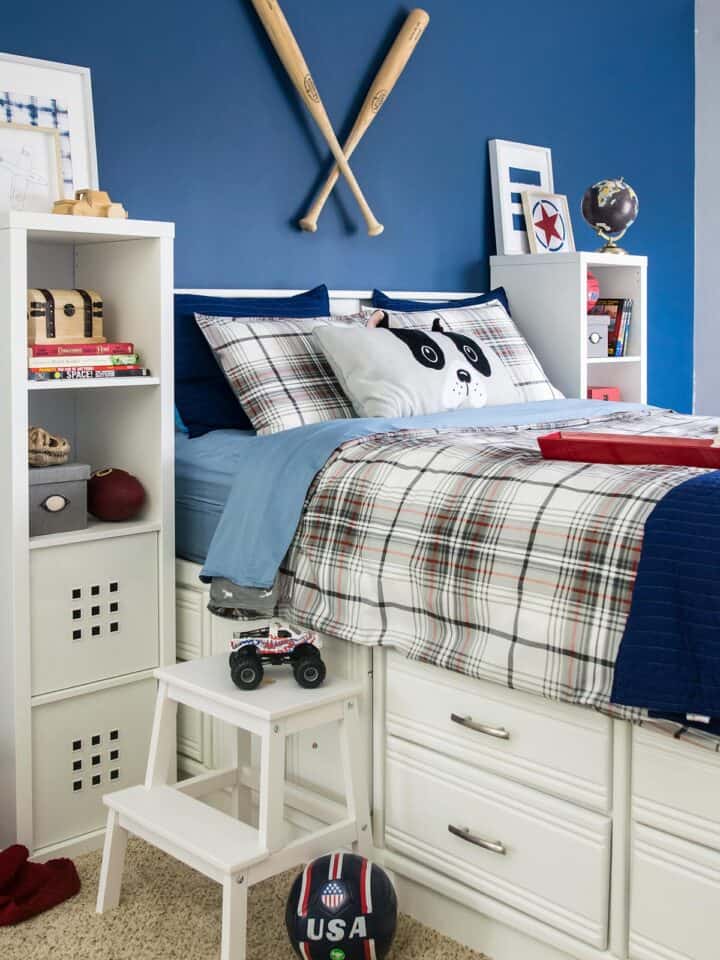
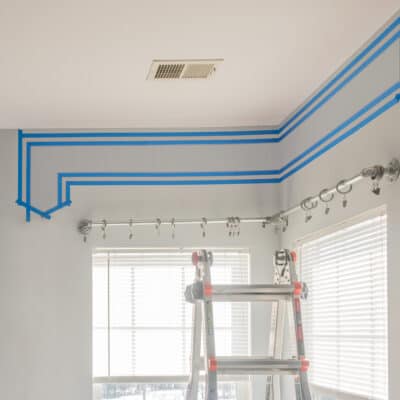
Few motifs have as many possibilities as the classic stripe, so it seemed a like a natural fit for our son’s bedroom makeover. This bold racecar-style stripe adds a splash of color that isn’t tied into a specific theme.
We’ve completed hundreds of painting DIY projects over the years, from mudding walls to bedroom accent walls, and my short-lived stencil wall. Whether painting thick or thin stripes in vertical or horizontal lines, this is a foolproof project for any skill level. Use these same techniques for edging ceilings, accent walls, or mosaic designs.
Recommended Supplies
The right tools will make or break painting stripes on a wall perfectly, especially when it comes to crisp edges. Here are my product recommendations for a professional finish:
- 1-inch-wide Painter’s Tape – Green Frog Tape or Scotch Blue Ultra Sharp Lines
- Paint
- Paint brush, foam roller, or other roller that applies thin coats.
- A four-foot Level or Laser Level
- Pencil
- Measuring tape
- Hanging Strips Optional, this was for our design.
- Cardboard hollow Letters Optional, this was just for our design.
Which Painter’s Tape for Crisp Lines?
Painter’s tape has improved a lot in the last few years. While Green Frog Tape is still highly recommended, Scotch Blue has improved their Ultra Sharp Tape and Sharp Tape lines. In our real-world tests, they’re almost imperceptible in the ability to make crisp lines.
Frog tape prevents bleeding slightly better than the Sharp, but the Ultra Sharp releases better with less chipping or tearing, specifically when working with Satin or high gloss paint. I highly advise against using Scotch Blue Original or any kind of plasticky hard tape.
Pointers for Perfect Straight Lines
Did you know that walls aren’t straight? Even if the drywall is hung perfectly, the mudding in the corners is never flawless. In fact, it’s quite common to find large dips or bumps within long stretches of wall. Follow these key steps to overcome any existing imperfections.
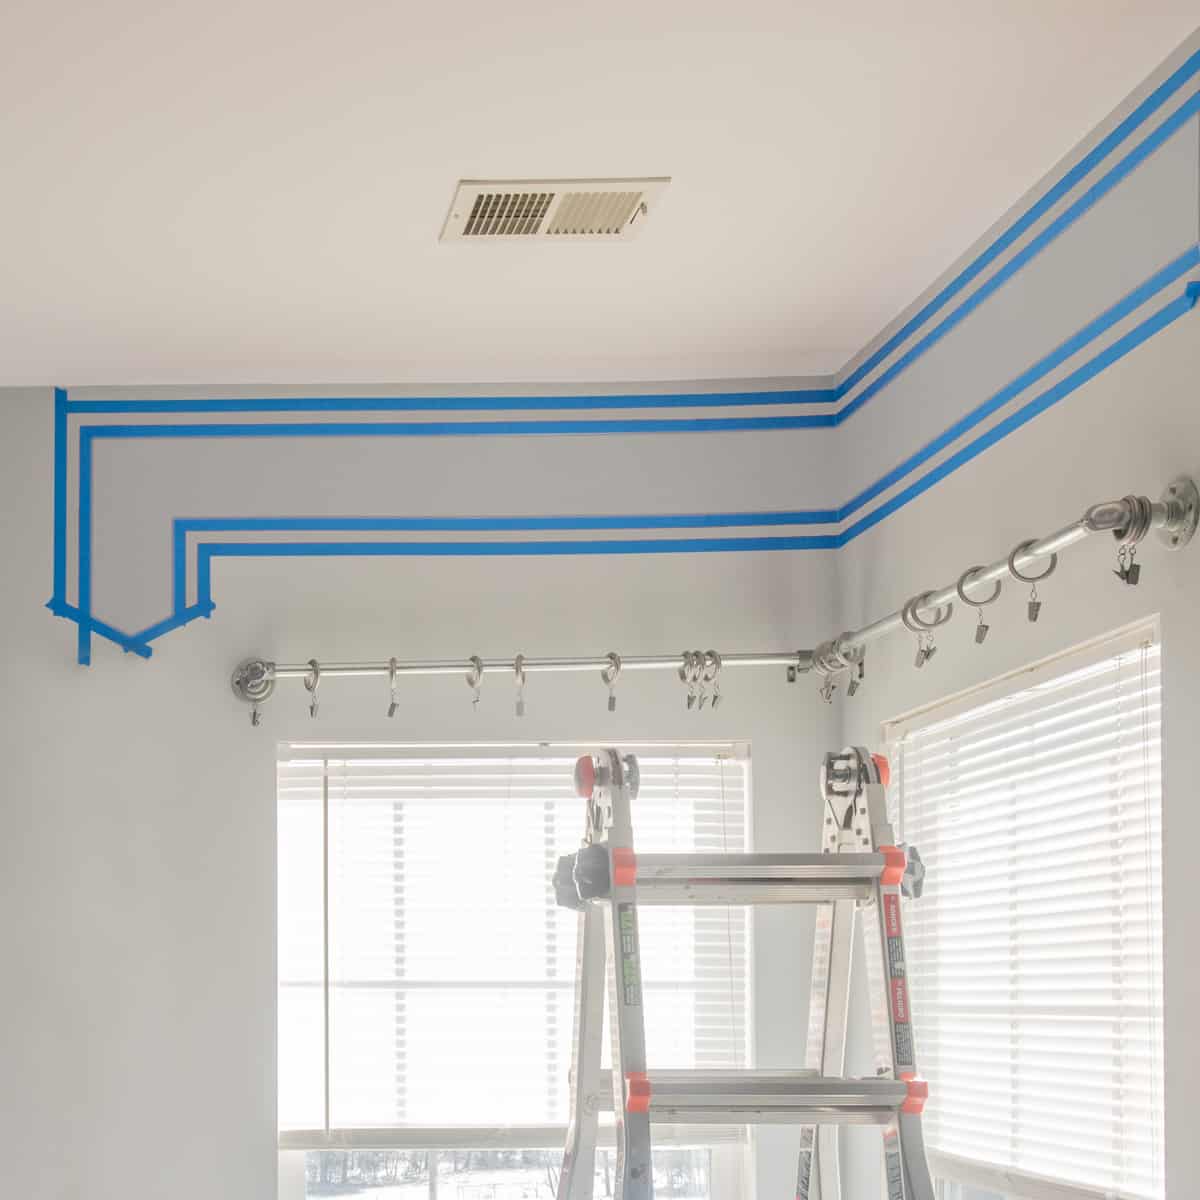
- Paint the entire wall with the lighter shade. You can tape off after it dries and there won’t be any painted areas missed.
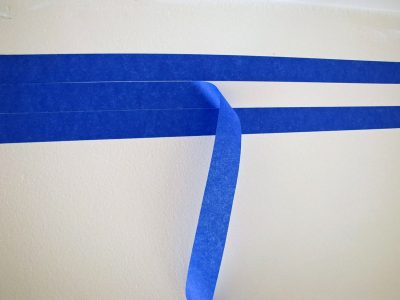
- Save time measuring and space the lines with a 1-inch strip of tape. Peel the middle strip off for perfectly even stripes.
- Use long sections. Tack 24+ inches at a time in place and then smooth over. This results in even lines that appear visually straighter than shorter lengths.
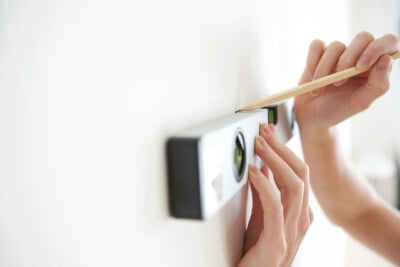
- Use a laser level to position stripes and mark with a pencil line. Use a colored pencil if you‘re painting a dark color!
- Once you’ve drawn the lines, step back for distance perspective to check your placement.
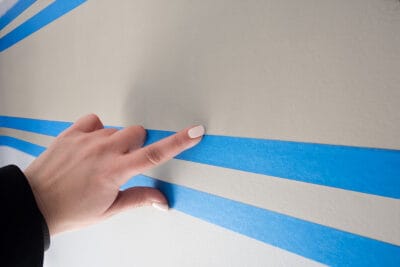
- Burnish the edges. Just before painting, run your finger along the edge so that paint won’t seep below the edges. This is extremely important for textured walls and no-fail crisp lines.

More Taping Tips
- Overlap new sections. If you have to use more than one piece of tape for a single line, overlap the sections by about an inch and line up the edges.
- Apply thin coats of paint with a small foam roller or a paintbrush. Moisture from thick coats can cause paper tape to release prematurely or buckle. Apply a second coat rather than a heavy first layer for a professional result.
- Pull the tape when the paint is still fully wet for a crisp paint line. If the paint does dry or become tacky, especially Satin or High Gloss sheens, let it dry for several hours before pulling. Paint that dries on top but wet underneath is more likely to pull away.
- If you used more than 1 piece of tape to make a line, pull from where you first taped. That way you pull the overlapped sections without having to restart.
- Have a sharp razor blade handy. Sometimes that tape will tear rather than release. A sharp razor or box knife will help you pry up even the smallest tid bit.
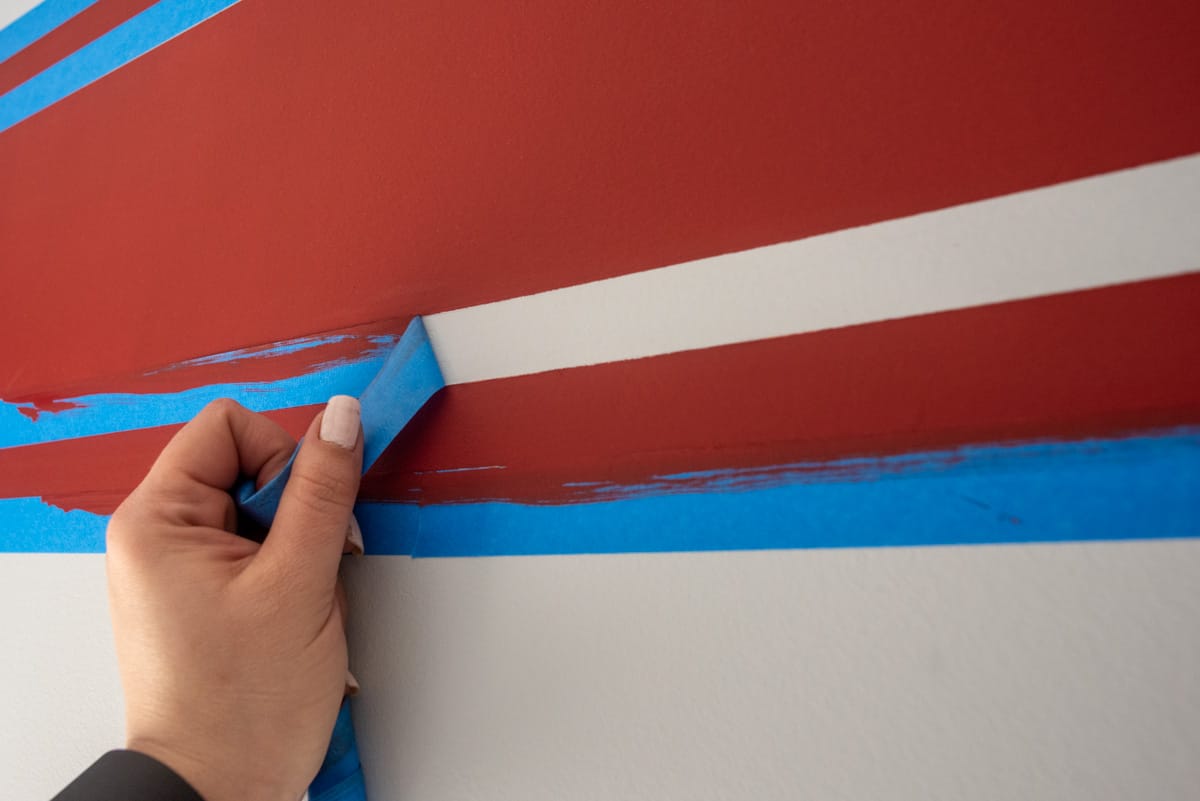
Pro Tip: If your wall is heavily textured, you may find it best to paint the existing color over the tape, allow that to dry, and then paint the accent color. This technique allows for any bleed areas to get filled in.
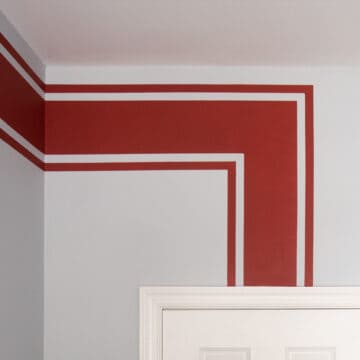
Our Project Results
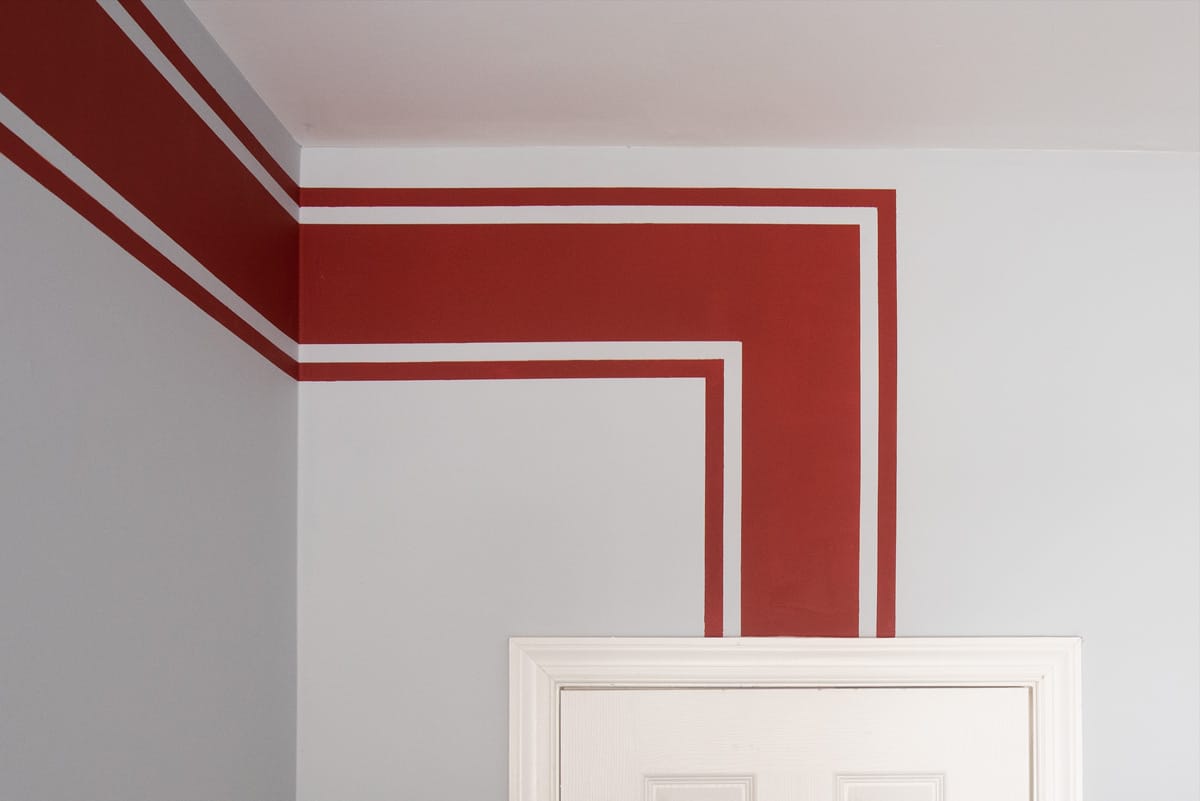
Look at that! Clean, crisp lines. To create these vertical lines, I used a level to draw a straight line perpendicular to the ceiling.
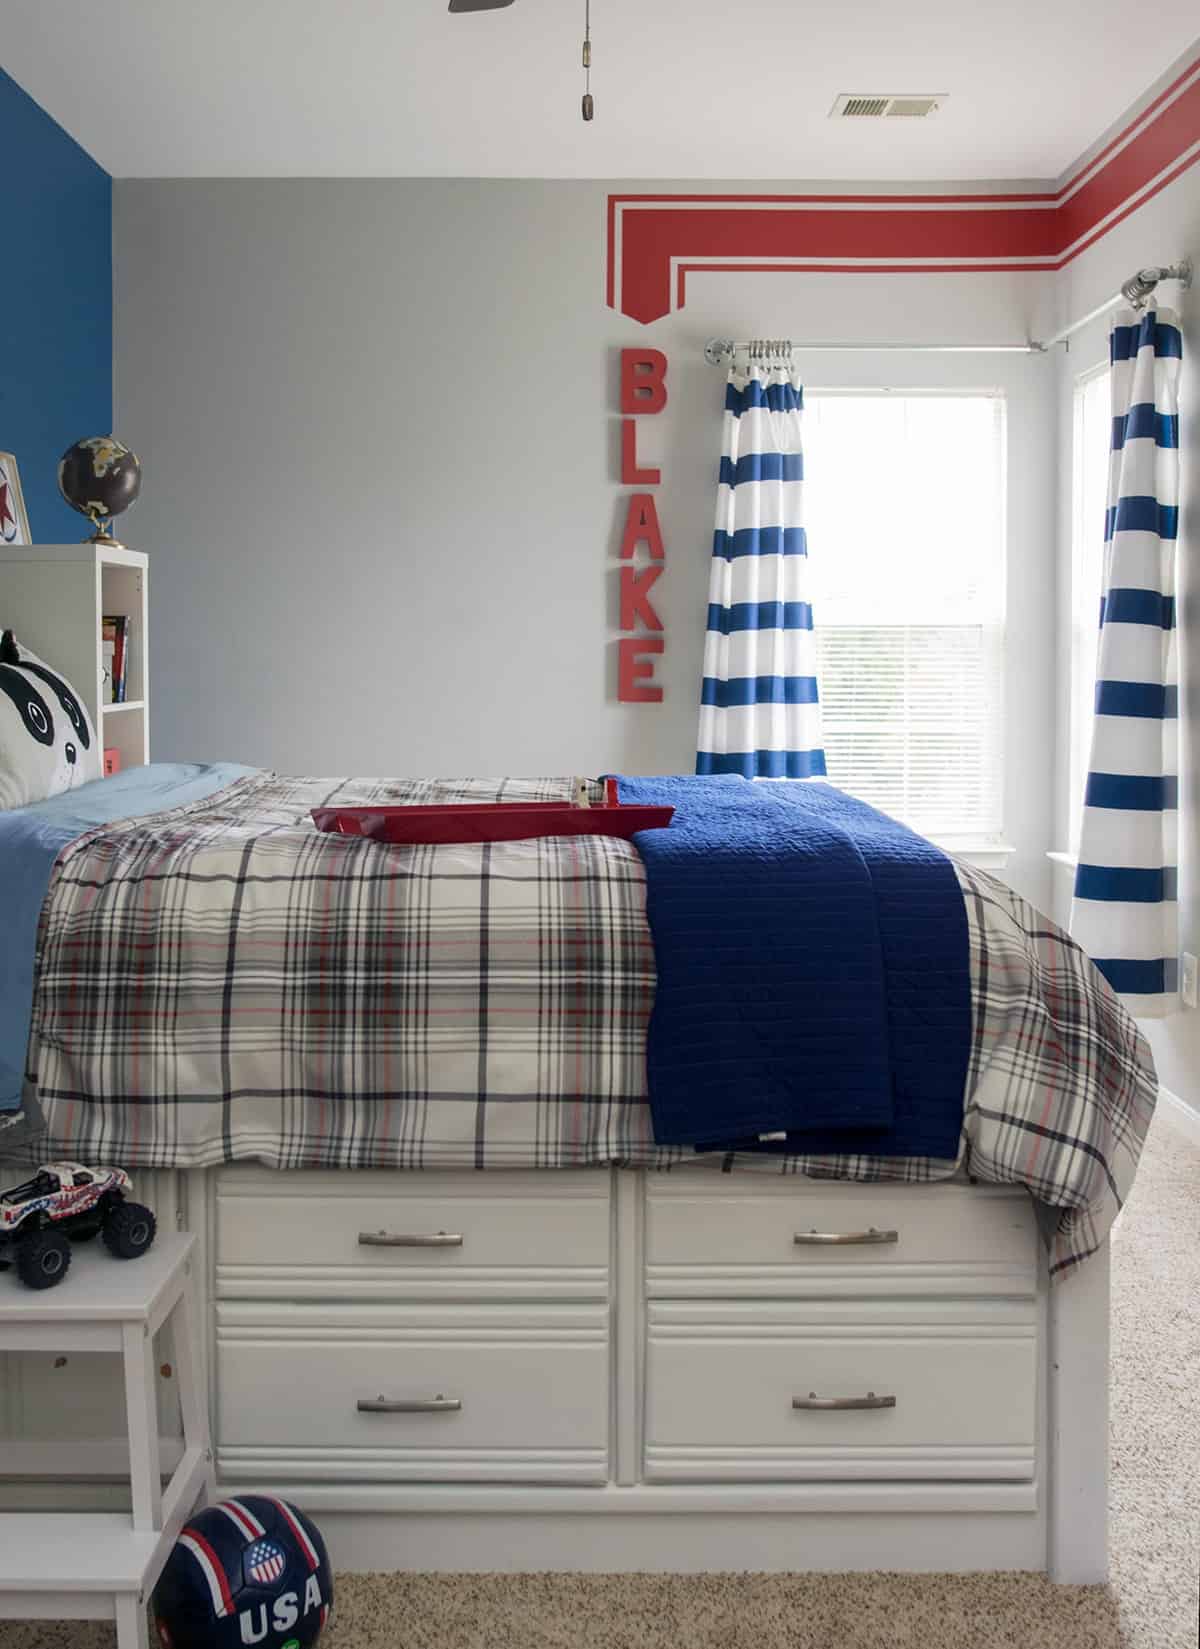
As a finishing touch, I painted cardboard letters with the same red paint and hung them near the stripe’s edge. I love how this room turned out. I admit, I felt a bit skeptical once I painted the first set of outside lines. Had I gone too bold?
At the gentle insistence of my hubby, I plowed ahead and (cough, cough) he was right. Just goes to prove that sometimes all you need is a bit of perspective…and maybe we don’t always know best. (I won’t tell if you won’t).
FAQs
While green Frog Tape is still highly recommended, Scotch Blue has improved their Ultra Sharp Tape and Sharp Tape lines. In our real-world tests, they are almost imperceptible in the ability to make crisp lines. Frog tape prevents bleeding a tiny bit better than Scotch, but the Ultra Sharp releases better with less chipping or tearing.
The width of stripes is completely up to you, but most commonly between 4-12 inches wide. You can also vary the width between the two colors (1-inch-wide accent stripe followed by 12-inch base for example) for a unique look.
If your stripes are evenly spaced, measure the wall (width for vertical, height for horizontal), and divide the measurement by your stripe width. If your stripes are not evenly spaced, divide the wall measurement by the measurement of both stripes. This will give you how many stripe sections you will have.
There are two reasons paint will pull off with tape: the paint under the tape did not fully dry, or the paint wasn’t well bonded to the wall. Fresh paint under seven days old is often not dry all the way through. Lower quality paints are more likely to pull away. Another common mistake is not priming a surface, particularly if you patch with spackle or mud a corner. These must be primed and paint + primer does not count.

Grab our free series "Weekend Home Projects that will Transform Your Life" Sign up below to receive updates including free printables, organization tips, home improvement projects, recipes and more! |
More Boys’ Bedroom Ideas

PS I love seeing your creations! Be sure to take a photo and tag #cravingcreative on Instagram! You can also stay in touch with me through following me on Instagram, Pinterest, and subscribing to the newsletter!
How To Paint Wall Stripes
Tools
- Paint Brush
- Foam Roller
- Handi Pail optional
Supplies
- Painter's Tape *See Note for Brands
- Paint
Instructions
- Paint your base coat. This should either be the main color or the lightest and flattest color. For instance, if you are painting a flat color and a satin, paint the flat first all over the wall. Paint should dry at least a few days, but 7+ is optimal especially for high gloss or cheap paints.

- Mark your Lines. Mark Your Lines with Pencil. I highly recommend a laser level, mark with pencil with a steady hand. If you don't have one, measure down from the ceiling for horizontal lines and use a level to remove any noticeable dips or bows. For vertical lines, a level is a great tool.

- Tape along the outside lines. Work in long sections, at least 18 inches, to get visually straight lines. If your lines have corners, use scissors to cut the corners rather than tearing.

- Paint the accent color. Make sure to burnish edges just before painting to eliminate bleed through. Use a brush or foam roller to add thin coats.
- Remove the tape. For satin or high gloss paints, don't remove while the paint is tacky. This makes the paint more likely to stretch and ruin the crisp line. Pull the tape back on itself, at an angle away from the line, and gently pull. Use a razor knife or box cutters to release the tape from trouble spots.
- Allow to Dry. You can touch up any areas needed after the paint is entirely dry.


ANG says
That looks so cool! Thanks for sharing this at Cook it! Craft it! Share it! (I pinned this to the party board) I can’t wait to see what you link up this week!
Ang
Shanice says
Looks great! I would love it if you joined and contribute your awesome posts at my link party at City of Creative Dreams , starts on Fridays 😀 Hope to see you there at City of Creative Dreams Link Party.
Pam@over50feeling40 says
Such a great idea! Thanks for sharing on the Thursday Blog Hop how to do this!
Jess says
OH my gosh! This is SUCH a neat idea!
Thanks again for joining the Link Up this week!
Rebeccafaith says
It looks SOOOO GOOD. Geeze, I want this to be my room! Wait, now I want to see YOUR room. My husband is always right and it’s soo annoying. Especially because I always challenge him and then he turns out to be right, you’d think I’d learn by now. How is it possible he’s right 99% of the time? Grrr.
Rachel says
Honestly, our room will probably be last. I haven’t decided quite how I want to go with it and still use everything we already have. Husbands, lol. Gotta love them! But they were right about one thing: choosing us, right?! haha
Rebeccafaith says
Oh that’s too good! I always forget to pop my collar and throw that one out there lol
Amanda (Moming About) says
I absolutely love this! I have never taken the tape off while paint is still wet. I need to try that. What do you do if you’re doing two coats?
Rachel says
I find that removing the tape while still tacky or wet prevents tearing or chipping of the paint and you get a smoother edge. You can do it while dry if careful. I was standing on the ground while removing the tape so I was anything but careful. Because of the brightness with this, I did two coats as well. I did half of the design and then put the second coat immediately on it before removing the tape. Constantly moving the ladder was the most arduous thing about this design. Thanks for stopping by!
Amanda (Moming About) says
Oh my. I hate painting when it requires lots of ladder moving. It is very tiresome!
Jhanis says
Love it! Lovingly personlized! I just hope I can pull this off for my kids’ playroom! I’m so bad when it comes to paints!
Natasha Rodriguez Mom 2 5321 says
Very COOL! I LOVE IT!! PINNING FOR LATER!! 🙂
Marilyn Lesniak says
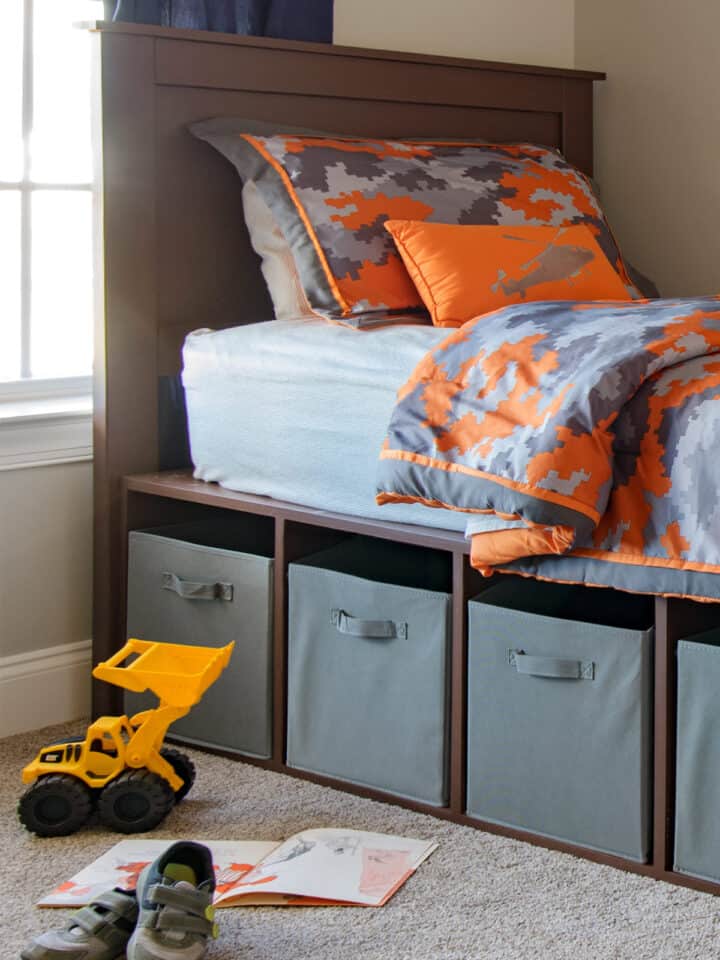
I love that the stripes don’t run the full height of the room. And orange is a nice uplifting warm color. Someday I will admit what my 11 year old wanted. I gave him full reign as he always got the “baby” room being the youngest. Thx for bring this to MM!
Simple nature decor says
The room looks so good and very smart looking.. I love frogs tape.. Use it all the time.. Thanks for coming to my party..
Maria
Leslie says
I love it, it looks great. I also love command hooks or anything command. It makes it so easy to decorate. I hope he likes his room.
Rachel says
We just got his bed in this weekend. And yes he loves it! The projects I have planned for his room are so fun and all boy!