Spruce up any interior or exterior space with a stone veneer installation. Add timeless elegance and an instant wow factor to your home, without wrecking your budget. Follow our comprehensive guide for choosing your materials, installation how-to’s, and before and after project pics.
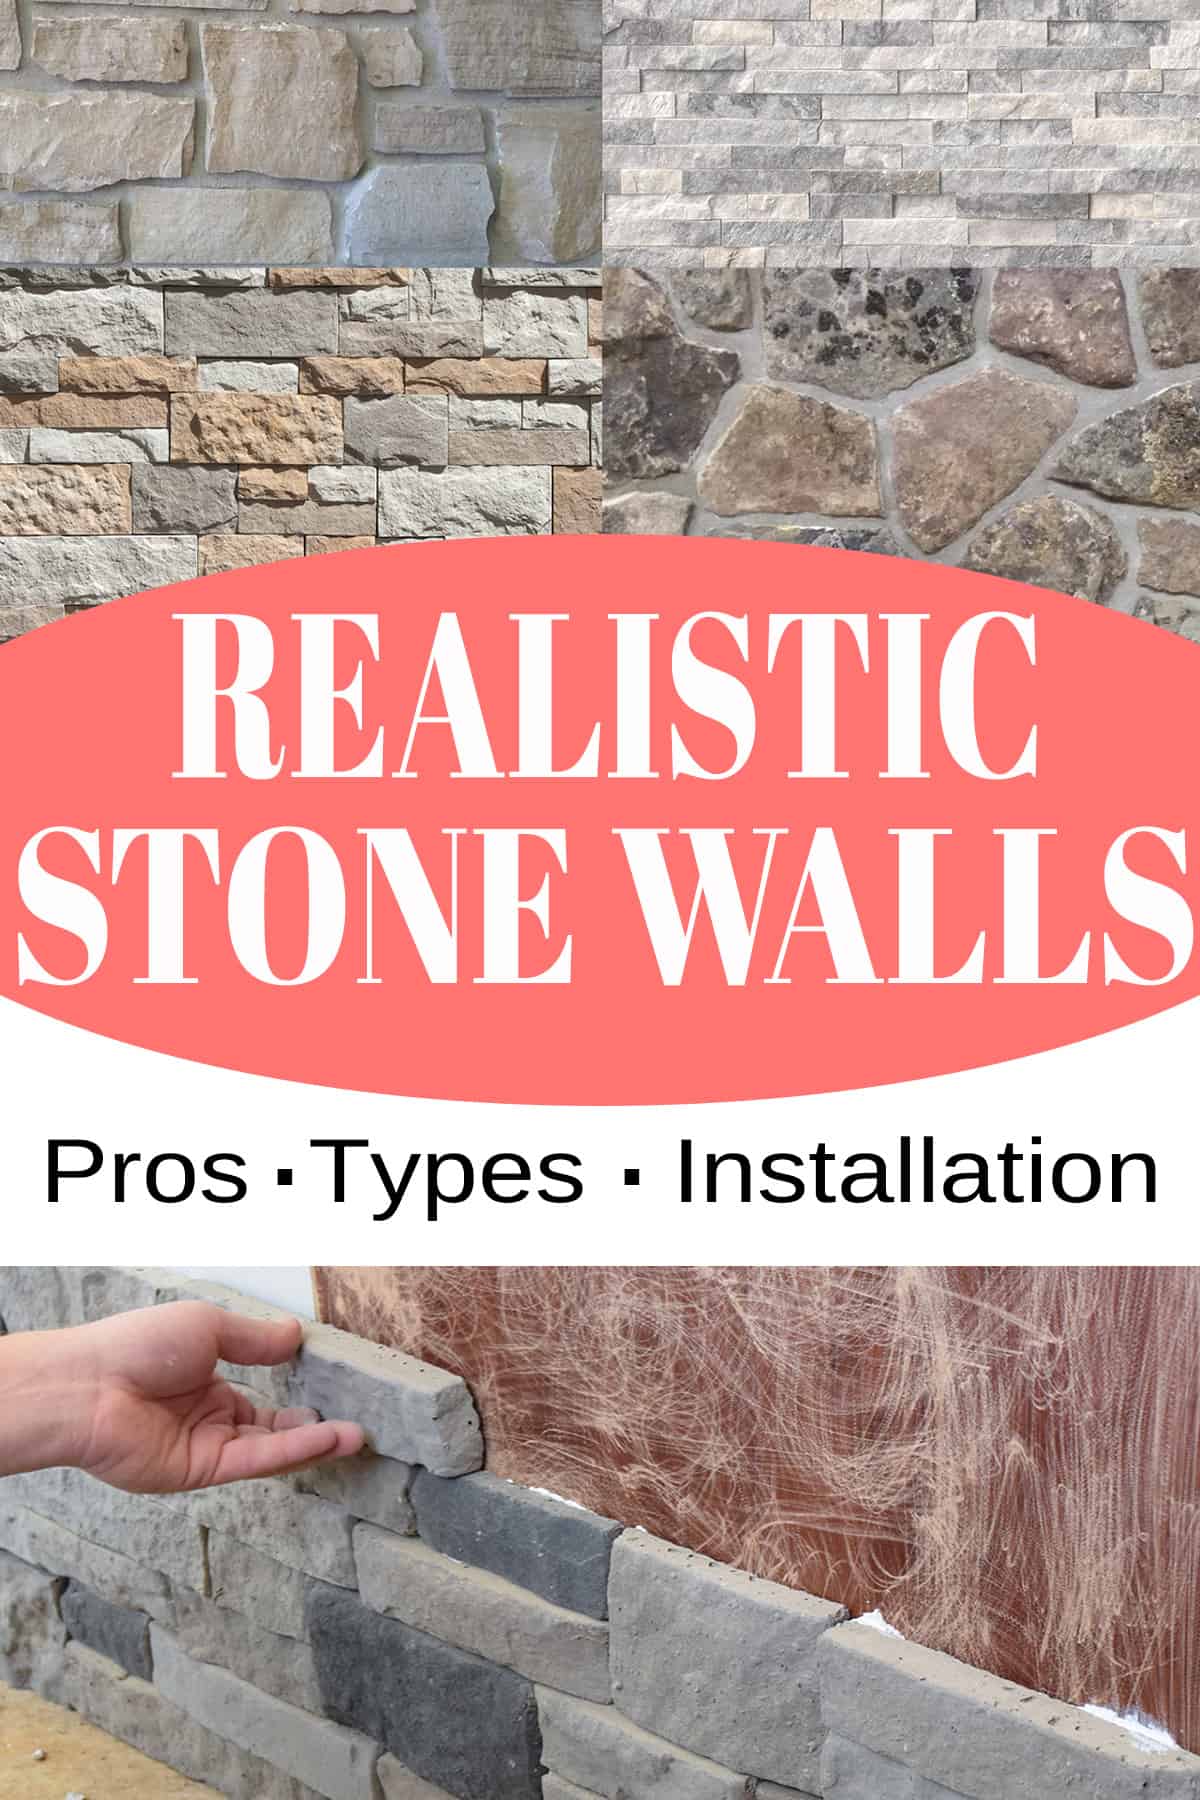
Stone veneer is a versatile and timeless addition to any part of your home. Think feature walls, fireplaces, kitchen islands and even outdoor spaces! It’s an excellent way to add an instant “wow” factor when revamping your space.
These techniques have been around for some time, but there are modern innovations which have vastly improved the process to make it lightweight and easy to install. Even better? It’s a fairly simple installation process, and there are great options for the DIY novice.
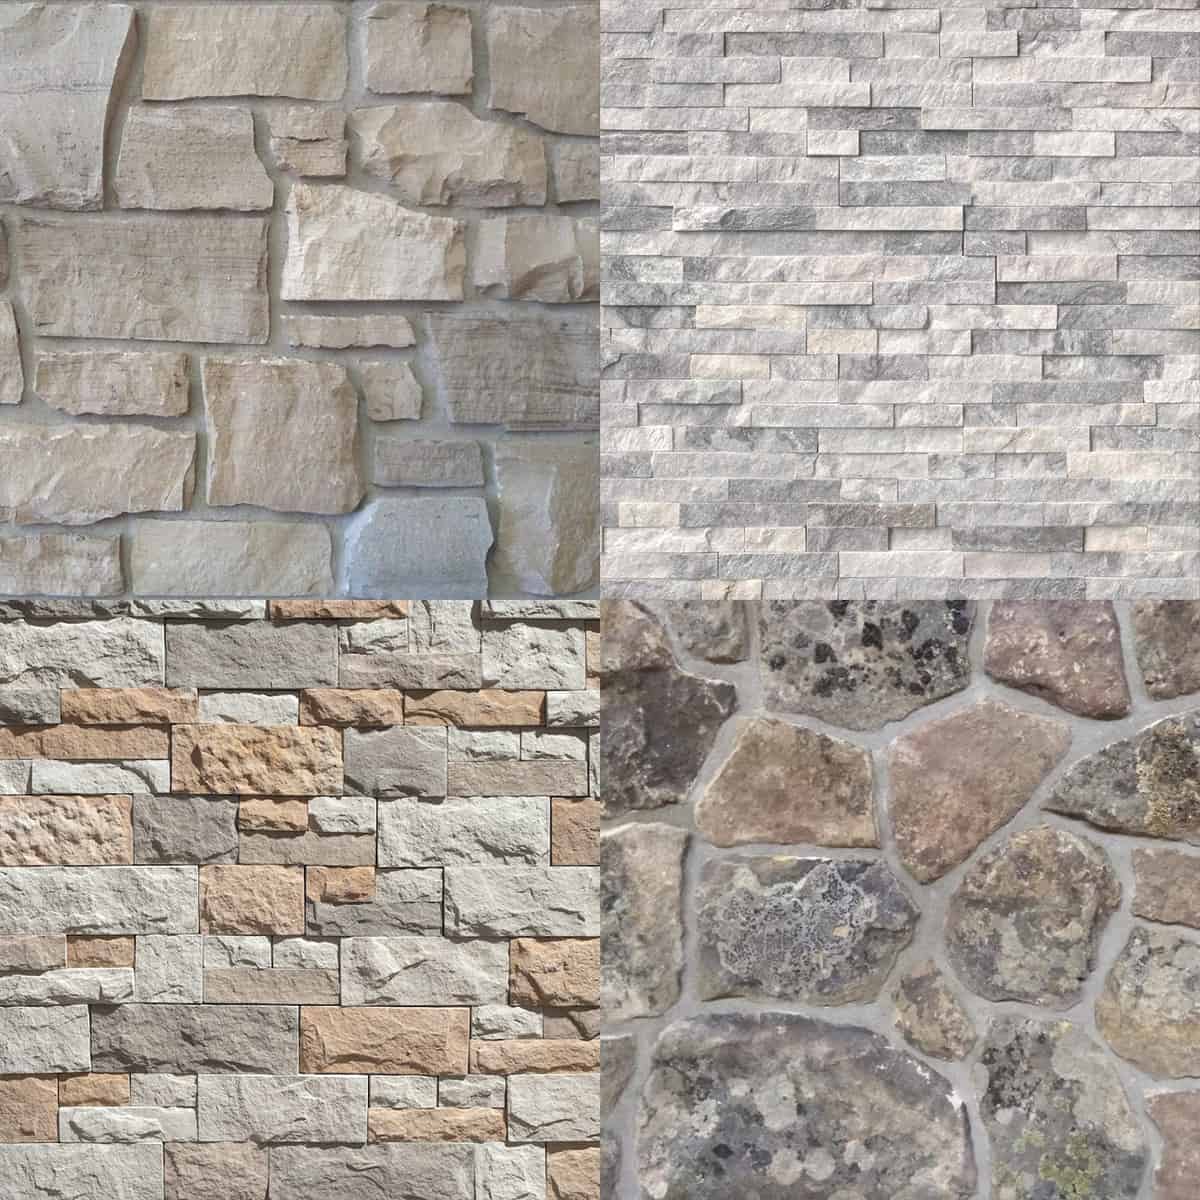
What Are the Types of Stone Veneer?
Veneer Panels: Veneer panels can be made from real stone. However, they are more often made from molded concrete with a fiber board backing. The panels fit together and can be quite easy to install but aren’t the most natural looking option.
Manufactured stone: Manufactured stone veneer is a product often made out of concrete or a lightweight aggregate compound that’s molded and colored to look like marble, granite, and other desirable natural stones. Unlike panels, these are individual stones that can be grouted, mixed with other colors, or adjusted to fit your own design.
Natural stone: Natural stone veneer is typically comprised from thin slices of limestone, sandstone, and occasionally granite. It is extremely heavy and costly, so it isn’t commonly used except in high end homes or on exteriors.
The installation process varies somewhat depending on the product you choose. Natural stone and heavier manufactured stone require a metal lath and mortar for installation, while the lighter manufactured stone and veneer panels are more novice friendly.
*Pro Tip: Stone veneer of any type-manufactured or natural-is not a structural product. It cannot bear weight like blocks of concrete or solid stone can. Stone veneer requires firm attachment to a base of metal lath and mortar much like stucco.
What is Stone Cladding?
Stone cladding is also called stone veneer, stacked stones, or a faux stone wall. Unlike panels, thin, flat sections of individual stone are laid over a material that isn’t stone, such as concrete. These stone veneers can be either be natural stone or manufactured, sometimes called faux stone.
One of the benefits of using a thin layer is that it is lightweight and is cheaper and easier to install. The styles of stone cladding interior walls can include stacked stone, brick, or mosaic patterns. While many styles do not have mortar between the stones, it can include mortar. Examples of the many styles:
Natural Stone Vs Faux Stone
Natural stone veneer tends to have more color variation in a single stone, so it creates a unique look with every installation. Due to their lightweight nature and durability, many can be used in both interior and exterior applications such as walls, entryways, patios, bathrooms, kitchens, fireplaces and landscape surfaces. Often ordered through landscaping retailers, they are definitely more expensive and vary considerably.
So what is Faux stone? There have been several innovations in the last few decades to create molded stone products that look like real stone at lower prices. These products are created from individual stone molds, not sheets or panels. The manufactured stone is composed mostly of molded cement. Some mixtures have pockets of air purposely added to decrease the weight further, like Airstone. The molded concrete is often stained so that you have different textures and colors that mimic real stone, while having more variation in color choices.
There are a ton of brands of manufactured stone veneers and those focused towards the DIYer include Airstone, GenStone, and ClipStone. Many of the faux stone applications come with corner pieces so the stone can look natural while wrapping around an object such as a fireplace surround or island.
An important feature of faux veneer walls is that the stone, even if it is grouted and mortared in, is not structural. The substrate wall is the structure while the stones themselves do not bear weight.
Tools and Materials for Lightweight Stone Cladding Interior
While natural stone may require higher quality of tools, manufactured stone veneer walls with an interior installation are much easier.
- Mitre Saw or Wet Saw
- Concrete blade – A continuous blade offers cleaner cuts but are prone to becoming hot.
- Hack Saw. This is used to cut small tips off if your blade is smaller.
- Level. Make sure it is long enough to go across the wall, not just a few tiles.
- Putty Knife. To pry off and remount stones as needed.
- Sandpaper. To smooth any edges and to sand the installation surface if needed.
- Faux Stone in preferred color (We chose Airstone in the color Spring Creek, with a natural edge)
- Adhesive. Some products will require a mortar bed with scratch coat over a wall, but the lightweight faux stones often use a caulk type adhesive, which is much easier.
*Pro Tip: There are a few choices to make if you are thinking about doing this project. The first choice is color tone. The second choice is whether you want rough/natural edge or a flat edge. If you have places where the edges will be seen, you will at least want a natural edge for that section.
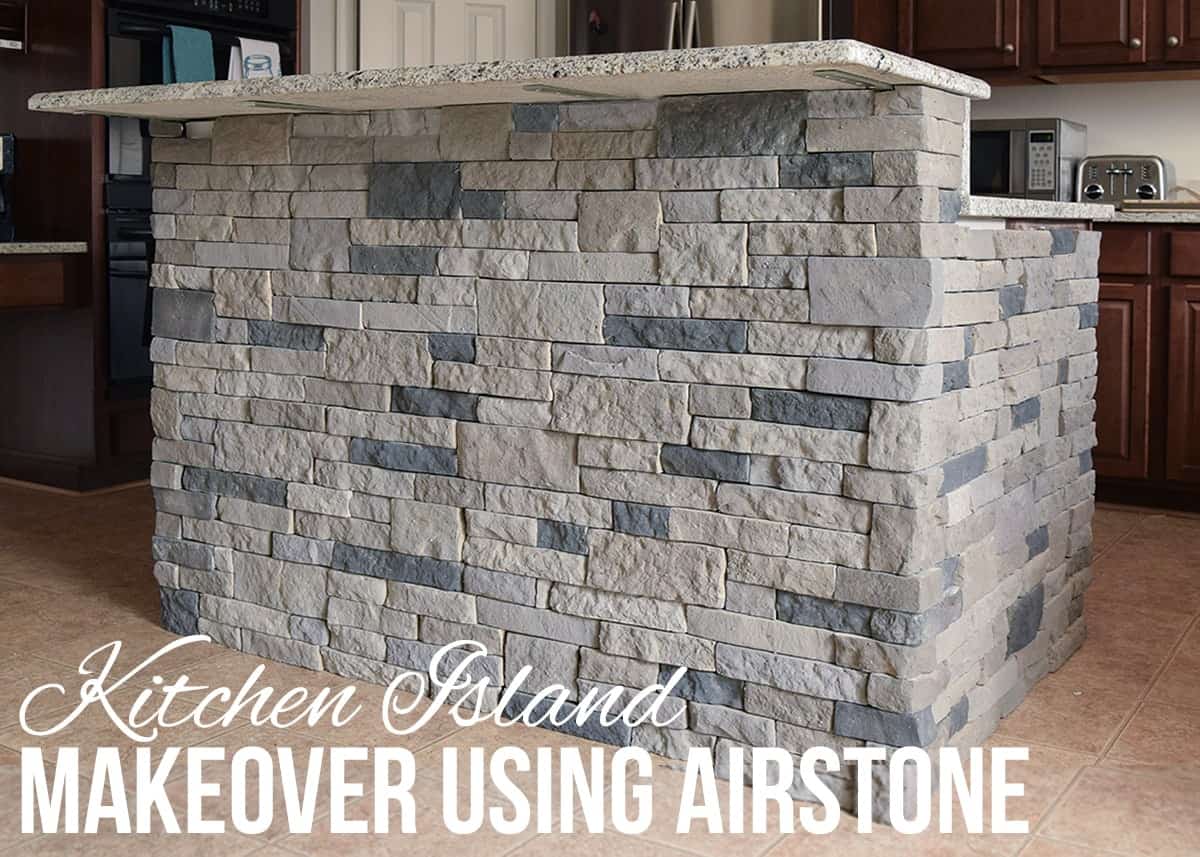
How to Install Stone Veneer – Our Project
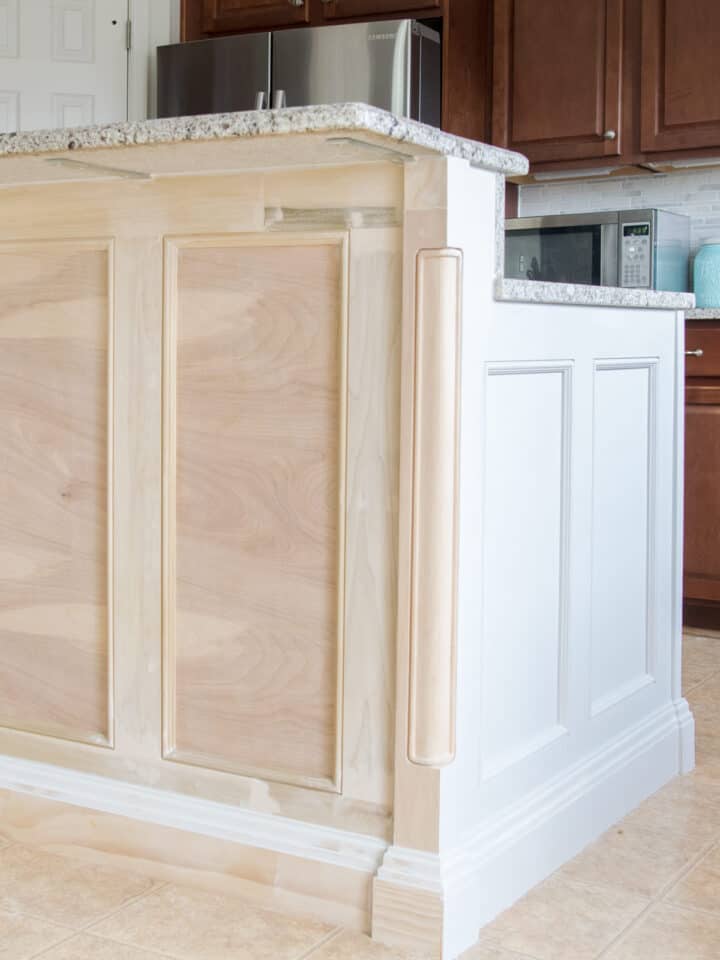
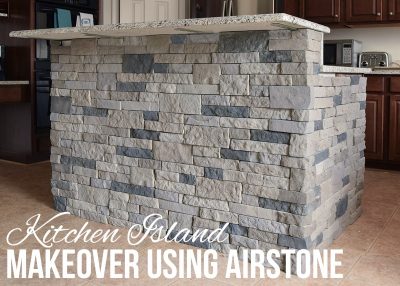
When we first built the kitchen island, my husband envisioned a stone cladding facade in a color to match the luxury vinyl tile flooring we added. Installation methods will vary by products, so I include this section as well to go over our design, as well as tips and problems that we have encountered.
For lightweight faux stone products such as Airstone or LiteStone, it is an easy project, and you don’t need to hire a professional mason.
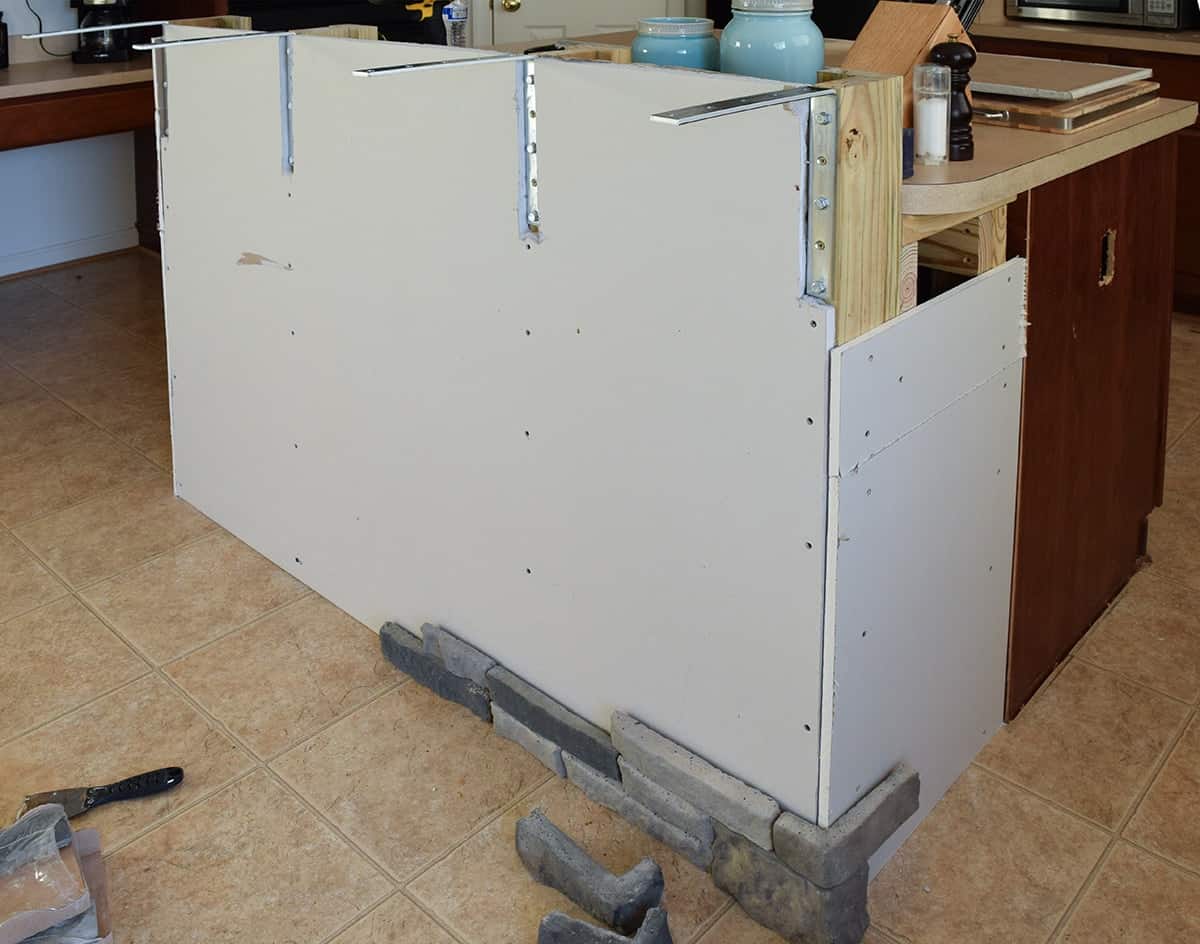
Step 1 – Preparation
In our project, lightweight Airstone comes with a caulk like adhesive rather than using mortar to glue in the stones. We sanded the sides of the cabinets to remove any gloss.
Any new material, even stone should be allowed to acclimate in the area of install for a day or two.

Pro Tip: Because Airstone uses adhesive rather than mortar, it attaches to many interior surfaces without a lot of prep like drywall, wood, and concrete. Exterior applications or those with other products may require a vapor barrier and metal lath.
Step 2- Plan
The first step is to calculate your square footage necessary and have a plan for the stone placement. I always buy at least 15% extra above the square footage to accommodate cutting the stones.
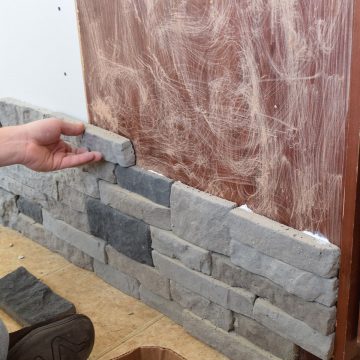
If you have corner pieces, start with one corner and work towards edges. Dry fit each row before adhering. Because the pieces come in varying sizes, you may need to cut a stone or two to fit each row.
Step 2 – Laying the Stones
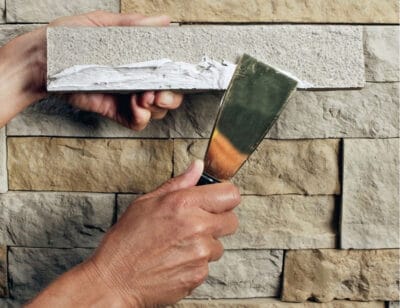
Spread a ⅛-inch-thick layer of adhesive all across the back of the stone. Press the stone evenly and firmly against the wall. Make sure the stones are lined up tightly against one another.

If you make a mistake, you can remove and replace a stone within 30 minutes of application.
As you lay the rows, check occasionally with a level that the rows are straight and level.
Allow the adhesive the proper dry time before you continue laying rows above. Grout is not necessary as both the stones and the adhesive material are waterproof.
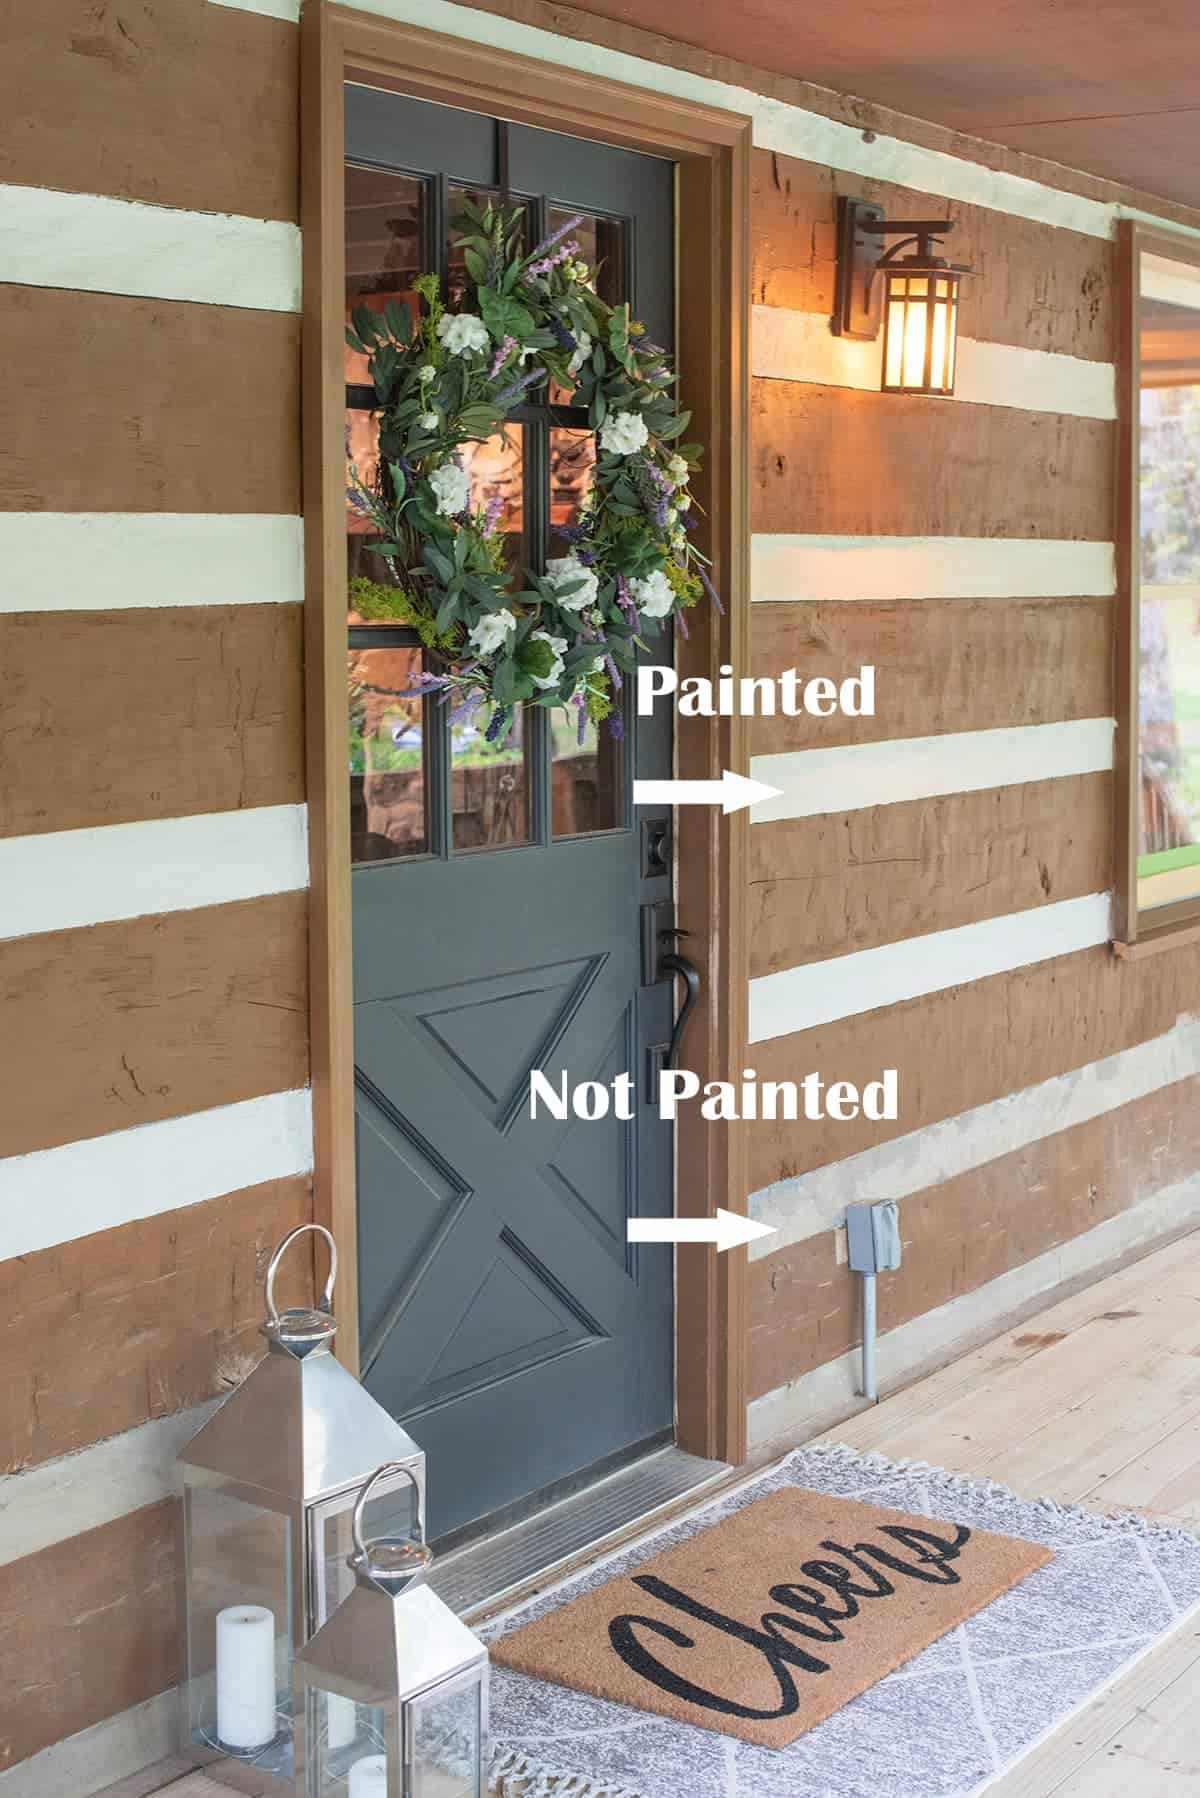
However, with some natural stone veneers, you can add a cement grout for style and surface stability. The natural stone veneer around these painted garage doors has this and it has lasted over 40 years with no maintenance.
More Home Improvement Projects To Check Out
- How to Paint Concrete
- Paint Kitchen Cabinets like a PRO
- Building a DIY Kitchen Island
- How to Stain a House Exterior
Frequently Asked Questions
Airstone should be cut with a concrete blade on either a mitre saw or a wet saw.
Outlets are quite tricky with a thicker stone veneer. The electrical box that houses the outlet and wiring will have to be replaced with a deeper box and moved outward to line up with the outer surface of the stone. This should be done prior to installation.
Stone veneer can vary from $6 to $15 per square foot, compared to natural stone siding costing $22-40 per square foot or more with labor charges. Natural stone will most likely be more expensive than brick, but manufactured stone may cost about the same or less than brick.
Different products will have different requirements and you should read manufacturer’s directions. Additional variations can include whether your installation is above or below grade as well as exposure and weight of product. Many use an all-purpose Type N mortar that has a 28-day compressive strength of 750 psi.
Both natural and manufactured stone veneer siding is very long-lasting and durable. Manufacturers’ warranties often range from 20 to 75 years. If properly installed, it is maintenance-free and has a better fire rating than wood or vinyl siding.

Grab our free series "Weekend Home Projects that will Transform Your Life" Sign up below to receive updates including free printables, organization tips, home improvement projects, recipes and more! |
More Kitchen Remodeling Projects
PS I love seeing your creations! Be sure to take a photo and tag #cravingcreative on Instagram! You can also stay in touch with me through following me on Instagram, Pinterest, and subscribing to the newsletter!
How to Install Faux Stone Veneer
Tools
- Wet Saw a Miter saw can also be used but it produces a lot of dust
Supplies
- Sandpaper
- Airstone Faux Stone any color
- Adhesive
Instructions
- Any new material, even stone should be allowed to acclimate in the area of install for a day or two.

- If you have corner pieces, start with one corner and work towards edges. Dry fit each row before adhering. Because the pieces come in varying sizes, you may need to cut a stone or two to fit each row.

- Spread a ⅛-inch-thick layer of adhesive all across the back of the stone. Press the stone evenly and firmly against the wall. Make sure the stones are lined up tightly against one another. As you move up, check with a level that the rows are straight and level.
- The area can be used immediately but should be treated lightly as the adhesive dries over 24-48 hours.
Notes
- If you make a mistake, you can remove and replace a stone within 30 minutes of application.
- Grout is not necessary as both the stones and the adhesive material are waterproof.
- These lightweight stones can be laid over a variety of materials including wood, drywall, and concrete. For exterior applications, make sure that your substrate material is also waterproof.
- I always buy at least 15% extra above the square footage to accommodate cutting the stones.
Leave a Reply