Learn about the amazing benefits of vinyl flooring, including lvt and lvp. In this article, I will show you how to install glue-down vinyl plank flooring the right way including pro tips for a successful project that will last for years!
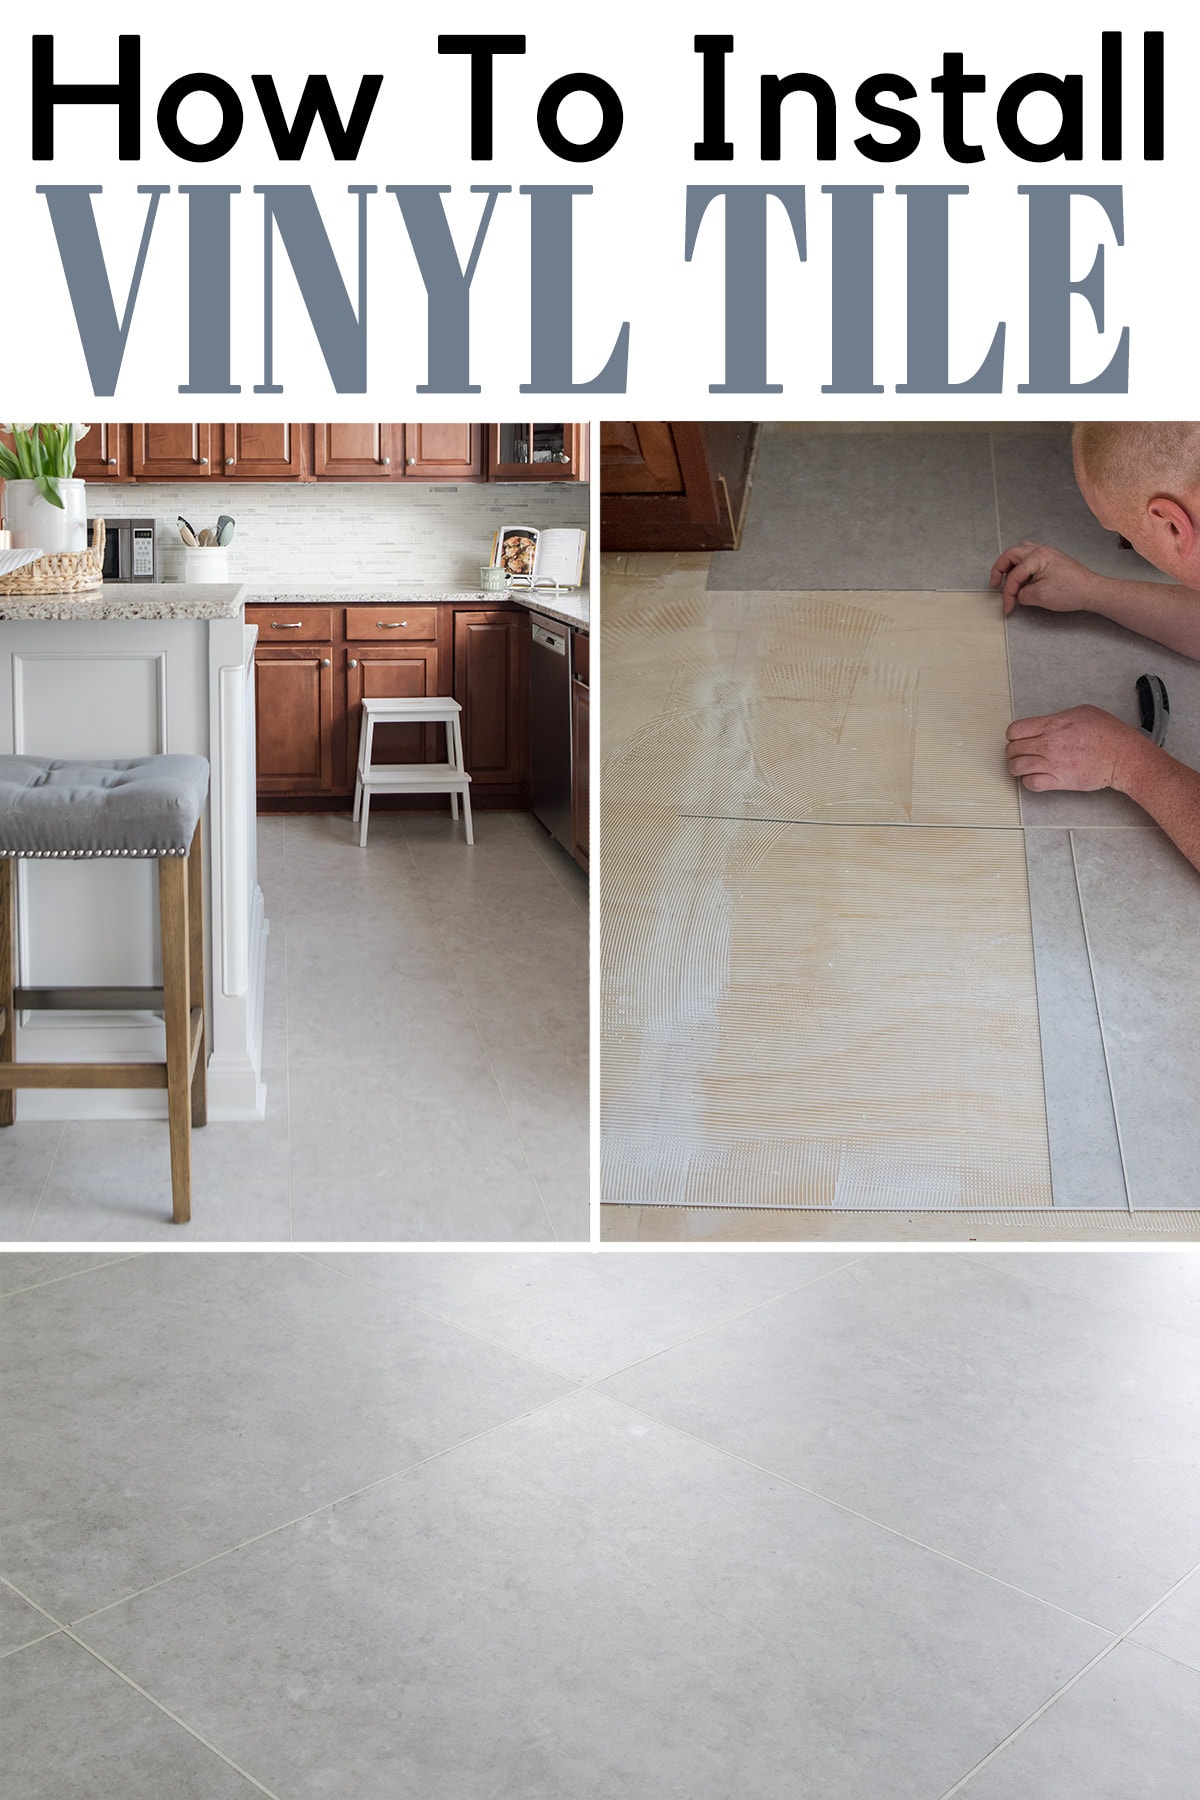
Vinyl plank and tile flooring has become one of the most popular flooring choices in homes today, both new builds and renovations. The flooring is warm, and soft underfoot, attractive, and with basic care and maintenance, can serve you for a long time. If you want to transform your floors on a budget, vinyl flooring is a great choice.
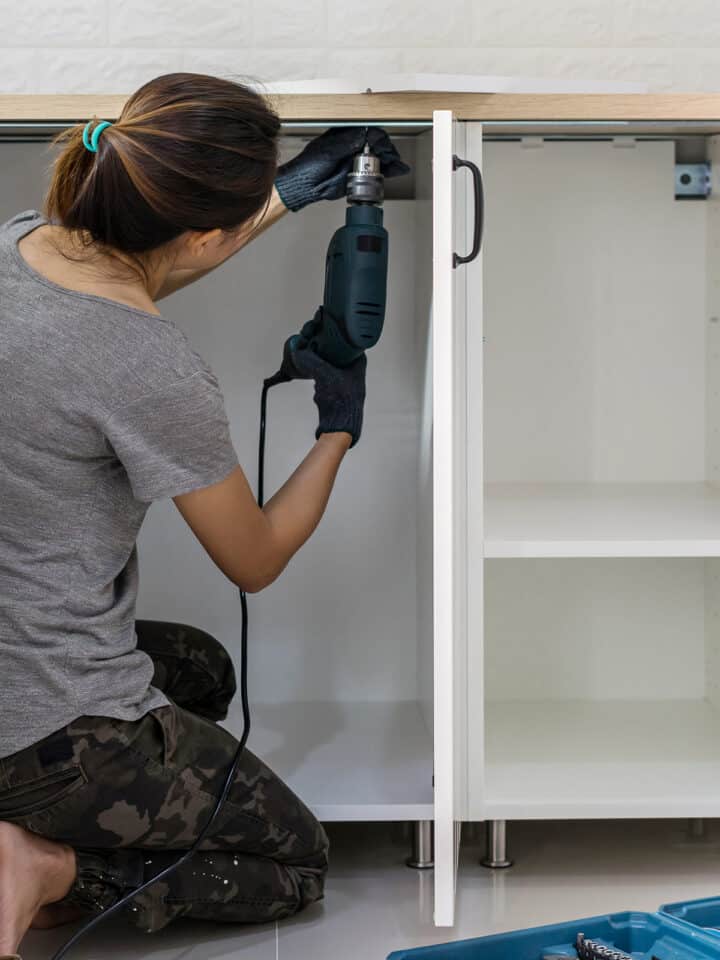
Also, the installation is pretty easy for a DIY project. We are a Wife and Husband team of home improvement enthusiasts that have been renovating homes for over a decade including many, many types of flooring. Products are always changing and improving so we are very excited to showcase this project.
We have an in-depth guide on the Pros and Cons and types of Vinyl Flooring and How to Grout Vinyl Tile if you are looking on the best type for your situation. There are many types and I explain the differences in each one. Today, however, I want to share the basics of installing glue down vinyl flooring with a step-by-step guide and after reading it, you might come to the same decision if you are ever looking for new flooring.
Benefits of Luxury Vinyl Tile
Luxury Vinyl Tile has many pros and cons, but durability is one of their best features. The durability over time hinges on the “wear layer”.
- LVT flooring won’t crack like traditional tile but it can scratch and cut more easily.
- LVT isn’t impervious to water damage under the waterproof layer. The glue and tight seams make it water resistant but not waterproof. A few brands do make the claim that their seams are waterproof, but I never assume that in a real-world installation.
- Easy to clean and you never have to seal grout.
- Stain resistant.
- If a glue down LVT tile is damaged, you can simply pull it up with a putty knife and lay a new one.
- More durable against dog nail scratching. However, older large dogs often have a hard time walking on them and are prone to slipping.
- Great for high traffic areas.
- Higher quality LVT and LVP have excellent dent resistant from dropped dishes or heavy furniture.
Cost of LVT Vs Traditional Tile
The biggest cost saver in our project was that we could DIY this installation, saving us literally thousands of dollars! However, the materials for luxury vinyl flooring installation are also much more affordable.
For our LVT flooring, the cost broke down to $3 per square foot. For our 300-square-foot project, the total, including all materials and supplies, was $1400. That includes the underlayment that was required as a substrate over the plywood subfloor. The options for luxury vinyl tile prices ranged from $2-5.50 per square foot.
Let's compare that to our Navy and white bathroom renovation the prior year. The floor tile was $3 a square foot over 24 feet- which is an affordable tile. Our total cost for the bathroom floor was $230 including mortar, cement backer board, grout, and other installation supplies. If you multiply that by 300 square feet, that's $2800!
So, in cost comparison, traditional tile installation supplies are much more than LVT flooring.
Recommended Supplies
- Plywood Underlayment for Vinyl, concrete, or other suitable substrate
- Floor Patch
- Putty Knife
- Level
- Guillotine Cutter (Optional)
- Utility Knife or Power Saw
- Carpenter's Square
- Vinyl Planks or Tile
- Vinyl Adhesive
- A V Notch Trowel
- Flooring roller (a heavy-duty kitchen rolling pin also works well)
You may need additional supplies for the removing of the old flooring or for leveling a floor.
Pro Tip: While technically LVT and LVP can be installed over existing sheet vinyl, concrete, and smooth plywood subfloor, I do not recommend it. The reason is because if you ever want to change the flooring, removing the adhesive is going to be a MAJOR pain. I have seen my unfortunate share of installations directly over sheet vinyl that look awful. The planks gap and it looks sloppy.
Before You Get Started
Leveling the Floor
A smooth and level subfloor is a must-have for the successful installation. Any bumps, large holes, or large cracks should ideally be filled or leveled. Manufacturer's instructions vary and should list the specific leveling requirements with your flooring. Make sure the subfloor doesn't flex too much.
Remove Baseboards
Anytime you change the height of the floor, the baseboards height will need to be adjusted. There are two options. Most installers will lay quarter round in front of the baseboards to cover any gap. However, many homeowners do not like this look. The other option is to remove the baseboards and reinstall them. If you gently remove the baseboards, you can oftentimes reuse them.
Check out our post for more information on replacing baseboards.
Moisture Test
If installing over concrete, perform a moisture test before getting started. If there are any concerns about your concrete, you can do a calcium chloride test or get a professional to do a moisture probe test which is the most accurate. Evidence of moisture problems might be salt crystal formations, new installation drying, old paint bubbling, or temperature differences.
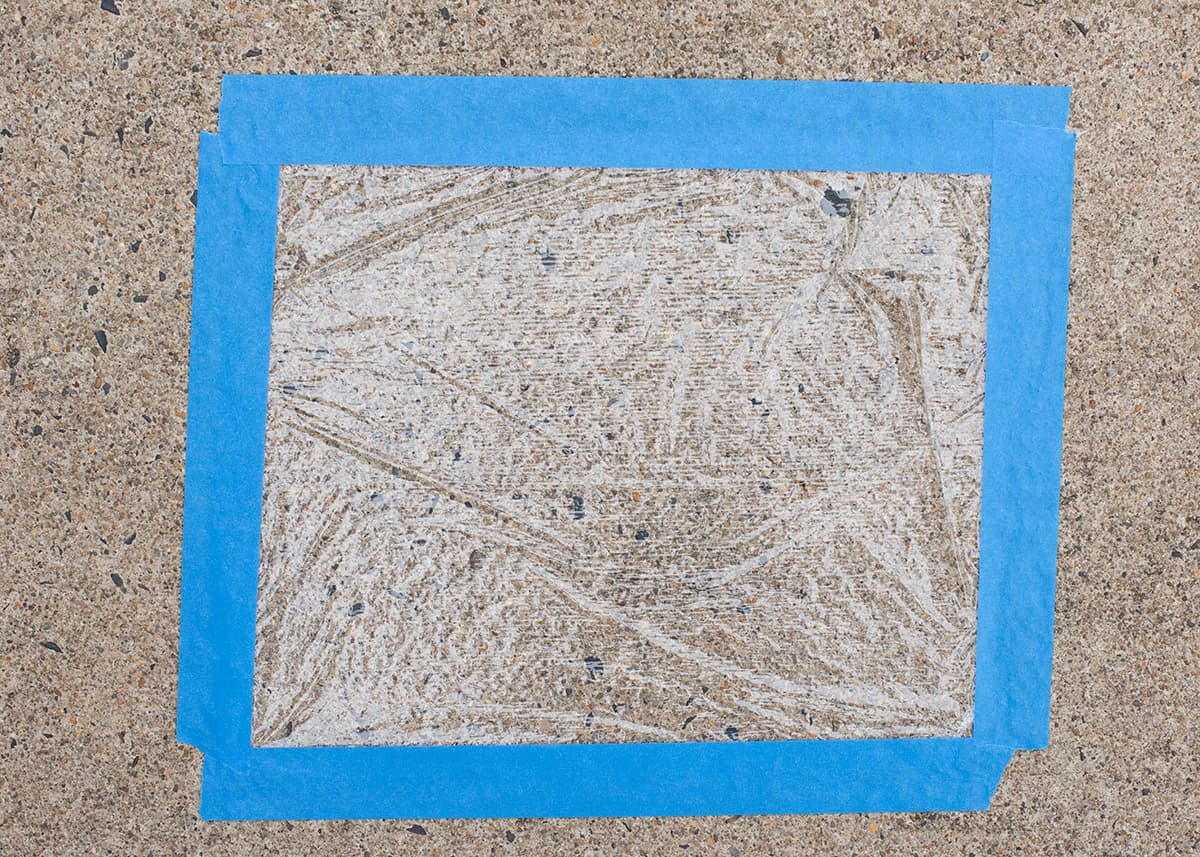
In another project, we didn't have any concerns about moisture, so we did a quick and dirty moisture test. Tear off a few feet of clear plastic wrap and lay it on the floor. Use Duct Tape or another well sealing tape around all of the edges. I would recommend leaving for a day or two and check periodically if any moisture, color change, or condensation collects on the floor or the underside of the plastic wrap.
You will have to wait at least six weeks for new or newly leveled concrete floors to cure before you can glue down vinyl planks.
How To Cut Luxury Vinyl Planks or Tile
1. A Guillotine Cutter
This is my preferred method generally. While you still need a razor or other tool for intricate cuts, this tool gives a nice clean edge, and you don't have to get off the floor to cut the LVT. For rigid core, I like this guillotine cutter style best. However, you can also use a lever action style like below for thinner materials or those without a separate core.

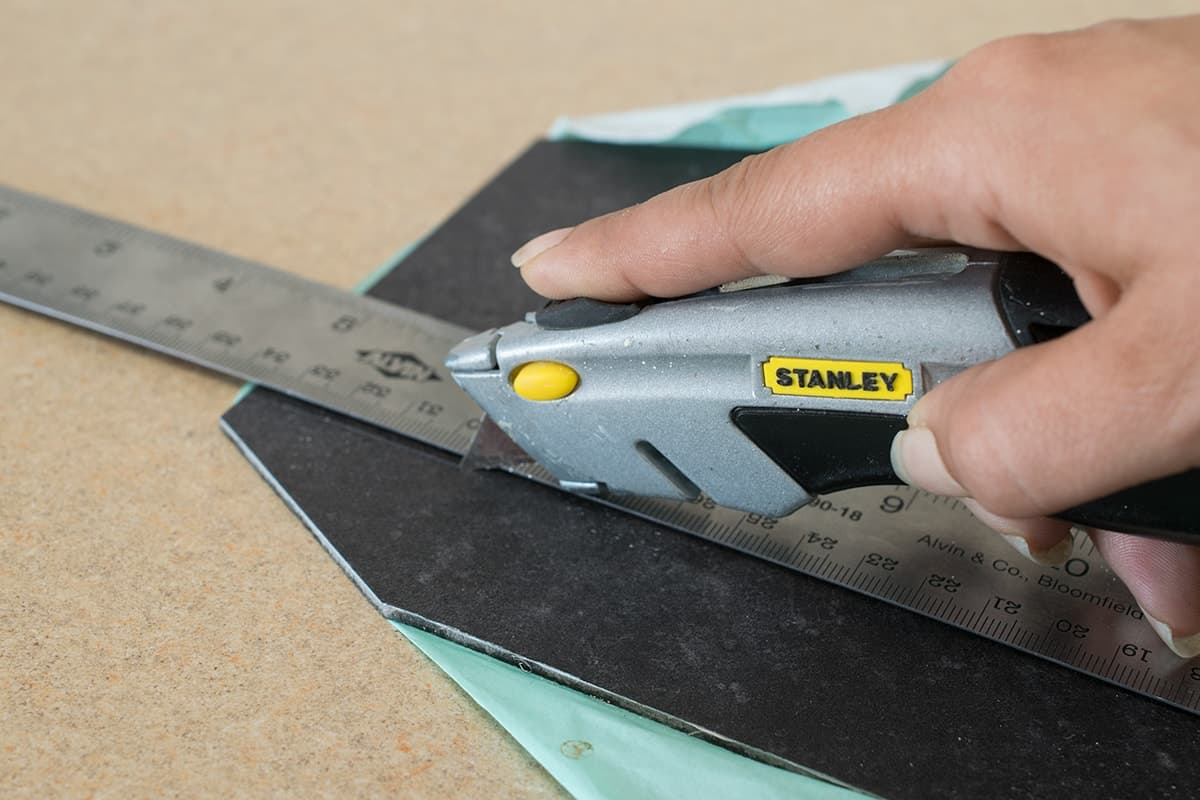
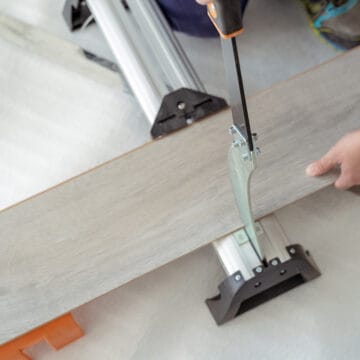
2. A Razor and Straight Edge
For thinner tiles, this is a really simple method. Score along the top and you can snap the piece off. It may take a few cuts to get through the tougher top layer. This is also how I tend to make intricate cuts like around a corner or plumbing.
3. Power Saw
You can also use a jigsaw, an oscillating multi-tool, or a miter saw. They may make rougher cuts, more mess and dust to clean up and require you getting off the floor multiple times to use. However, we used this for our rigid core plank installation because it was faster and easier to make clean, straight cuts. The cut ends are hidden under the baseboards. Make sure you use a fine-tooth blade.
How To Install Luxury Vinyl Tile
Luxury Vinyl flooring installation is much easier than traditional tile.
Step 1: Underlayment (Recommended)
Do you have to use an underlayment with glue down vinyl planks or tiles? Technically LVT and LVP can be installed directly on previous vinyl, concrete and smooth plywood, but I DO NOT recommend it. The reason is because if you ever want to change the flooring, removing the adhesive is going to be a MAJOR pain. Also, I have seen my unfortunate share of installations directly over sheet vinyl that look awful. The seams don't line up and it looks sloppy.
Underlayment is just a material sandwiched between two other materials. In this case, it is a water resistant, smooth, thin plywood. This is different from the underlayment you would use for floating vinyl.
It is a little more money to get a ⅕-½ inch proper underlayment, but it is worth it for a better-looking result, longevity, and replacement. I would recommend one rated for wet areas if in a bathroom or kitchen. Screw down the underlayment with appropriate screws and check for any loose or creaky areas - add more screws to secure it.
Pro Tip: If applying to existing plywood subfloor, lay the boards in the perpendicular to the existing boards. This is so the seams don't line up directly on top of each other.
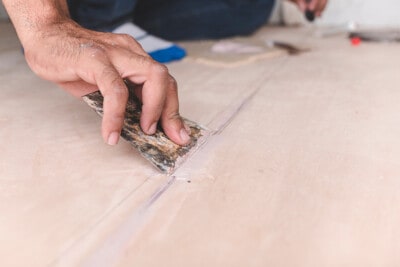
Step 2: Fill Seams
Seams and nail heads should be filled with latex additive floor filler. It's a mixture of portland cement that is more flexible and moves with the flooring. Smooth filler into place with a putty knife and remove any excess. Allow the filler to harden according to directions or 24 hours before installing the vinyl.
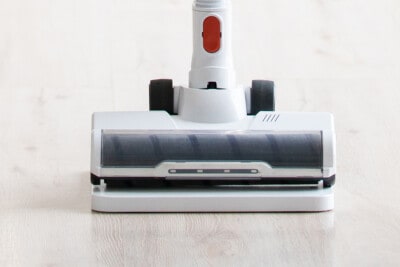
Step 3: Remove all Dirt and Debris
Now you have a clean, smooth surface to work with!
Step 4: Plan Layout
For thin vinyl planks, you can start on any side you like of the most open or largest area of your room.
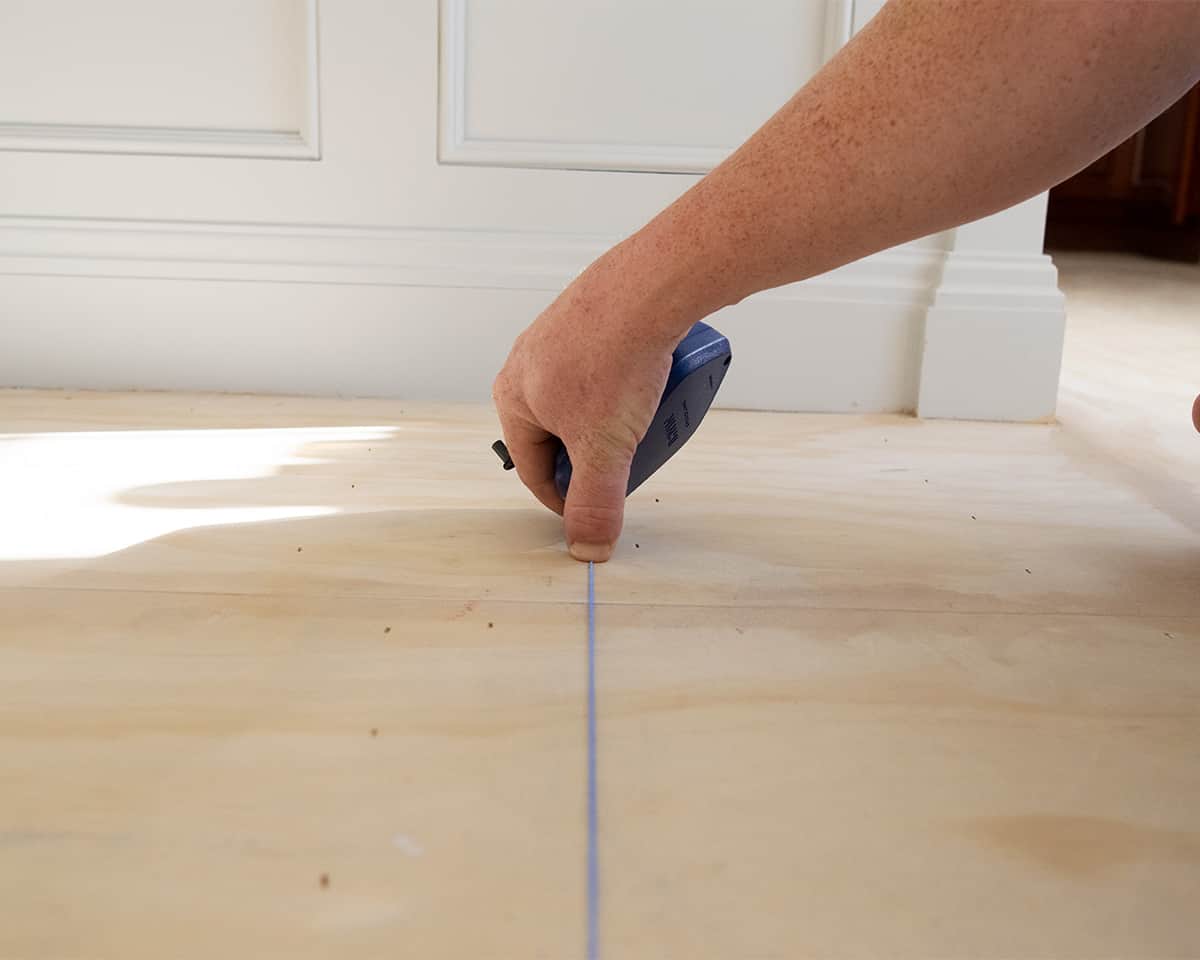
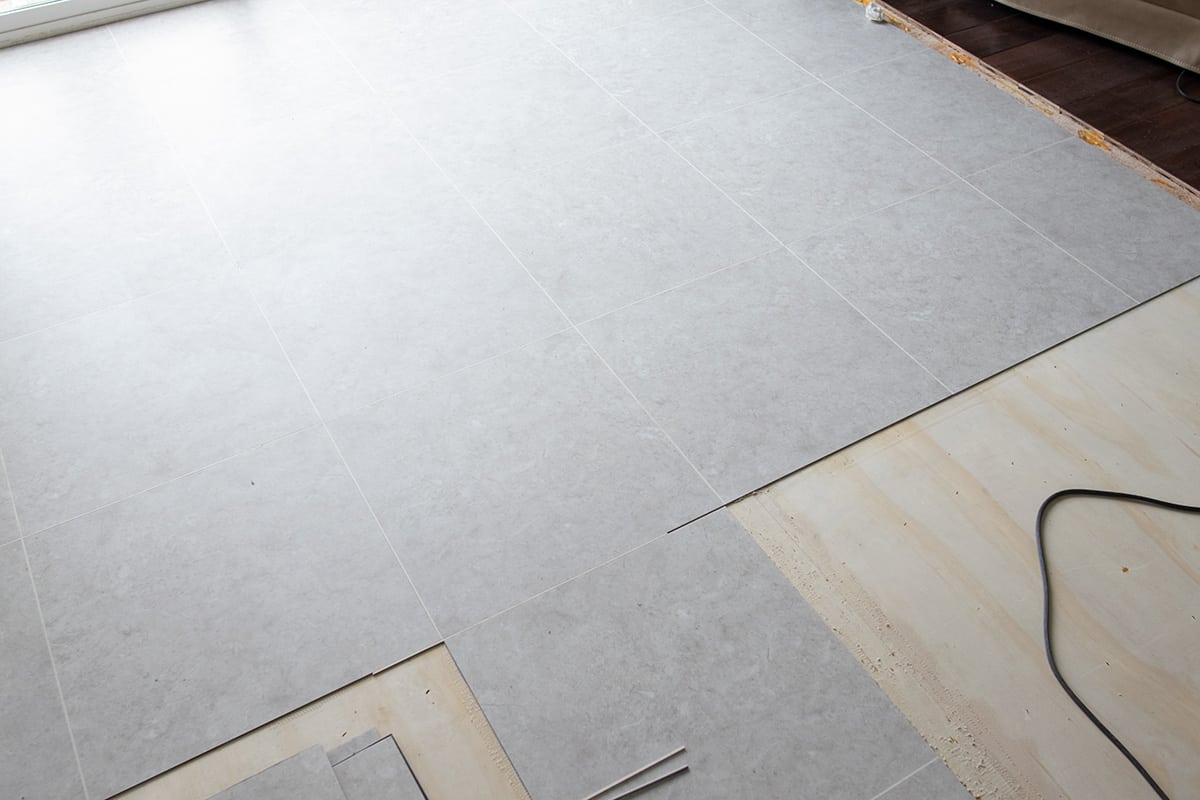
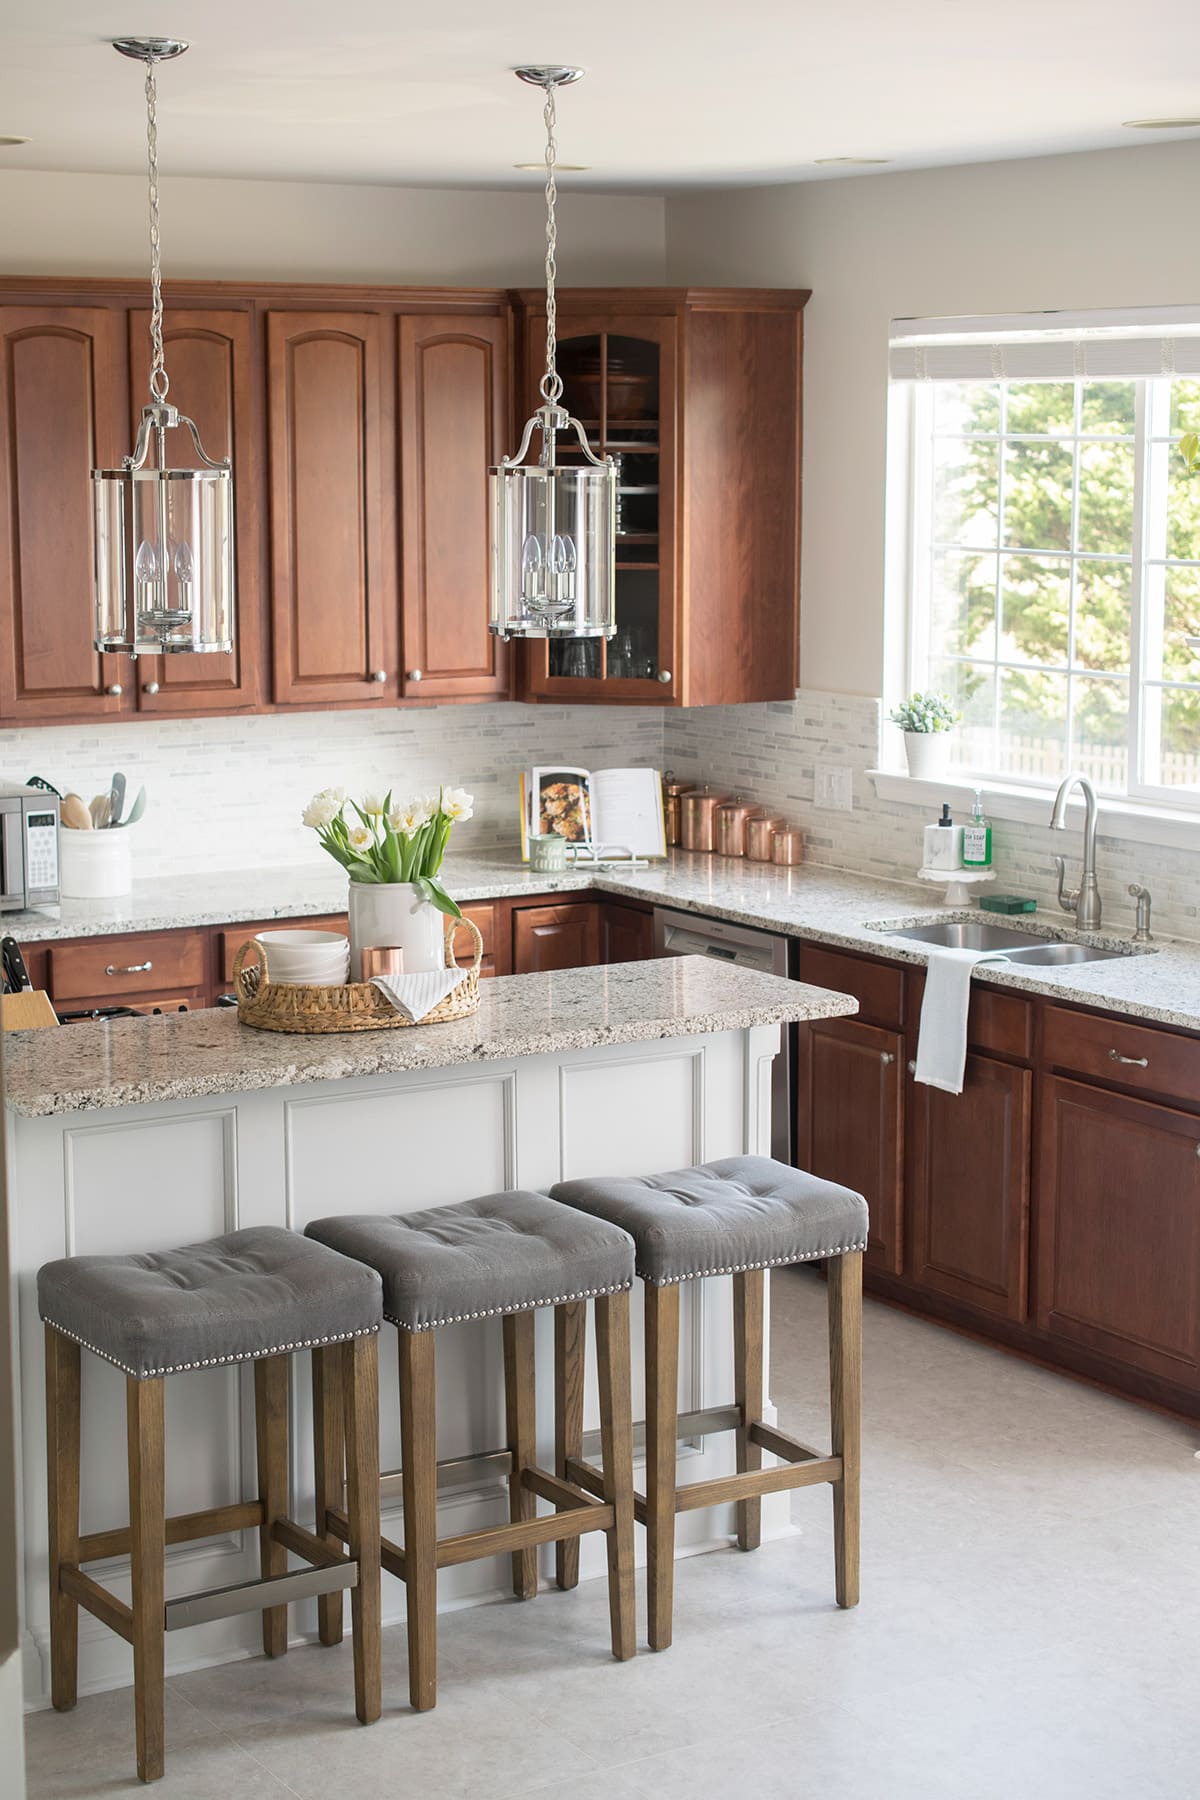
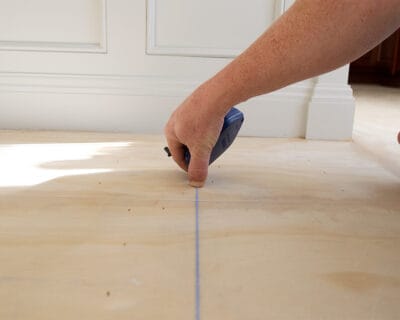
For large format glue down vinyl (12×12 or larger), I usually start by making a center line. In this case, we made several measurements to find the center down the area in front of our kitchen island. We then snapped a chalk line, but a straight edge and pencil is fine. We also made a second perpendicular chalk line, to produce 4 quadrants in the area. Using a carpenter's square, we checked to make sure the island was perpendicular to the chalk line (it was because we built that island).
Lay out the tiles in rows just to double check you won't have any awkward or thin strips along the edges. This is more for aesthetic reasons than anything else. Adjust line as needed.
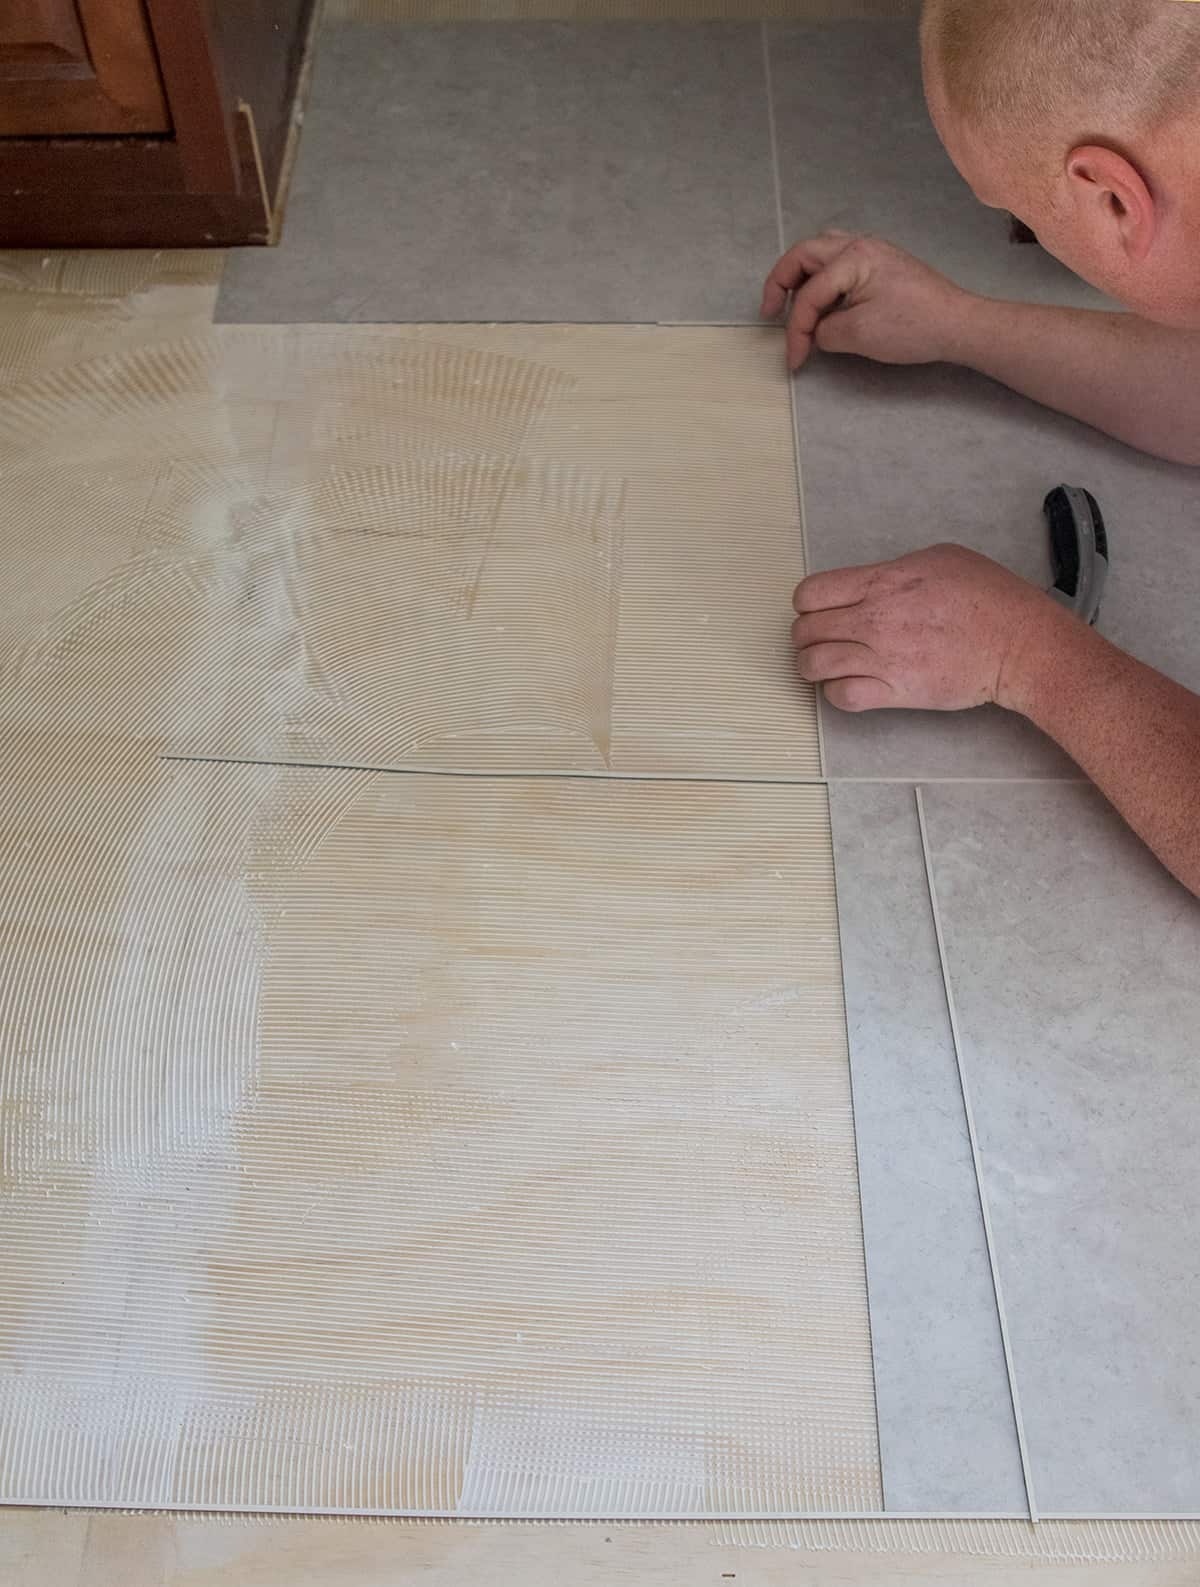
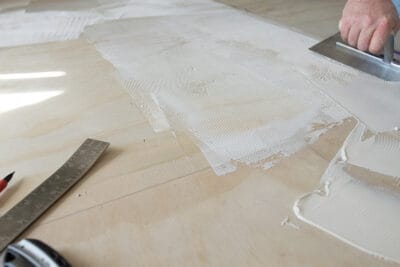
Step 4: Lay Adhesive
Starting where the centerlines cross and moving in one direction to the edge, lay down enough of an area that you can do in less than 15 minutes. Use a V-notch trowel to spread the adhesive evenly.

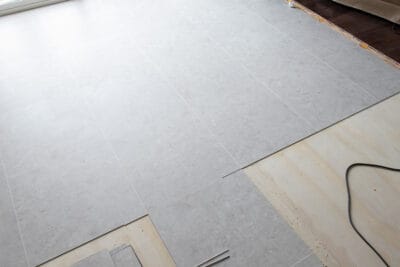
Step 5: Lay Tiles or Planks
To get the tiles nice and flat, a floor roller like this is highly recommended. It gets all the way to the edges nicely. we used a large, heavy kitchen rolling pin and a fair amount of pressure.
We did one quadrant at a time before working around the island and kitchen area.
Because of the rise in popularity of vinyl flooring, many manufacturers have added bevels or a grout border for a much less commercial look. In my opinion, I wish we had that option. Instead, we had to purchased luxury vinyl tile grout strips from Karndean. You can learn about their design strips here.
Step 6: Finishing Up
Wait at least 24 hours or manufacturer's instructions before walking on the surface. Put the baseboards back as needed.
If you get any glue on the surface of the flooring, this may be a pain to get off. Try to get it off before it hardens. If it is dry, acetone or nail polish remover is the best way to remove it. Spray the acetone directly onto the glue. Then, push the glue away horizontally with a flat scraper.
More Home Remodeling Tutorials
- Kitchen Island Upgrade with Trim
- The Best Tips for a Glass Peel and Stick Backsplash
- Tips For Painting Old Kitchen Cabinets
FAQS
While technically LVT and LVP can be installed over existing sheet vinyl, concrete, and smooth plywood, I do not recommend it. The reason is because if you ever want to change the flooring, removing the adhesive is going to be a MAJOR pain. I have seen my unfortunate share of installations directly over sheet vinyl or linoleum that look awful. The seams don't line up and it looks sloppy.
Avoid installing vinyl planks on floating floors, tiles with cushioned backs, laminate, carpet, or cork.
The amount of leveling needed will vary from product to product. The standard tolerance required is for the floor to be level to 3/16" over 10 feet. It also can't have a dip of greater than ⅛" within 2′. Some brands have improved materials that allow for covering minor imperfections.
The installation method itself does not determine the quality of the vinyl. There is cheap glue down and high quality. The density and rigidity of the top layer as well as the materials used are more accurate determinations.

Grab our free series "Weekend Home Projects that will Transform Your Life" Sign up below to receive updates including free printables, organization tips, home improvement projects, recipes and more! |
More Home Improvement Ideas

PS I love seeing your creations! Be sure to take a photo and tag #cravingcreative on Instagram! You can also stay in touch with me through following me on Instagram, Pinterest, and subscribing to the newsletter!
How To Install Glue Down Vinyl Flooring
Tools
- Guillotine Cutter Optional – You can use a mitre or power saw instead
- Flooring Roller A heavy-duty kitchen rolling pin works well too.
Supplies
- Plywood made for Vinyl Installation
- Floor Patch
- Vinyl Planks or Tile
- Vinyl Adhesive
Instructions
- If using a thin plywood underlayment, screw down the underlayment with appropriate screws and check for any loose or creaky areas.

- Fill any seams and nail heads with seam filler using a putty knife. Seams should be flat and smooth. Allow the filler to harden according to directions or 24 hours before installing the vinyl.

- Clean away any dirt and debris from the surface with a vacuum.
- Plan your layout. For large, open areas, draw a centerline down the room. Make a second perpendicular center line, to produce 4 quadrants. Lay out the tiles in rows just to double check you won't have any awkward edges. Adjust line as needed.
- Starting where the centerlines cross and moving in one direction to the edge, lay down enough of an area that you can do in less than 15 minutes. Use a V-notch trowel to spread the adhesive evenly.
- Lay tiles or planks with tight fitting seams. Use a floor roller and a fair amount of pressure to completely flatten and bond the tile.
- Wait at least 24 hours or manufacturer's instructions before walking on the surface. Reinstall baseboards as needed.


Sophia says
Great tutorial! I didn’t know they made strips to look like grout.
ADigs says
You should not have to remove baseboards for vinyl planking, waste of time and creates more work…
And u can install over cork with the right preparation and a 5mm thick vinyl plank
Rachel says
This installation guide is for glue down vinyl. I would not advise gluing to an existing cork floor. Also, my advice was that the baseboards need removed “if you don’t have clearance”. I agree that it isn’t the best wording and I will fix that. Many people don’t like the look of quarter round on their floors. If, after adding an underlayment and the vinyl, you have clearance under your baseboards or want to use quarter round, go for it.