And that’s a wrap, folks.
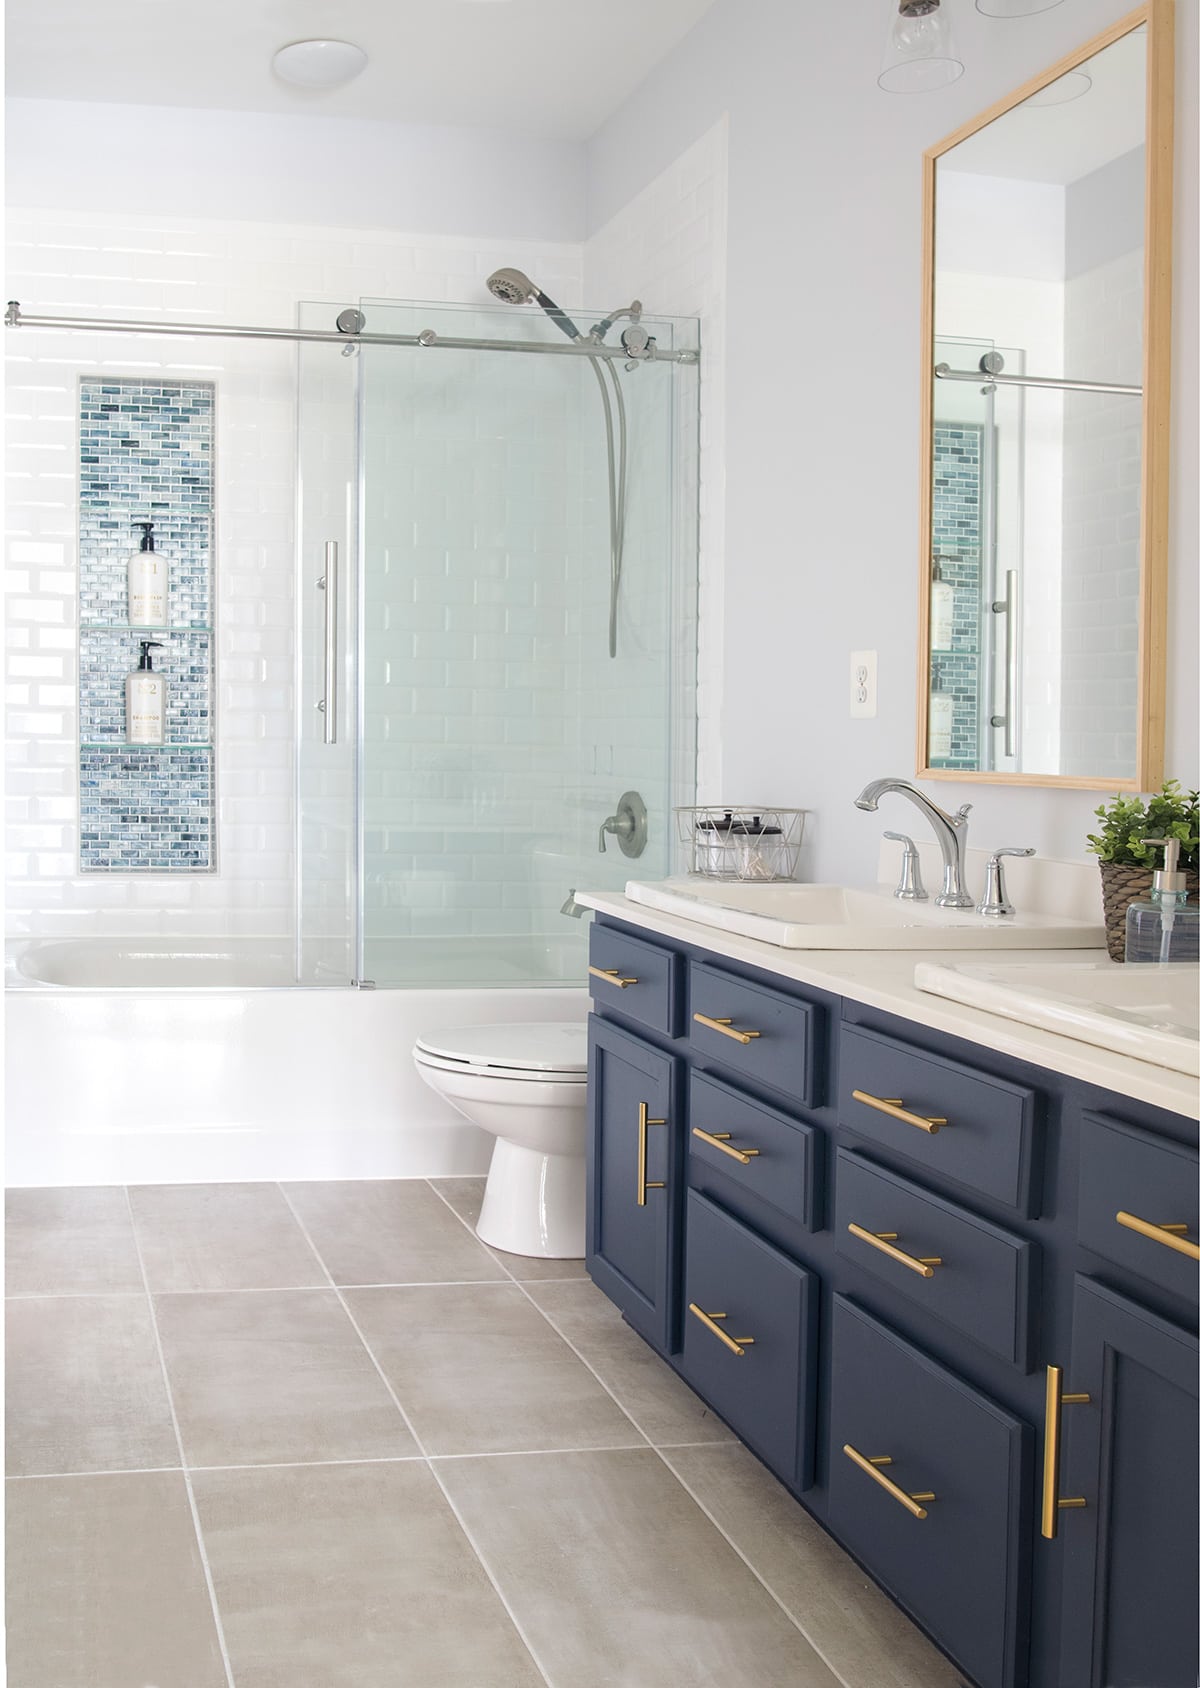
OUR TRANSITIONAL – MODERN CLASSIC BATHROOM RENOVATION IS DONE!
Yes, I am yelling in glee, haha, like I can’t believe this is real. Really, I can’t, someone pinch me!
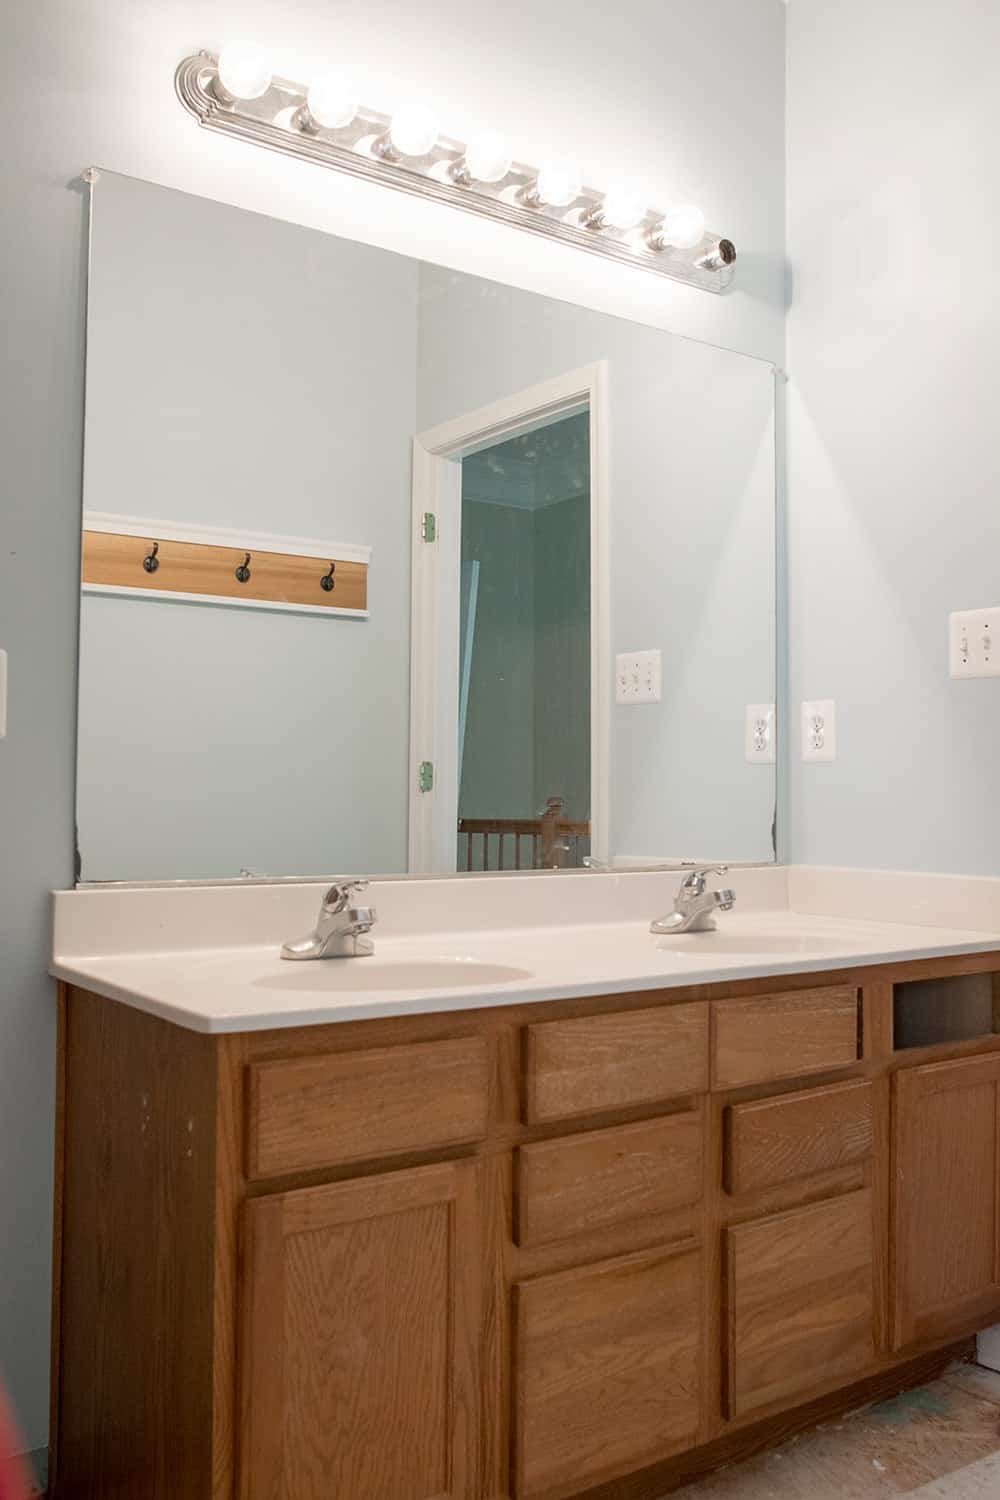
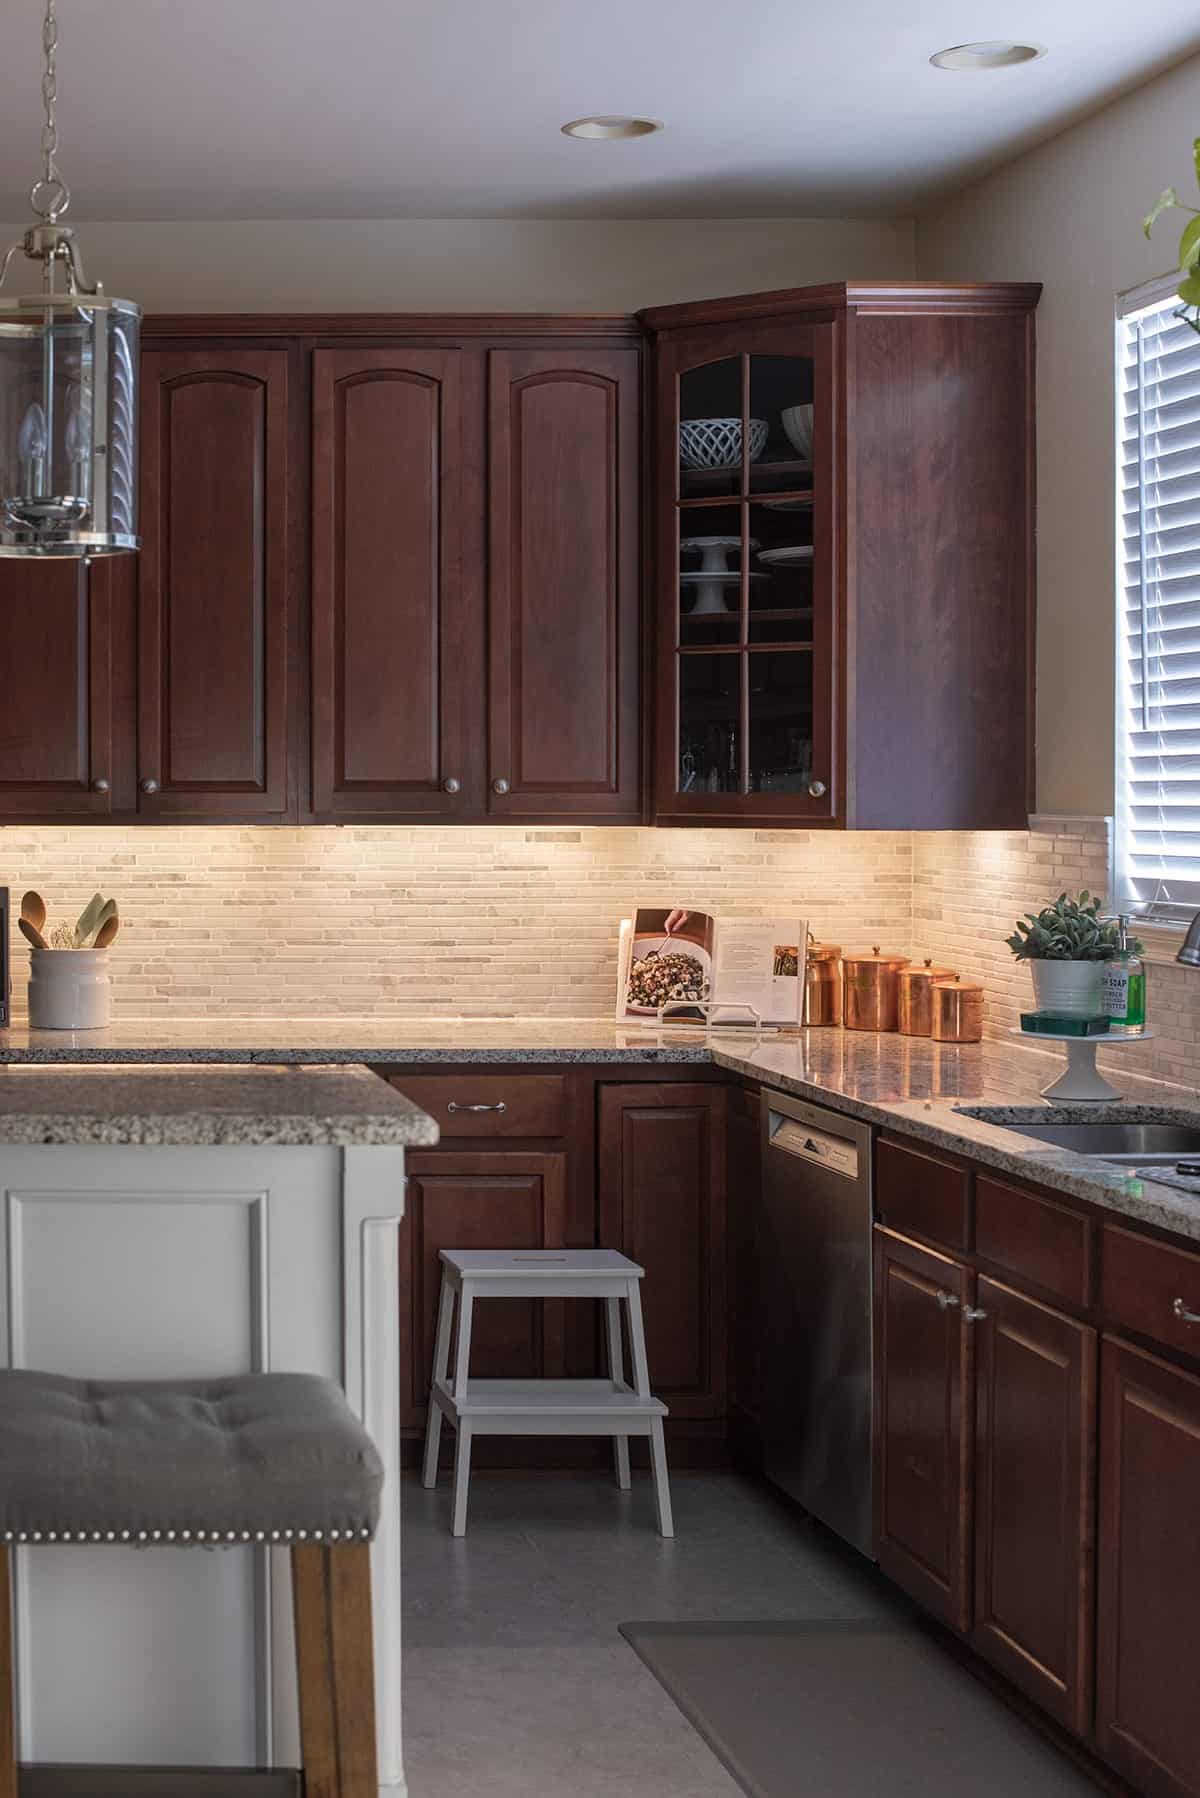
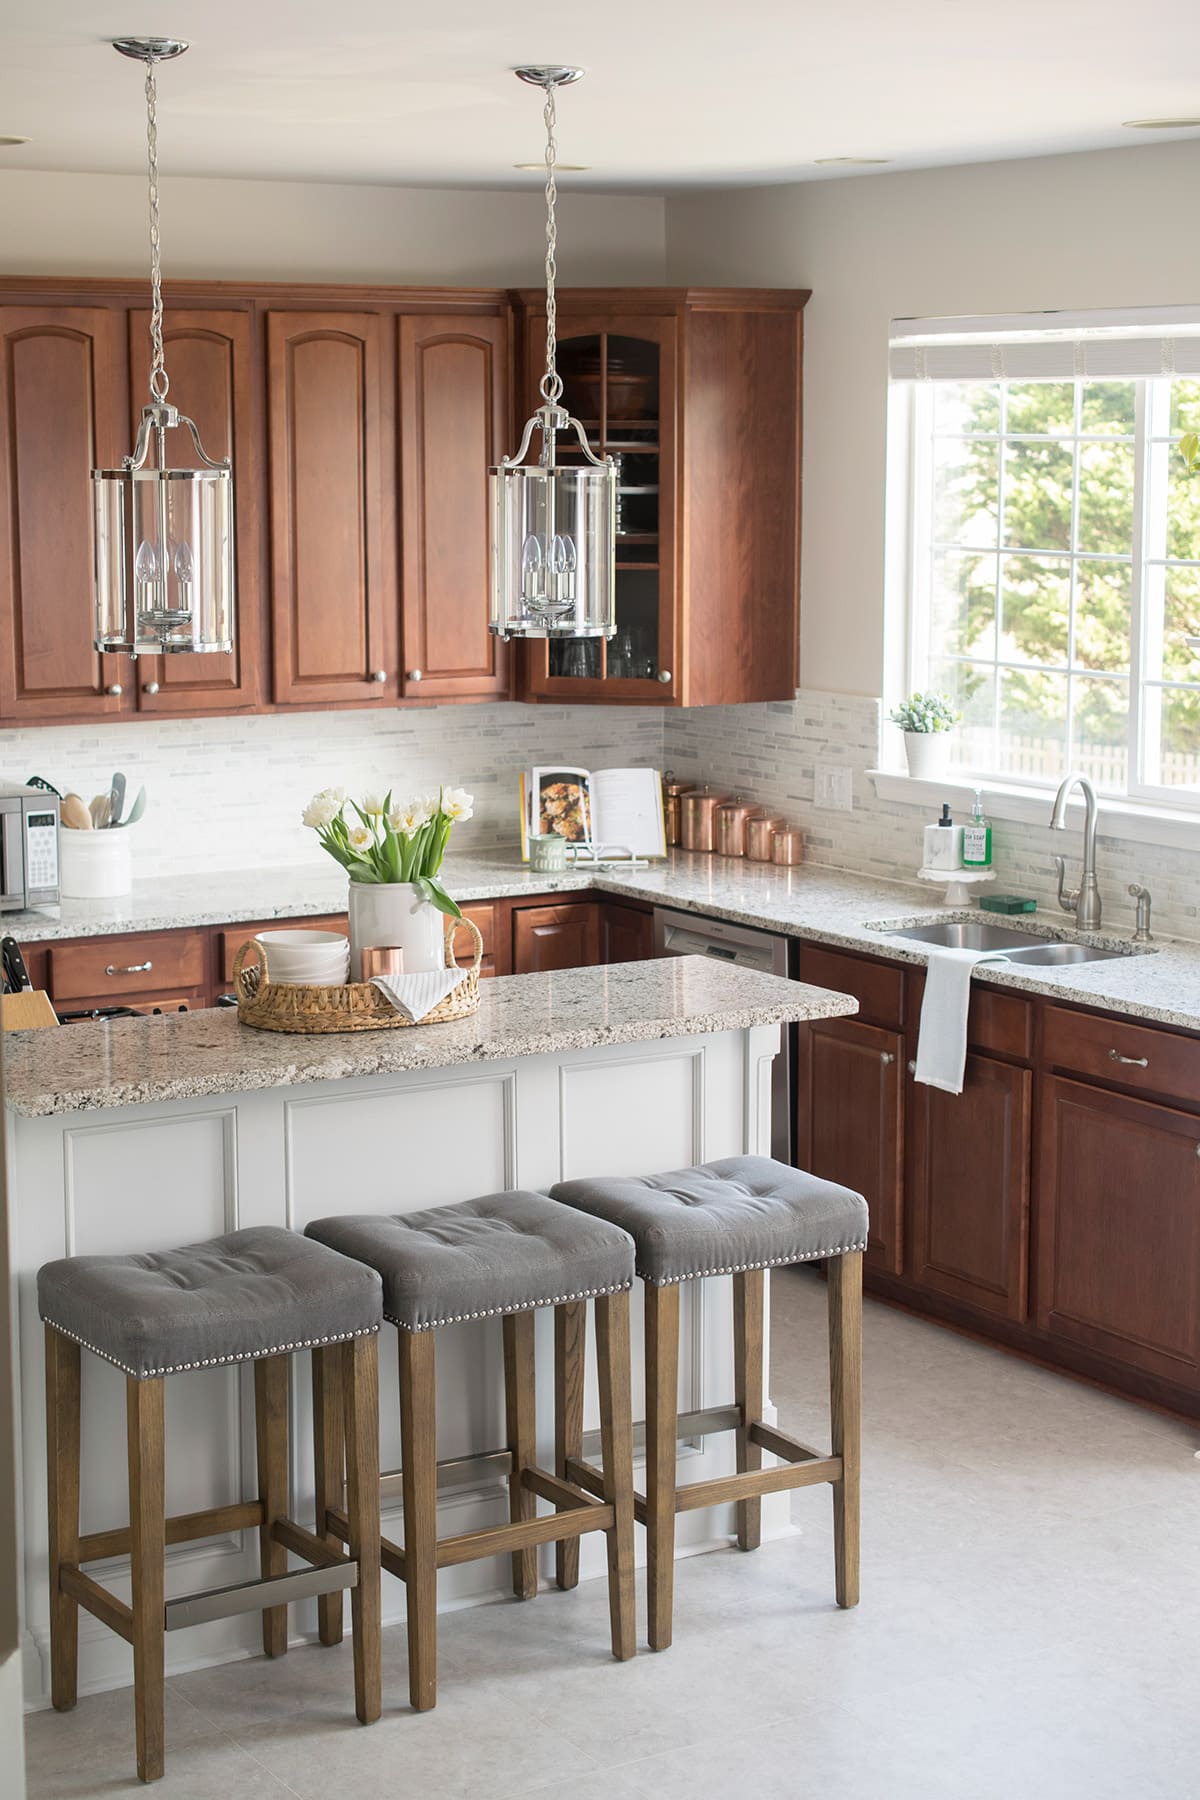
Let’s step back a bit to look at how it looked before…
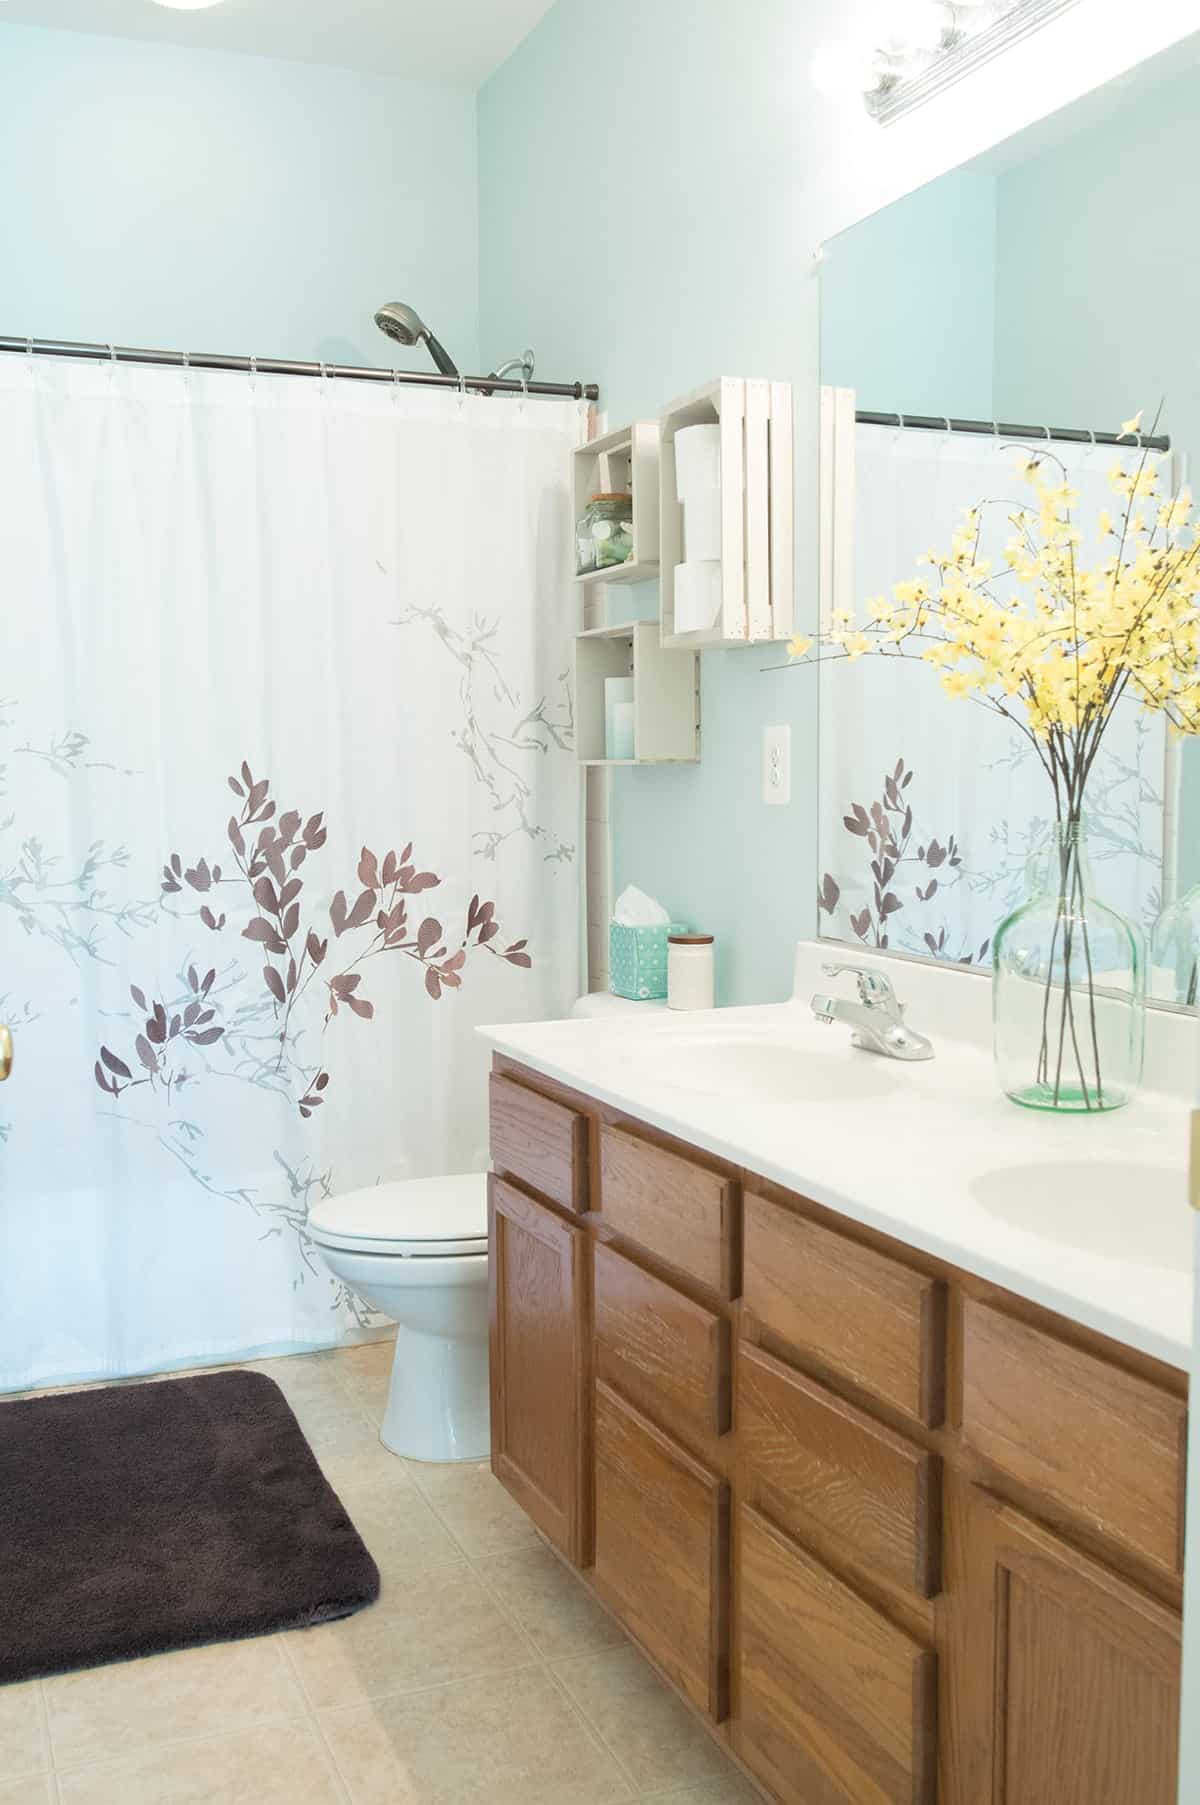
Now you can see why I am so very excited! This is a bathroom that my son and I share, but it’s also the guest bathroom. And, yes, our renovation was entirely done ourselves including the tiling, plumbing, and, well, everything. It may look like a lot, but taking things step by step (and hours of videos and manufacturer questions, lol) is always best practice.
I have included the sources at the bottom of this post if you see anything you like.
Ok, Let’s start with the shower.
Bye Bye bottles of soap everywhere and getting knocked off the side.
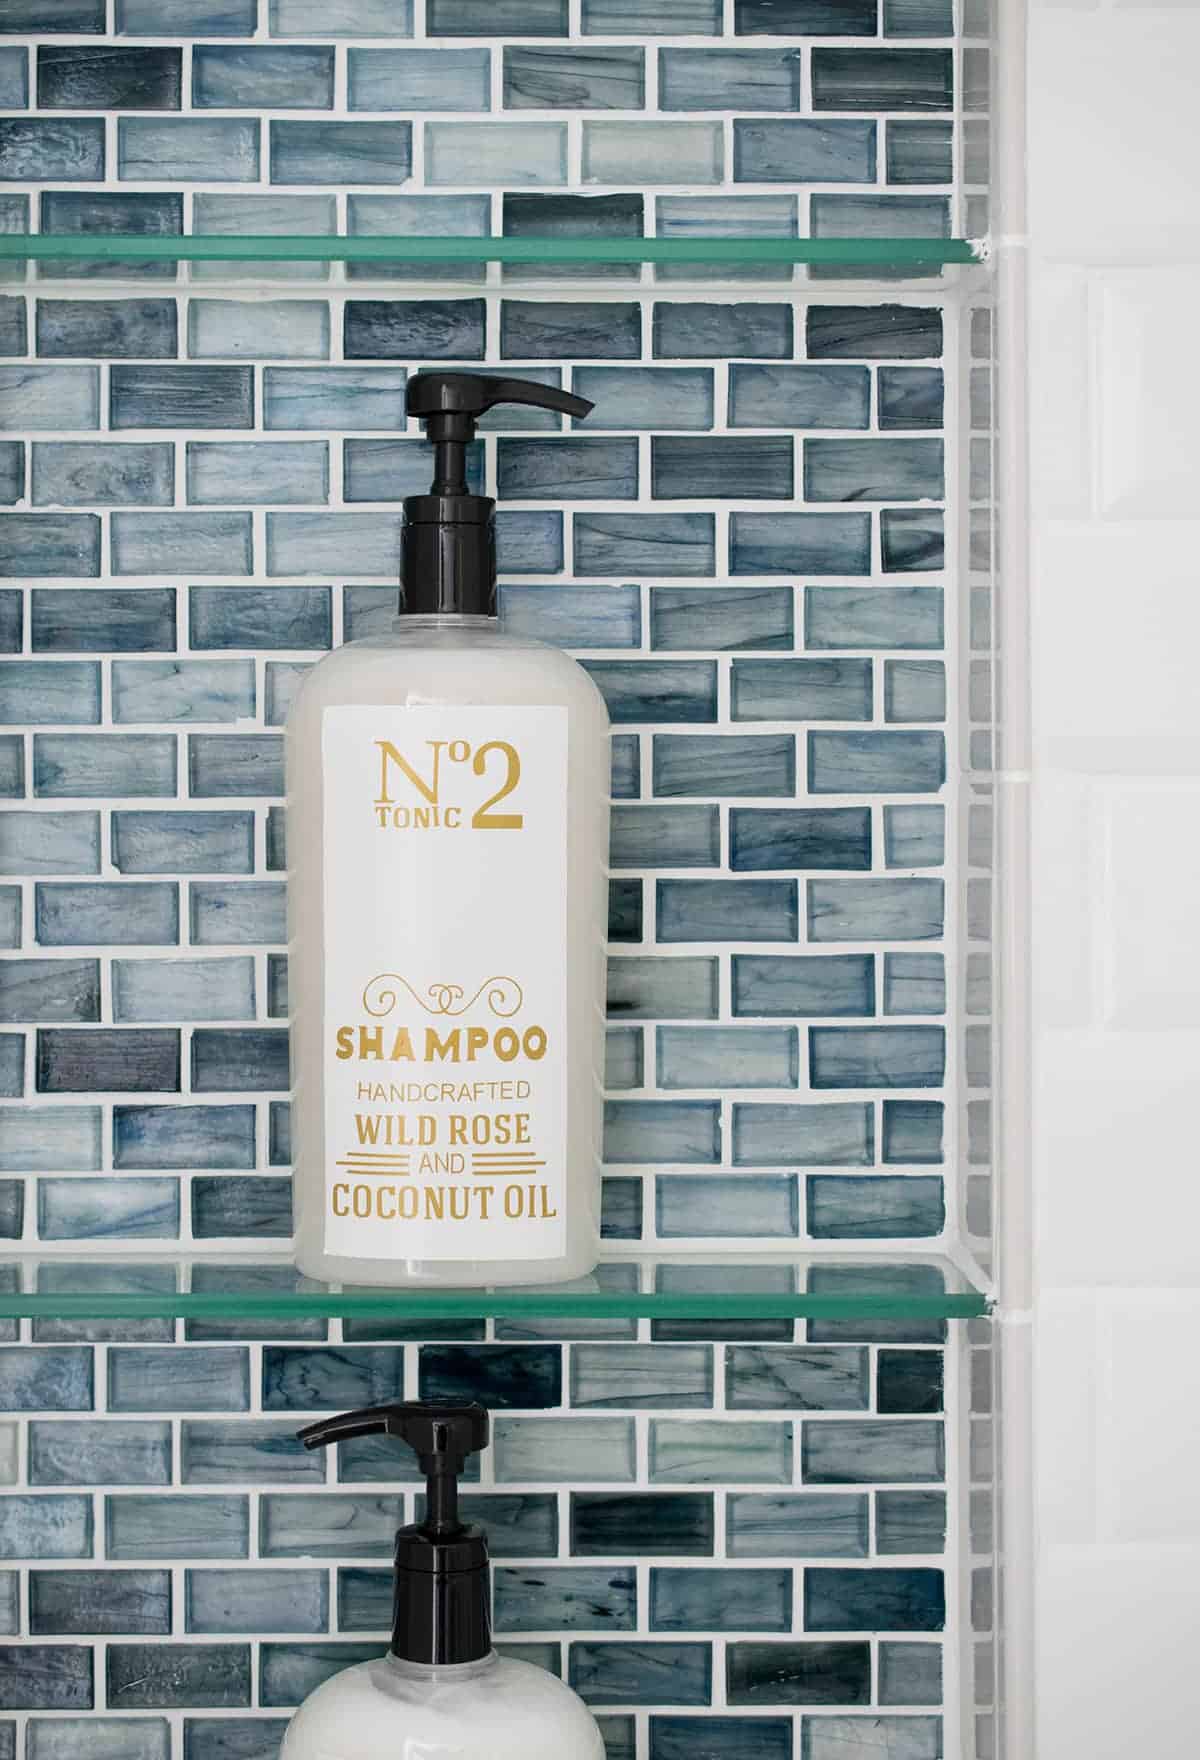
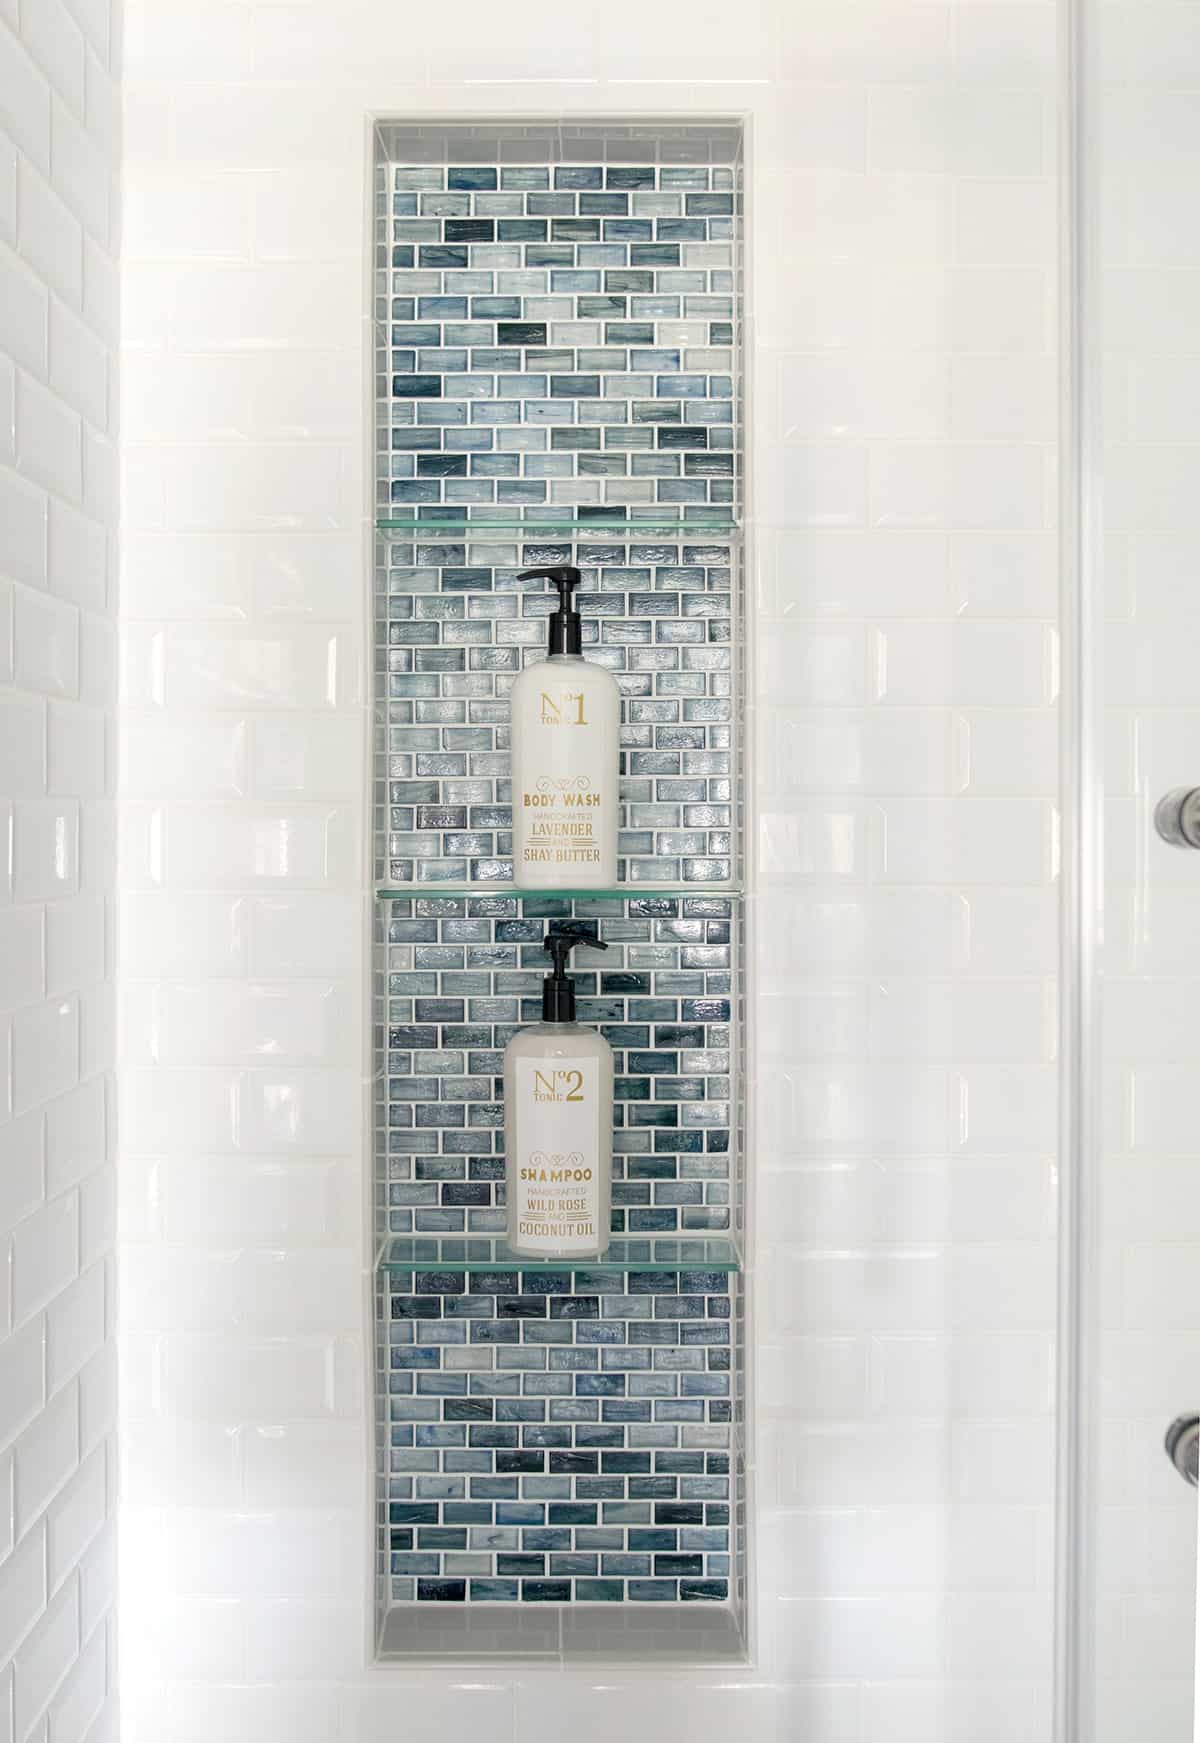
Hello, storage! The shower niche was by far the hardest way you could ever try to do a shower niche (it’s almost 5 feet tall and completely custom), but oh, the storage! I’ve never seen one done like this, so we took every precaution to build it and make sure it was absolutely sealed.
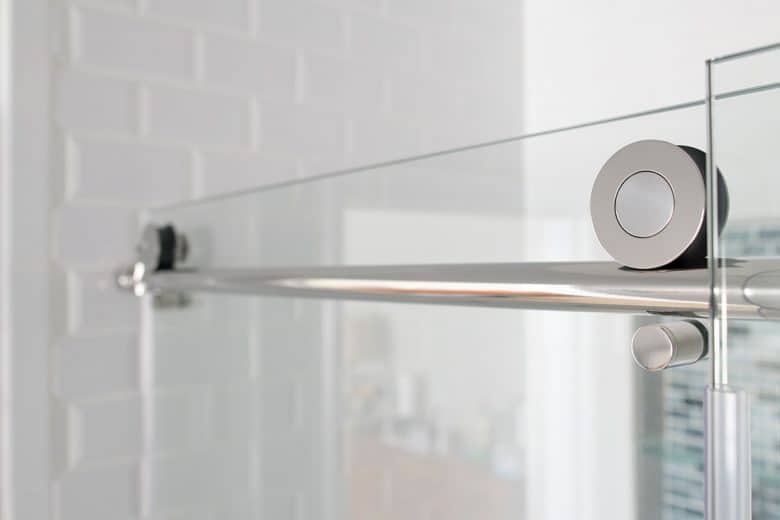
For the rest of the shower, we used beveled edge subway tile in white. You can see how we planned and worked with this specific tile here. Although I can’t decide a favorite item, these glass shower doors have got to be in the top 3. They slide so smoothly and look so chic.
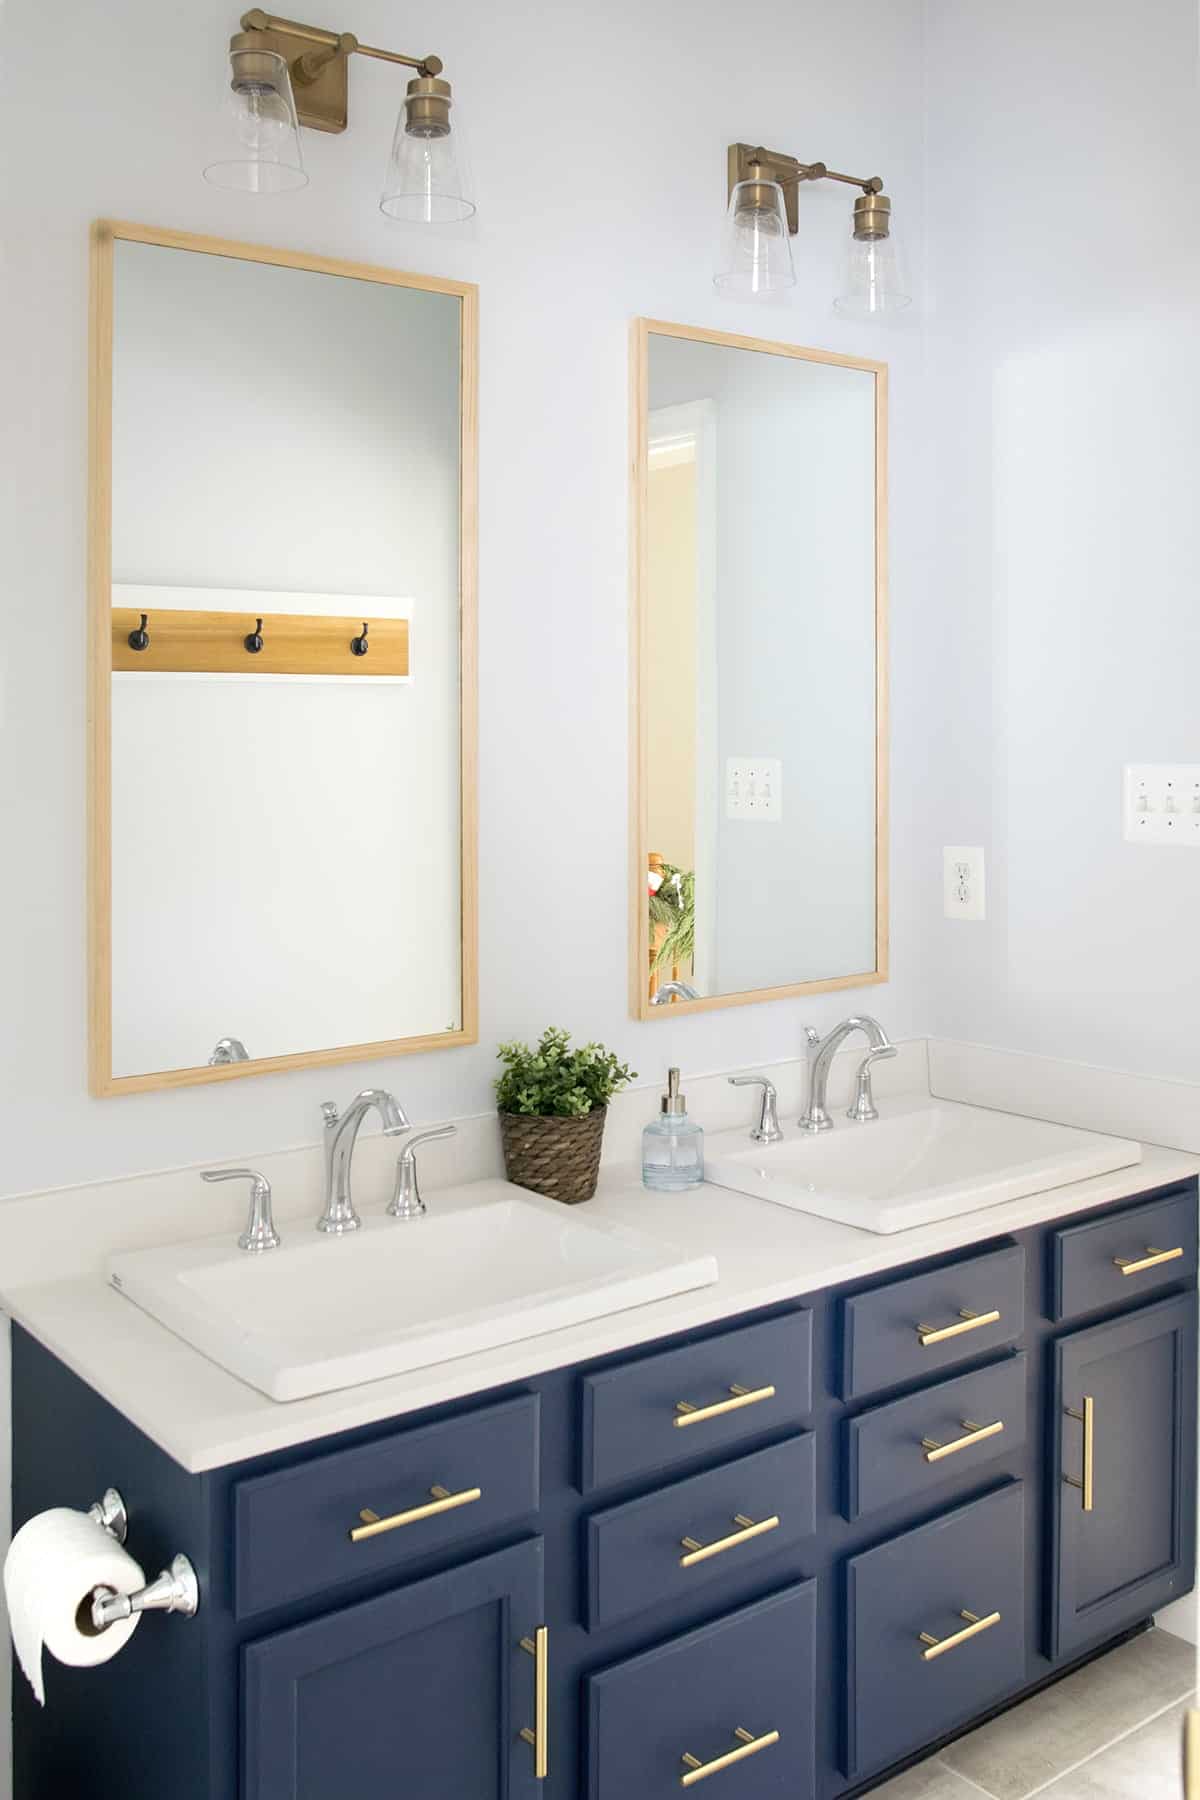
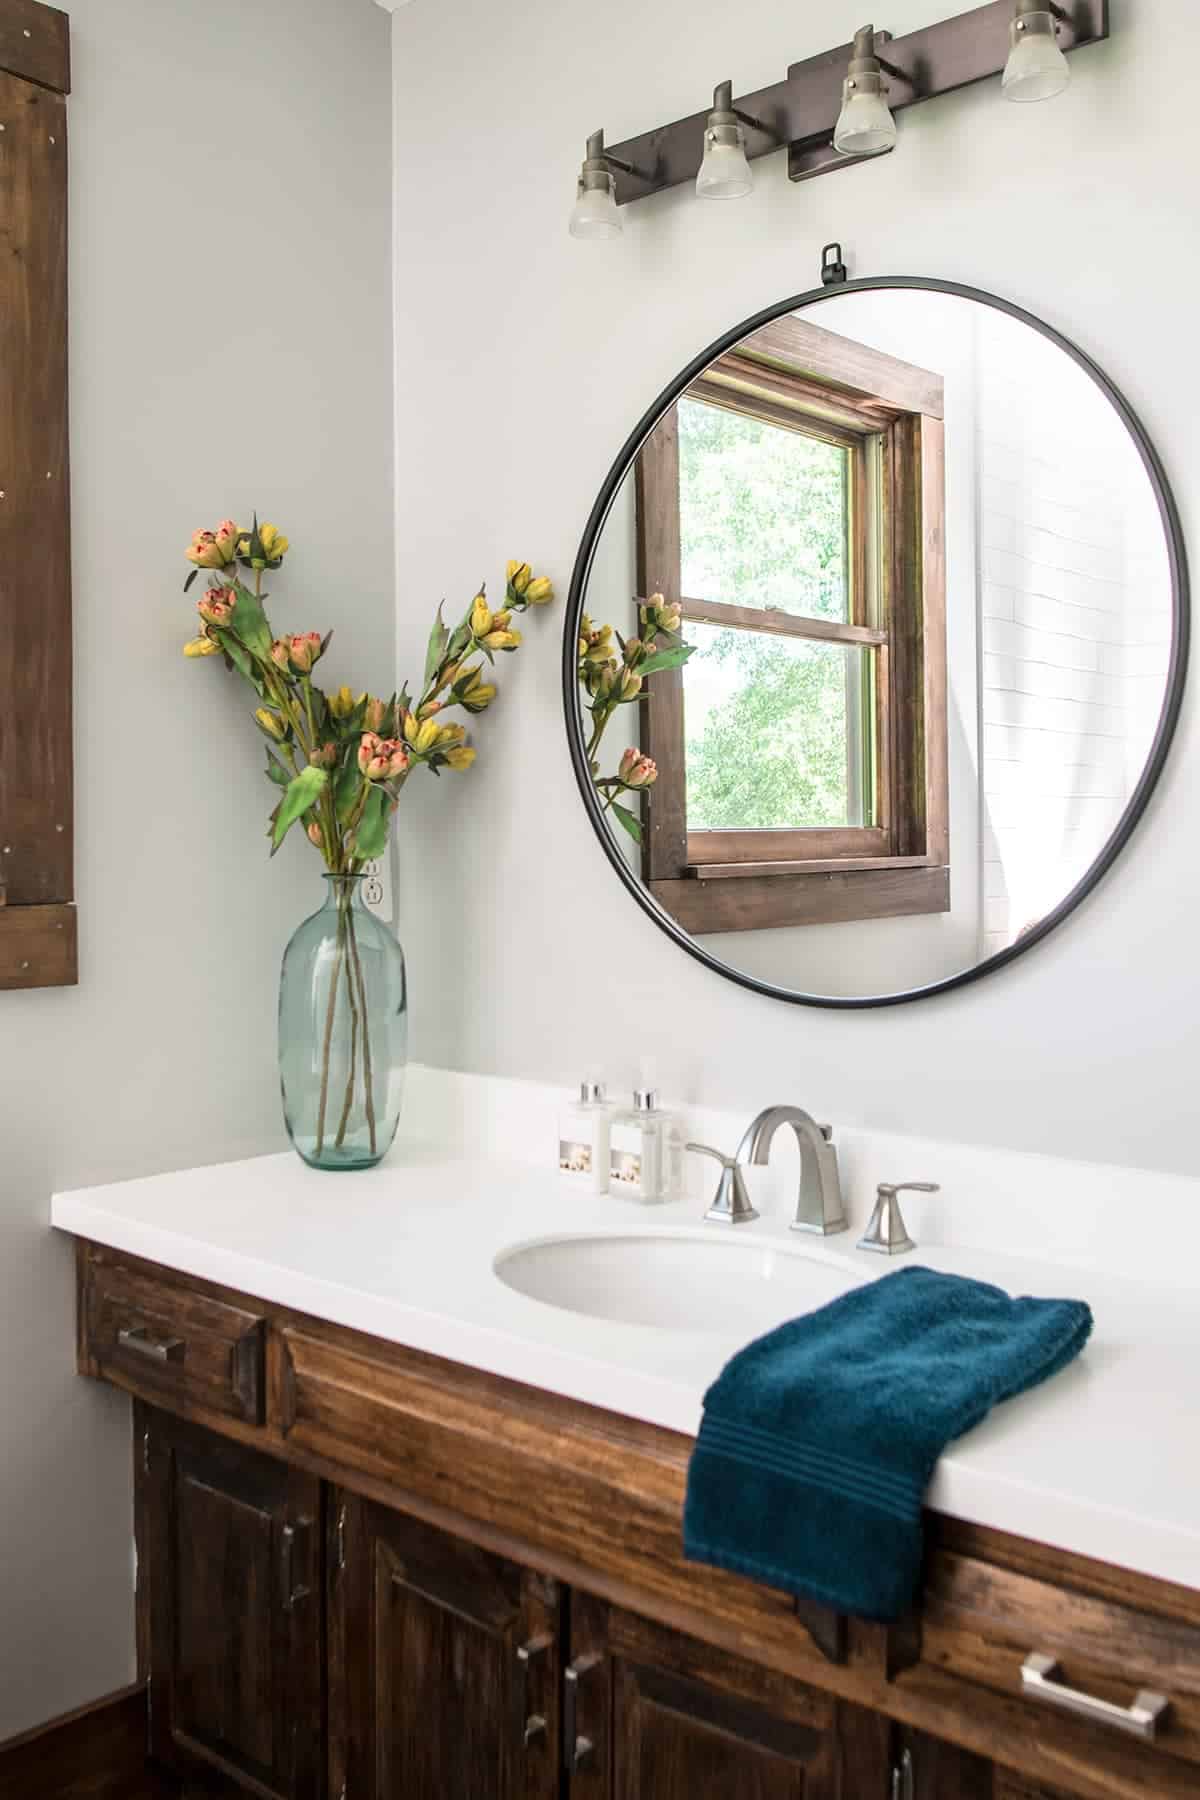
Now the vanity. As I spoke about in the post about how to paint a vanity, this is actually the original builder-grade oak vanity. I painted it in my favorite matte furniture paint in midnight blue.
For the mirrors, we actually cut the old, huge mirror into two segments and then backed and framed them. Serious cost saver!
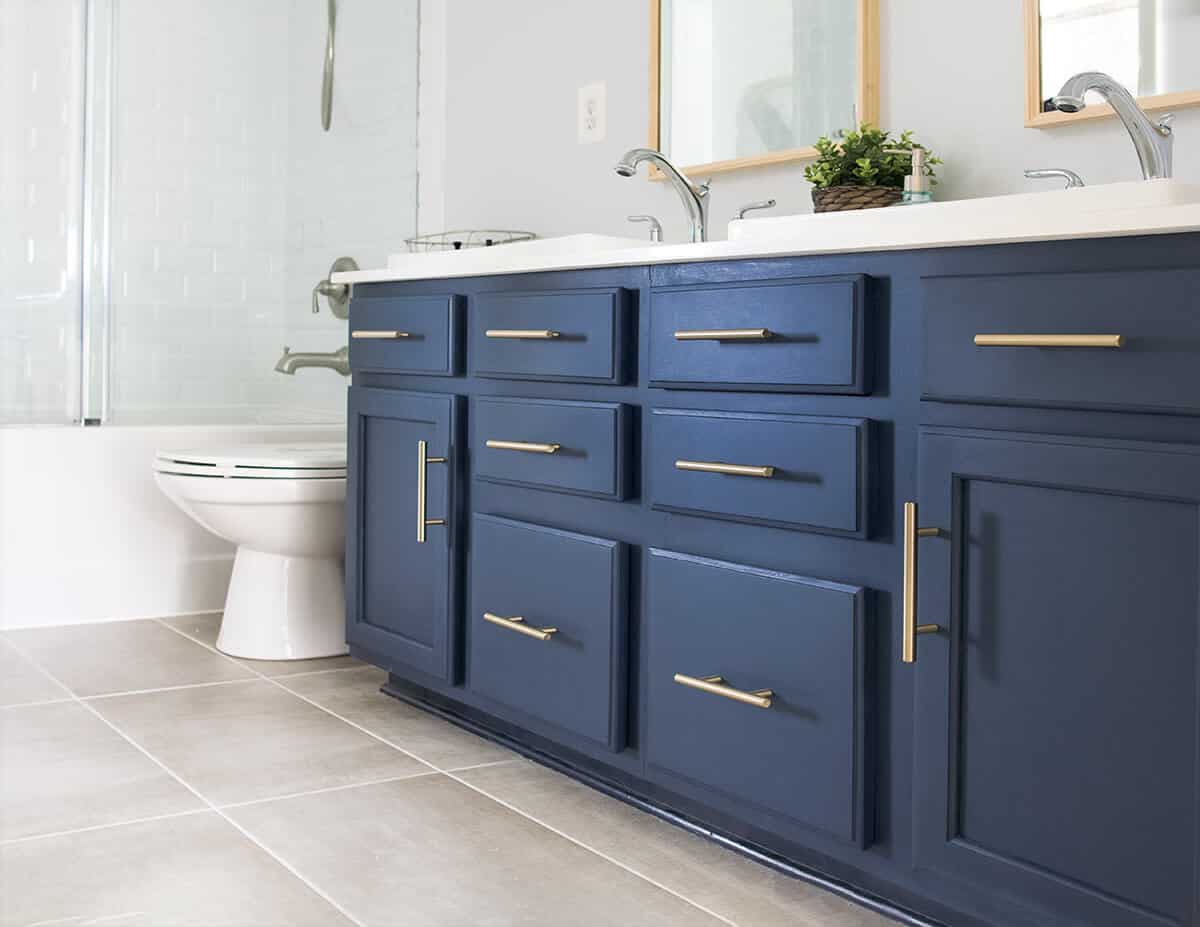
Oh, and that floor! I wanted a textured, natural looking floor, but for whatever reason I wanted to avoid wood tile flooring and most stone. Enter porcelain concrete printed stone. It’s textured and beautiful and looks so natural in the space. There were also a huge range of shades to choose from.
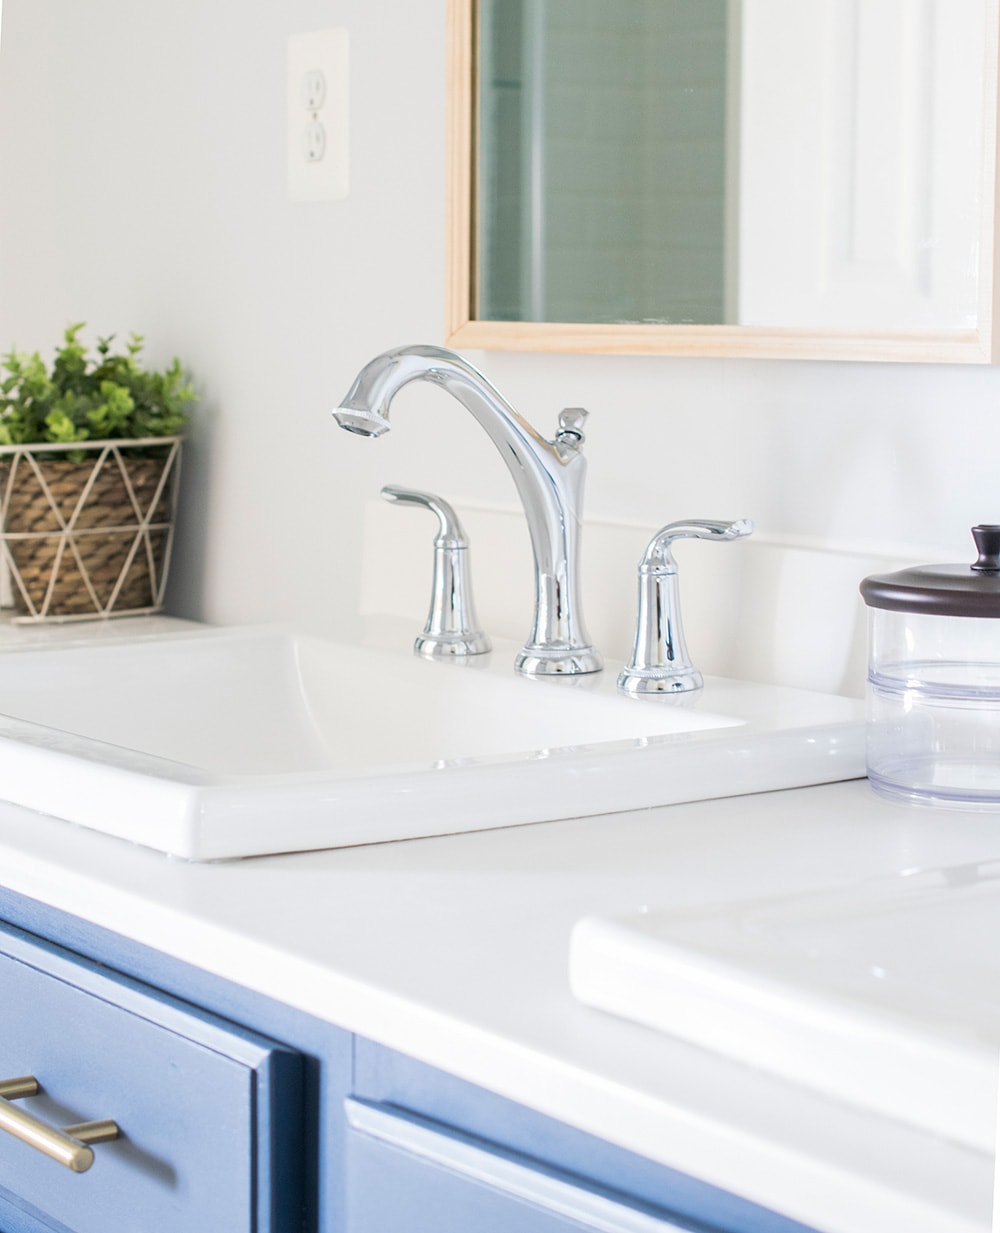
For the sinks and faucets, we decided on these from American Standard and they have a wonderful vintage and modern detailing. I won’t in this post, but we go into a lot of detail about why we chose these sinks and faucets here.
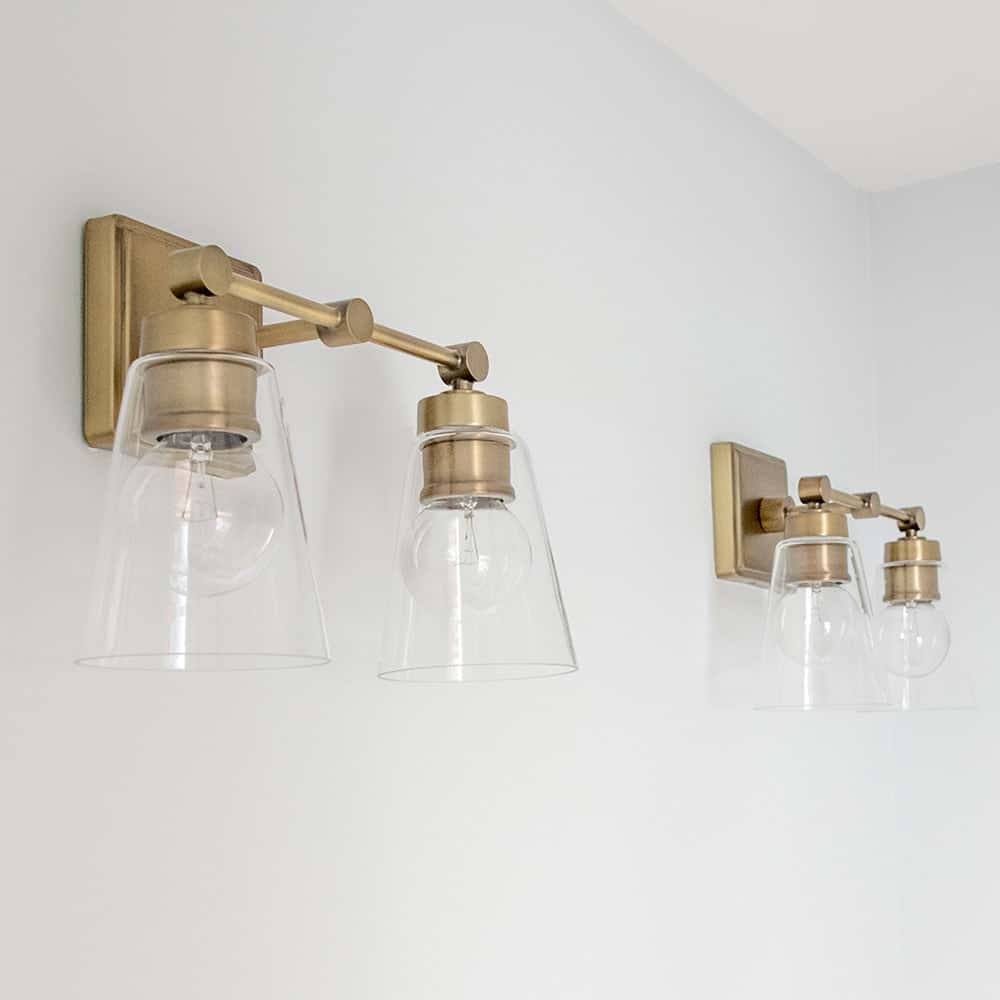
The vanity lights were actually one of the first items I picked out for the space. They perfectly embody both the classic vintage aspects and the modern shaping that I wanted.
Well, there’s our modern classic bathroom makeover. While I may add some shelves over the toilet or the wall switch eventually, there is no timeline on that and I am perfectly happy with how it is today. I am thinking it’s time for a glass of wine and a long soak to enjoy the view.
What do you think of our new bathroom space?

Shower
- Beveled Edge Subway Tile (with white unsanded grout)
- Glass Shower Niche Tile (no longer available)
- Grey Ceramic Tile and Pencil Tile (Shower Niche walls)
- Glass Tub Doors
- Enamel Bathtub (we researched this for days and posted a guide here, only available online)
- Tub Faucet and Handle in Chrome Finish with 8-inch widespread holes
Paint
- Wall Color – Benjamin Moore Ice Cubed Silver
- Vanity Paint – Midnight Blue
Vanity
- Brass vanity Handles (3 inch on the drawers and 3.75 inch on the doors)
- Vanity Lights in Brass
- Countertops (white on white in matte finish, these were custom made at Lowes. You can see how to replace a vanity top in this post.
- Drop In Sinks (Here is our 3-hole version. There is also a 1-hole version that is slightly smaller or a close matching 3 hole drop in sink)
- Mirrors (We tried cutting our own, but that was a major disaster, and these are the ones we purchased. Our mirrors are extra tall, but we kept the width about same as the drop-in sinks)
Other Fixtures
- High Efficiency 2 Piece Toilet
- Porcelain Floor Tile (there are more shades and colors)
Accessories
- Faux Potted Thyme Plant and wicker waterproof cover
- Glass soap dispenser
- White large pump soap dispensers
Total Budget spent: $3,815

Grab our free series "Weekend Home Projects that will Transform Your Life" Sign up below to receive updates including free printables, organization tips, home improvement projects, recipes and more! |
More Room Reveals

PS I love seeing your creations! Be sure to take a photo and tag #cravingcreative on Instagram! You can also stay in touch with me through following me on Instagram, Pinterest, and subscribing to the newsletter!
Melissa says
The before picture looked just fine. I have to laugh at what people think is outdated. We bought a fixer upper with 1 working bathroom that looks way worse than that one. The shower stared leaking in that one so we are stuck with using a dirt floor shower in the basement. We are a family of 12 so it’s a little tight. It’s fun to dream about what could be someday! Nice work!
Rachel says
Everyone is free to have an opinion, but I never said we remodeled this bathroom because it was outdated (I still have a peach bathroom I would love to demo, but it’s functional for now). When we bought this house from closed auction foreclosure, we had no running water and two of the bathrooms had toilets sinking into the floors from rot and water damage. The vinyl flooring may look fine, but the whole floor is rotting underneath. I realize I don’t talk much about where we started in this post, but I was focusing on the win. All that said, that’s still better than 12 people using a dirt floor shower. I am so sorry for that and I hope you can get your dreams soon too!
Leeann Anderson says
Hi! I love this bathroom… especially the tile niche. It’s really unique. I found some glass tiles similar to yours. Can you provide me some information regarding sealing them? Also is your entire niche framed with grey tiles, if so what size? And the pencil tiles how are they used? I have a handyman friend and he stated he will help me with a bathroom design similar to yours as it is so stunning:-) Can you provide me with some closer up photos. I’m really hoping for this to turn out awesome like yours!!
Rachel says
Glad you like it! Making a custom niche that large was a bit of a pain, but I wouldn’t have it any other way. It’s been a few years, but I remember there was A LOT of math involved with the spacing of the shelves and making sure everything lined up. Your design may be end up being different, but I can tell you what we did. I would HIGHLY recommend setting out all tile in your design to double check the measurements before framing the niche.
The grey tile around the outsides is a 3×6 subway tile. I tiled the blue back tile first (with gaps for the shelves), and then put the grey tile and shelves in, and then added the pencil tile on the edges. The rounded edge you see on the surround is a pencil tile. It isn’t part of the gray tile but it matches the color exactly. To be honest, the pencil tile took me an entire day because I cut them so all the grout lines matched up perfectly. An edging tile would be easier, but we didn’t have a good option. Everything is grouted with non-sanded white, and a grout specifically for glass tile that won’t scratch. I do use a sealer/flexible additive in my grout mix and I seal yearly although that isn’t needed – I have a marble surfaces in other places, so it’s just my routine because it only takes 10 minutes. I am careful about what sealer I use though because some can yellow over time. I will also share a mistake we made (haha!), which I shared in our yearly failures post. I had previously always worked with pre-made niches, so I forgot to take the cement board depth into account for the glass shelves. There are also more photos from the install in my tips for beveled subway tile post.
I know that was a lot of info, but I hope it helps to make your project a bit easier and more awesome!
Leeann Anderson says
Thank-you for taking the time to provide me those specific details! Are you familiar with Luanda Bay glass Tiles? I found the most beautiful striking blue to use for my tile niche project. Series: Sumi-e, Color Kyoto, Finish:Natural. A contractor friend was going to order them for the niche, unfortunately we found out today that they have been discontinued. I saw that what you used for your niche was also discontinued. Can you tell me where you ordered yours from as possibly they would have a similar style and color?
Penny B Wheeler says
Can you show us what brackets you used for the glass shelves in the niche? I did a niche like this, from scratch (yes a real pain) but the brackets seem to be a real issue, I dont want to drill thru the tile until I am positive on correct brackets.
Thanks in advance!
Rachel says
I actually didn’t use brackets or drill through the tile. The shelves are set into mortal between the tiles with the front being tiled in with pencil tile. This one is a permanent fixture. A glass shelf after the niche has been set is a little different but with any shelf, just make sure there is a slight slope to allow water to run off. There are special drill bits to use for tile (usually diamond tipped) so they don’t crack or apply too much pressure. That’s the best I know.
Nicole says
Thanks so much for sharing, this is exactly what we are looking to do to our bathroom! Do you have any tips on how you replaced the flooring? Curious what sub flooring you used and what tools are necessary.
Rachel says
I am working on some tiling posts, but I don’t expect them to be out soon. We laid traditional mortar and tile here. This particular floor was a plywood subfloor and tile should not be laid directly on a plywood subfloor. The main underlayments that are suitable for tile include Hardibacker, Fiber Rock, and Ditra products. In this tiling installation, we used hardibacker but have used Ditra in other instances. If the floor isn’t level (dips, large cracks, etc), it needs to be leveled first. That way the cement board or hardibacker has full support underneath to prevent tile cracking. There are a few instances where I would use Ditra – tiling over concrete, tiled shower floors, and heated floors. Ditra is a waterproofng and uncoupling membrane. There are a lot of layers of products for tiling, but not really a lot of tools – an appropriate tile saw, trowel, float, 5 gallon buckets, tile spacers, and a way to mix the mortar are all you need for any tile job. Most of the cost is actually in the products needed to lay the tile. I hope that helps answer you questions.
Ashleigh says
Hello! I love the midnight blue and am getting ready to order. Do you still feel like the paint has held up?
Few other questions- I have redone a lot of furniture and did our entire kitchen last summer.
Do you use a stripper before this paint?
Did you use a topcoat?
Thank you 🙂
Rachel says
I love this paint! I’ve redone a lot of furniture with Fusion and rarely use a topcoat except for things like table tops or kid’s furniture. I did not use a top coat and it has held up really well. Unless the underlying paint or finish is in bad shape such as peeling, you don’t need to use stripper. A simple rough-up sanding is all that is needed. It bonds very well, although if you had a slick surface that you couldn’t sand, they make a bonding agent called Ultra Grip that helps.
Meg says
Am a little late to this party—
What an amazing transformation! Congrats on all your hard work paying off—it’s gorgeous! And props to you for doing it yourself.
How’s the frameless shower door holding up with the beveled tile? We’re you able to successfully fill the gaps where the sliding door meets the tile?
Thanks, hope you still get that great feeling every time you walk into that room!
Rachel says
Yes! Having a easy to clean and maintain bathroom that I love is the best! I did silicone the gaps on the shower head side, but that wasn’t possible on the open door side. However, I have never had any water spill out, so I’m good with that. Our 10 year old sweet-but-incredibly-energetic son uses this bathroom, so that glass shower door scared me because I have visions of him slamming and shattering it, but 2 years later and it looks as good as the day we put it in. I will say that my biggest tip with a shower door like this is keeping it clean. Weekly, I wipe off the spots with water and a gentle sponge and then dry it with a Norwex window cloth. No scrubbing, no chemicals, no streaks. That’s the easiest method to making the glass sparkle with minimum effort.