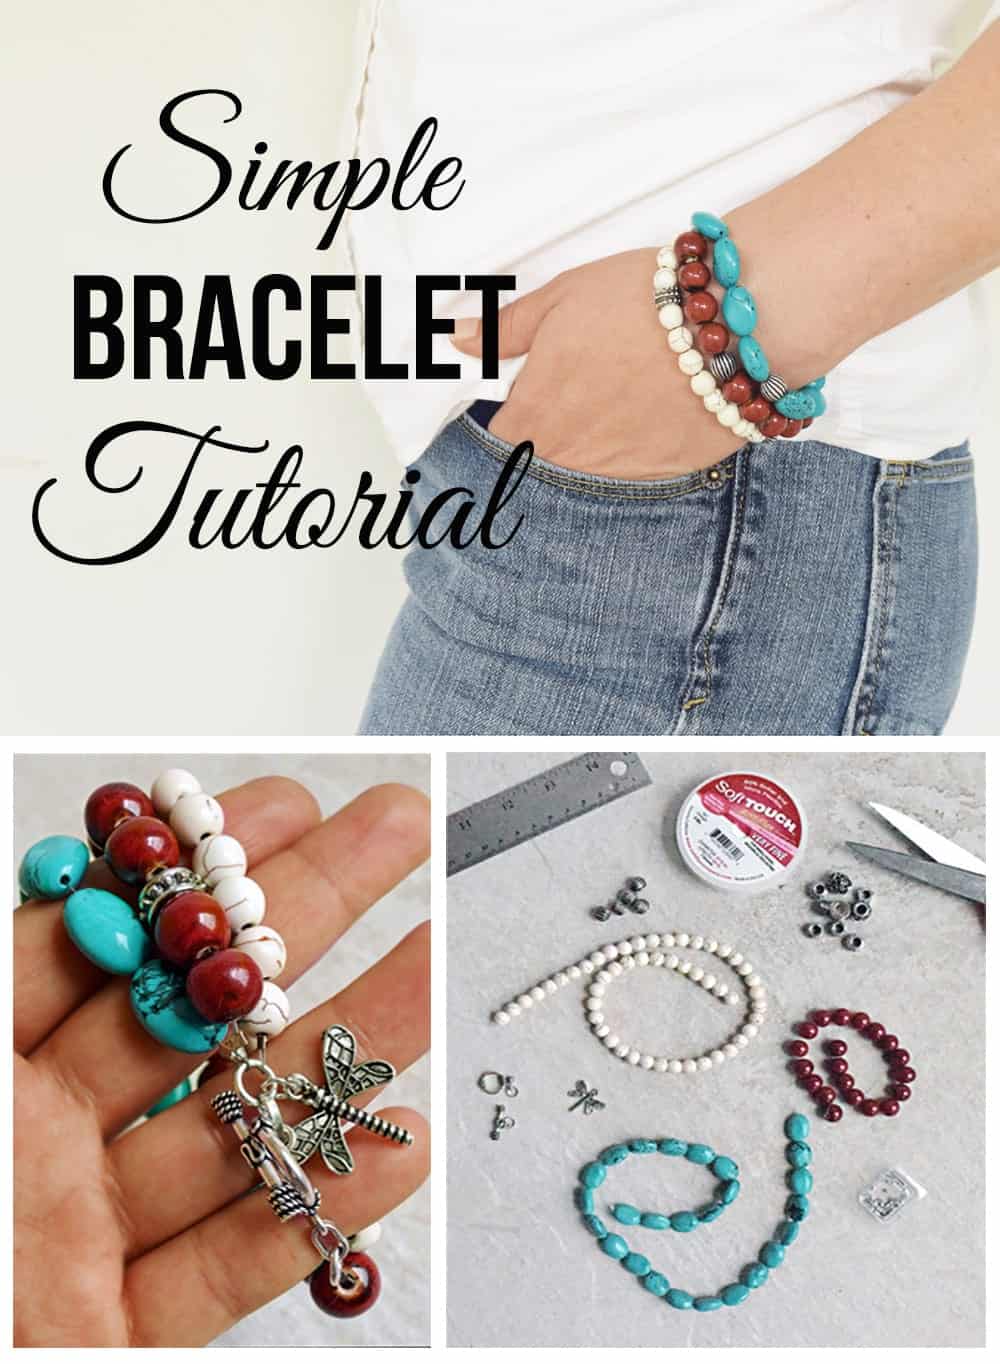
Jewelry making for beginners – I had some fun with these easy DIY bracelets, combining stone beads and charms to mix and match.
I have just completed a new adventure in DIY – making jewelry! Fashionistas, watch out! Actually, I will admit that I have always been very impressed by those who make jewelry and accessories. Personal expression is another sign of creativity. I have done my share of crafting like Wire Art, making my own eyelet for currents and even a rustic arrow wall art in my custom craft room. I saw all those jewelry supply aisles in craft stores, but I thought you might need tons of tools to even get started. But it turns out, I was wrong, and this bracelet only took me about an hour with no experience!
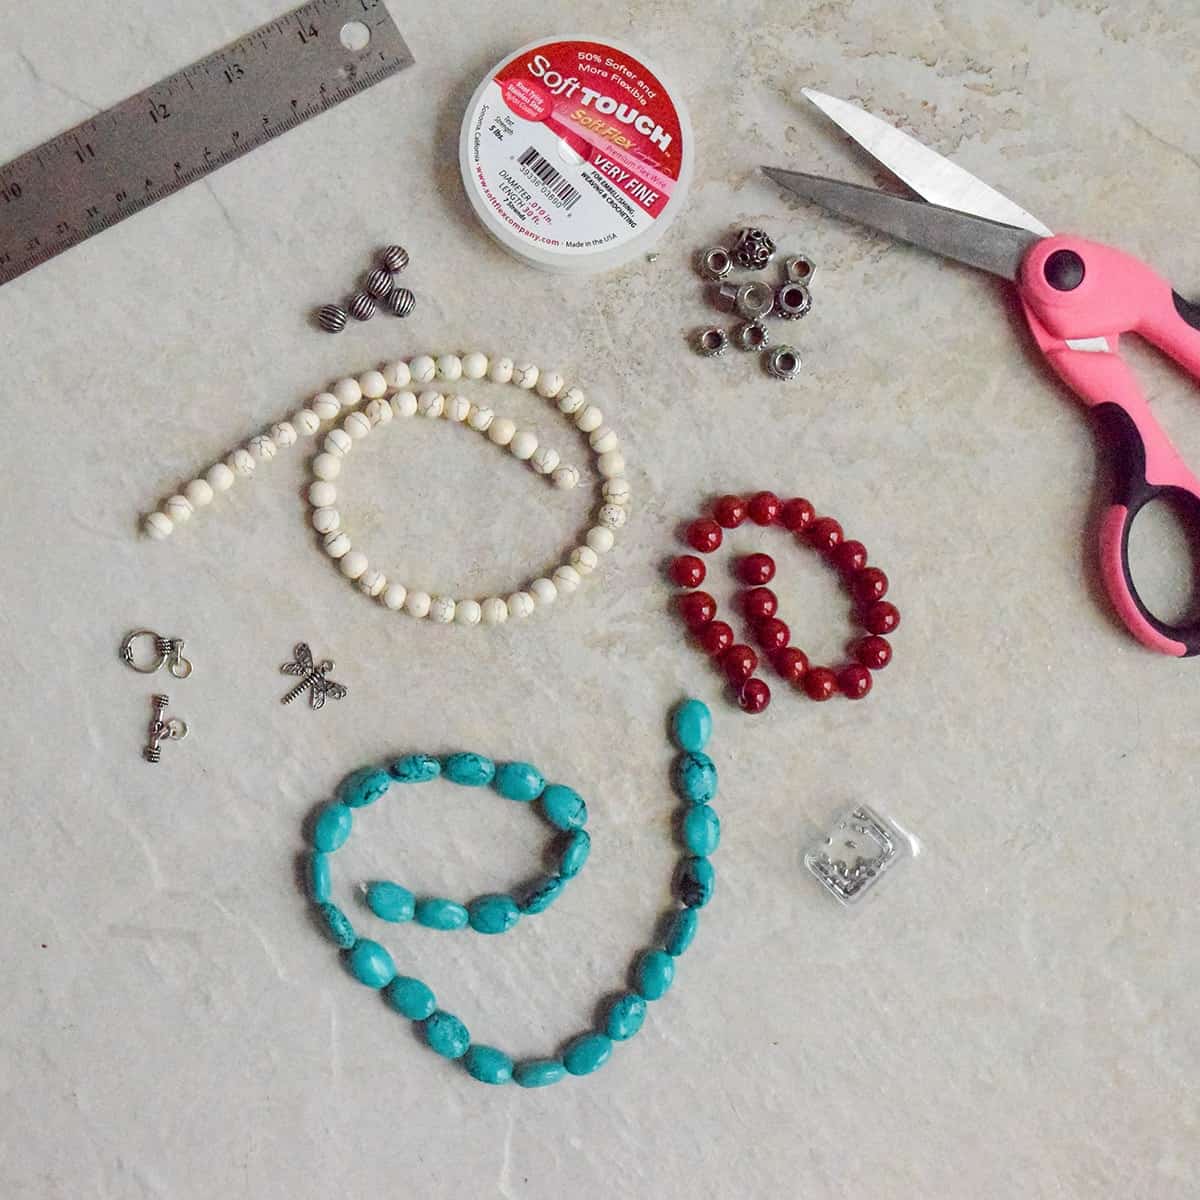
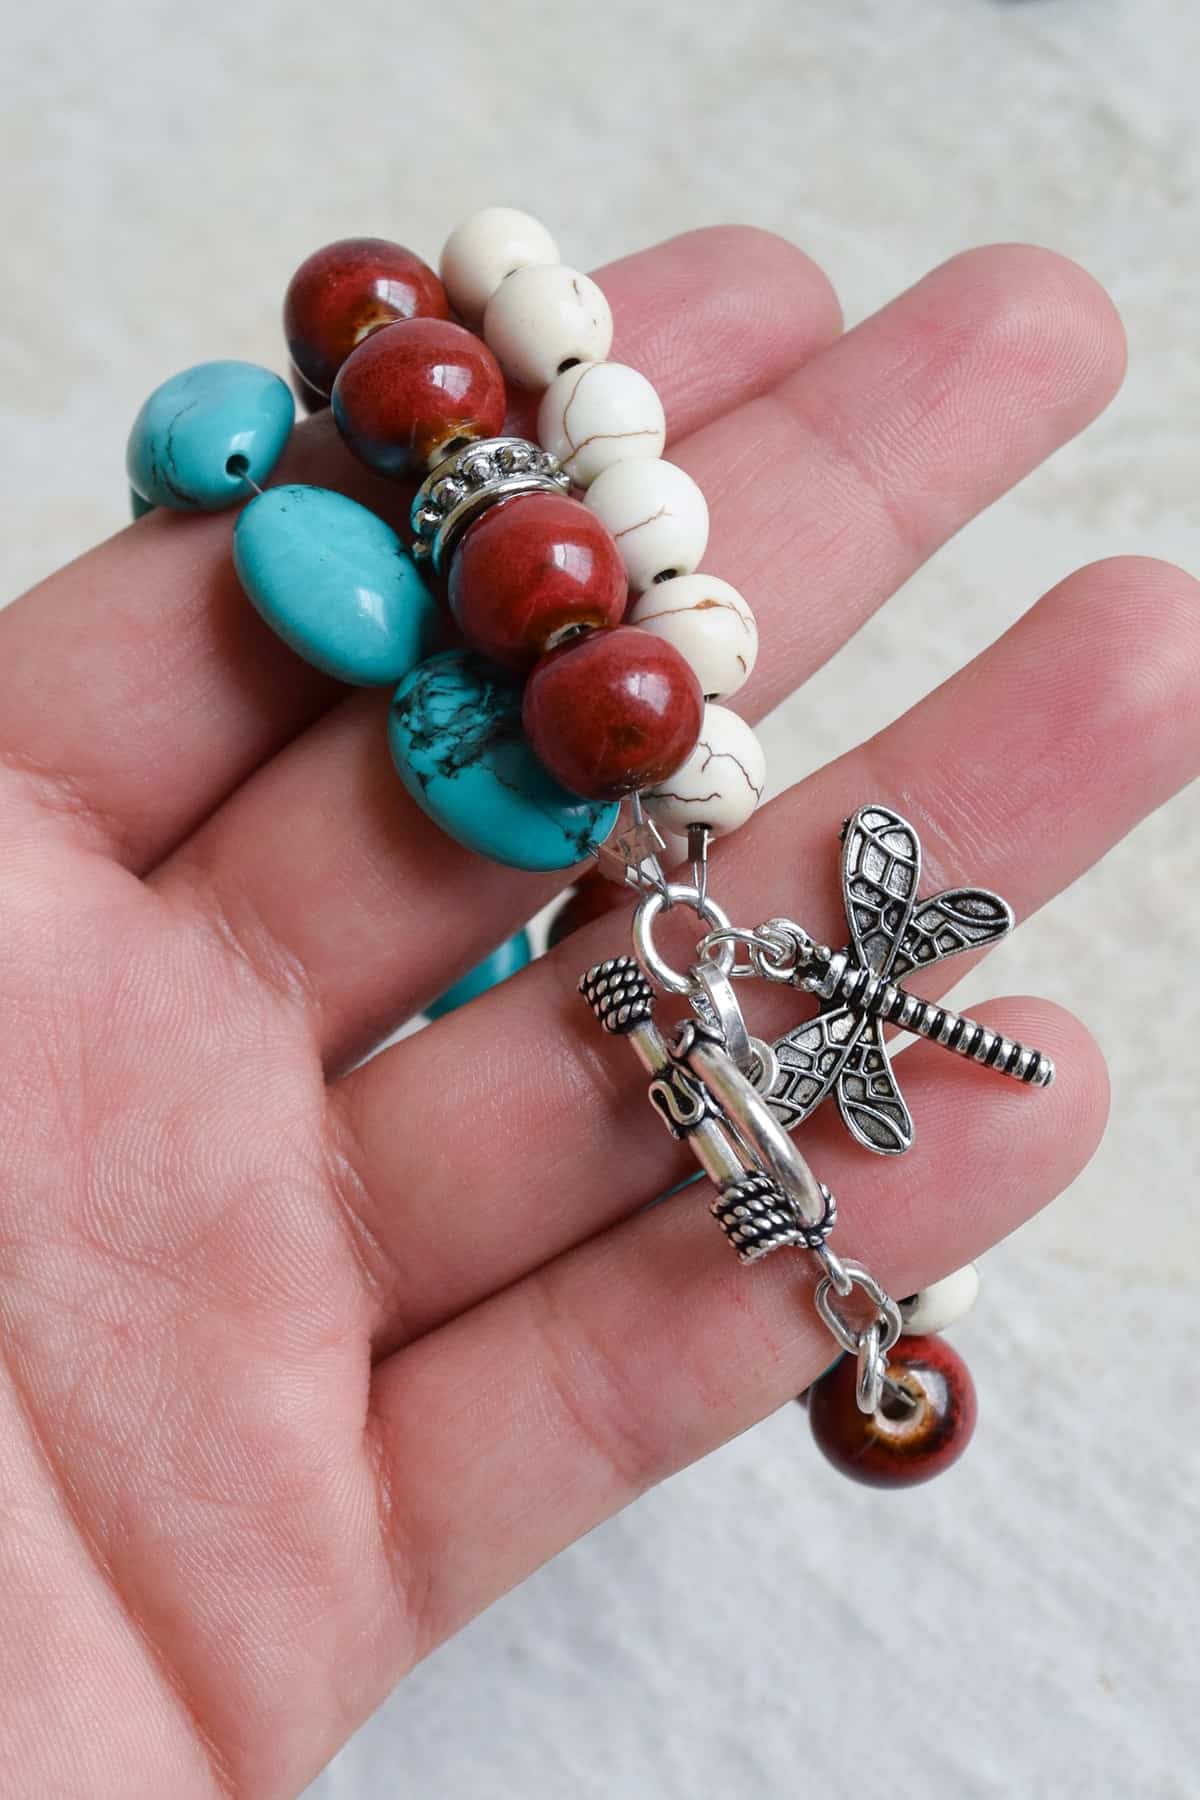
The best thing about this project is selecting the beads. They had all the supplies I needed including clasps, charms, and even wire! Their wholesale prices were impressive! Actually, cheaper than my local craft store. I chose turquoise and mixed in some 8mm howlite and maroon ceramic beads. I really like the color combination. I can see how this can be an addicting hobby because I already have a wish list, haha.
Ok, so let’s get to making!
How to Make A Bracelet Step By Step
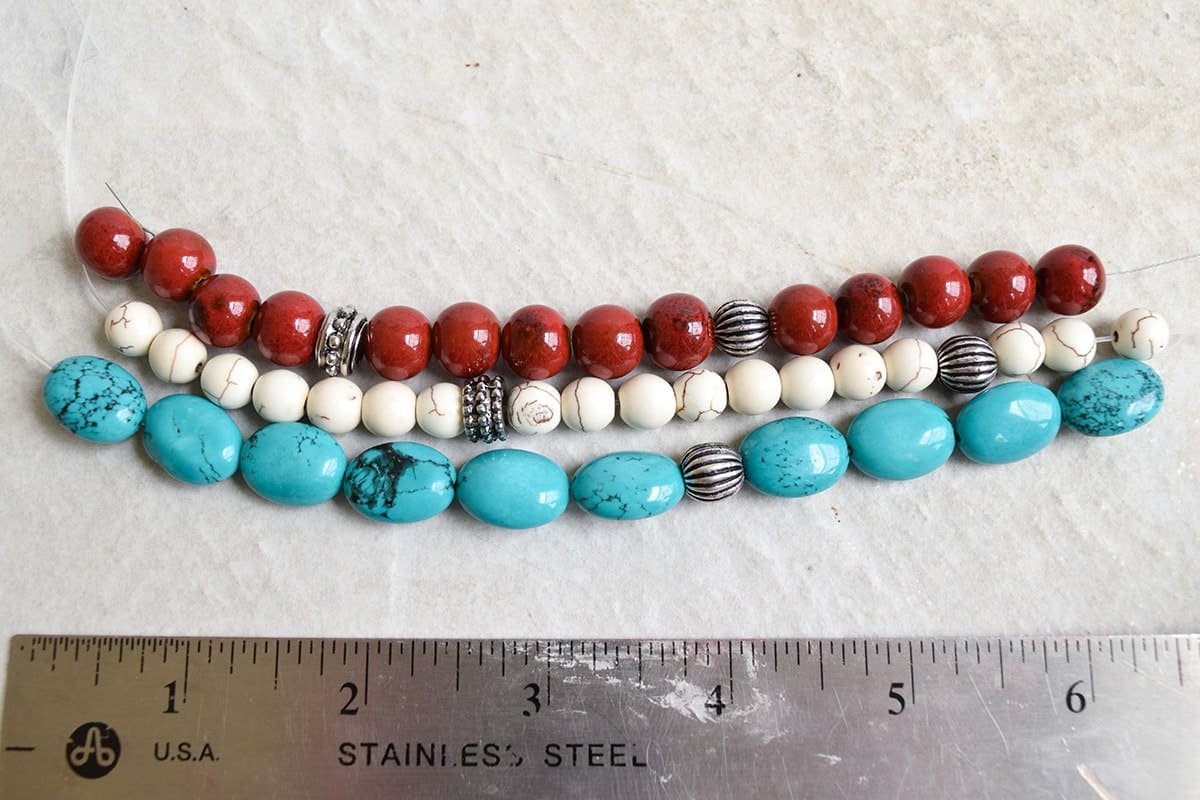
Step 1- Layout your beads and spacers how you want them to be. (For the astute observers out there, you may notice I made a few changes later in the order of beads). Decide the length of your strand. My total length was 8 inches with a 1.5-inch for the clasp. Therefore, I designed for a 6.5-inch string of beads. Using the flexible wire, thread one string of beads on it.
Tip: Many steps are made easier by stringing the beads while the flex wire is still on the spool (uncut).
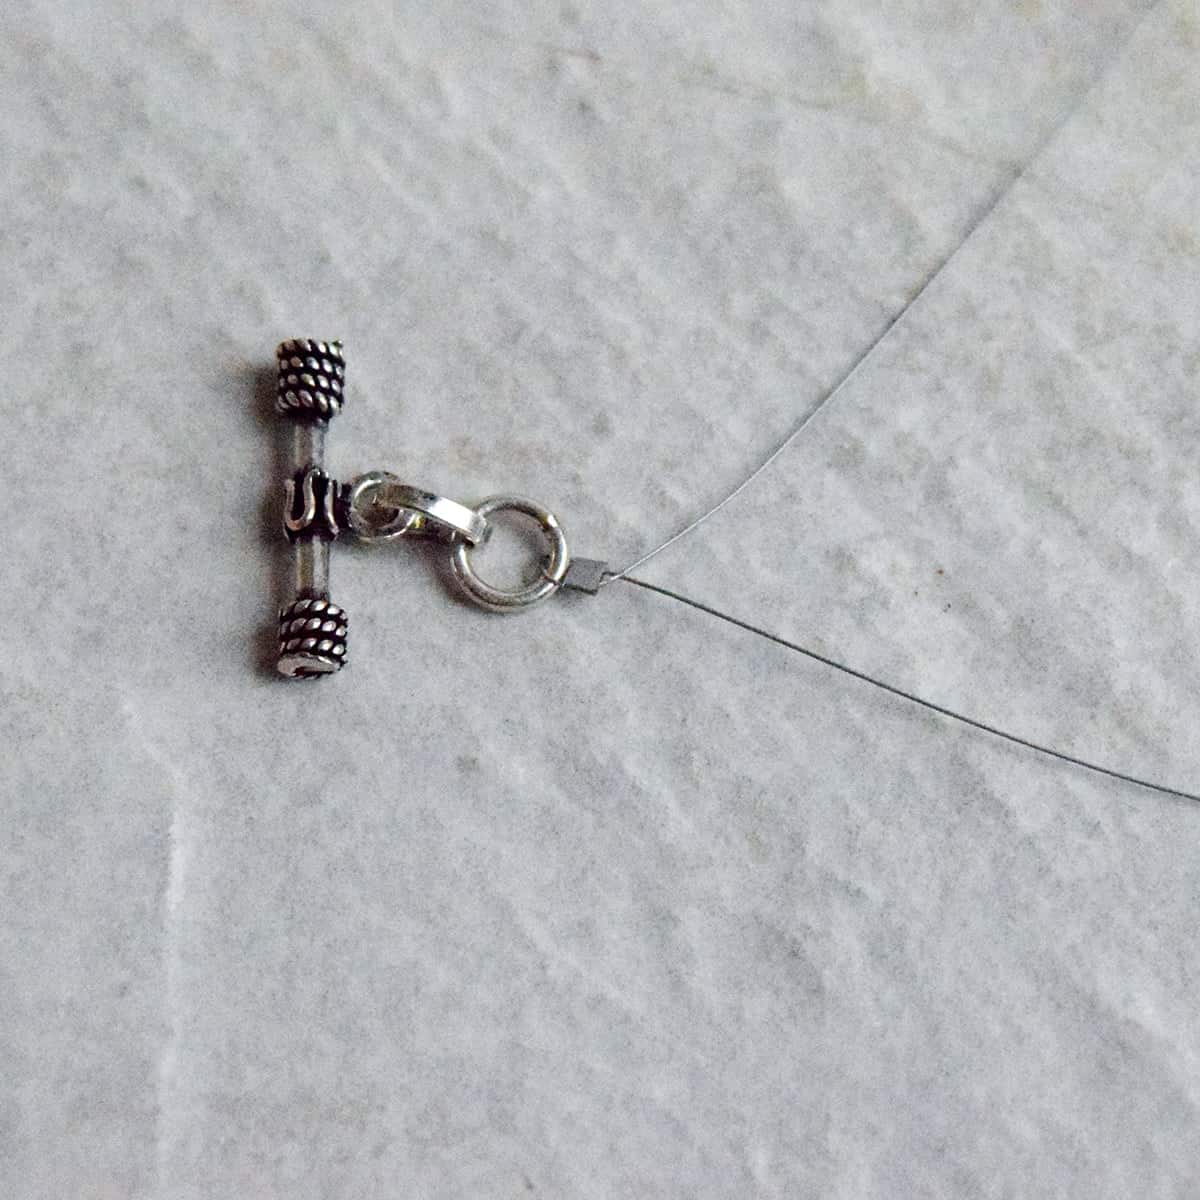
Step 2- After the beads were on, I threaded the flex wire through a crimp bead, then through the closed hole that attaches to your clasp, and then back through the crimp bead. Pull the crimp bead up close to the clasp, and, using a special 4in1 tool or a set of pliers, flatten (a.k.a. crimp) the bead closed. Test the ends to make sure everything is secure. It should look like the picture above. You will have a tail on the flex wire. Slide the beads down towards the clasp and thread the tail back through 1 or 2 beads. Trim the excess tail.
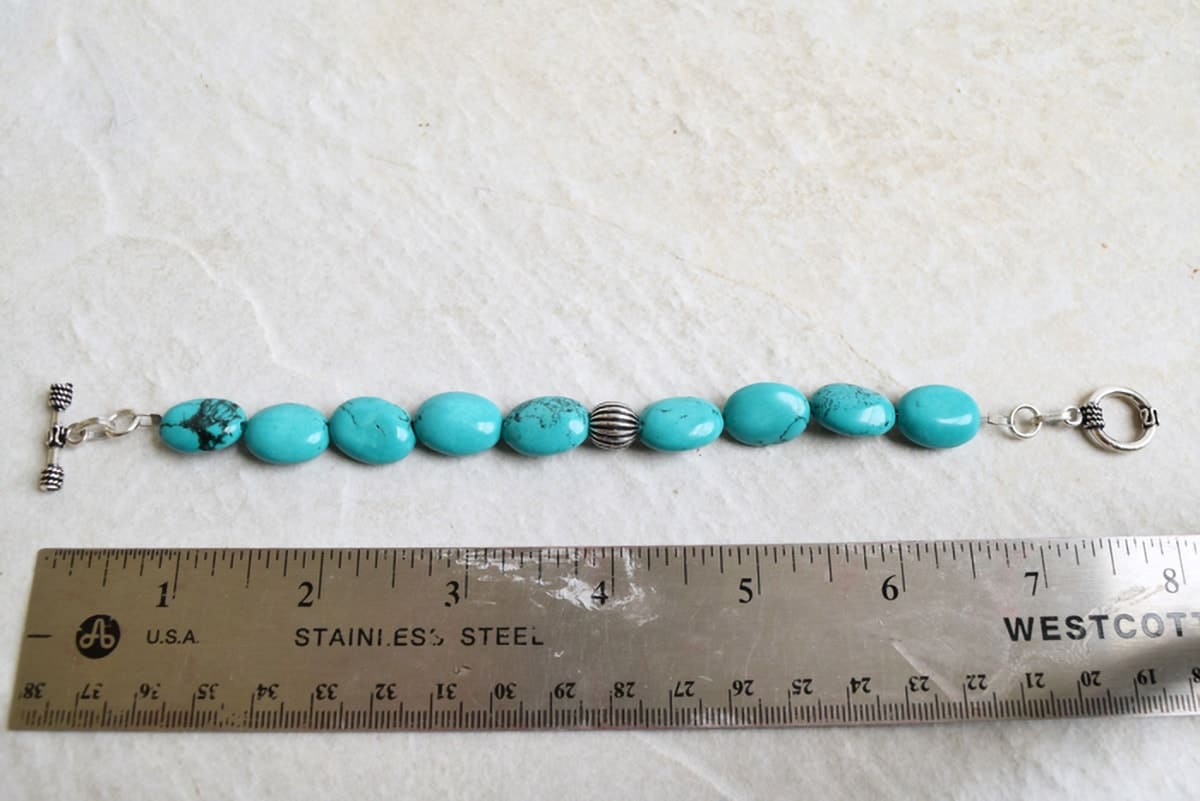
Step 3- Now cut the flex wire from the spool. I cut mine around 9 inches for extra tail. Test on your wrist for proper fit. Repeat Step 2 on opposite side with the other clasp piece.
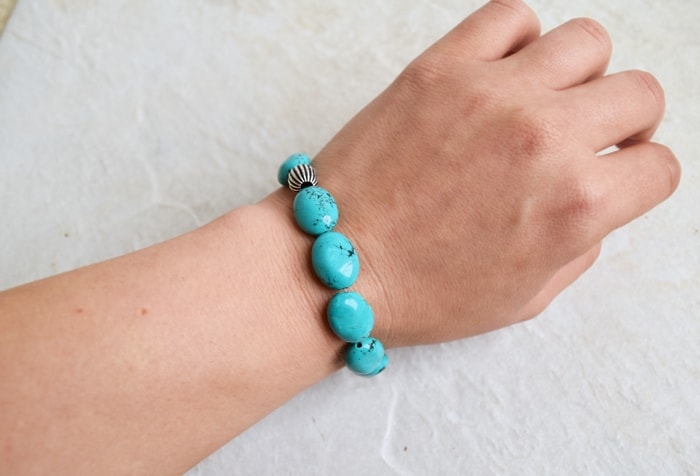
Now, you could stop there, and it was really pretty, but I wanted something bold. I added the other two strands of beads simply by repeating the steps above and adding to the original clasp pieces. I then added a cute dragonfly charm.
Frequently asked question:
Gems or Beads of Choice
Charms (optional)
Spacer beads (I really like this kit for variety and price)
Flexible wire or Elastic String
A ruler
Scissors
A clasp and closed wire circle if your clasp does not include one (I used a Toggle Clasp but Lobster Clasps work well)
Crimp Beads
Special Pliers
These make great gifts for family and friends. They’re easy enough to make and only need a few supplies. They make adorable Mother’s Day gifts, gifts for birthdays, or a special just because token of appreciation.
You can make a necklace with the same concept by using a longer flexible wire or string. You can also add more charms to make a charm bracelet. Choose whichever charms you like the most and place evenly around with beads to space in between.
I already have ideas for my next jewelry making adventure. I have this old-school belief that every woman should own a set of pearls. And by pearls, I mean any round uniform strand similar to a pearl necklace. It is just so classic chic. I lost my old one and I know exactly what I want to use. Check out these blue goldstones and banded agate. They got that whole mysterious and sparkly attraction. I am totally for that! Hey, does this mean I am becoming a fashionista? haha, probably not but I can now wear my creativity!
More Beginner Crafts for the Ladies:

Grab our free series "Weekend Home Projects that will Transform Your Life" Sign up below to receive updates including free printables, organization tips, home improvement projects, recipes and more! |
More Easy Crafts
thejewelcreation says
Love for turquoise jewellery is never ending. Thanks for this amazing tutorial!
angie says
they look awesome what a great gift idea
RebeCca says
I love the turquoise!!! These would make such great Xmas gifts! I have four sisters…sister bracelets!!!!!
Rachel says
Wow! 4 sisters. That must be so much fun! I only have one and we are polar opposites but still share a special relationship. Funny how family is like that.
Rebecca says
Eh, I mean…sure it was fun. Also very tough lol We were quite catty and I know what you mean about opposites!
Julia@Happy House and Home says
That came out great!!! I want to make bracelets! I’ll pin this and give it a try 🙂 Thanks for the tutorial – I’m going to need it, but it looks fun. Julia (the sparkly blue beads are super pretty!)