A step-by-step tutorial for making a beautiful paper windmill using colorful craft paper or foam. Sometimes called a pinwheel, there are options for a windmill that spins or one that can be used as a party decoration. A fun and simple Spring craft for all ages!
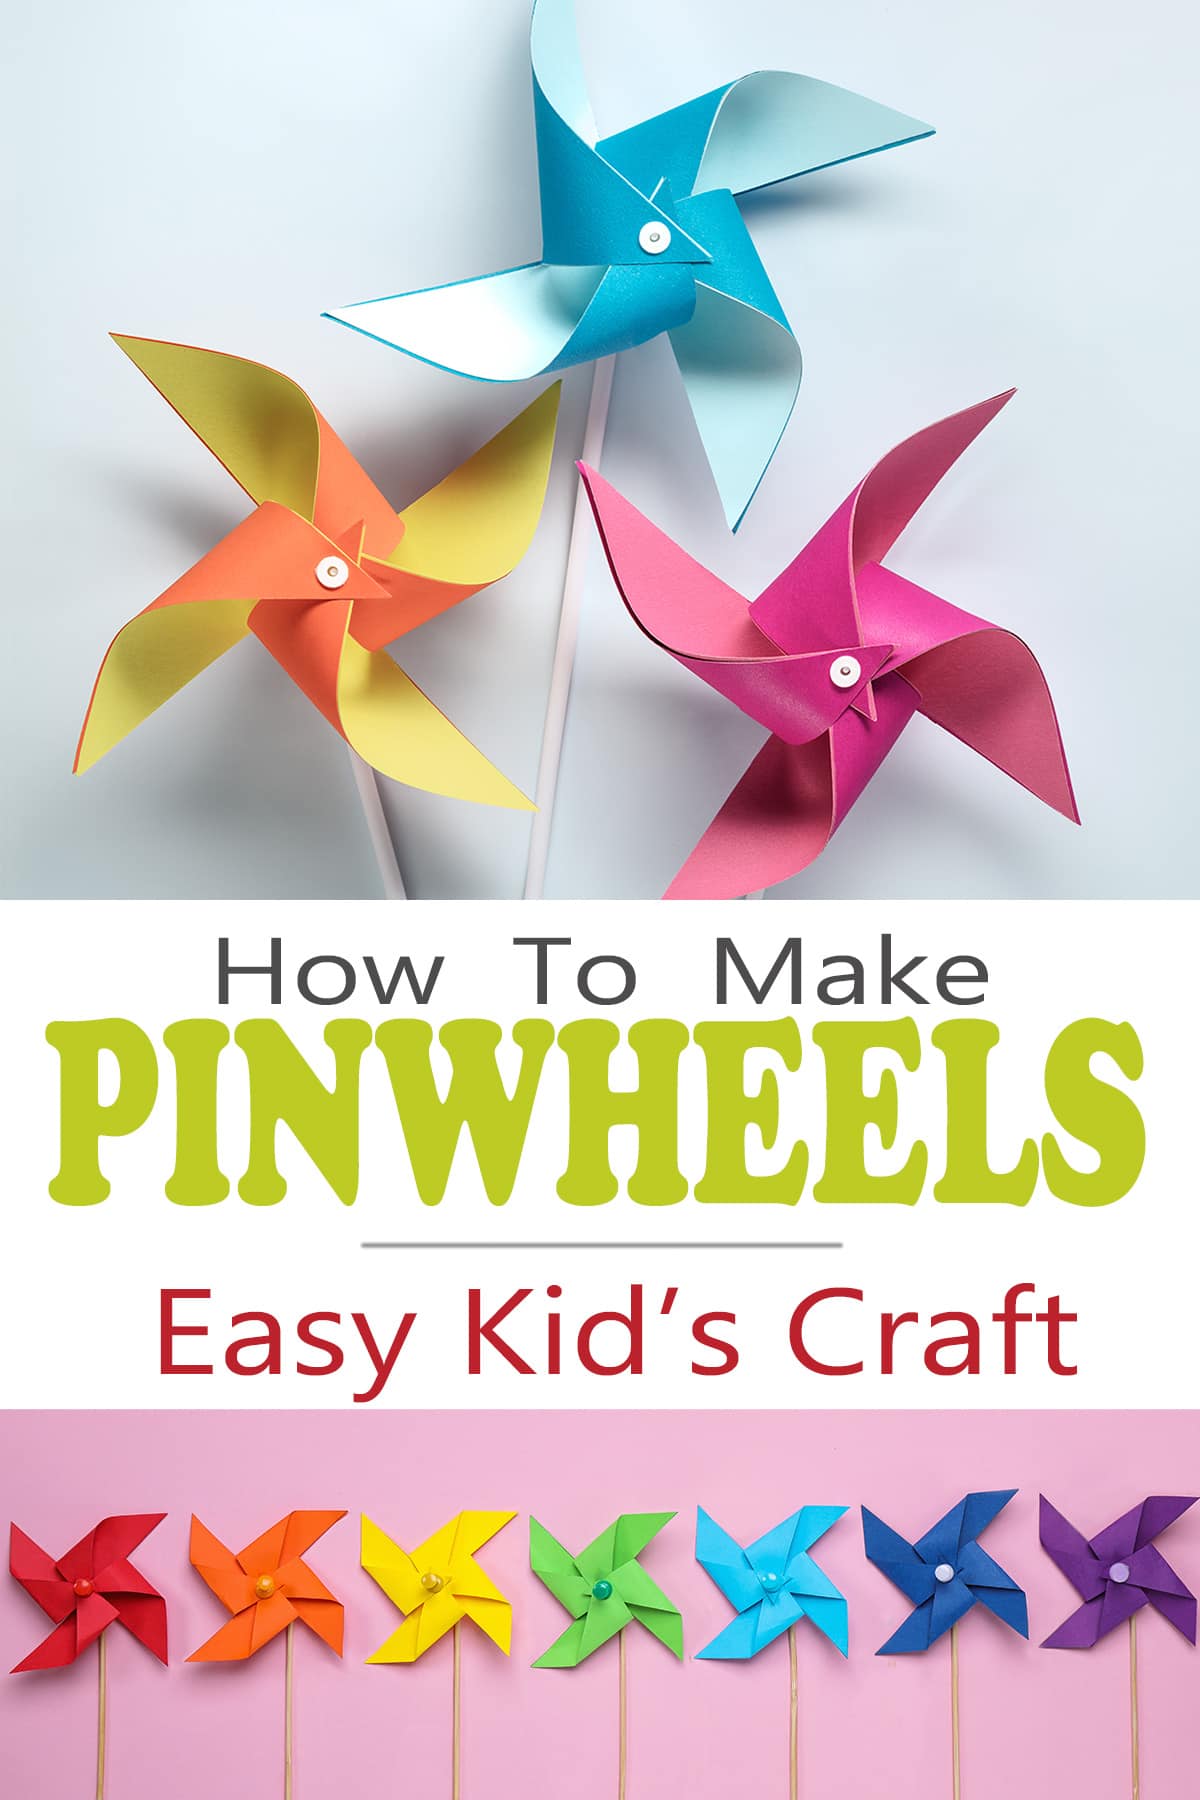
Pinwheels, or paper windmills, are a family-friendly paper craft, and we have done lots of them around here! Paper pinwheels, Recycle Planters Craft, and Marshmallow Pops are some of my family’s favorite Spring Break crafts. Choose colorful craft paper and spend an afternoon creating magical memories.
These are wonderful touches of whimsy to include in your Spring decor, or to add to an Easter table setting. They’d also make sweet favors for a baby or wedding shower!
And really, pinwheels are so simple to make. Follow my step-by-step tutorial for a no-fail finished product. I’m even sharing how to make them spin! Have a young scientist in the house? This is the perfect STEM craft to experiment with wind power. It’s super fun to explore different ways to make your paper windmill spin.
Materials List
Below is an overview of what you will need to make these super easy windmills.
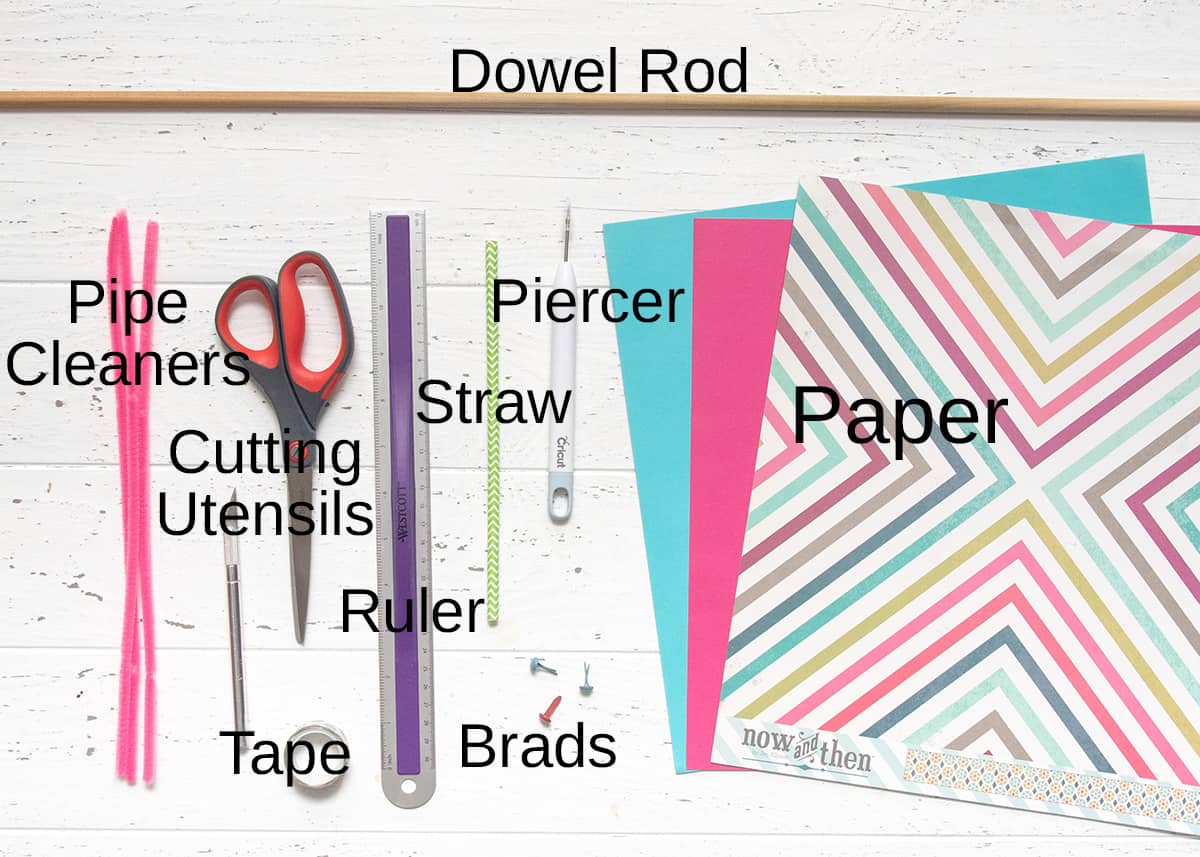
- Ruler
- Scissors
- Pencil
- Hole punch – one that will punch holes big enough for a straw to go through.
- Tape
- Colorful paper or craft foam square – these are 6×6 inches.
- Sturdy dowel rod – diameter around 3/16 inch
- Pipe Cleaners
- Paper Straw
- Spacer bead – optional, but it can help it spin better.
Step by Step for a Simple Windmill Decoration
***Complete directions for a windmill that spins with step-by-step photos are in the tutorial card at the bottom of this post, which can print out. However, if you just want a windmill decoration that doesn’t need to spin, you can use this variation.
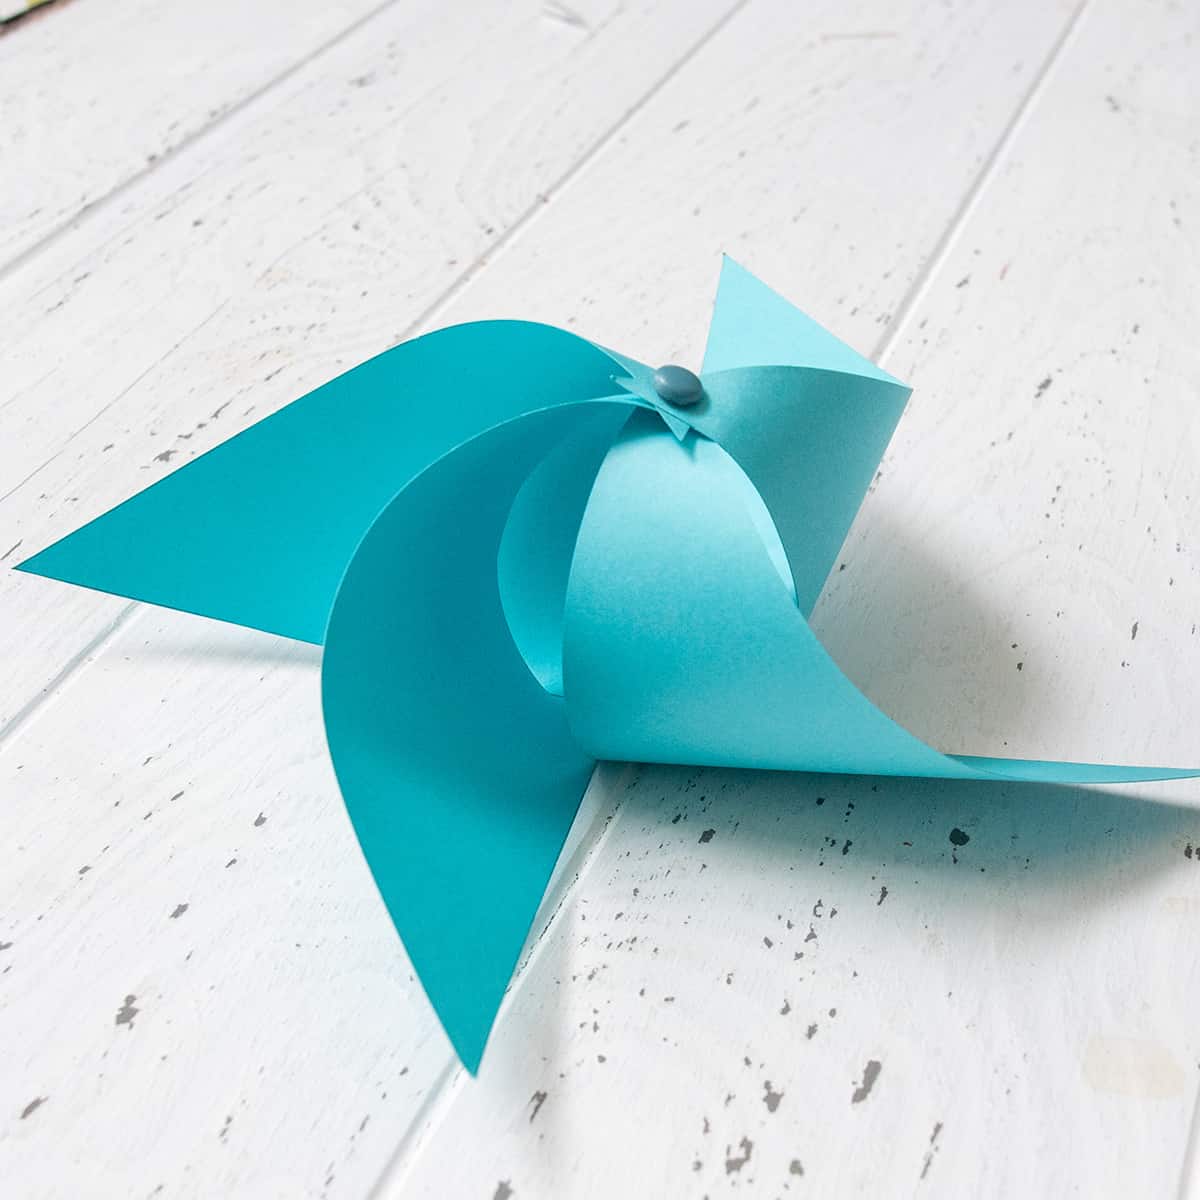
Follow steps 1-2 in the card to make the paper shape and punch holes through it. Work your way around the corners clockwise, folding them up and putting the brad through each hole.

Once you have the brad through all four corners, push the center down and push the brad through the hole in the center of the back of your paper and secure. Tape or glue your pinwheel to a dowel rod or bamboo skewer.
Here’s one that I did as a table centerpiece for easter:
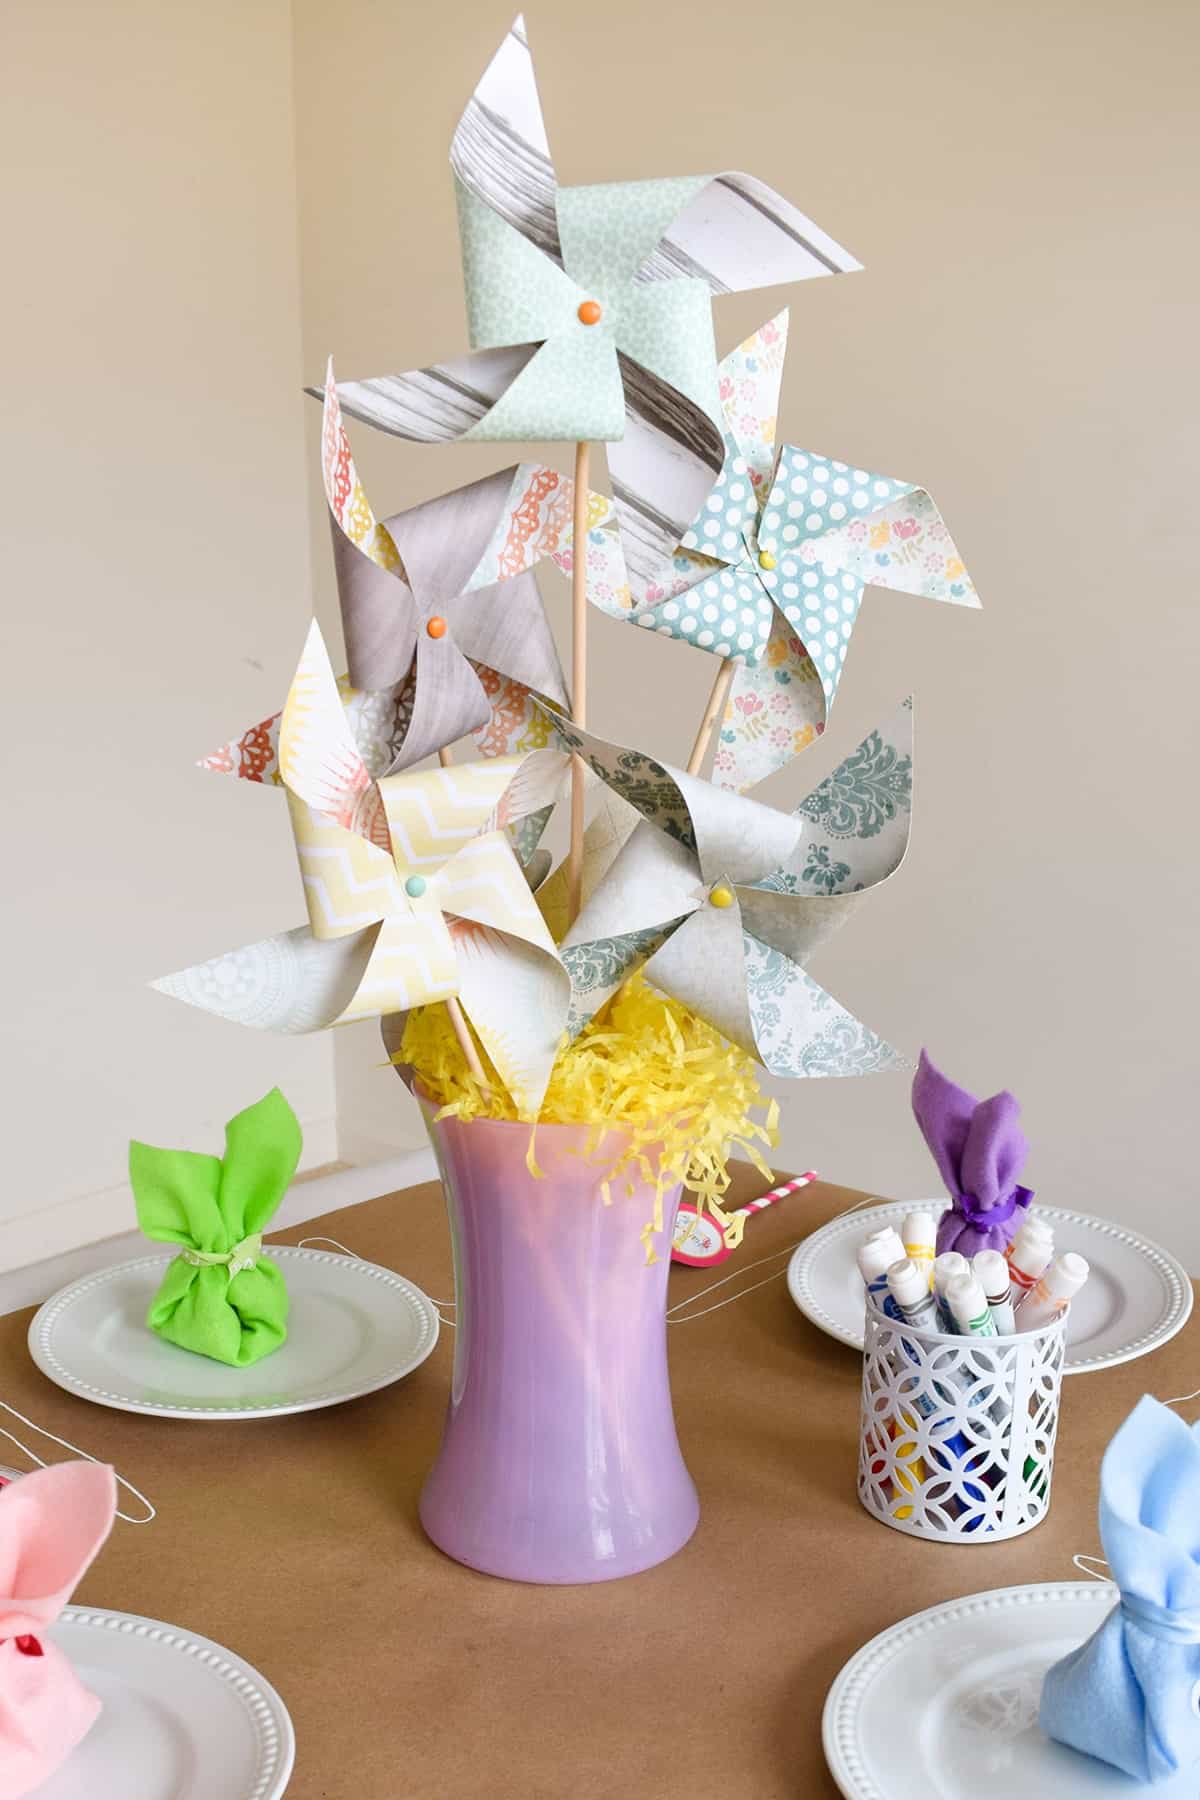
I love using double-sided patterned paper as it creates a fun effect. To make an arrangement like this, use Styrofoam or floral foam to stand the pinwheels up. I cut the dowel rods to varying heights.
Quick Tips
I have tried so many ways to improve these for maximum spinning action and durability, while keeping it as simple and fast as possible to make. So I have some tips and variations that might work better depending on your situation.
- Trimming off the pipe cleaner hairs that go inside the inner pinwheel straw helps it spin more.
- Putting a smooth spacer bead at the front, and then curling the pipe cleaner around it can help if the pipe cleaner to too tight.
- For a sturdier windmill craft, use a long nail or screw instead of a pipe cleaner. You will need a heavier dowel rod so it won’t split. Paint the tip or cover with a screw cover.
- Alternatively, you can use a metal eyelet through all of the holes instead of a straw. This works very well because there are less points of friction, but the folding can be challenging.
- If the pipe cleaners are sliding down the dowel rod, you can tape them in place.

Grab our free series "Weekend Home Projects that will Transform Your Life" Sign up below to receive updates including free printables, organization tips, home improvement projects, recipes and more! |
More Ideas For Spring


PS I love seeing your creations! Be sure to take a photo and tag #cravingcreative on Instagram! You can also stay in touch with me through following me on Instagram, Pinterest, and subscribing to the newsletter!

DIY Paper Windmill that Spins
Tools
- Ruler
- Scissors
- Hole Punch
- Pencil
Supplies
- 1 Colorful Paper or Craft Foam
- 1 Dowel Rod 3/16 diameter or larger
- 1 Pipe Cleaner
- 1 Paper Straw
- Tape
Instructions
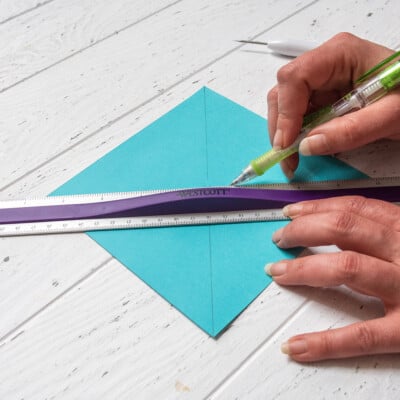
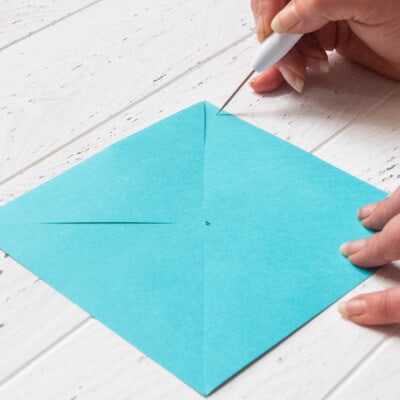
- Using a ruler, lightly draw straight lines from corner to corner diagonally. The lines will intersect at the center point. Punch a hole in the center wide enough for the straw to pass through. I use a hole piercer and widen the hole. Cut the lines, leaving about ½ inch from the hole intact.

- Using a hole punch, punch holes in one side of each corner. Make sure your holes are always on the same side of each corner. (The photo shows me pointing to the location.)
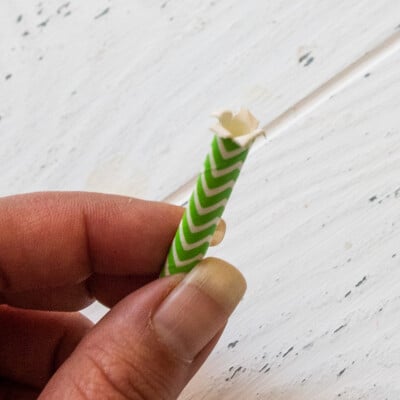
- Cut the straw to about 1.5-2 inches depending on how wide you want the folds of the pinwheel. Wider folds will grab air more easily. Using scissors, cut one tip of the straw in 6 sections so it splays outward (pictured). This makes sure the pinwheel won't fall off the straw.
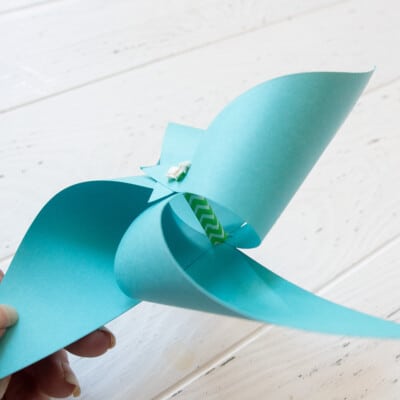
- Fold one corner of the sheet of paper into the center, lining up with the center hole. Put the straw through the hole. Work your way around the corners clockwise putting the straw through each hole. Then thread through the back hole.
- Just like with the first end of the straw, cut the second end to widen it. The pinwheel paper should be secured on the straw.
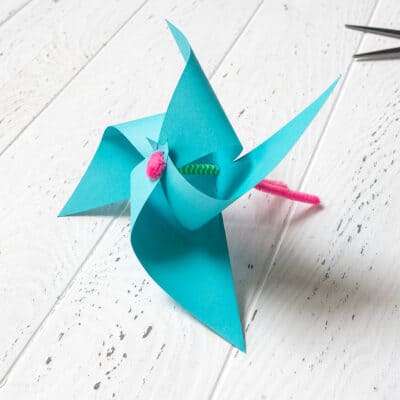
- Fold the pipe cleaner in half and twist tightly. Thread the pipe cleaner through the straw. Wind the front tip around to secure the pinwheel. It spins better if the pipe cleaner hairs that will be inside the straw are trimmed down with scissors.
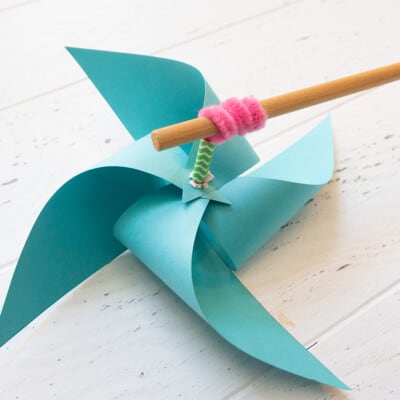
- Cut another ½ inch of paper straw and thread behind the windmill. Make sure everything is a little loose to allow for spinning. Wrap the back end of the pipe cleaner around the dowel rod tightly.

Notes
- Trimming off the pipe cleaner hairs that go inside the inner pinwheel straw helps it spin more.
- Putting a smooth spacer bead at the front, and then curling the pipe cleaner around it can help if the pipe cleaner is too tight.
- For a sturdier windmill craft, use a long nail or screw instead of a pipe cleaner. You will need a heavier dowel rod so that it won’t split. Paint the tip or cover with a screw cover.
- Alternatively, you can use a metal eyelet through all of the holes instead of a straw. This works very well because there are less points of friction, but the folding can be challenging.
- If the pipe cleaners are sliding down the dowel rod, you can tape them in place.
Marie says
This is fantastic! I love pinwheels and this would make an incredible center piece on our table for summer! Thanks for sharing!
Krista Low says
These are beautiful! I soooo want to make these for spring! Thanks so much for sharing 🙂
Rachel says
Thank you so much! I am so tired of winter (it snowed yet again today!) so it was really a joy to make and share this project.
Barb says
Paper pinwheels…how grand! I love that you bunches them to make a bouquet too. I am a bit of a self confessed paper junkie and letter loving gal so of course I had to stop by and take a closer look. Visting “AlittlebirdtoldmeWednesday’ linkup.
Emily says
So much fun and so cute! love it!
Emily @ elizabethjoandesigns.com
Jennifer Dawn says
I love this! So fun! This is being featured at this week’s link party.
Rachel says
Oh thank you so much! This is amazing since I am a relatively new blogger. I already have my post ready for tomorrow. It is so nice to meet new bloggy friends.
Charlie says
Thanks for the great link on Craft Frenzy Friday! I will be featuring you on my Saturday Spotlight tomorrow morning! :o) Stop by, share and grab a featured button!
Rachel says
Giggling in bursting enthusiasm! Thank you so much! I wrote on Craft Dictator’s blog that I was just discovering this party and you guys have put together a great sampling of talented bloggers to party and connect with.
Rachel says
Thanks, Rachel! I love looking through our link party! We have so many talented bloggers (like you!) linking! Thanks for joining us!
Pam@over50feeling40 says
Now that’s really cute and you don’t have to water it!! Love the idea of this for a spring centerpiece!!
Rachel says
I am not very good with indoor plants so, your right, the no watering required is definitely a bonus. Thanks for stopping by!
Sue Williams says
Dropping by from Katherine’s Corner. My niece made large pinwheels like these as part of her wedding decorations and they looked fabulous! Thank you for the step by step.
Sue
Mom says
I want one