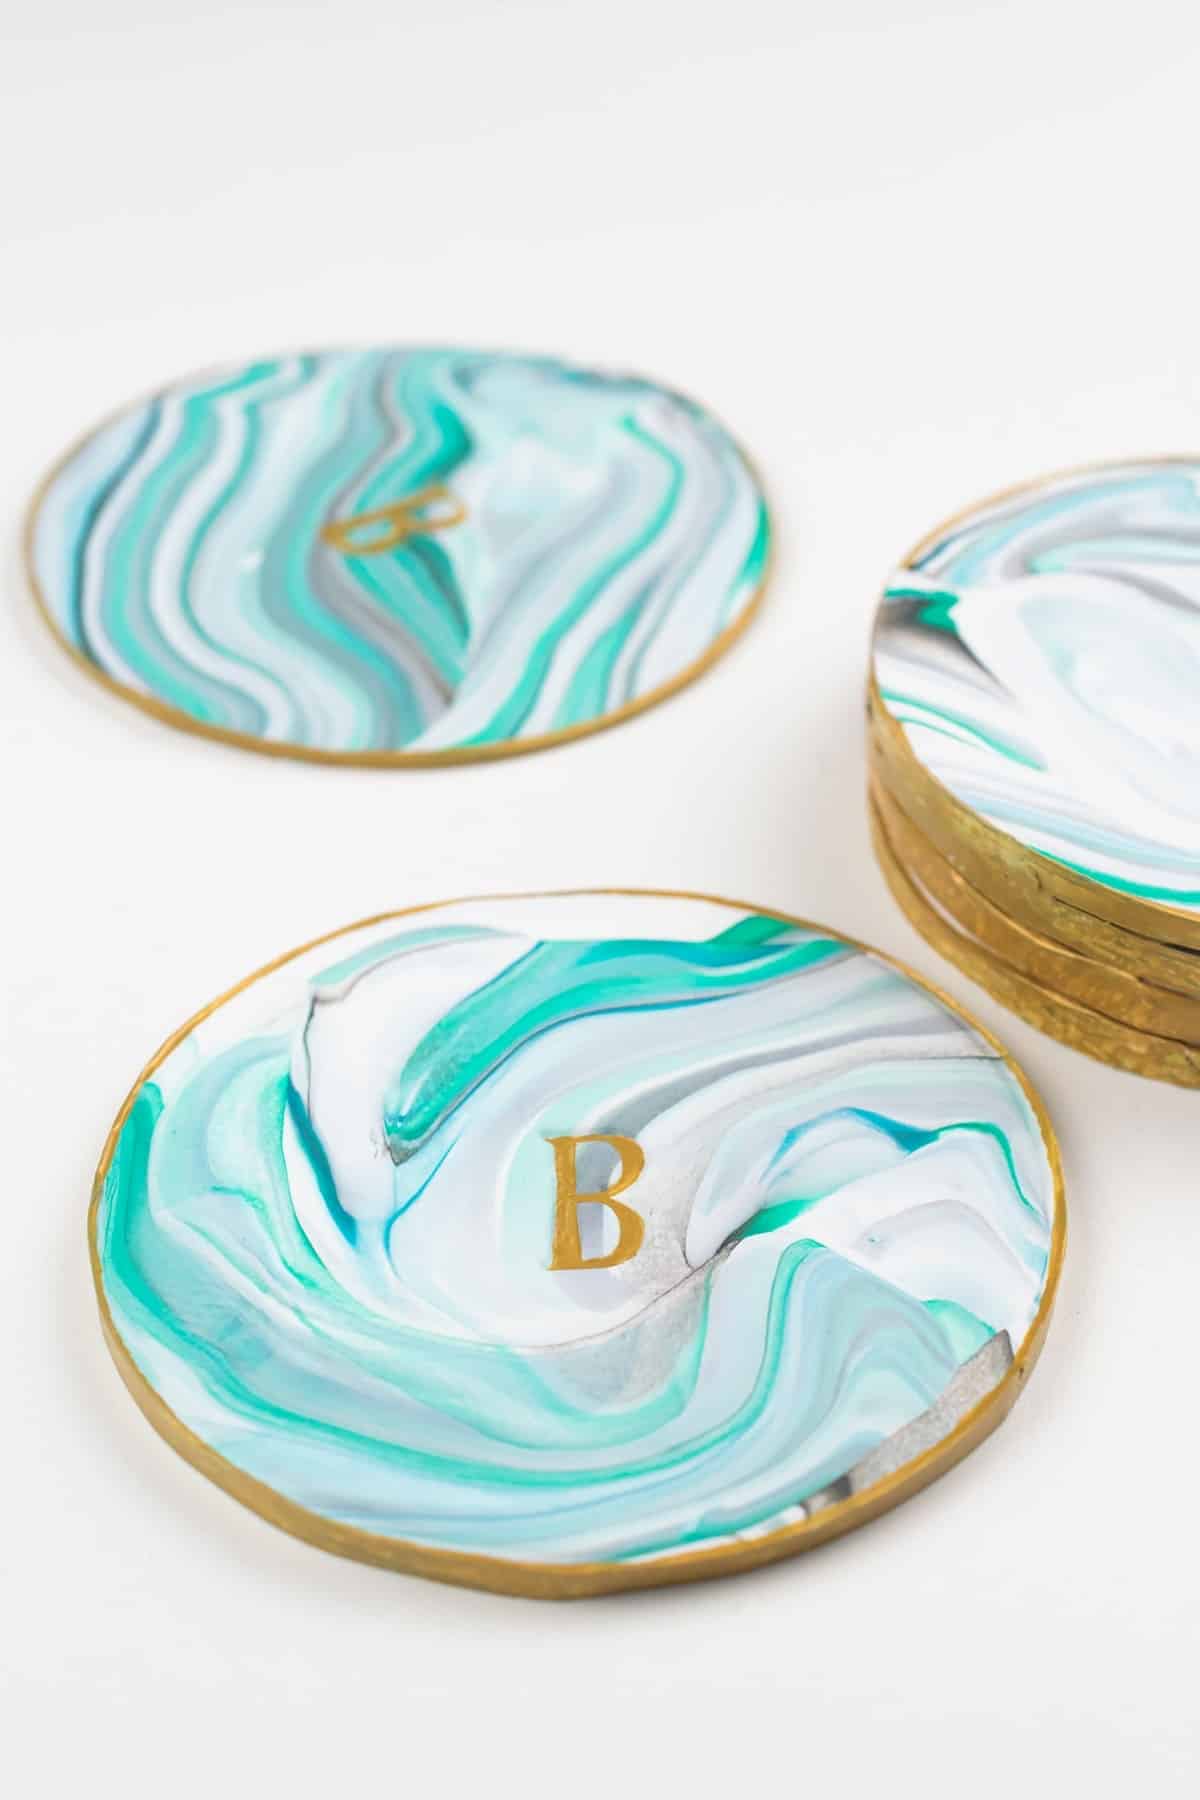
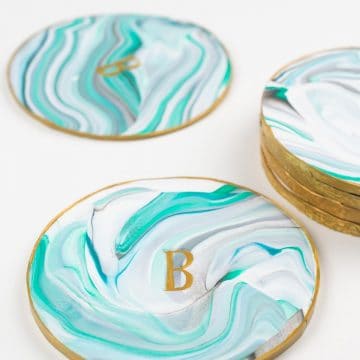
Marbled DIY Clay Coasters add a chic design touch to any room while protecting your furniture! A great craft to make with the kids and an adorable DIY gift for newlyweds or Mother’s Day. Easy tutorial and how-to video included.
When spring rolls around, it always gets me in the mood to do some colorful kid crafts. These DIY clay coasters check all of the essential DIY project boxes- easy to make, inexpensive, and practical. This technique makes beautiful, unique designs that won’t scratch furniture and it is also quite easy – suitable for beginners and kids!
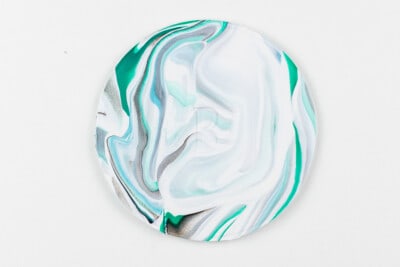
The swirled clay gives the illusion of colorful marble, while making it an absorbent choice to soak up beverage sweat. Choose a sparkly clay to mimic quartz for added texture and depth. Gold accents provide an extra touch of elegance.
Have a budding crafter in your house? Check out our clay ornament ideas, painted coffee mugs, and more Spring craft tutorials for other activities.
Feeling inspired to make your own set? Watch the video below or follow my easy step-by-step tutorial.
What You Will Need
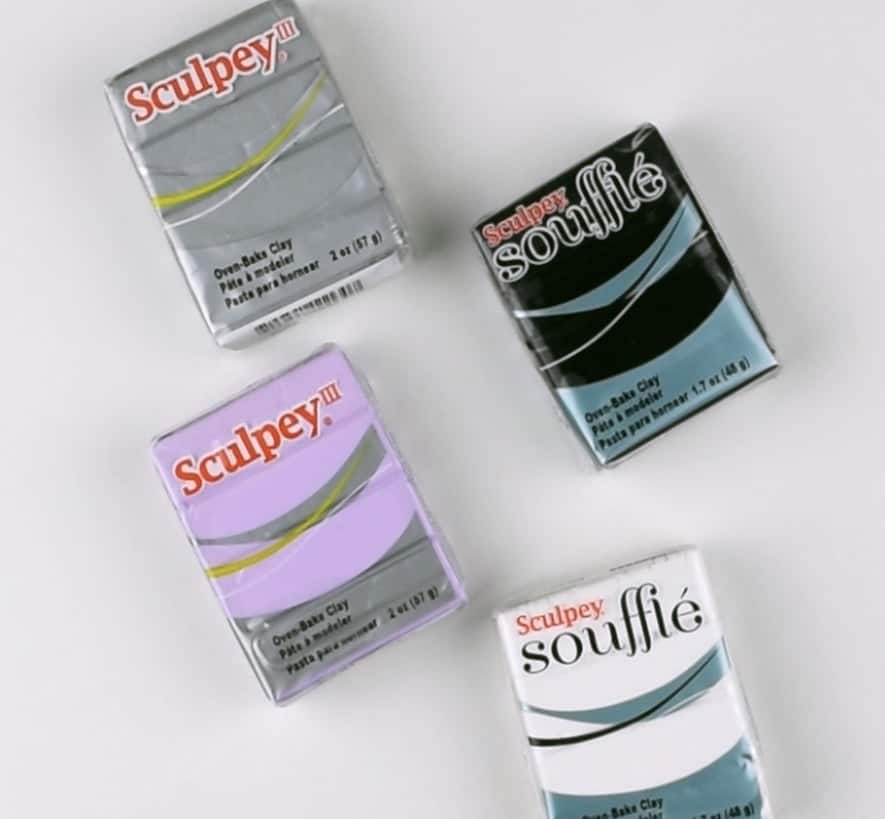
- Modeling Clay in Multiple colors
- Fine tip paint brush
- Craft cutting knife or X-acto Knife
- Rolling Pin or Acrylic roller
- Monogram Stamp
- Metallic Paint
- Circle shape for cutting or large jar, about 3.5 inches wide
There’s no limit to the color combinations or creativity within this design. Every coaster is an original work of art! It’s the quintessential gift for Mother’s Day, newlyweds, or neighborly welcome.
How to Make Polymer Clay Coasters
There are full step by step instructions, with photos, at the bottom of this post in the tutorial card. However, if you like video instructions, I have also made a quick step by step demonstration in the video below.
More Adorable Kid Friendly Crafts
Tips for a Great Coaster
- I like to use polymer clay as it can be baked instead of air dried which takes much longer.
- Polymer clay is water resistant, so you don’t need to seal them.
- However, you can seal the coasters if you like with an acrylic sealer.
- I find that 3-5 contrasting colors works well for the marbling effect.
- Instead of a monogram, you can use anything to stamp like a brooch or figurine that will make an impression.

Grab our free series "Weekend Home Projects that will Transform Your Life" Sign up below to receive updates including free printables, organization tips, home improvement projects, recipes and more! |
More Crafting Ideas
PS I love seeing your creations! Be sure to take a photo and tag #cravingcreative on Instagram! You can also stay in touch with me through following me on Instagram, Pinterest, and subscribing to the newsletter!
DIY Polymer Clay Coasters
Tools
- Fine tip paint brush
- Craft knife
- Acrylic Roller A smooth rolling pin also works
- Monogram Stamp Optional
- Circle shape for cutting A 3.5 inch wide mouth glass or jar works great
- Oven
Supplies
- 5 Polymer Clay 3-5 colors per coaster
- Paint
Instructions
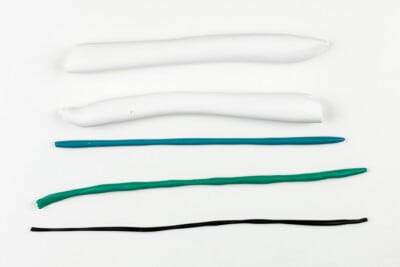
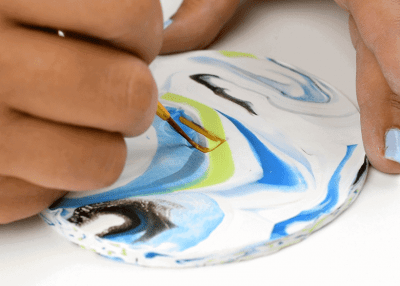
- On a flat surface, roll each clay color into strips about 5 inches long. For your primary color (or white), make a roll slightly smaller than the diameter of a quarter. Make smaller rolls of secondary/highlight colors. The amount of each color you use will change the look and feel of the final project.

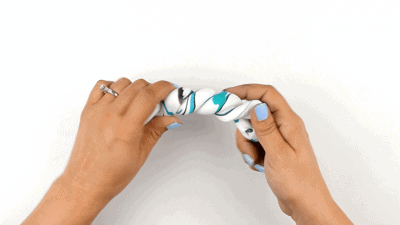
- Twist the rolls together in a chain. Roll and gently stretch until smooth and well incorporated. Fold in half and twist several times. Roll and stretch the twisted clay. Use your hands to knead the the colors together, to blend colors and create finer striations.

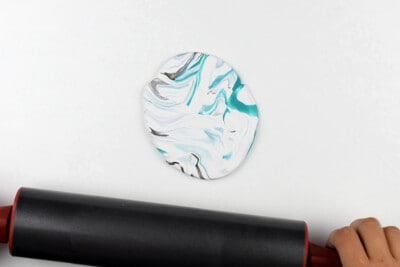
- Roll your chain into a ball and flatten with your palm on a smooth surface. Using a rolling pin or acrylic roller, flatten out the ball to at least 3.5 inches in diameter. Check for any apparent bubbles trapped in the clay. You can remove with a pin if necessary. Pick up to make sure it doesn't stick to the board.
- Place your 3.5 inch circle cutting shape on top of the clay. Trace around with a craft cutting knife. Remove excess.
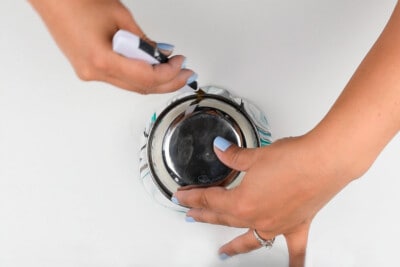
- If desired, stamp your monogram in the center.
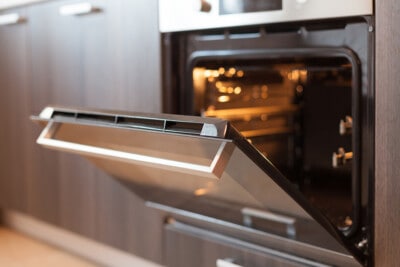
- Bake at 275 degrees F for 15 minutes for every ¼ inch thickness. Let cool completely.
- Using a small brush, paint the monogram and the edges with gold metallic craft paint.

Jessica says
Would it be a good idea to use some type of glue to put cork on the bottom of these coasters? I know some people that are so fussy about their tables and not putting anything directly on top of it without something to protect the finish from heat, scratches, water spots (aka condensation drips), looking at it wrong, etc.
Rachel says
😂 to your “looking at it wrong” because it’s so true! You certainly can add a cork or felt bottom. I would use like a thick wood glue or something for cork specifically because it is quite porous. Apply the glue after baking or curing time.
Isabella says
Can you use air-dry clay for these?
Thanks! 😉
Rachel says
Yes, although air dry clay takes at least a few weeks to cure and I would recommend adding a clear top coat to them after curing, unless it specifically says waterproof. Also, make sure to use acrylic enamel or other waterproof paints.
Heather says
These look amazing! Wouldn’t they need to be sealed if they are being used as coasters? Is the paint acrylic, I know that will rub off if it gets wet…. thank you for the great idea:)
Rachel says
I personally used a waterproof enamel paint for these coasters, but I would definitely test for water resistance.
Hilary says
Thanks for this tutorial! Got this project on my list.
Hilary
Isadora Guidoni says
Wow, these coasters look so chic!! I simply love them! I’m definitely making some to use around my house =)