Often called cerused oak or limed oak, cerused wood is an elegant finishing technique that showcases the grain patterns of wood. This step-by-step tutorial will guide you through creating the effect yourself on any species of wood.
If you are looking to add an elegant finish with old-world charm, Cerusing is the perfect technique. Originally developed in the 1500s, it is currently enjoying a renaissance among furniture refinishers and DIYers.
It’s called Cerusing Finish (or sometimes Limed Finish), and it’s a process of rubbing a contrasting color into the pores of wood to highlight the patterns of the wood grain, similar to a whitewashing technique.
With its impressive style and antique look, the unique pattern options are endless. If you are looking for something elegant and unique, give this technique a try!
Cerusing vs Liming Wax
There are two techniques that produce similar effect, although they work completely differently.
The first, and easiest, is using a liming wax, which is basically just a white furniture wax. This is the liming wax brand I most use. You use it a lot like a furniture wax, where you apply a paint and then buff the furniture wax into the grain pattern.
For a low or medium traffic piece such as a side table or dresser, I prefer liming wax finish. The process is slightly easier, and you have a bit more control with layering the wax. However, a wax will never be as durable as polyurethane, and you will have to rewax it eventually.
The second method is layering paint to bring out the grain pattern. For a high traffic piece such as this dining room table, I prefer this method because high traffic furniture needs a durable topcoat to fully protect it, and you can’t use wax under a polyurethane coat. This is the method that I detail below.
Best Wood Types for Cerusing
Cerused oak is the most common species because it already has a strong grain pattern that shows easily. In fact, red oak doesn’t require any wire brushing or prep to get the look. White oak is also great, but the pores are smoother with a more subtle grain pattern.
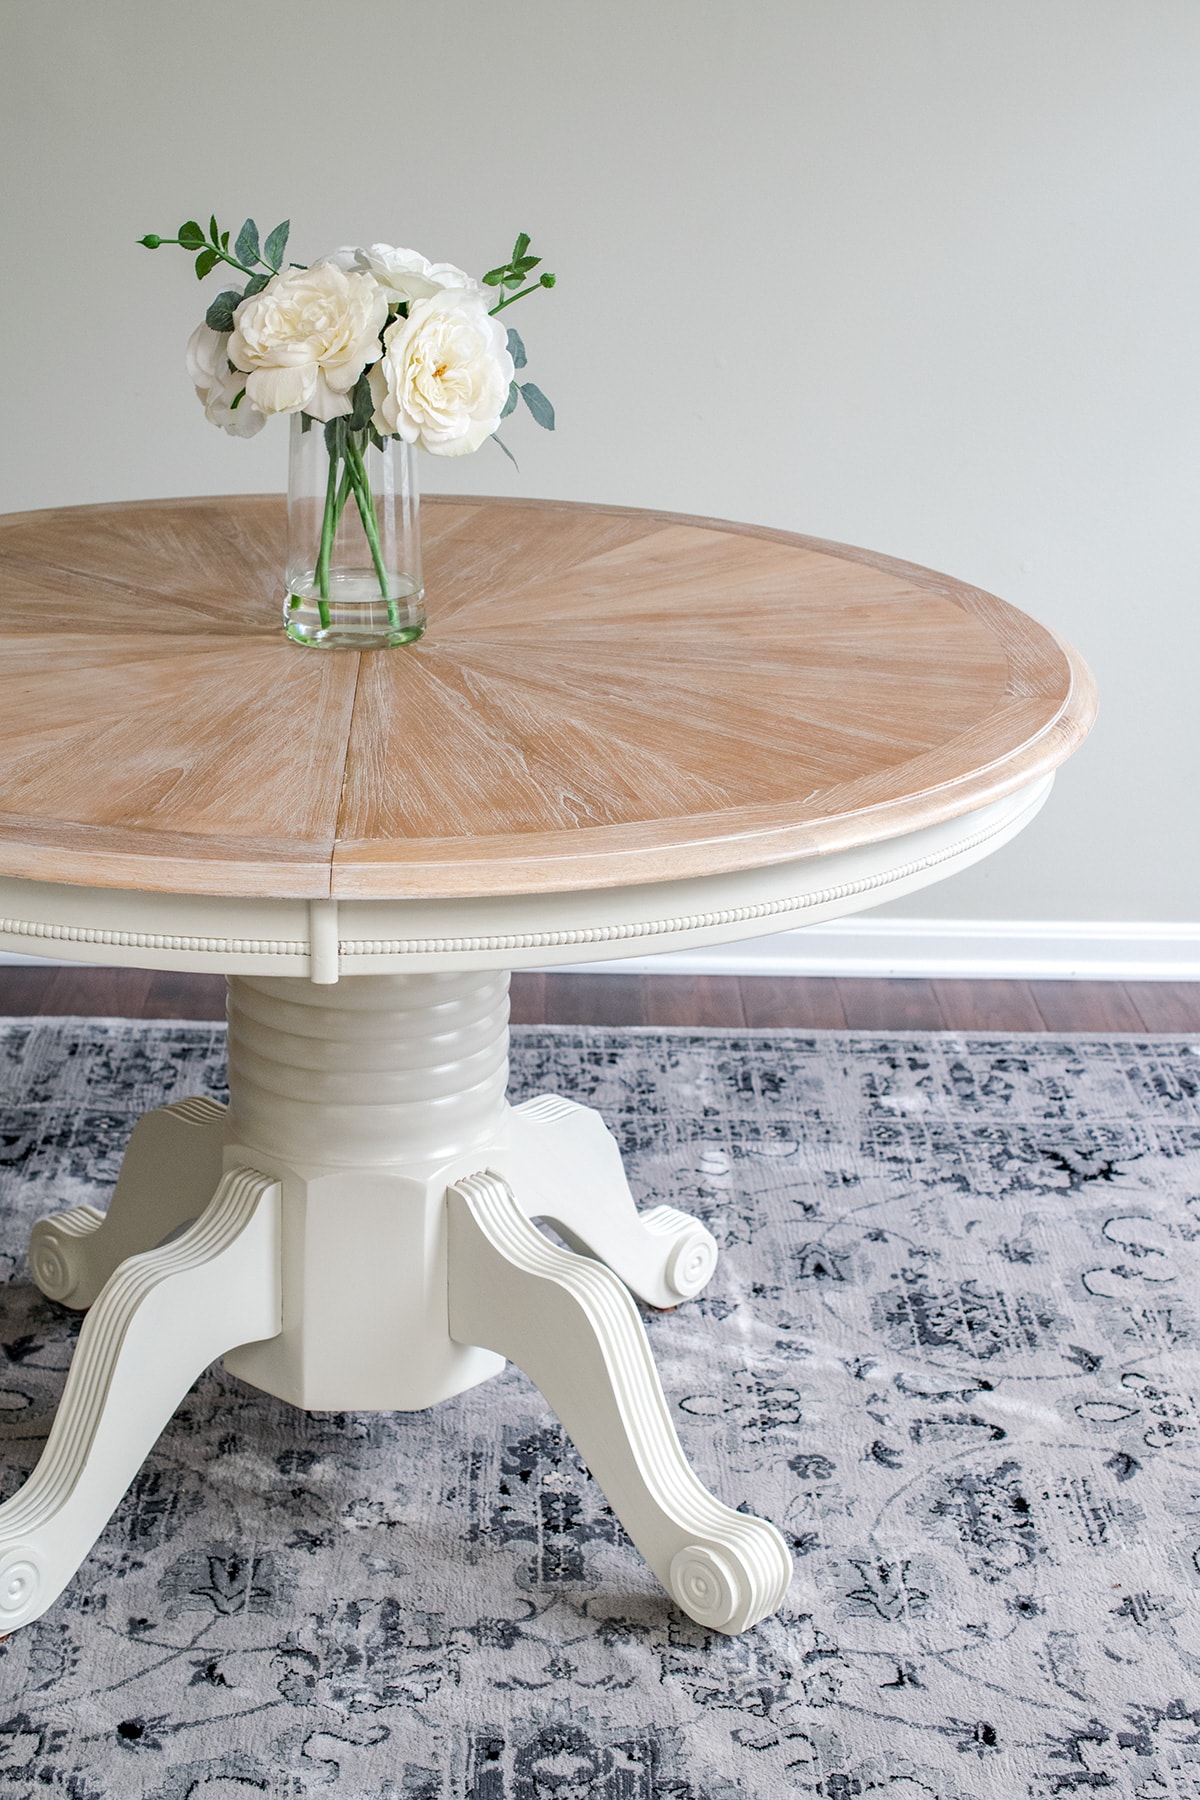
This technique, however, works very well with many species including mahogany or cherry. In fact, I prefer it on species like this maple table because they have a more delicate grain pattern. However, I don’t recommend this technique on pine or burled wood.
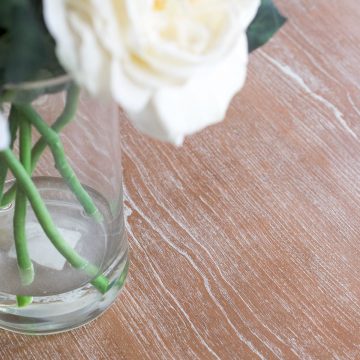
Look at the graining pattern on a surface and you can get an estimate of how the cerusing will look once finished.
Supplies
These are the items that I use most often with this technique. If your furniture needs to be stripped or prepped prior to starting the cerusing, here is our tutorial for stripping wood furniture.
- Wire Brush
- Sand paper - I use 120 grit for smoothing and prep, 220 or 300 grit for removing paint or final coats.
- Random Orbital sander
- Drop cloths
- Steel wool
- Lint free towels
- Stain or Paint of your preference for bottom layer
- Paint
- Paint Brushes
- Clear Topcoat of your preference
How to Ceruse Wood
This technique utilizes paint to create the cerusing technique. It is different from using liming wax because the table can be sealed with a clear coat that is hard and durable.
Step 1: Prep the wood surface
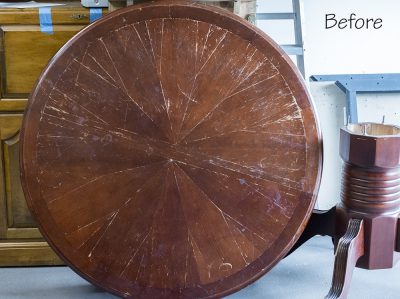
For best results, all previous stains, paints, and polyurethanes must be removed. Even if you like the finish underneath, you will be accentuating the pores with a wire brush, so that alone will ruin any current finish. If your table needs to be stripped, I have an excellent tutorial on stripping wood furniture that will walk you through that process.

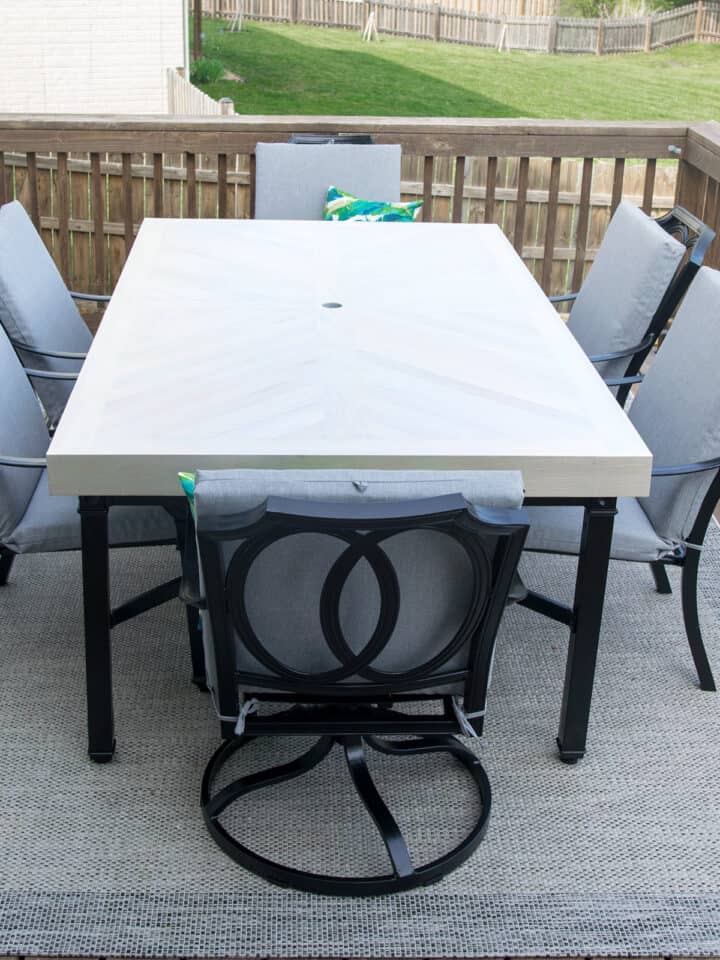
As you can see, this was how the table came to me. It has an interesting pattern when the center leaf isn’t incorporated, and I wanted to highlight that pattern even more. So let’s see how it turned out!
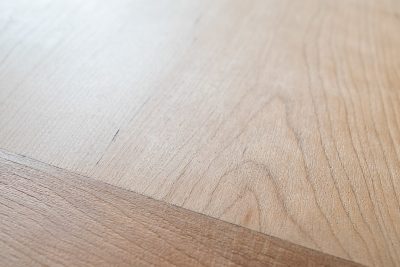
Step 2: Wire Brushing the Wood Grain
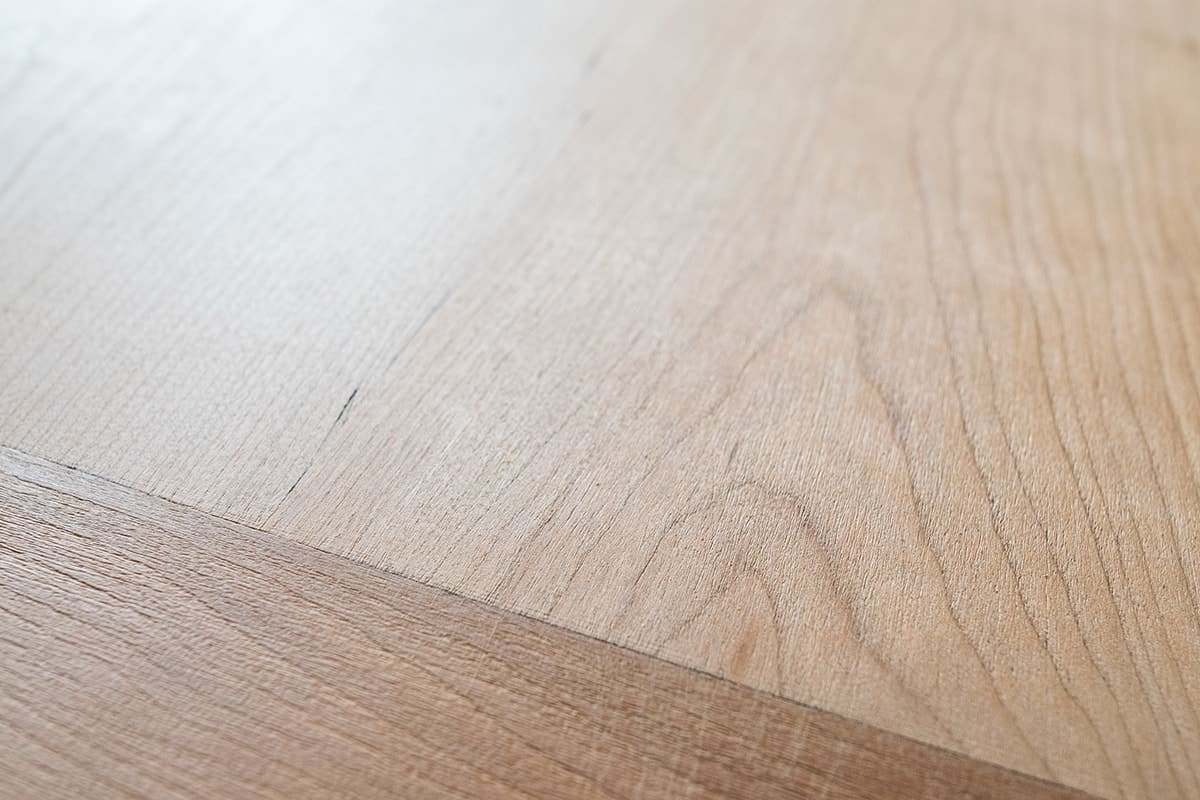
The key to a good technique is in the wire brush. Using a very stiff wire brush like this one and working in long strokes in the same direction as the wood grain, you can see the pores open a little. You will have to put a little power behind the brush to really get into the wood grain.
Tip: If you already have very pronounced wood grain, such as oak, you can skip the wire brush step. This step is done to remove a bit of the softer areas of the grain and works best on tight grained wood. Oak that has dried out usually already has a recessed grain.
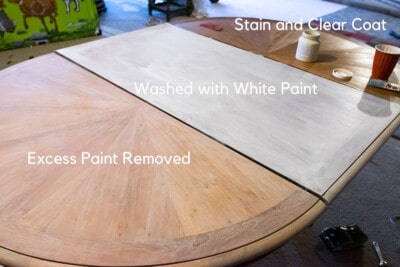
Step 3: Apply a Finish
This step layers the color that contrasts with the white cerusing and what to do is up to you. You can use any color of stain, paint, or use a clear coat. This step also will help the grain expand for your cerusing layer.
Some Ideas:
- Paint it black and use white paint to ceruse which is called Ebony Cerusing.
- Stain the wood.
- Paint any color of your preference.
- Leave the wood raw. Wipe the wood with a damp cloth to raise the grain.
- Ceruse in a slightly lighter shade – It doesn’t have to be white.
What we did for this table:
I used a water based light colored stain for this. Because I am using a white paint for the cerusing, it will lighten the overall look of the stain a little bit after applied so keep that in mind when choosing the stain and color. I then put a thin layer of water-based polyurethane. The extra layer of poly was to ensure that the stain did not bleed into the cerusing paint.
Tip: I recommend adding a water-based poly layer between the contrasting if you use white paint for the cerused pattern. The reason is to keep anything from bleeding into the white. Keep the contrasting and poly layer thin so it doesn’t fill in the grain.
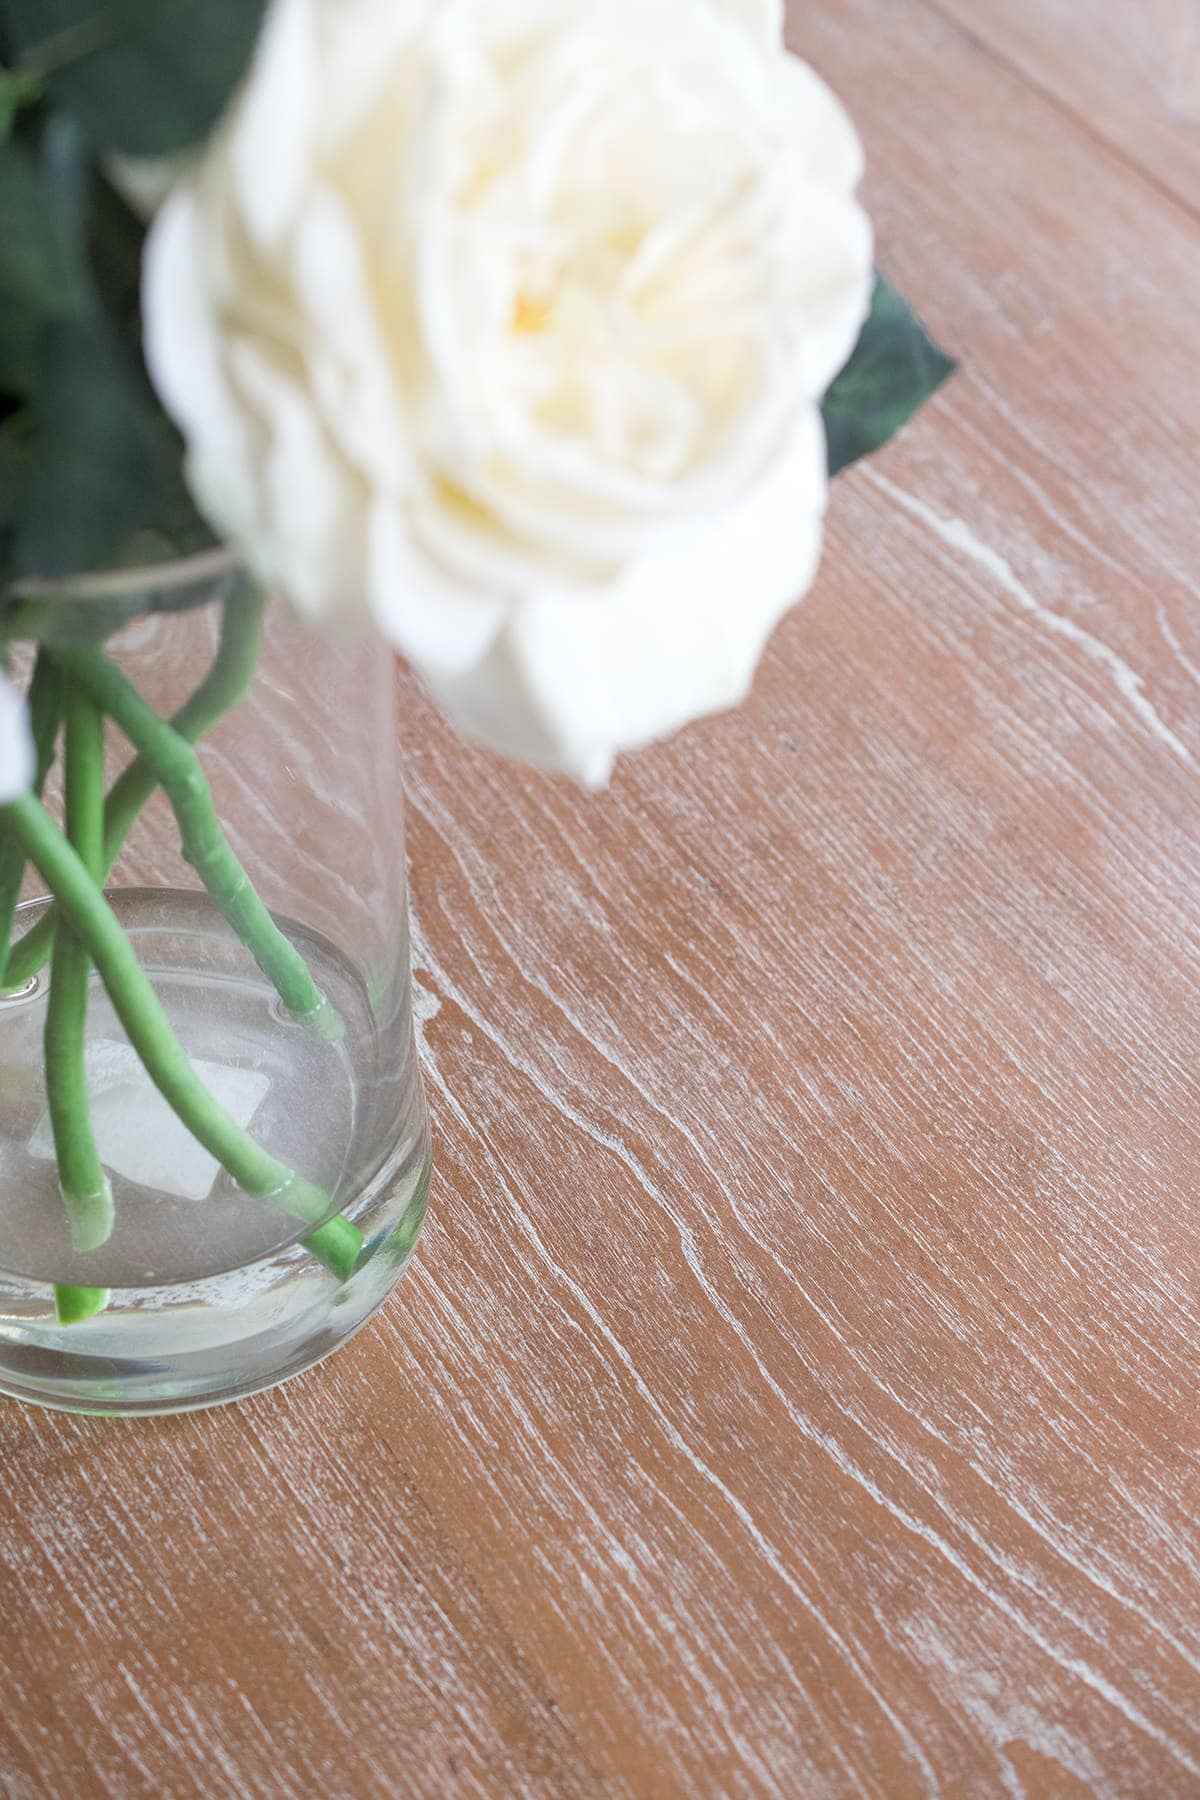
Step 4: The Cerusing Technique

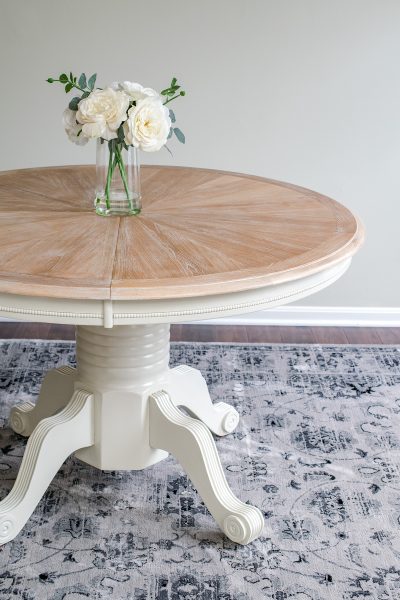
For this table, I used Fusion Mineral Champlain for cerusing (you can buy it here). I thinned it out with water, about 25%. You can use other furniture paints such as chalk paint.
Quickly brush the paint on over a whole section. To keep it even, you really want to do a whole section at a time or if you don’t have leaves like this one, do the whole top.
Give about 10 minutes for the paint to turn tacky or dry a little. The best way to remove the excess paint is with 000 steel wool, rubbing in the direction of the grain but not digging into the crevices. If the paint isn’t coming off, try using 220 grit sandpaper on a random sander can also be used. Just be sure to be careful and quickly go over the table with no pressure until the grain shows through.
Step 6: Sealing
I finished it up by spraying my favorite water-based coating to make it ultra-durable. You can read about our favorite durable polyurethanes for furniture here to choose the right one for you.
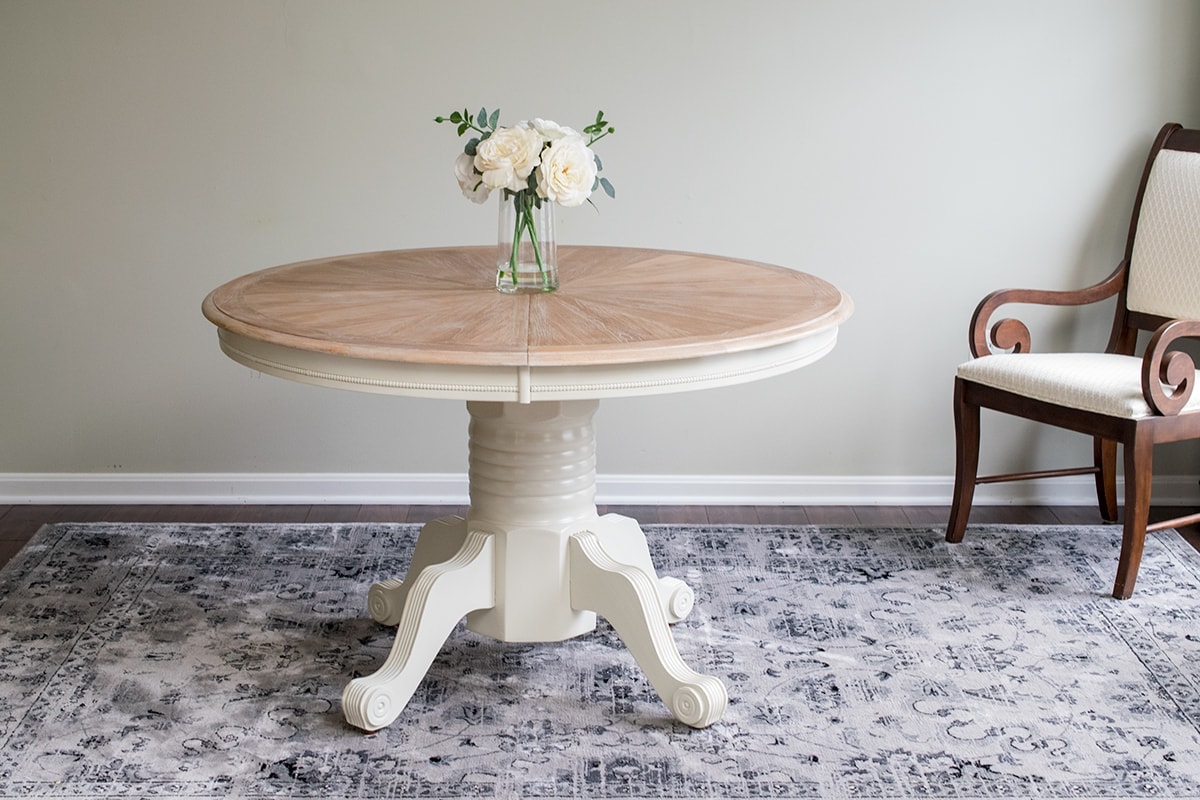
For this table, I painted the base in Fusion Mineral Champlain and 2 coats of the same poly in satin sheen.
Tips for Getting the Best Result
- Always work in the direction of the grain. This includes painting, wire brushing, and removing the paint. Working across the grain will produce scratches rather than defining the grain.
- Keep your coats thin. You don’t want the layers, except for the white, to fill in the grain.
- Allow a few days to dry before adding the final topcoat. This is to allow any outgassing to happen and the paint layers to harden.
- Some woods have a chemical reaction with steel. Therefore, avoid using a steel brush. Fragments left can blacken the wood and disfigure the finish. Steel wool shouldn’t have an effect if the table is sealed prior to cerusing.
- Don’t take shortcuts on the prep work. Prepping the surface correctly is the foundation for a great result. If you remove the previous finish, always give a final sanding to even out the color and completely allow the surface to dry.
Want to see more furniture transformations? Check these out!
- How to Protect Painted Furniture
- How to Eliminate Brush Marks or Strokes
- How to Paint a Bathroom Vanity
- How to Paint Old Kitchen Cabinets
- How to Paint a Stair Rail that Lasts
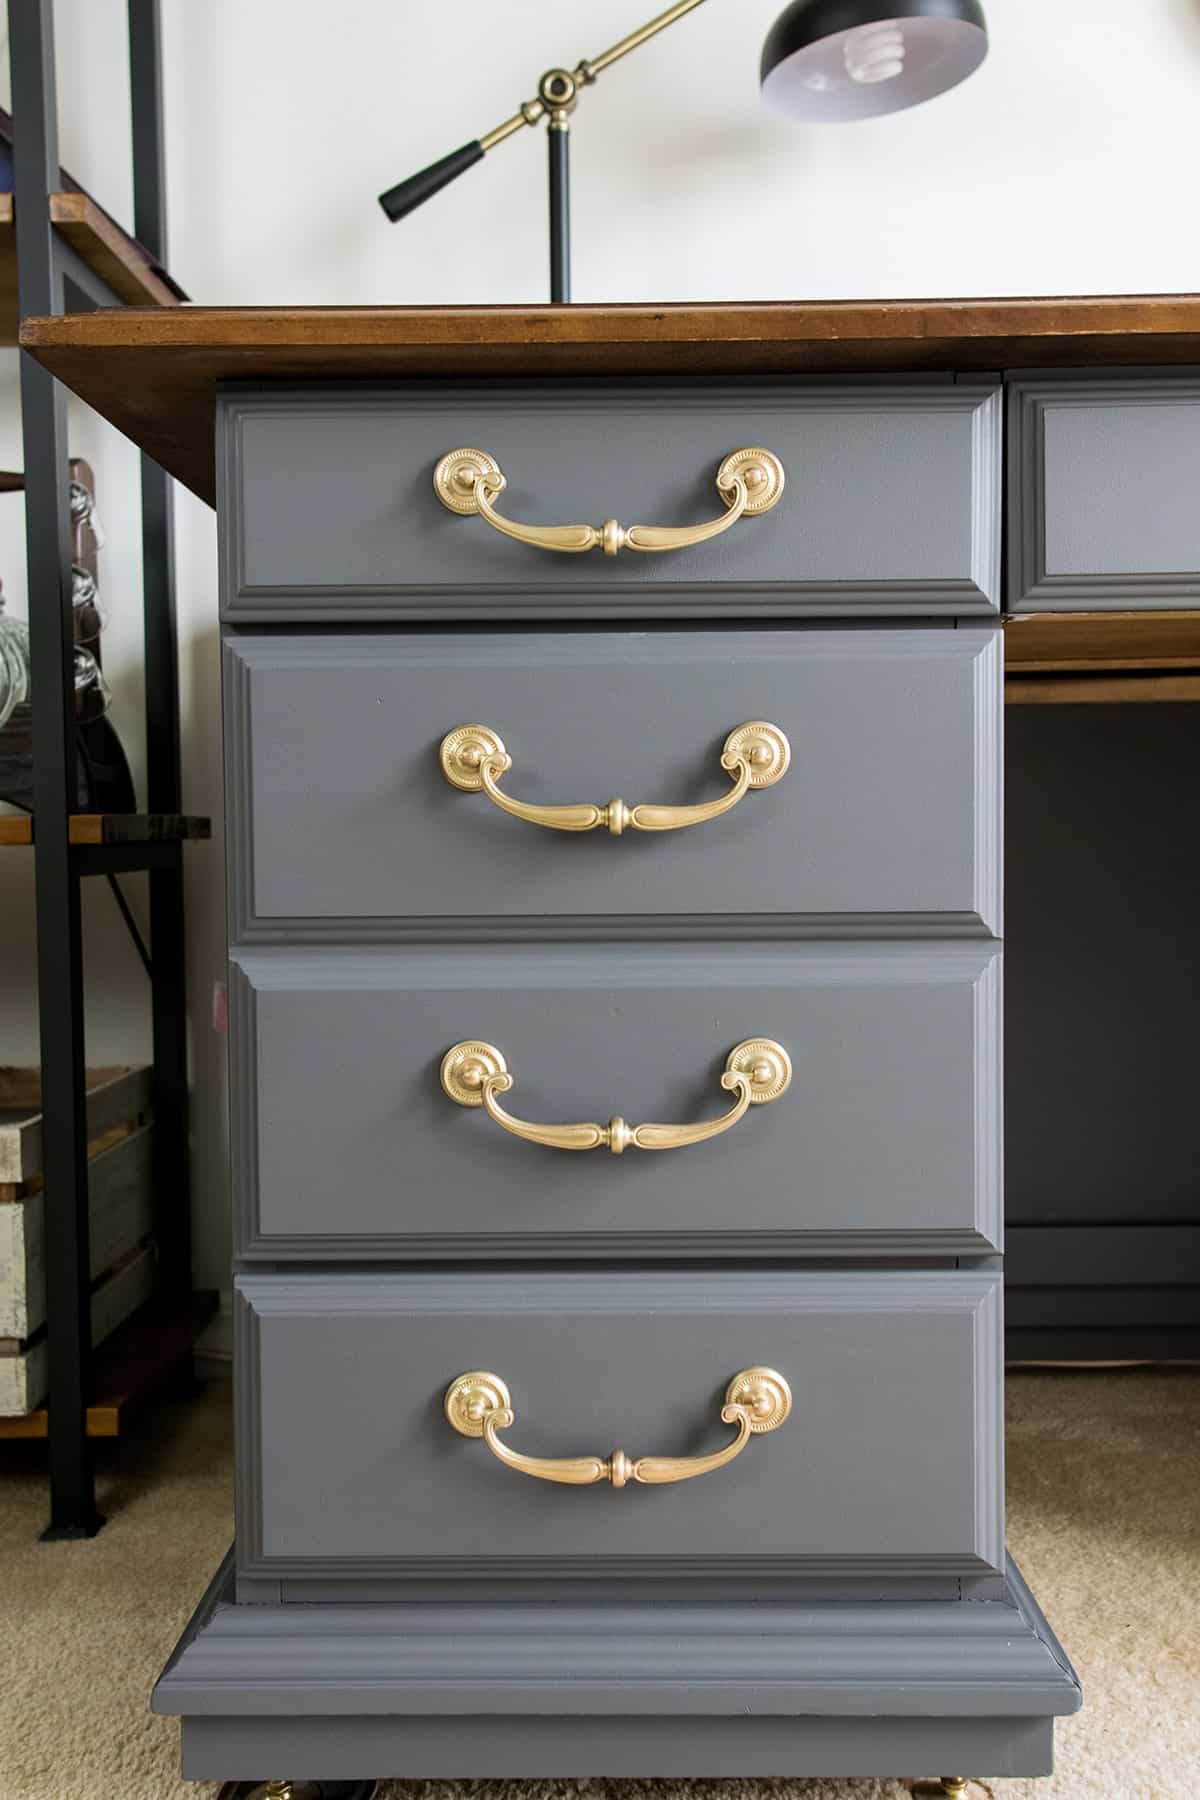
- Executive Desk Makeover
FAQs
No. Wax must always be the last layer. If repainting, all traces of wax must be removed, or the paint will not bond properly.
I recommend the cerusing technique that utilizes paint rather than cerusing wax for high traffic pieces or surfaces that may be exposed to water.
Pictures don’t even do this table justice. The wood is gorgeous! So tell me what you think. Is this a technique you would try?

Grab our free series "Weekend Home Projects that will Transform Your Life" Sign up below to receive updates including free printables, organization tips, home improvement projects, recipes and more! |
More Furniture Makeover Projects

PS I love seeing your creations! Be sure to take a photo and tag #cravingcreative on Instagram! You can also stay in touch with me through following me on Instagram, Pinterest, and subscribing to the newsletter!
How To Ceruse Wood (aka Limed Finish)
Tools
- Paint Brush
Supplies
- Sand paper 220 and 120 grit
- Paint or Stain of your preference
- Steel Wool
- Protective Top Coat
- White Paint
- Lint free dust cloths
Instructions
- All previous finishes must be removed.
- Using a very stiff wire brush to scrape out the softer areas of the wood grain. Work in long strokes in the same direction as the wood grain. You will have to put a little power behind the brush to really get into the wood grain.
- Apply 1-2 coats of water based stain or paint of your choice as the basecoat. Use thin coats. This will raise the grain a bit more.

- If using a white paint for the cerusing, add a thin layer of water-based polyurethane with a brush. The extra layer of poly will ensure that the stain does not bleed into the cerusing paint.
- Cerusing layer technique. Thin the paint with 25% water and brush over the surface in full sections. Give about 10 minutes for the paint to turn tacky or dry a little. The best way to remove the excess paint is with steel wool, rubbing in the direction of the grain but not digging into the crevices. If the paint isn't coming off, 220 grit sandpaper on a random sander can also be used. Just be sure to be careful and quickly go over the table with no pressure until the grain shows through.
- Add a sealing topcoat. Give the surface a few days at least to dry and harden before sealing. This will make the surface more durable.
Notes
- Always work in the direction of the grain. This includes painting, wire brushing, and removing the paint. Working across the grain will produce scratches rather than defining the grain.
- Keep your coats thin. You don’t want the layers, except for the white, to fill in the grain.
- Some woods have a chemical reaction with steel. Therefore, avoid using a steel brush. Fragments left can blacken the wood and disfigure the finish. Steel wool shouldn’t have an effect if the table is sealed prior to cerusing.
- Don’t take shortcuts on the prep work. Prepping the surface correctly is the foundation for a great result. If you remove the previous finish, always give a final sanding to even out the color and completely allow the surface to dry.
Maddi says
Hi! I love the color of the apron and base of the table. I’m cerusing my table as well and just wanted to know the paint color of the base/apron! TIA!
Rachel says
It’s Champlain from Fusion Mineral Paint.
Maddi says
Hi! Curious what paint color you used in the apron and base? I love that it’s jot a pure white!
Rachel says
Thank you Maddi! It’s from Fusion Mineral Paint (one of my favorites). It’s called Champlain.
Maddie says
Hi Rachel,
Love what you’ve done with the table. I’d like to do something similar with my dining room table, which is almost identical to yours with the leaf in. It’s cherry wood and a beautiful table, but it’s a very bright orangy (Golden Maple?) stain. If I lime/ceruse the table, and I end up not liking it, can you ever go back?
Rachel says
Yes, you can always change it, depends on how much time and effort. I wouldn’t go too deep with the wire brush if at first you don’t like it. If possible, I would sand off or strip the orange-wood stain before I even started the process. Ours was a maple and the stain didn’t penetrate the wood. You could also stain it slightly darker or mix in a muted wood stain over top. Ours wasn’t a laminate or thin veneer, which is why I could do what I did without worrying about going through the veneer. Good luck with your project!
Kelly says
Hi! I have a very similar table as this. Do you think using the poly before hand would make the paint harder to stick to if you are rubbing it off instead of sanding it off?
Rachel says
Poly is mostly meant as a top coat, so I wouldn’t think that it would make any difference really.
Jordan says
Hi Rachel,
This is exactly the look i want, but I have a huge area to do and maybe its me, or I’m letting it dry too much but I find using 400 grit sandpaper OR 0000 steel wool I am having to work REALLY hard to get the paint off and can’t imagine doing it for the big area I have… I tried your palm sander idea too and some of the under-stain stripped off (yes applied poly layer). Then even after that I would say I’m getting WAY more lines of grain then your pictures and I really like how you really accent the waves of grain but not so much all the grain. Any more tips to share?
Also I was using a brass wire brush instead of a steel brush like you linked. I was worried the steel would be too harsh on the surface that I have (plywood veneer layer).
Thanks!
Jordan
Jordan says
I’ll add, I’m using a chalk paint over top… is that maybe a bad type to be using? Thanks! Jordan
Rachel says
Chalk paint should be fine.
Rachel says
Hi Jordan! Sorry that you are having trouble. First, what kind of look you get may depend on what type of wood the table is. I have seen this technique often done with oak, which has more natural grain, although I prefer it on maple or cherry, which have tight grain lines. What grit for the random orbital sander were you using? I suggest something very fine like 220 or 320 so that it doesn’t eat through too many layers. If none of that works, adding liming wax would be a bit easier to control and you can always add it with the paint layer or instead of.
Rachel says
Love the table!! I’m going to try this technique on a tv stand given to me by my parents. What do you use to get such great lighting and pictures?
Rachel says
I have a Nikon D5600 camera and I hope I can upgrade to a full frame this year. I only use prime lenses like my favorite macro lens. I didn’t use any special lighting in these photos, just window light. I buy all my equipment used to save some $$. Hope that helps!
Nicole says
The table looks stunning!! I am currently trying the same technique on a yard sale find. After you poly’d, did you lightly sand or just put the paint down?
Thanks!
Nicole
Rachel says
Great question! I just put the paint down. I figured the sanding afterward would take care of that and I didn’t want to go through the stain underneath.
Janet says
Hi Rachael, I love what yo did! I’m going to try the cerusing on a table that has a leaf. Did you do it all at once or the leaf separate.
Thank you so much,
Janet
Rachel says
When it came to putting the white cerusing part on, I did it all at once. Since I was gently sanding the white paint off, it didn’t matter if it dried. However, if you try wiping it off with a rag, then I would do one section at a time. Good luck on your project! I know it will be stunning.
JP Zielke says
Hello, I’m wondering if the poly topcoat you used had any difficulty sticking to the liming wax. Do you think I could paint the topcoat instead of spray?
Rachel says
You can’t put a top coat over a wax. It won’t stick well, however, the liming wax can be put over a poly without a problem. Wax hardens but doesn’t bond the way that paint or polyacrylic does. Cerusing wax is a little different because some brands have paint-based liming wax, which isn’t really a wax at all. Depending on what brand you use, they will probably have excellent tutorials on how best to use it.
Renee says
I noticed both times you linked the same polyacrylic ( after the stain, and at the end of the project) is that the correct? And you say to spray it on at the end. Does that product come in a spray? Or can it just be brushed on? Thank you
Rachel says
Yes, I linked the same just for clarity. I used the poly to make sure the stain wouldn’t bleed into the white paint, and then to protect the table as a whole. That is my most used poly, but I have a list of the best polycrylics here also if that one doesn’t work for you. It does work with a brush and a microfiber roller, although I have a paint sprayer since for ease, speed, and a brush stroke free appearance.
Leanne says
Your “Regular Stripper” link is dead and i’m curious and ignorant to the entire process. Would you be able to share what type of stripper you used? Liquid? Sponge?
Thanks!
Rachel says
Thank you for letting me know that the link wasn’t working. I used Citristrip. However, you don’t necessarily need a stripper. This particular table had a rather thick coat of varnish so I thought it easier than just sanding everything down. I still had a fair amount of sanding because of all of the scratches. Stripper is also good if you are concerned about sanding through a thin layer of veneer. Hope that helps and good luck with your project!
Aarsun Woods says
Thanku for a great explanation !!!! this is great idea !!! Thanks….
Chrystie says
We are looking for this exact color on our table top, what color stain did you use? Love how it came out!!!
Rachel says
Hi Chrystie! Thank you so much. For the stain, I honestly mixed up some that I had on hand already. It was pretty close the the lightest brown I had but I thinned it out maybe 30% with mineral spirits. The directions on the stain can should tell you how you can thin it, if necessary. I find that a lot of stains are much too dark for my liking. I also recommend using an old t-shirt rather than a brush as it puts thinner, more even coats.
Aimee Aimee says
Embroidery
Thank you for a great explanation. I was looking online for a similar idea and really appreciate it
Mary says
Gorgeous… Did you also use Champlain for the base of the table. I have this table without the center section…this is great idea. I couldn’t decide how to finish it…so its sat for several years in the sad state of neglect.
Thanks for the inspiration.
Mary
Mary says
PS> I love your rug also…would you share your source? Mary
Rachel says
Oh, of course. Here it is. It comes in several sizes and I will mention that it has a tendency to look darker in one direction than when you look at it standing from the opposite side of the rug. Not a huge difference but I do notice it. Reminds me of vacuum marks that older carpets had sometimes, but it is just how you look at it. I have two 8×10 rugs and I oriented them so that the lighter side shows towards the room entrance (how you see it in the pictures).
Rachel says
Hi Mary! Yes, I used Champlain for the base as well. I have those projects too, just waiting for the right strike of inspiration. Actually, I have a whole bedroom suite my husband has had since college. Maybe one day I will get around to it, haha.
Roxanne says
This is gorgeous! How have I never tried this technique?
Rachel says
I thought the same thing! I have wanted to do it for awhile, but didn’t have just the right piece until now. Now I want to do more!