How To Ceruse Wood (aka Limed Finish)
Often called cerused oak or limed oak, cerused wood is an elegant finishing technique that showcases the grain patterns of wood. This step by step tutorial will guide you through creating the effect yourself on any species of wood.
Cost: $45
Equipment
- Paint Brush
Materials
- Sand paper 220 and 120 grit
- Paint or Stain of your preference
- Steel Wool
- Protective Top Coat
- White Paint
- Lint free dust cloths
Instructions
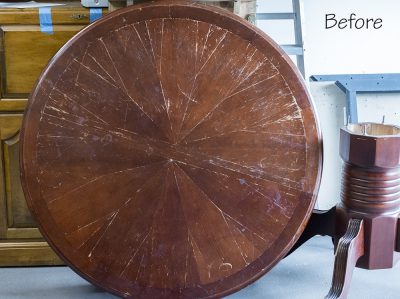
- All previous finishes must be removed.
- Using a very stiff wire brush to scrape out the softer areas of the wood grain. Work in long strokes in the same direction as the wood grain. You will have to put a little power behind the brush to really get into the wood grain.
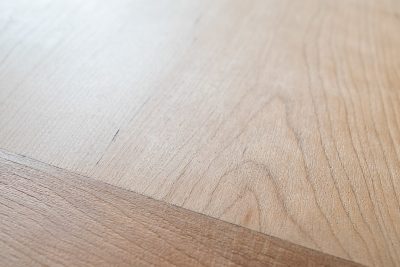
- Apply 1-2 coats of water based stain or paint of your choice as the basecoat. Use thin coats. This will raise the grain a bit more.

- If using a white paint for the cerusing, add a thin layer of water-based polyurethane with a brush. The extra layer of poly will ensure that the stain does not bleed into the cerusing paint.
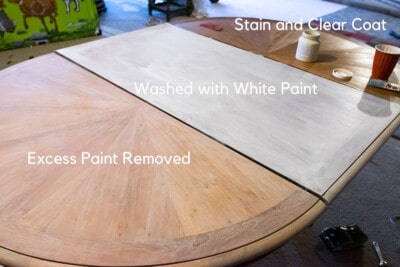
- Cerusing layer technique. Thin the paint with 25% water and brush over the surface in full sections. Give about 10 minutes for the paint to turn tacky or dry a little. The best way to remove the excess paint is with steel wool, rubbing in the direction of the grain but not digging into the crevices. If the paint isn't coming off, 220 grit sandpaper on a random sander can also be used. Just be sure to be careful and quickly go over the table with no pressure until the grain shows through.
- Add a sealing topcoat. Give the surface a few days at least to dry and harden before sealing. This will make the surface more durable.
Notes
Tips for the Best Result
- Always work in the direction of the grain. This includes painting, wire brushing, and removing the paint. Working across the grain will produce scratches rather than defining the grain.
- Keep your coats thin. You don't want the layers, except for the white, to fill in the grain.
- Some woods have a chemical reaction with steel. Therefore, avoid using a steel brush. Fragments left can blacken the wood and disfigure the finish. Steel wool shouldn't have an effect if the table is sealed prior to cerusing.
- Don't take shortcuts on the prep work. Prepping the surface correctly is the foundation for a great result. If you remove the previous finish, always give a final sanding to even out the color and completely allow the surface to dry.