Did you know you can get the look of stainless-steel appliances for cheap?! Use stainless steel contact paper to cover your refrigerator or dishwasher in about an hour. This DIY project looks great too and holds up over time with the right prep.
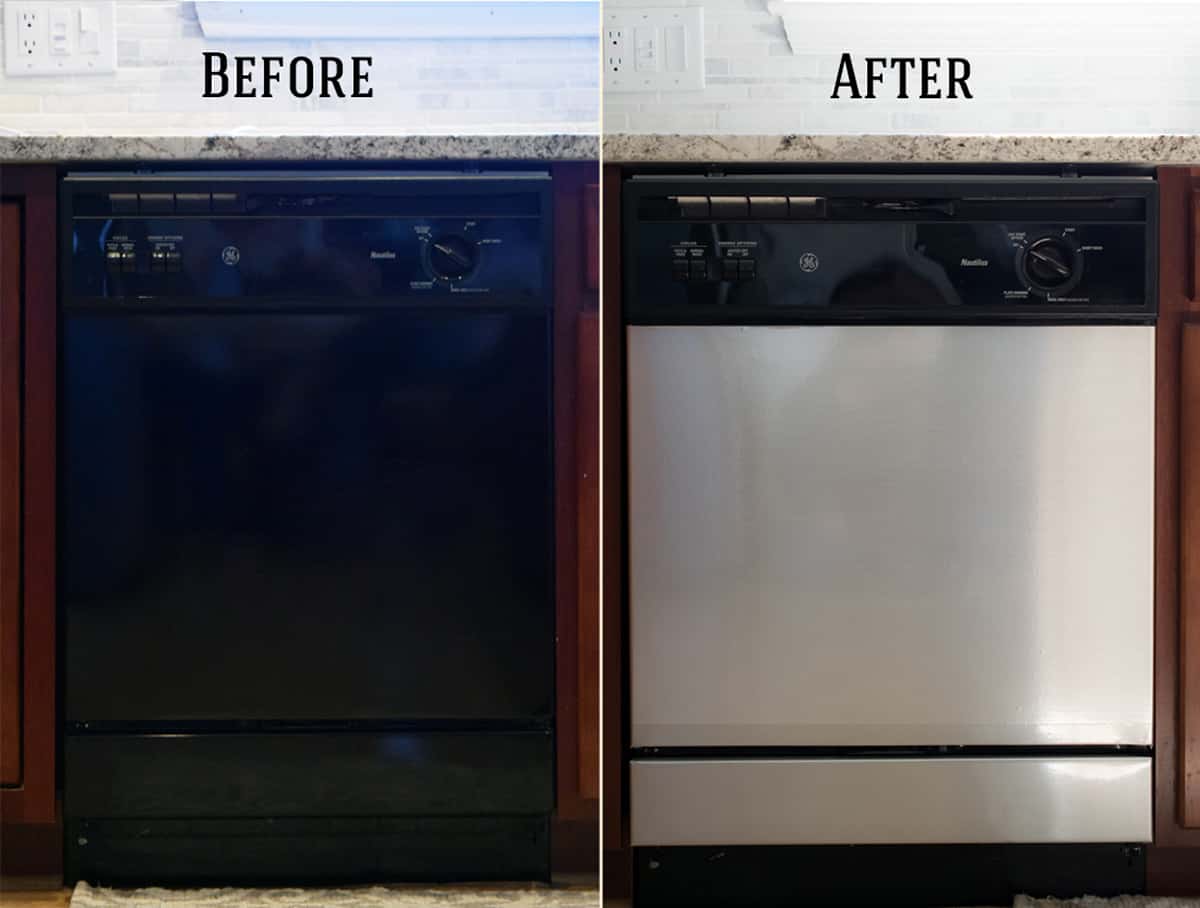
When we remodeled the kitchen, I didn’t have all new appliances in the budget and the dishwasher was actually functioning pretty well. So we decided to put our money towards building a kitchen island, new countertops, and adding more cabinet storage.
But the dishwasher was still saved! I upgraded by covering the dishwasher in stainless steel contact paper. Yes, you read that right! Contact paper! And years later, it held up very well until we eventually replaced the appliances.
I often get questions about this project. How does it hold up to heat and steam? Does it actually look like stainless steel? Is the contact paper waterproof? Does it leave any sticky residue or damage walls when you remove it? All the details are included!
Supplies
- Contact Paper – These come in rolls like this or in sheets that are made for dishwasher size. I like the sheets because it will leave less seams.
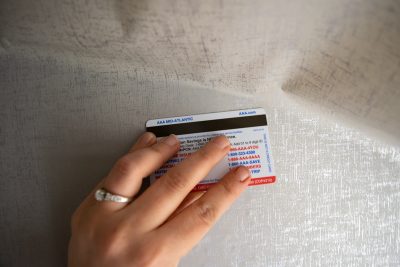
- Credit Card or Plastic scraper
- Pin or Sewing Needle (optional)
- All-purpose cleaner that won’t leave a residue. I used Windex because it dries fast.
Tips for using contact paper on an appliance
1. This is a 2-person job. It depends on the direction of the contact paper. For large horizontal sheets, it’s much easier if one person holds the sheet straight and pulls the backing while the other smooths it out.
2. Take measurements beforehand. You want to make sure the sheets will be large enough for your project.
3. Bubbles. If you do get a small bubble that you can’t smooth out, use a sewing needle and poke a super-tiny hole to release the air and flatten it out.
4. Where to buy? I purchased my stainless-steel contact paper here. It really does look like authentic; it has the horizontal lines and matches my real stainless fridge exactly. It also has a great adhesive and I have not had problems with the edges. I would not recommend purchasing any ol’ contact paper you find from the grocery store, as some of those are thinner and have less durable adhesive.
5. How does it hold up? This project looked good as new 2 years after I did it. The dishwasher broke around that time, so we had to replace it. However, I think it would have lasted at least a few more!
6. Want to avoid seams? There are rolls that come in more sizes for all kinds of appliances and even countertop width! These weren’t available years ago when I did this project, but I definitely would have went with this option.
7. Heat and water. I never had a problem with this brand pulling up at the edges even though the dishwasher gets quite warm, and steam came out the sides. Contact paper is usually waterproof, so that should not be a concern if the paper is applied well. I will say I have not tried this on an oven, so I am not sure that would work.
Our Project Step by Step
Much like my recipe posts, there are full instructions in the card at the bottom of this post that can be printed. I am sharing our particular project here for a few tips and decisions we made.
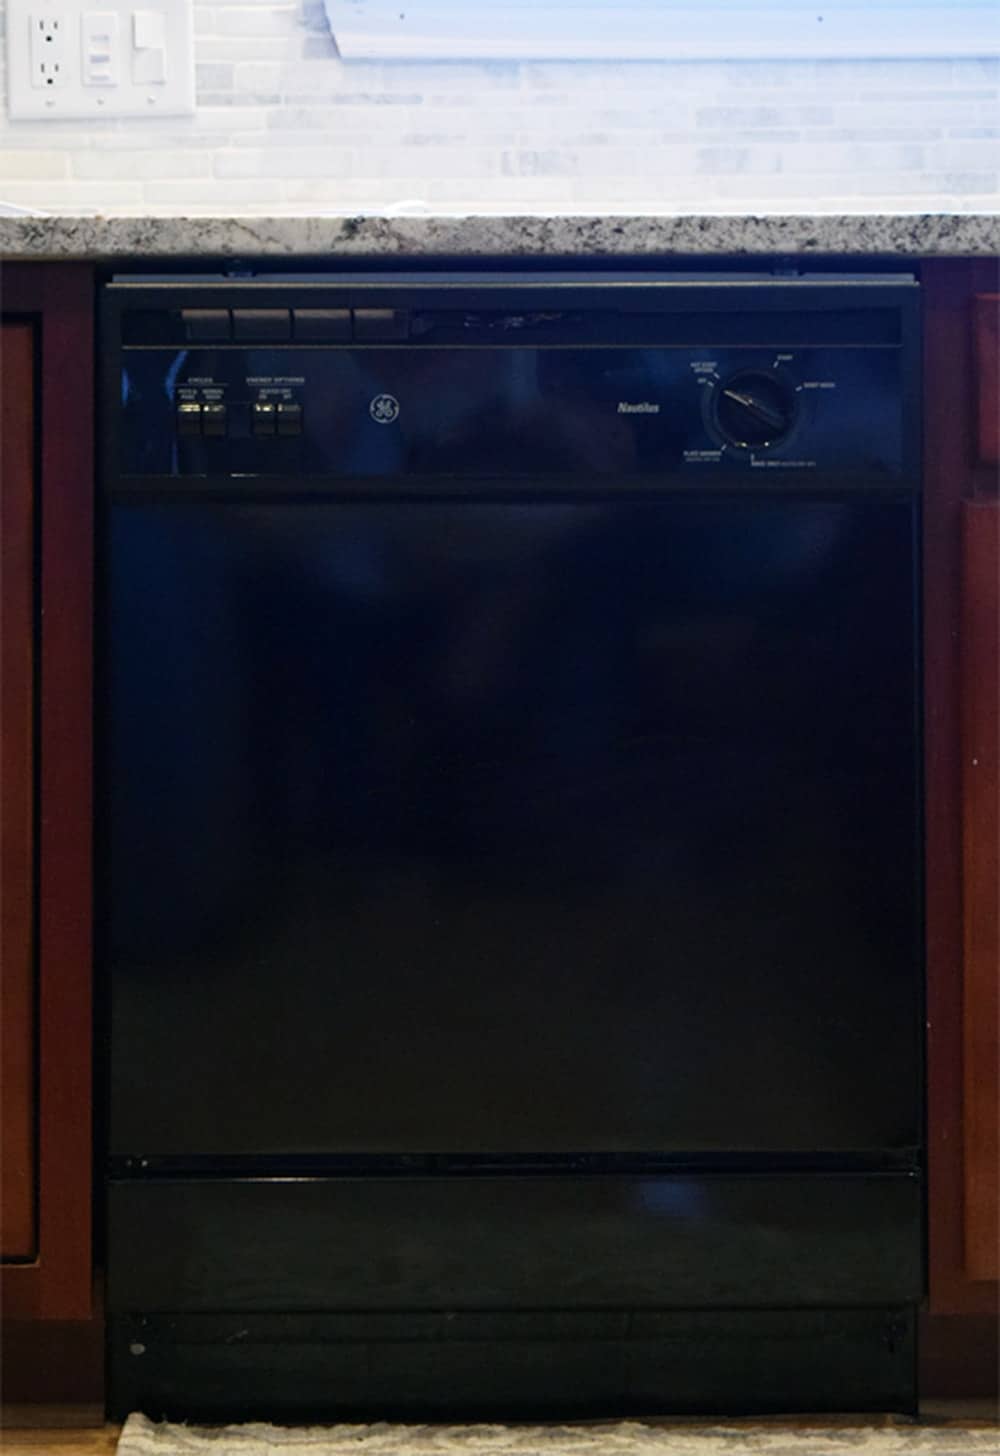
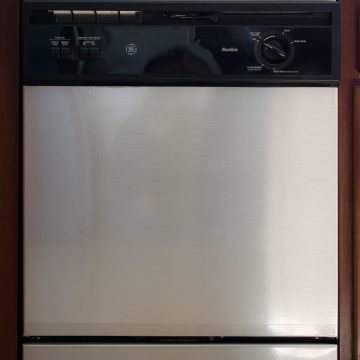
This is the original dishwasher and, apparently, it is pretty hard to photograph scratches on black but it had a few deep scratches, a lot of abrasion scratches, and a few dings. Before starting I cleaned it thoroughly with Windex (no residue) and made sure it was cool and dry.
Because of the lines in the paper, we had to lay this horizontally from left to right. Since it is a vertical surface, I highly recommend two people so a partner can hold the sheet as you smooth it down. We did the bottom as a separate piece.
If you pay attention to the dishwasher, you may notice that the sheet was about 1 inch short of the top part. Therefore, we do have a seam on ours. It doesn’t bother me, but there are much better sizes available today so that you won’t get seams on dishwashers or refrigerators.
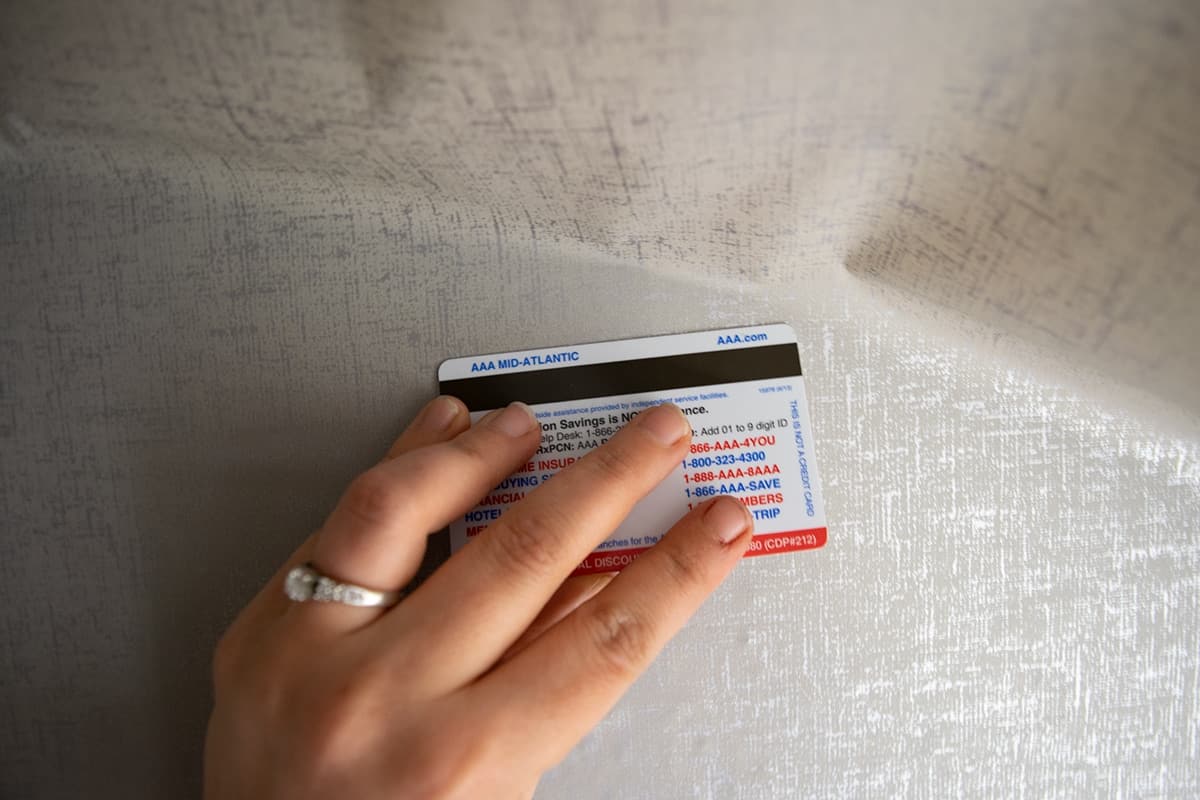
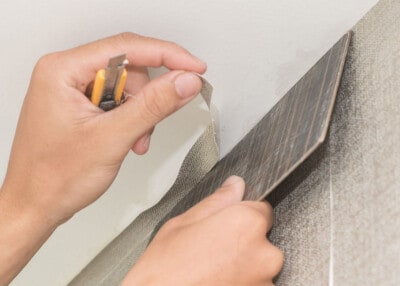
Watch for any bubbles as you work and push them out or lift the contact paper back up a bit and redo. Patience is key. The picture of this technique was unrecognizable, so the above photo is the same technique that I use with wallpaper.
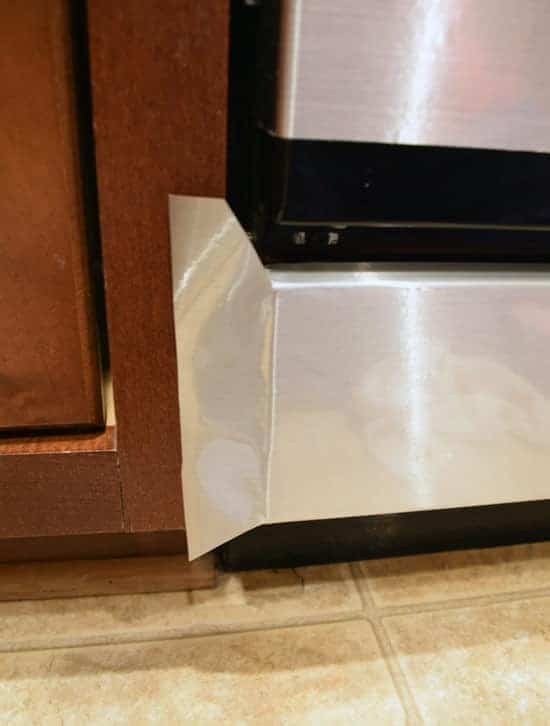
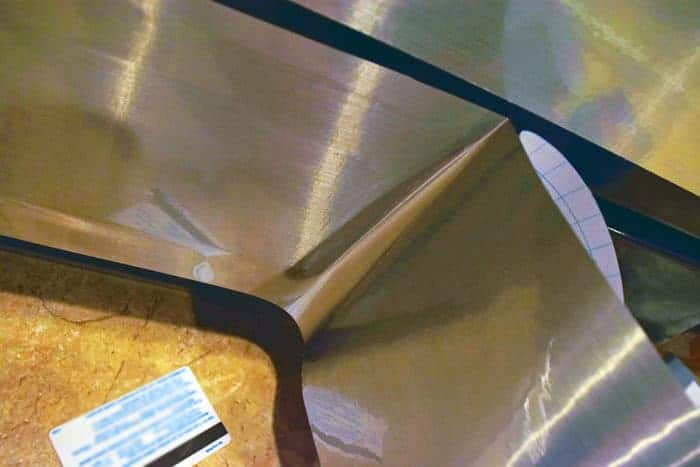
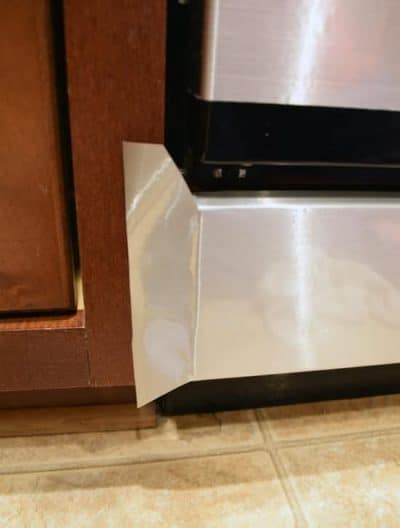
Covering the dishwasher was a bit trickier with the corners. After cutting the sheet, I smoothed out the front and then cut these wings on the sides. Fold the top and bottom down first, wrapping around the side edges a bit. Then the sides are smoothed down, overlapping the previously laid bits. This ensures no gaps in the corners.
More Kitchen and Home Projects for DIYers
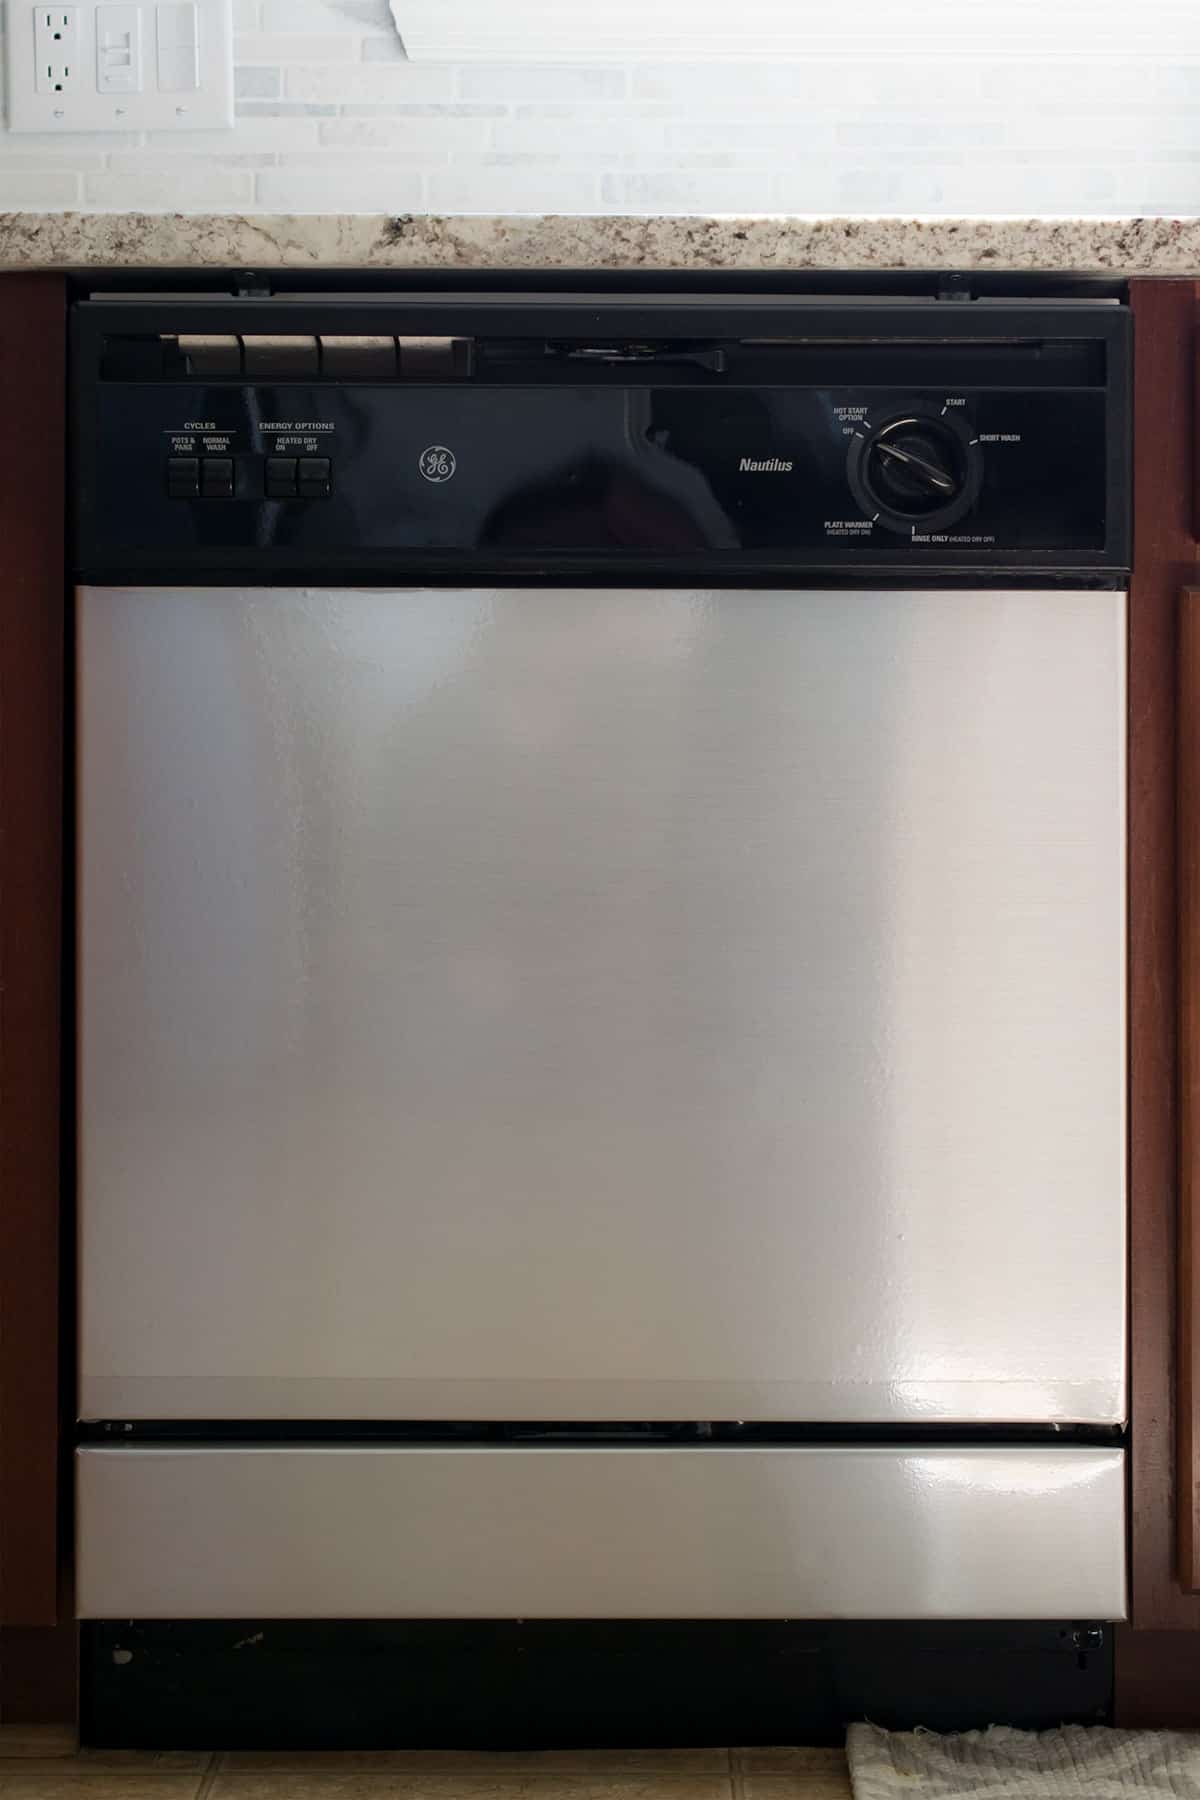
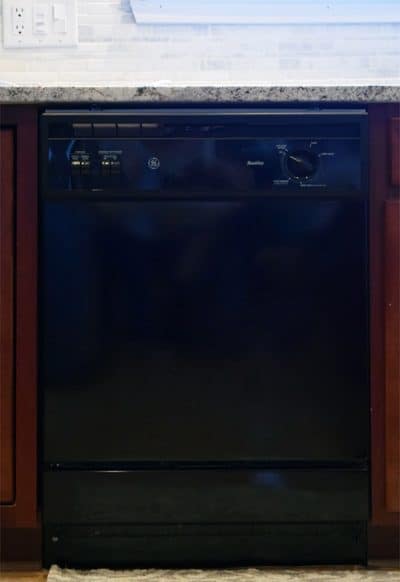
The after picture was taken 4 months after installation. We run the dishwasher almost every day and I worried that the heat and potential steam from the dishwasher would affect the contact paper over time. It hasn’t, but I did make sure the wrapped sides were firmly attached to the dishwasher and the sides.
FAQs
It depends on the brand and the strength of the adhesive. Some are made to be repositionable or renter friendly, but If walls are painted in flat paint or have surface problems, the contact paper may damage the walls on removal. In small spaces, you can add the contact paper to a thin plywood board and then nail to the wall. Then the contact paper is very easy to remove with no damage.
This is not a good idea because contact paper can scratch and will not prevent water damage. If the surface below (tile, grout, etc) is not sealed, water can seep behind the paper and cause much bigger problems than ugly tile.
Yes! Use a good quality contact paper that has a durable adhesive backing for best results. Make sure the surface is clean and don’t forget to wrap around the sides for best effect.

Grab our free series "Weekend Home Projects that will Transform Your Life" Sign up below to receive updates including free printables, organization tips, home improvement projects, recipes and more! |
More Home DIY Ideas
PS I love seeing your creations! Be sure to take a photo and tag #cravingcreative on Instagram! You can also stay in touch with me through following me on Instagram, Pinterest, and subscribing to the newsletter!
How to Use Stainless Steel Contact Paper
Tools
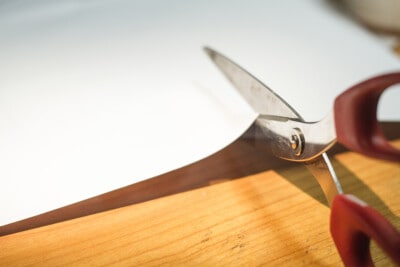
- Scissors
Supplies
- Stainless Steel Contact Paper
- Plastic Scraper or Credit Card
- Windex
Instructions
- First, clean and dry your surface thoroughly. Determine if your sheets will need to be laid vertically or horizontally, which can differ depending on the pattern and surface you are working on.

- Cut the sheet of contact paper to size with a little extra to wrap around the sides.

- Gently peel the top line of the backing down several inches evenly, making sure that it does not roll back on itself. Line up the edge along the top of the surface and press down firmly along that edge when you have it straight. If your edge is not perfectly straight, you can overlap the edge about an inch and remove excess with a razor knife and smoothing tool.

- A few inches at a time, continue removing the backing from underneath, pressing the contact paper down as you go. Pulling the roll taut with one hand and sliding a scraper or credit card (to smooth the paper) towards the roll helps. This prevents air bubbles. Don't try to stick the entire sheet down and then smooth – a few inches at a time is much easier.
- Once you have the front side done, wrap around the corners and continue smoothing. Remove any excess with a razor knife.

Cindy says
I am so happy that I found your blog on Pinterest. I want to simply cover the handles of my refrigerator, so I have ordered this contact paper. Do you have any tips for applying it to a rounded surface like an appliance handle?
Rachel says
That’s a great idea for making wiping smudges and things off! The main tip that I find useful is to have two people – one to hold the excess sheet away and the other to slowly smooth it down from one end to the other. That way you get it well bonded and without bubbles. For a rounded surface, I would probably smooth right up the center where it is flat and then wrap around slowly using a plastic card to smooth.
Samantha says
What is the contact paper you used? Can you provide a link? All the stainless contact paper I find isn’t wide enough so you have to use two pieces side by side to cover the whole door.
Rachel says
Hi! The contact paper that I used was from home depot but you can also find it on Amazon. The 18 inches is about 1 inch short for my style of dishwasher, but you have to really look to notice it as I lined the pieces up pretty well to cover the whole area. However, if you have a larger or completely flat fronted dishwasher, there is this one and it even works with refrigerators. I haven’t tried it personally, but I also found this magnetic option that seems rated highly I hope that helps!