Discover my tried-and-tested tips for sparkling grout! From deep cleaning and removing mold to expert sealing techniques from decades of home renovations, this guide has all the supplies and methods you need for pristine tile surfaces.
Several years ago, after buying our house with a leaky toilet meant we had to install a new floor pronto, I had the blind ambition to install a real marble tile floor with white grout (seen here) in the most-used main floor bathroom.
We often play the guinea pig role around here with our projects, and sometimes we do wonder how things will hold up in time.
We worried the same thing about the peel and stick backsplash in my brother-in-law’s kitchen and bleaching our dining room table. Those projects were both BIG WINS, but we have already had to regrout that tile floor to a more manageable grey color.
While it is high maintenance, it looks almost brand new 8 years later because we reseal it every few years. That also means that all of the grout in the house gets a nice deep clean at the same time and today I am sharing the BEST methods to clean grout deeply and quickly.
What Not To Use
I don’t want to waste anyone’s time, but let’s take a brief look at other grout and tile cleaning methods that I have tested and why I don’t recommend them as best:
- Vinegar plus baking soda. I cannot stand the smell of vinegar and I don’t find that this method works any better than the methods I share below.
- Bleach or anything that will leech color. Many stone tiles cannot have bleach on them, particularly marble. It will actually leech out the color of the tiles.
- Household Bathroom Cleaners. While these work for everyday grime, some of them (Kaboom, Clorox Foam Bathroom Cleaner) also will damage sealants and cause acidic damage long term. I generally avoid chemicals in our home.
- Abrasives like sponges or Magic Erasers. These aren’t effective against mold or stains.
- OxiClean. I tried this and didn’t like the results as much unless I mixed with other chemicals, which can actually be very dangerous. See Oxiclean + Ammonia = POSSIBLY DEADLY.
What types of grout surfaces can this technique be used this on? The methods below work on both sanded and unsanded types of grout surfaces. Epoxy grout doesn’t stain, so you may not need anything more than dish soap cleanser and water there.
Supplies and Notes
While I give a few different approaches, and why you would use them, there are still some basics for the supplies apart from the cleaning method. There is a handy printable at the bottom of this post (like a recipe card), so you can use the “jump to tutorial” button at the top to skip down to the instructions.
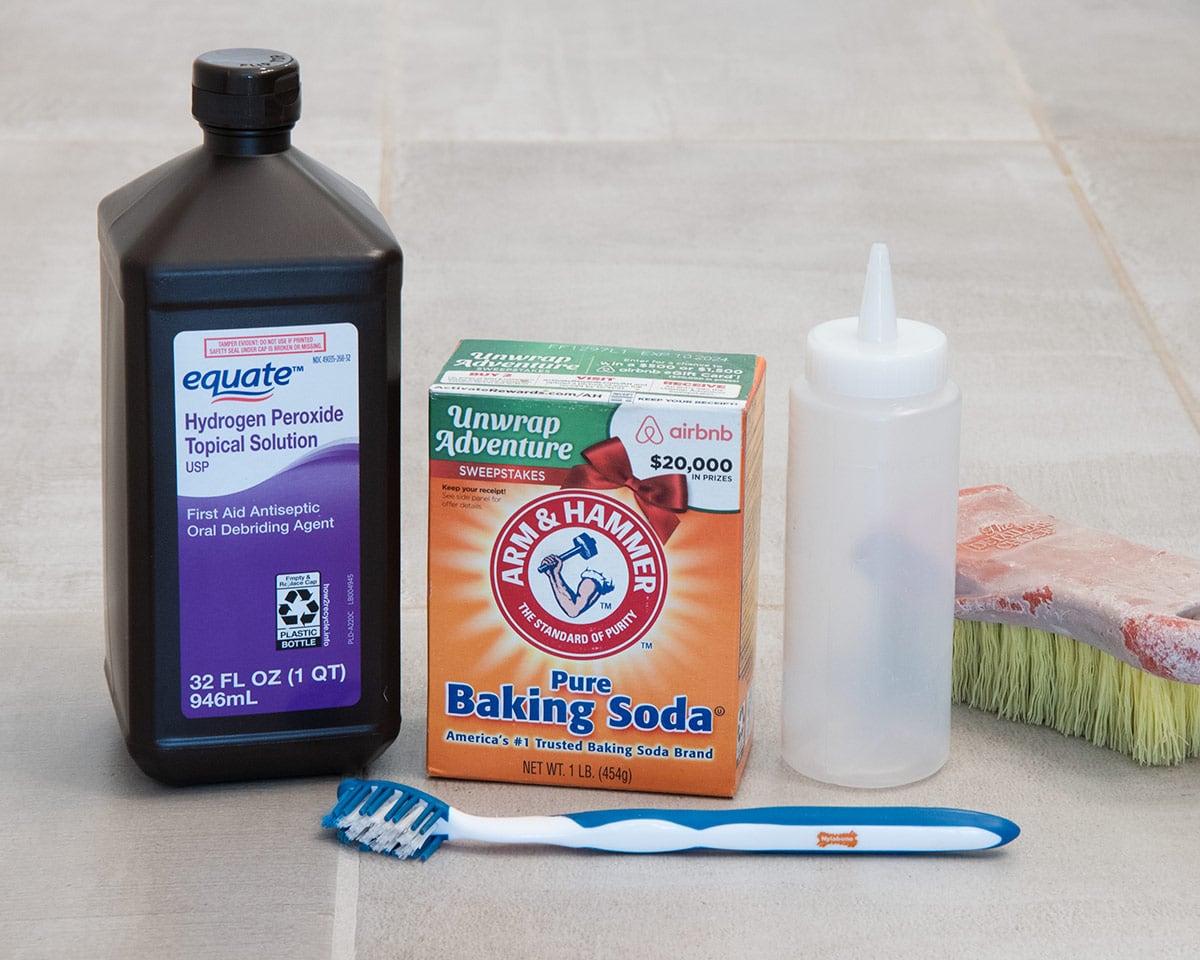
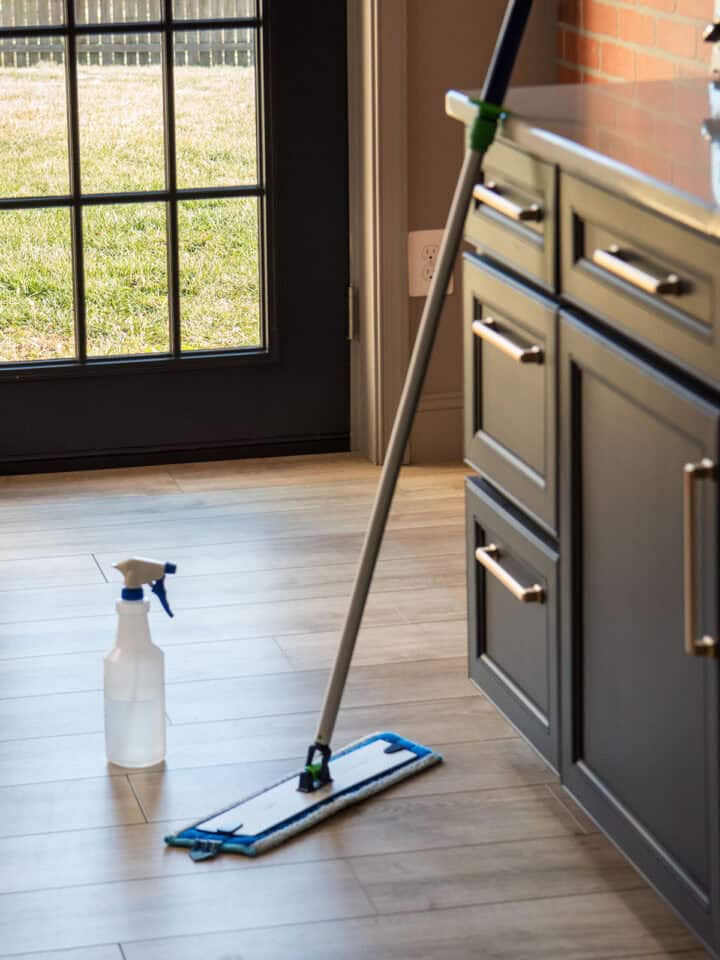
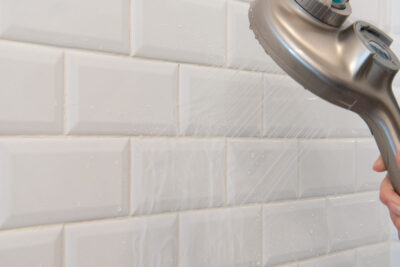
Grout Brush. Get a brush with stiff bristles (but not metal), a bent handle, and soft, comfortable non-slip grips. While honestly, I use an old dog toothbrush that has all of these traits, I would recommend these OXO cleaning brushes. For our glazed beveled subway tile shower, I also use a larger stiff cleaning brush like this one to make the job faster because the lines are so close together.
Bottle or Spray Bottle. You can use a mist spray bottle with a concentrated stream pattern, but I most prefer a chocolate bottle with a small hole in the tip to control the application.
*Rachel’s Note: I personally try to use green cleaning solutions in my home. Everything, including bathrooms and floors, are cleaned entirely with special microfiber cloths and ONLY water unless it’s a special project like rust, mold, or limescale. We do a lot of home renovations so I understand that sometimes stronger agents are needed. However, overuse of acidic chemicals degrades surfaces over time, making them more susceptible to future dirt collection and failure.
Baking Soda and Hydrogen Peroxide
I won’t call this an all-natural grout cleaning solution, but it’s cheap, safer, extremely effective in a variety of circumstances, and even kills mold and mildew.
I do use this solution to clean grout between my honed marble tiles, but it’s still important to keep the solution from dwelling on the marble tiles themselves. Marble is very porous and prone to color loss if not sealed well.
I have also used this method to deep clean a mildewy 15-year-old floor in a basement and it worked perfectly.
Top Tip!
Do not mix the hydrogen peroxide and baking soda ahead of time. The key to this recipe is that the chemical reaction happens while on the grout, lifting the old dirt and grime. For most effectiveness, add the baking soda to the grout line and then add hydrogen peroxide until a damp paste. Let the mixture sit for 5-10 minutes.
Best Chemical Grout Cleaner
While hydrogen peroxide and baking soda are indeed environmentally friendly miracle cleaners for grout, some stains like rust or hard water stains may need a different cleaner- say a grout floor that hasn’t been cleaned since a flood in 2010? (true story!)
Zep Grout Cleaner is my go-to reasonably priced professional-strength cleaner and grout brightener that doesn’t contain bleach. Let it sit on the tile grout for a few minutes to minimize scrubbing.
ZEP is moderately acidic (diluted hydrochloric acid), so cleaning gloves and eye protection are required. If you're cleaning a large floor area, work in sections. Wash away with a wet rag and gloves.
Best Heavy-Duty Grout Cleaner
Clean-eez Grout-eez is a serious grout cleaner for stubborn stains.
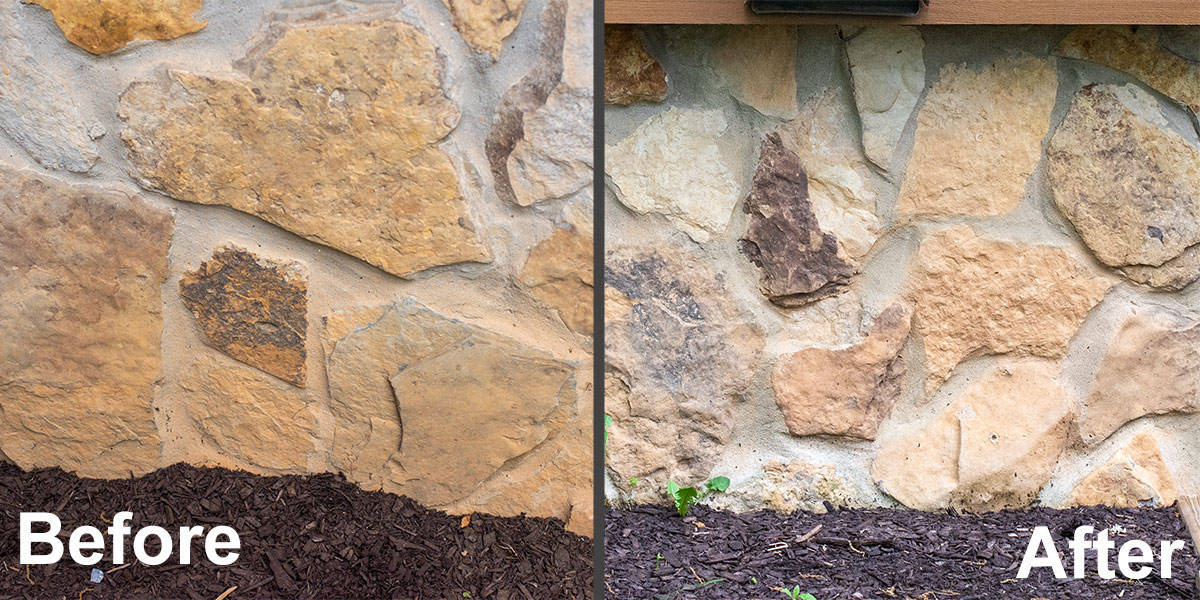
I have actually used this one time, and it was to clean some outdoor mortar when nothing else would work for some heavy stains- I tried so many products and this worked to get the heavy stains out without etching the surface like muriatic acid would have done.
Grout-eez is a very powerful acid mixed with a detergent, so keep that in mind it’s not something to use often. It will eventually break down the top layers of your grout surface and will certainly require resealing of the grout.
How to Clean Floor Tile Grout Tips
- One of the reasons that hydrogen peroxide and baking soda work so well is the chemical reaction raises the dirt, therefore you want to mix them on the tile – NOT AHEAD OF TIME.
- When working on walls, mix the hydrogen peroxide and baking soda in a tin when you are ready to apply. Allowing the mixture to sit wastes the effectiveness.
- Make sure your baking soda and hydrogen peroxide are FRESH.
- A long-handled brush sounds appealing, but you have to get close to the floor to get the grout really clean.
- For sensitive stone floors, like real marble, try keep the chemicals within the grout lines only.
- If you have thicker layers of dirty or greasy kitchen residue, use a degreasing pre-treatment mix of dish soap and warm water to help lift the top layers of dirt.
- Work in small sections so that the grout won’t start to dry.
- After the grout has completely dried, you may find some baking soda residue (white powder) that got missed. You only need to clean those spots again, not the whole floor.
- A steam cleaner is another environmentally friendly way to clean grout, but I don’t own one and I hated our steam mop. It can be quite effective for dirt and soap scum.
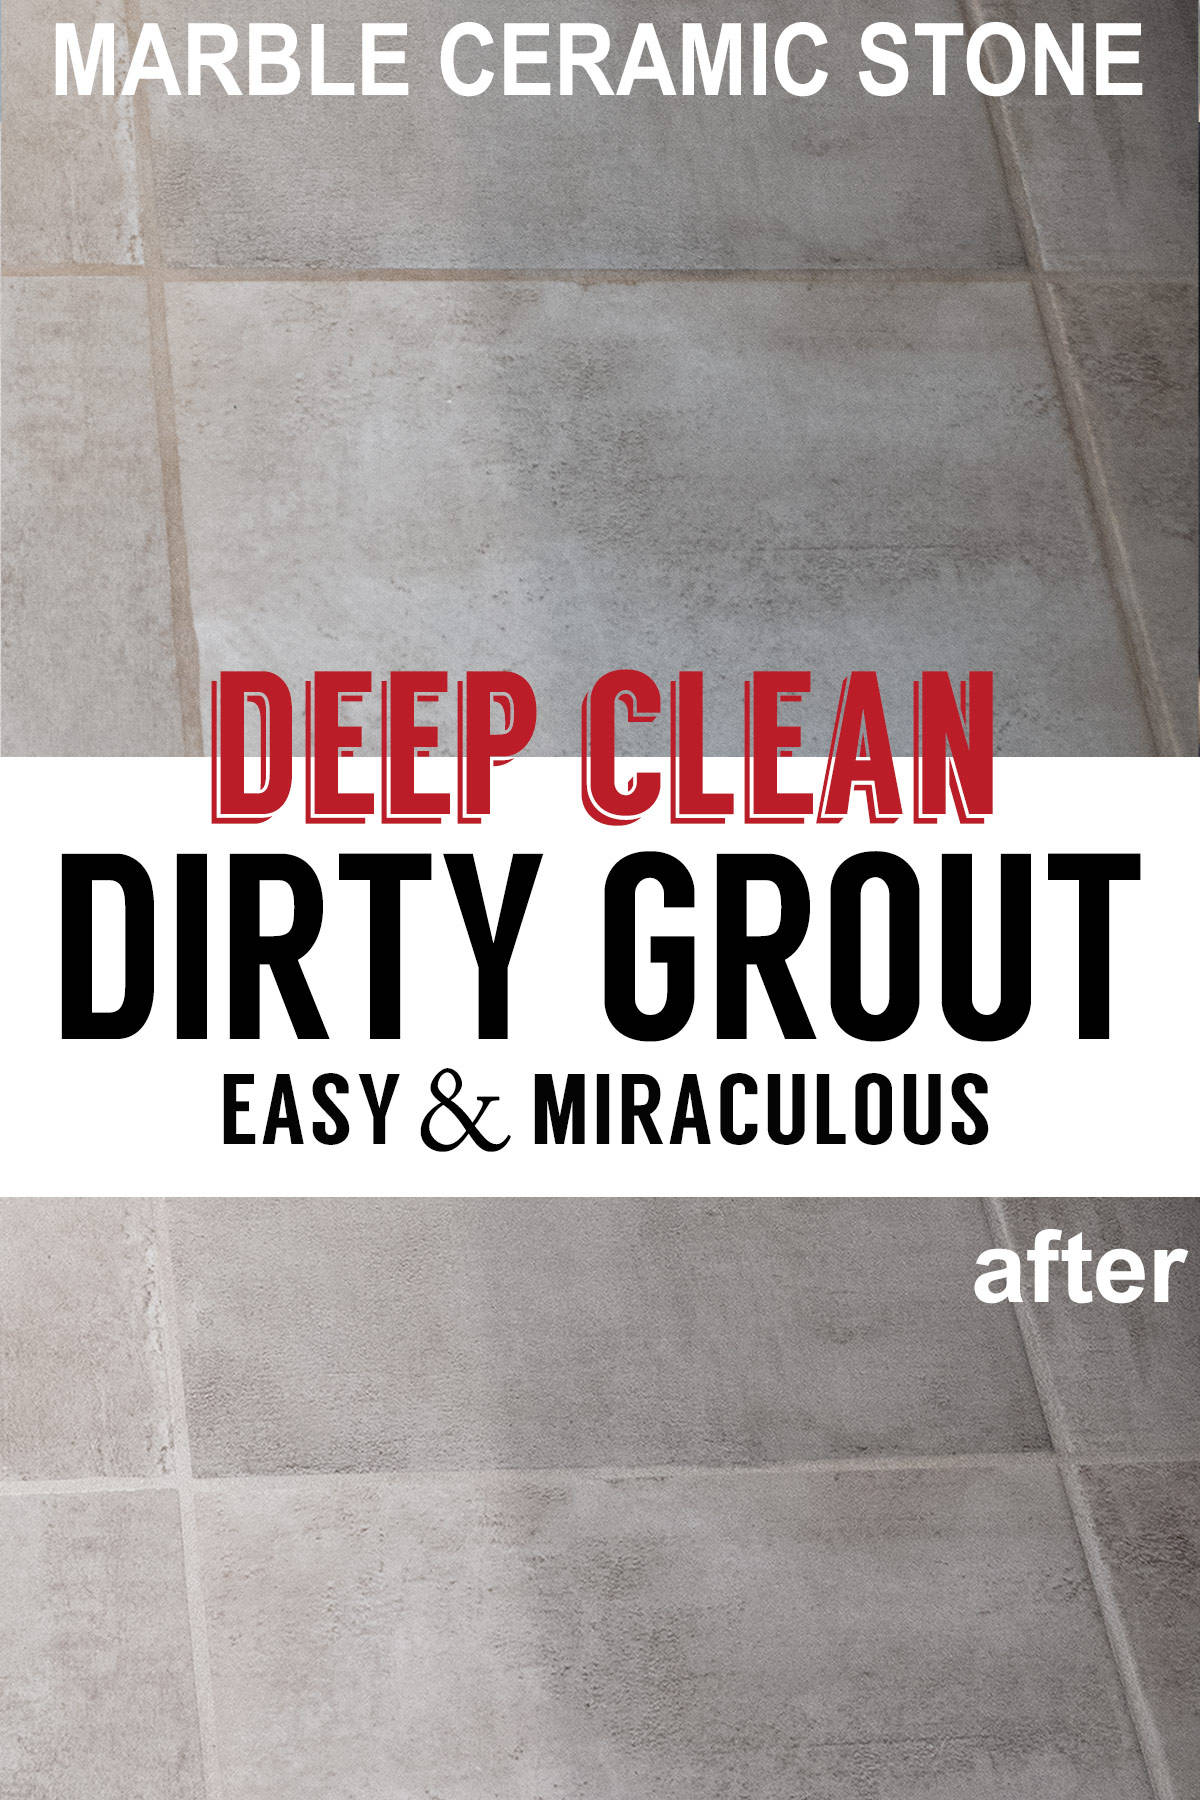
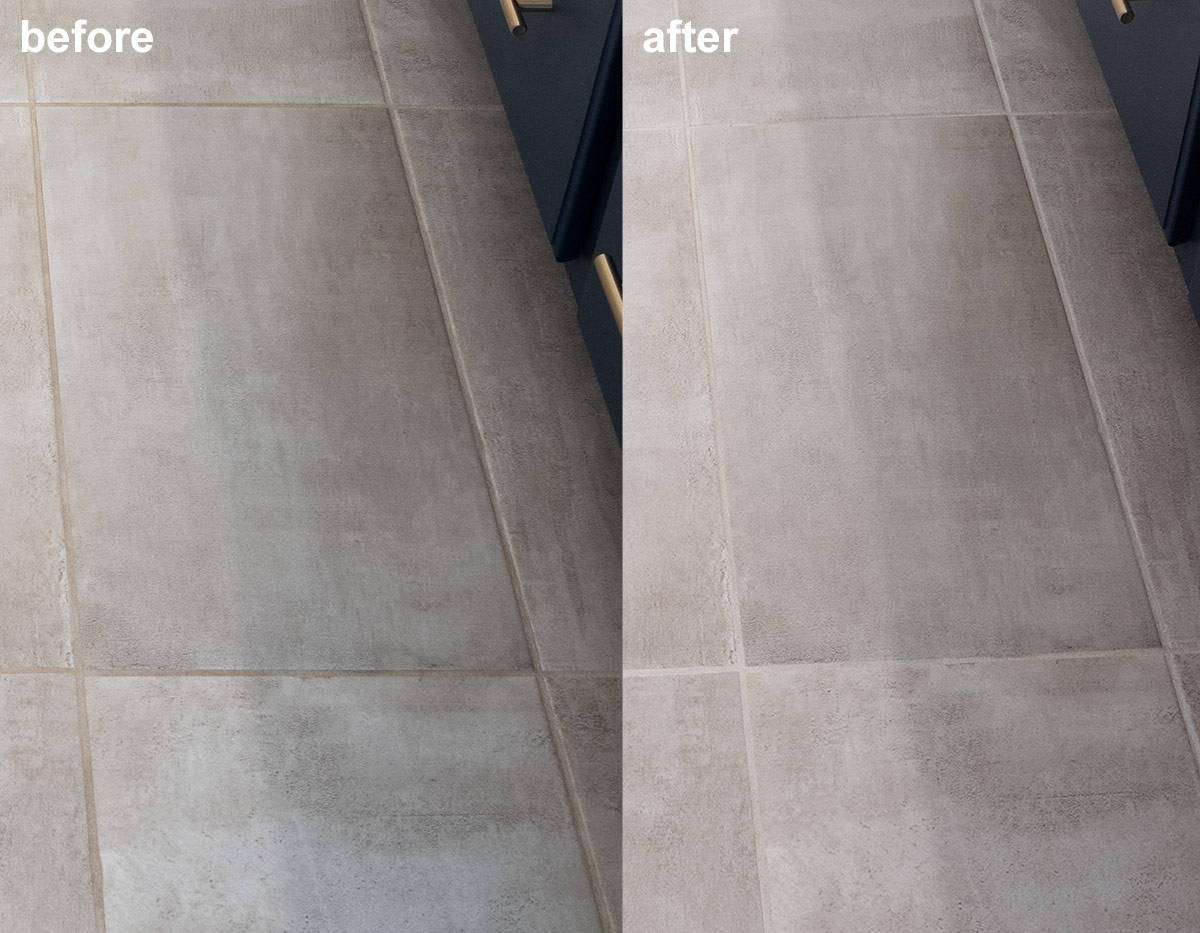
The Results
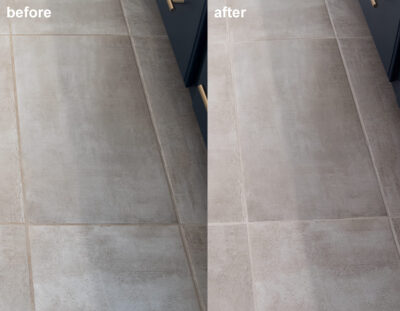
Although I have used many methods for different things, I use the peroxide method in my own home because it is highly effective, cheap and safe on sensitive stone like marble tile. This is large format printed porcelain tile that looks like feathered concrete. So, the tile isn’t dirty – it’s designed to look like that.
Here is a closeup of the before and after using the hydrogen peroxide method and after sealing. The grey grout lines look exactly like when it was new, but it’s 8 years old!
Sealing Grout
I use a 10 year grout sealer from the local big box store. I often get asked why I do it if the sealer says “10-year”. Firstly, the bottle says “Up to 10-years”. I would bet that’s a marketing term for if you NEVER EVER walked on, used or cleaned the tile area.
Think about the caulk in your daily shower – many are rated 10 years or more. Has it ever really lasted that long? I’m betting nope, but who is going to complain to DAP about a warranty (or even remember the company much less have a receipt)?
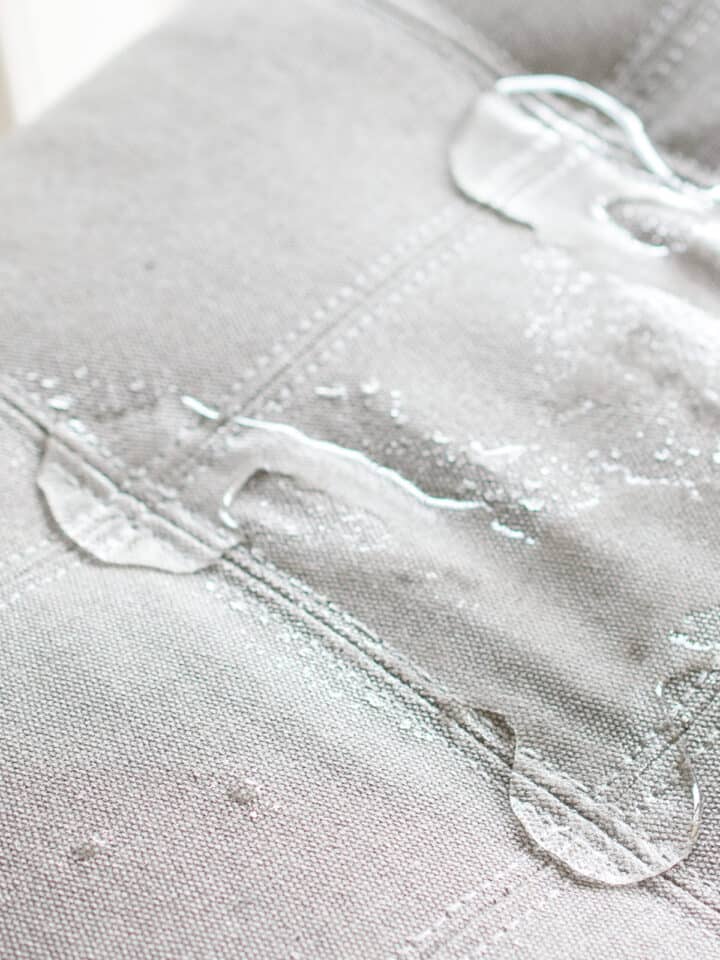
Sealers wear over time from shoes, spills, and even soap and hot water. A good way to test if your sealer is still good is to see how well water beads on it. A great time to test and reseal is just after cleaning the grout to provide that extra protection.
FAQs
The best grout brushes have a bend at the handle to keep you from scraping your knuckles and have soft, comfortable non-slip grips. Stiff bristles are a must, but metal bristles are too harsh for cleaning grout, so I recommend these OXO cleaning brushes or these palm cleaning brushes which check all the boxes.
From personal experience, if your grout has discolored and cleaners can’t get it white again, the best option is to use a grout pen that will essentially paint the grout lines white. I was so tired of white floor grout looking dingy between cleaning that I replaced it with a light grey grout.
Some professionals have access to commercial grout cleaning machines that work with heavy-duty cleaners and rolling scrub brushes. It is somewhat similar to how a commercial rug doctor cleans carpets.
You can bleach grout, although chlorine bleach can fade colored grout and should only be used on white grout. Alkaline cleaners are generally recommended for everyday cleaning of all types of grout.

Grab our free series "Weekend Home Projects that will Transform Your Life" Sign up below to receive updates including free printables, organization tips, home improvement projects, recipes and more! |
More Cleaning Tutorials


PS I love seeing your creations! Be sure to take a photo and tag #cravingcreative on Instagram! You can also stay in touch with me through following me on Instagram, Pinterest, and subscribing to the newsletter!
How to Clean Grout
Tools
- Grout Brush with
Supplies
- Baking Soda
- Hydrogren Peroxide 12% is more effective, but I have had good luck with 3% too, particularly with marble tile.
- 1 Bottle Applicator A very small tip makes it easier to control the amount of hydrogen peroxide.
Instructions
Preparation
- Ensure the area is swept or vacuumed of loose debris. Clean the tile surfaces to remove any grime or water spots. Stone tile should be cleaned with an appropriate cleaner.


For Cleaning Tile Floors
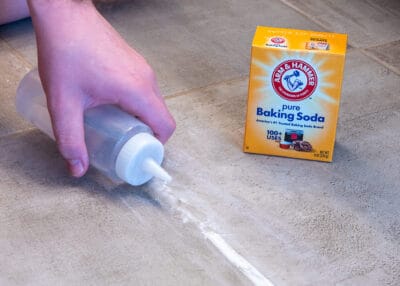
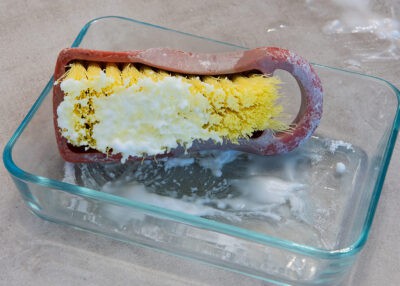
- Apply Baking Soda to Grout Lines. Fill the grout lines with baking soda, covering them evenly. No need to waste it on the tile surface if that is clean. I tend to brush it into the grout lines and avoid the tile surface.

- Activate with Hydrogen Peroxide. Fill a small bottle with hydrogen peroxide. Hold the bottle containing hydrogen peroxide directly above the baking soda-covered grout lines. Spray a fine mist or drip the hydrogen peroxide over the baking soda until it is dampened but not overly saturated.

- Let the Solution Sit. Allow the baking soda and hydrogen peroxide mixture to sit on the grout lines for about 5-10 minutes. The reaction between the baking soda and hydrogen peroxide will create a bubbling effect, helping break up and lift the dirt.

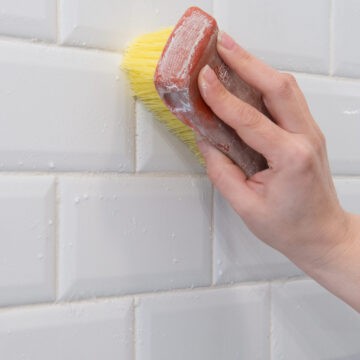
- Scrub the Grout Lines. After the sit time, use the scrub brush or toothbrush to scrub the grout lines vigorously. Work in small circular motions or back-and-forth strokes to dislodge stubborn grime.
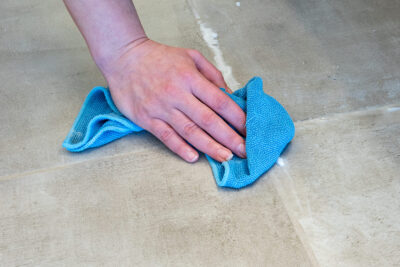
- Rinse and Wipe Clean. Once you have thoroughly scrubbed the grout lines, dampen a clean cloth or sponge with water. Wipe down the tiled surface, including the grout lines, to remove any remaining baking soda residue and loosened dirt. Rinse the cloth or sponge frequently in clean water to prevent spreading dirt or baking soda. It may take a few passes to remove all the baking soda residue.
- Dry the Surface. Once the grout lines are clean, use a dry cloth or towel to pat the tiled surface dry. The grout may appear darkened from being wet. Allow the area to air dry for about 24 hours before resuming normal use or sealing.


For Cleaning Walls or Showers
- Have everything ready, including reading all of the instructions, before mixing the cleaning solution. The chemical reaction helps to lift dirt and grime so you will work quickly to apply the paste to the wall.
- Mix a Paste. In a small bowl or dish, pour a small amount of baking soda. Pour enough hydrogen peroxide that a damp, but thick paste forms. It's about 1 part hydrogen peroxide to roughly 2 or 3 parts baking soda.
- Dip your brush into the baking soda mixture and apply to the wall. You don't need to scrub vigorously at this point, you are just trying to get it into the grout lines.
- Let the Solution Sit. Allow the baking soda and hydrogen peroxide mixture to sit on the grout lines for about 5-10 minutes. This dwell time helps to loosen dirt and stains for easier removal.
- Scrub the Grout Lines. After the sit time, use the scrub brush or toothbrush to scrub the grout lines vigorously. Work in small circular motions or back-and-forth strokes to dislodge stubborn grime.
- Rinse and wipe clean. For a shower, you can just spray with a handheld water sprayer to rinse all the residue from the walls or wipe any spots that need a little more pressure.
- Dry the Surface. The grout may appear darkened from being wet. Allow the area to air dry for about 24 hours before resuming normal use or sealing.


Notes
- Make sure your baking soda and hydrogen peroxide are FRESH.
- One of the reasons that hydrogen peroxide and baking soda work so well is the chemical reaction breaks up and raises the dirt, therefore you want to mix them on the tile – NOT AHEAD OF TIME.
Siddnath Verma says
Such a lifesaver, Grout cleaning can be a nightmare, but these tips make it so much easier. Definitely trying this.