Groutable Vinyl Tile is a contemporary alternative to traditional mortar and tile that is gaining in popularity, particularly because of it’s ease of installation. These peel and stick tiles mimic the effect of ceramic or stone while also being more cost effective. Installation tutorial and product review included.
What’s the craziest thing you’ve ever seen in a home? I’ve seen my share of cringe-worthy things during home renovations, but a carpeted bathroom is probably at the top of my list. Like why?
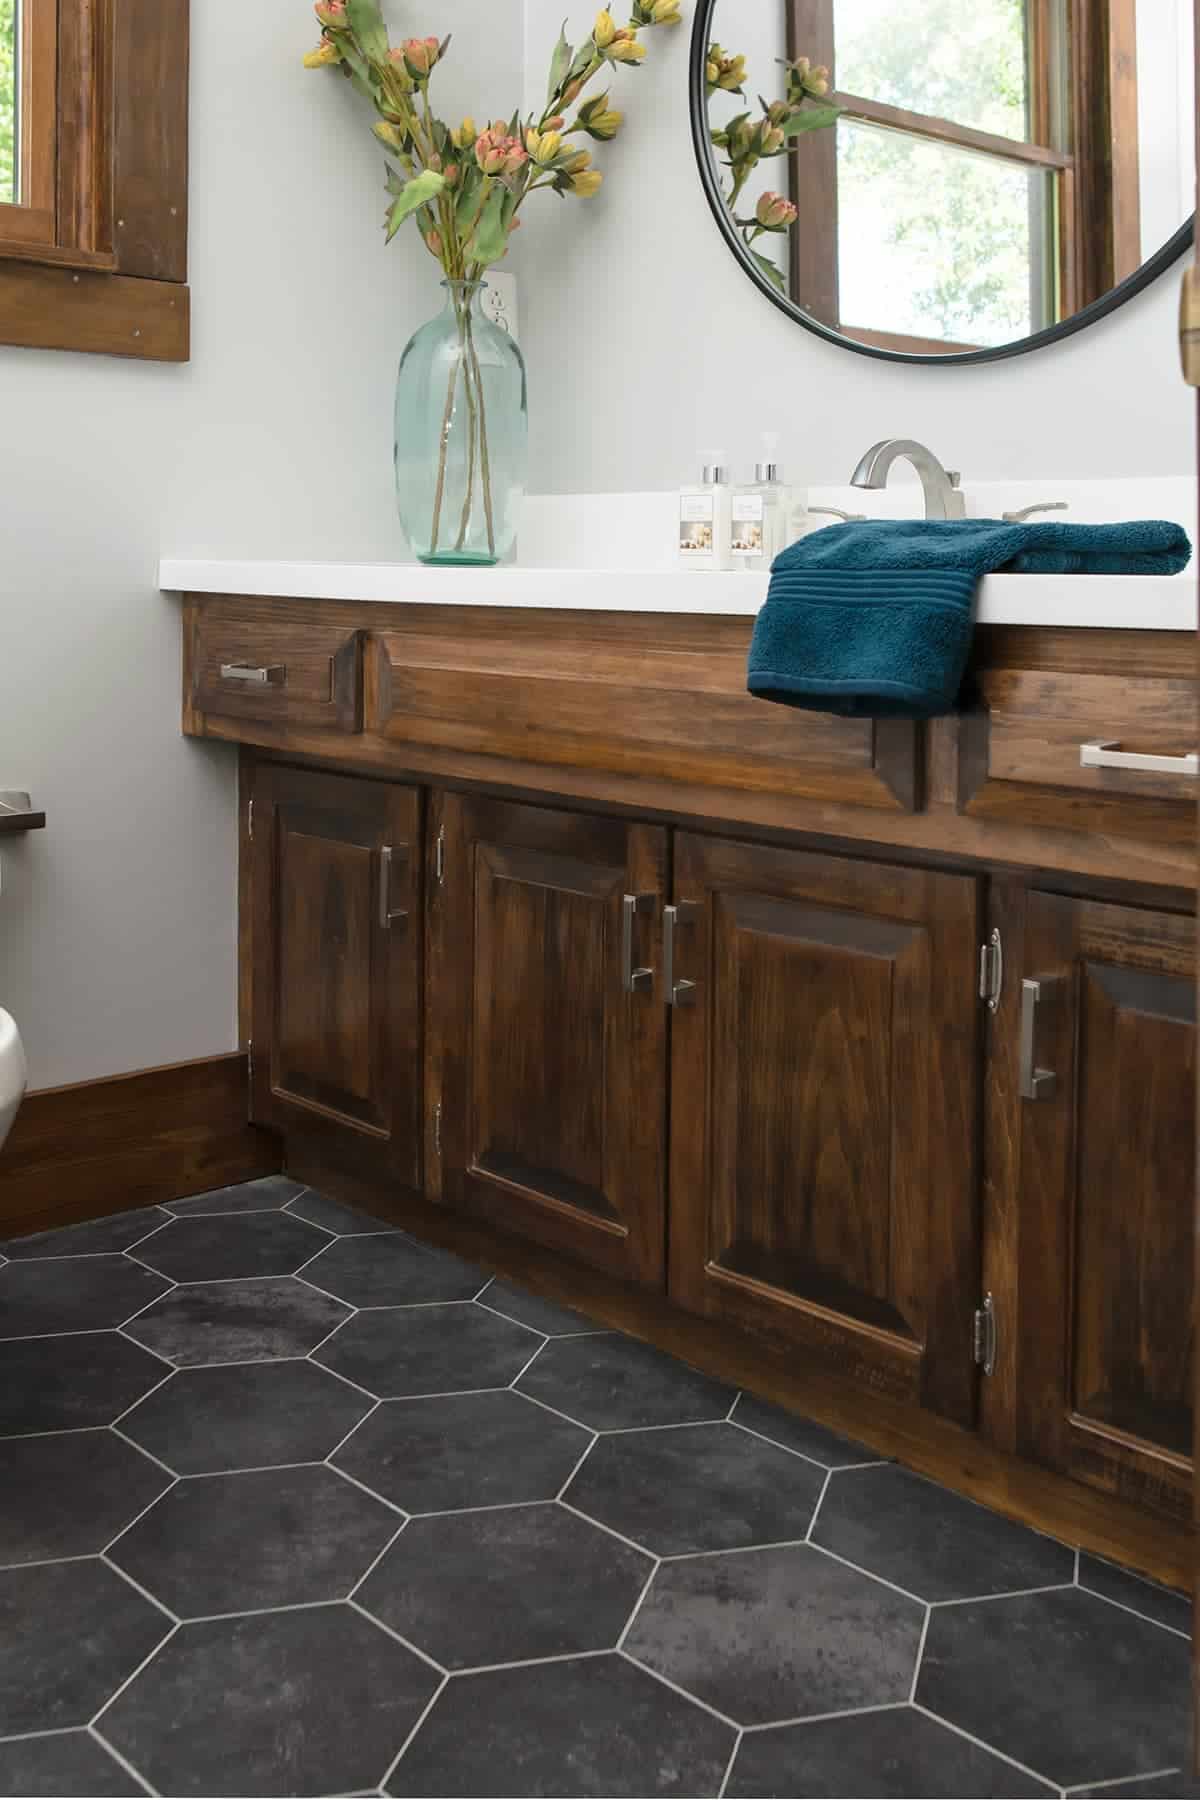
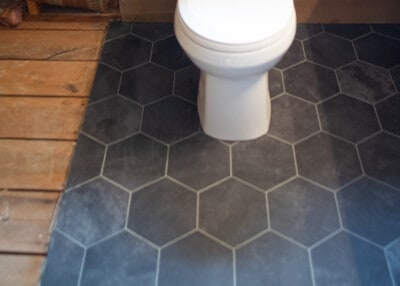
But that is today’s project! We ripped out some awful carpet from this 1982 log cabin bathroom remodel. You can see the before and after photos to see how much it has changed.
Luckily, today’s homeowners have access to many modern and low maintenance types of vinyl flooring. We installed glue down LVT in our own kitchen. Groutable vinyl tile is an affordable alternative to traditional tile. Vinyl is durable, water-resistant and easier to install than traditional porcelain tile. Plus, it is one of the lowest maintenance flooring types!
But can you grout it to look more realistic? There are specific vinyl tiles that are labeled as groutable and adding grout between tiles provides a new layer of dimension that mimics traditional tile.
So, let’s talk about the pros and cons of this flooring type as well as a step-by-step demonstration and tips for how we made this work for us.
Pros and Cons
- Much easier to install – this is a pretty simple mid-level to beginner DIY project.
- Easy to Cut – no tile saw required
- Much faster than tile. The adhesive sets in a few hours and we even walked on our previous LVT installation as we set down new tiles.
- Cheaper than tile! This whole project was about $150 including the underlayment.
- Feels good on your feet – no cold, hard tile but it looks pretty realistic.
- Very easy to patch if a tile gets damaged.
- Grout seals the edges of tiles – even though the tiles themselves are waterproof, the edges and spaces between are not.
Traditional stone or ceramic tiles and grout are one of the most long-lasting flooring types – they can easily last several decades. I would not expect this type of installation to last anywhere near that. There is more flex and thus the grout will eventually wear out or fail. However, many of us don’t need or want a flooring that will last well past its style prime.
Why We Chose Grouted Peel and Stick Tile
I have done a lot of tile work over a decade – from subway tile patterns to glass backsplashes including several bathrooms, kitchens, backsplashes, and flooring surfaces. Most aren’t on the blog because of time constraints. I love tile for its beauty, durability, and long-lasting appeal.
However, this house was being prepped for sale. We wanted a cost-effective option that the new homeowners could replace eventually with a style of their preference. Plus, I am always looking to try out new products in real world situations. It was 3 years before the house was sold and the tile was used daily and it held up very well.
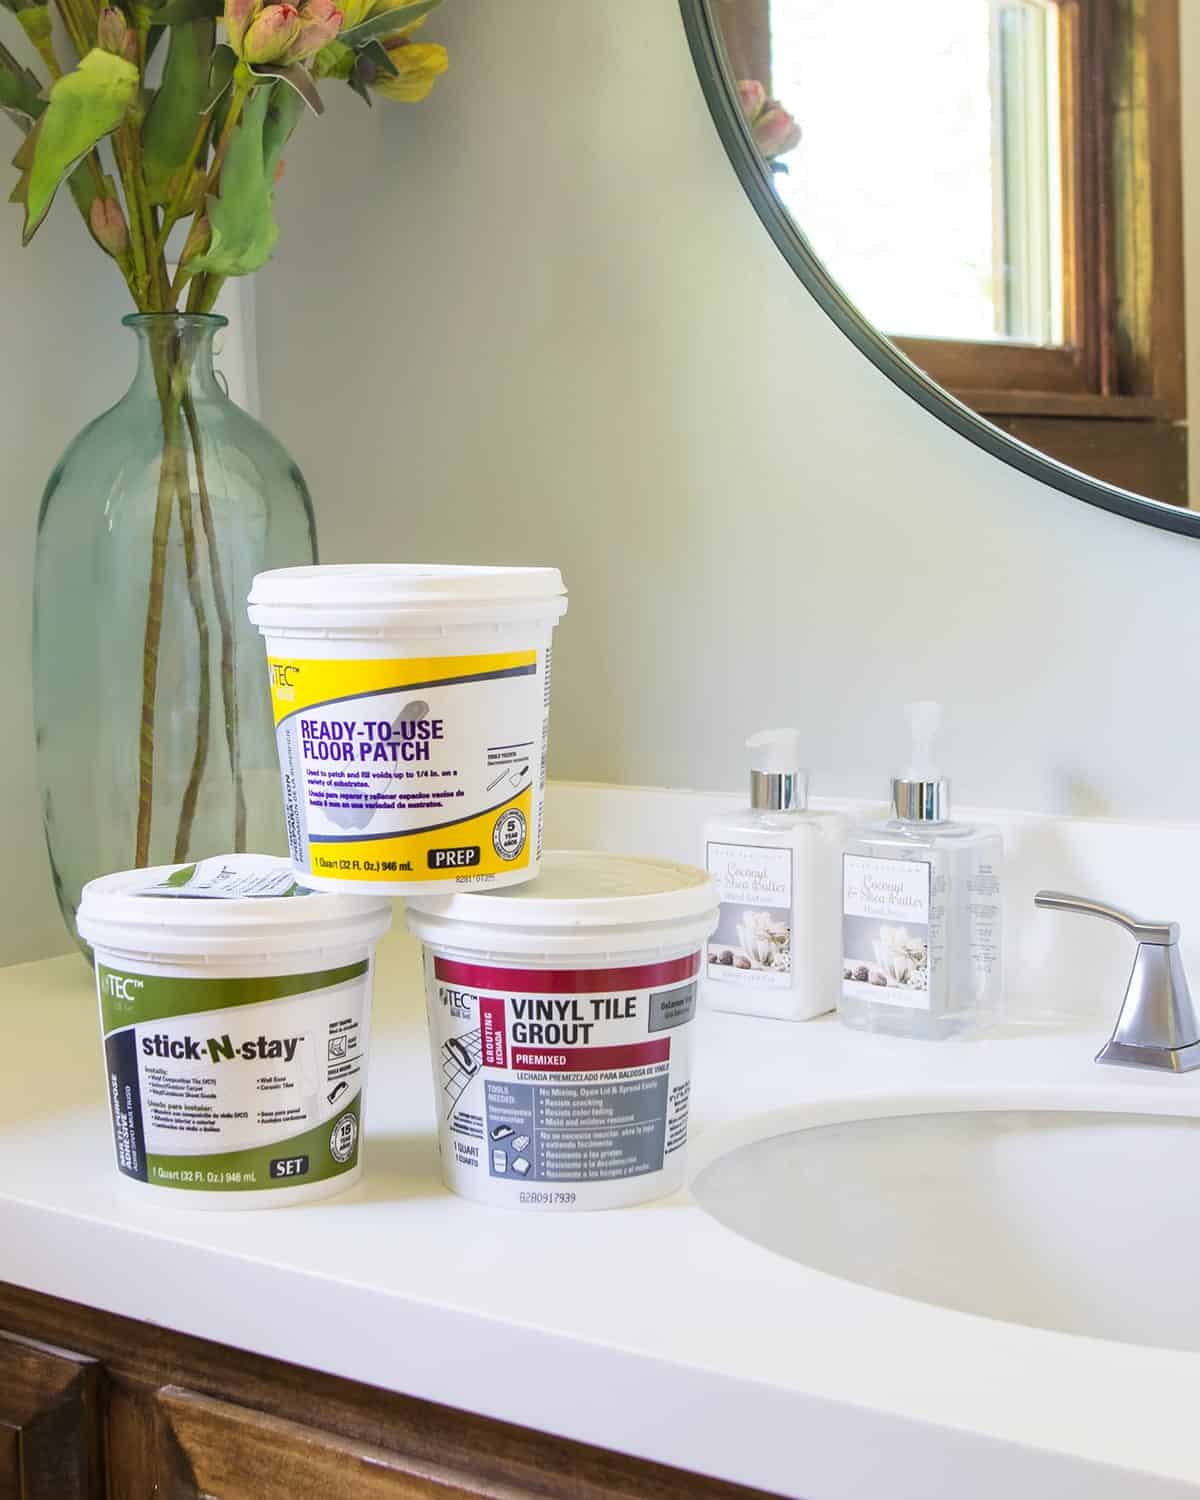
Recommended Supplies
- APA underlayment – This gives a smooth surface to work on. Peel and stick vinyl is so thin that bumps and seams will eventually show. I recommend water resistant for kitchens and bathrooms.
- Floor patch – For uneven floors or seams between floor joints.
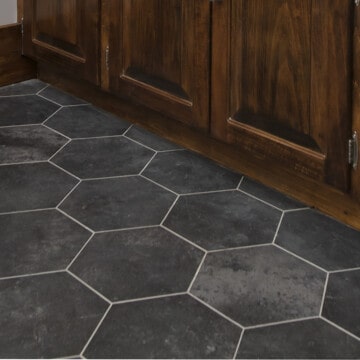
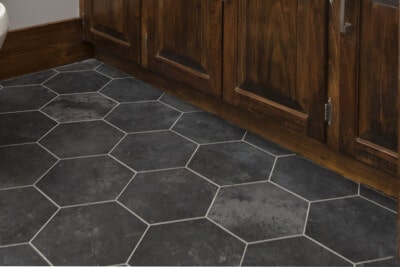
- Groutable Vinyl Tile – we used this hexagon pattern.
- Vinyl Tile Adhesive – optional if you have peel and stick tile.
- Vinyl Tile Grout
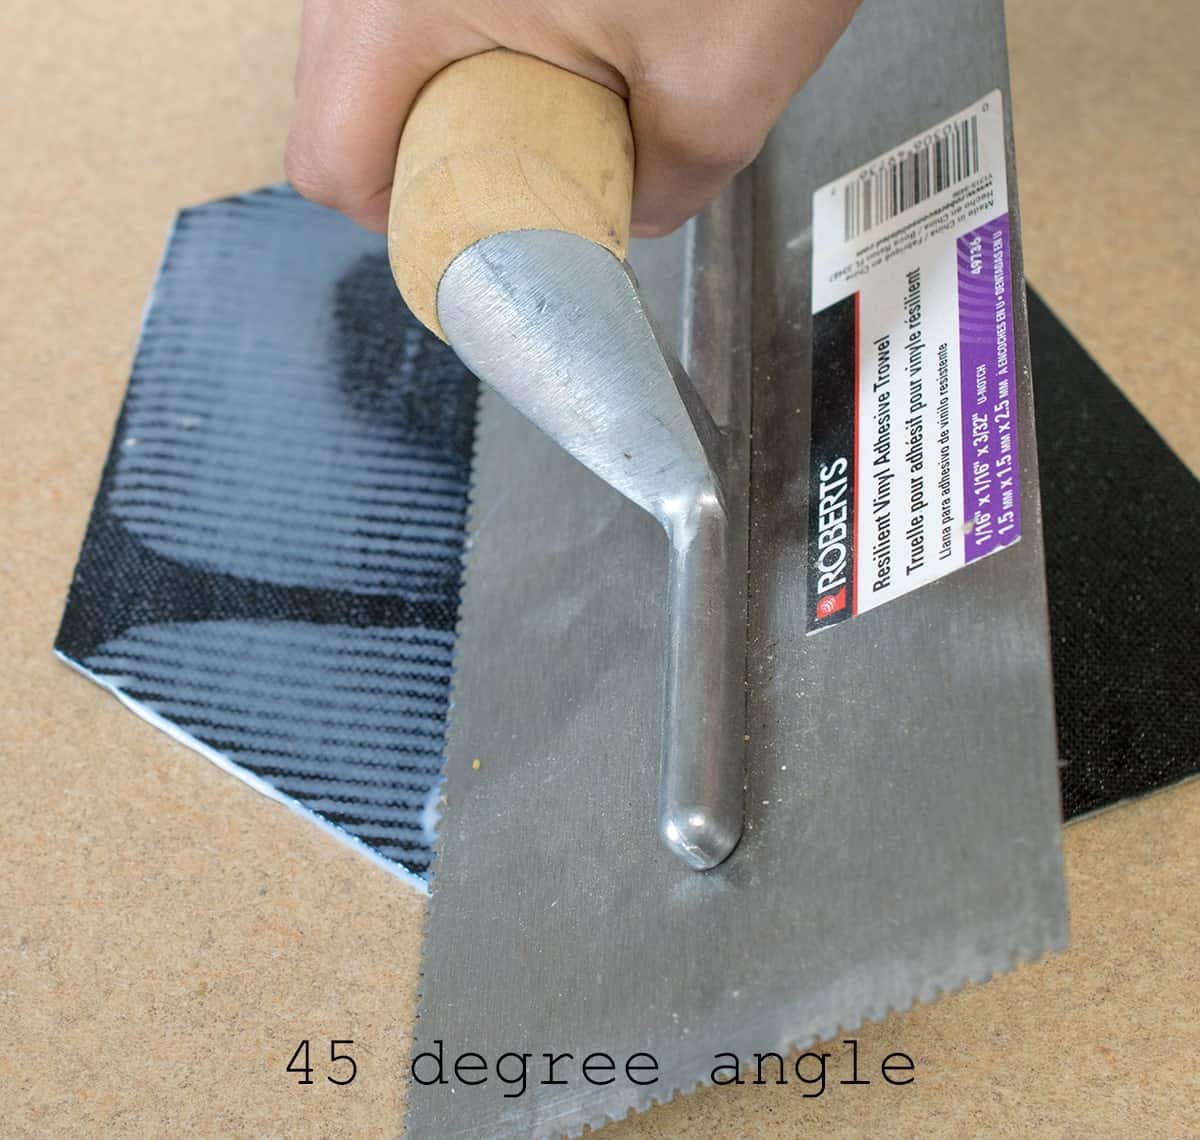
- Vinyl Tile Trowel – Only needed if you are spreading adhesive.
- Grout Float
- Sponge
- A strong utility knife
- A sturdy ruler (for both measuring and as a straight edge)
- Tile Spacers (1/16 or ⅛ inch)
How To Prep for Vinyl Flooring
Proper prep is always your best friend in getting long lasting results.
After removing the old floor and anything on top of it, like a toilet, assess the subfloor. If there isn’t an APA underlayment that’s mostly smooth and in good shape underneath, I suggest that you add one. It’s as simple as cutting to match the floor size and screwing or tacking it down to the subfloor with a nail gun.
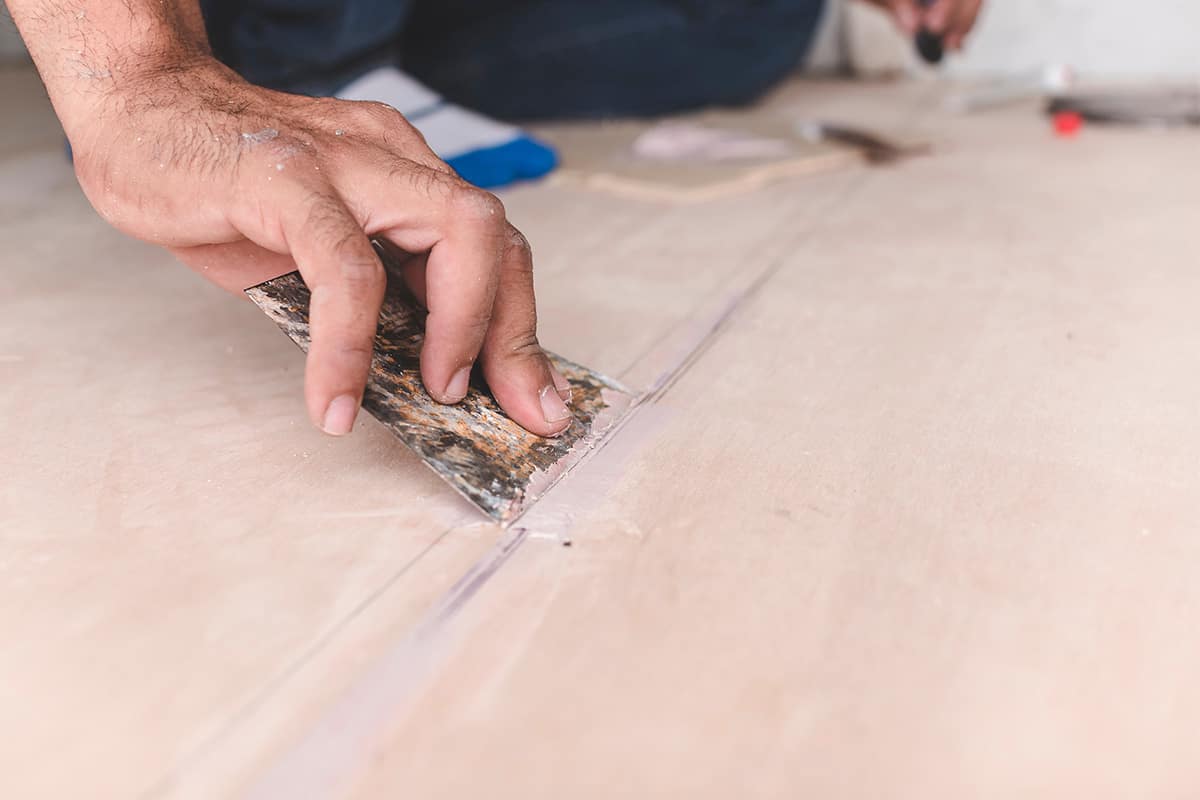
Patch any seams, obvious dents, or defects in the underlayment. We screwed/tack along the seams, so it was easy to cover any screws with floor patch.
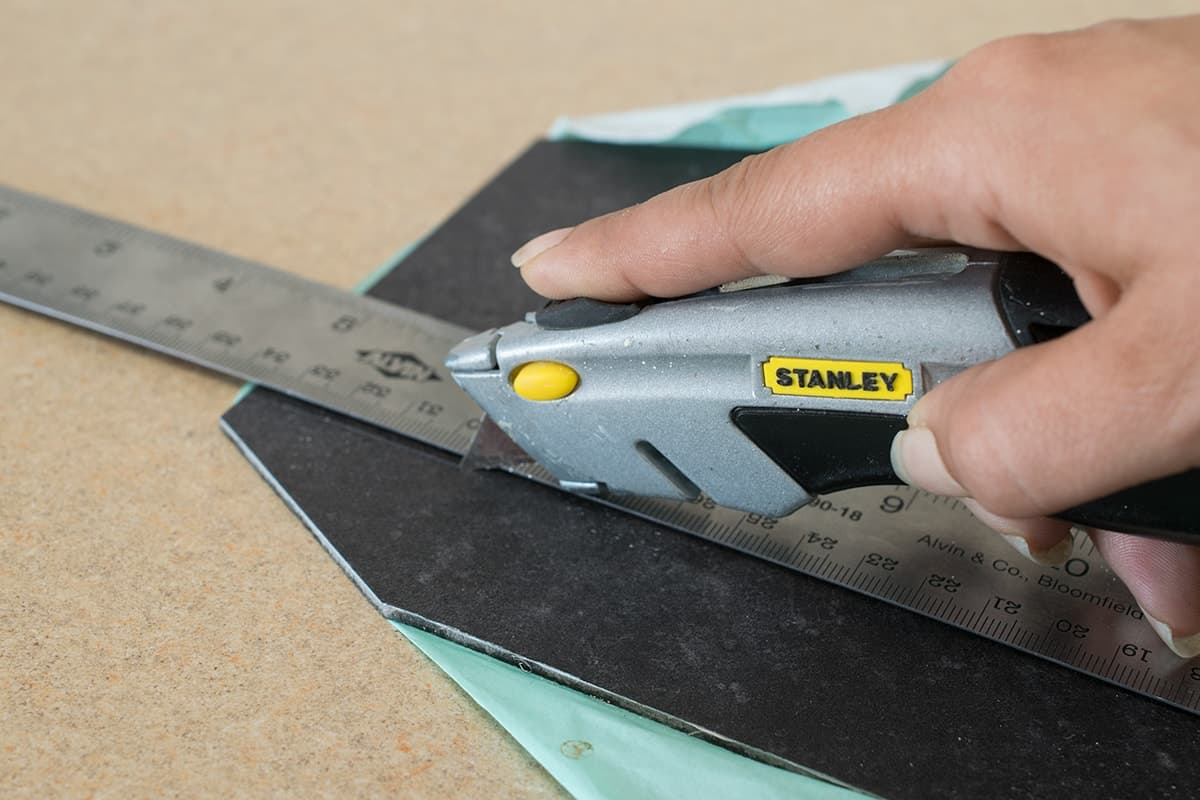
How to Cut Vinyl Tile
These tiles are very easy to cut! Simply score a line with a utility knife and snap them apart.
How to Install Groutable Peel and Stick Tile
You peel. and. stick.
Just kidding. There’s a bit more to it, but not much!
The full instructions are at the bottom of this post in the printable card, but I include this area to show our own project as well as tips and considerations.
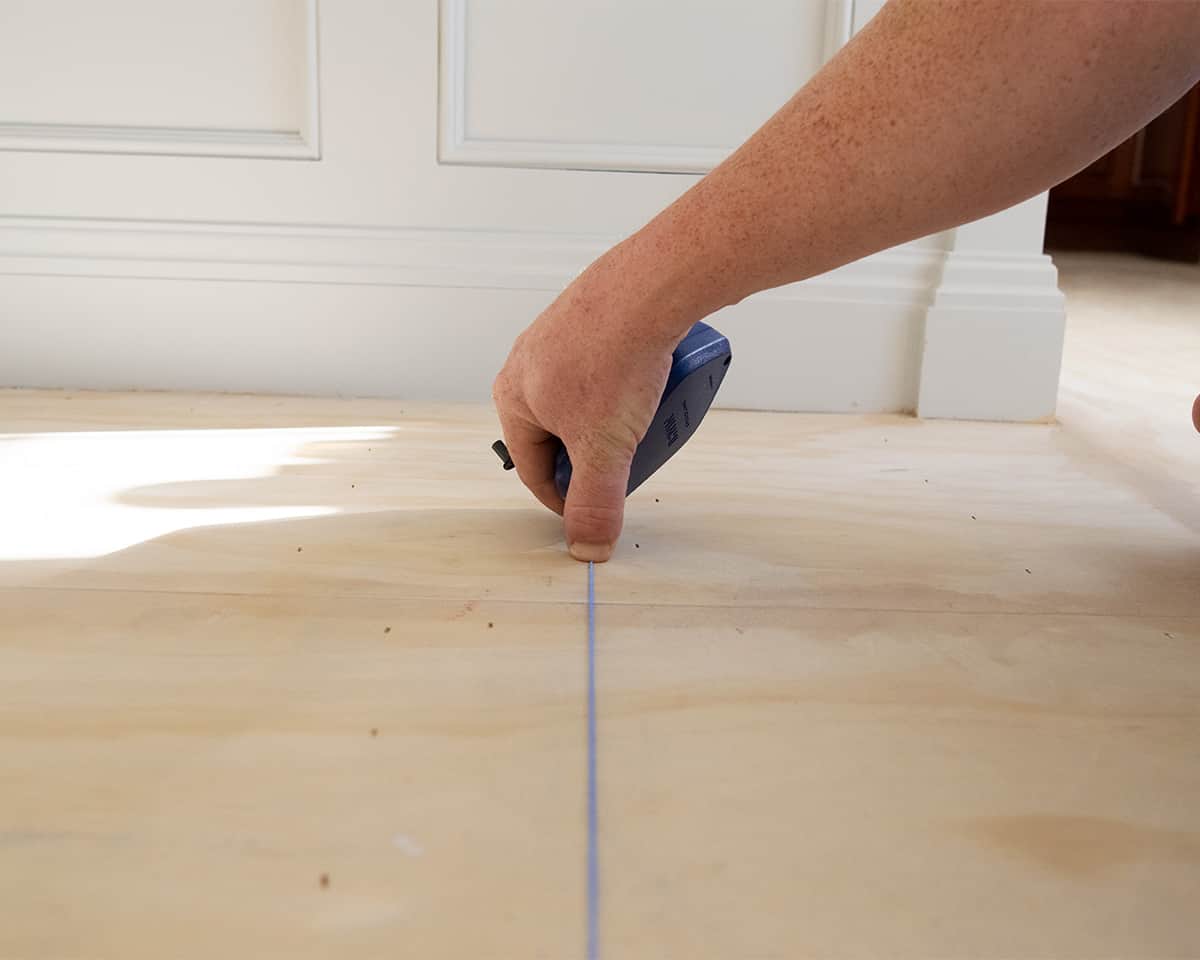
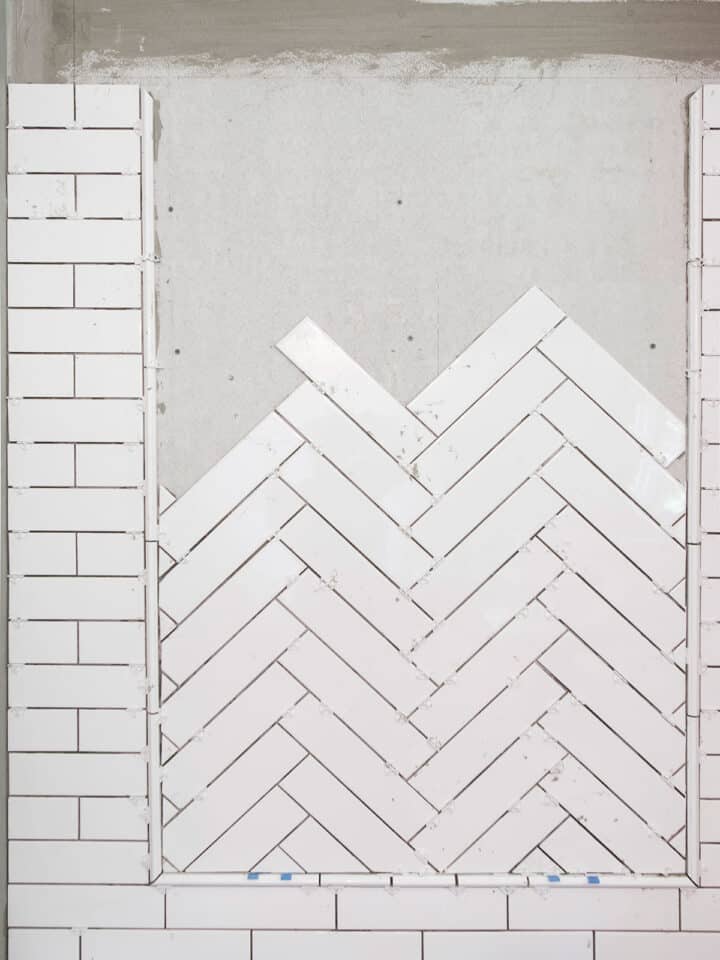
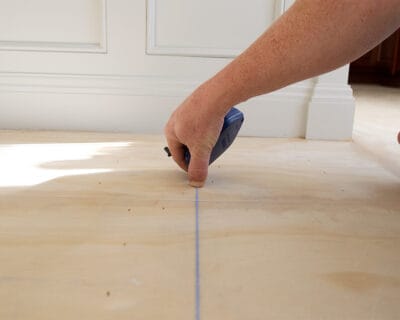
1. Getting Your Layout
For large format glue down vinyl (12×12 or larger), I usually start by making a center line. I have step by step instructions for that in our Kitchen Vinyl Flooring post if you want to see more.
For a smaller area, it’s pretty easy to layout the lay out the tiles in rows just to double check you won't have any awkward or thin strips along the edges. Adjust as needed.
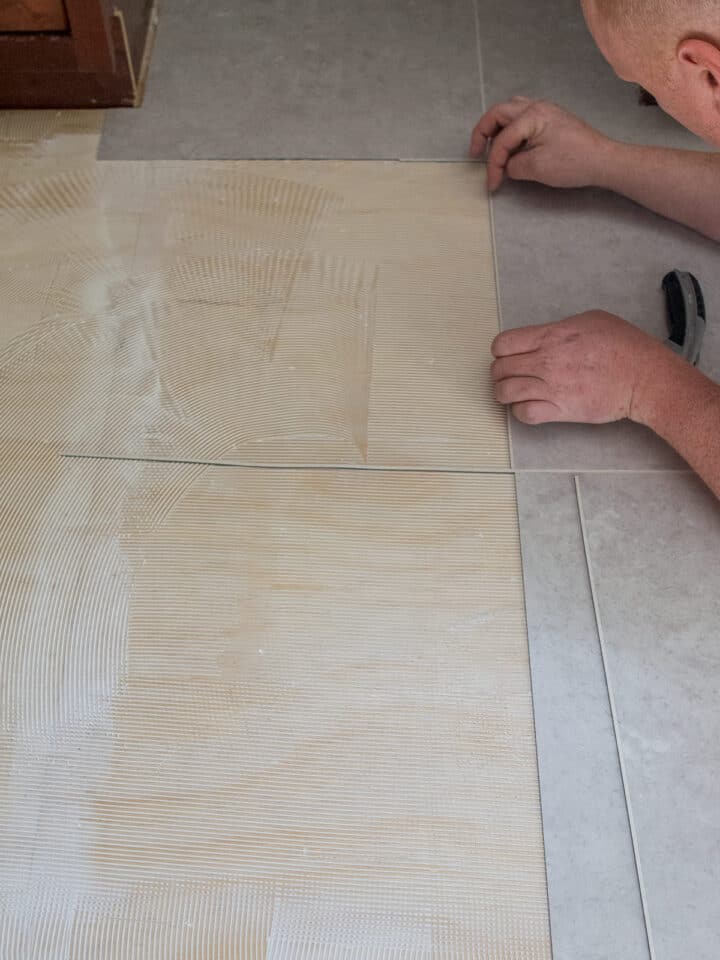
2. Laying the Tile
Not all grouted vinyl tile is peel and stick, meaning it may or may not have an adhesive built onto the back.
However, ours did and we still chose to add more adhesive to the tile because reviews suggested that the adhesive backing wasn’t enough. Wipe any excess adhesive off from the edges, because the grout may not bond to the floor as well.
Pro Tip!
Use something heavy to make sure the tiles are completely down. We used a heavy kitchen rolling pin and our body weight to make sure they were completely stuck down.
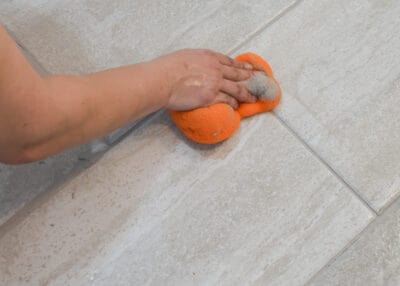
3. Grouting
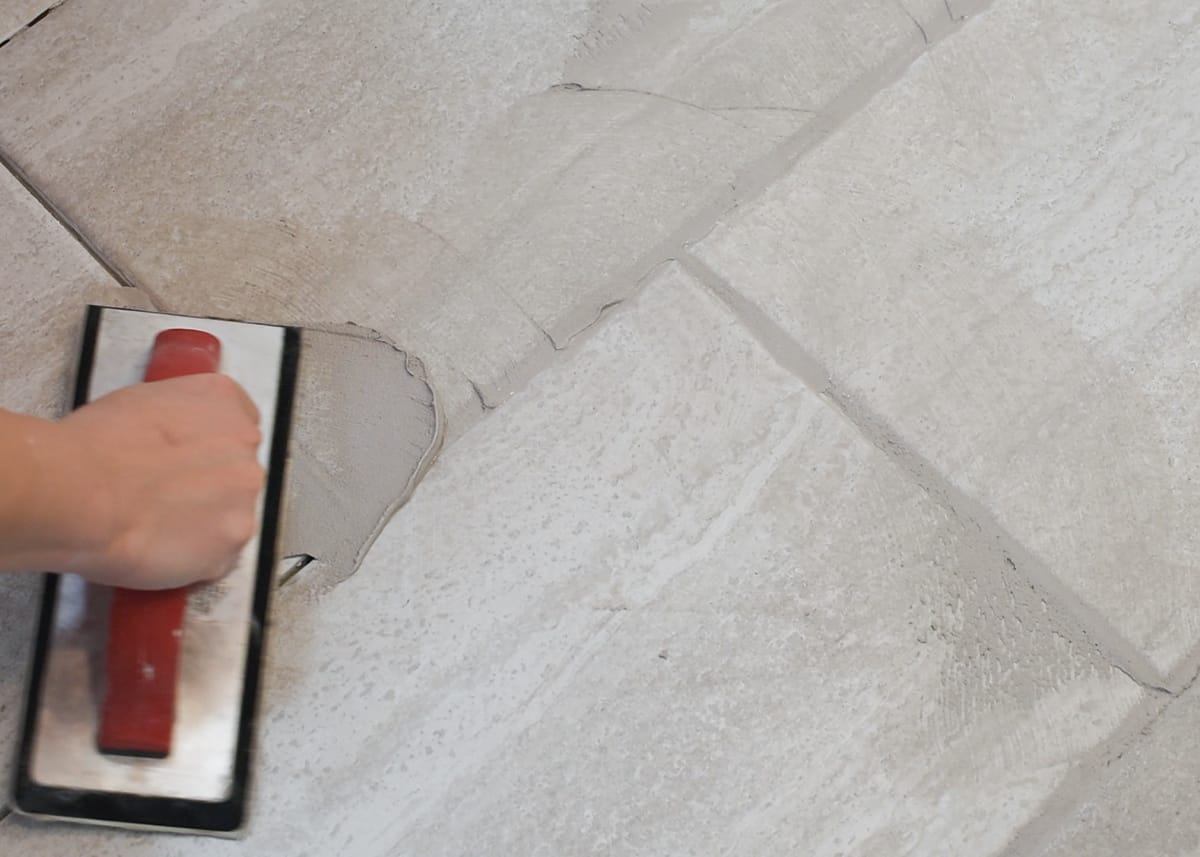
After the entire floor is laid, wait at least 24-48 hours before grouting. The grouting technique is similar to traditional tile, although it uses a more flexible material. Cement grout may scratch, so don’t use it.
With most tile, I recommend using a hard rubber float for grouting. Because this flooring is so thin, I found that a stiff sponge or soft masonry float worked best to push the grout in the cracks.
Definitely make sure to press the grout in the cracks very well. Sweep in multiple directions to be sure there are no gaps or air bubbles.
Reader’s Note: I originally wrote this post several years ago. Unfortunately, I wasn’t as good back then about taking photos for every single step. The grouting photos are from another tile project that I did because the steps are the same.
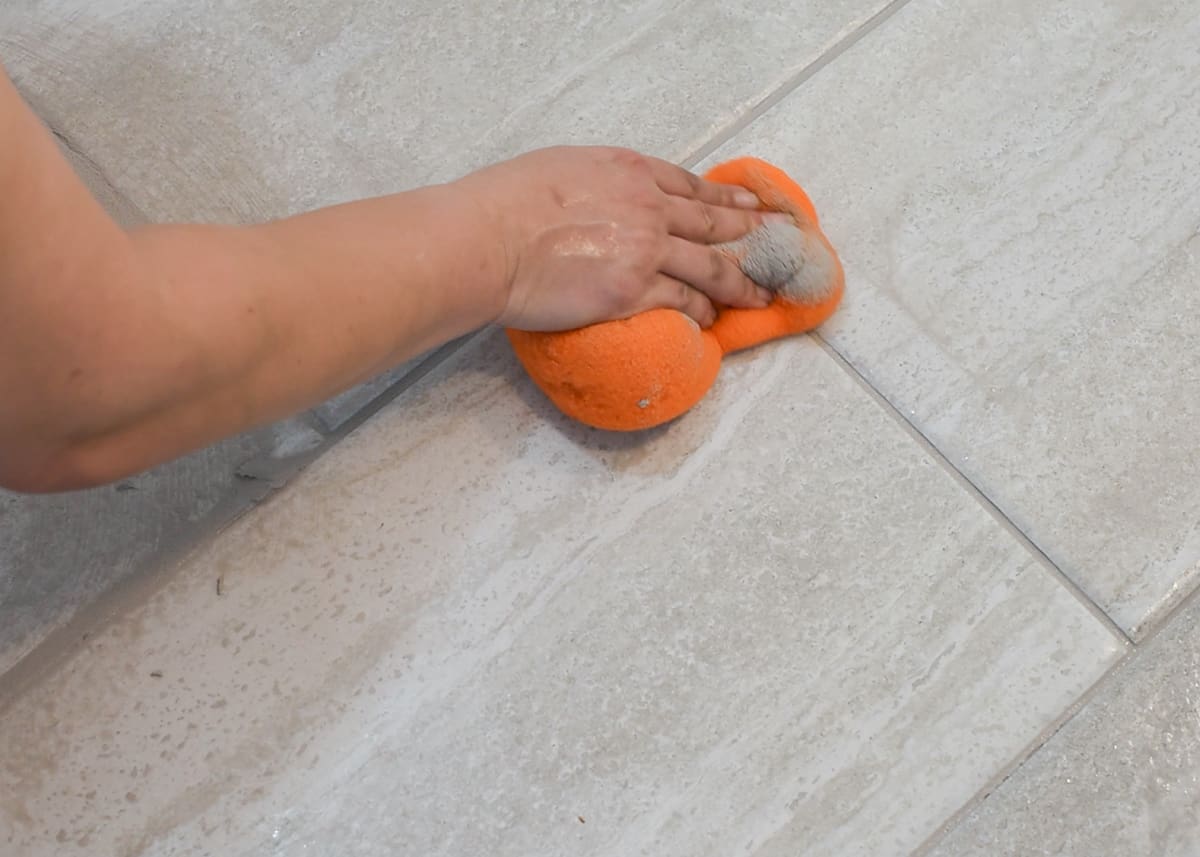
Whichever float you choose, you will still need to go back over it with a tile sponge to even out the grout and create clean professional lines.
Don’t worry about getting every bit of haze off the tile. That will come later. However, do make sure to get any grout off surfaces it wasn’t meant to be on (bathtub wall, baseboards). It will be much harder to get off once it dries.
4. Remove Haze
Wait about 24-48 hours to wipe off the haze from the grout. If you do this step early enough (i.e. don’t wait a week), using a damp, soft sponge and water will get it off. Change your water often when it turns dirty, and it will take a few wipe downs to remove all the haze.
You can also use a dehazing product to help with more stubborn grout.
Tips for a Good Installation
Remove excess glue from grout lines. If you have any blobs of glue in between the tiles, use a utility knife to scrape it out. The reason is that the adhesive remains more flexible, so the grout over top may crack over time.
You can’t walk on the grout until it dries, so as you work in sections, wipe up excess with a barely damp sponge. The sponge also serves to level out the grout and will give you those professional looking results.
Pay attention to the “do not walk on for X amount of time” instructions. But do come back in a day or two and wash any additional haze off the tile, after that drying period.
More Bathroom Remodeling Projects and Tutorials
Frequently asked questions
I am happy to report that the flooring is doing really great, even after 3 years. No scratches, dents, or tile pulling up. We did have one small pit in the grout, but I patched that up easily in a few minutes.
Most vinyl and luxury vinyl tile require APA rated underlayment on top of a subfloor. The underlayment is a special layer under the top flooring that resists dents and punctures from concentrated loads (i.e. refrigerator, furniture legs). Unlike some types of plywood subfloor, underlayment is a very smooth surface that will give maximum adhesion for vinyl tile.
You can install peel and stick tile directly over linoleum; however, you will get better results if you remove the pre-existing floor and install an underlayment. The reason for this is the condition of the old flooring. Older linoleum is generally uneven, bubbled, or textured which can make the edges not line up perfectly.
Make sure to fill the grout lines in multiple directions so there are no bubbles or air gaps. Vinyl tile grout won’t crack if properly installed with tile rated for grouting. However, I would not expect the grout to last as long as traditional mortar and tile (which can be 20 years). I would plan on about 5-7 years, depending on the type and frequency of use.
No. Cement based grouts will likely scratch the vinyl surface when installing. They are also less flexible, which may lead to cracks and leaks over time. Use a grout specific to vinyl installation and vinyl tile that is rated to be groutable.

Grab our free series "Weekend Home Projects that will Transform Your Life" Sign up below to receive updates including free printables, organization tips, home improvement projects, recipes and more! |
More Tile Projects and Tutorials
PS I love seeing your creations! Be sure to take a photo and tag #cravingcreative on Instagram! You can also stay in touch with me through following me on Instagram, Pinterest, and subscribing to the newsletter!
Groutable Vinyl Tile Installation
Tools
- Ruler Metal or hard sided
- Razor or Cutting Tool
- Putty Knife If you need to reposition tile, and for floor patch
- Marking Pen To mark tile for cutting
- Tile Spacers 1/16 or ⅛
Supplies
- Underlayment To create a smooth and water resistant surface
- Groutable Vinyl Tile
- Floor Patch
- Vinyl Adhesive
- Vinyl Grout
- Adhesive Trowel
Instructions
- If using a thin plywood underlayment, screw down the underlayment with appropriate screws and check for any loose or creaky areas. Decide layout of tile.

- Fill any seams and nail holes with floor seam filler using a putty knife. Allow the filler to harden according to directions or 24 hours before installing the vinyl.

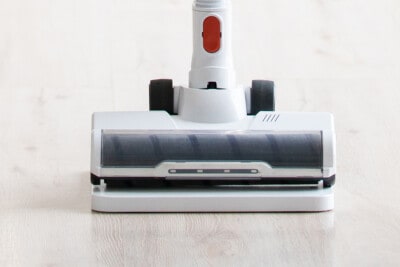
- Remove all debris and dirt from the surface with a vacuum.
- Apply in the pattern you would like and use spacers to create even spaces between grout lines. Use something heavy to make sure the tiles are completely down. We used a heavy kitchen rolling pin and our body weight to make sure they were completely stuck down. Make sure to remove any excess glue from the grout lines.

- Add Grout. after waiting 24-48 hours. Scoop up a hand-sized ball of grout and start pushing it into the cracks. With grout you really want to push into the grooves to make sure the space fills completely. The grout lines aren't as deep at traditional tile, so it's pretty easy to get in there. Then drag the float at a 45-degree angle to remove the excess.
- Wipe excess grout off of floor with a tile sponge and water. This will make the lines look professional and flat. Change the water often.
- Wait about 24-48 hours to wipe off the haze from the grout. If you do this step early enough (i.e. don't wait a week), using a damp, soft sponge and water will get it off. Change your water often when it turns dirty and it will take a few wipe downs to remove all the haze.


Trina Hawkes says
I noticed when I was reading the tile specifications on the link it says “groutable: no” – so what made you choose it? I have been looking for groutable tile and unable to find it. Is it just a matter of thickness that determines groutabililty? I noticed this one was 12mm thick, that’s what I’m going to use.
Rachel says
It may be a change in the recommendation from the manufacturer or a misprint because it says “tile size:9-in x 9-in”, but also says the “actual width (Inches): 5.75”. That doesn’t make any sense.
Liam Jones says
This blog on groutable vinyl tile installation is a gem! It offers concise, step-by-step guidance for a hassle-free process. With clear instructions and useful insights, it’s a must-read for anyone looking to upgrade their flooring with ease.
Kelly says
Did you seal the grout between the tiles? If so what sealer did you use?
Thank you!
Rachel says
Premixed grout never *needs* to be sealed. The properties of the sealer are throughout the grout so they are waterproof. That being said, the top layer of sealer can wear over time which may make the grout harder to clean. I only worry about this with my white or very light grout in floors. I am kind of a clean freak, so I use a regular non-yellowing sealer from the hardware store about once a year because I have a marble floor with bright white grout (the horror!) in our main bathroom and cook every day in the kitchen. I seal everything from my granite countertops to floors one day a year, but most wouldn’t find that necessary or appealing.
Hannah says
I have this same tile in white in my kitchen and have found it very hard to clean. Any suggestions?
Rachel says
I’m not sure if it was the grout or the tile itself that was difficult, but I can understand either situation. The tile itself is a rather thick, hard vinyl. While this tile is definitely more textured than some other vinyl floors I have used, it isn’t uncommon. The best thing I have found for almost all vinyl floors is to use water and very little chemicals if possible. Most chemicals seem to leave a residue or foams like crazy. For the grout, about every six months I clean my grout with a mix of baking soda and hydrogren peroxide to remove discoloration and deep clean it. Works like a charm. Then I seal it very well so it beads. That’s what’s worked for me, but there may be better solutions.
Lindsay says
Hey, could you just put the vinyl tiles straight on existing floor? Ex. Pre-existing linoleum bathroom flooring.
Rachel says
While, yes, you can install peel and stick tile over linoleum, you’ll probably get better results if you install directly over a subfloor, underlayment, or concrete. The reason being is the condition of the old linoleum is probably not the greatest for a substrate. Older linoleum is usually uneven, bubbled, or textured which can make the edges not line up perfectly.
Jenny McNeal says
Love this look! About how long was you bathroom “unusable”? We only have the one bathroom so trying to calculate if the groutable peel & stick tile is do-able.
Rachel says
With standard tile, the unusable time is about a week (2-3 days for tile mortar to dry, 48-72 hours for grout, then sealing the grout for another 24). For peel and stick, there is no tile mortar so the adhesive really only needs about 24 hours – although I have walked on lvt in less time. The grout is also generally less because the grout isn’t as thick. Most manufacture’s say 24-48 hours, but pay attention to the instructions. You can walk on it as you get the haze off. You could do half of the bathroom, come back and do the rest, then the real downtime would only be about 24 hours for the grout.
Julie says
Where did you find the tile? I have looked and cannot find any that shape. And I need that color too. 🙂
Rachel says
We got this vinyl tile from Lowes, but it isn’t available anymore.