
DIY Paper Windmill that Spins
A step-by-step tutorial for making a beautiful paper windmill that spins! Sometimes called a DIY pinwheel, this is a fun and simple Spring craft for all ages.
Yield: 1 craft
Cost: $8
Equipment
- Ruler
- Scissors
- Hole Punch
- Pencil
Materials
- 1 Colorful Paper or Craft Foam
- 1 Dowel Rod 3/16 diameter or larger
- 1 Pipe Cleaner
- 1 Paper Straw
- Tape
Instructions
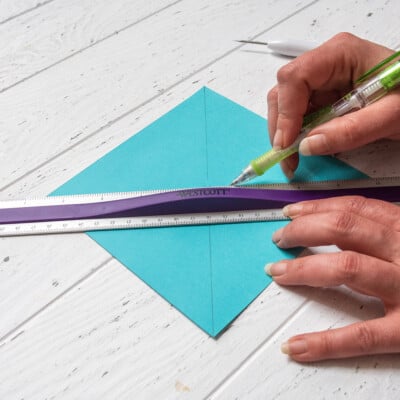
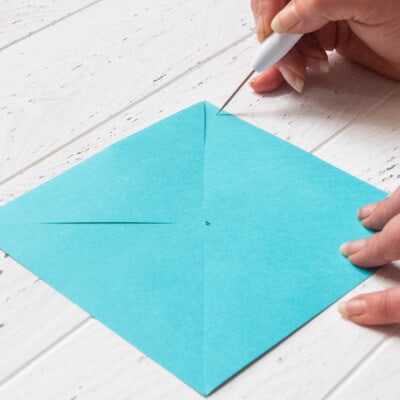
- Using a ruler, lightly draw straight lines from corner to corner diagonally. The lines will intersect at the center point. Punch a hole in the center wide enough for the straw to pass through. I use a hole piercer and widen the hole. Cut the lines, leaving about ½ inch from the hole intact.
- Using a hole punch, punch holes in one side of each corner. Make sure your holes are always on the same side of each corner. (The photo shows me pointing to the location.)
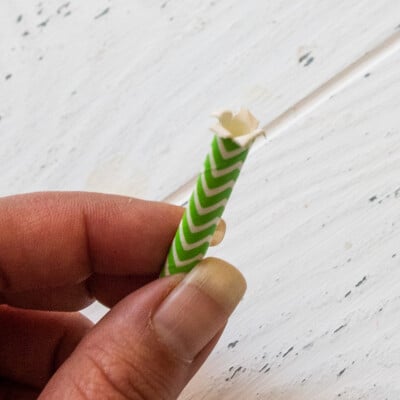
- Cut the straw to about 1.5-2 inches depending on how wide you want the folds of the pinwheel. Wider folds will grab air more easily. Using scissors, cut one tip of the straw in 6 sections so it splays outward (pictured). This makes sure the pinwheel won't fall off the straw.
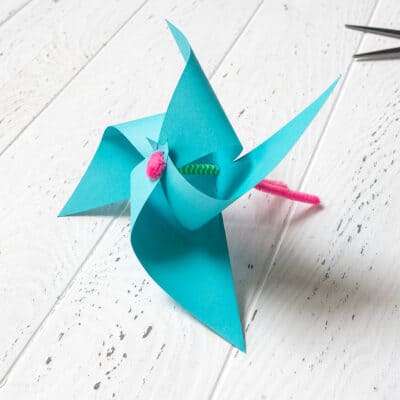
- Fold one corner of the sheet of paper into the center, lining up with the center hole. Put the straw through the hole. Work your way around the corners clockwise putting the straw through each hole. Then thread through the back hole.
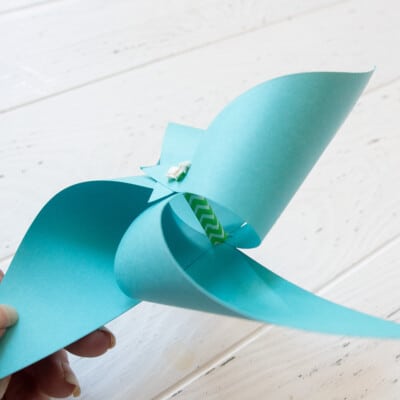
- Just like with the first end of the straw, cut the second end to widen it. The pinwheel paper should be secured on the straw.

- Fold the pipe cleaner in half and twist tightly. Thread the pipe cleaner through the straw. Wind the front tip around to secure the pinwheel. It spins better if the pipe cleaner hairs that will be inside the straw are trimmed down with scissors.
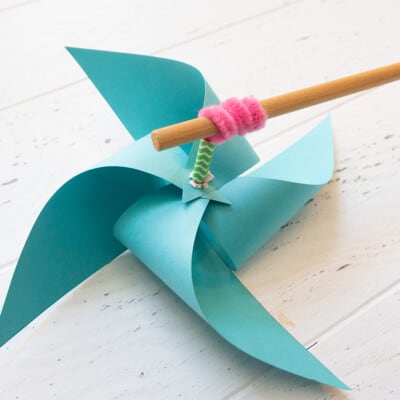
- Cut another ½ inch of paper straw and thread behind the windmill. Make sure everything is a little loose to allow for spinning. Wrap the back end of the pipe cleaner around the dowel rod tightly.
Notes
General Tips and Variations
- Trimming off the pipe cleaner hairs that go inside the inner pinwheel straw helps it spin more.
- Putting a smooth spacer bead at the front, and then curling the pipe cleaner around it can help if the pipe cleaner is too tight.
- For a sturdier windmill craft, use a long nail or screw instead of a pipe cleaner. You will need a heavier dowel rod so that it won't split. Paint the tip or cover with a screw cover.
- Alternatively, you can use a metal eyelet through all of the holes instead of a straw. This works very well because there are less points of friction, but the folding can be challenging.
- If the pipe cleaners are sliding down the dowel rod, you can tape them in place.