
DIY Pumpkin Topiary
This diy pumpkin topiary is the cutest Halloween decoration for the front porch! Easy to make and fun for all ages, they light up and can be broken down for storage when not in use.
Yield: 1 topiary
Cost: $25
Equipment
- ¾ inch drill bit
- Hand Saw
Materials
- 1 ¾ inch dowel rod
- 3-5 Pumpkin Heads
- 1 Large Planter
- Spanish Moss Optional
- Sand for filling planter
- Foam for filling planter
Instructions
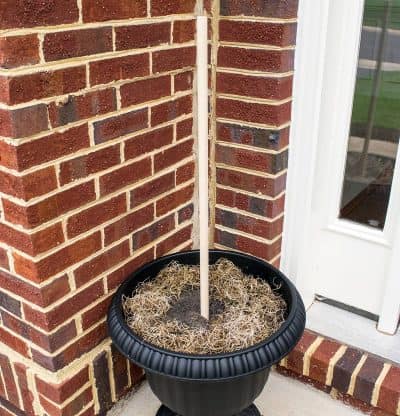
- Insert the dowel rod into the planter, all the way to the bottom. Fill planter with sand and foam or dirt to anchor the dowel rod.
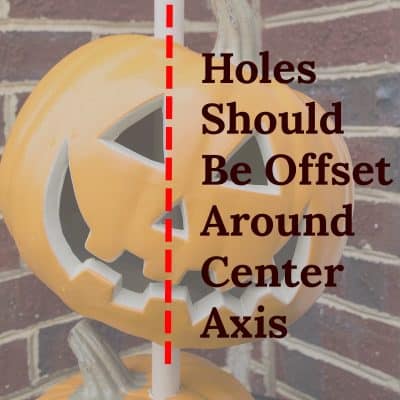
- Plan out how you want the pumpkins to stack and in which order. Mark areas for holes in the pumpkin head so that they stack nicely on top of each other at alternating angles.
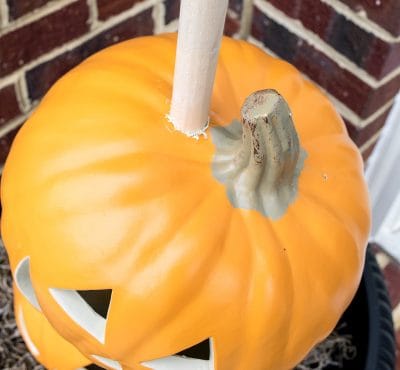
- Drill holes in the top and bottom of all pumpkin heads except the top one.

- Press the pumpkin heads onto the dowel rod. If necessary, cut any excess off of the dowel rod using a hand saw or other cutting tool.
- Add flameless tea lights or battery operated outdoor lights inside the pumpkins.

Notes
I got my jack-o'-lanterns at Lowes several years ago but haven't seen them in a few years. Here are a few ideas of where you might be able to find similar ones, although I haven't used these:
- Carvable foam pumpkins from Amazon.
- The Dollar Store and Michaels Craft Store sometimes has them.
- Home Depot has had very similar ones in the past few years.
- Plastic candy buckets.
- If your pumpkins aren't able to be carved, decorate them in other ways like paint, flowers, stickers, or even glow in the dark paint.
- Using real pumpkins will cause them to rot faster.