DIY Arrow Wall Decor
Make this wooden arrow wall decoration, any size you desire! It's a pretty easy and quick woodworking project that makes a unique gallery wall decor idea.
Yield: 1 arrow
Cost: $15
Equipment
- Pocket Hole Kit Option 1 to attach pieces together.
- Mending Plates Option 2 to attach all pieces together.
- Miter Saw
- Wood clamps to hold wood in place for safety
Materials
- 1 6ft 1x4 board
- Velcro Command Hangers
- Wood Glue
Instructions
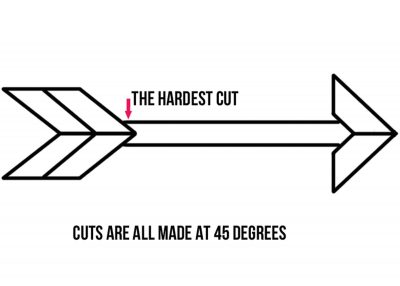
- The design can be as long or short as you wish. All cuts are performed at a 45 degree angle. Start by cutting the front arrow point pieces and the 4 rear fins. The cuts are shown below.
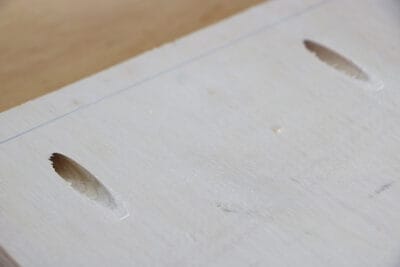
- Using a pocket screw kit, make holes along the lines shown below. If you do not have a pocket hole kit, then you can use mending plates and ½ inch screws attaching along a similar way as shown.
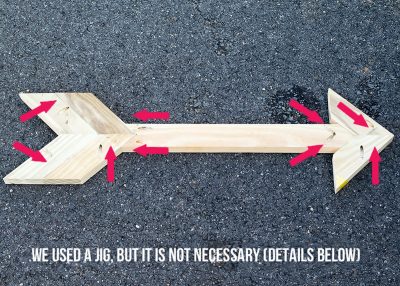
- Join the 4 flap pieces together by screwing into the pocket holes. Join the two front arrow pieces and the rear fins.
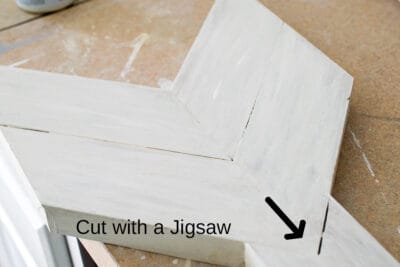
- Decide the length of the center shaft of the arrow. Trace the assembled arrow head and the assembled arrow fins as a template for the front and rear of the shaft. Clamp the wood down for safety and use a jigsaw or a band saw to cut a notch out of the rear of the center arrow shaft.
- Add the pocket holes to the shaft and screw the shaft to the fins and arrow head.