
How To Make DIY Pallet Signs
How to build a wood pallet sign for your home or yard! This tutorial includes tips for for creating a frame, sealing, and painting so you can use any pallet sign idea your can come up with!
Yield: 1 sign
Cost: 15
Equipment
- Paint Brush
- Cricut
Materials
For the Sign
- 1 Pallet Wood At least ½ inch thick
- 1 Removeable Vinyl Stencil See notes for ways to make a stencil
- 1 Paint or Stain
- 1 Sealer Optional (see note)
- Wood Glue
Hanging Materials
- 4 Eyelet Screws
- Screws For Wall
- Hanging Wire
Instructions
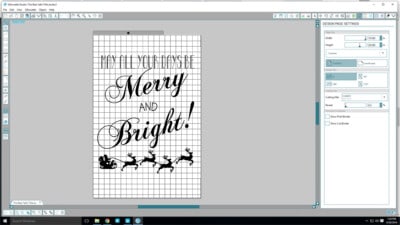
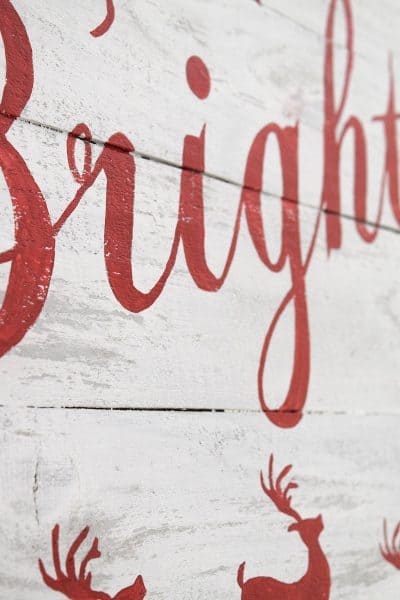
- Prep your design or stencil. I blew it up to the size of the sign. I highly recommend removable vinyl and transfer paper for vinyl stencils.
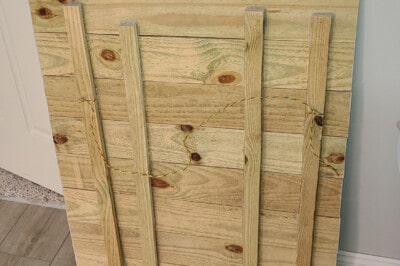
- Cut the wood to size. For more intricate shapes, you can use a jigsaw to cut out the template.
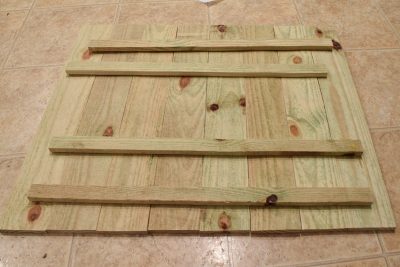
- Build the sign. Depending on the thickness of the wood, you can use pocket holes or screw slats to the back of the pallet wood so that each pallet slat is attached. If the pallet wood is too thin, you can generously use wood glue to attach.
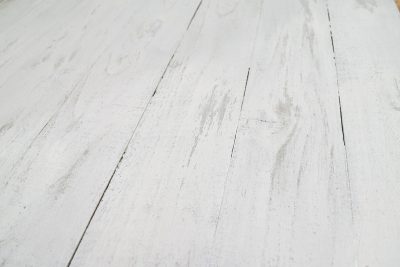
- Paint the background. Paint the board with any background color you choose and allow to completely dry.
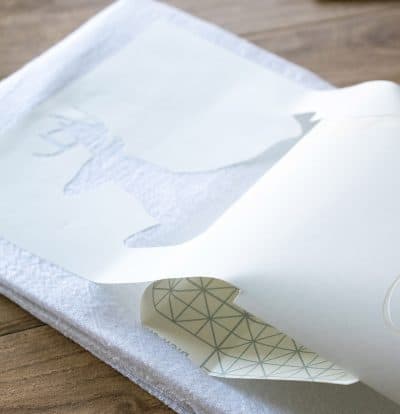
- Lay the stencil. Remove the part of the stencil you want to paint. Lay transfer material over the stencil. Peel back the top 2-3 inches of the backing and position the stencil onto the boards. Working a few inches at a time, carefully peel the backing material down and press the stencil into the board. Smooth any bubbles as you go. Remove the transfer material after the stencil is completely on the board.
- Paint the stencil. Just before painting, run your finger along all edges to minimize any paint seeping under the stencil. You can use a paint brush or roller over the stencil. Either peel the stencil off when the paint is still wet or completely dry. Do no peel if the paint is tacky or wet underneath the top layer.
- Hang the sign, if desired. I drilled holes through the backing frame and tied wire. but you can also attach hangers.
Notes
How to Make a Stencil without a Cricut or Silhouette
- You can draw something free hand, if you’re good at that.
- You can also use a projector, like this one, and project the image in your board and trace, then paint.
- Or have an etsy shop (like this one) cut out a design for you with vinyl. Just make sure to ask that the vinyl is removeable without damage if you want to use it as a stencil.
- If you desire, you can seal the paint with a poly made for painted surfaces that won't yellow. Fusion Mineral Tough coat is one of my favorites that is guaranteed not to yellow, but I have also used Spray Polyurethane. This one from RustOleum is my favorite.