How To Caulk and Repair Baseboards
All the tips and tricks to caulk baseboards perfectly with this step-by-step guide.
Yield: 1 room
Cost: $20
Materials
- Silicone Caulk Make sure it is paintable caulk made for trim
- Sandpaper or Sanding Blocks
- Painter's Tape
- Well fitting Latex or Nitrile Gloves I get these from Harbor Freight
- Paper Towels
- Wedge Tool Optional
- Paint Supplies
Instructions
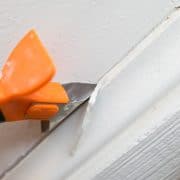
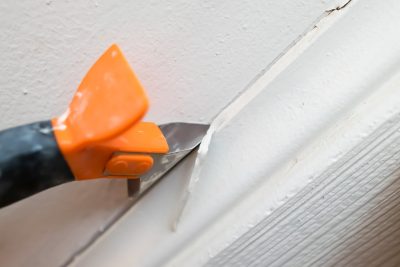
- Remove the old caulk. I love this a caulk scraper because it won't gouge the wall or tile. Scrape or sand any excess texture off to create a smooth surface.
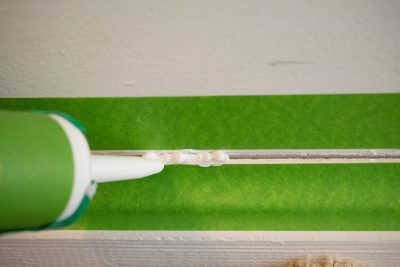
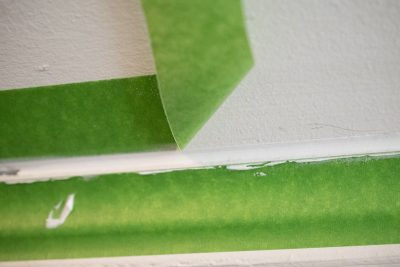
- (Optional) Tape off the wall. I like to tape the front of the baseboard to the edge It makes it easier to wipe off. If I want a really crisp line, I will tape the wall as well. This helps give me a guide for painting later.
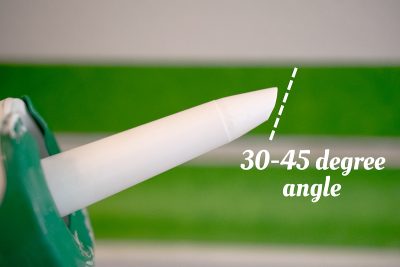
- Prepare the caulk and gun. Cut the tip of the caulking gun at an angle. Pierce the inside seal with a skewer or some caulk guns come with a piercer tool.
- Hold the gun so that the tip is completely flush with the baseboard. Caulk an entire side end to end. Make sure to fill all gaps.
- Smooth out the Caulk. With a bit of practice, smoothing caulk with your index finger is a breeze. Put on some latex gloves and make sure they are tight fitting around your finger (no ridges or ripples). Use your index finger at an angle with light, but consistent pressure. If you aren't confident using your hands, a wedge tool helps. Make two passes - Wipe most of excess off of several feet to make sure it is covered well. The second pass is end to end with a little more pressure to make sure the final look is smooth. Use paper towels to wipe the glove between passes.
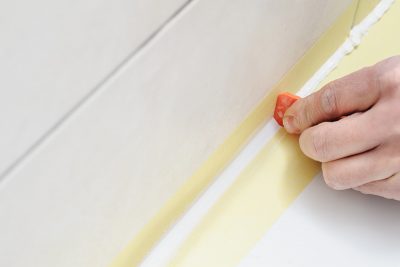
- Pull the tape. Before pulling the tape, make sure you can see the edges of the tape well. Otherwise, the tape will not have a nice edge.
Notes
Best Types of Caulk for Trim and Baseboards:
There are many good brands for trim caulk. Pay attention to whether the caulk you are using is intended for interior or exterior as well as whether it is paintable. Crack and shrink resistant caulk is a very good idea.
If your gap is larger than ¼ inch:
Cracks larger than ¼ of an inch may take more passes. The process is essentially the same as smaller gaps. However, make sure you fill deeper in the gap (not flush with the surface). Allow the deeper caulk to dry completely before caulking a surface bead.