Make a 3D paper star perfect atop the Christmas tree or other festive holiday crafts. This family friendly paper project takes less than 15 minutes. The easy 3D paper star tutorial includes simple step-by-step instructions and two different star templates in a variety of different sizes.
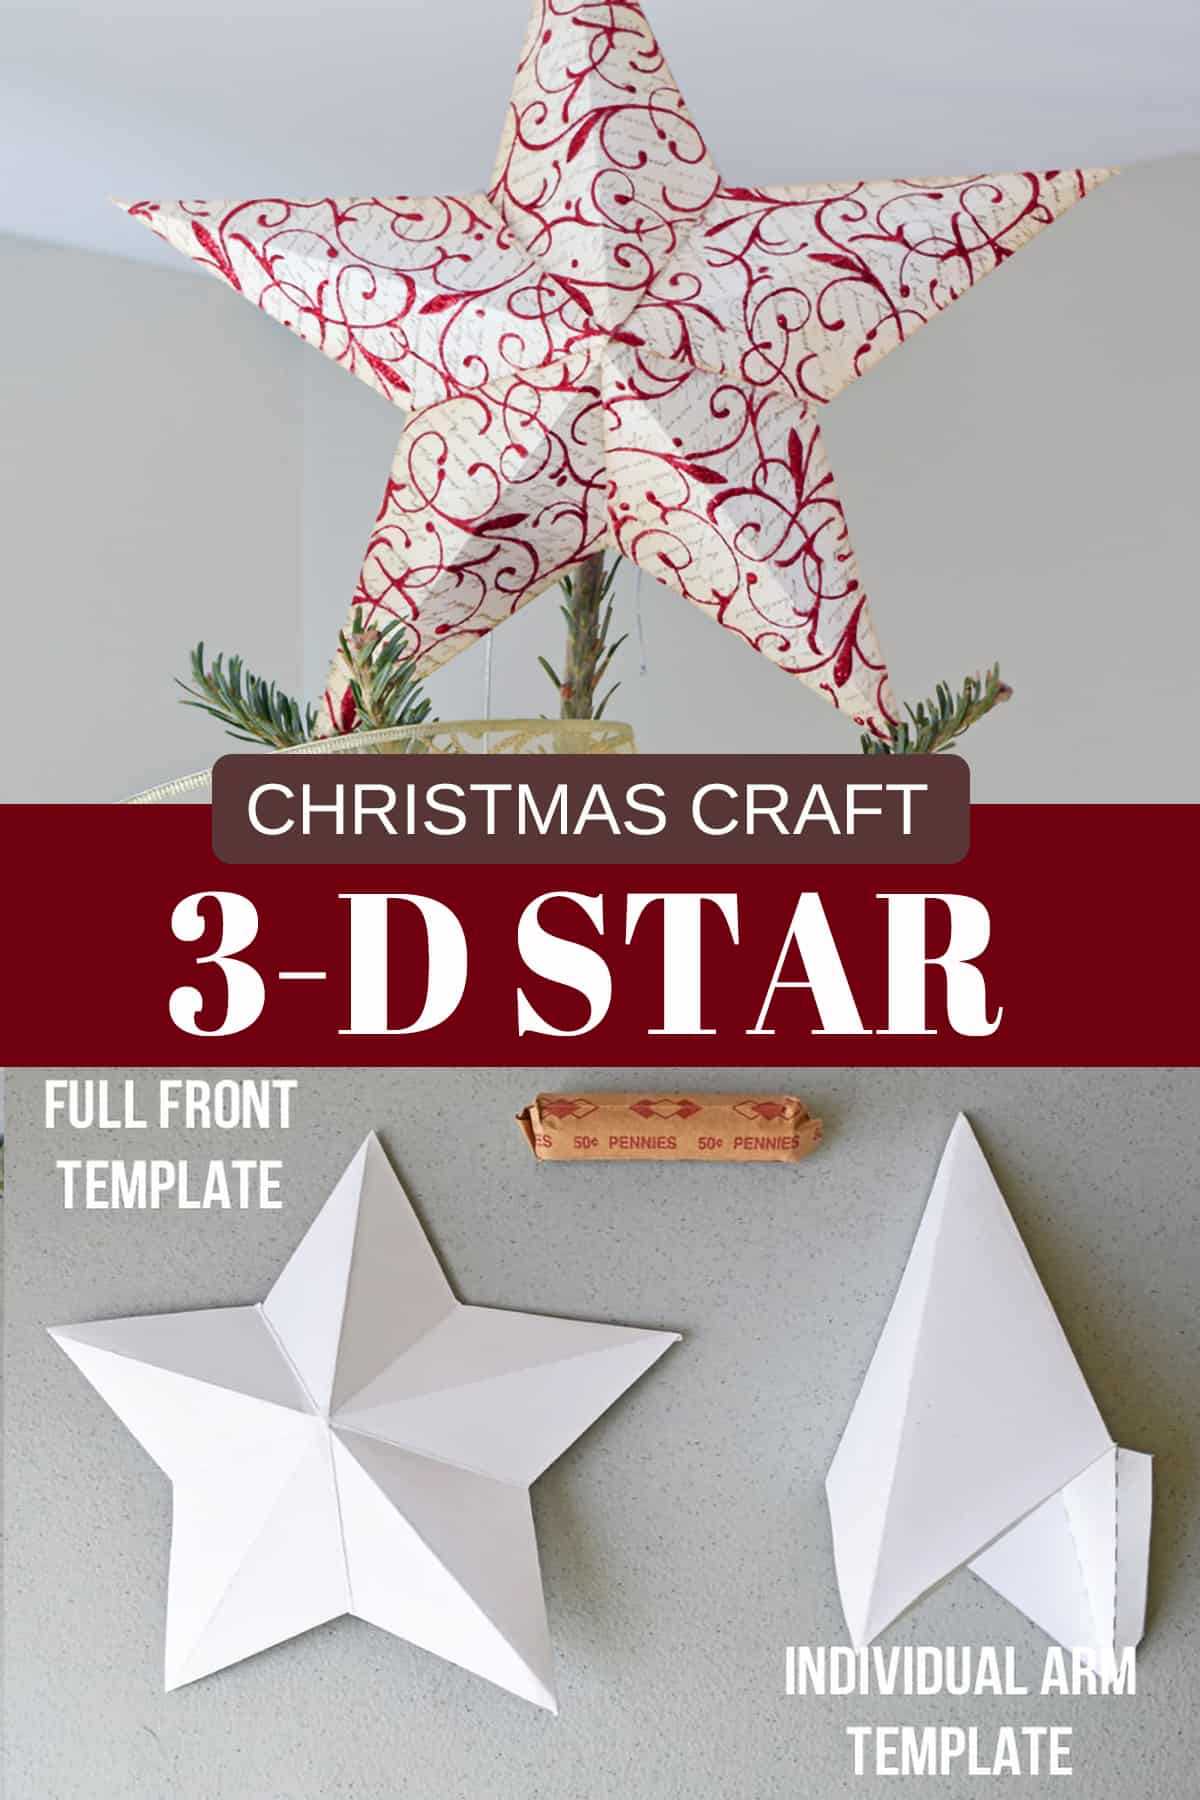
I’m a big enthusiast of a good family-friendly paper craft. Especially when they’re holiday themed! I’ve featured some of our perennial favorites on my Christmas bucket list like this tutorial on how to make a three-dimensional star.
A few years ago, after fruitless searches for the perfect Christmas star to adorn our family tree, I decided to make my own. These easy yet elegant 3D paper stars have so many uses as ornaments, mantle decor, or a festive garland.
You can also purchase different paper patterns and colors for inexpensive Christmas decorations or for any occasion. Red, white, & blue stars are the perfect choice for a July 4th party theme. Create silver and gold stars to ring in the New Year! Or make a few precious mobiles for decorating a nursery.
Supply List
- Heavy Weight Card Stock or other heavy paper that can be folded
- Template (links below)
- Scissors
- String or raffia for hanging.
- Tissue Paper
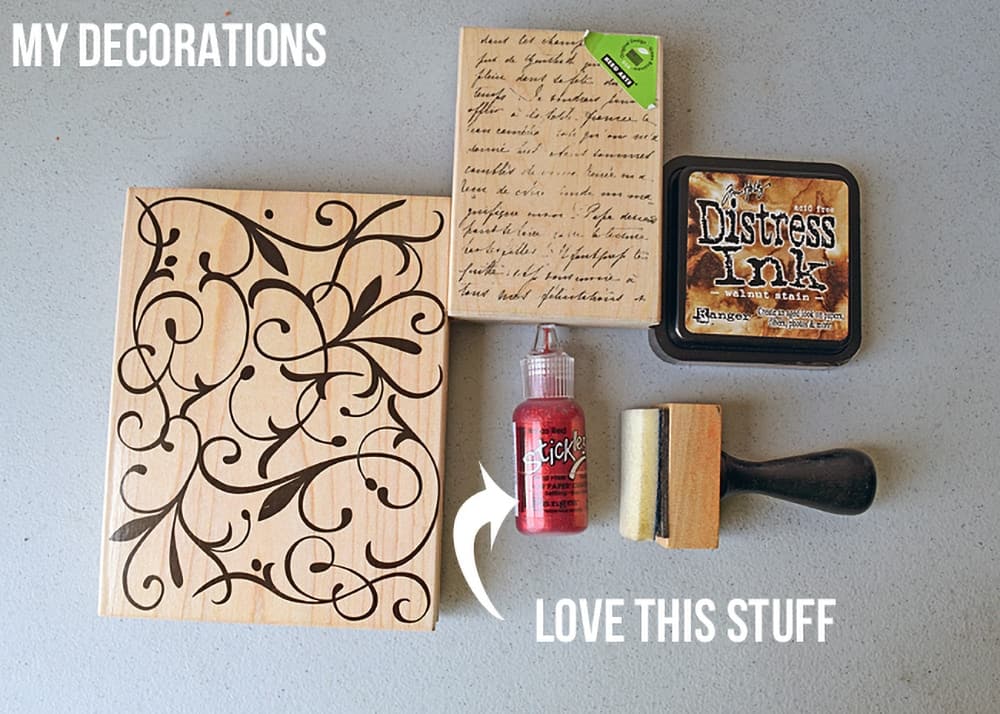
- Decorating Materials – spray paint, mod podge, stamps, glitter, scrapbook paper, etc
- Hole Puncher (this one is my favorite and doesn’t hurt your hands)
- Paper Protector (optional). I use this to avoid finger smudges while working with layers and inks.
- Dry Adhesive – Glue strips or Glue dots (don’t use wet glue!)
- Fabric or Paper Stiffener
Free DIY 3D Paper Star Templates
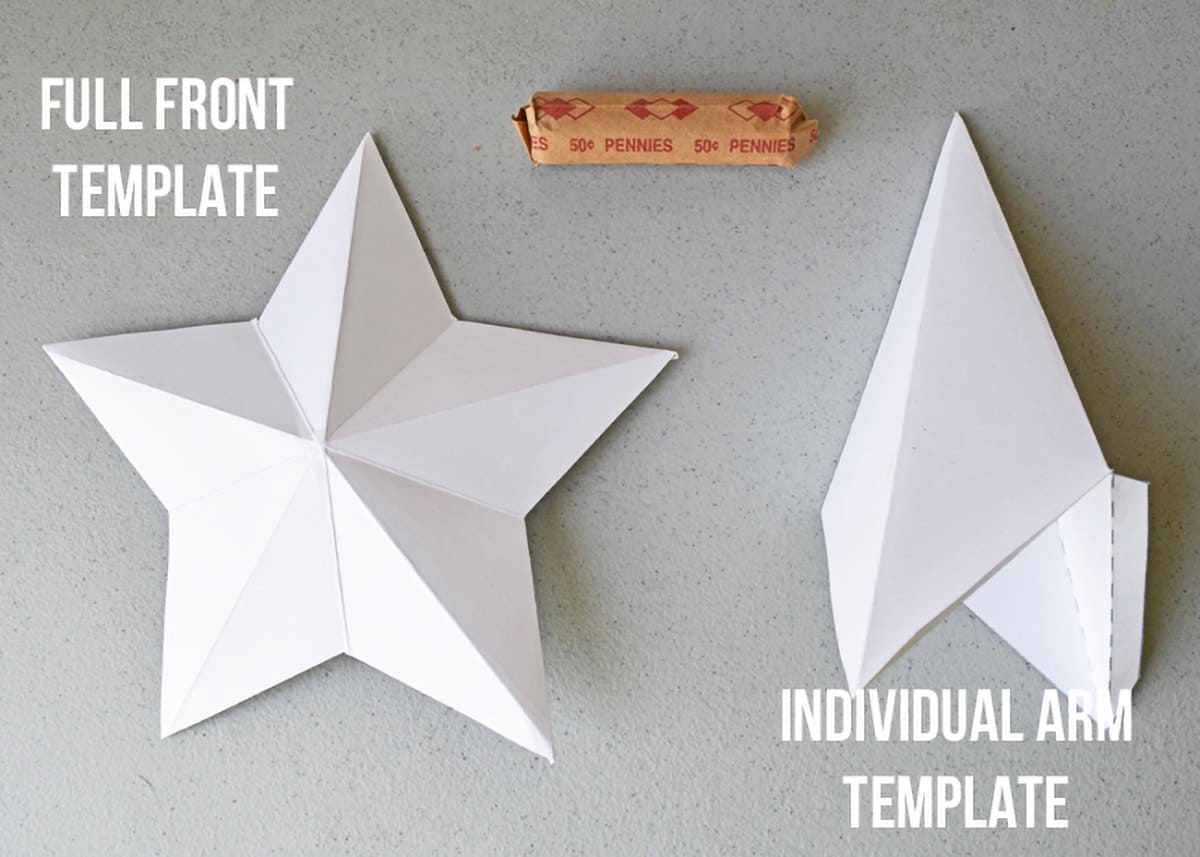
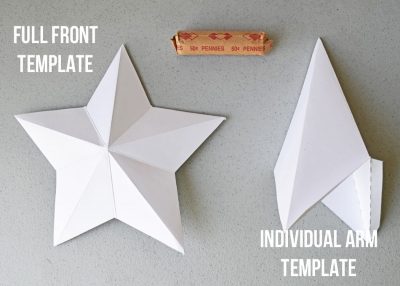
There are two templates to choose from depending on your preference. Check out our free printable 3d star templates below that all start with a piece of square paper.
Click on the links below to download the free files to make your own 3D paper star projects. You’ll find directions for larger stars and smaller stars.
- Individual Arm Template Large and Small (PDF)
- Individual Arm Template Large and Small (JPEG for easier resizing)
- Double Sided Folded star – Large, Medium, and Small (PDF)
Notes:
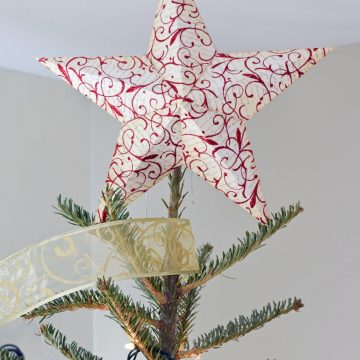
- The Individual Arm 3-D Star Template is what I chose to make my tree topper. Each arm is stamped, and the pattern does not extend to the other arms.
- The Full Front 3-D star Template is a bit easier to work with. However, you’ll only have the option of decorating the whole side at one time.
How to make a Paper Star
You’ll find printable step-by-step instructions at the bottom of this post. I include this area in the post for additional notes, tips, and variations.
How many templates do I need for a star? You’ll need two full front patterns or 5 individual arms.
Tips for Decorating. Fold before painting or adding dimensional elements to avoid cracking.
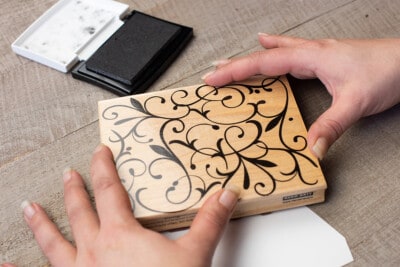
I layered two stamps: a script stamp and a flourish stamp to create my Christmas tree star topper. After stamping the images, I rubbed a bit of the ink around the edges to create a distressed look. After stamping the flourish, I covered the entire flourish pattern in dimensional glitter glue. The Stickles brand is wonderful to work with because of its very fine tip.
***If you plan to hang your star, punch a hole as directed below in “How to Hang a Star.”
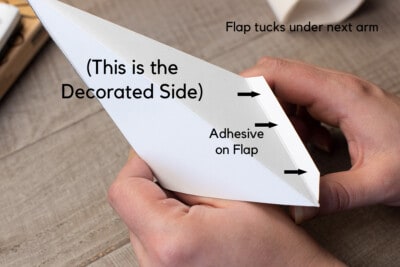
Tip: If using the individual arm template, shape the arm and stick the tabs to the appropriate side firmly. Shape each individual arm before assembling the full star.

Here is a closeup of how the individual arm template works. This is the easy way to put the 3D paper star together that makes that star shape.
Spray with a paper stiffener or aerosol starch if desired. Test that this step is cohesive with the types of materials you used.
FAQs
You can use any lightweight colored or patterned paper, such as card stock, origami paper, or scrapbooking paper, to make a 3D paper star. Thicker weighted papers like cardstock or mixed media paper is best for the individual arm template or large stars.
I recommend using glue dots or permanent double-sided tape for making DIY 3D stars for best results. Press firmly together. Using wet glue may cause the project to stretch and buckle, which would be unsightly and won’t create a lasting seal.
To make a 3D paper star garland, fold and assemble multiple 3D paper stars, then string them together with a thread or ribbon, leaving spaces in between each star.
To string paper stars, thread a needle with a string or ribbon, then carefully pierce through the top of each star, leaving enough space between each star to create your desired arrangement.
How To Hang this Star Ornament
As a regular ornament:
Punch a hole in the top tip and thread ribbon through before adding adhesive to either template. Or tape the thread inside the top arm and fold around it so that the thread comes through the tip opening at the very top.
As a tree topper:
To attach the star from the center back, punch two holes in the back. Thread stiff ribbon or string through the holes and tie to the top of the tree. Another popular idea is to insert a small rod from the bottom (inside corner of arms) to the top tip and clip the rod to the treetop with a few strong clips similar to a hair clip.
More Easy DIY Christmas craft ideas
- Handmade Ornament Ideas
- Christmas DIY Advent Calendars
- How to Make Pallet Signs
- DIY Stenciled Tea Towels
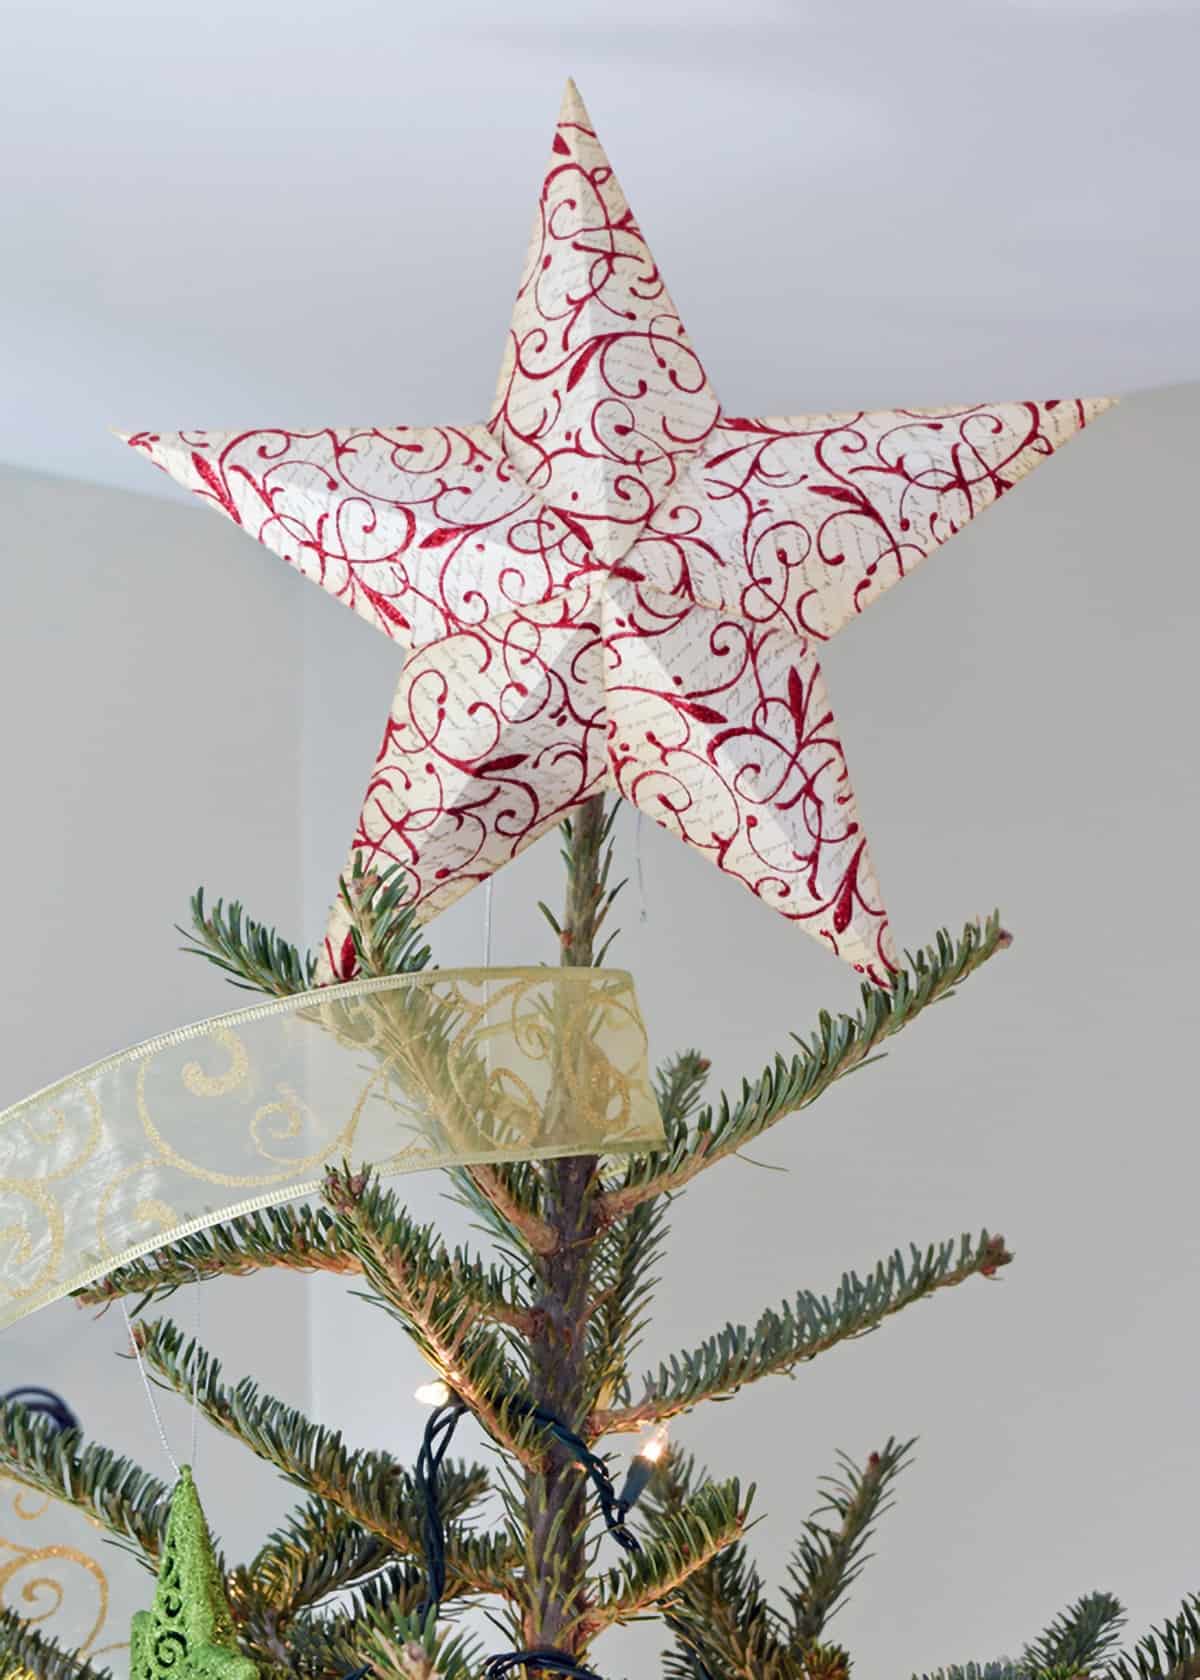
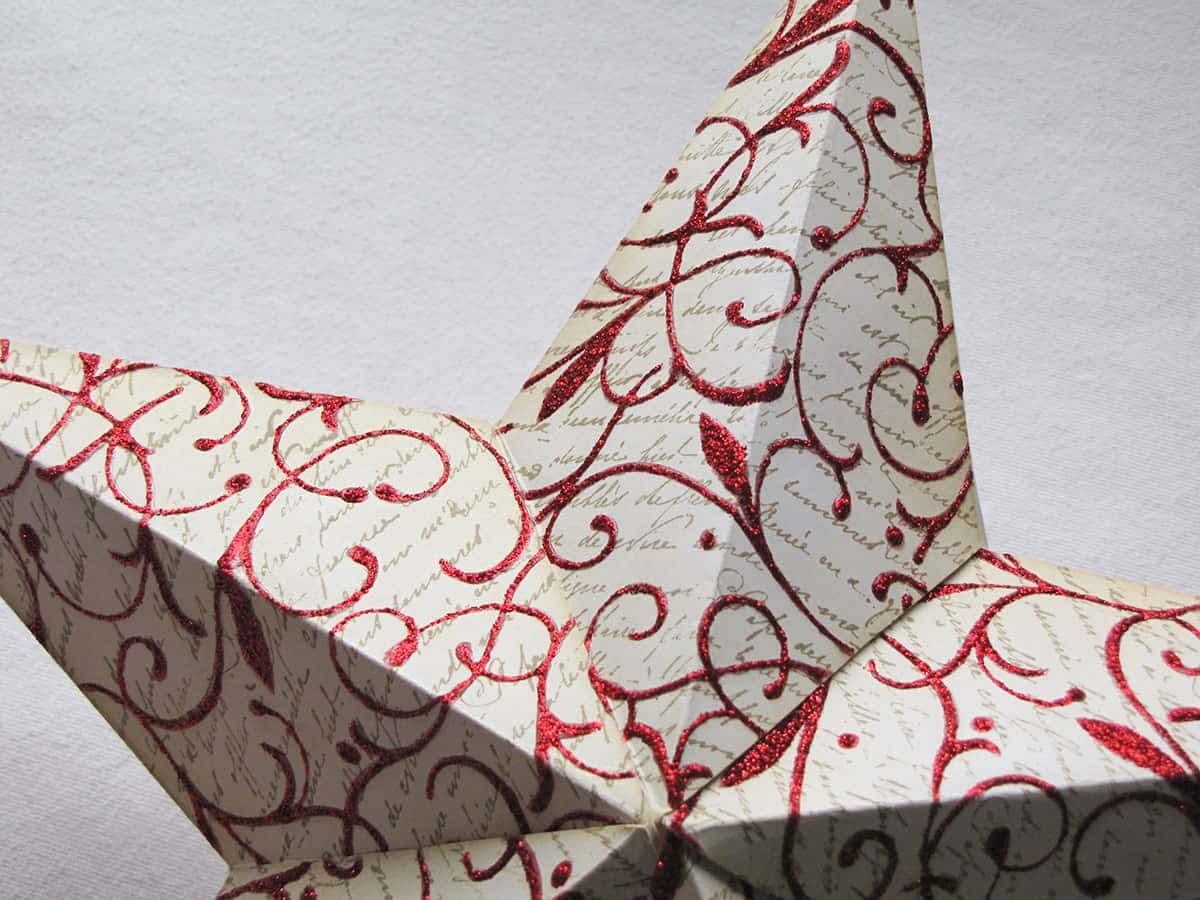
Our finished 3D paper patterned star looked radiant upon our tree. Happy Holidays!

Grab our free series "Weekend Home Projects that will Transform Your Life" Sign up below to receive updates including free printables, organization tips, home improvement projects, recipes and more! |
More Christmas Crafts and Projects


PS I love seeing your creations! Be sure to take a photo and tag #cravingcreative on Instagram! You can also stay in touch with me through following me on Instagram, Pinterest, and subscribing to the newsletter!
3D Paper Star
Tools
- Pencil
- Scissors
- Ruler
Supplies
- Heavy Cardstock
- Decorating Materials Stamps, paint, glitter, etc.
- Dry Adhesive Double sided tape or glue dots
- Tissue Paper For added rigidity
- Spray Starch Optional – stiffens paper
- Template linked in notes below.
Instructions
- Cut out the templates. For a double-sided full front star you'll need two templates. For a single arm star you'll need 5 arms. Trace lightly with a pencil over heavy weight paper to preserve paper.

- Decorate the template.
- Fold both the center lines and tabs as directed. Gently score lines by using a scoring tool or ruler and a craft knife on the folds. Burnish the edges once folded, (run your fingernail across them), to create crisp fold lines that will help make the star points.

- Add adhesive to all tabs. If you're using the individual arm template, shape the arm and stick the tabs to the appropriate side firmly so that each individual arm is shaped before assembling the full star.
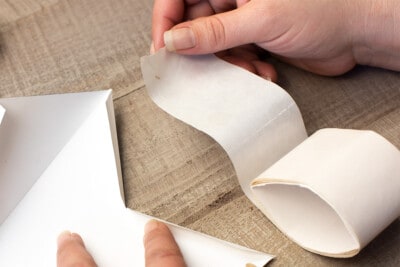
- Attach tabs and stuff the arms with tissue paper to increase strength.
- Spray with a paper stiffener or aerosol starch, if desired.


Shay Schenk says
Nicely written post. I honestly like the topic covered here. I’ll check back every now and then for more posts like this one.
Claudia says
Hi there! This is beautiful! Do you have the name and brand of the flourish stamp used for this project by any chance pls?
Rachel says
I bought it several years ago, so I was actually surprised to find it! You can find the Hero Arts Wood stamp on Amazon.
Audra @ Renewed Projects says
love love love this! Thank you for the template.
Rachel says
Thanks, Audra! I’m sure that you will make something beautiful with it.
Heidi Fowler says
It’s beautiful. Thanks, Rachel. I plan to make a star every year, but I never quite get to it. Pinned.
Rachel says
Thanks for the pin, Heidi! I have lot of projects that I haven’t got to yet so I know that feeling.
Kimberly says
Beautiful! Pinned and tweeted. Lou Lou Girls
Lorelai @ Life With Lorelai says
Congrats! Your Star Tree Topper Template is a Featured Post at the #HomeMatters Linky Party #18! Have a wonderful weekend. 🙂
Ginger says
It turned out BEAUTIFULLY! Pinning so I’ll “remember” how to do this later. Thanks for linking to Show Me Saturday.
Leslie says
This is gorgeous! I’m so making one of these for next year! I’m stopping by from Lou Lou’s, I hope your having a great day!
Rachel says
I love lou lou’s party. I hope you have a Merry Christmas and thanks for stopping by!
crystal says
This is so beautiful! I’d love it if you shared it on the Saturday showcase at Bowdabrablog.com
Crystal
Rachel says
Definitely hopping over, Crystal. Thanks for stopping by!
Lorelai @ Life With Lorelai says
Very pretty! Looking at the picture I didn’t realize it was paper. The things you can do with good old paper and some rubber stamps! 🙂 Fun project. Pinned.
~Lorelai @ Life With Lorelai
#HomeMatters
Rachel says
Thanks for the pin! I love working with paper and you are right that it can be more versatile than people think, lol.
Sarah J says
Popping over from Teach Me Tuesday =) Your star is beautiful! I bet they’d make great garland too. Be sure to share your crafts & DIYs at Two Uses Tuesday over at Sarah Celebrates if you don’t already!
Rachel says
Thanks for stopping by, Sarah! I will definitely hop over to share it and join the party.
Jess says
This looks like so much fun! We need a new tree topper anyways!
Thanks for joining the Link Up this week!
Bonnie @ Our Secondhand house says
This doesn’t look at all like a paper craft to me. Wow. When I first saw the photo I assumed it was made of metal. It’s beautiful! Thanks for linking up at the #HomeMatters Linky!
~Bonnie
Rachel says
Thanks so much, Bonnie! Even though it is made of paper, it has actually held up really well for the last 3 years. Thanks for visiting!
Bismah says
Wonderful and very creative idea! The outcome is so beautiful!
Rachel says
Thank you so much! I am thrilled with the star and very happy it has held up for the last few years.
Robin @ Redo It Yourself Inspirations says
That is truly beautiful, Rachel! Great tutorial too! Pinned and shared on Facebook this morning 🙂
Rachel says
Thank you so much, Robin!