Our Traditional Style Kitchen Remodel with Wood Cabinets and Gray island.
Today is the BIG DAY! We only have 1 project left to go – adding French doors – but I’d say that it’s ready for a big ‘ol reveal. When we moved into this house I knew that this kitchen would be a major project I wanted to tackle. I can’t even believe the difference! The journey has been so worth it.
In case you missed it or would like more information, here are the articles to the rest of the kitchen renovation series:
- Kitchen Renovation Plan and Before Pictures
- Extending the Island and Adding a Breakfast Bar
- Building A Kitchen Island
- 5 tips for Replacing your Counter Tops
So are you ready to see the transformation??
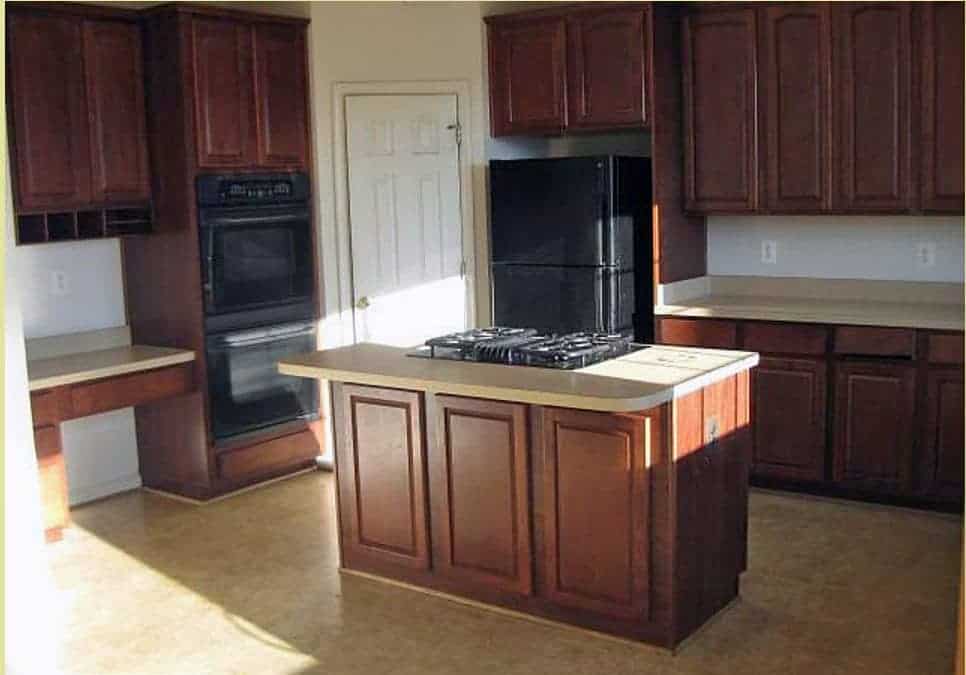
First, let’s visit the BEFORE KITCHEN of doom. Dark and a little outdated at this point. This picture is from when we moved in, but it is the only one, I have that shows the full kitchen.
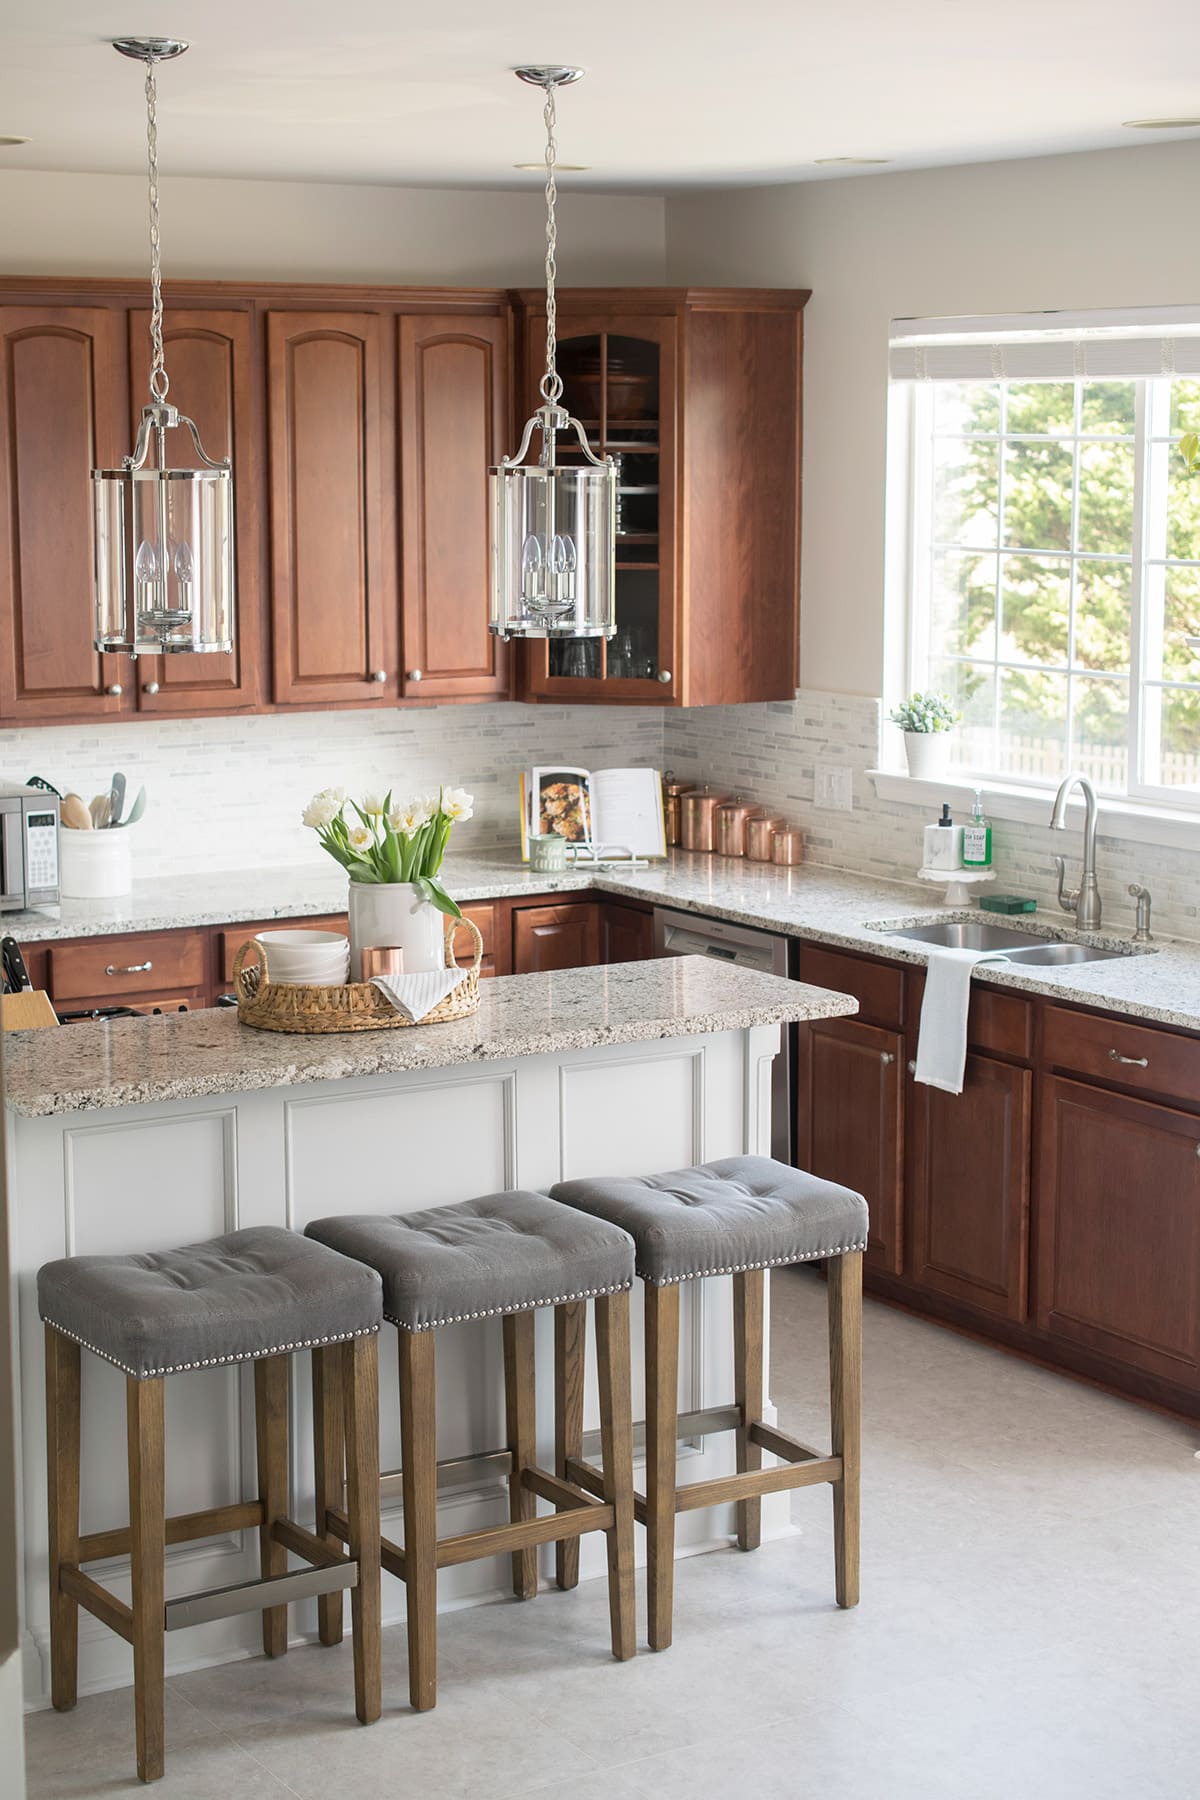
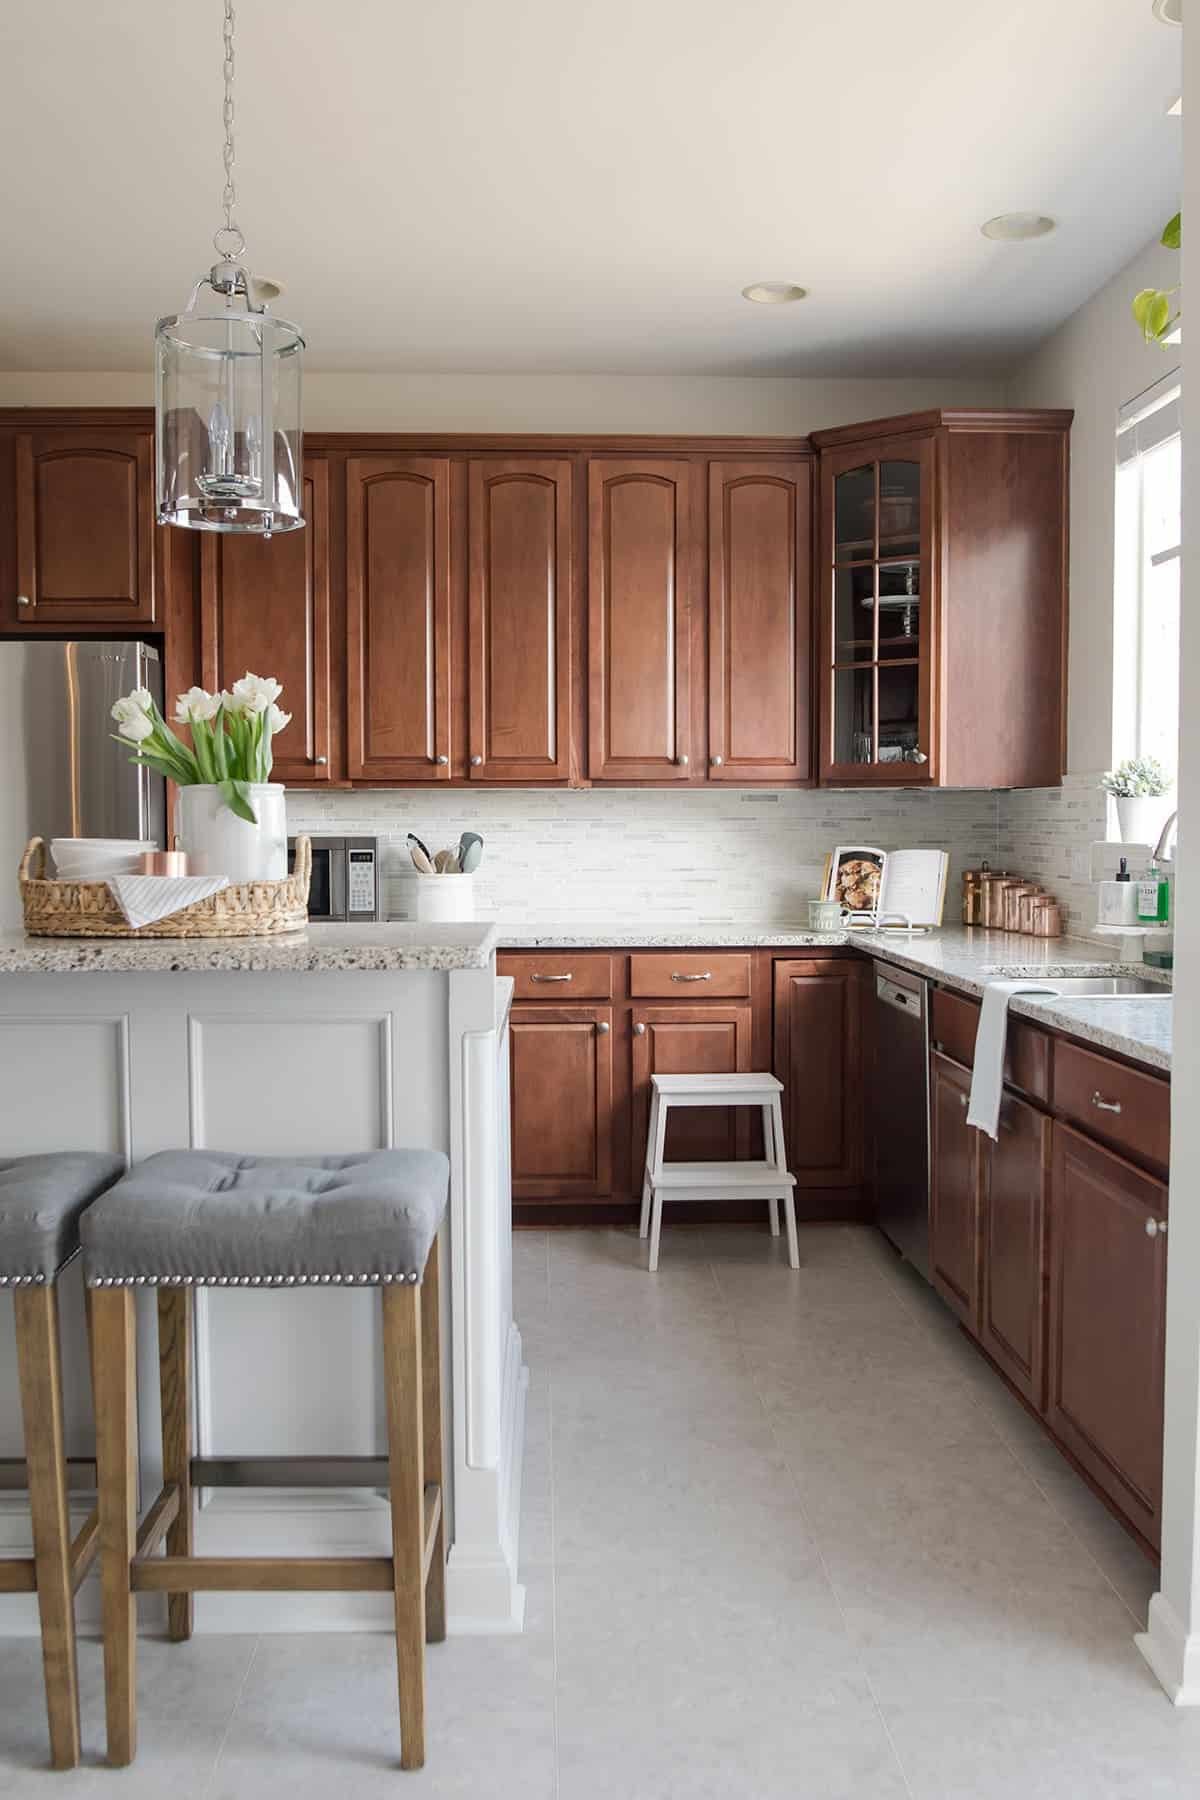
And this is what it looks like today!
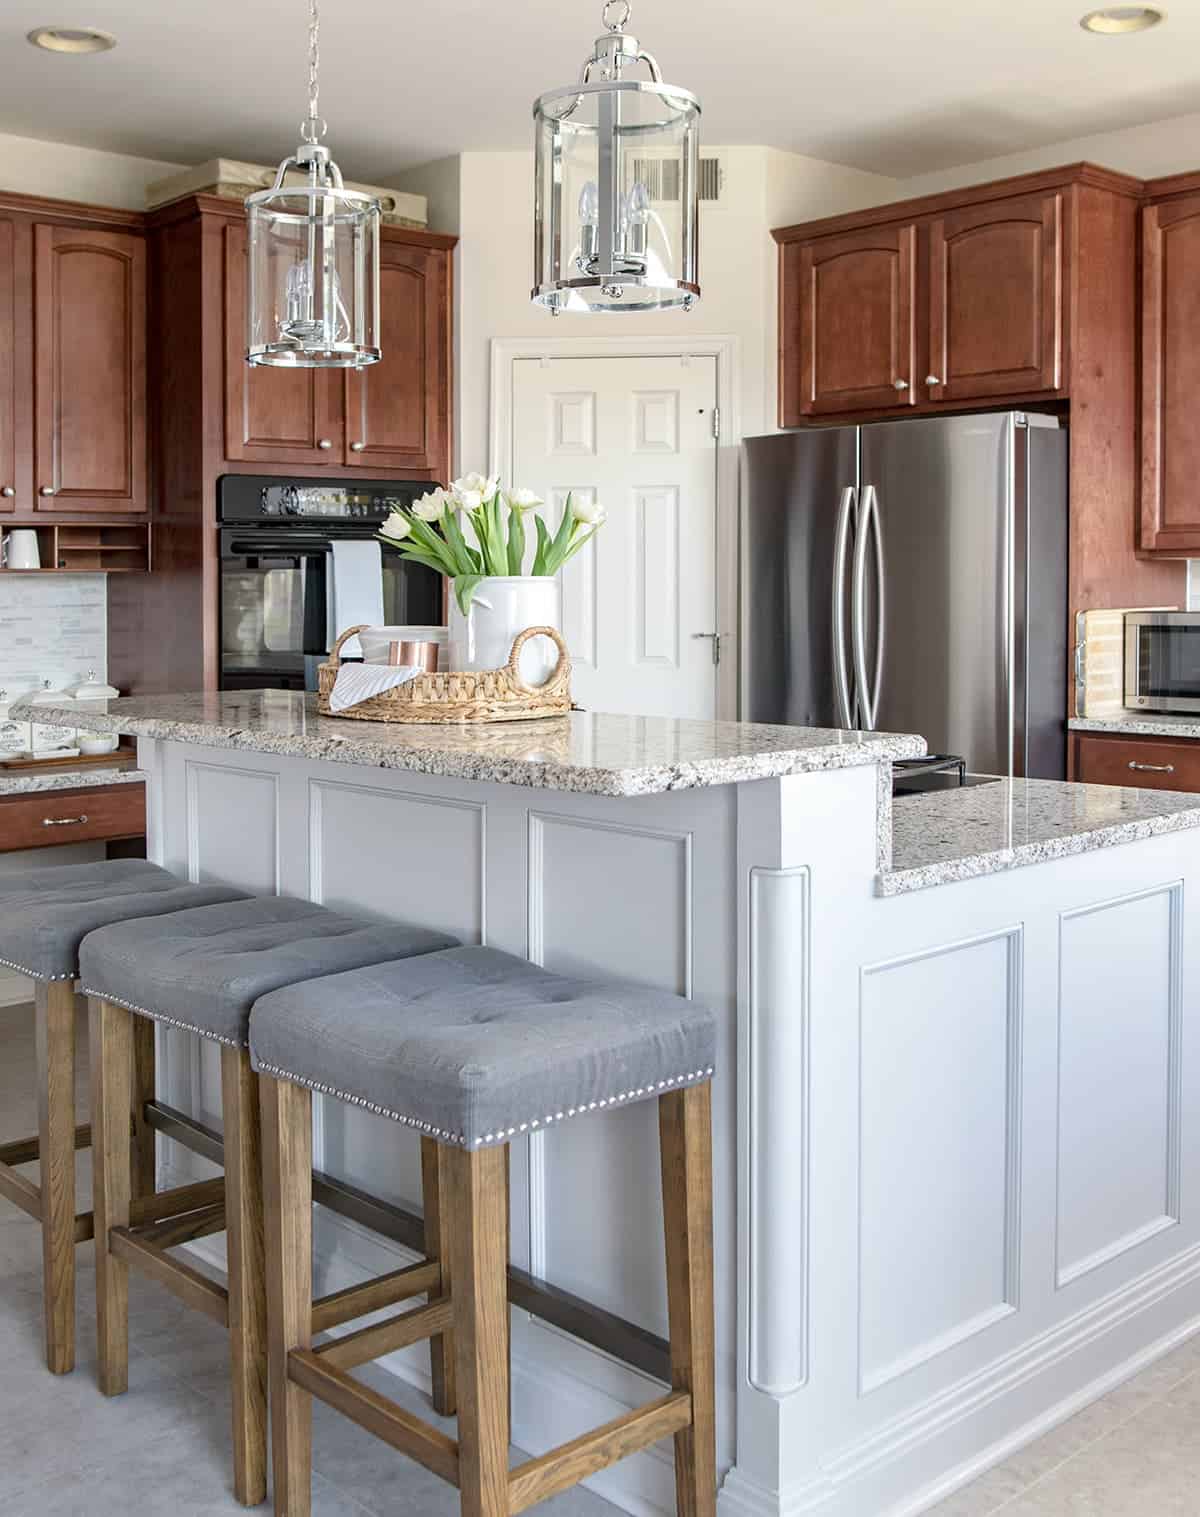
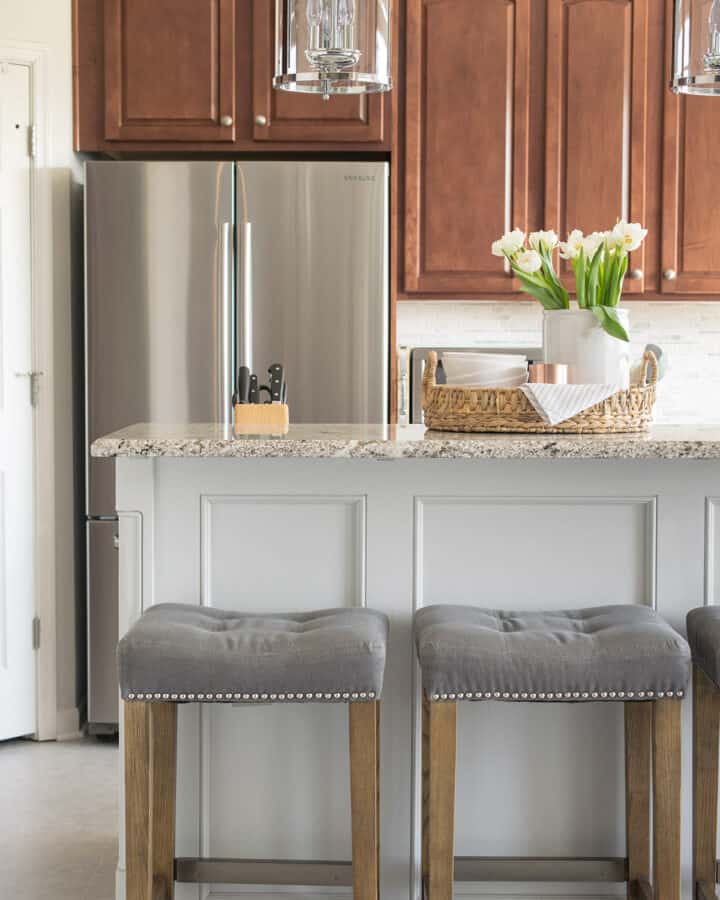
The finished breakfast bar with extension. We added on to the original island to make it more functional as this is this the main eating area for our family of 3. You can see how we built a DIY kitchen island ourselves. We also added these new bar stools and waterproofed the fabric to prevent spills.
Per hubby’s request, the cabinets have not changed. That was one of my compromises. However, in return, I got to do the accessorizing. The new, better fitting fridge is awesome! Even with the darker cabinets, the kitchen makeover makes this room much lighter and airy in feeling. Love It! The grey really brought out the richness of the cabinetry that was missing in the yellow/beige outdated scheme.
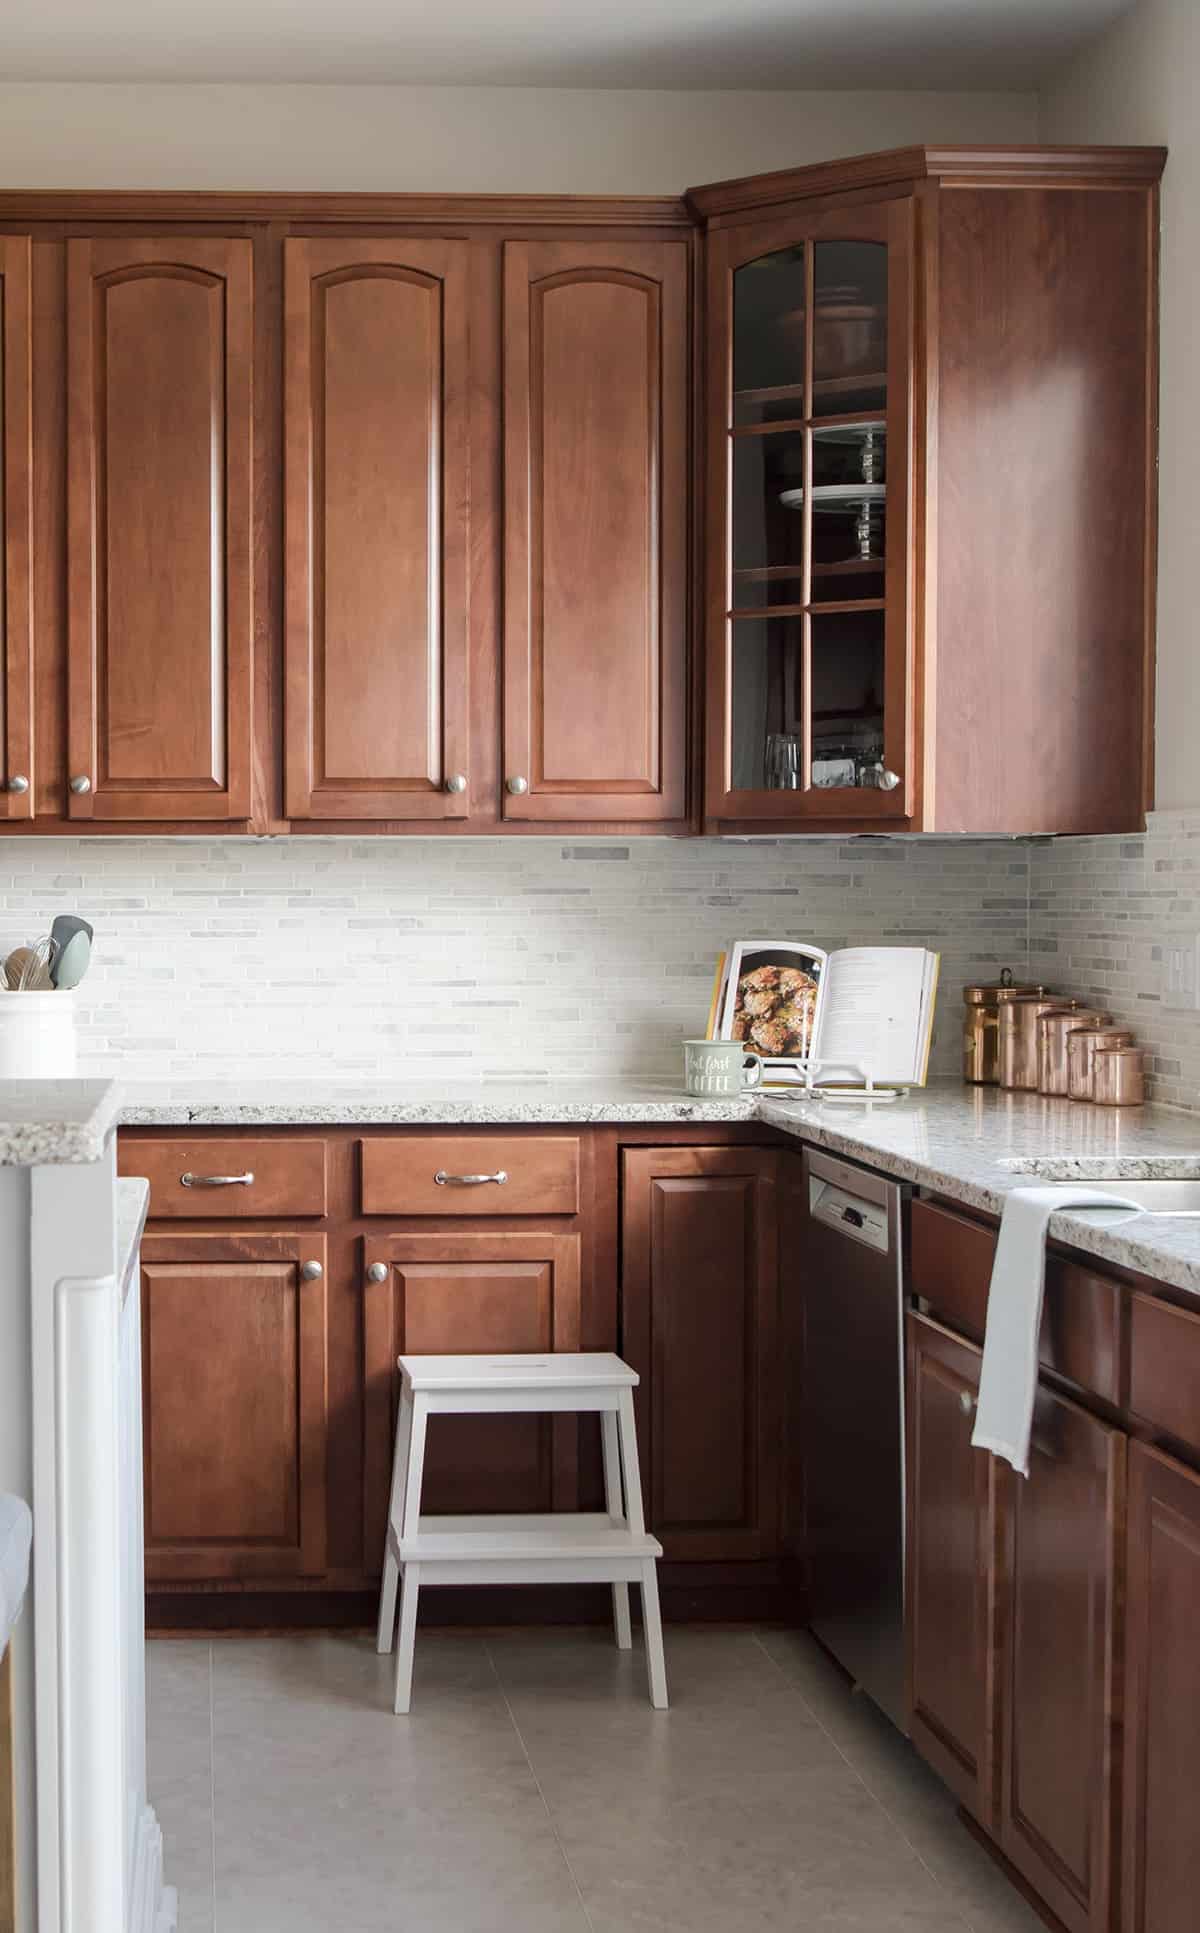
I will totally take credit for that back splash, though! It’s a tumbled marble tile ….and it’s gorgeous! So many people wanted me to add decorative tiles or color or sparkle to it. But I dug my heels in about keeping it white and plain. And, dang it, I feel vindicated looking at that picture.
Remember how we rewired and hid the outlets under the cabinets? So.Much.Better.
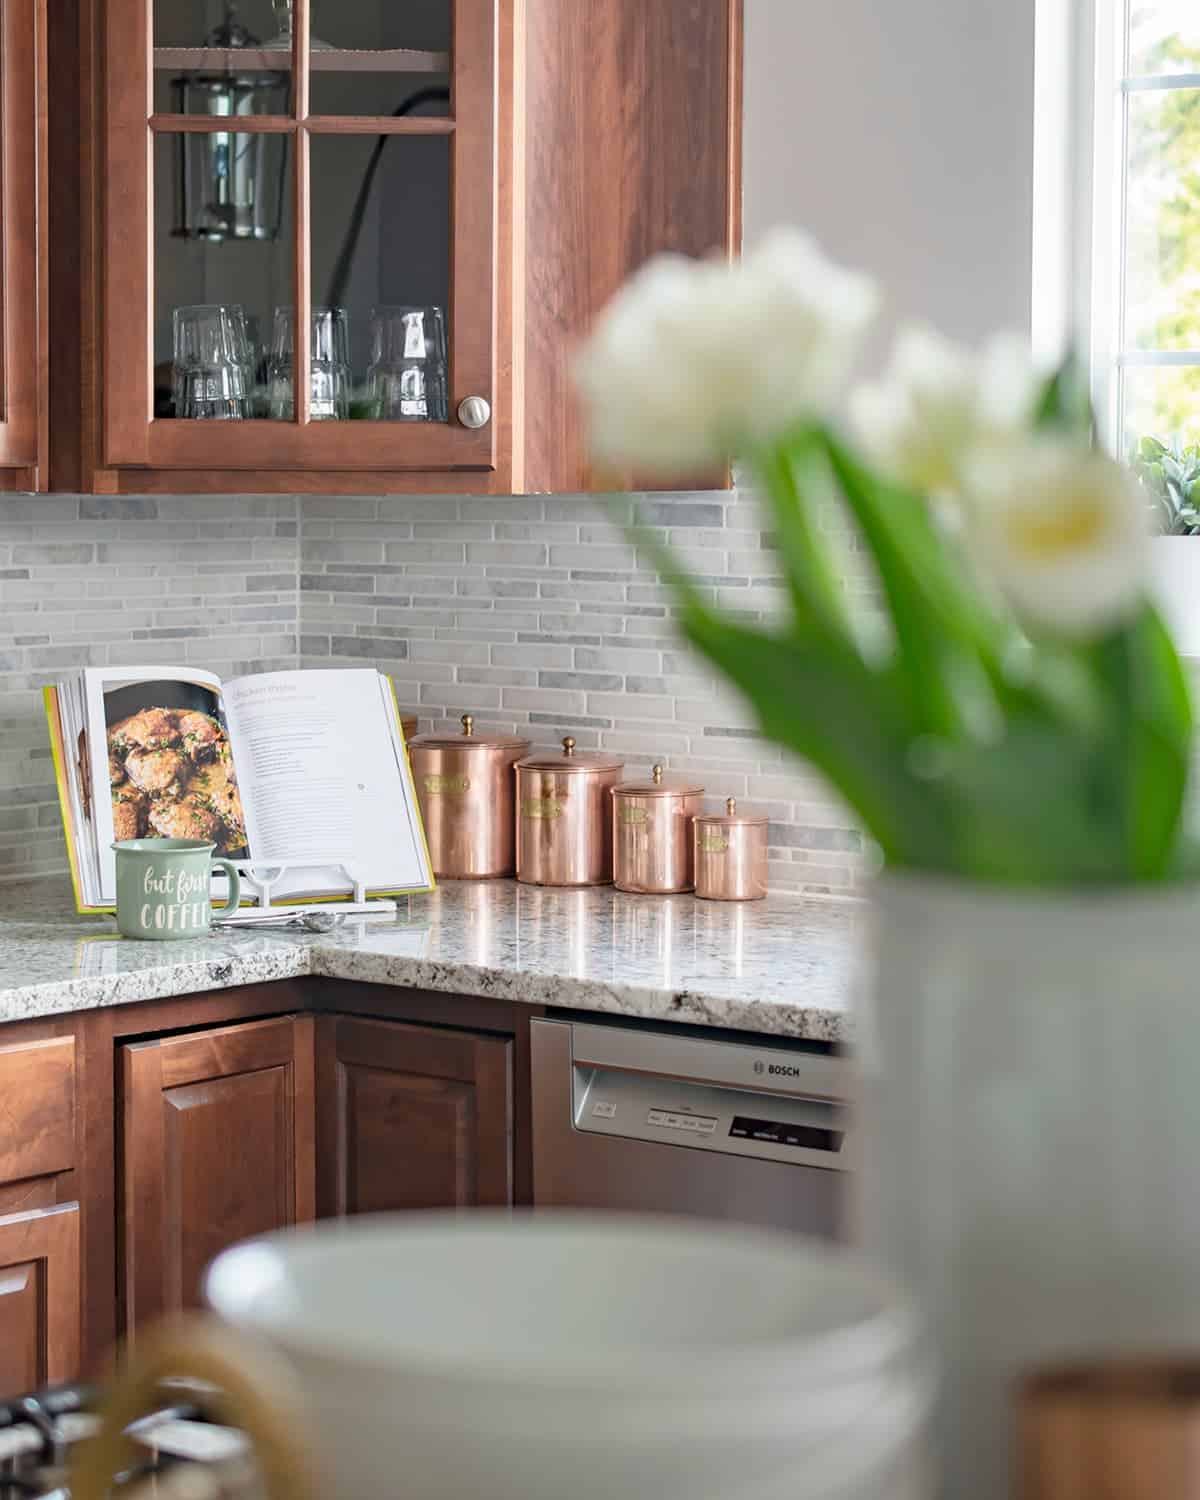
Hubby and I did all the tile job ourselves and much of it was hand laid because the sheets did not fit together properly or were in awkward spaces.
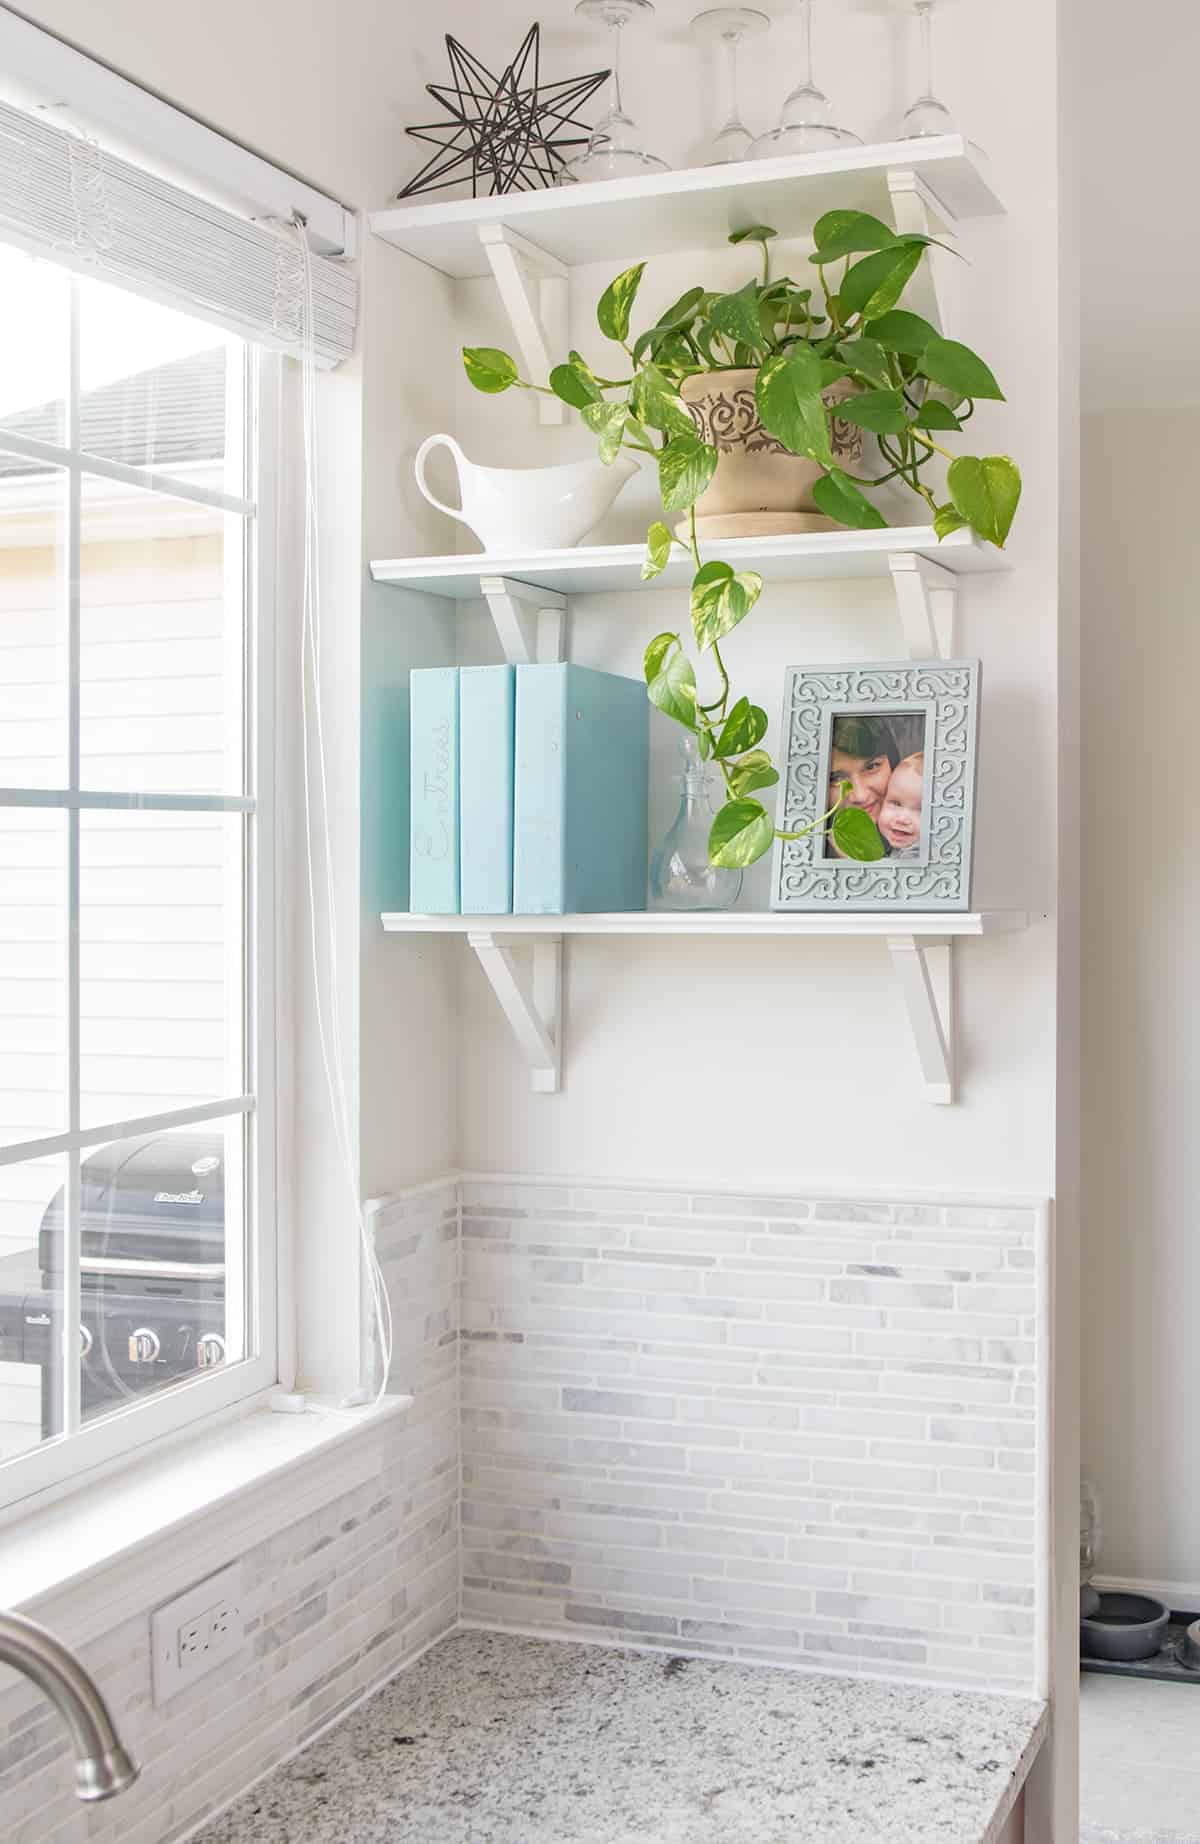
Although it’s hard to say which part of the kitchen makeover is my favorite, but the open shelves are definitely up there. I had to add at least a little bit of color and sunshine. I store my cookbooks, the family heirloom plant, and a few cute accessories on them.
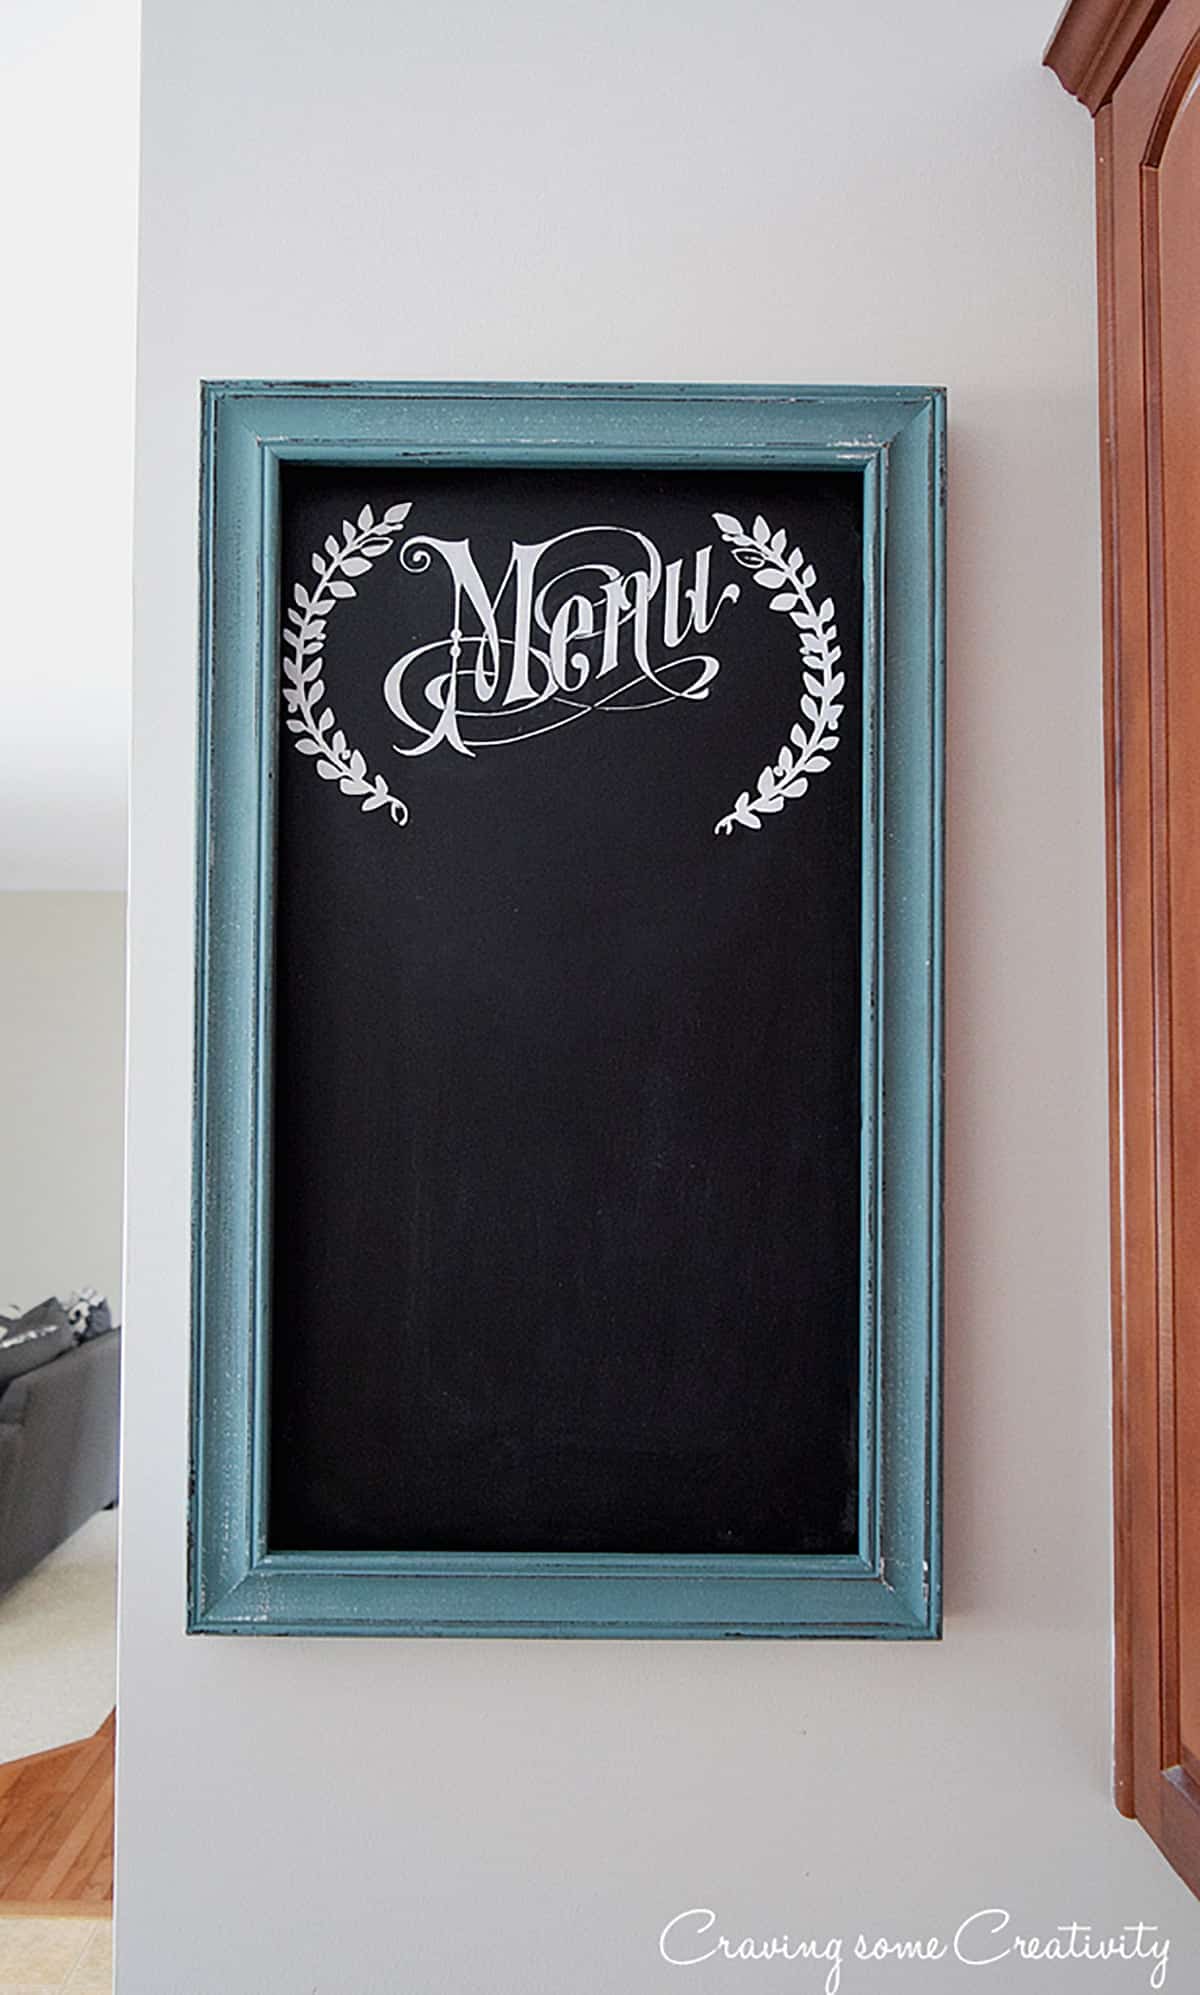
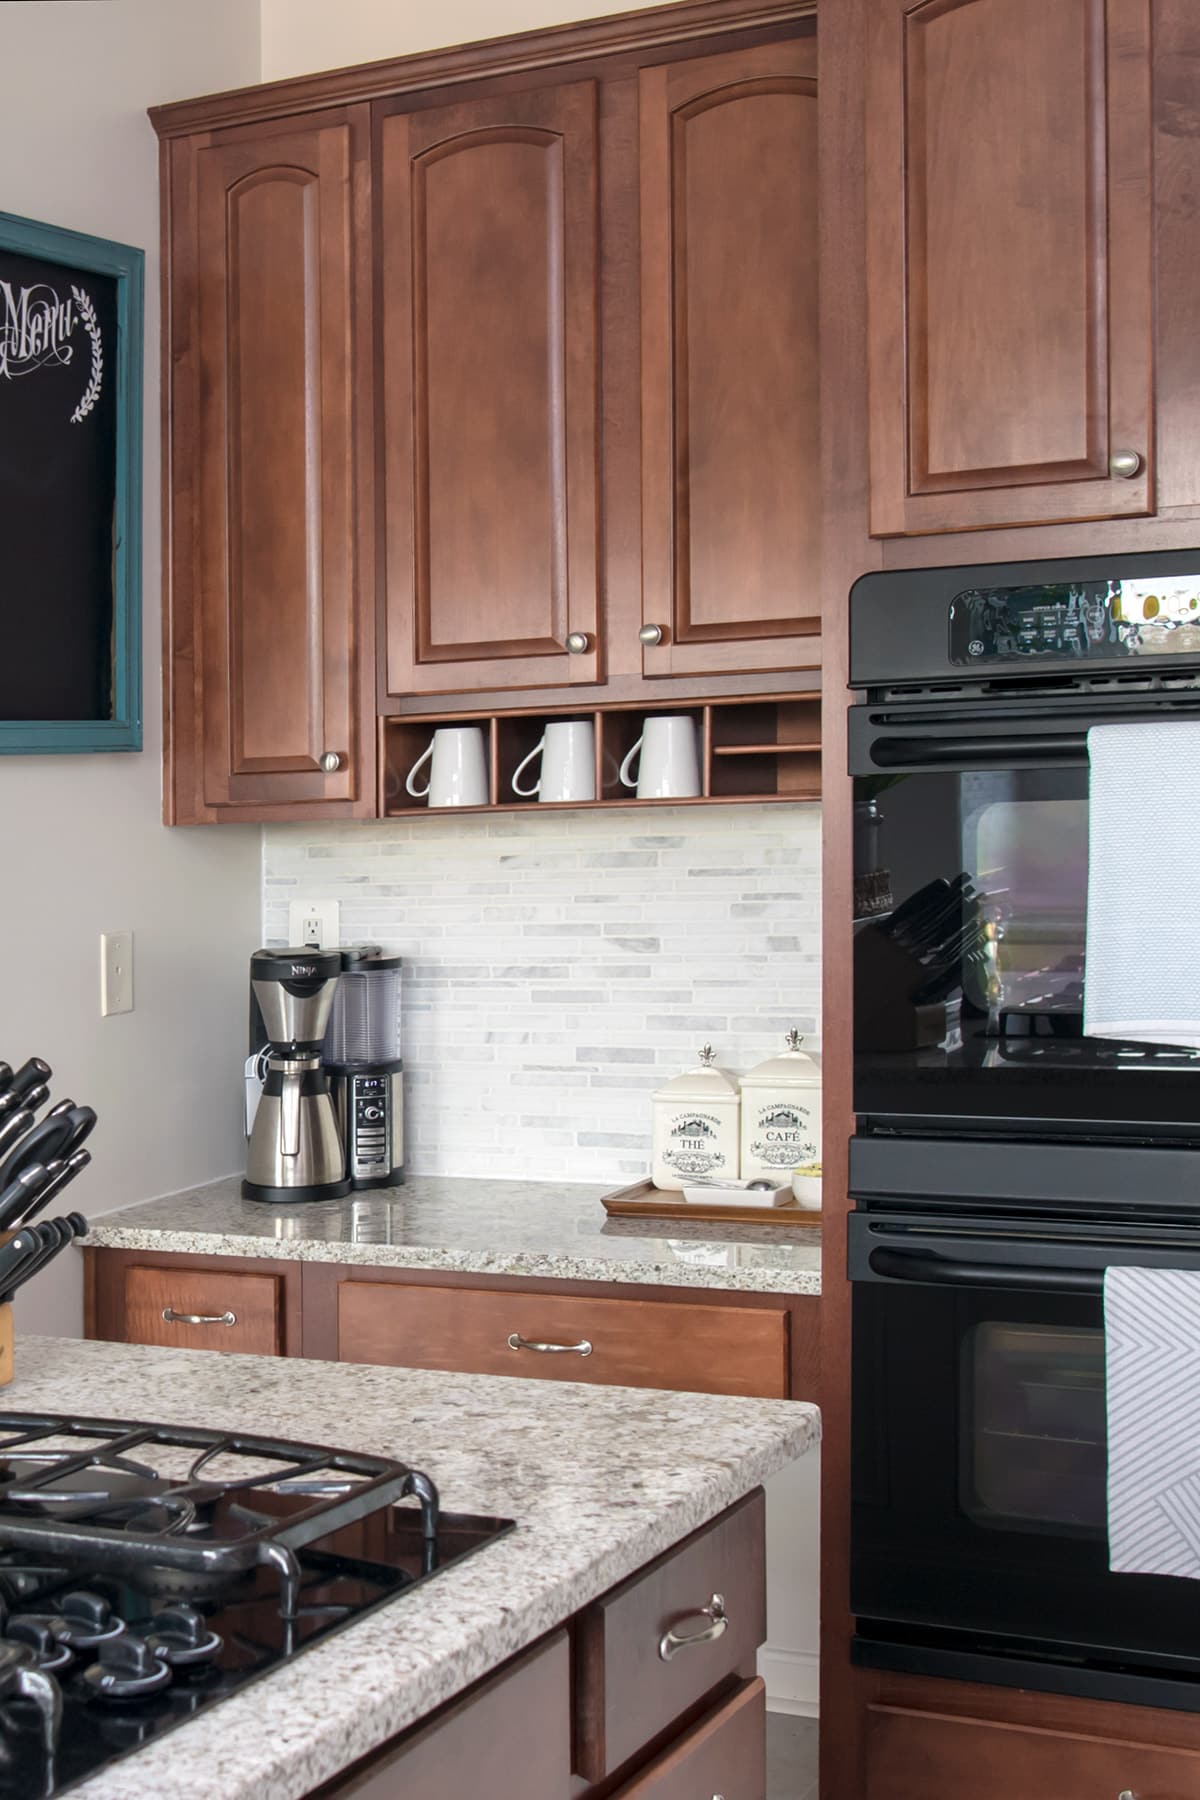
Of course, every kitchen needs a good area for the coffee setup. Above is my menu chalkboard. The Tile Shop has been so generous to us in finding a last bit of tile to cover that back wall. They called every store in the US to find enough for our project and pulled it together from 4 different stores. I actually intend to put a corkboard there, but we want the tile behind it in case we ever change our minds.
Kitchen Decor Sources and Details
Paint Colors: Valspar Asiago | Trim/Moulding- Valspar Pale Bloom
Hard Surfaces: Countertops- Bianco Romano but I have also seen it called Andino White (with mitered edge island on island) | 15 inch deep Double Undermount Sink | Tall Kitchen Faucet (similar) | Liberty 3-inch drawer pulls (3″ satin nickle) | Flooring: Shaw Floors Galleria Aker’s Mill | Cabinet Color: Unknown but looks like a brown cherry- solid wood | Backsplash: Tumbled Marble with ⅛-inch white grout
Lighting: Island Pendant Lights (Chrome Finish)
Furniture: Bar Stools | Step Stool
Walls/Art/Windows: Cordless Shades (White) | Chalkboard Menu | White Shelves (similar)
Kitchen Accessories (link on photo):

If you have any questions, let me know in the comments below! Be sure to check out the other parts of this series at the top of this post!

Grab our free series "Weekend Home Projects that will Transform Your Life" Sign up below to receive updates including free printables, organization tips, home improvement projects, recipes and more! |
More Room Reveals
Leave a Reply