Our no-fail method for painting a dresser! With this step by step, inexpensive yet professional looking project, your painted furniture will look great for years to come.
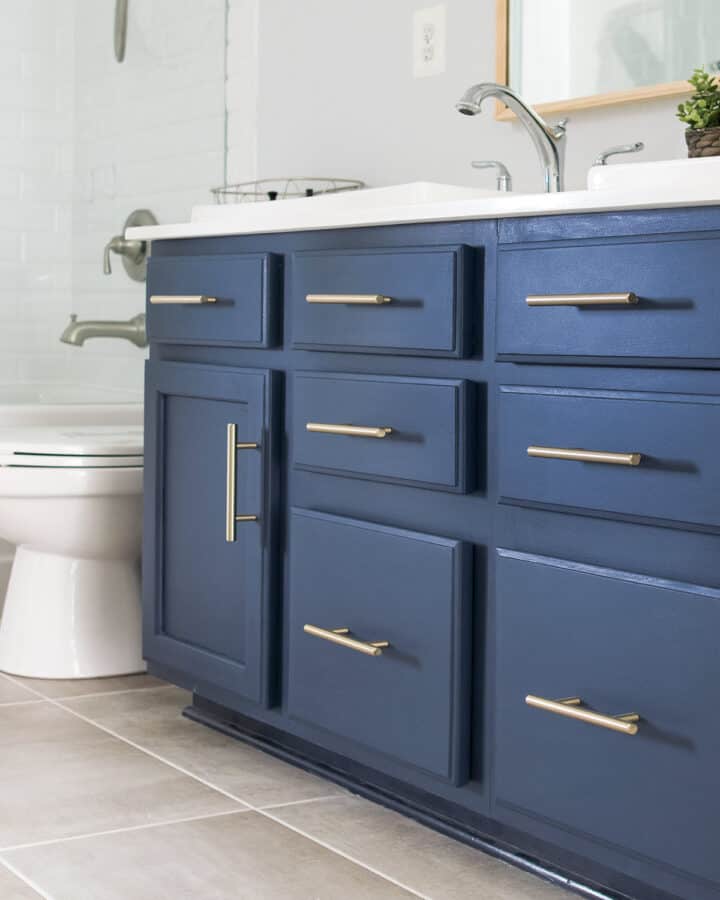
Alright, I wasn’t originally going to share another furniture makeover with you so soon after painting a bathroom vanity, but since we are waiting on installing the new tile floors and with the extremely warm reception last week’s makeover received, I thought I’d take a short break from the bathroom remodel.
Over the years, I have done dozens of furniture and painting projects and honed my no-fail tips and products to make it easy with consistently great results that last. I know because my son has tested our furniture to the max, so durability is super important to me. This same exact method will work on most any furniture piece.
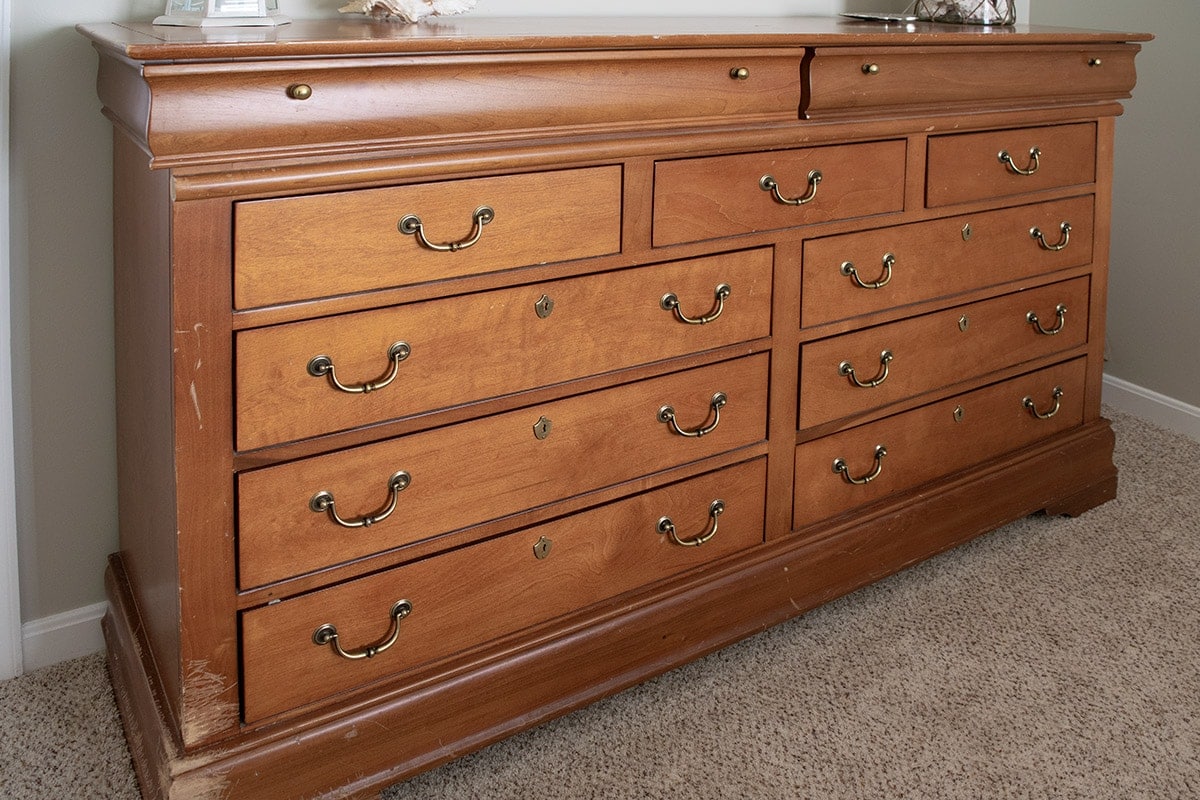
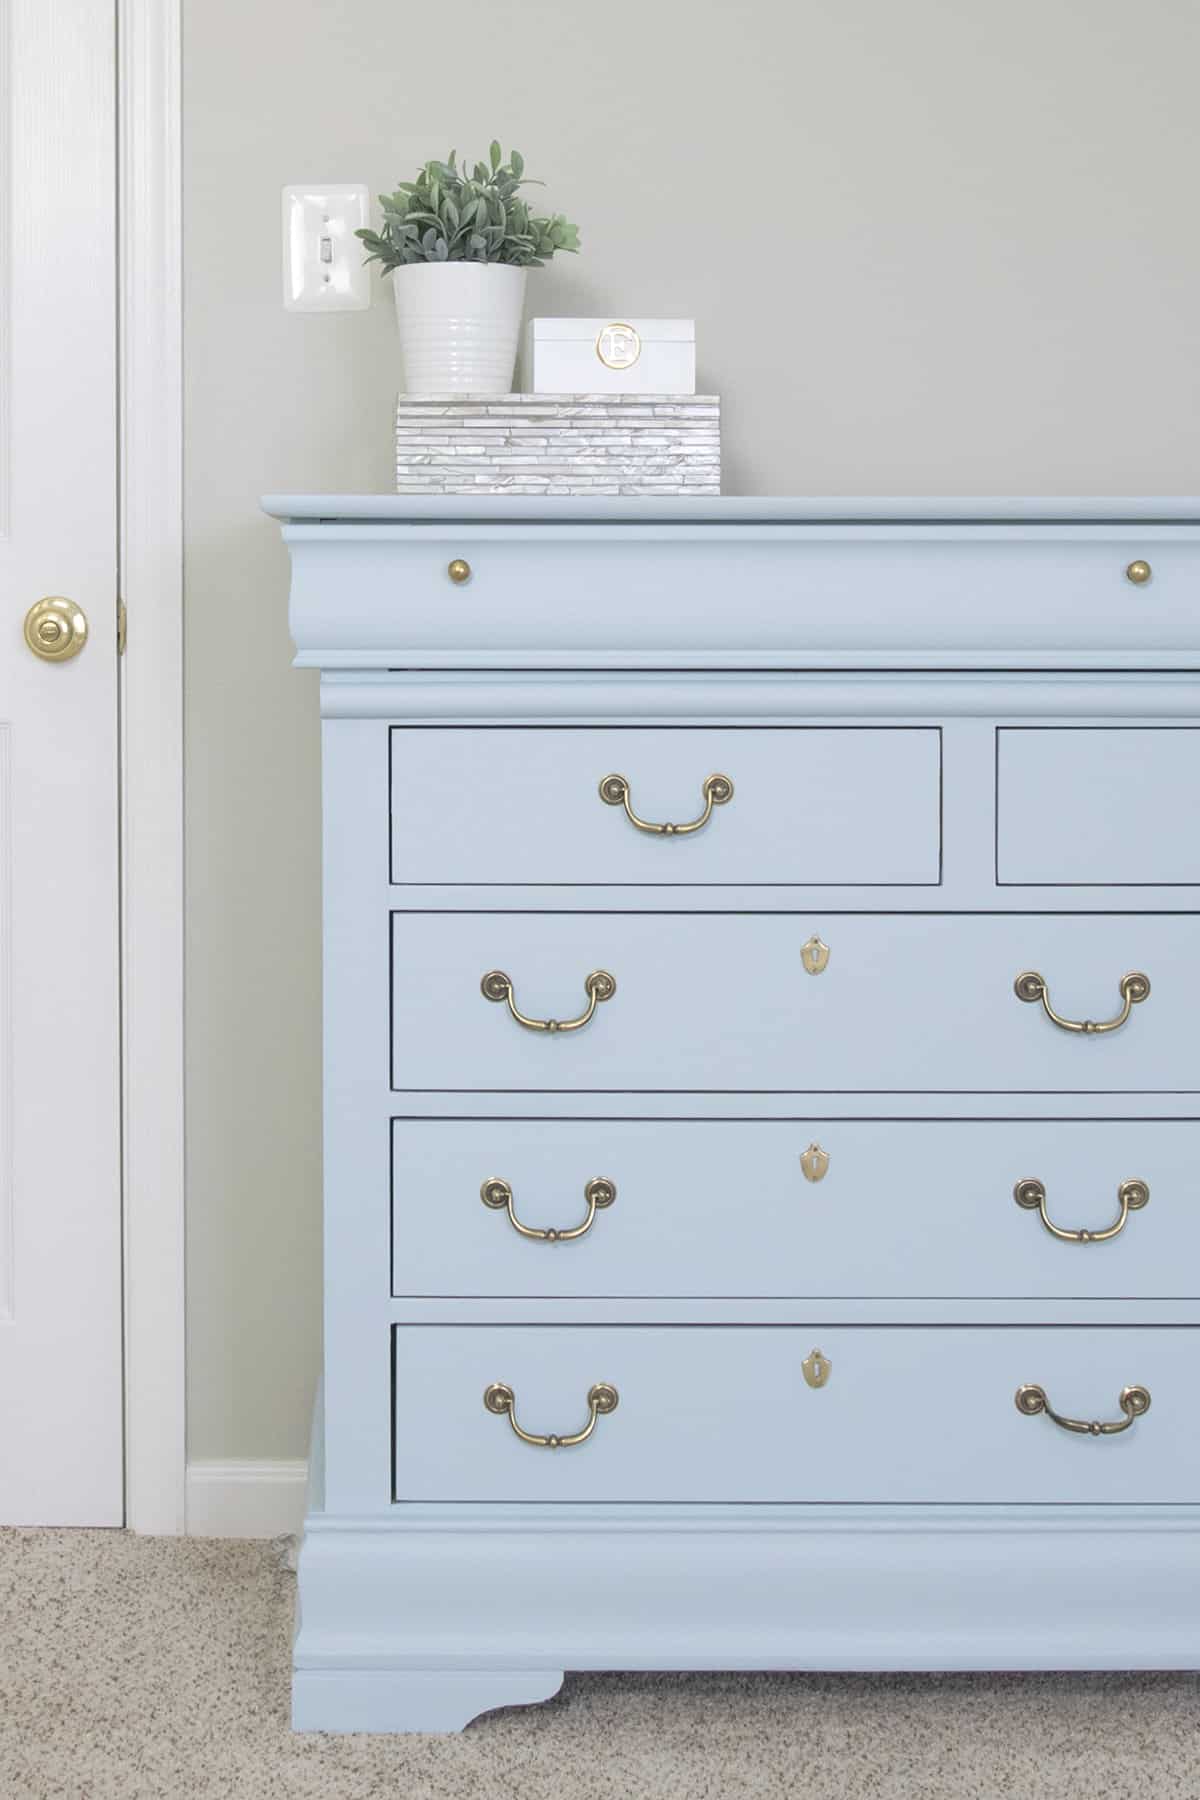
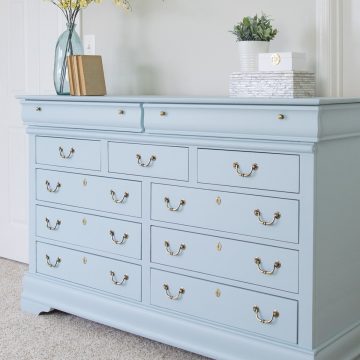
We scored this dresser for free when it was leftover from an estate sale. Clearly no one but me saw the potential. Yes, there is some damage (claw marks?), but that’s nothing that a bit of wood filler and some paint can’t make beautiful!
Recommended Tools and Supplies
These are the supplies I used for this particular dresser:
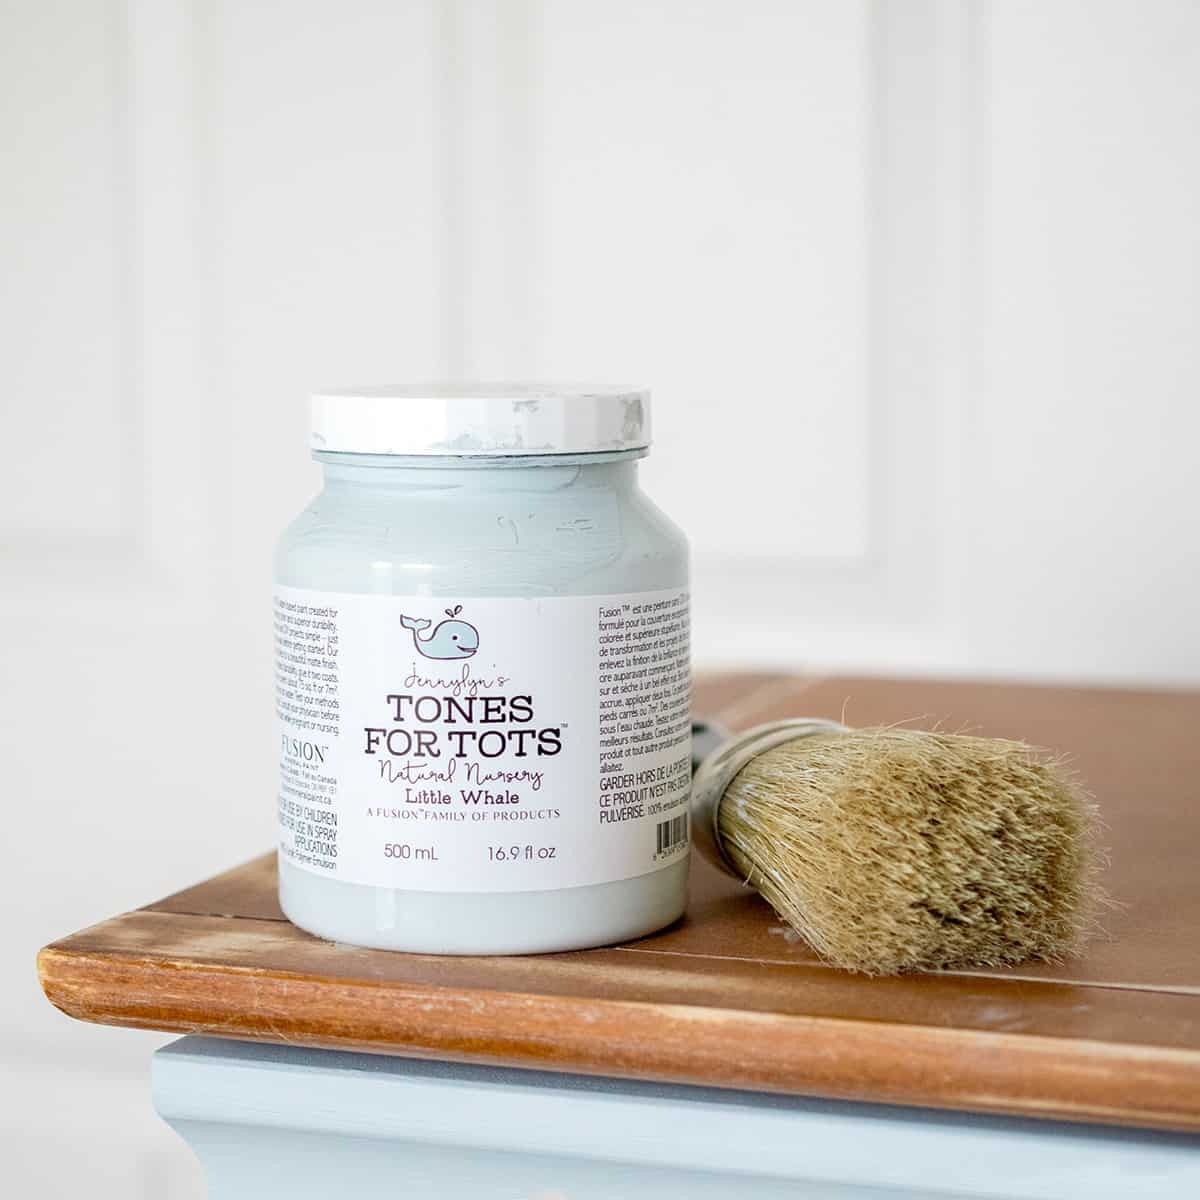
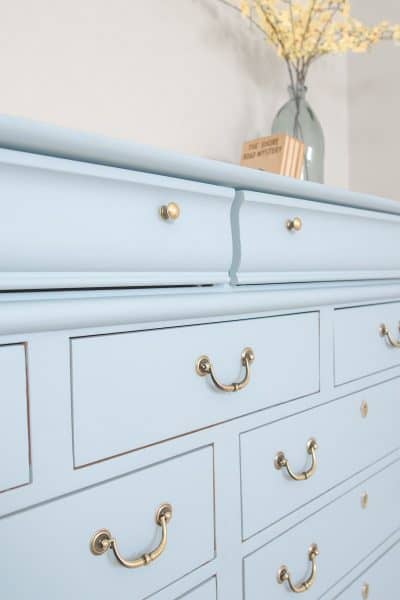
- Fusion Mineral Paint in Little Whale
- Stainblocking Primer
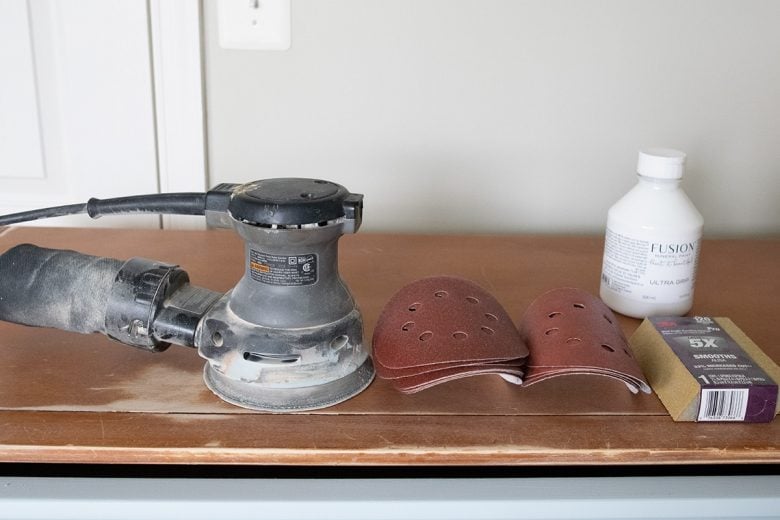
- Mouse Palm Sander with 120 or 220 grit sandpaper and Sanding block
- Fusion Mineral Natural Paint brush or Fine Paintbrushes
- Clean, dry lint-free rags
- TSP or Degreaser
- Wood Filler Only for imperfections or filling old hardware
- Lint-free Microfiber rollers
- Paint trays
How To Paint Furniture Step By Step
Step 1: How To Evaluate and Clean
I usually start a project by asking myself a few questions.
What is the dresser made of? Solid wood, laminate, or something else?
Always inspect a project piece thoroughly. It’s very rare to find solid wood furniture. Most always, large flat surfaces like sides or a tabletop is made of plywood with a thin veneer on top to match the rest of the wood. So long as the veneer is thick enough, this won’t be a problem with painting or sanding, but useful to know.
Are there any stains or knots in the wood?
I’ve painted pieces covered in everything from sharpie to gooey-icky-what-in-the-world?! Stains are important to note ahead of time because some things will bleed through paint, no matter how many coats you use.
Here is a rough guide to dealing with various stains:
- Knots – use a shellac-based primer
- Gooey stuff/adhesive – I like Goo Gone for gooey messes, but make sure to clean off with a degreaser or teaspoon afterwards to remove any residue.
- Grease stains – clean with a good degreaser like Simple Green to break up what you can.
- Permanent Marker/food coloring/other – Clean as best you can with teaspoon and then prime at least two coats.
For strong stains and greasy or grimy surfaces, I recommend using a primer. My go-to never fail primer is this one from Kilz (not the original Kilz). Wait for the primer to completely dry, usually 24-48 hours, before painting.
How to Clean furniture for painting?
Use Tri-Sodium Phosphate or a degreasing cleaner for getting any grime and dirt off of them. I like it because teaspoon doesn’t leave a film.
Step 2: Remove Hardware
Remove any hardware present. If you are changing out the hardware to a different size, fill any holes from the old hardware. Also, fill any deep scratches or gouges. You will sand them smooth during the next step.
Step 3: Sand or Etching
There are two ways of prepping furniture or cabinets for painting: sanding or etching.
Sanding with a palm sander or a mouse sander (we use a multi-tool for inner corners) makes this step pretty quick. You don’t necessarily need to get every bit of varnish off. I give a general rule – sand enough to take the gloss off. Sanding is going to give the best bond, and I will always sand high traffic surfaces such as tabletops, around doorknobs, or dresser tops.
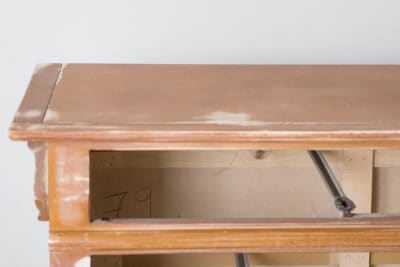
You can see about much really needs to be sanded in this photo from another dresser I painted. The original stain is still noticeable, but the surface is smooth and scratches removed:
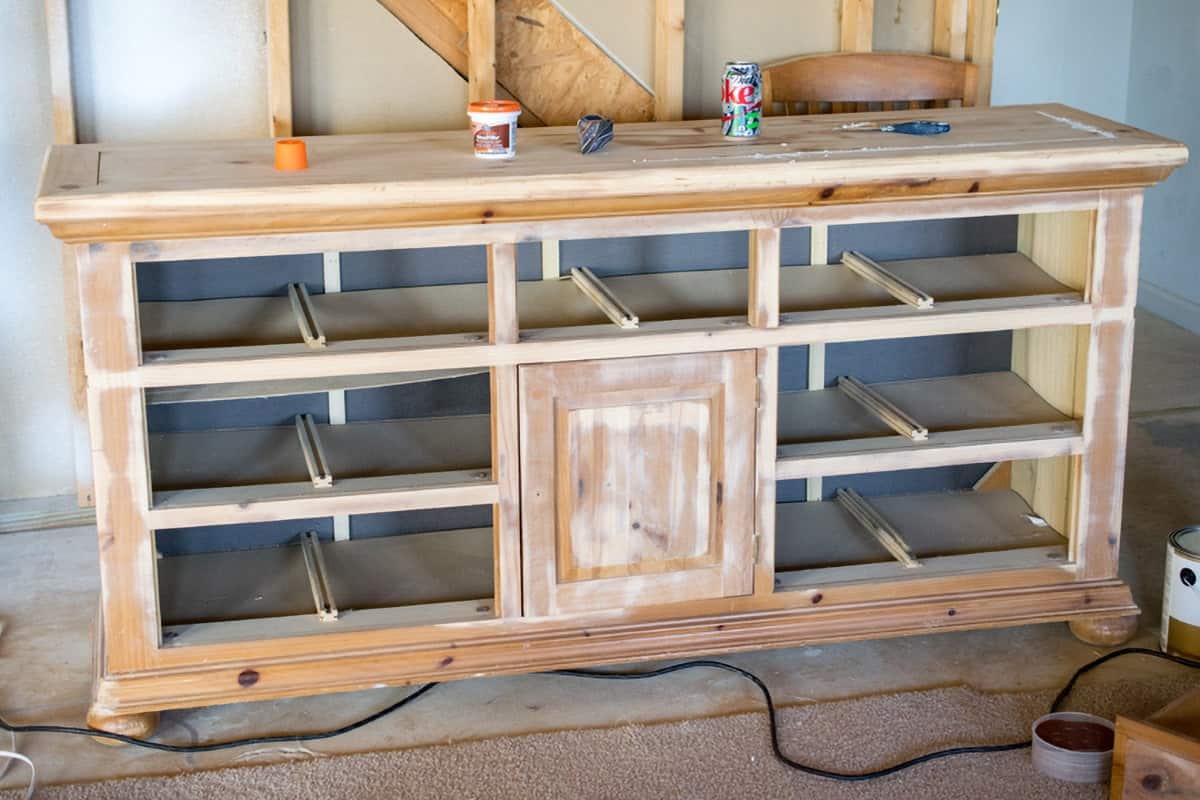
I sand with 120 grit sandpaper generally on an orbital sander. I sand with 220, after the 120, if I want a high gloss or ultra-smooth finish, or when hand sanding.
However, there is a no-sand method that I have had good success with. I use a product that helps paint bond to wood. My favorites have been Ultra Grip or this high-bond primer that works amazingly well. I’ve also used deglosser, but it isn’t my favorite overall.
Step 4: Priming (Maybe)
I would skip priming if:
- You use on a no-primer needed paint.
- There is NO risk of stains, oils, or grease coming through the paint (use a stainblocking primer if there is).
- You aren’t painting bright white (I like to use a stainblocking primer for white).
Paint lines/brands that don’t require priming include Fusion Mineral, Benjamin Moore Advance, Sherwin Williams Emerald Line (whoa expensive!), and many chalk paints. I do not recommend painting furniture in latex wall paint. You get what you pay for.
If priming for stains, 2 coats is fine and I usually lightly sand the second coat for smoothness.
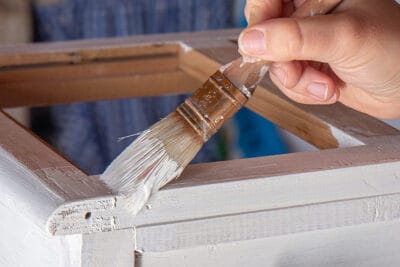
Step 5: Paint
Usually 2 coats is all you need. You do not need to sand between coats unless the surface is not smooth to your liking.
Expert Tips for The Best Finish
- Get the right tools. A few extra dollars will save you a lot of heartache and frustration. I prefer fine taklon brushes.
- Tape off any edges you don’t want painted such as inside doors.
- Use a lint free -microfiber roller across all flat or large surfaces for the smoothest finish.
- You will get the best results if you brush details or corners then roll before the paint has time to dry.
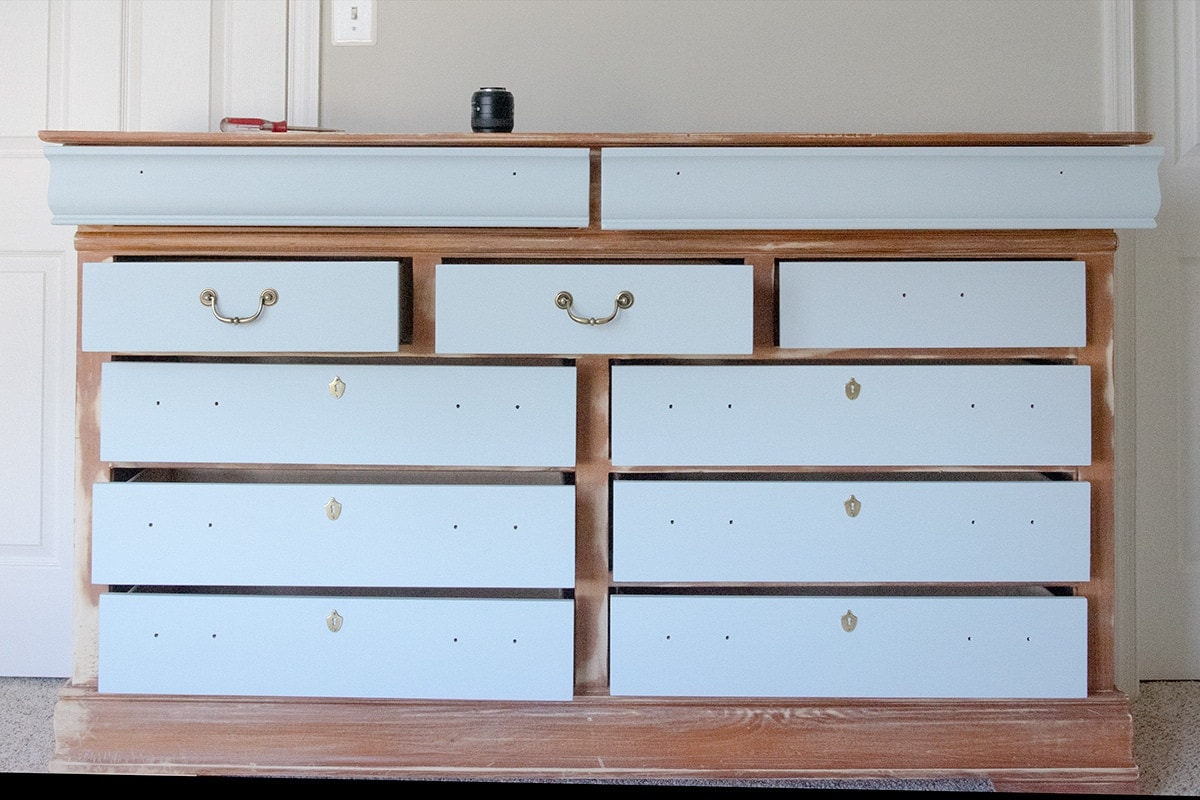
I chose to paint the drawers while on the dresser. It made it considerably easier to get all the edges and allow the drawer fronts to dry fully without disturbance or taking up as much room. I removed them to paint the frame.
Optional Step: Top Coat
With the paints I use, a topcoat is not required, but recommended for high traffic pieces, and especially kid’s furniture. If you do choose to add a protective topcoat, I have some recommendations on choosing the best topcoats for furniture in this post to help make a decision. Just make sure that it is water based.
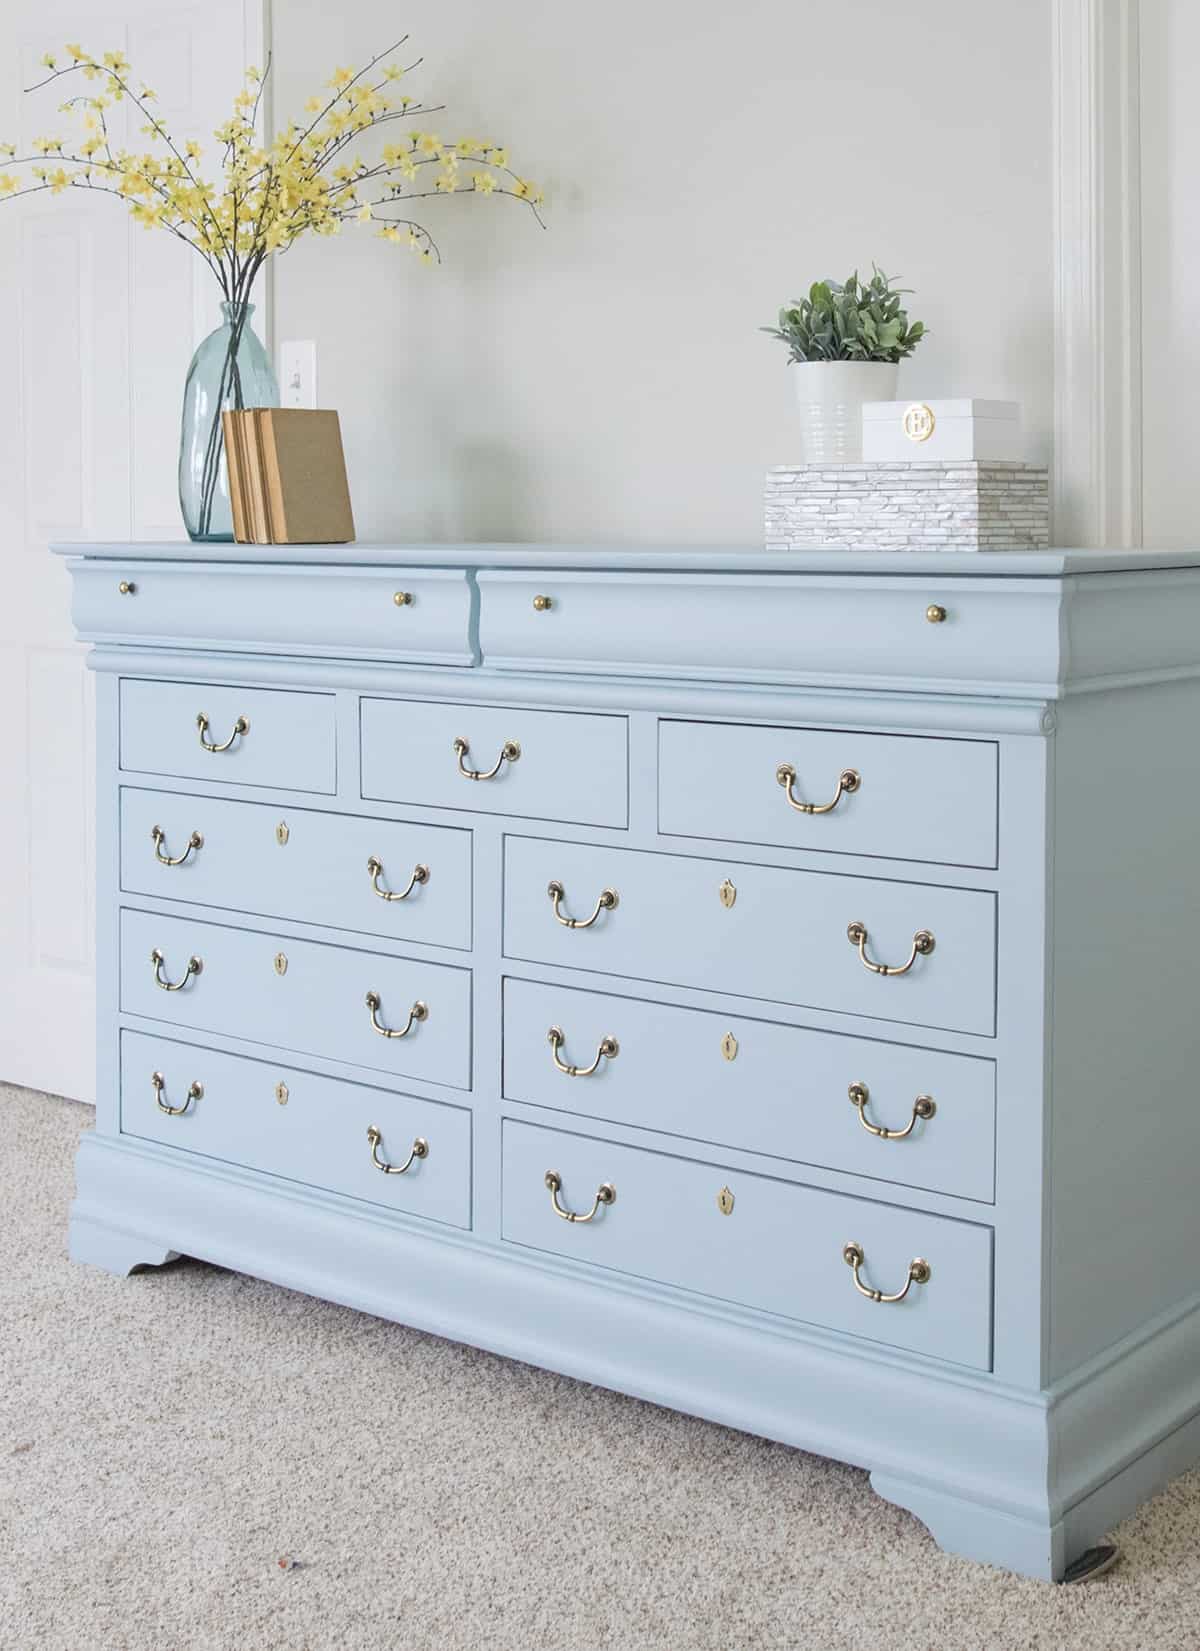
And welcome our newest beautiful addition! I will be much more proud to show guests to their room with this lovely storage piece now.
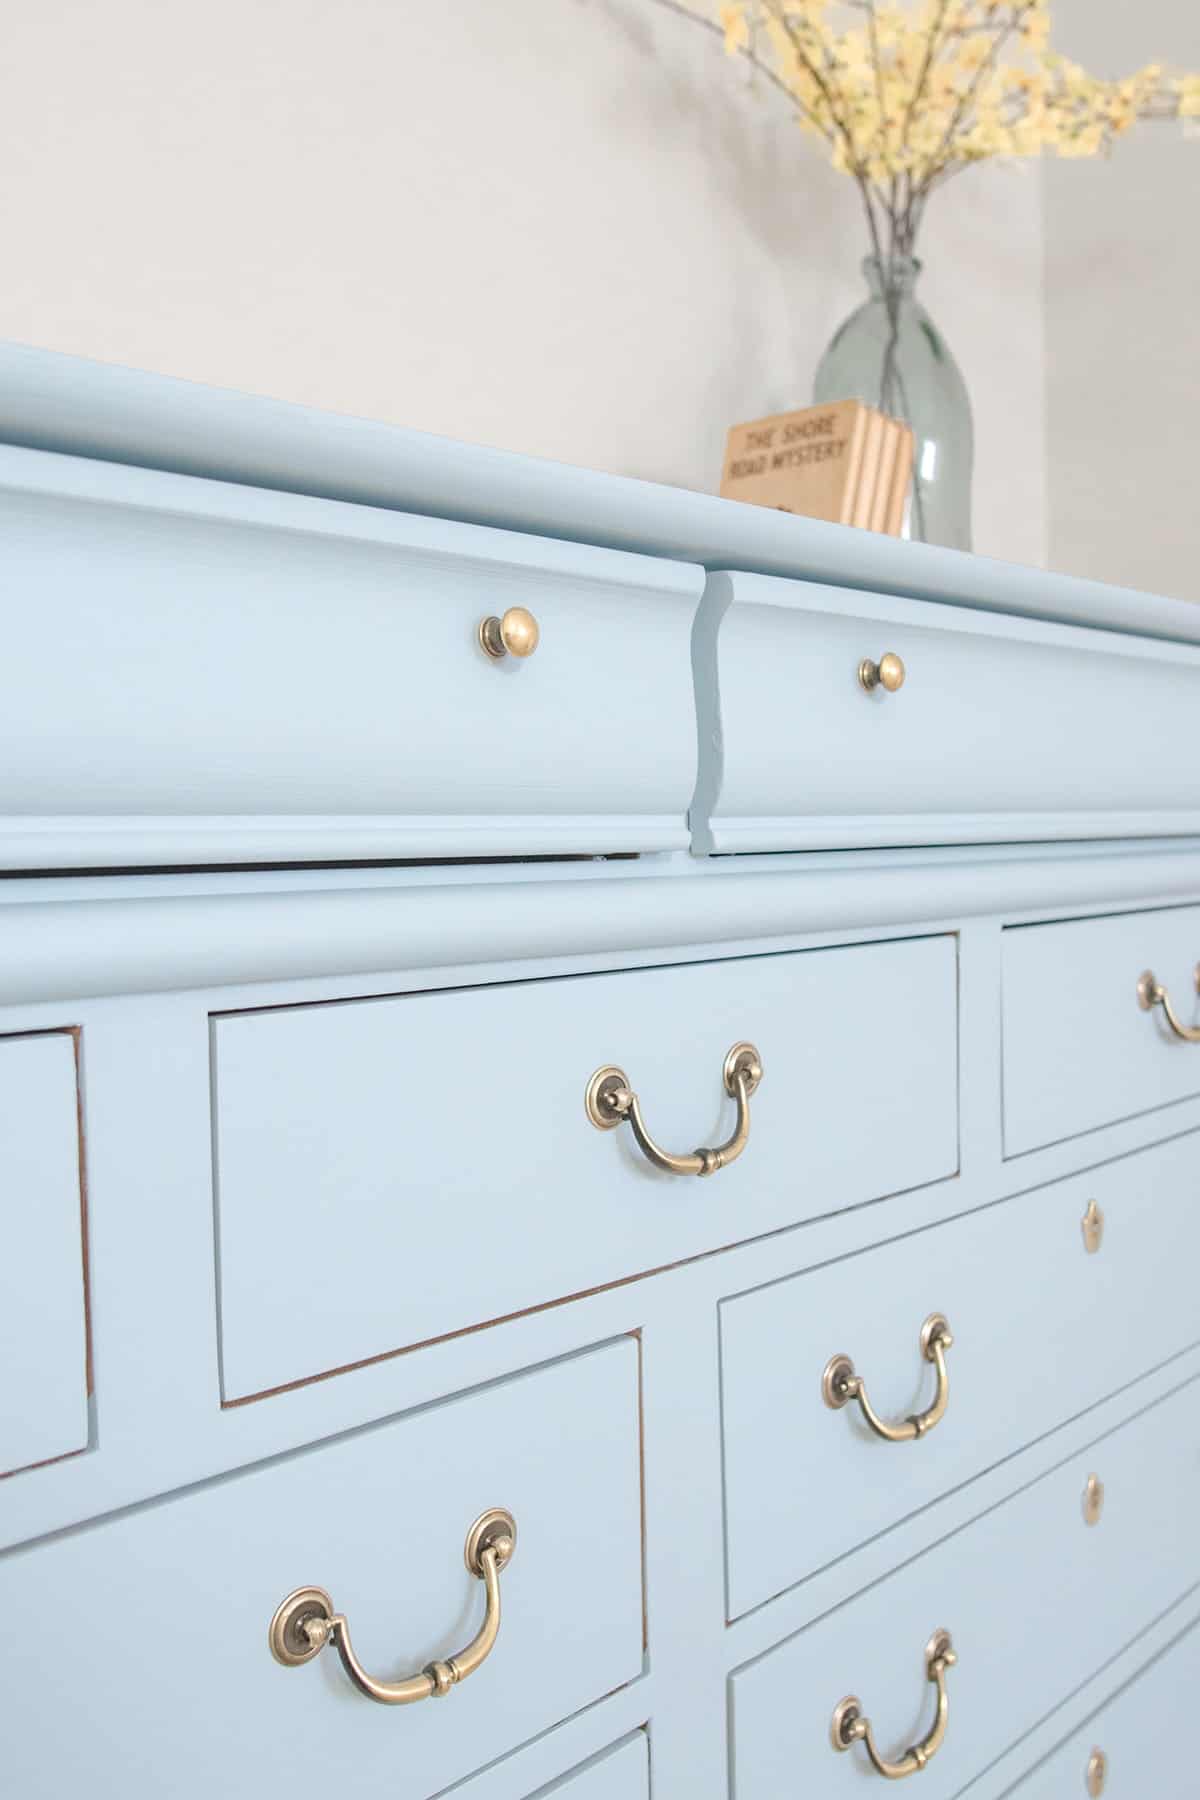
I knew that I wanted to give this painted dresser a romantic hand-painted style. The photos don’t show it, but it has a velvety texture and some brush strokes. Honestly, I tend to pride myself a lot on developing a technique to eliminate brush strokes so that there was more of a modern or professional style.
Wanna See More of Our Painted Furniture Projects? Here ya go!
- Midnight Blue Painted Vanity
- 10 Creative Painted Furniture Ideas
- Beer Safe Mini-Fridge Makeover
- 10-Foot Entertainment Center Transformation
Frequently Asked Questions
Never use wall paint on a dresser. Use a cabinet or paint made specifically for furniture. A satin or semi-gloss has the most durable finish. Recommended paint lines/brands that don’t require priming include Fusion Mineral, Benjamin Moore Advance, Sherwin Williams Emerald Line (whoa expensive!), General Finishes, and many chalk paints.
While sanding will give the best bond to wood, there is a no-sand method that I have had good success with. My favorites have been Ultra Grip or this high-bond primer that works amazingly well. I’ve also used deglosser, but it isn’t my favorite overall.
With the paints I use, a topcoat is not required, but still recommended for high traffic pieces, and especially kid’s furniture. If you do choose to add a protective topcoat, I have some recommendations on choosing the best top coats for furniture in this post to help make a decision. Just make sure that it is water based.
If you want the smoothest coat with no brush strokes, a paint sprayer gives the best finish. If you prefer a hand painted or distressed style, specialty brushes for painting furniture leave a velvety finish. Flat surfaces are easiest to paint with a lint-free microfiber roller for smooth surfaces.

Grab our free series "Weekend Home Projects that will Transform Your Life" Sign up below to receive updates including free printables, organization tips, home improvement projects, recipes and more! |
More Makeover Ideas


PS I love seeing your creations! Be sure to take a photo and tag #cravingcreative on Instagram! You can also stay in touch with me through following me on Instagram, Pinterest, and subscribing to the newsletter!
How To Paint a Dresser
Tools
- Paint Brush
Supplies
- TSP or Degreaser
- Sand paper 220 and 120 grit
- Sanding Blocks 80 or 120 grit
- Wood Filler Only for imperfections or filling old hardware
- Lint-free Microfiber rollers
- Paint trays
- Stainblocking Primer
- Paint
- Protective Top Coat
Instructions
- Remove doors and drawers. Unscrew hardware.

- Clean using Tri-Sodium Phosphate or a mild degreaser for getting any grime and dirt off. Repair scratches with wood filler.
- Sand any glossy varnish or coating off. You do not need to sand every bit of previous stain or paint off if it is in good condition. Sanding is going to give the best bond, and always sand high traffic surfaces such as tabletops, around doorknobs, or dresser tops. Use an orbital sander with 120 grit to make this much easier. Vacuum and wipe all dust off of the panels before priming.
- Prime the cabinets with a quality primer. Kilz Premium (not original) is my no-fail primer. For very light colors, use 2 coats of primer. Allow to dry 24 hours.
- Paint the dresser with 2 coats of paint. You can use either a paint sprayer or brushes and rollers. If brushing, brush with the grain and always from one end to the other. If paint starts to dry, don't go back over it.


Notes
- Knots – use a shellac based primer
- Gooey stuff/adhesive – I like Goo Gone for gooey messes, but make sure to clean off with a degreaser or teaspoon afterwards to remove any residue.
- Grease stains – clean with a good degreaser like Simple Green to break up what you can.
- Permanent Marker/food coloring/other – Clean as best you can with teaspoon and then prime at least two coats.
- Get the right tools. A few extra dollars will save you a lot of heartache and frustration. I have a helpful post on painting without brush strokes here. I prefer fine taklon brushes.
- Tape off any edges you don’t want painted such as inside doors.
- Use a lint free -microfiber roller across all flat or large surfaces for the smoothest finish.
- You will get the best results if you brush details or corners then roll before the paint has time to dry.
Jasmine says
Is a quart of paint enough for a dresser this size?
Rachel says
Yeah, it should be more than enough even with two coats.
Caroline says
Beautiful!! I’m looking for a similar blue for my dresser. Do you recall the name?
Rachel says
This particular dresser is painted in Fusion Mineral “Little Whale”.